
In some regions, shipping carriers have strict input requirements for addresses at checkout. For example, they may require a house number or reject addresses with P.O. Boxes. The Checkout Premium app allows you to create validation templates that check and block specific inputs to ensure your store always collects accurate and complete shipping information.
Installing Checkout Premium
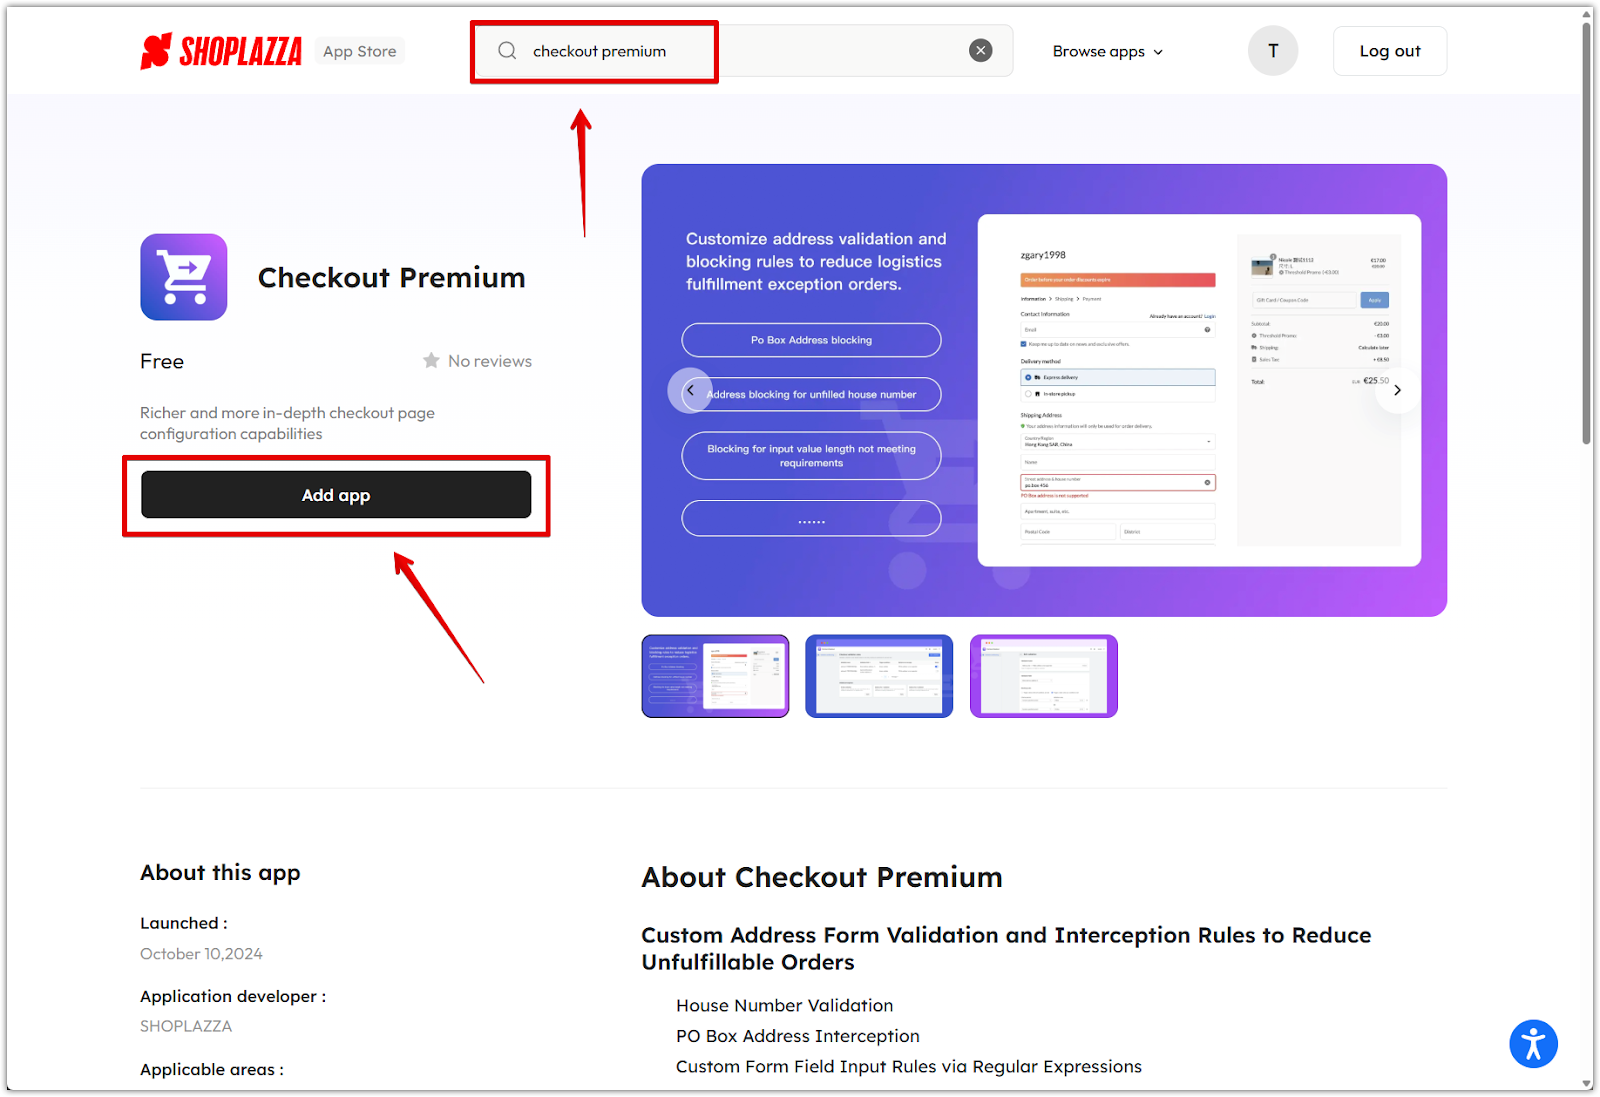
Start by installing the Checkout Premium app from the App Store.
1. Go to the App Store: Navigate to Apps > Visit Shoplazza App Store.

2. Search for Checkout Premium: Type Checkout Premium into the search bar, then click Add app.
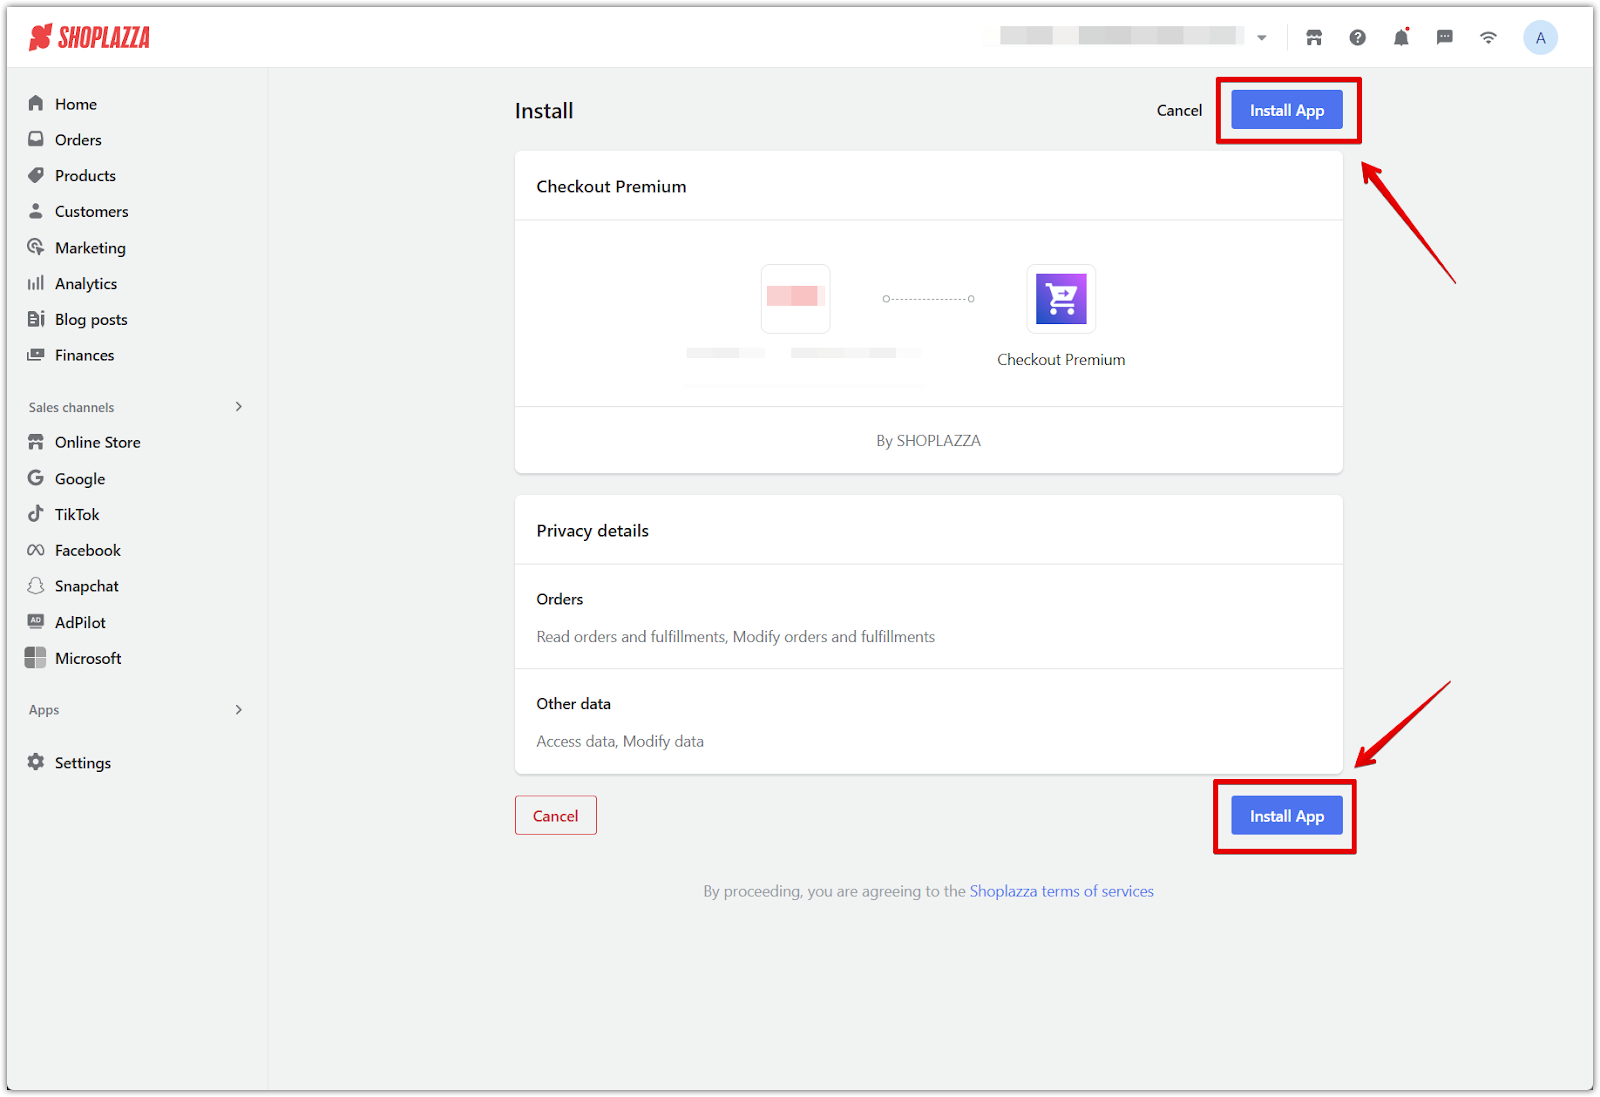
3. Install the app: On the app page, click Install app to add it to your store.
Applying validation templates
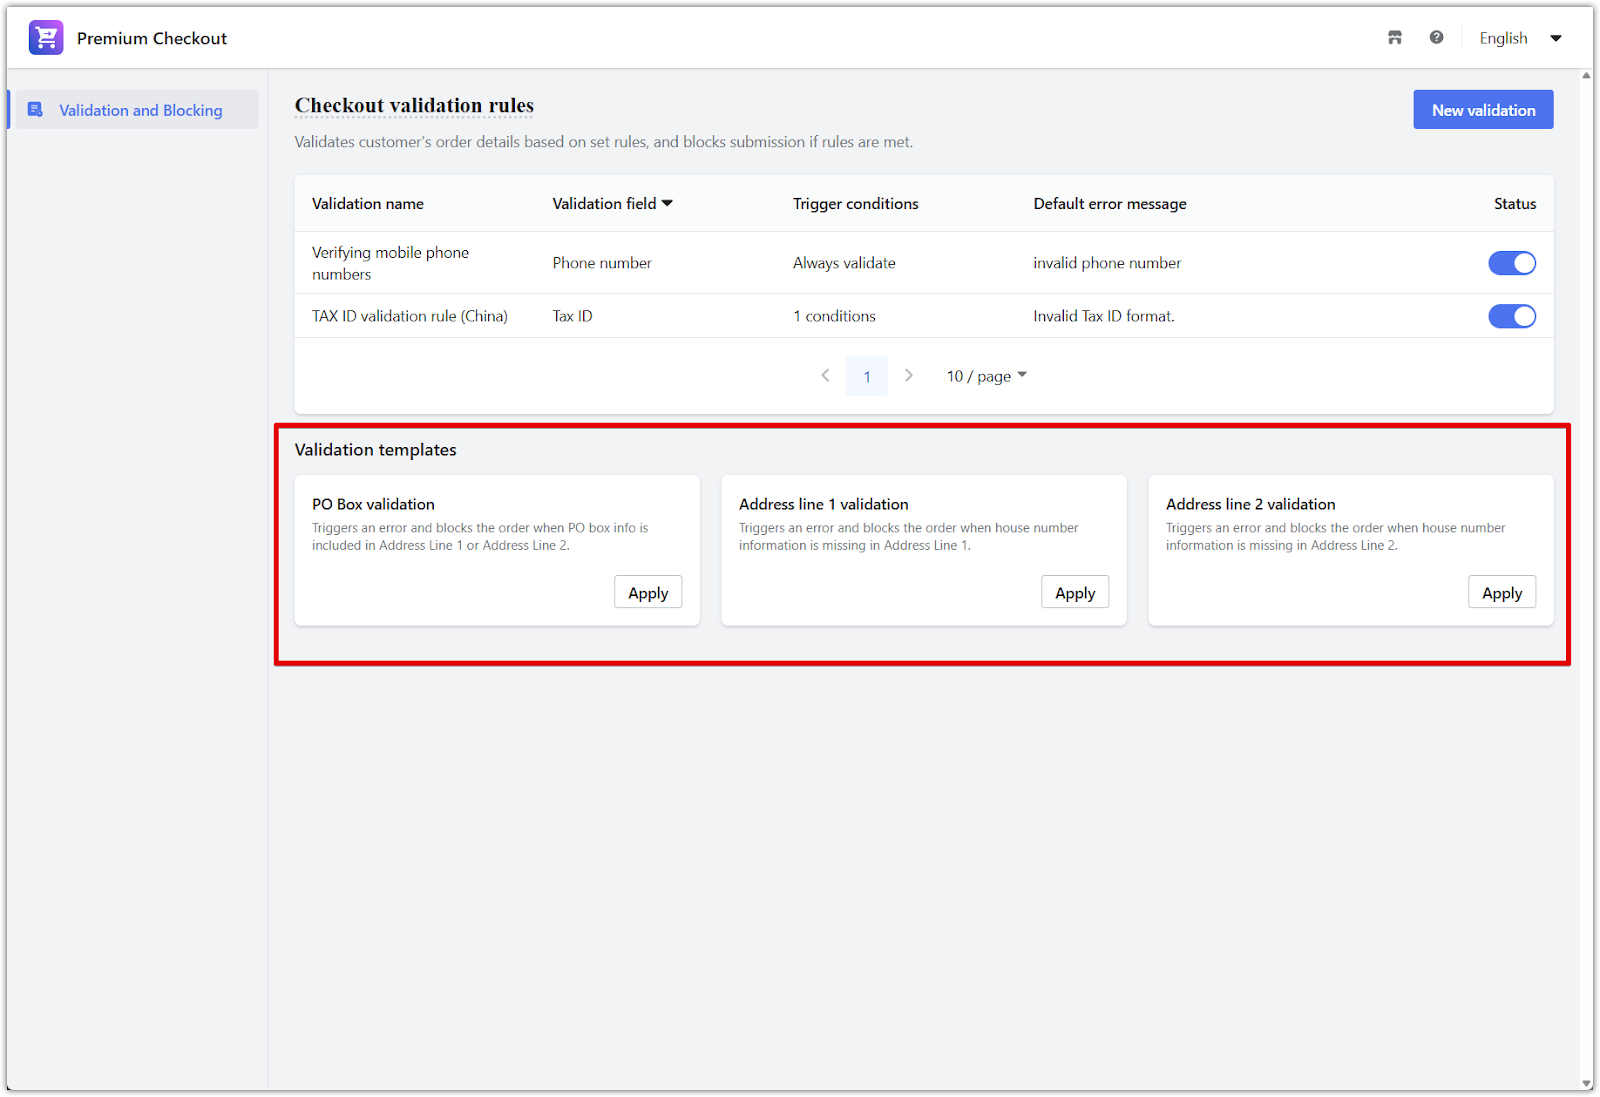
Validation templates are available in the Validation and Blocking section of the app. These are prebuilt templates designed to enforce common address requirements.
1. Apply a validation template: Under Validation templates, select the template you want to use:
- PO Box validation blocks the order when a P.O. Box is included in Address Line 1 or Address Line 2.
- Address line 1 validation blocks the order if the house number is missing from Address Line 1.
- Address line 2 validation blocks the order if the house number is missing from Address Line 2.
Click Apply to activate the template.
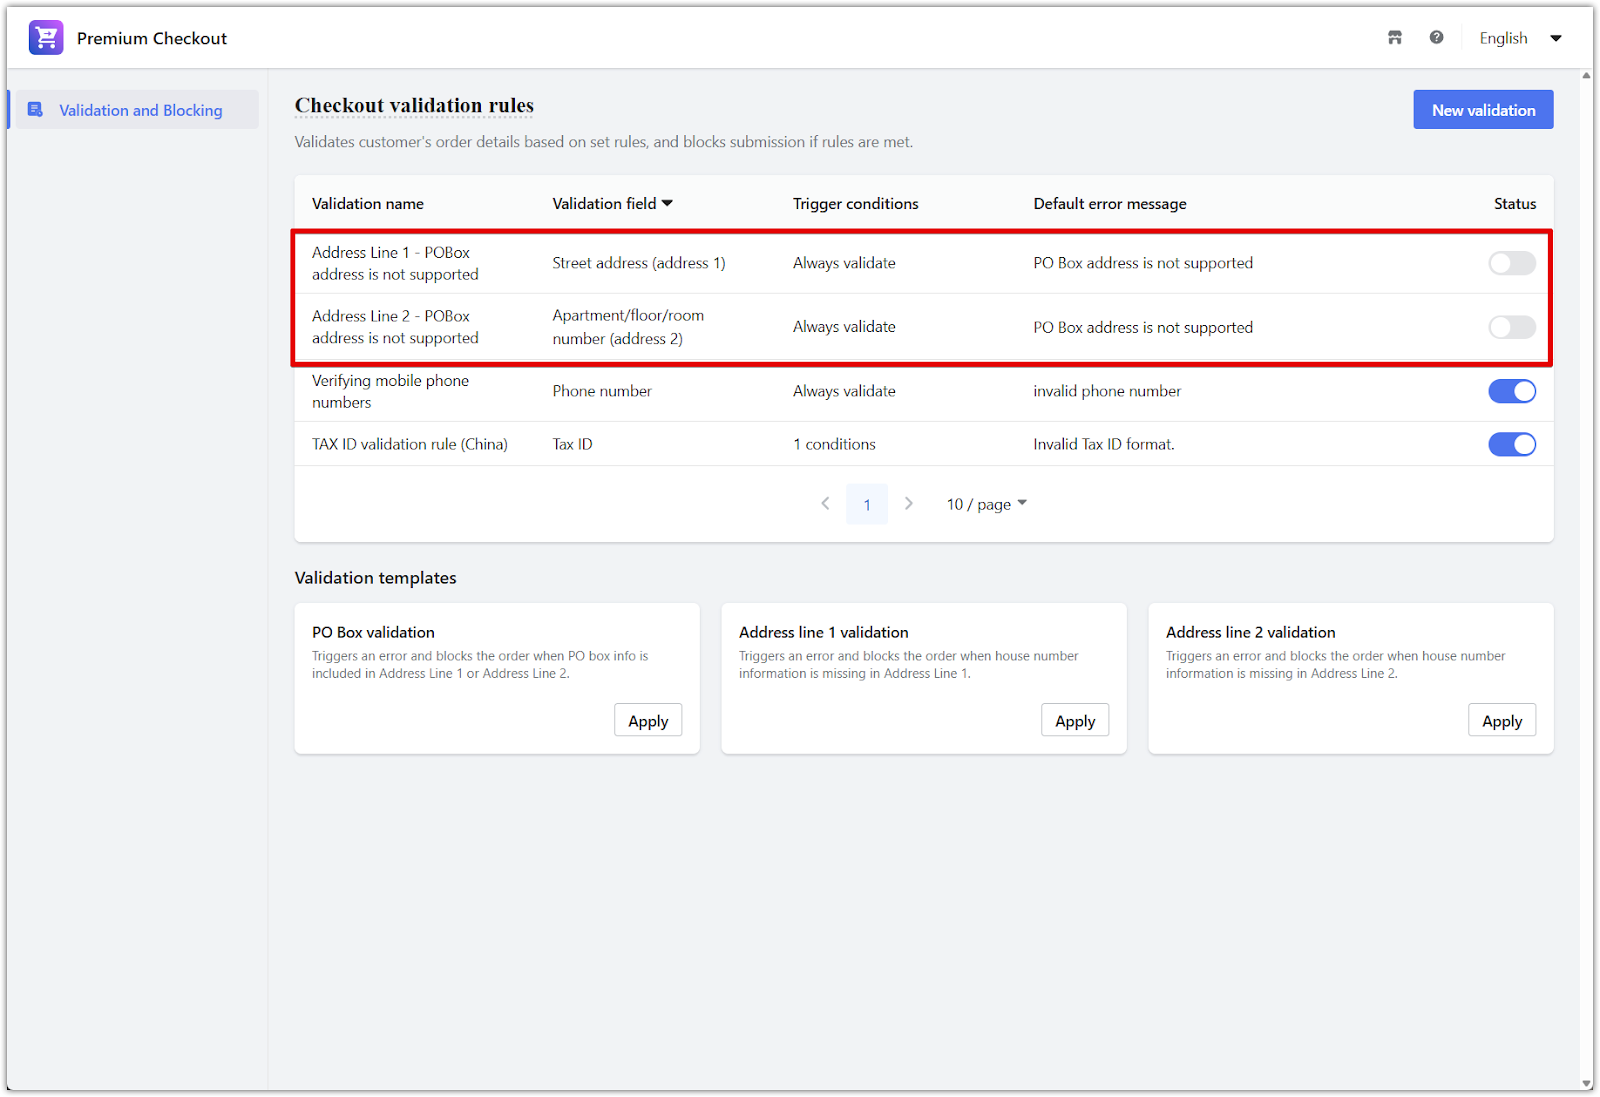
2. Edit the template (optional): After applying a template, it appears in your list of active validations. Click directly on the row for that template to view and adjust the settings.
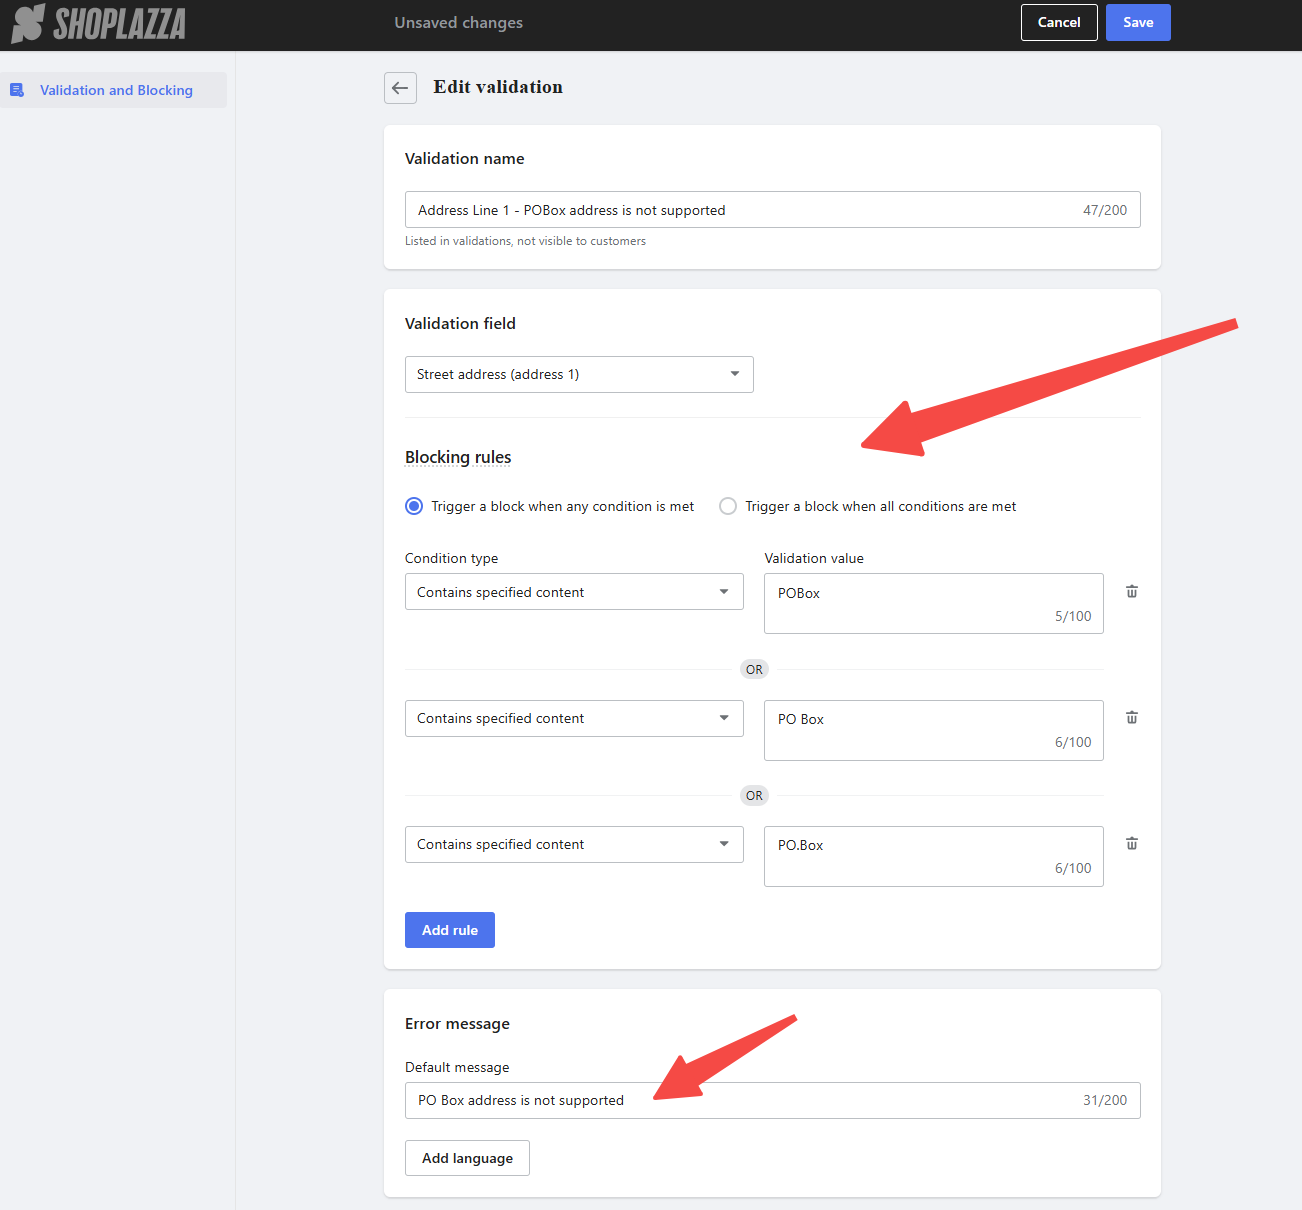
3. Configure the validation rule: In this step, define the core settings by editing the following elements:
- Validation field: Choose the field to validate, such as Street address.
- Blocking rules: Define what content triggers a block (e.g. PO Box).
- Error message: Customize the message shown to customers when validation fails.
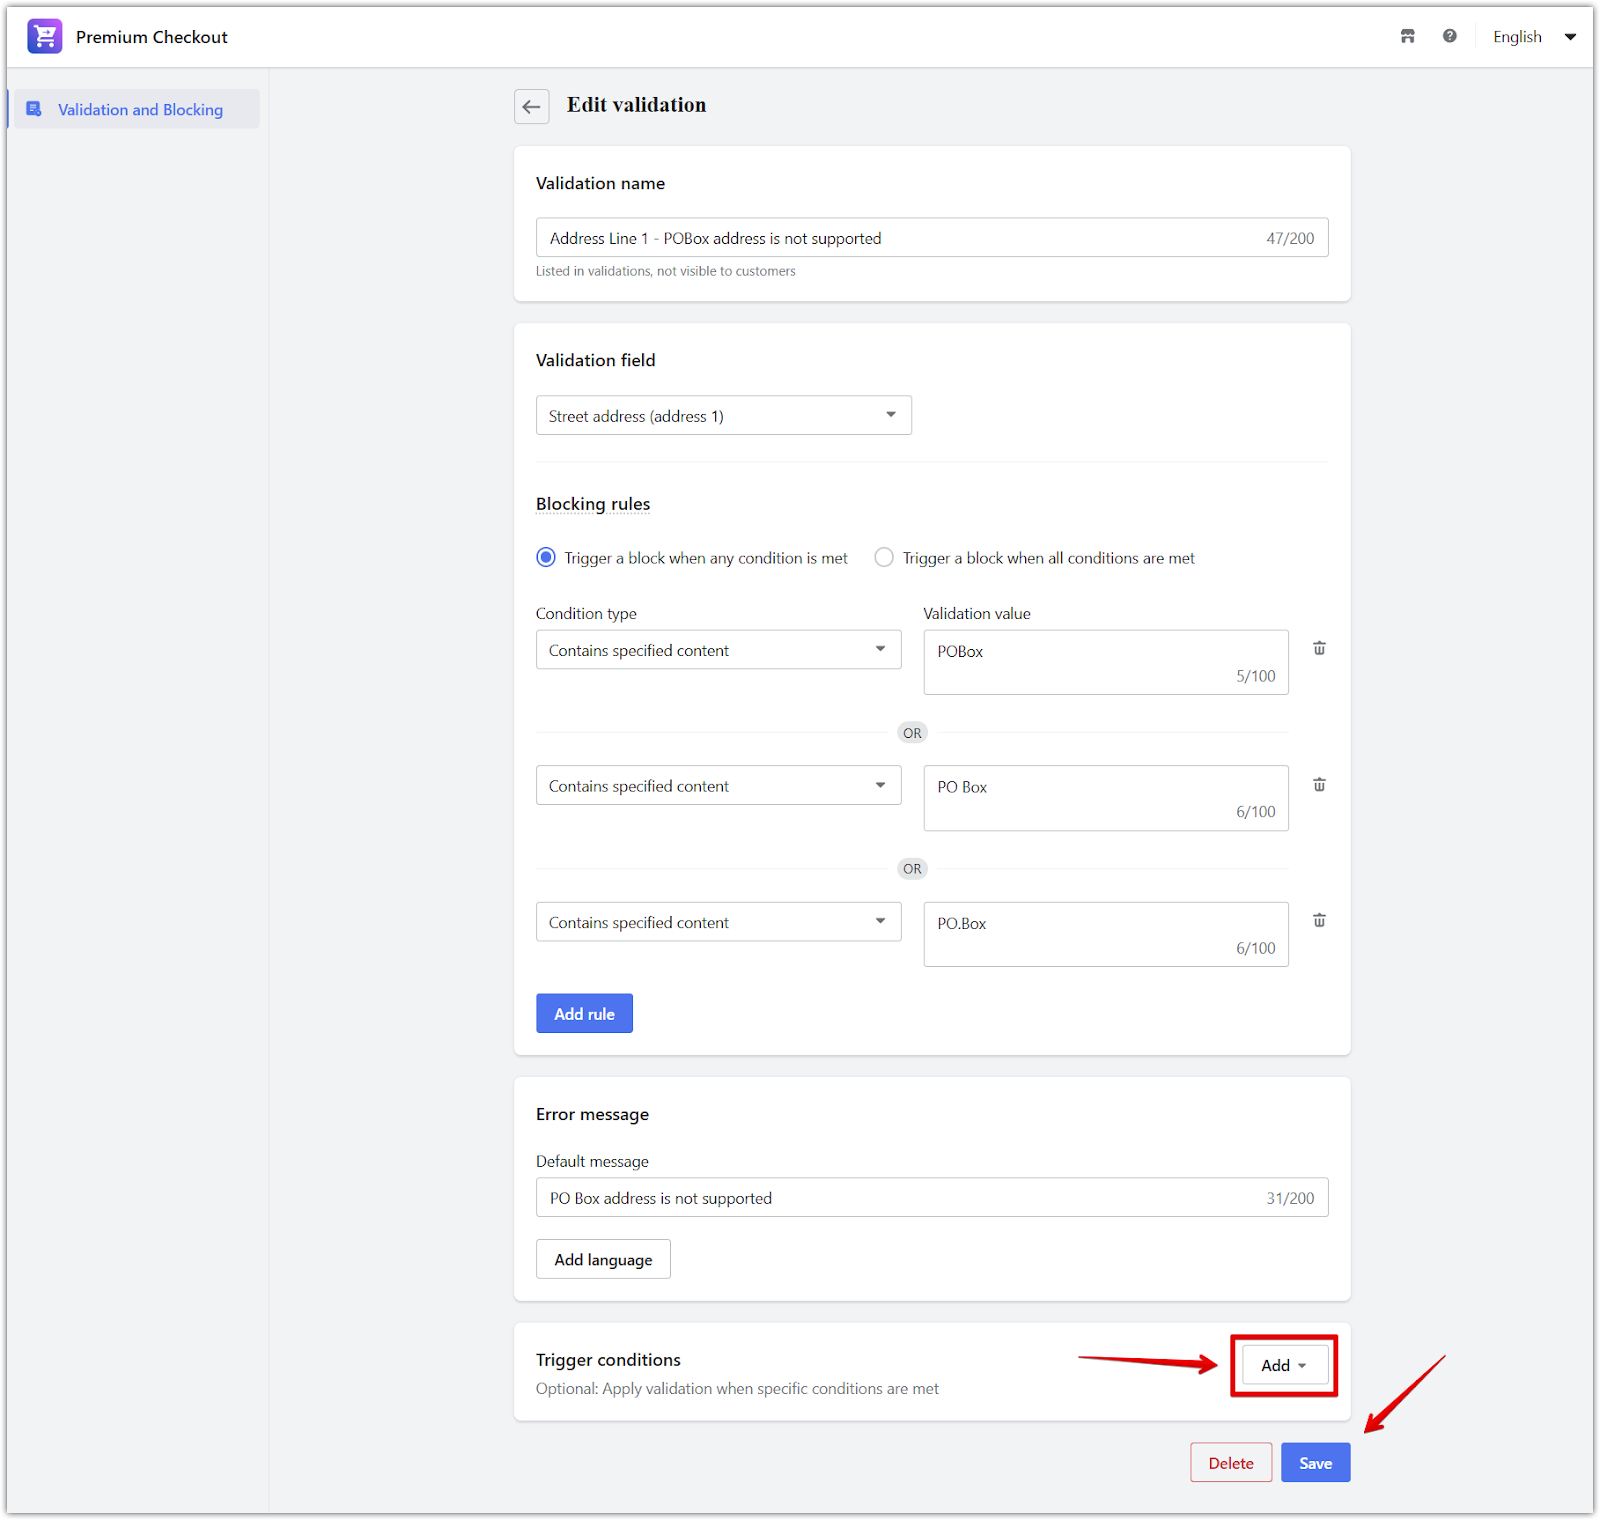
4. Set trigger conditions (optional): By default, this validation applies to all orders. Add trigger conditions if you want to restrict the rule to specific scenarios, like certain countries.
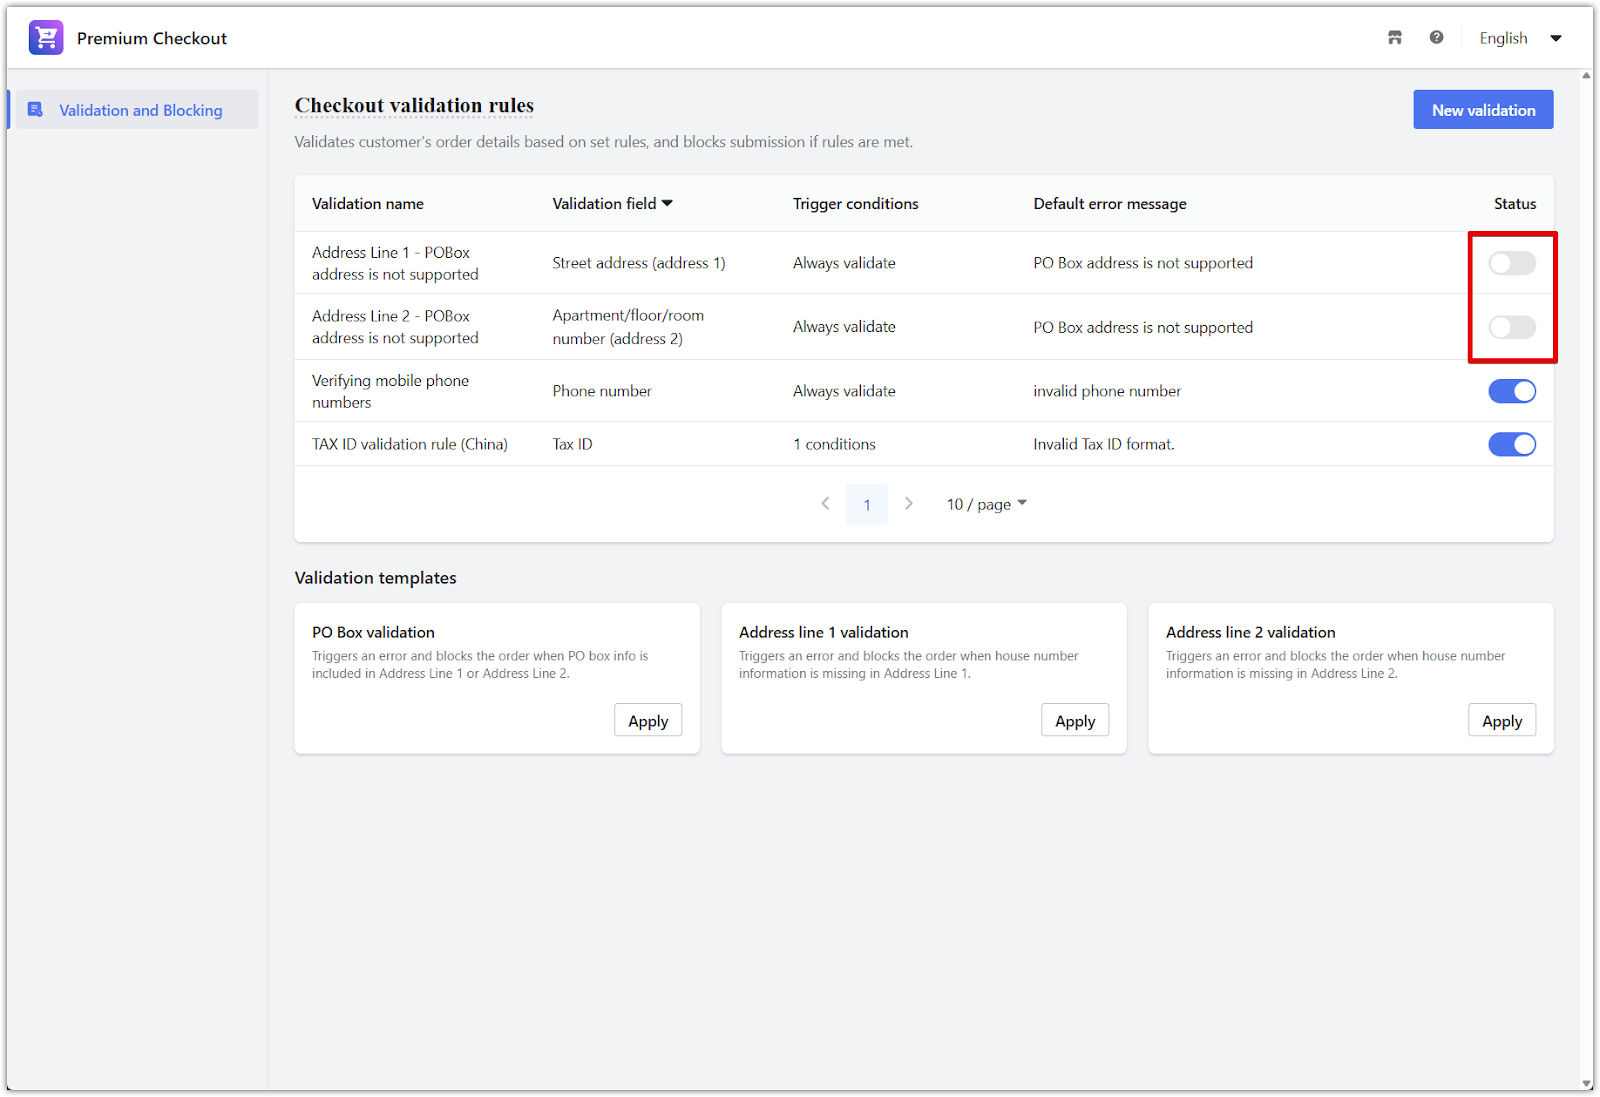
5. Enable the validation rule: After saving the template, you will be taken back to the Checkout validation rules list. Use the toggle switch in the Status column to turn the rule on. The validation will only be enforced during checkout once it is enabled.
What customers will see
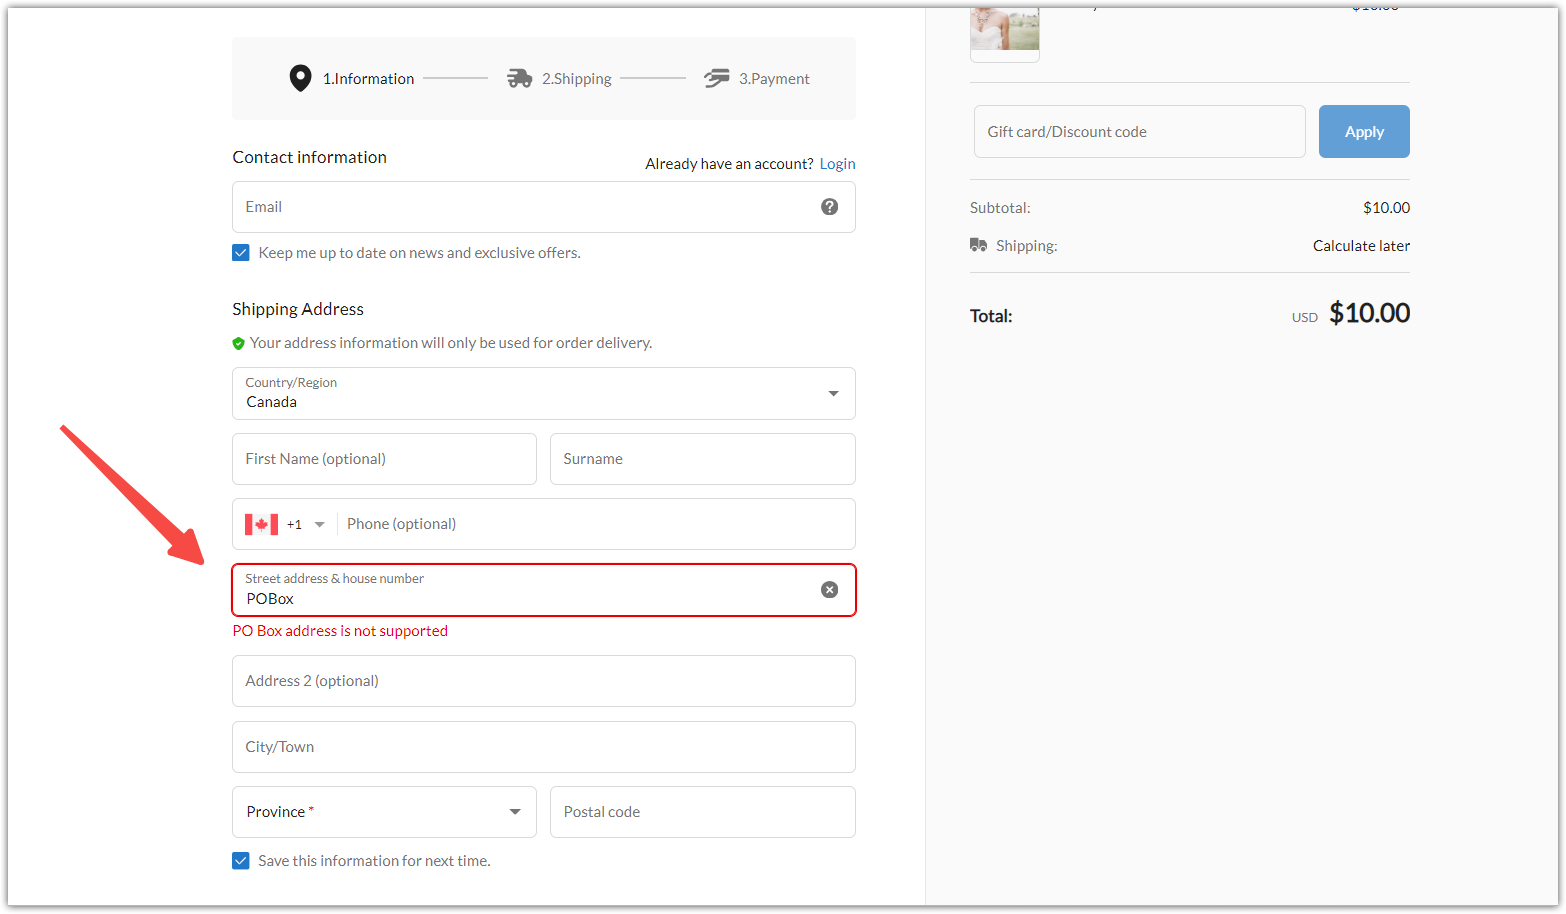
When a customer enters information that violates a validation rule:
- An error message appears directly on the checkout page.
- The customer must correct the field before placing the order.
This helps avoid fulfillment issues by catching problems early in the checkout process.
FAQs about validation behavior
Q: How many validation rules can I add?
Each input field supports up to five custom validation rules.
Q: Can these rules be bypassed?
Custom validation applies during standard checkout. If an order is created outside the normal customer flow, such as through manual creation by the merchant, the validation rules may not be triggered. We recommend reviewing manually created orders for accuracy.
Using validation templates in the Checkout Premium app helps you enforce specific information requirements at checkout. Whether you're preventing invalid address formats or ensuring that house numbers are included, these templates provide an efficient and reliable way to reduce errors and improve your order fulfillment success.


Comments
Please sign in to leave a comment.