
The OnePixel app in your Shoplazza admin allows you to manually integrate tracking codes from advertising platforms not covered by Shoplazza’s default pixel integrations.
This gives your store flexibility to track conversions and customer behavior across advertising platforms such as Meta (Facebook), Google Ads, Snapchat, Pinterest, TikTok, and others.
This guide explains what information to collect from your ad platform and how to add it into OnePixel using the Insert custom code option. This guide also includes an example using TikTok.
What you need from your ad platform
Before you set up your pixel in OnePixel, collect the following information from your advertising platform’s dashboard:
- Pixel ID: A unique string that identifies your ad account’s tracking pixel.
- Base tracking code: This is the core JavaScript snippet that tracks visits and loads on your website.
- Event code (optional): If you want to track actions like Add to Cart or Purchase, your platform may provide separate event scripts.
Note
Most ad platforms include these under a section like "Events Manager," "Pixels," or "Tag setup."
How to add a custom pixel in OnePixel
Once you have collected the required details, follow these steps to add the custom pixel in OnePixel:
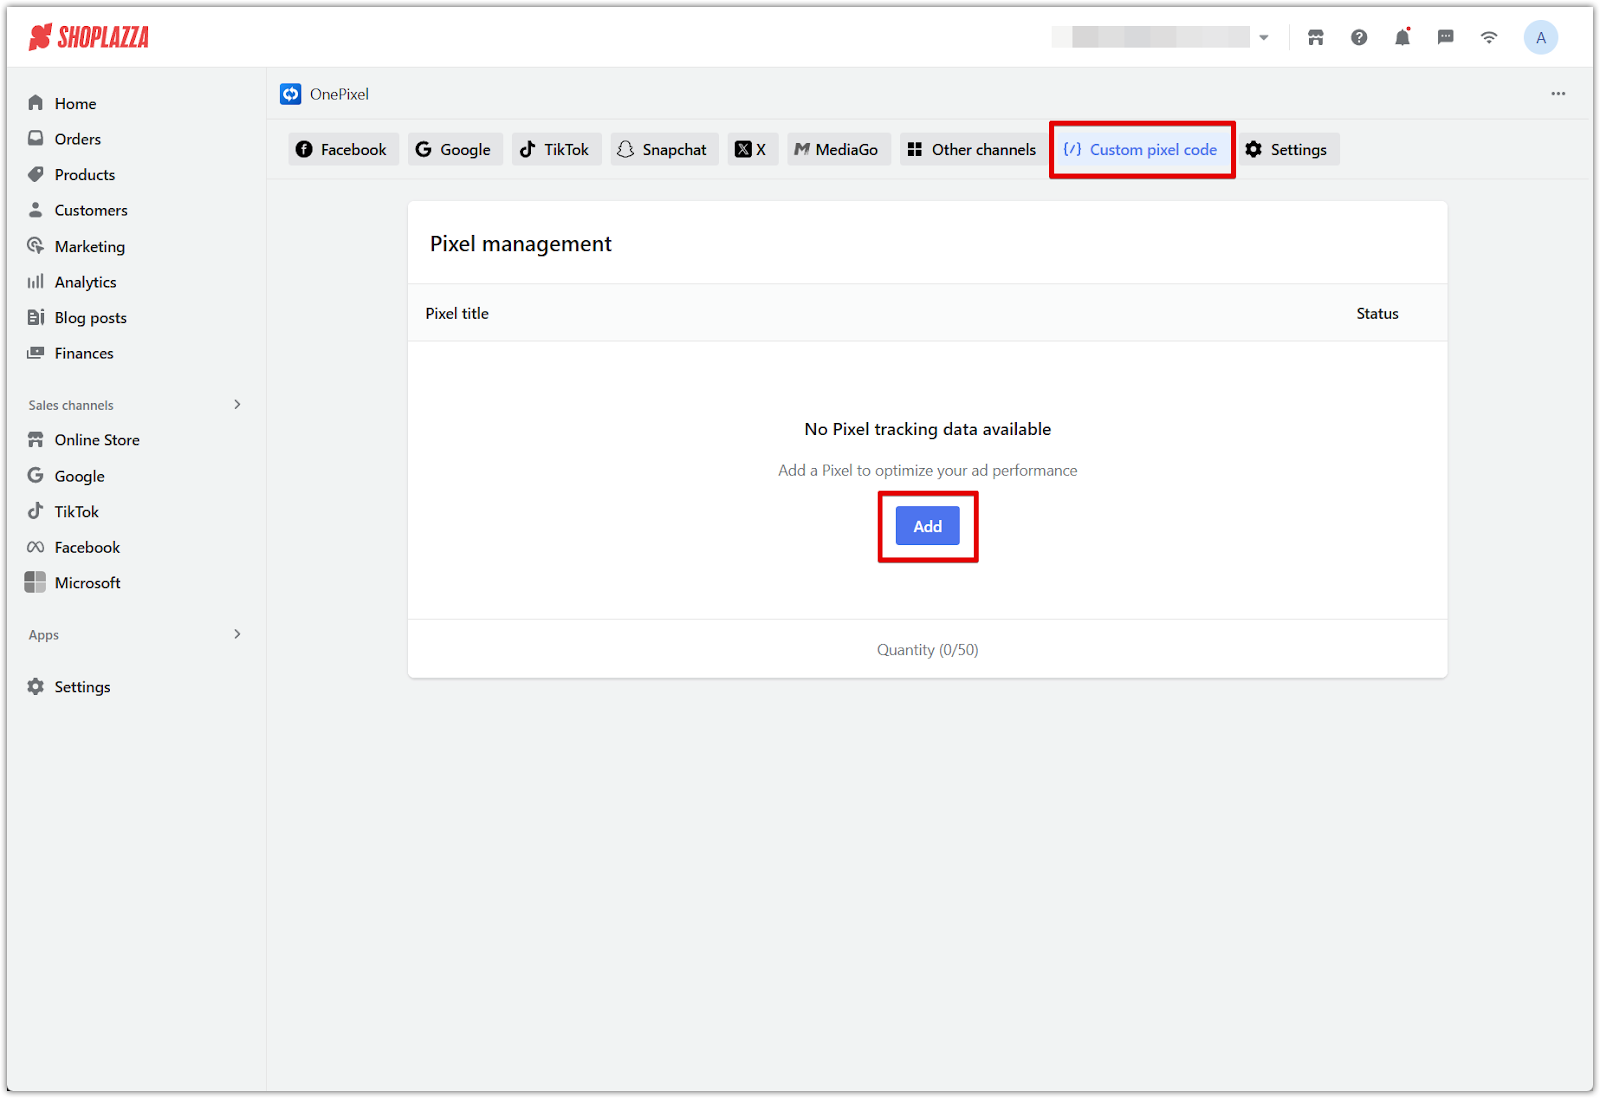
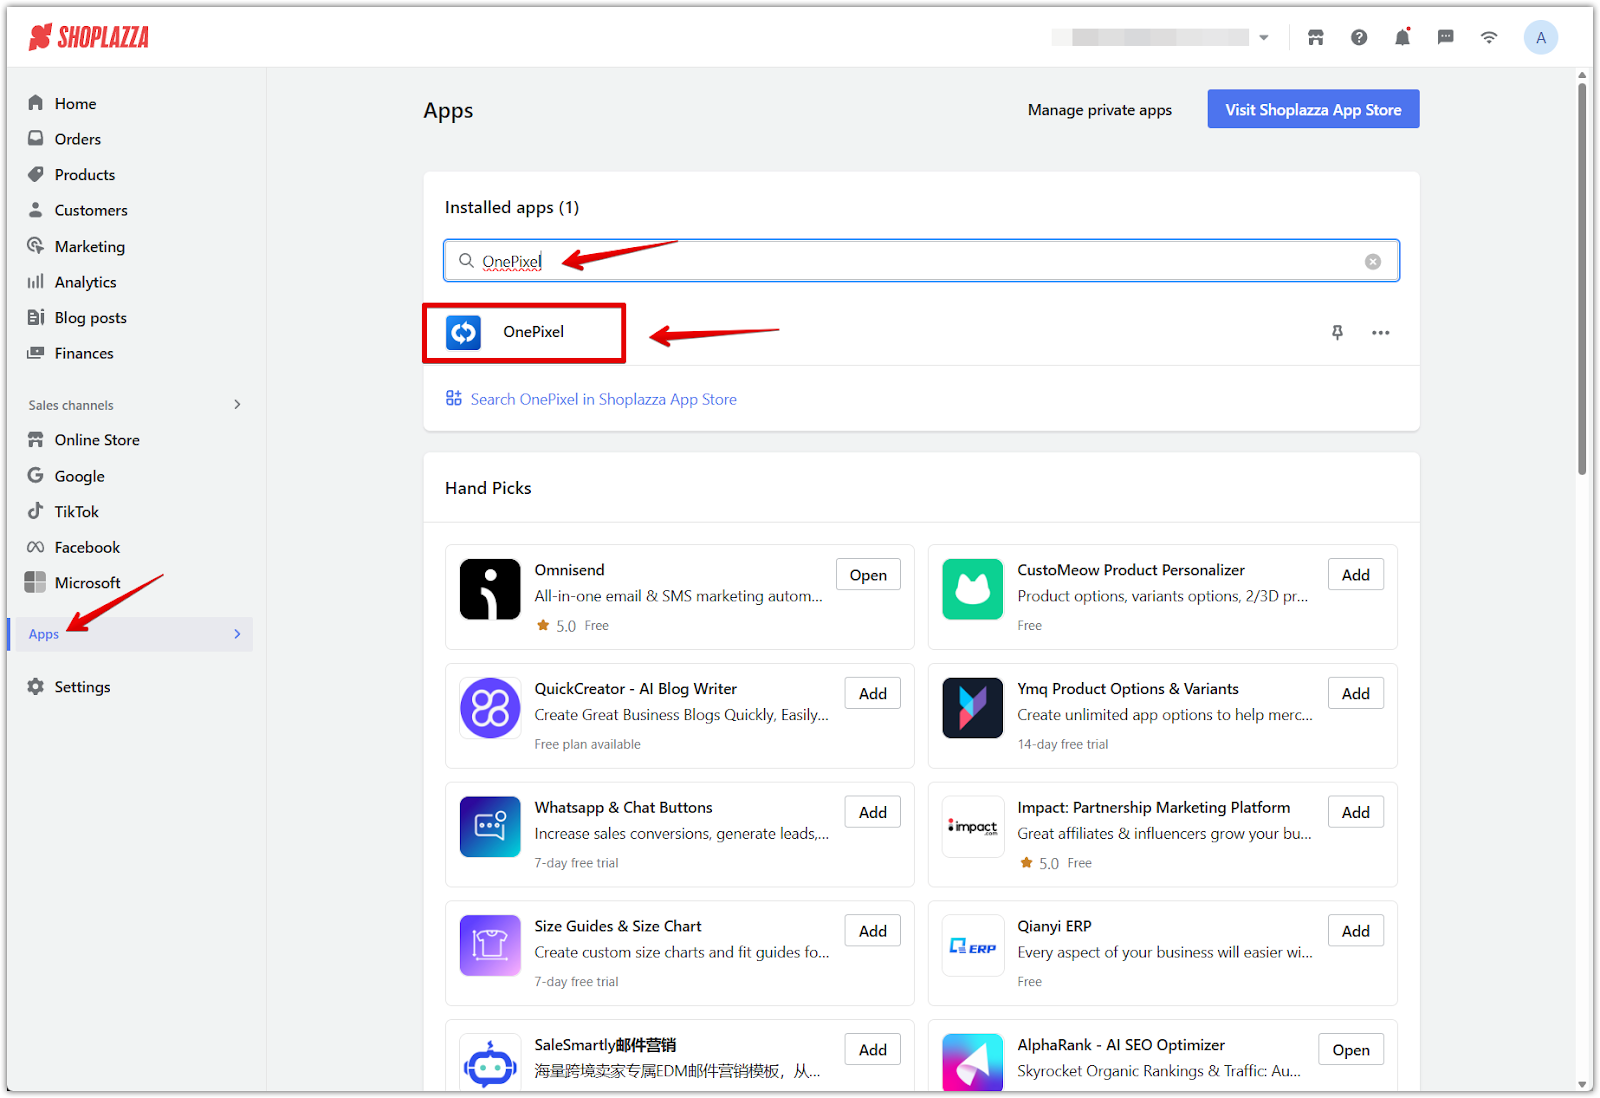
1. Go to the OnePixel app: In your Shoplazza admin, open the OnePixel app under Apps.

2. Click and add Custom pixel code: At the top, select the Custom pixel code tab. Click Add to start a new custom integration.
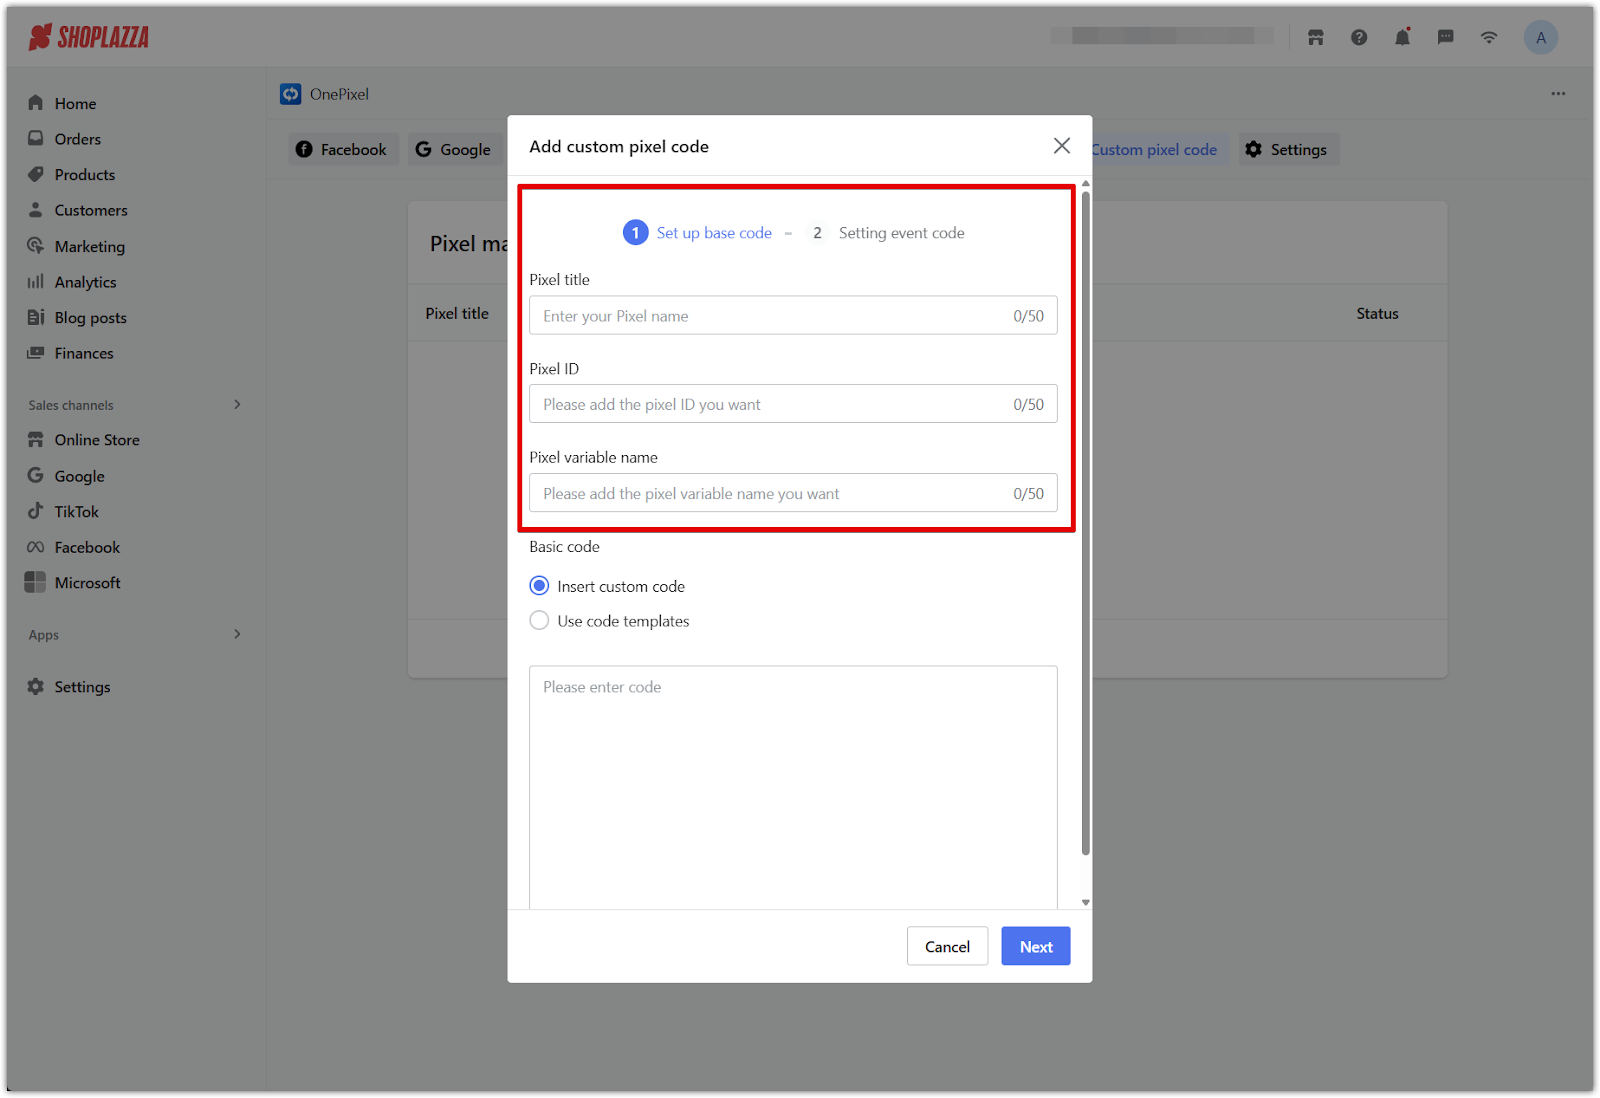
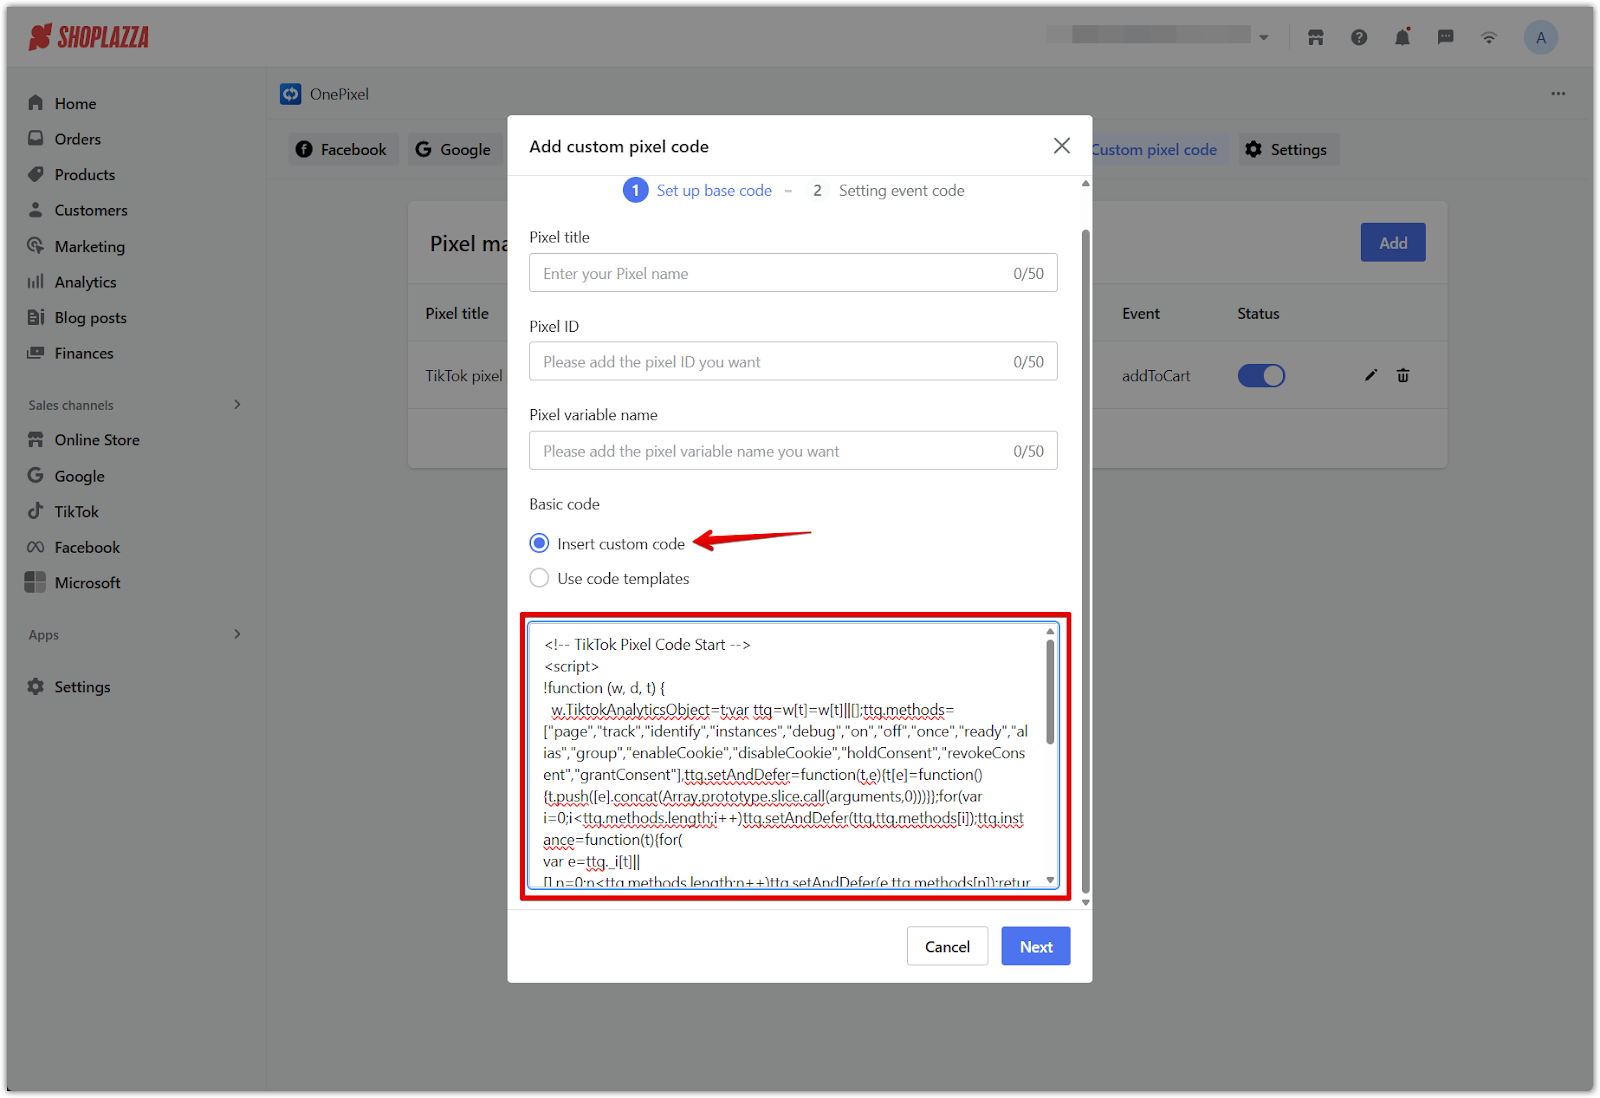
3. Enter the pixel details:
- Pixel title: Enter a name to identify this pixel.
- Pixel ID: Paste the ID from your ad platform.
- Pixel variable name: Use the variable name defined by your platform’s documentation (for example: pixel_id, fbq, gtag, or ttq).
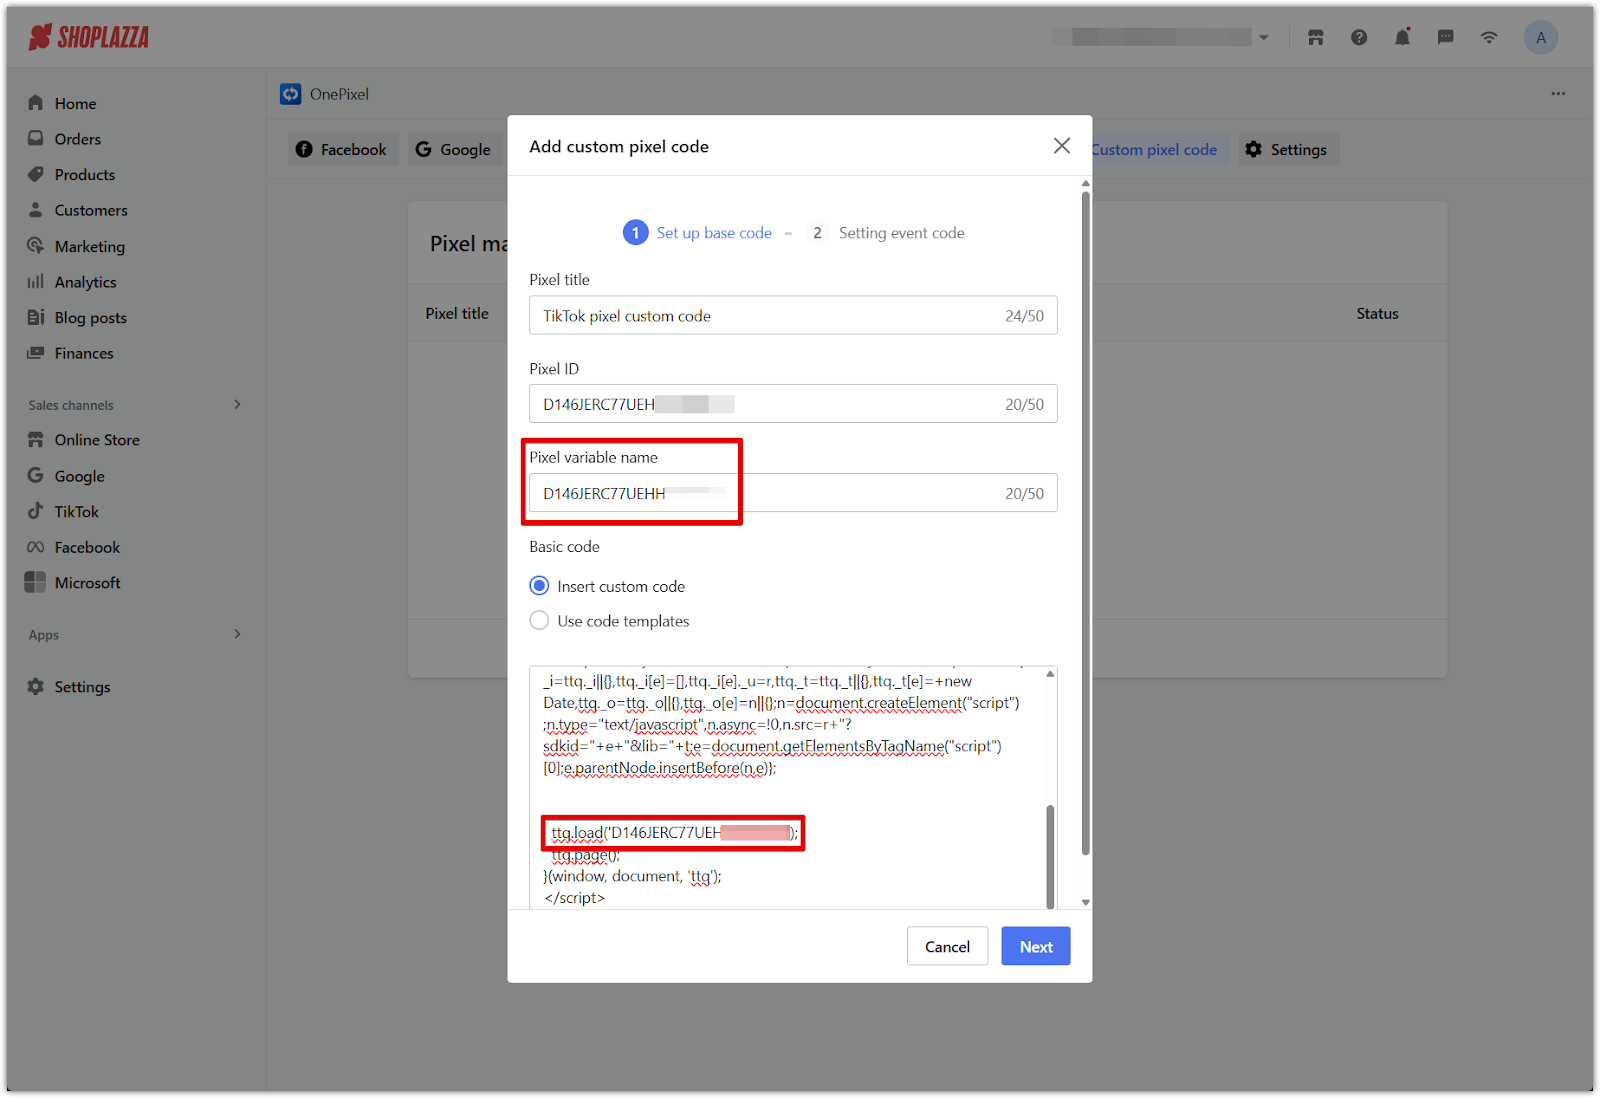
4. Paste the base code:
- Select Insert custom code.
- Paste the base tracking code you copied from your platform.
- Ensure the ID inside the script matches what you entered in the Pixel variable name field. Then click Next.

Adding event tracking (optional)
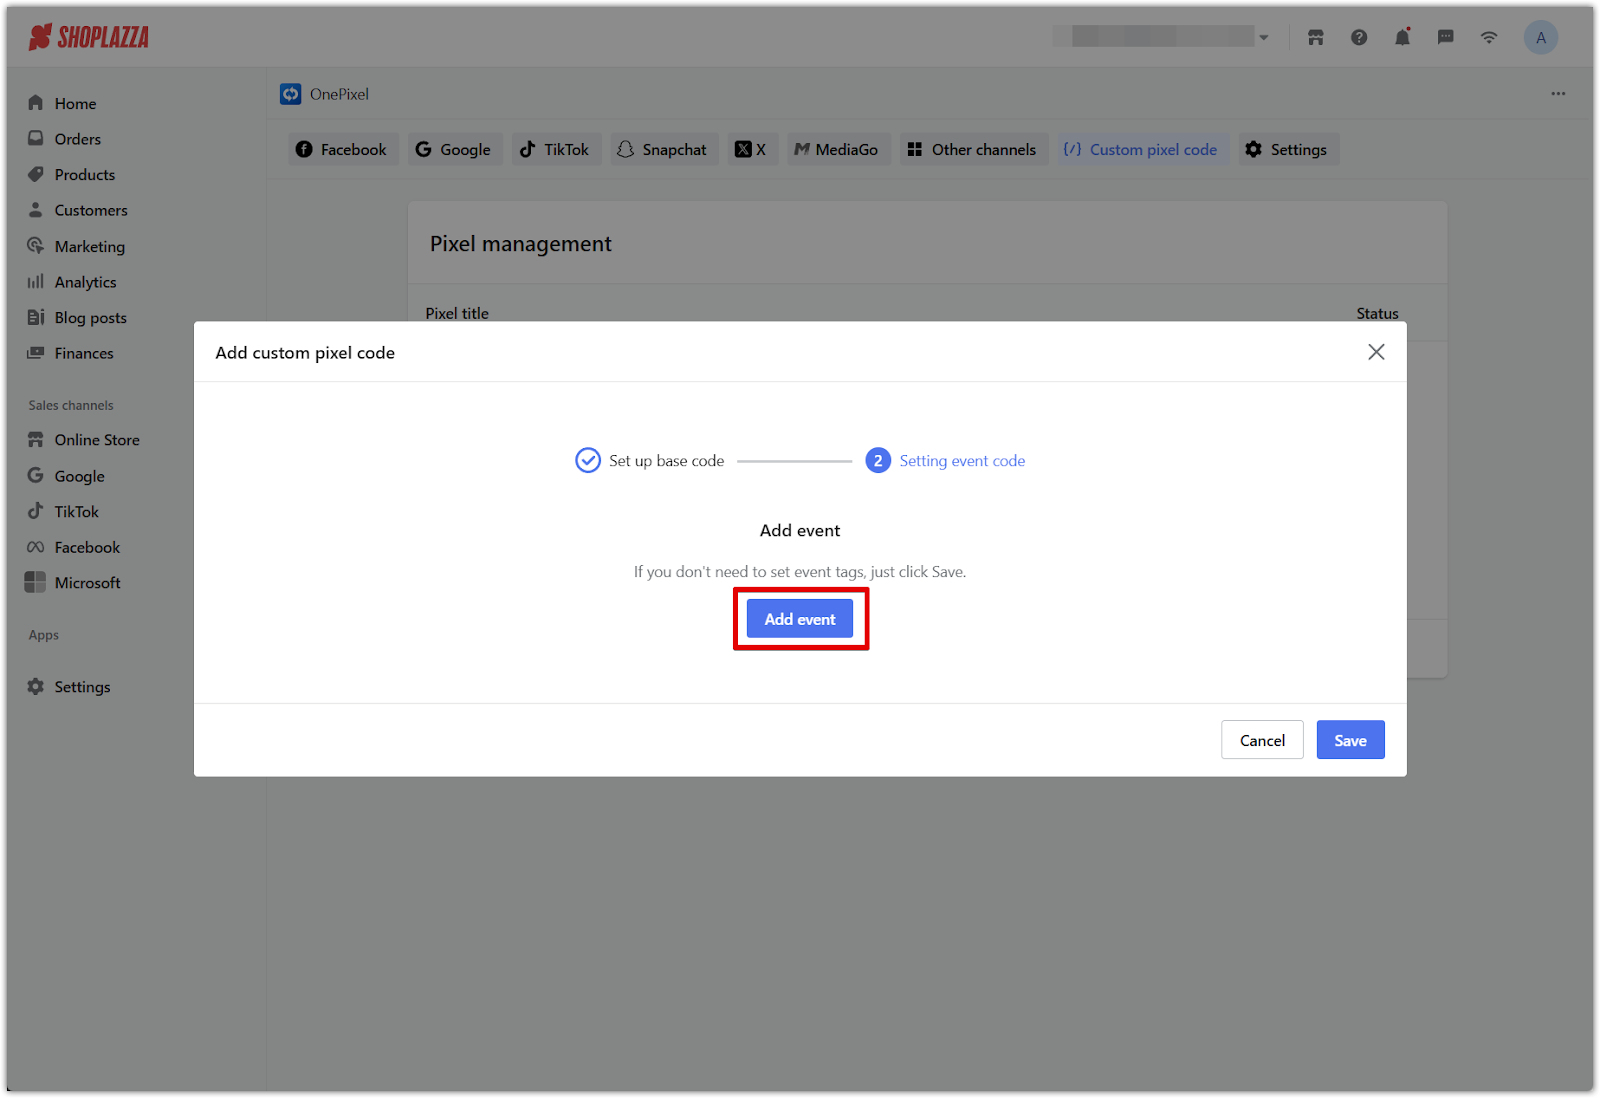
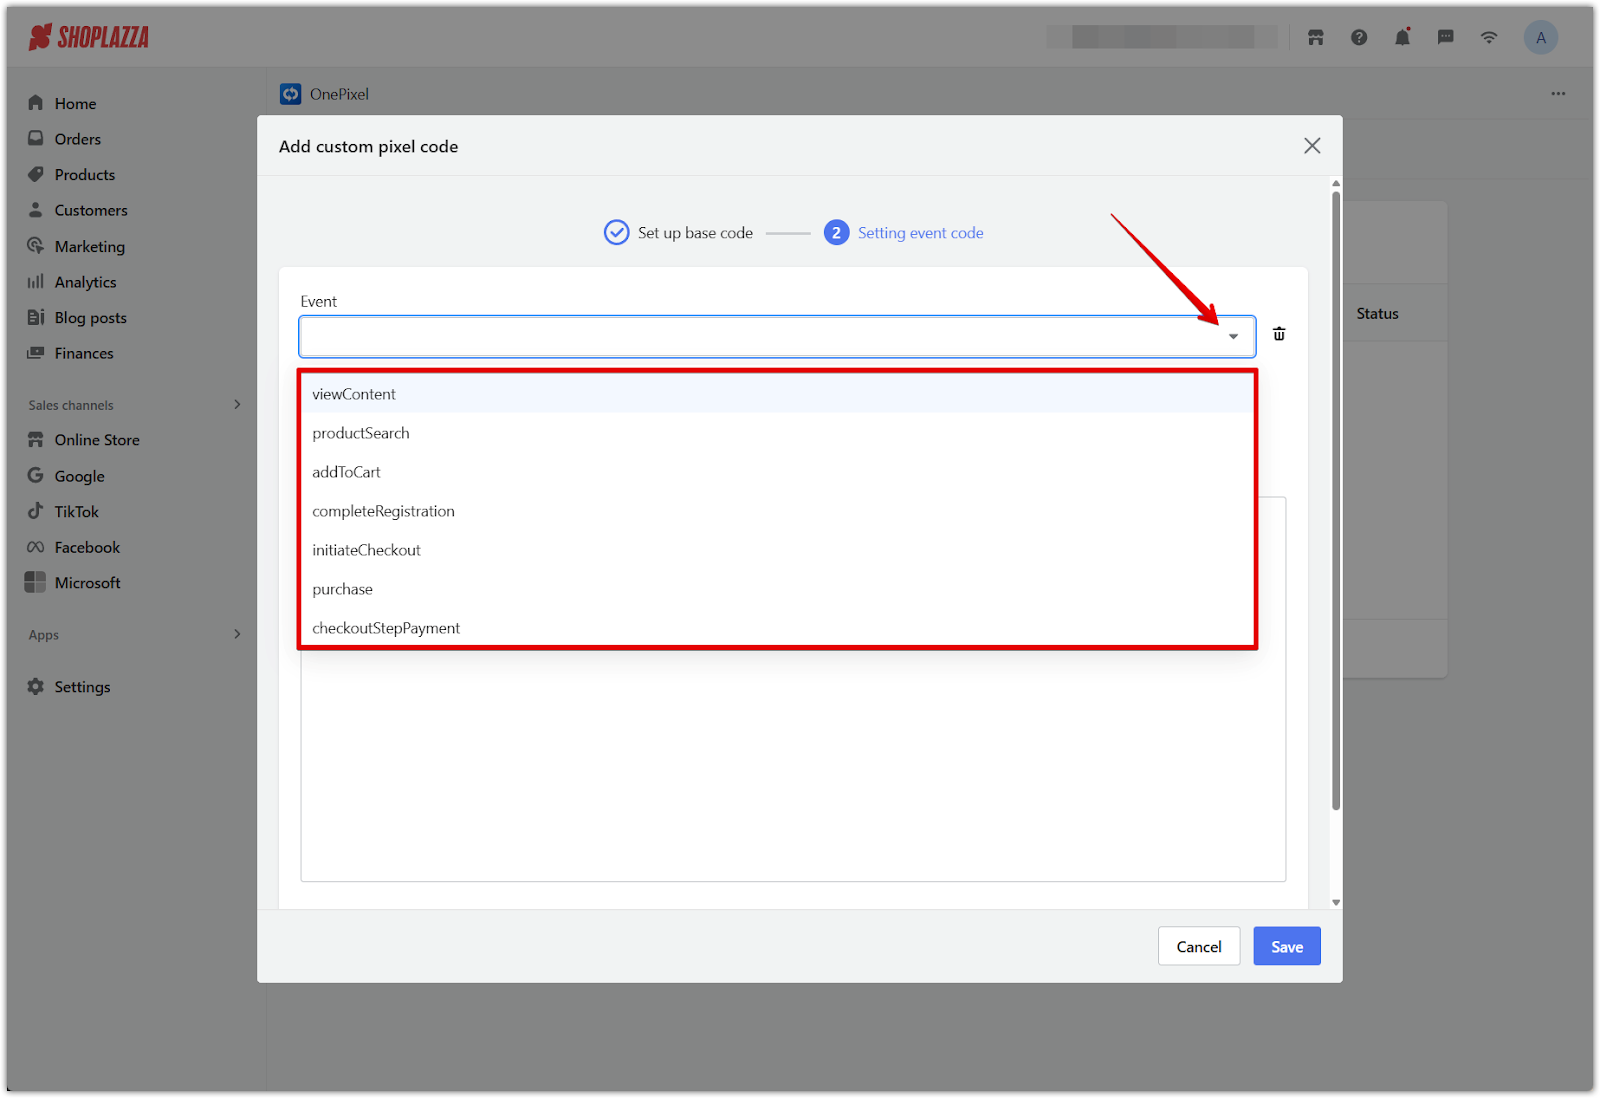
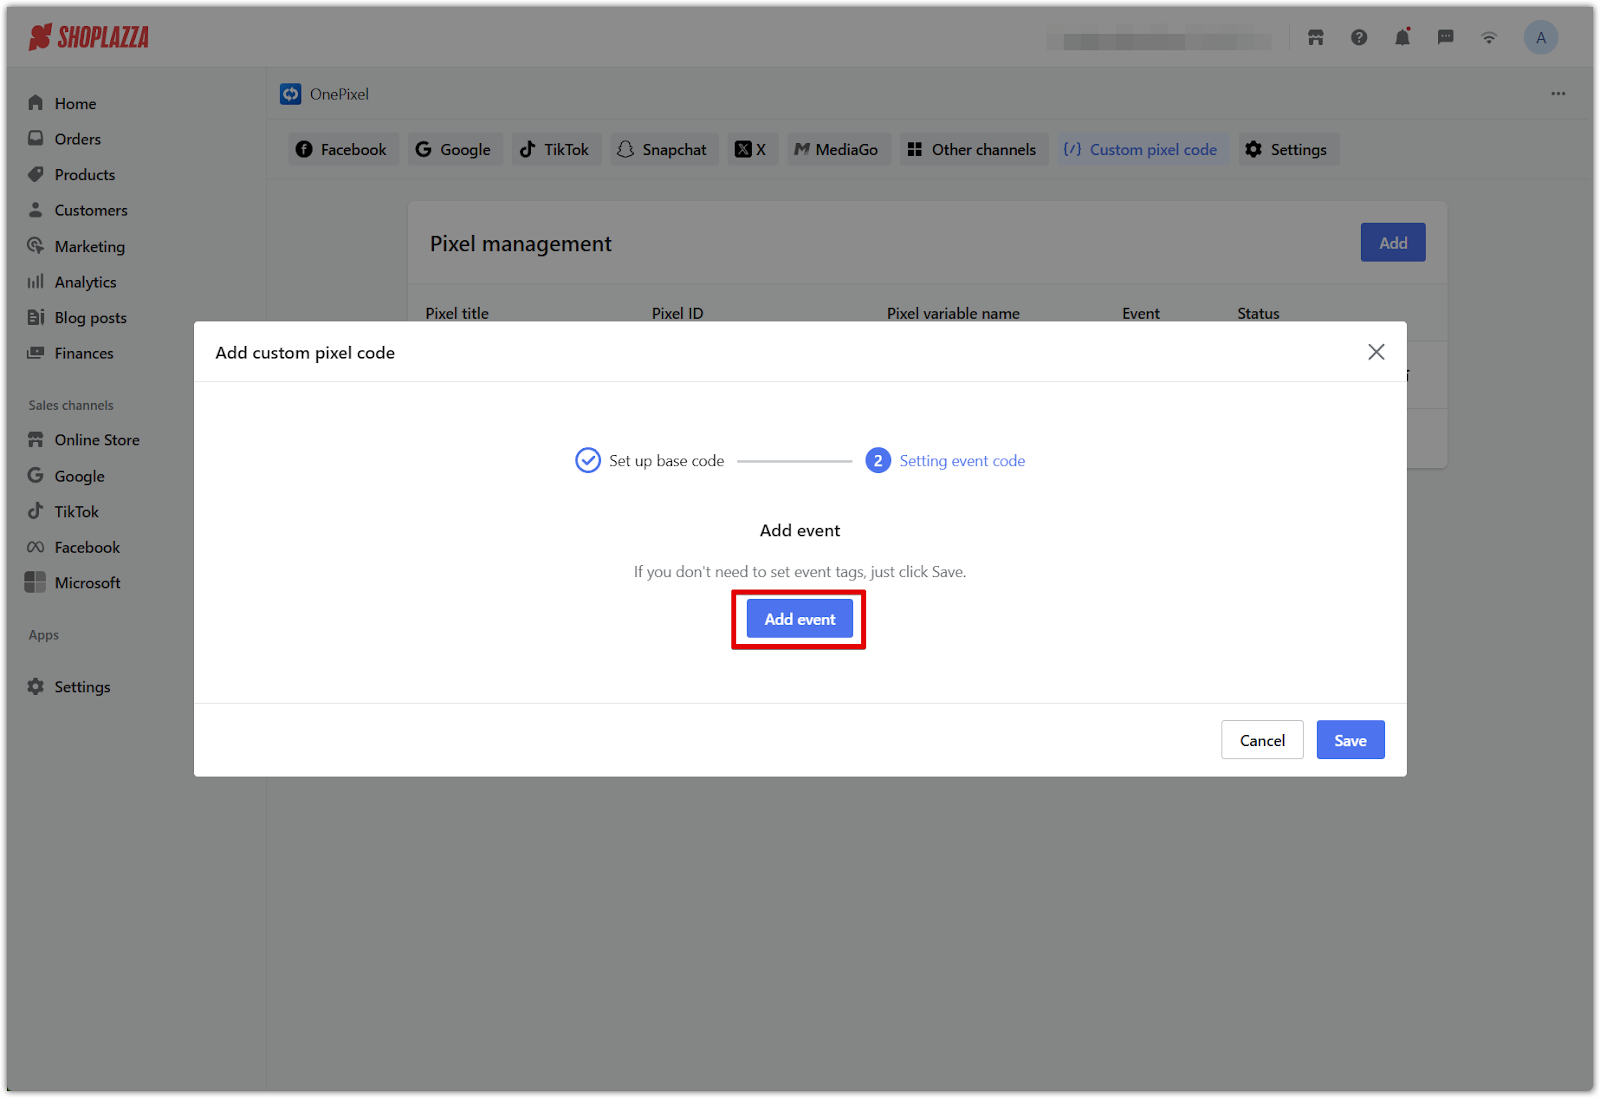
After you click Next, you’ll be prompted to add an event. This step is optional but allows you to track specific actions like Add to Cart, View Content, or Purchase.
1. Click Add event: Select the event you want to track from the dropdown (e.g. addToCart).
Note
If you are not setting up any event tags, click Save to complete the setup with only the base code.
Note
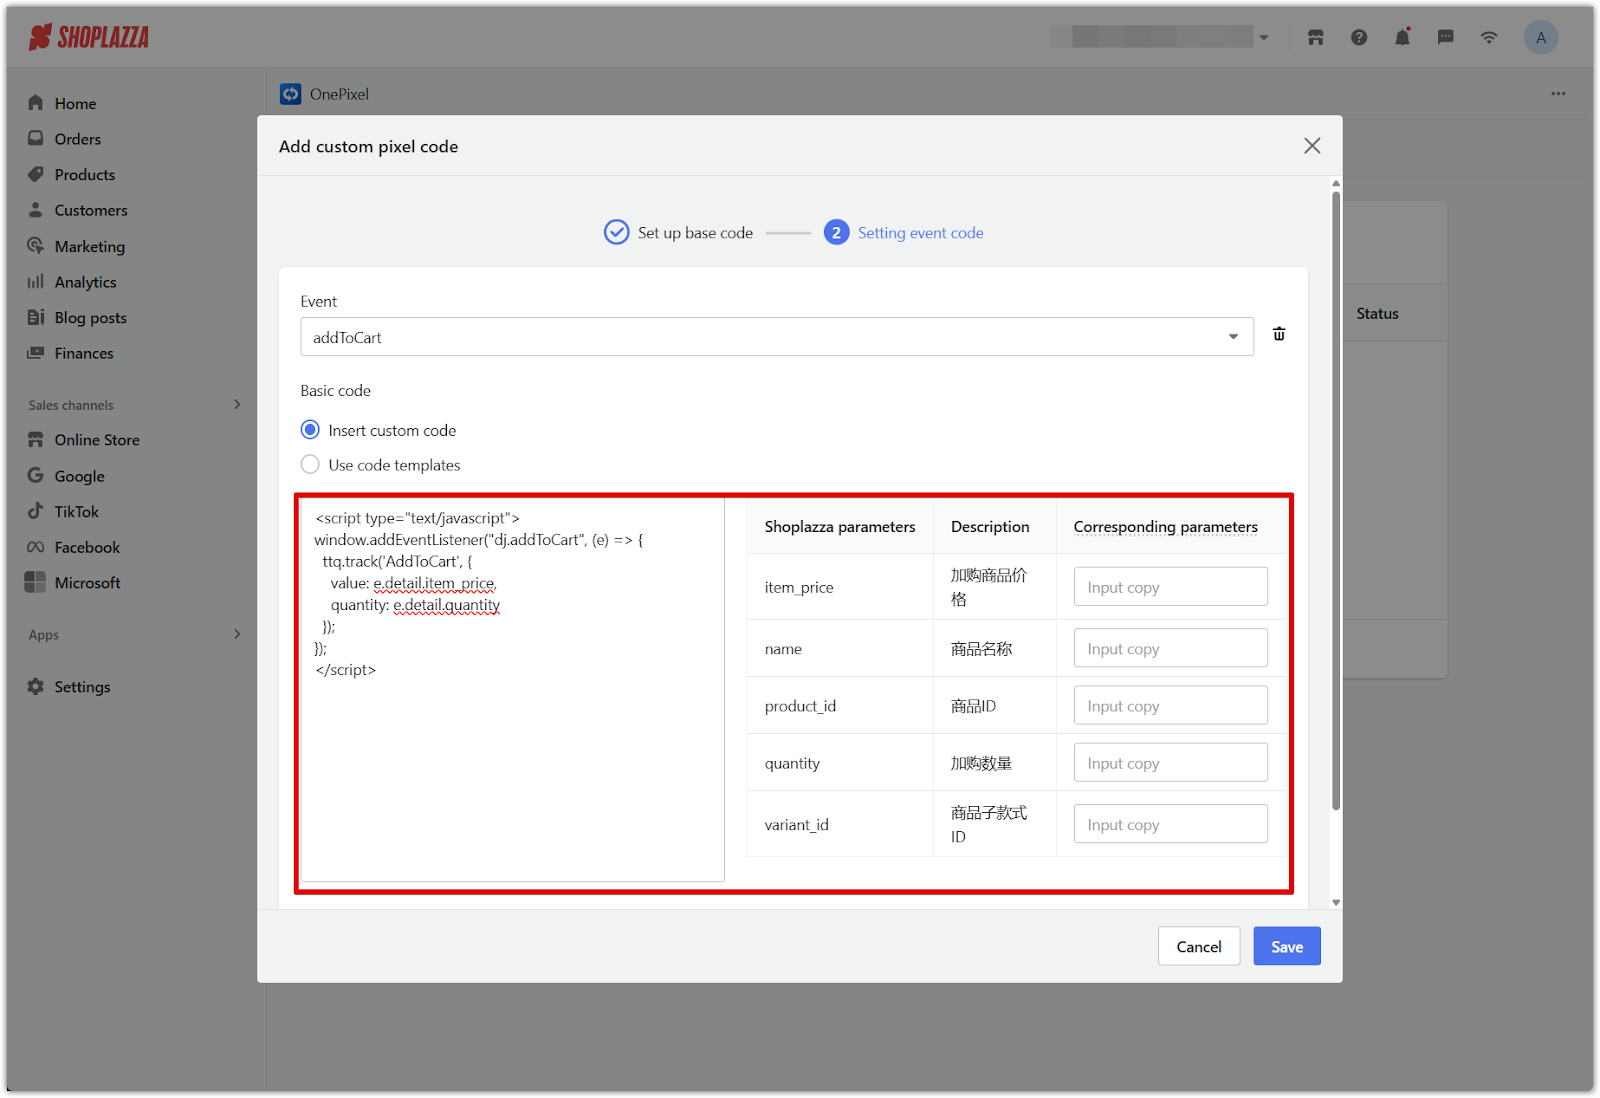
When you select an event, OnePixel will auto-generate a sample event structure on the left-hand side. This serves as a scaffold for your event code. You must replace the placeholder lines with your platform’s actual tracking syntax (e.g. fbq('track', ...) or ttq.track(...)).
2. Insert event code:
- Choose Insert custom code.
- Paste the event tracking script provided by your ad platform.
- Use the Shoplazza variable list (shown on the right in OnePixel) to replace values like price, product ID, or quantity.
- Wrap all dynamic variables in curly braces {}.
Example for TikTok:
<script type="text/javascript">
window.addEventListener("dj.addToCart", (e) => {
  ttq.track('AddToCart', {
    value: e.detail.item_price,
    quantity: e.detail.quantity
  });
});
</script>
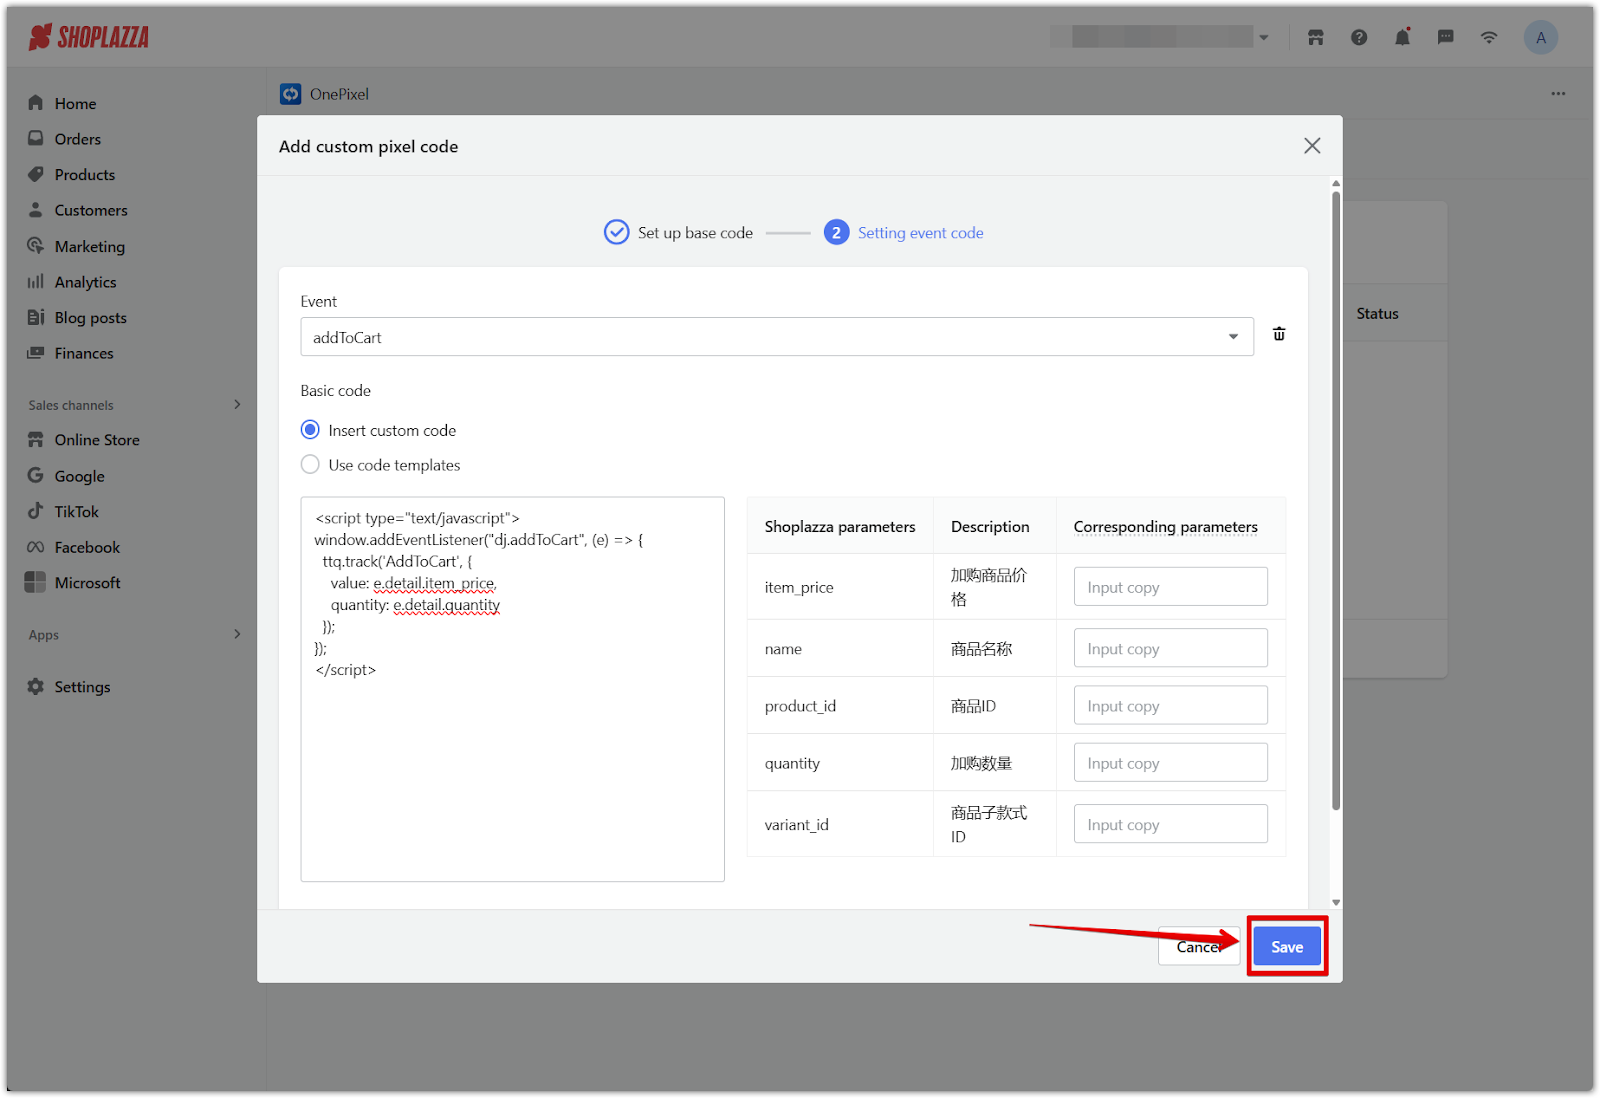
3. Click Save. The pixel will now appear in your Pixel management list with its assigned event.
Example: Getting pixel code from TikTok
TikTok’s Events Manager provides both the Pixel ID and the base code needed to track activity on your website. Follow these steps to retrieve and apply them in OnePixel:
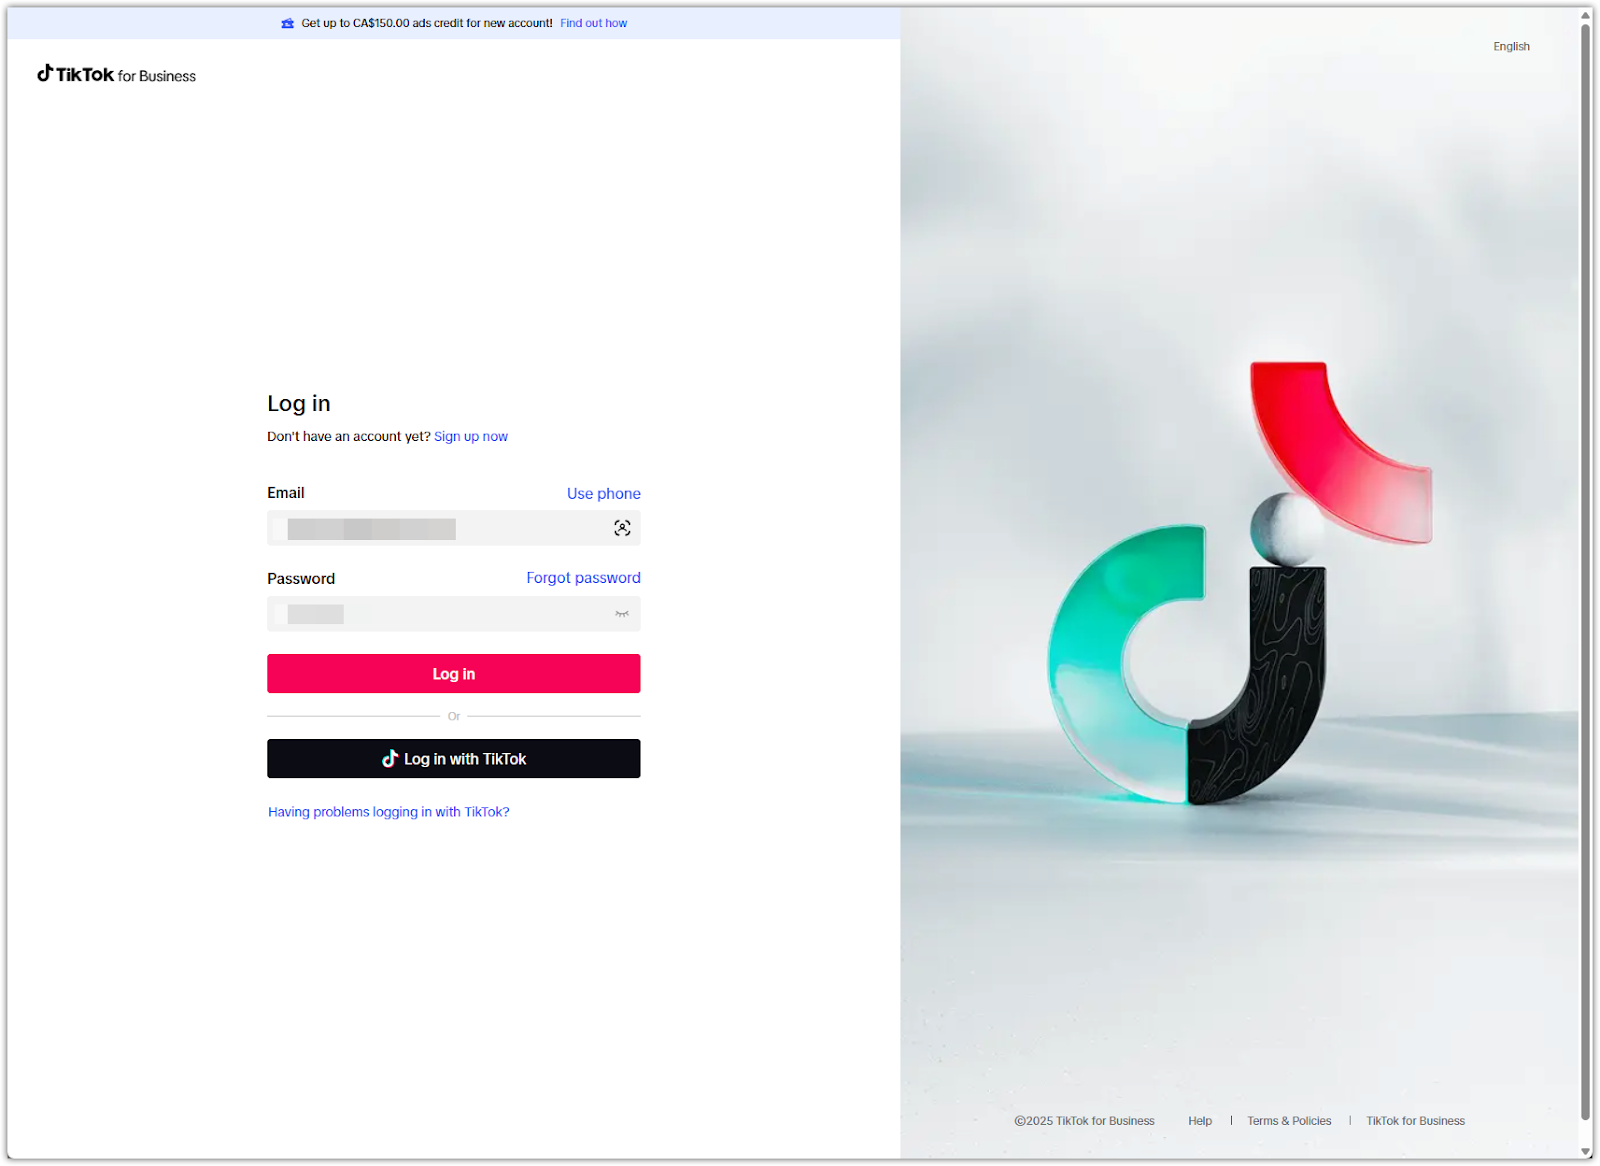
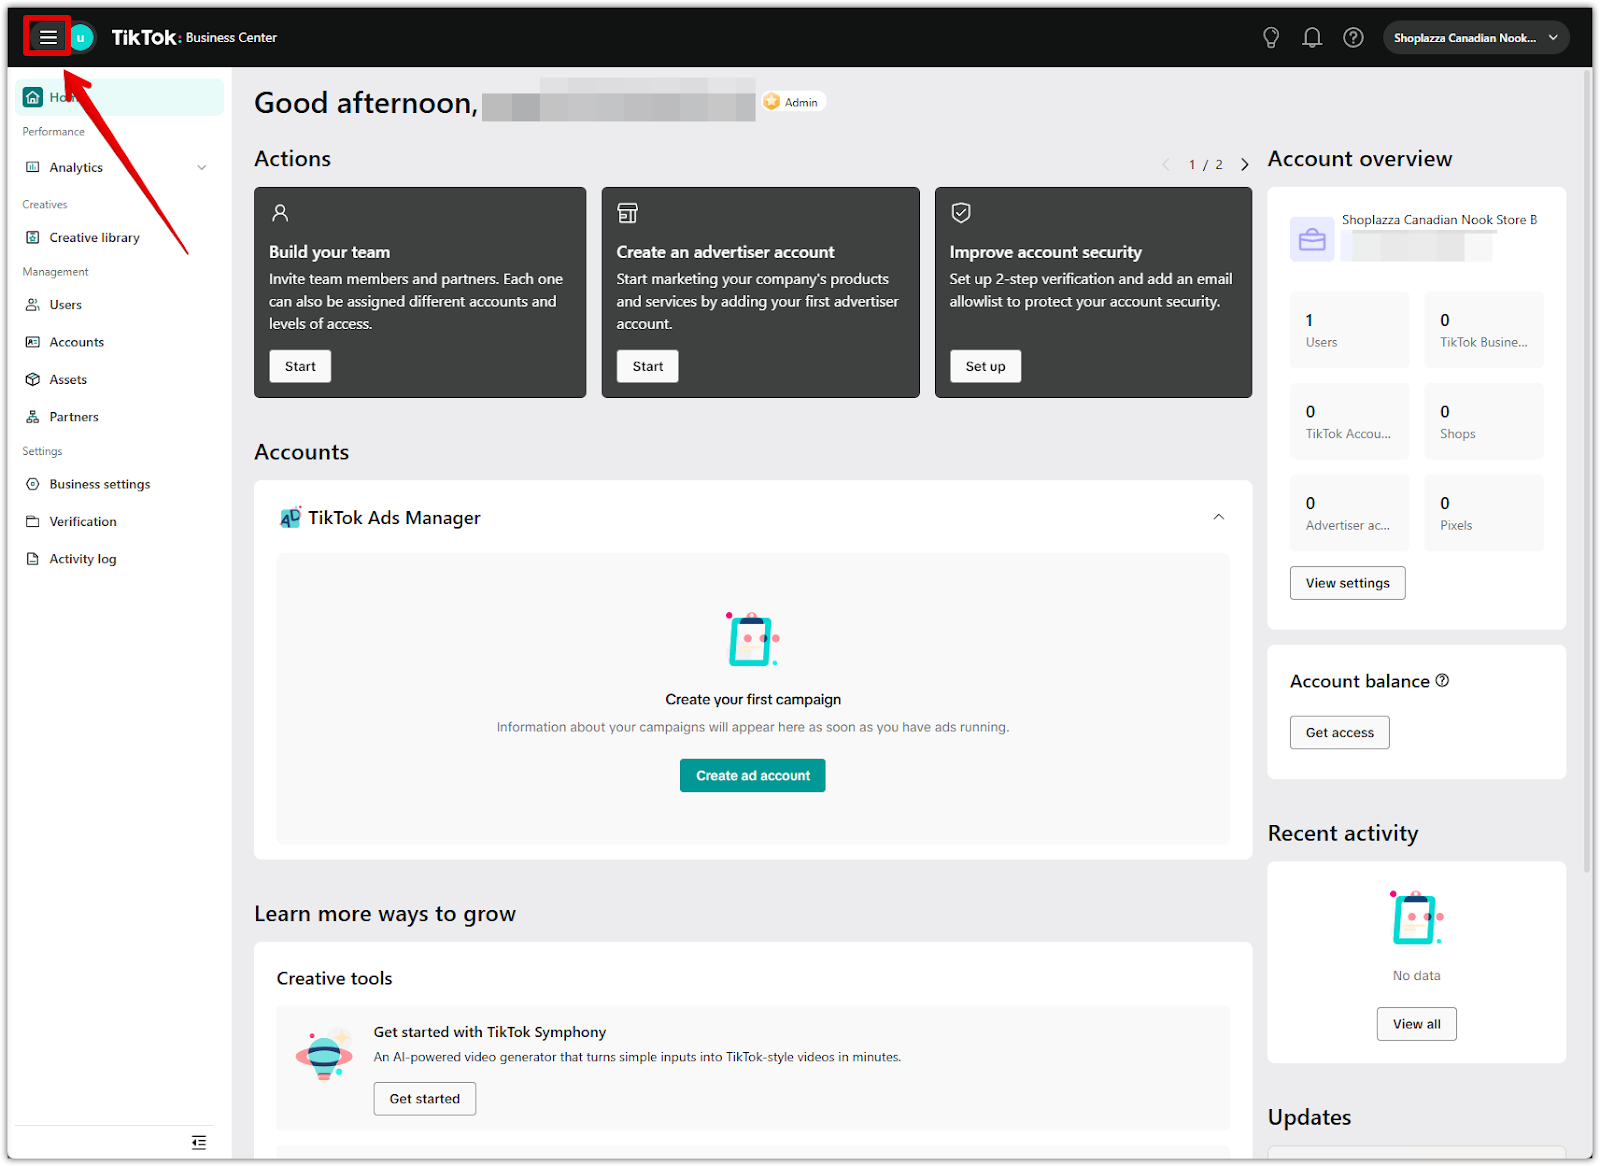
1. Log into TikTok Business Center: Go to TikTok for Business and sign in with your business credentials.
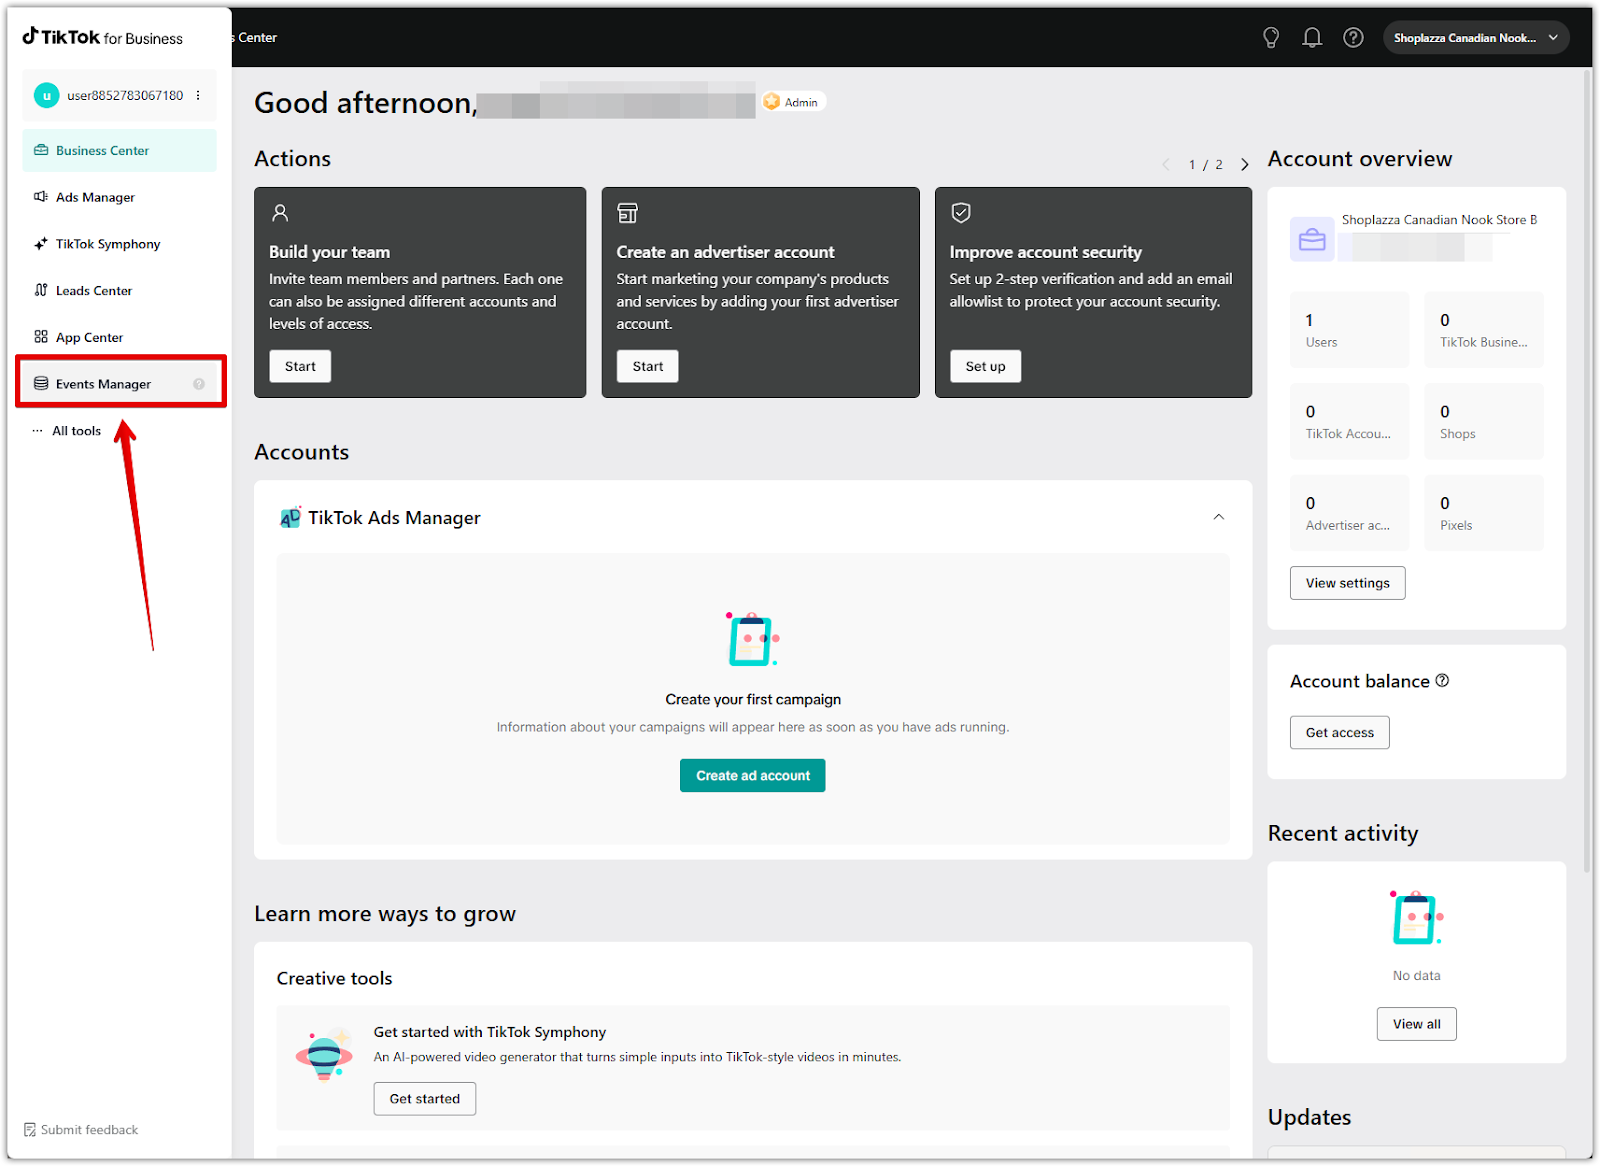
2. Access Events Manager: Click the menu icon in the top-left corner and select Events Manager from the navigation panel.
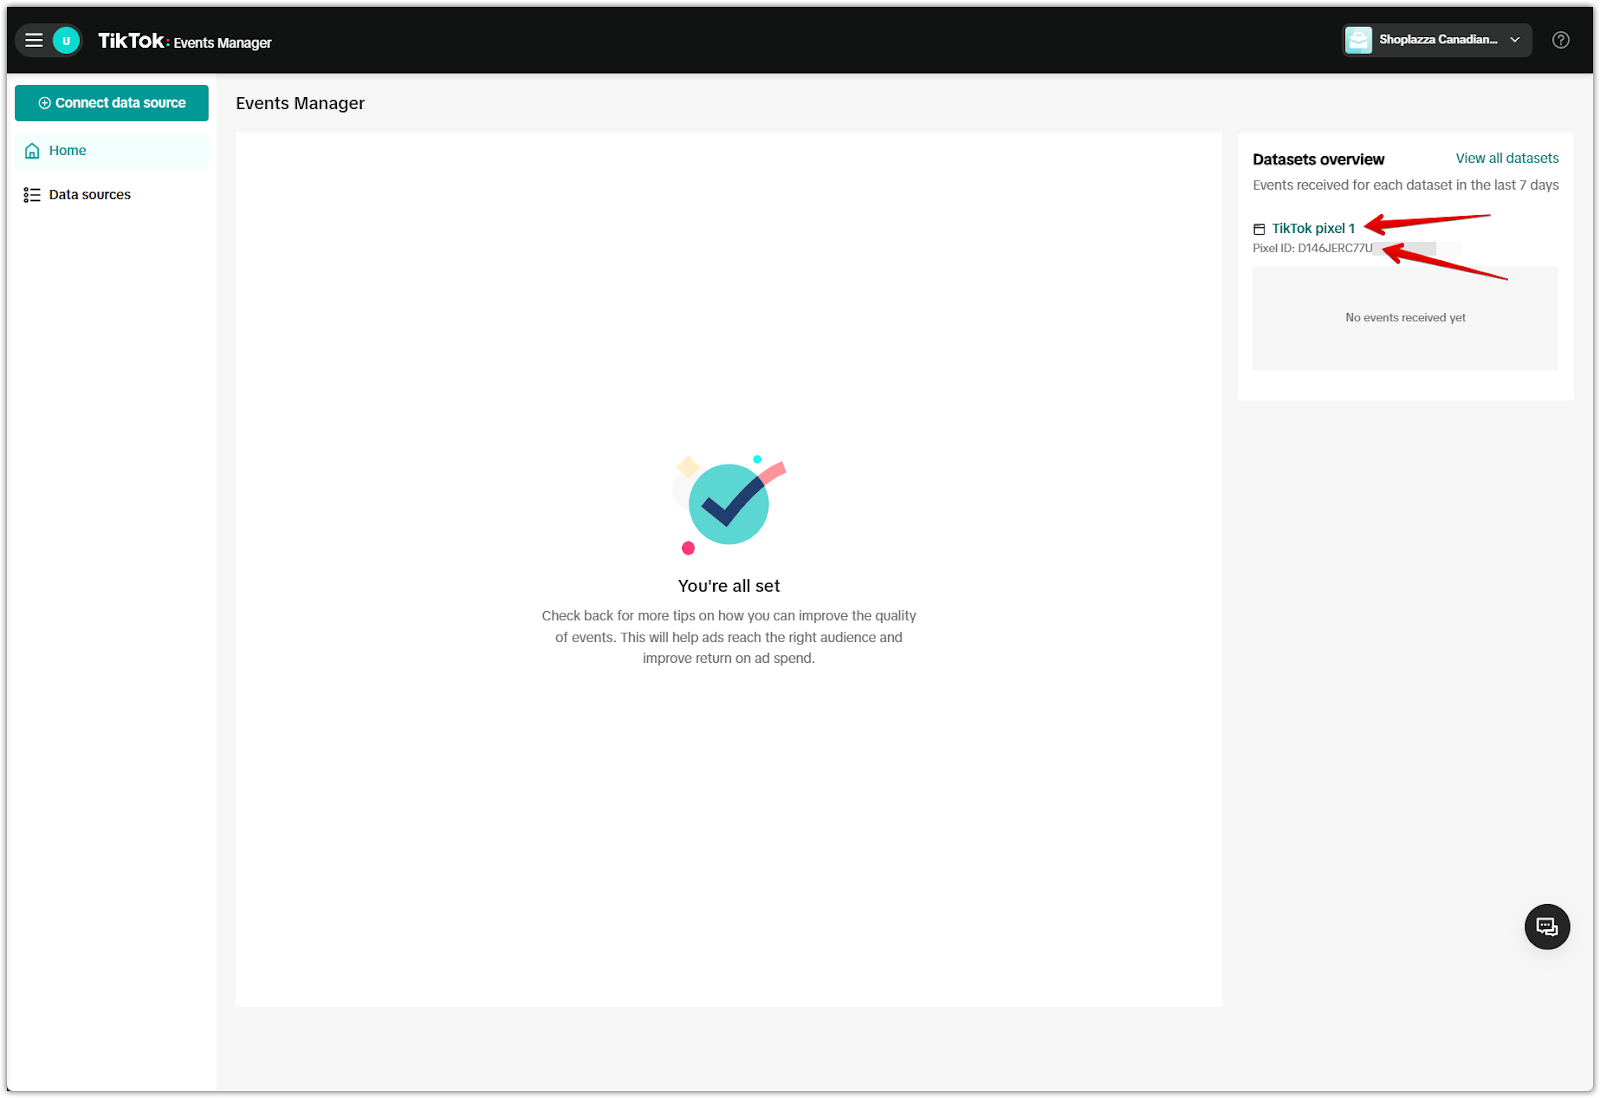
3. Select your pixel: Under the Datasets overview on the right-hand side, click your pixel name (e.g. TikTok pixel 1) to view its details. Copy the Pixel ID as this is the unique identifier you’ll need for OnePixel’s Pixel ID and Pixel variable name fields.
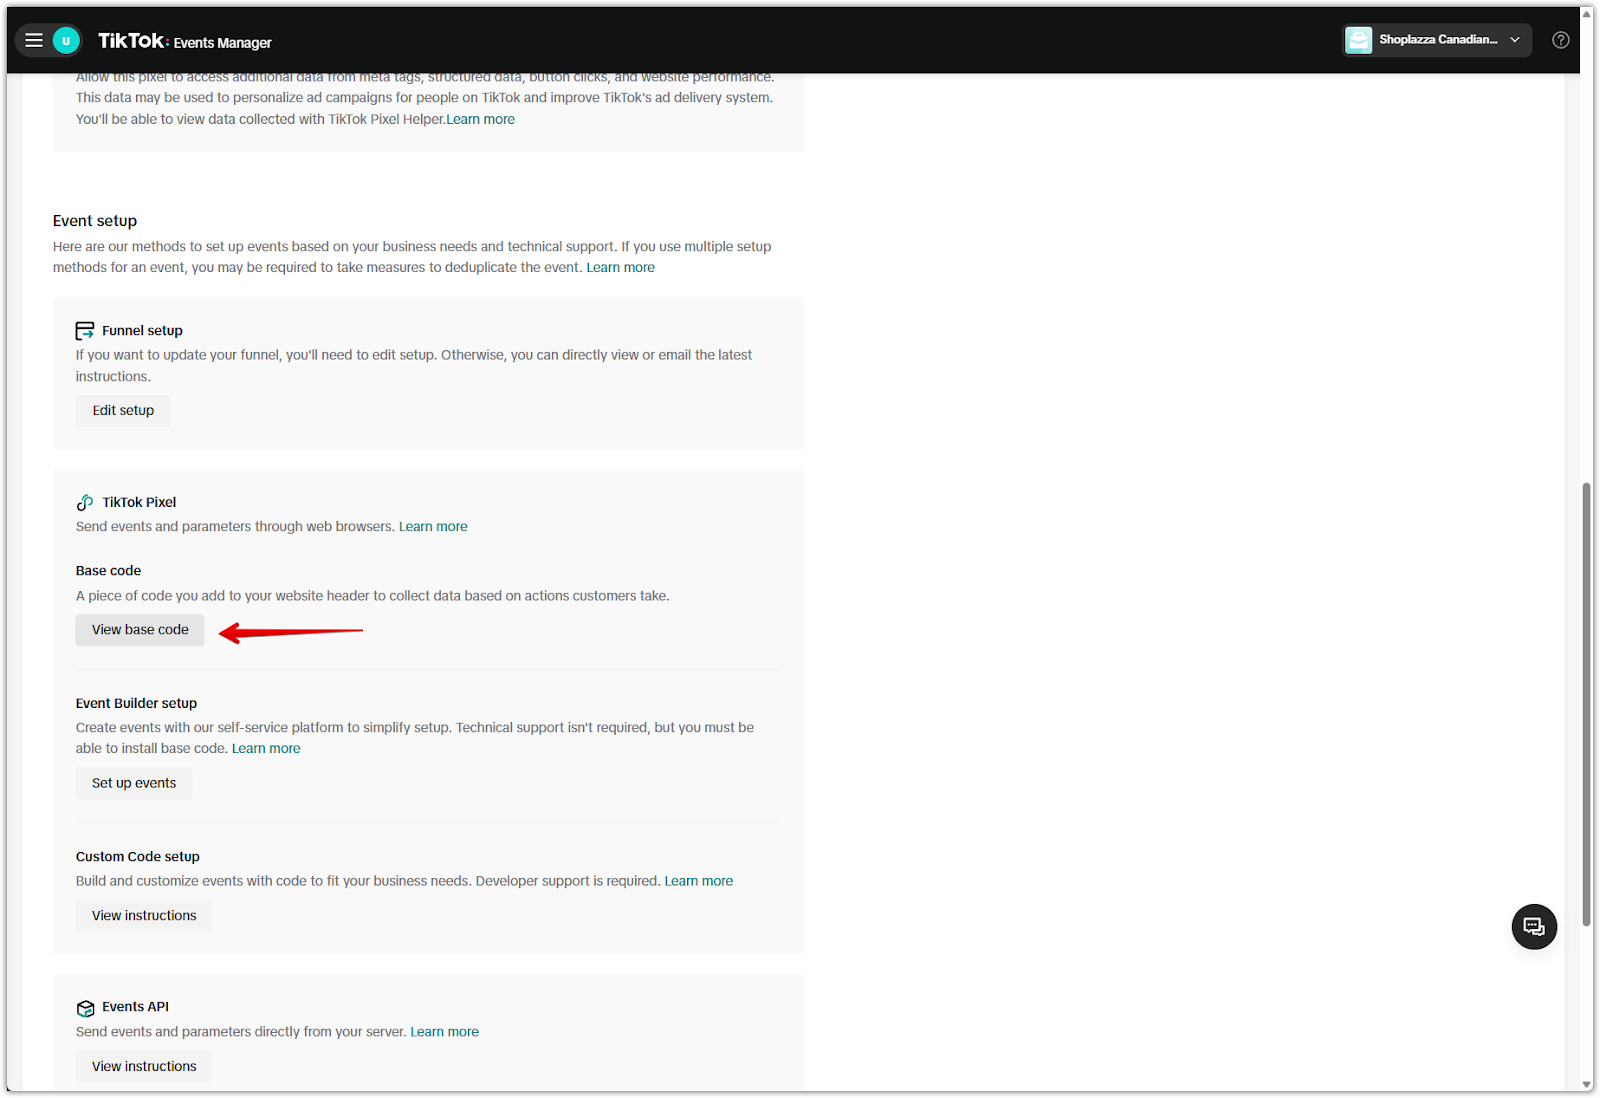
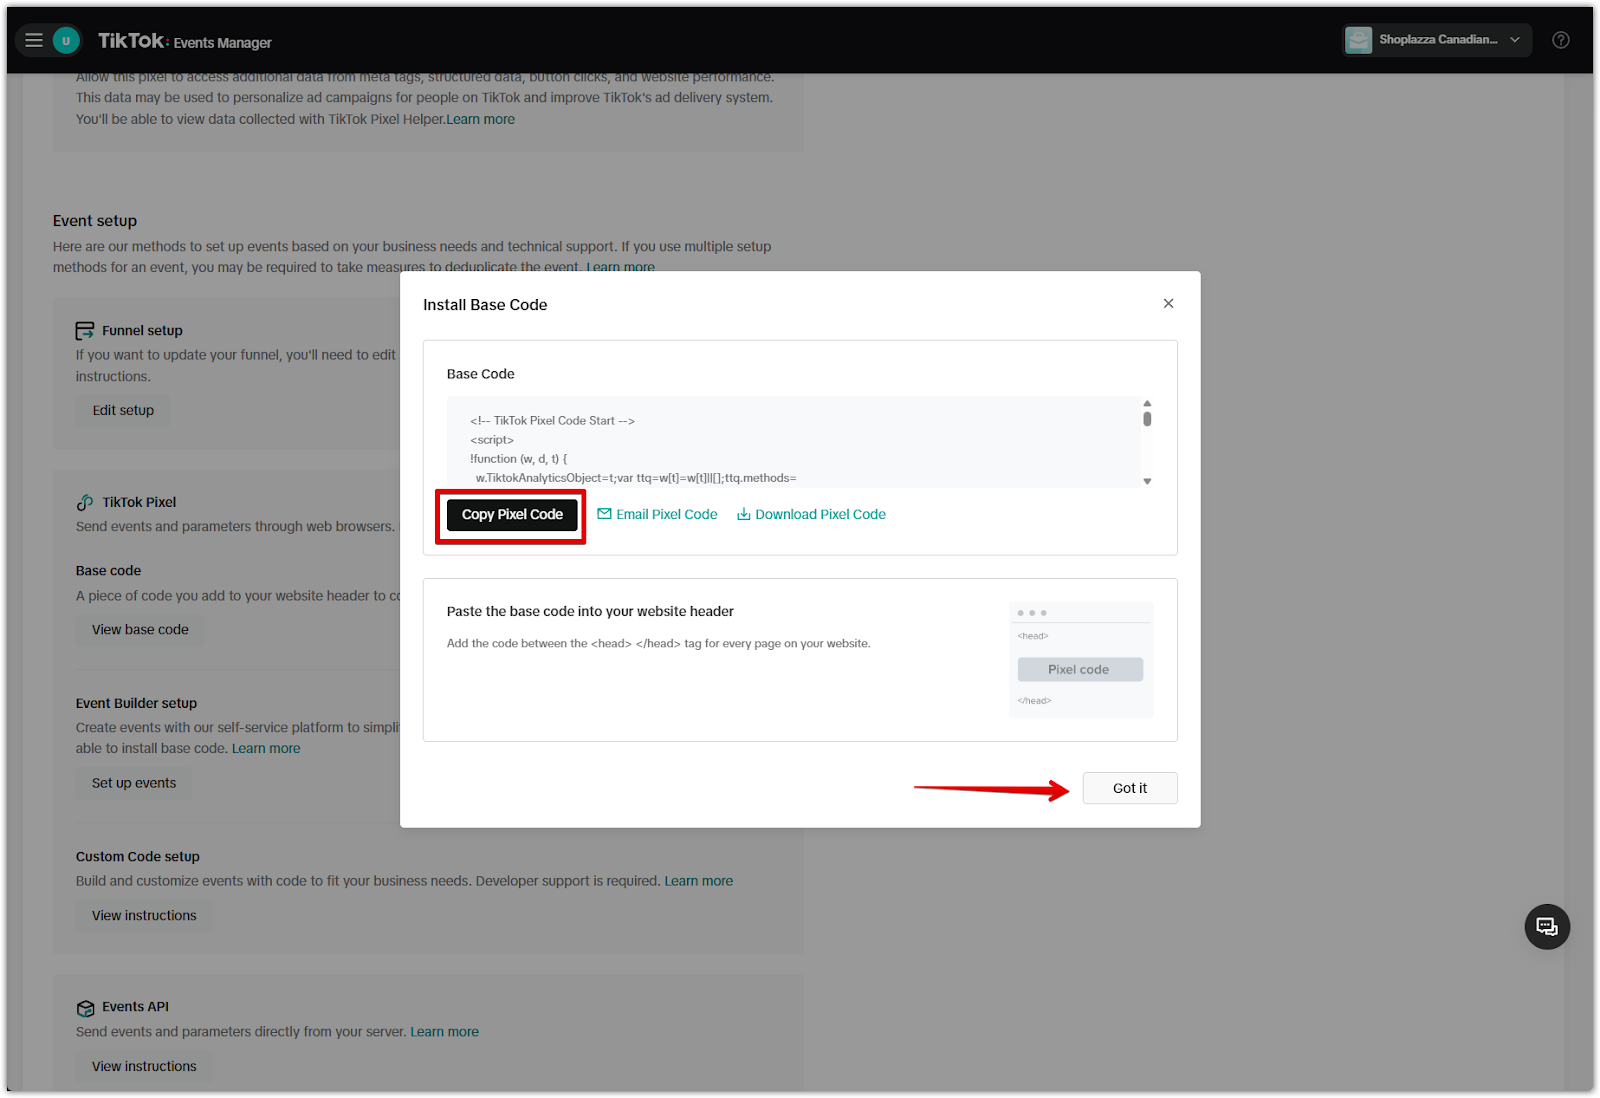
4. Get the base code: Inside the pixel’s Settings tab, scroll to Event setup TikTok > Pixel > Base code, then click View base code and Copy Pixel Code. This opens a dialog box with the full JavaScript snippet.
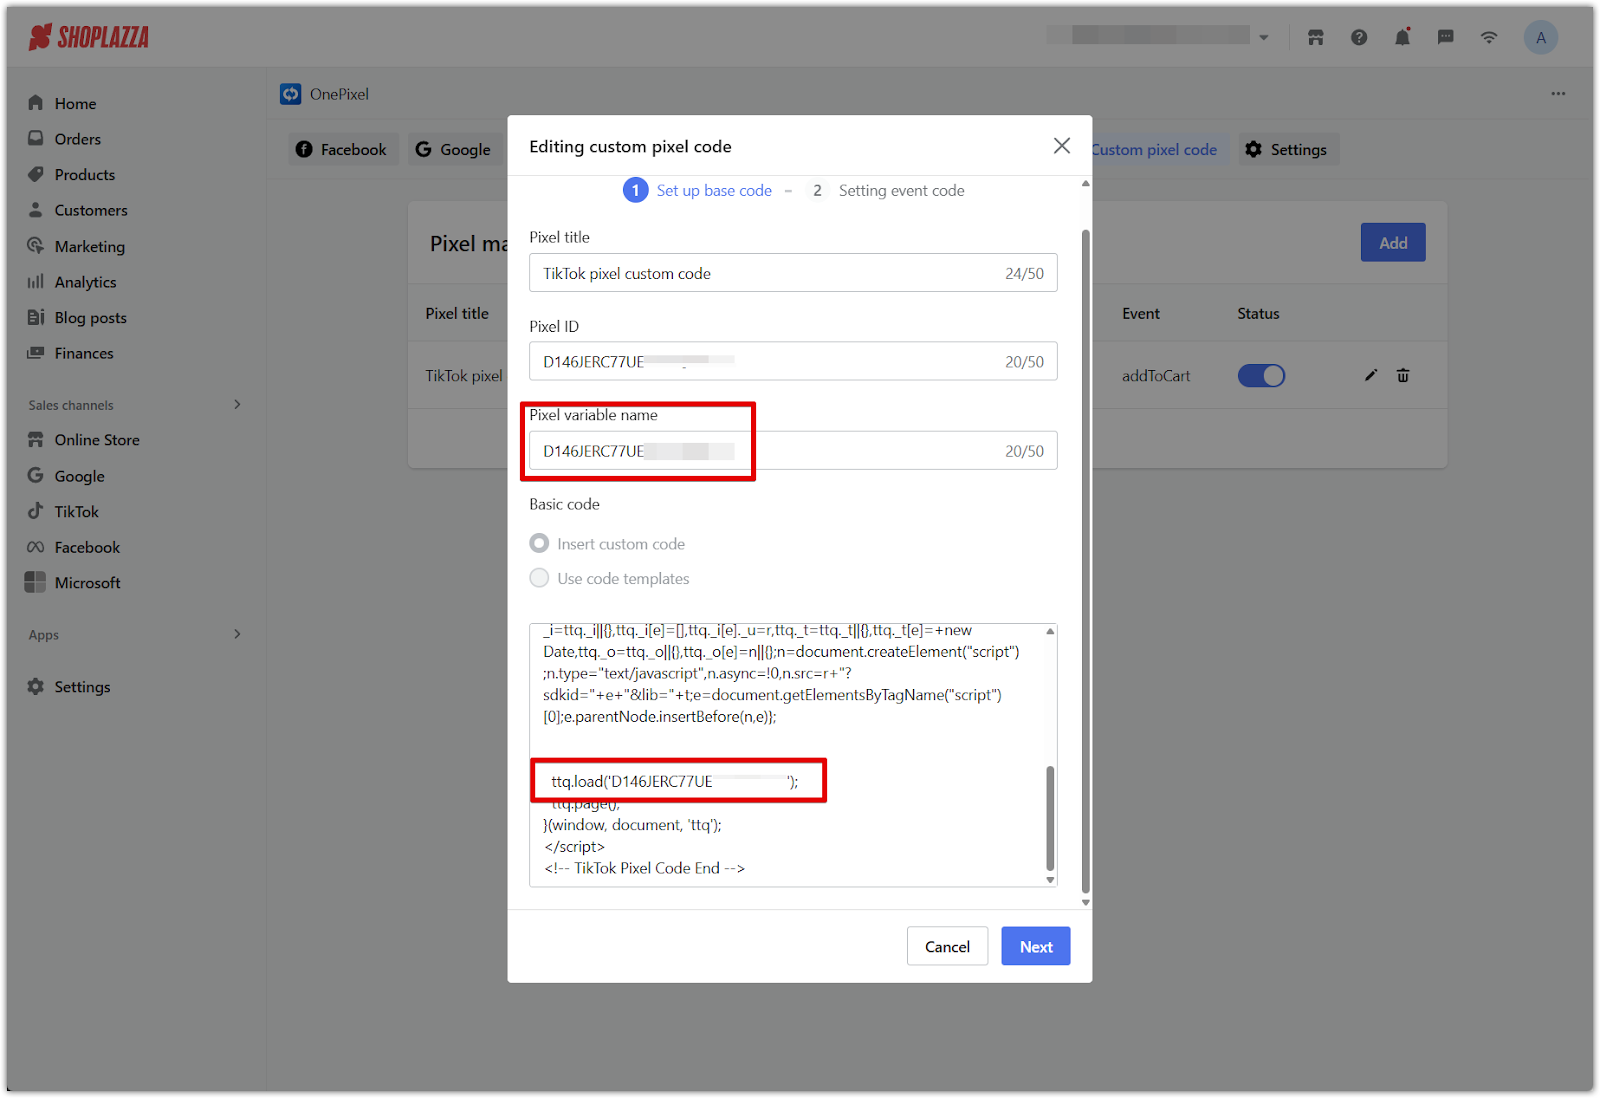
5. Paste the Pixel ID into the Pixel variable name field: Use the same value in the Pixel variable name field, unless your platform’s base code specifies a different variable name.
6. Paste the base code into the code editor: Select Insert custom code, then paste the entire TikTok base tracking script into the Basic code box.
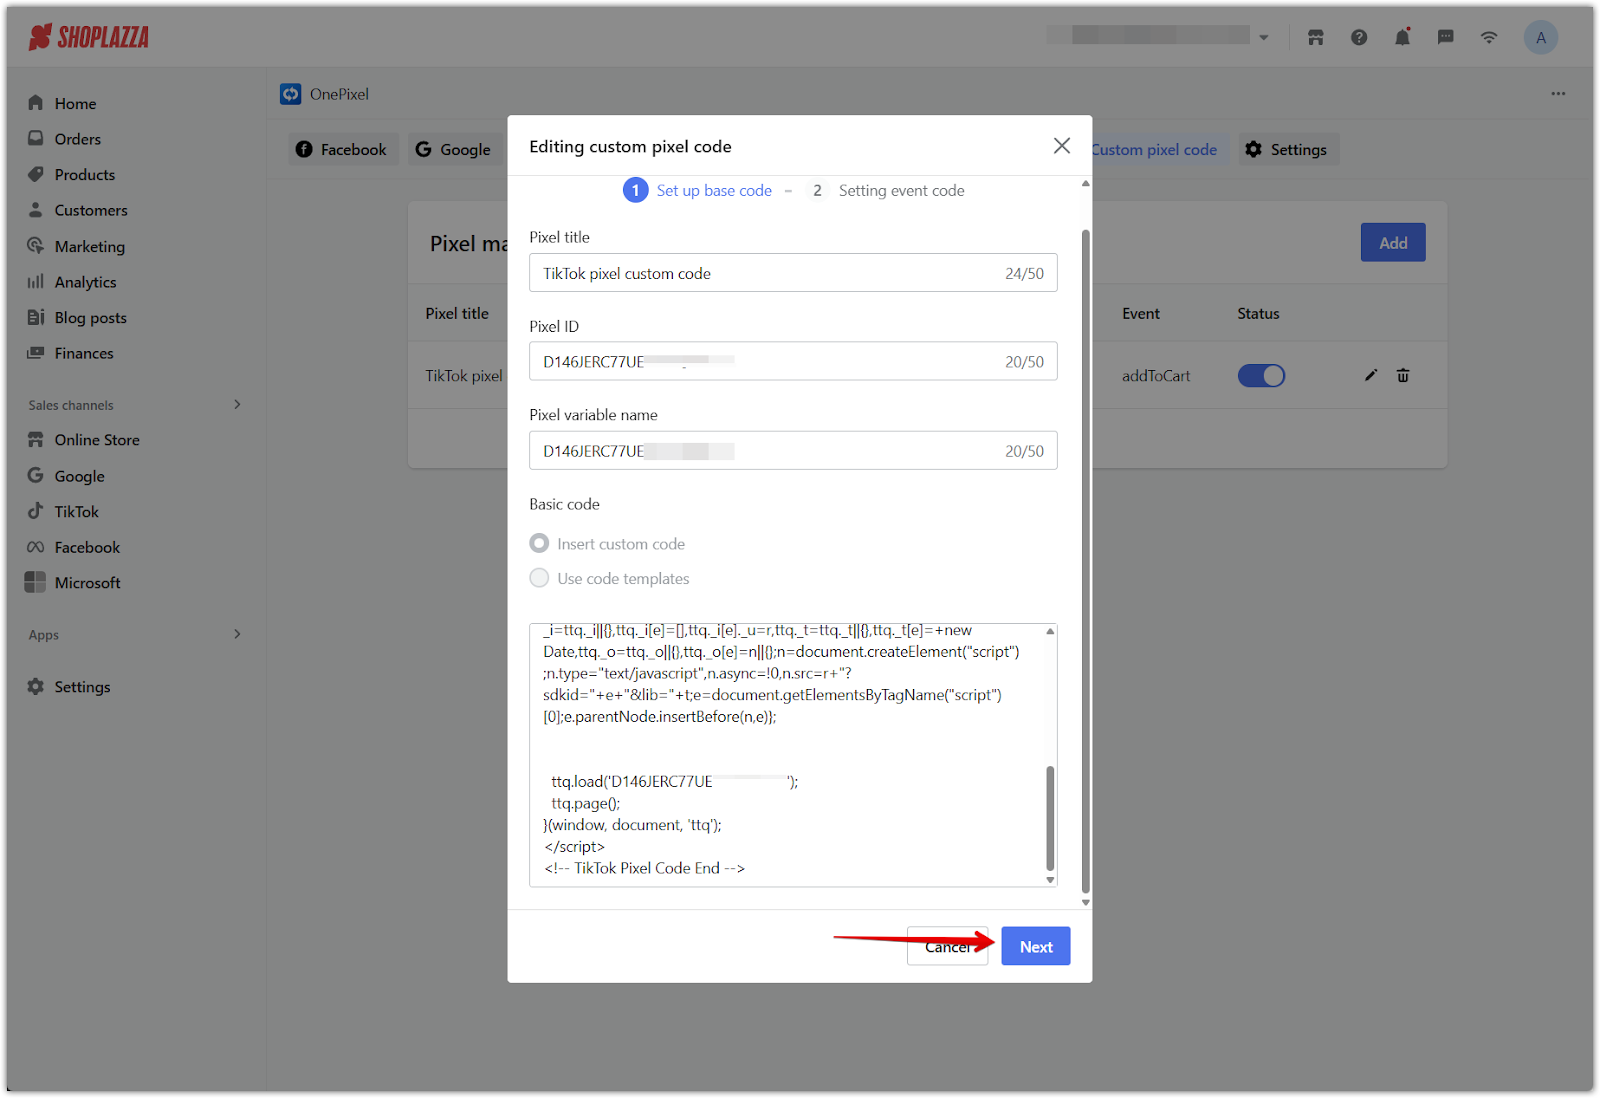
7. Ensure the ID inside the code matches the variable name: Check that the value inside ttq.load("...") matches what you entered in the Pixel variable name field.
8. Click Next: Proceed to the event configuration screen.
Using Code Templates for AppLovin Integration
The Use code templates feature simplifies setup for AppLovin integration, automatically generating base and event tracking code.
Note
Code templates are currently supported for AppLovin only. For all other platforms, you must use the custom code integration.
Example: Adding an AppLovin pixel using code templates
Follow these steps if you are using AppLovin and want to configure your pixel through the Use code templates method:
1. Go to the OnePixel app: In your Shoplazza admin, open OnePixel under Apps.
2. Click Custom pixel code: Select the Custom pixel code tab, then click Add.
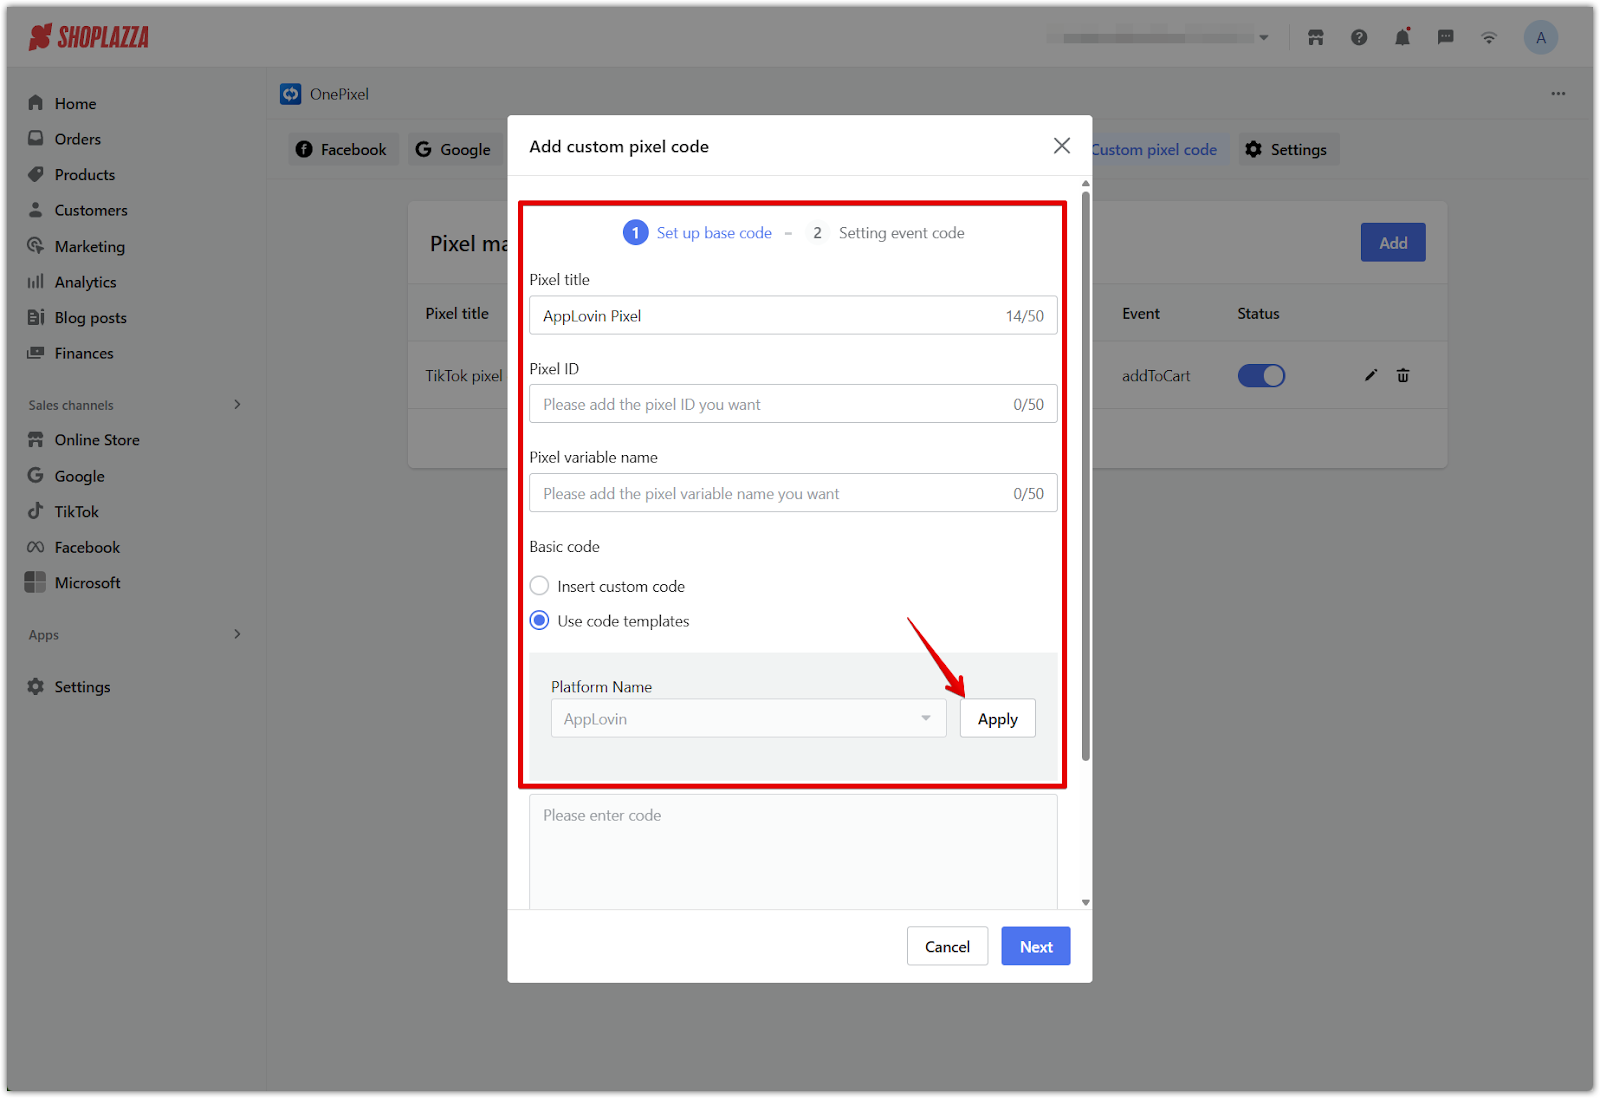
3. Enter the pixel details:
- Pixel title: Enter a Pixel title (e.g. “AppLovin pixel”)
- Pixel ID: Paste your event key from your AppLovin account into the Pixel ID field.
- Pixel variable name: Enter .
- Then click Use code templates to switch to the predefined setup mode. The Platform field will automatically be set to AppLovin and cannot be changed.
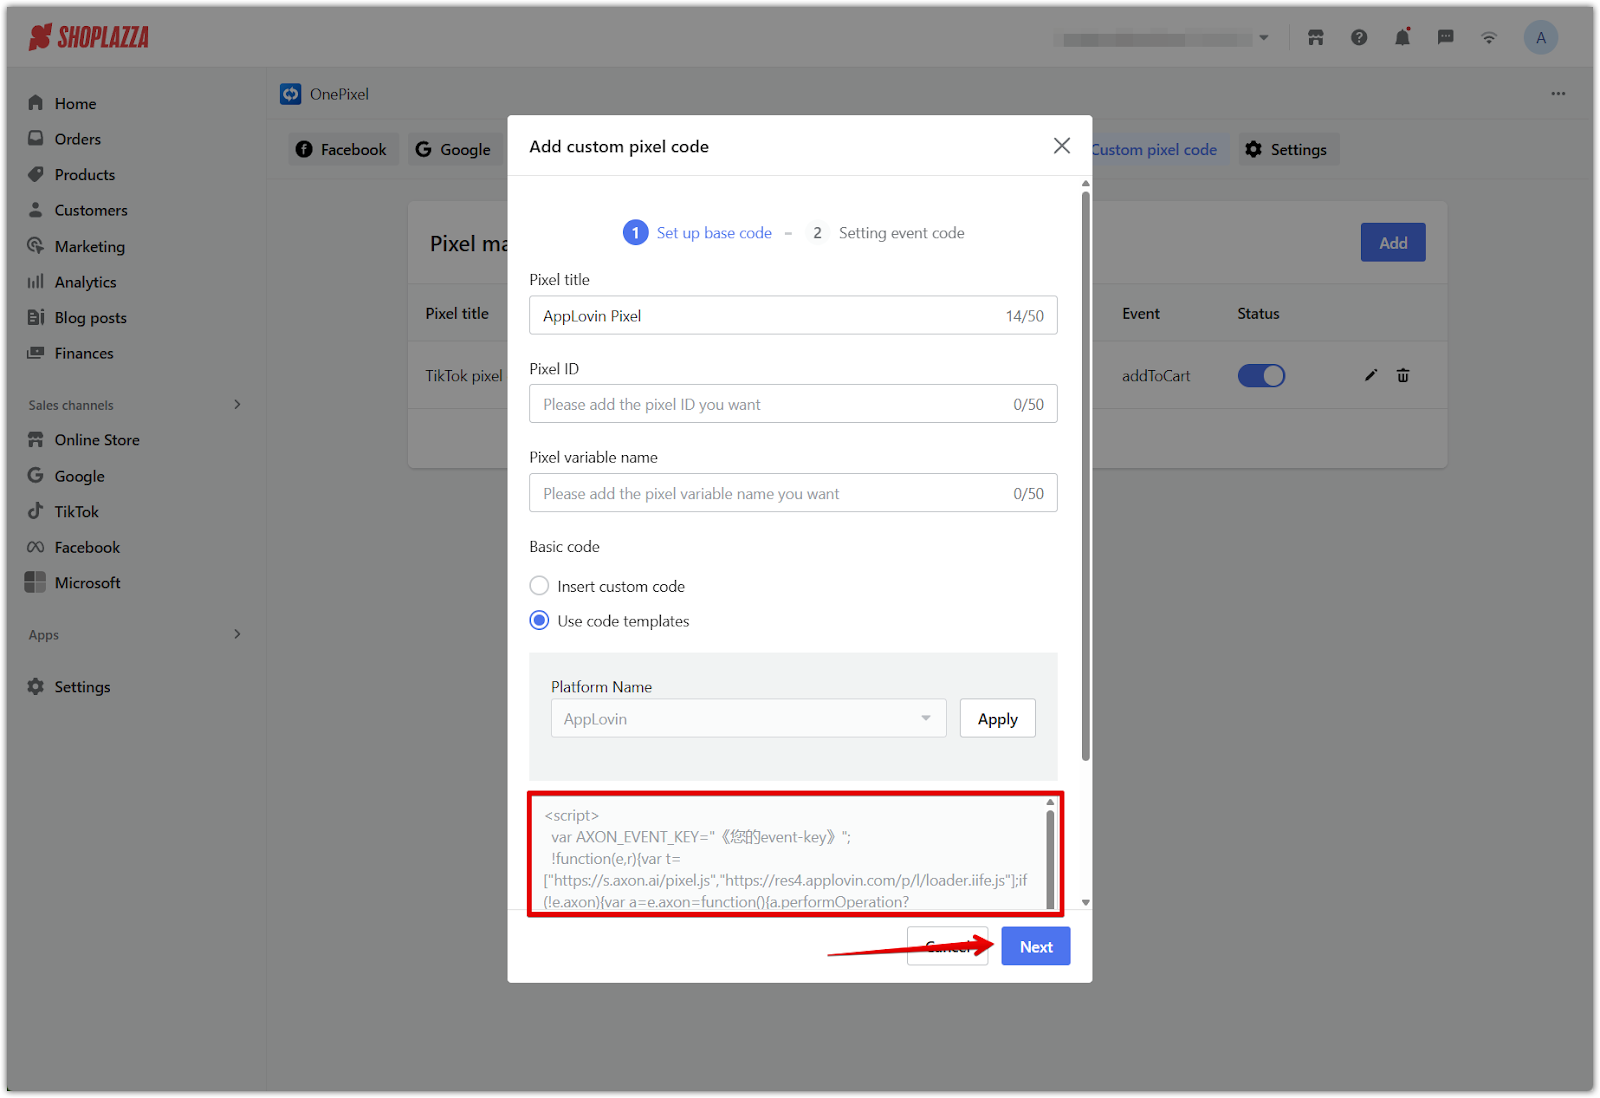
4. Auto-generated base code: OnePixel will auto-fill the base script using AppLovin’s axon(...) tracking method. Click Next.
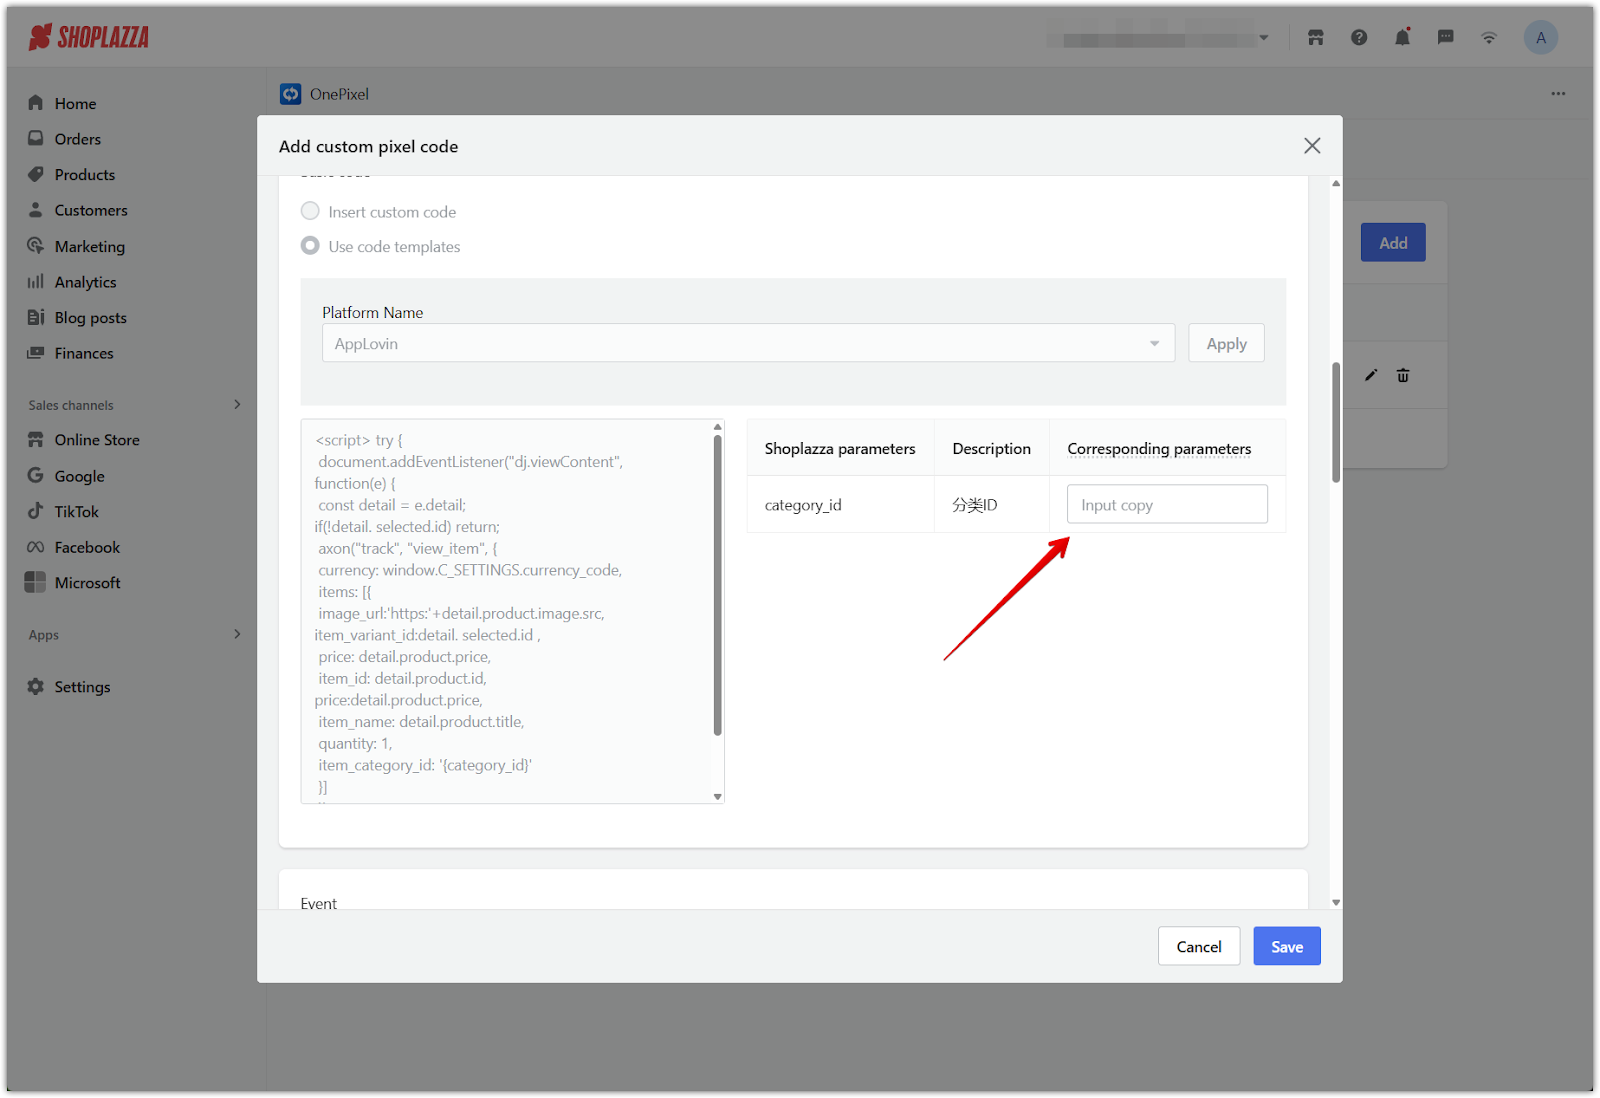
5. Add events:
- OnePixel will prefill standard events such as viewContent, addToCart, initiateCheckout, and purchase.
- You will need to replace the placeholder values (like category ID) in each event with your actual category ID values by scrolling down.
- If you’re unsure of your category IDs, refer to AppLovin’s documentation or your campaign setup.
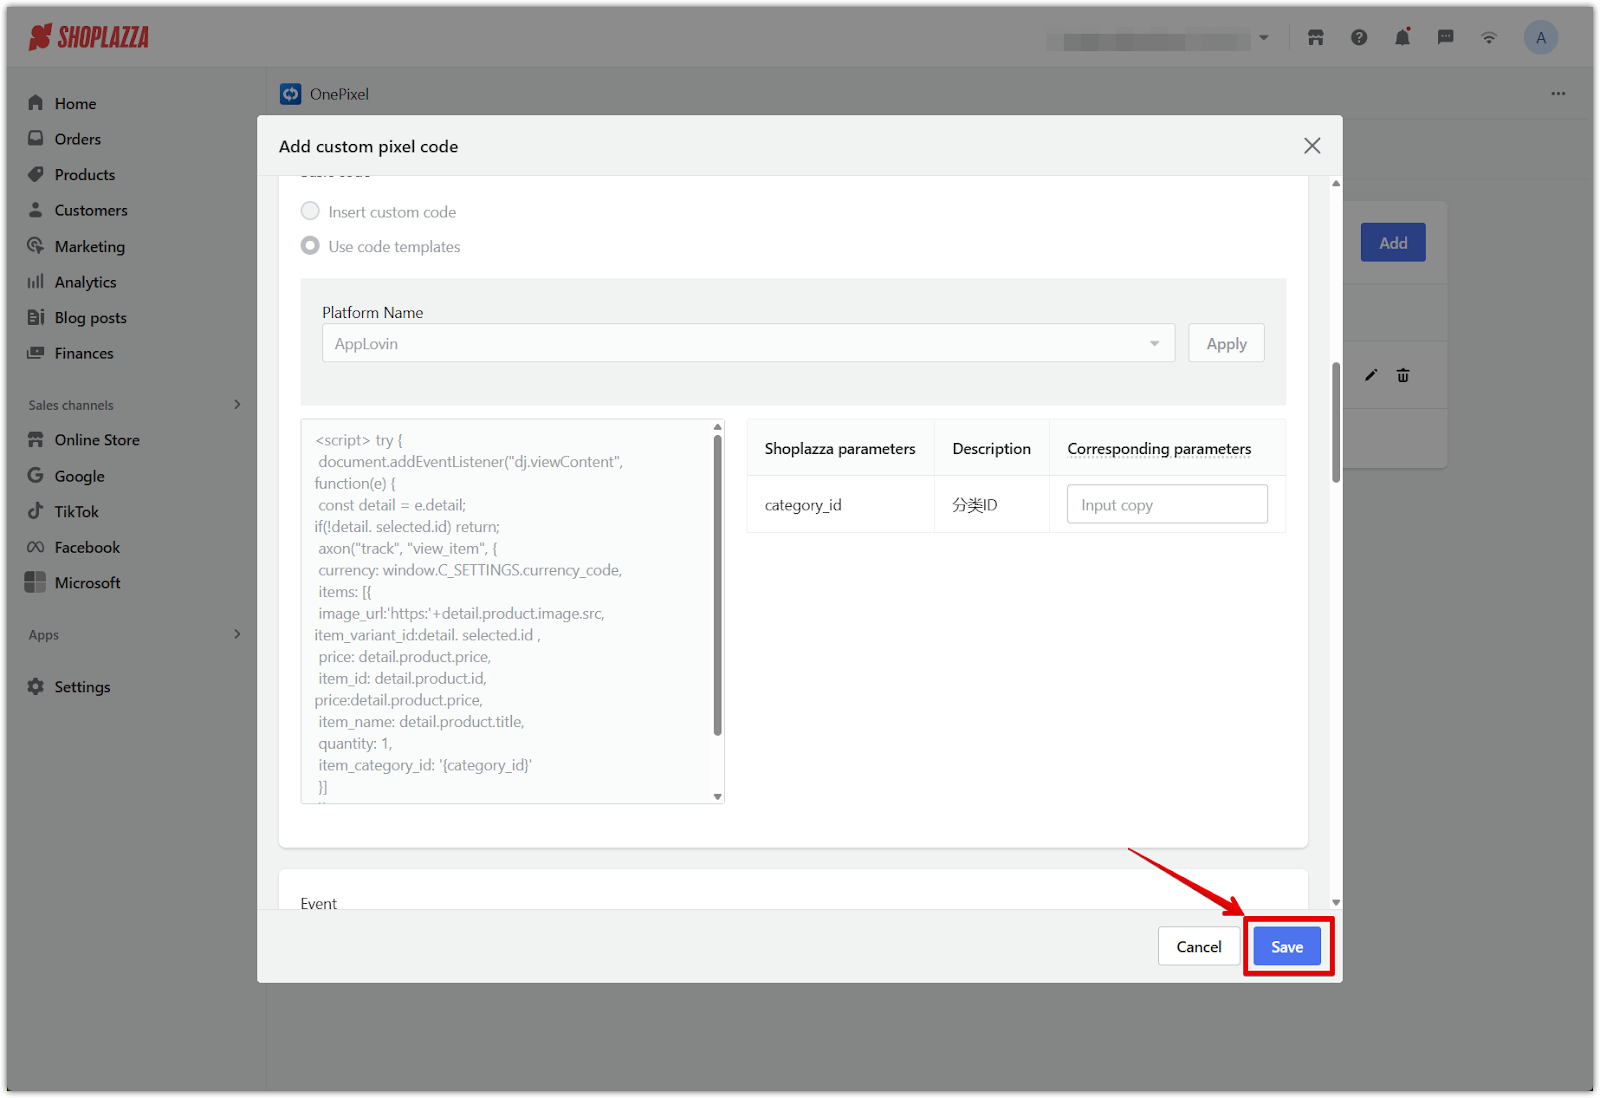
6. Click Save to complete the configuration.
Verifying Pixel Installation (AppLovin)
After completing the setup, verify that your pixel has been installed successfully.
- Download and install AXON Pixel Helper .
- Visit your store and trigger events.
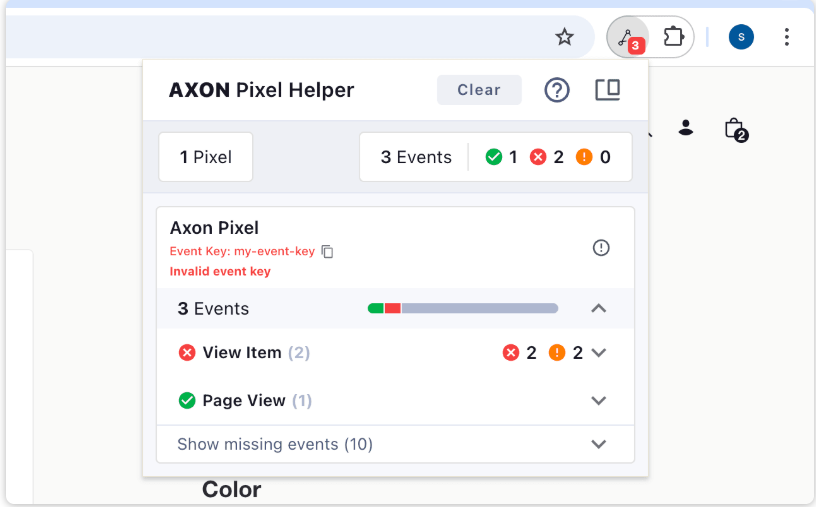
- Pixel helper will report:
- Green: Successful event capture.
- Yellow: Partially optimized (optional parameters missing).
- Red: Reporting failed.
Final tips
- Test your pixel installation using platform-specific tools, such as TikTok’s Events Manager, Facebook Pixel Helper, or AXON Pixel Helper for AppLovin.
- Avoid duplicate tracking by confirming the pixel is not also installed through theme code or other apps.
The Custom Pixel Code and Code Templates features in OnePixel give you full flexibility to integrate tracking for platforms outside Shoplazza's default integrations. Proper setup ensures accurate user behavior tracking and helps you optimize ad performance across multiple platforms.


Comments
Please sign in to leave a comment.