
To start using GlassOn with your Shoplazza store, begin by installing the app, selecting a subscription plan, and connecting a payment method. This article provides a step-by-step guide for these initial setup tasks so you can access the fullGlassOn dashboard and manage your subscription plan from your Shoplazza admin. Once complete, you will be ready to prepare your products for virtual try-on and customize your eyewear catalog with interactive features.
Installing the app from Shoplazza App Store
Start by installing GlassOn directly from the Shoplazza App Store. This connects the app to your store and lets you access it from your Shoplazza admin.
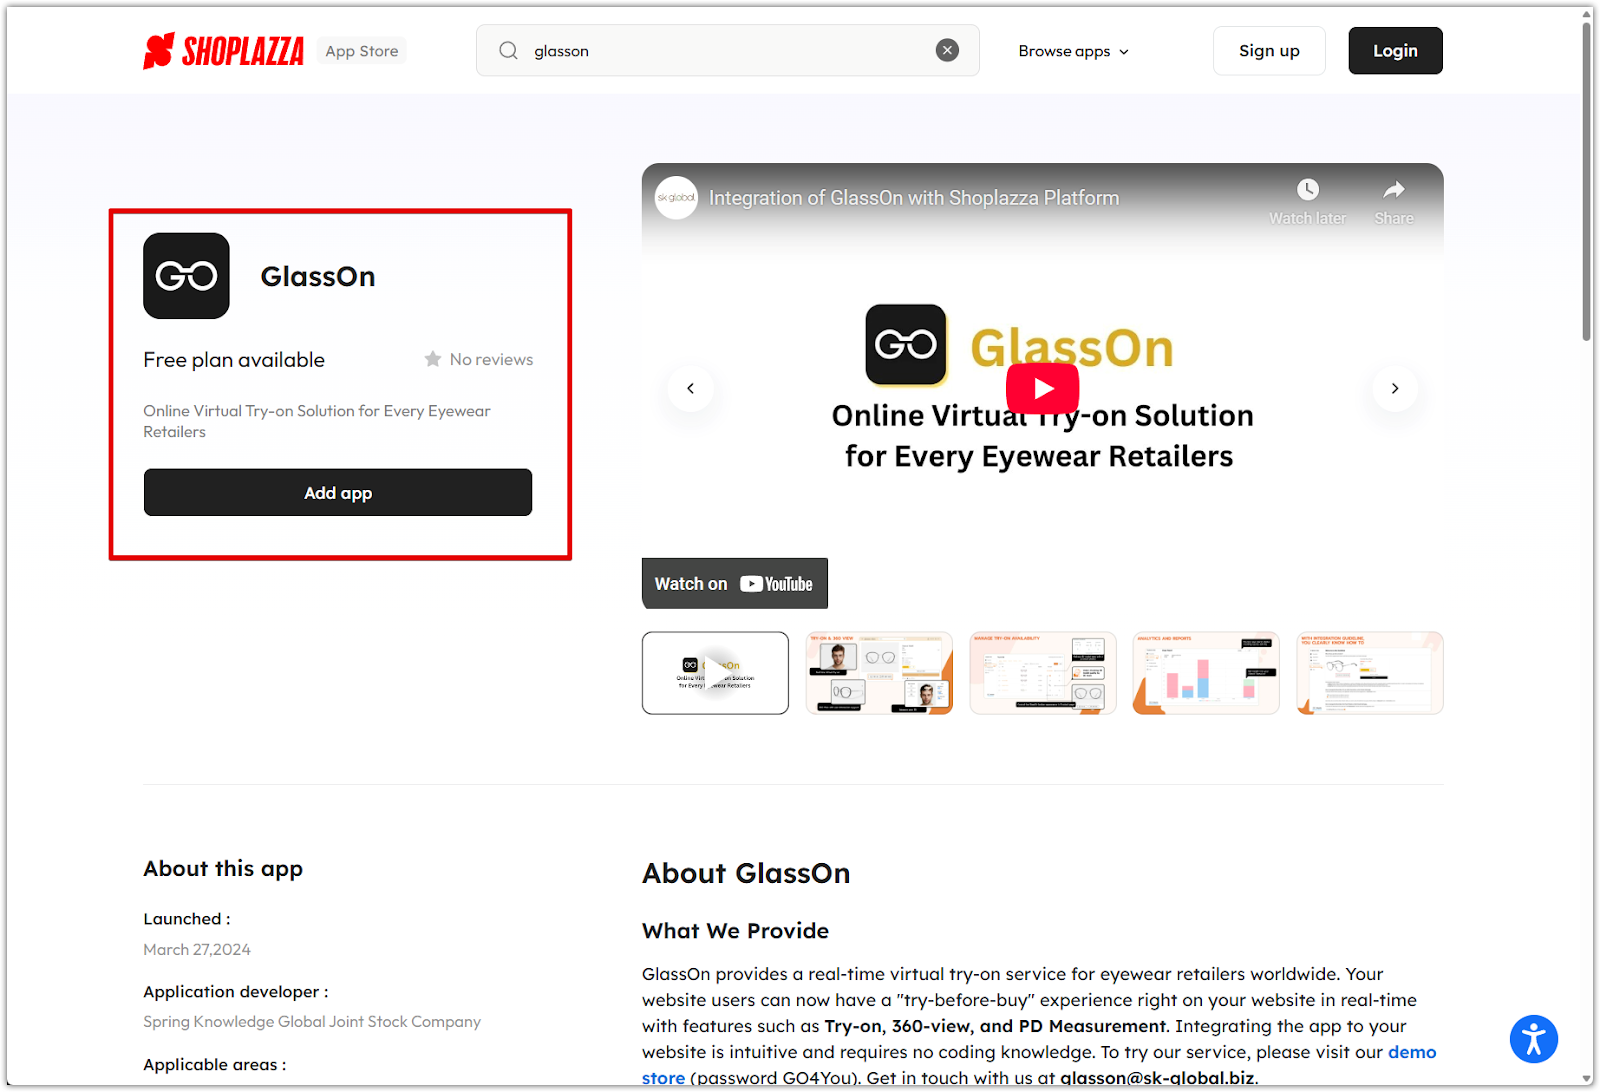
1. Go to the GlassOn listing: Visit the GlassOn app page in the Shoplazza App Store and click Add app then Install app.
Selecting a plan
After installing the app, you’ll be asked to choose a subscription plan. This determines how many products you can enable for try-on and whether advanced features like PD measurement are available.
1. Go to the Pricing Plan tab: You’ll automatically land on this page after installation. If not, click Pricing Plan from the left-hand menu inside the app.
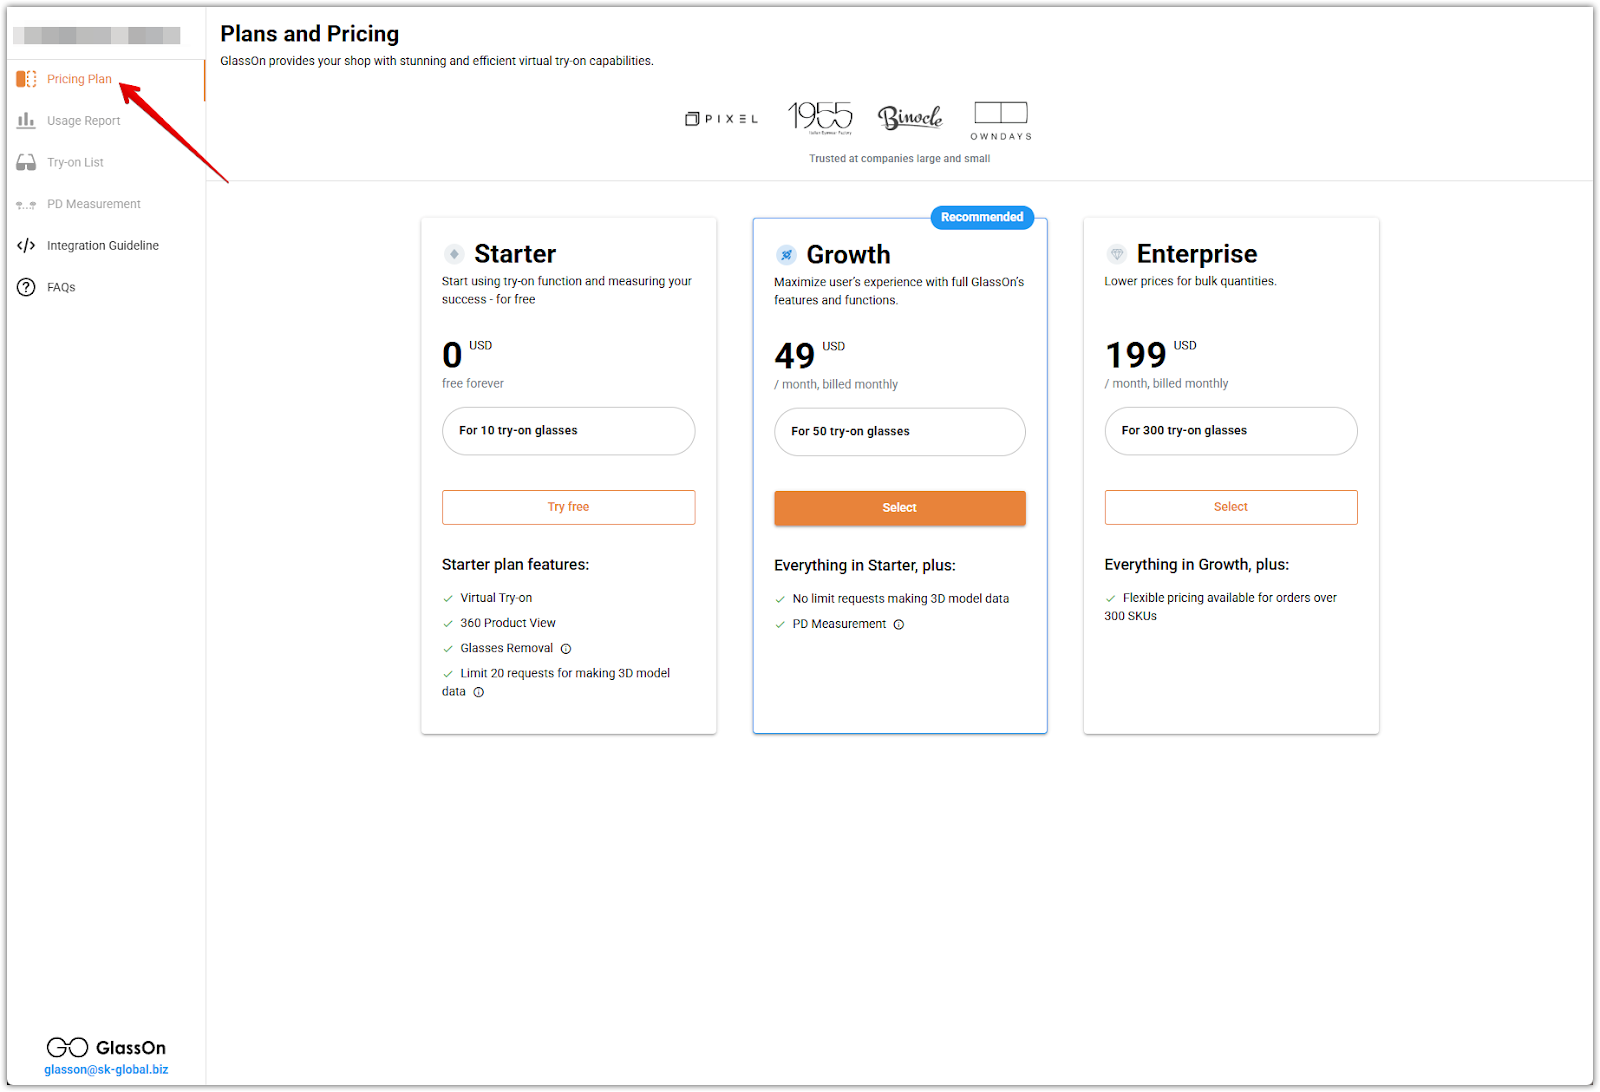
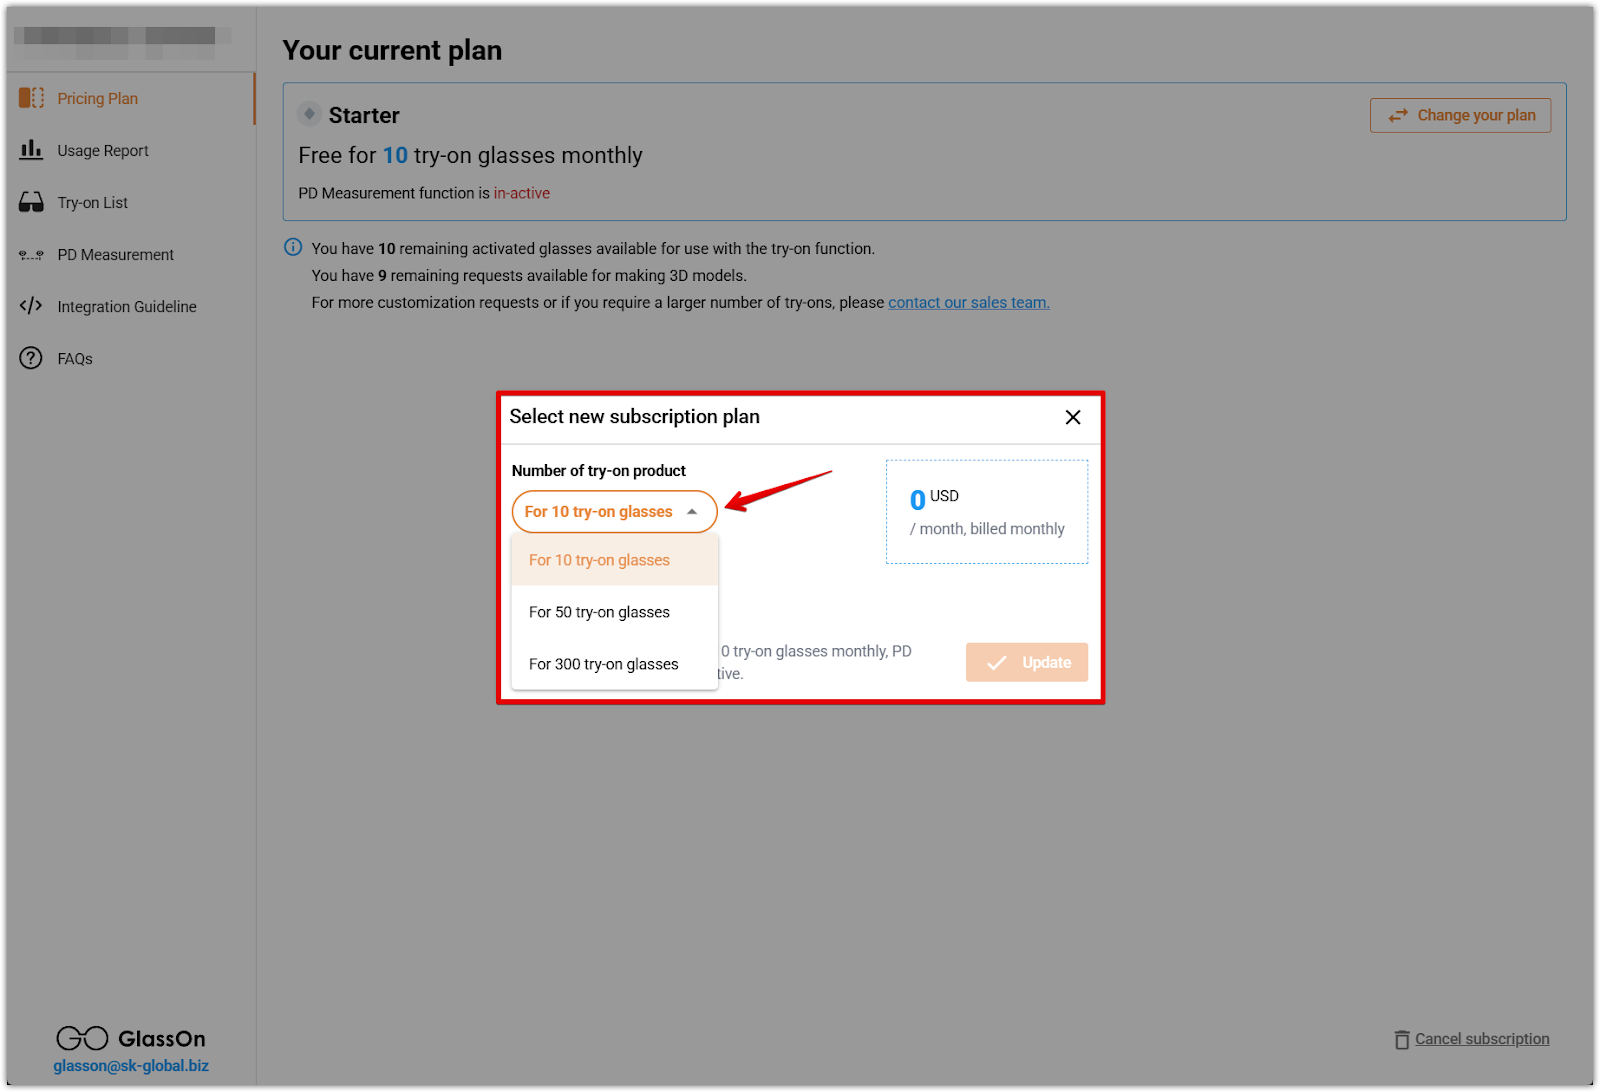
2. Choose a plan: GlassOn offers three subscription levels. Click the button below your preferred plan to continue.
- Starter (Free): Includes up to 10 try-on products and 20 3D model requests. Suitable for smaller stores testing the tool.
- Growth ($49/month): Includes up to 50 try-on products, unlimited 3D model requests, and access to the PD measurement feature.
- Enterprise ($199/month): Includes up to 300 try-on products, designed for stores with large eyewear catalogs.

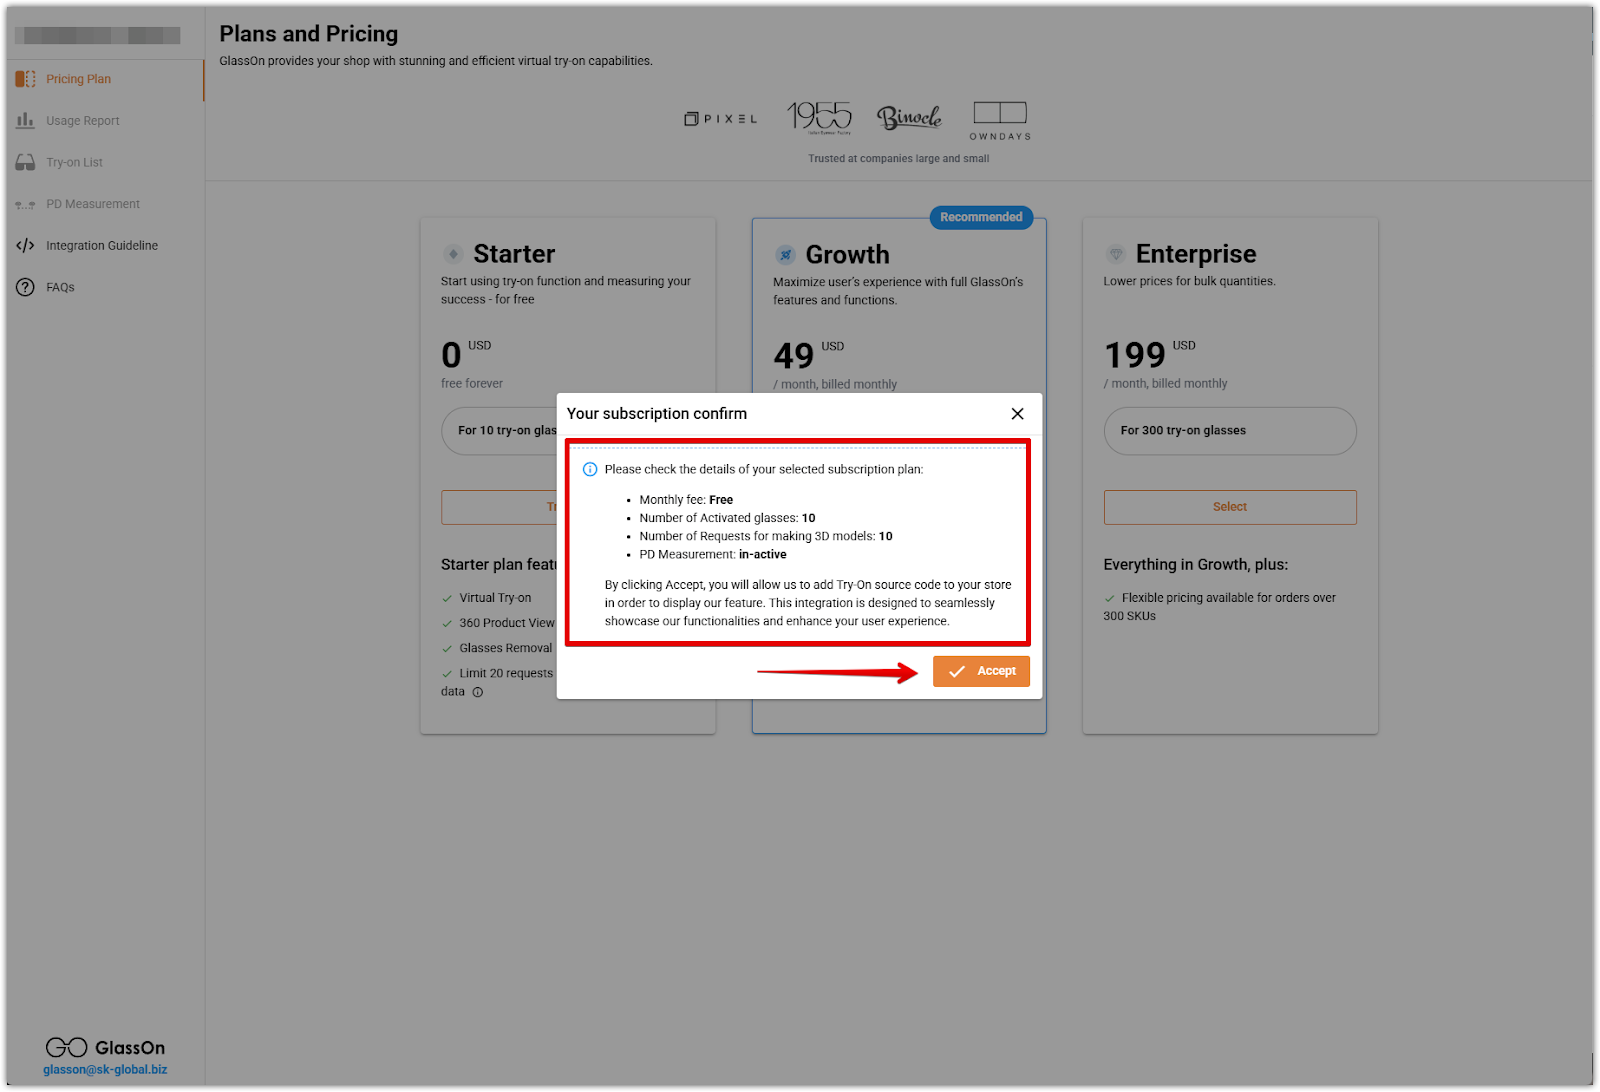
3. Review the subscription popup: You’ll see details such as your plan type, the number of try-on products available, remaining 3D model requests, and whether PD measurement is included. Confirm your choice to finalize the plan and proceed to the next step.
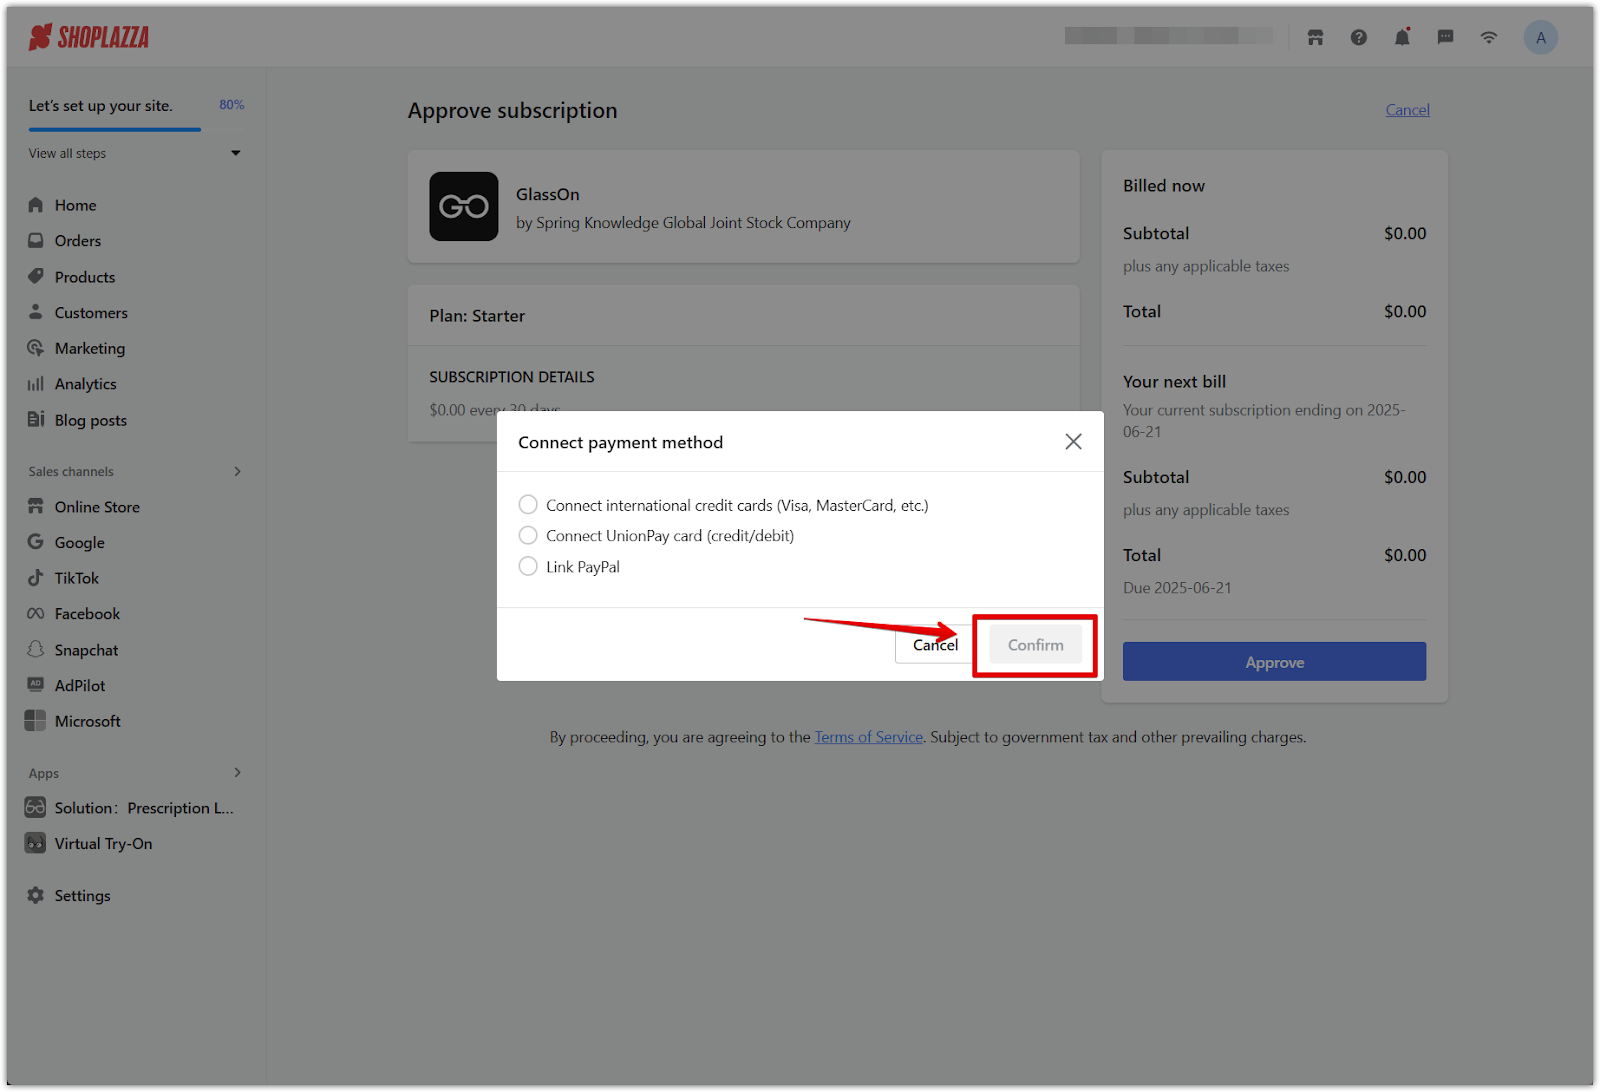
Connecting a payment method
Before you can use the app, you’ll need to connect a payment method—even if you selected the free Starter plan. This allows GlassOn to activate the app and charge for upgrades if needed.
1. Select a payment option: Choose one of the available methods:
- International credit cards (Visa, MasterCard, etc.)
- UnionPay cards
- PayPal
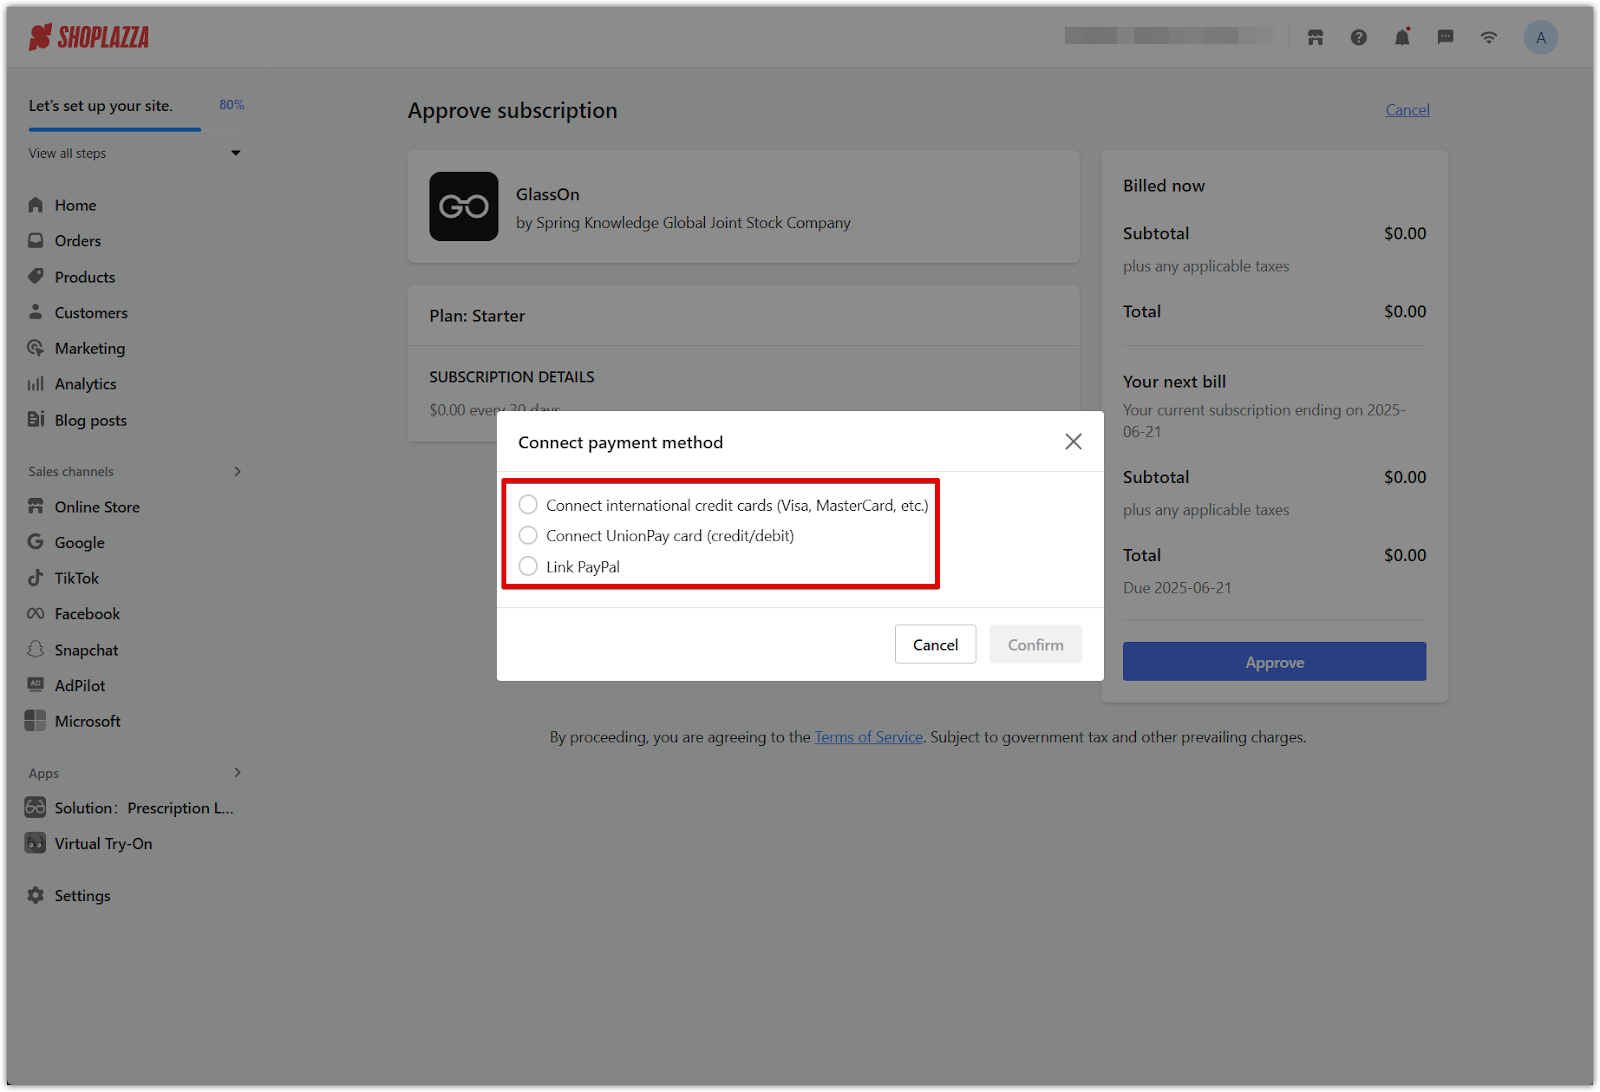
2. Click Confirm: This finalizes your billing setup and activates your GlassOn plan.
Accessing your active plan
After setup is complete, you’ll return to the Pricing Plan tab. This section lets you track usage and make changes to your subscription as needed.
1. View your plan summary: At the top of the page, you’ll see your current plan level, number of try-on products available, remaining 3D model requests, and PD measurement status.
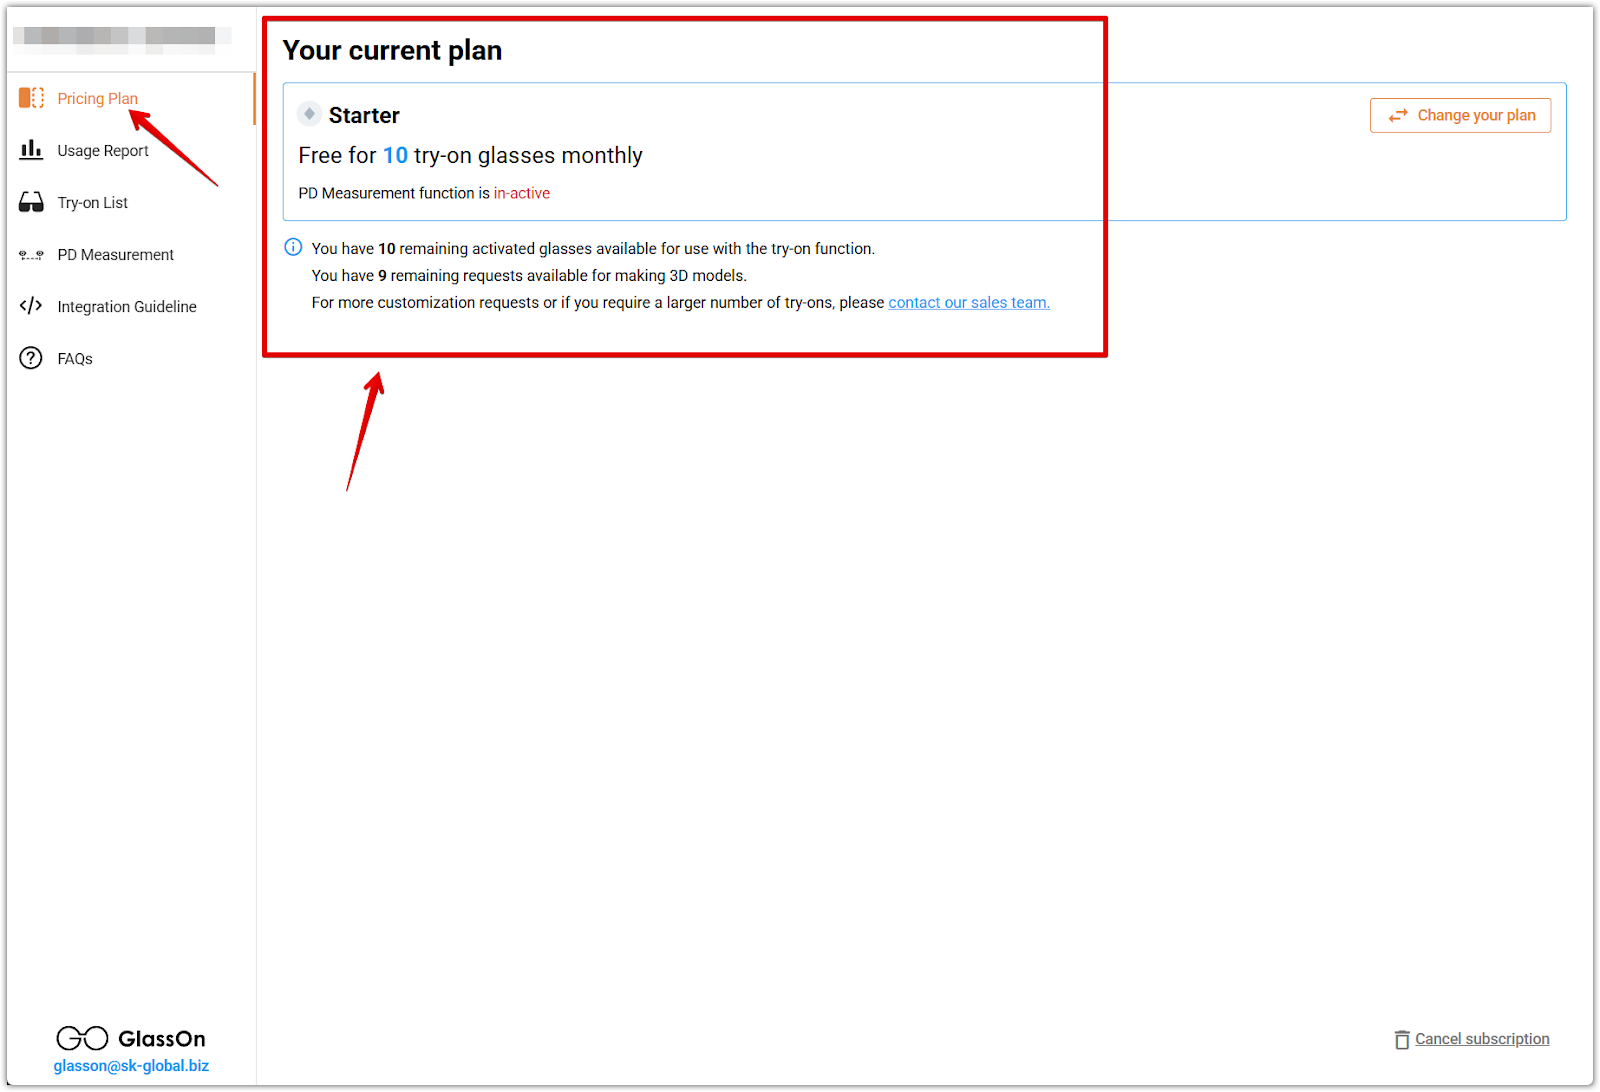
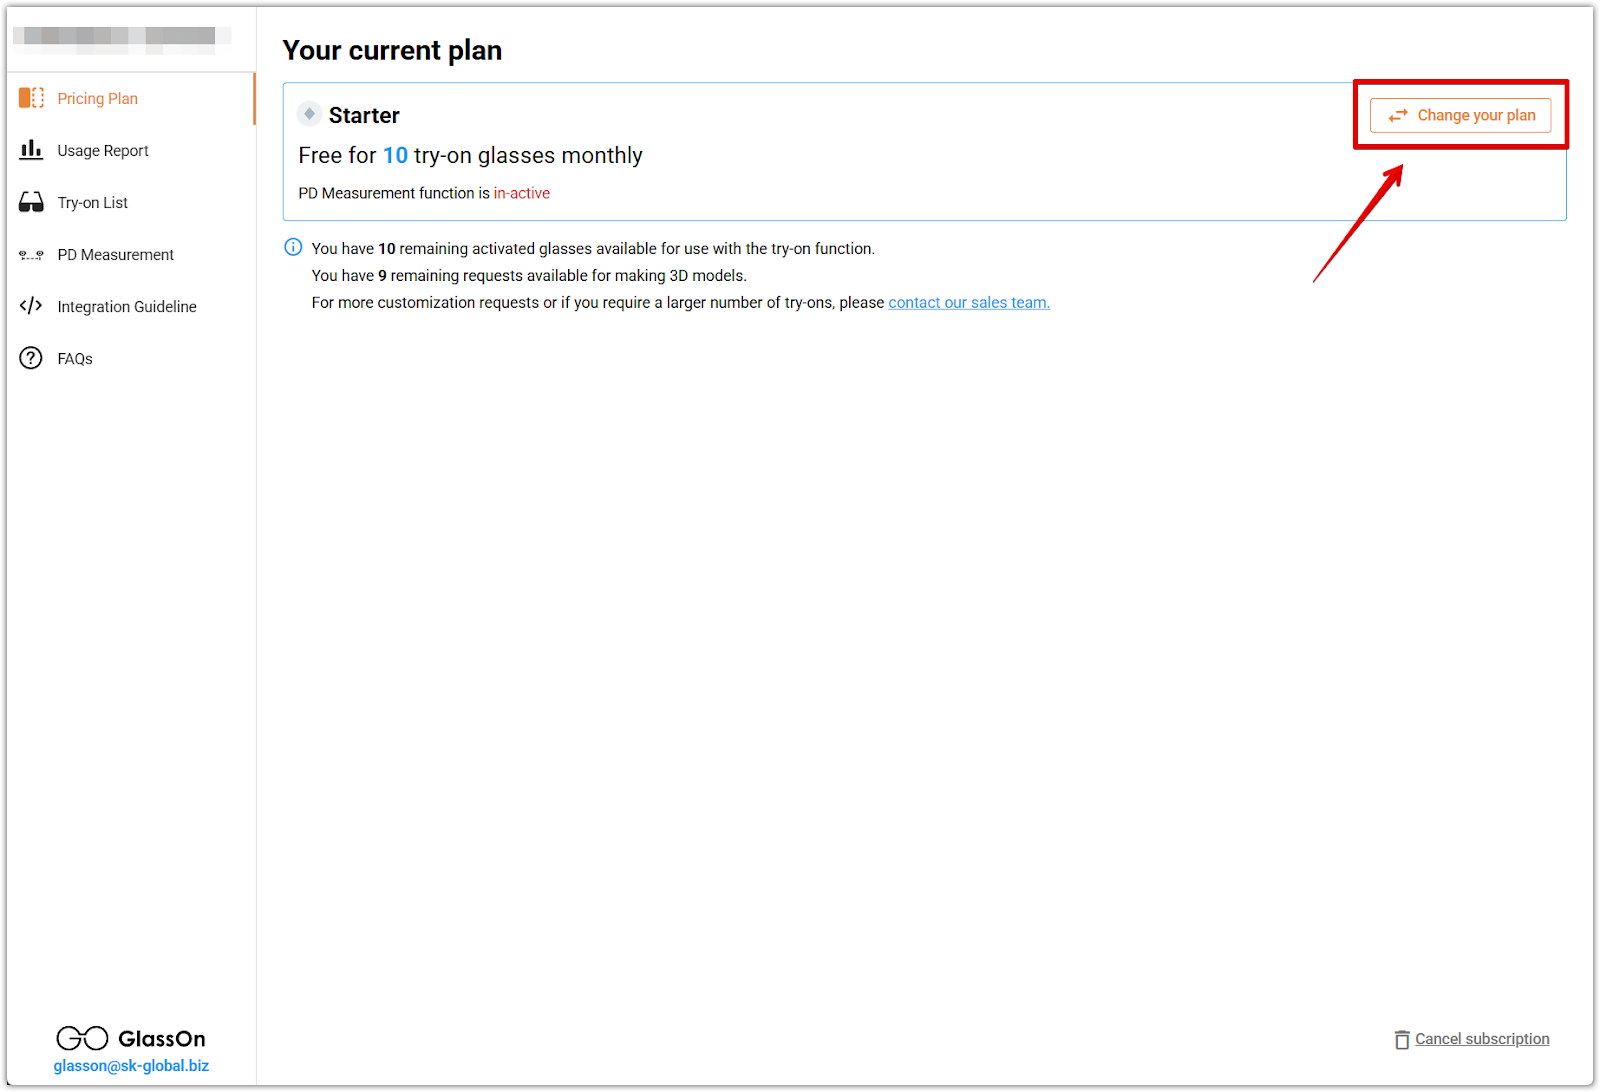
2. Upgrade or change plans: To switch plans at any time, click Change your plan in the upper right corner. If you need support with custom options, contact the GlassOn team directly.
Once your plan is active and your billing method is confirmed, you can access the full GlassOn dashboard from your Shoplazza admin. From there, start preparing products for virtual try-on, upload model images, and activate try-on features across your storefront.


Comments
Please sign in to leave a comment.