
Use Shoplazza Percentage Discount Code campaigns to launch data-driven promotions that boost conversion rates, raise average order value, and reward loyal customers. Whether you're setting up a storewide promotion or a targeted product offer, this guide walks you through the entire setup process inside your Shoplazza admin.
Start a new discount campaign
Choose whether your discount applies to all products or selected items.
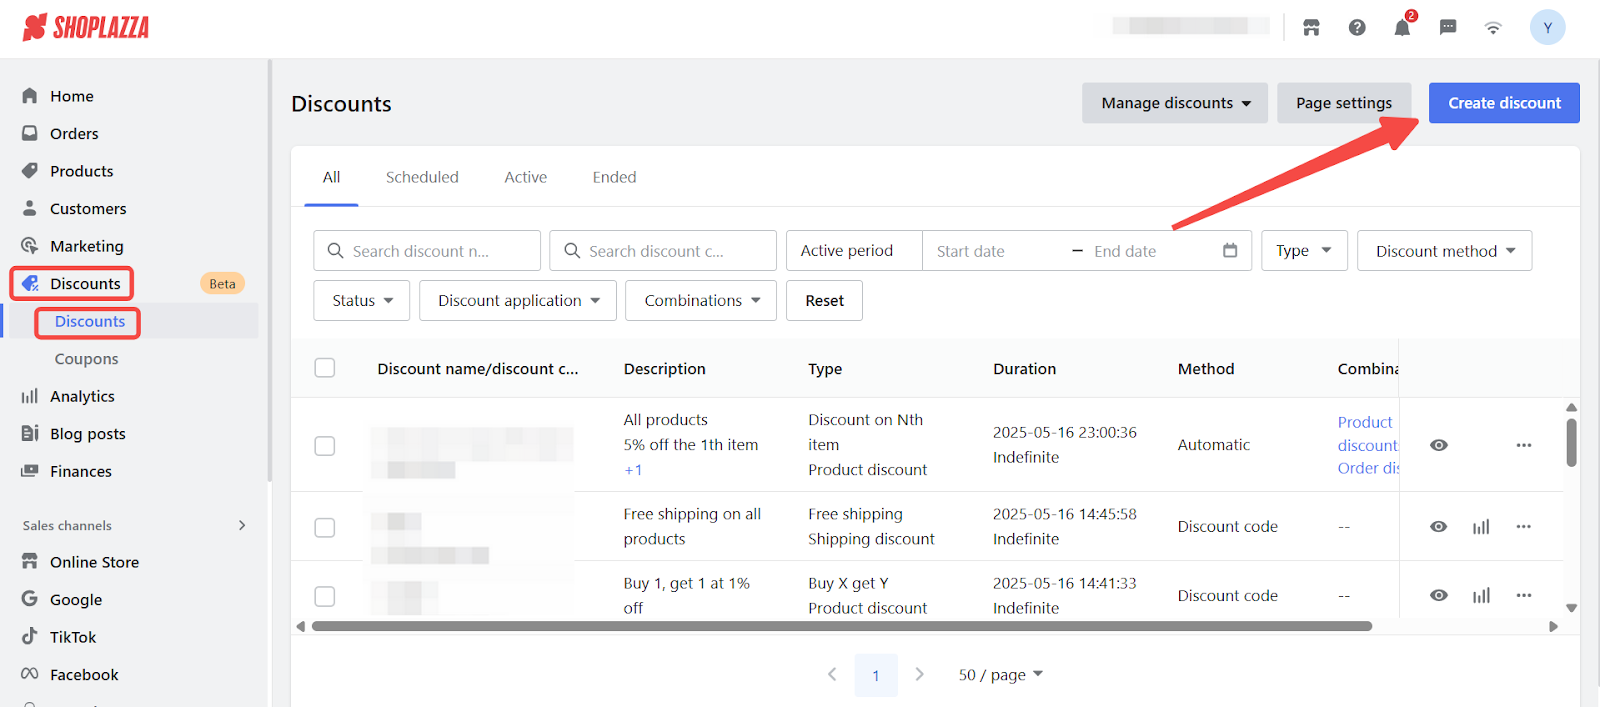
1. Log in to your Shoplazza admin: Go to Discounts > Discounts, then click Create Discount.
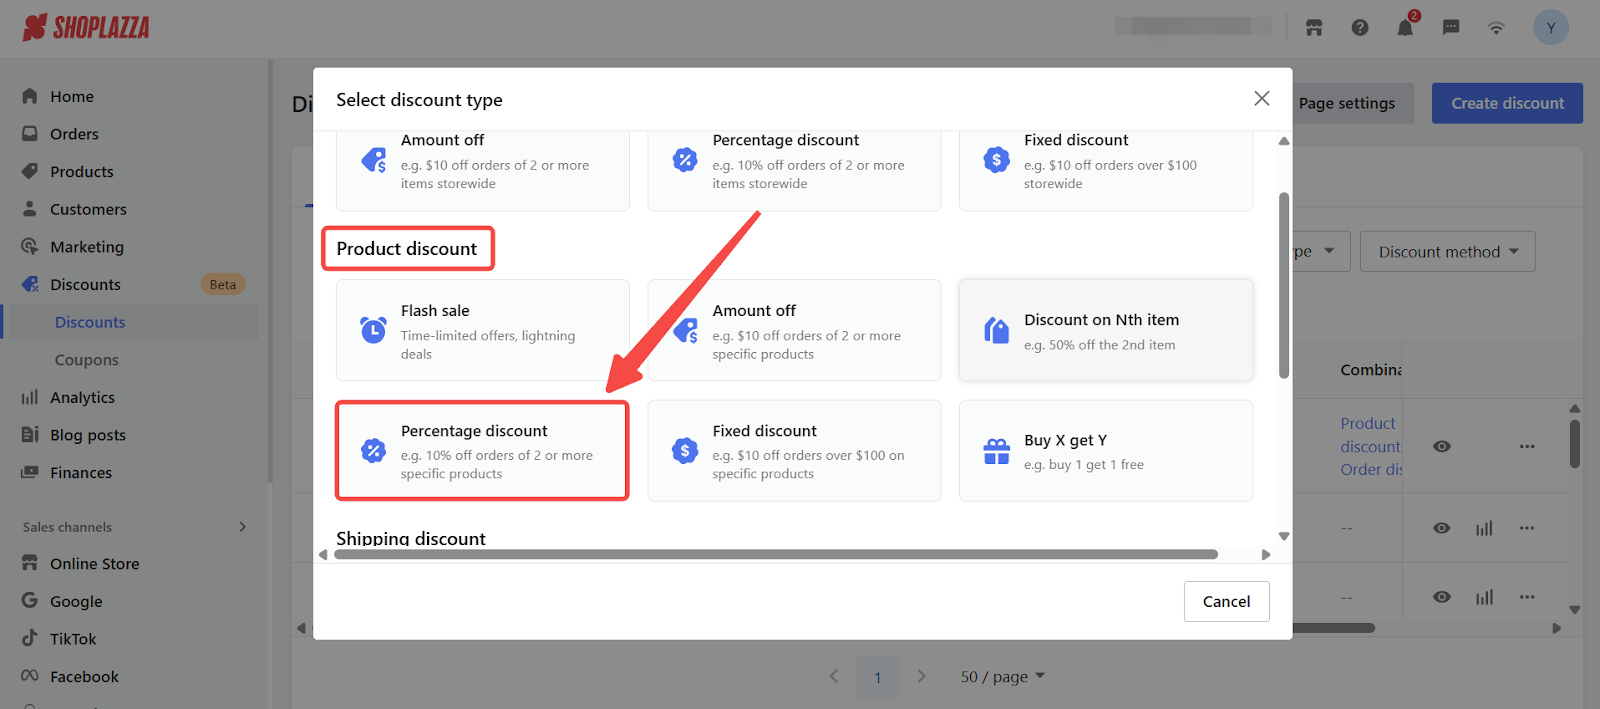
2. Start by selecting your discount type: After clicking Create Discount, select a discount type in the Select discount type panel. Under Percentage discount, choose the type of discount based on how you want it to apply.
- Choose Order discount if you want the promotion to apply to all items in the cart. This is best suited for storewide campaigns where every product qualifies automatically.
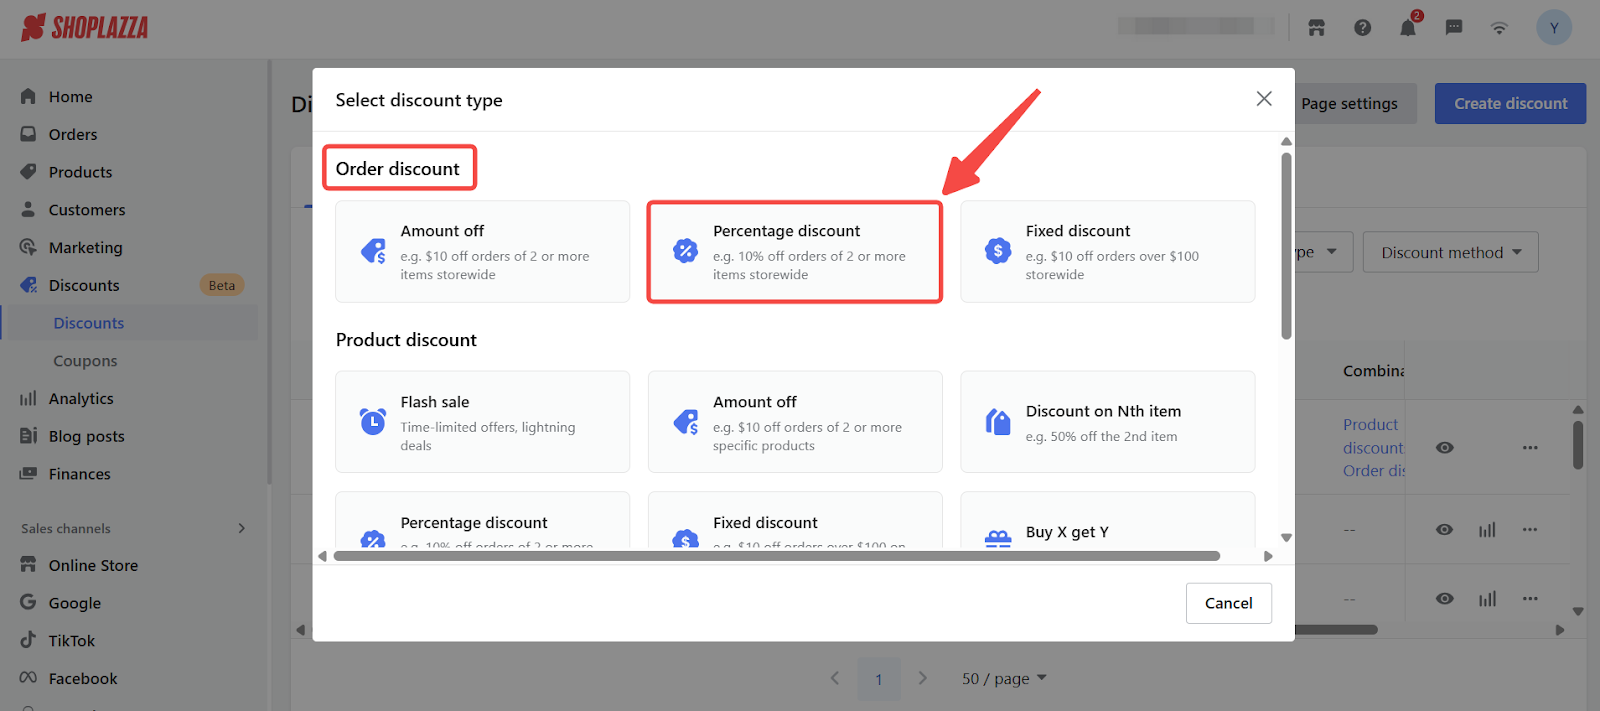
- Choose Product discount if you want to apply the promotion to specific products or collections only. This option gives you more control over which items are eligible for the discount.
Set up your Percentage discount campaign
Enter the details of your promotion to define how it will appear and function.
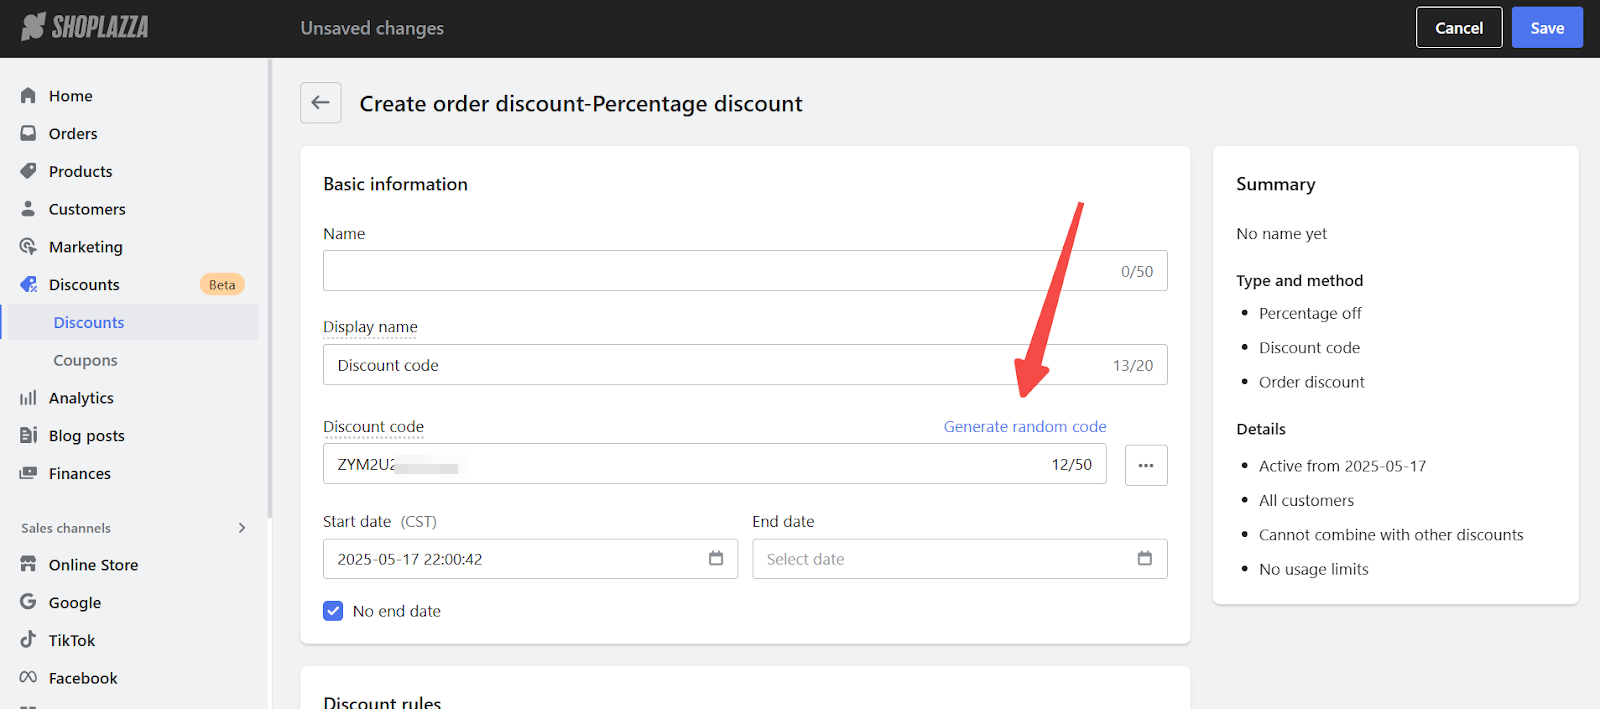
1. Enter your campaign information
- Name: Internal name for admin view.
- Display name: What customers see at checkout and in the cart.
- Set your Start and End time to define the active period.
-
Discount code:
- Enter a custom code or click Generate random code to create one.
-
- You can also create multi-code campaigns by generating or importing up to 5,000 unique codes. Use multi-code campaigns when sending personalized codes via email, affiliate links, or influencer drops.
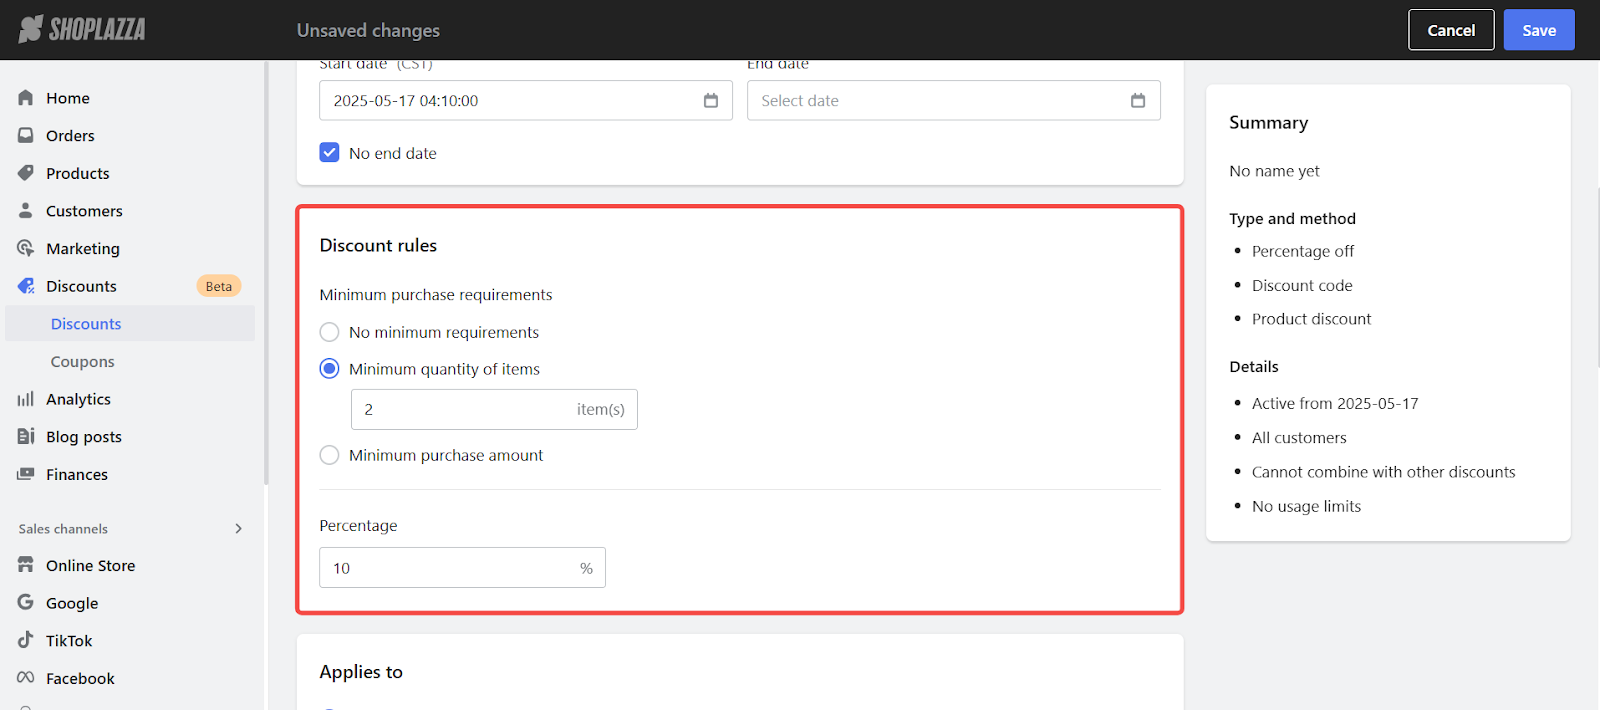
2. Define discount rules and tiers
Choose a discount type and set the required conditions to apply the code.
- No requirement: Customers can use the code with any purchase.
- Minimum item quantity: Customers must buy a minimum number of items.
- Minimum spend amount: Customers must meet a minimum cart total.
Set your discount type:
- Percentage off: e.g. 10% off the order for minimum purchase of 2 items.
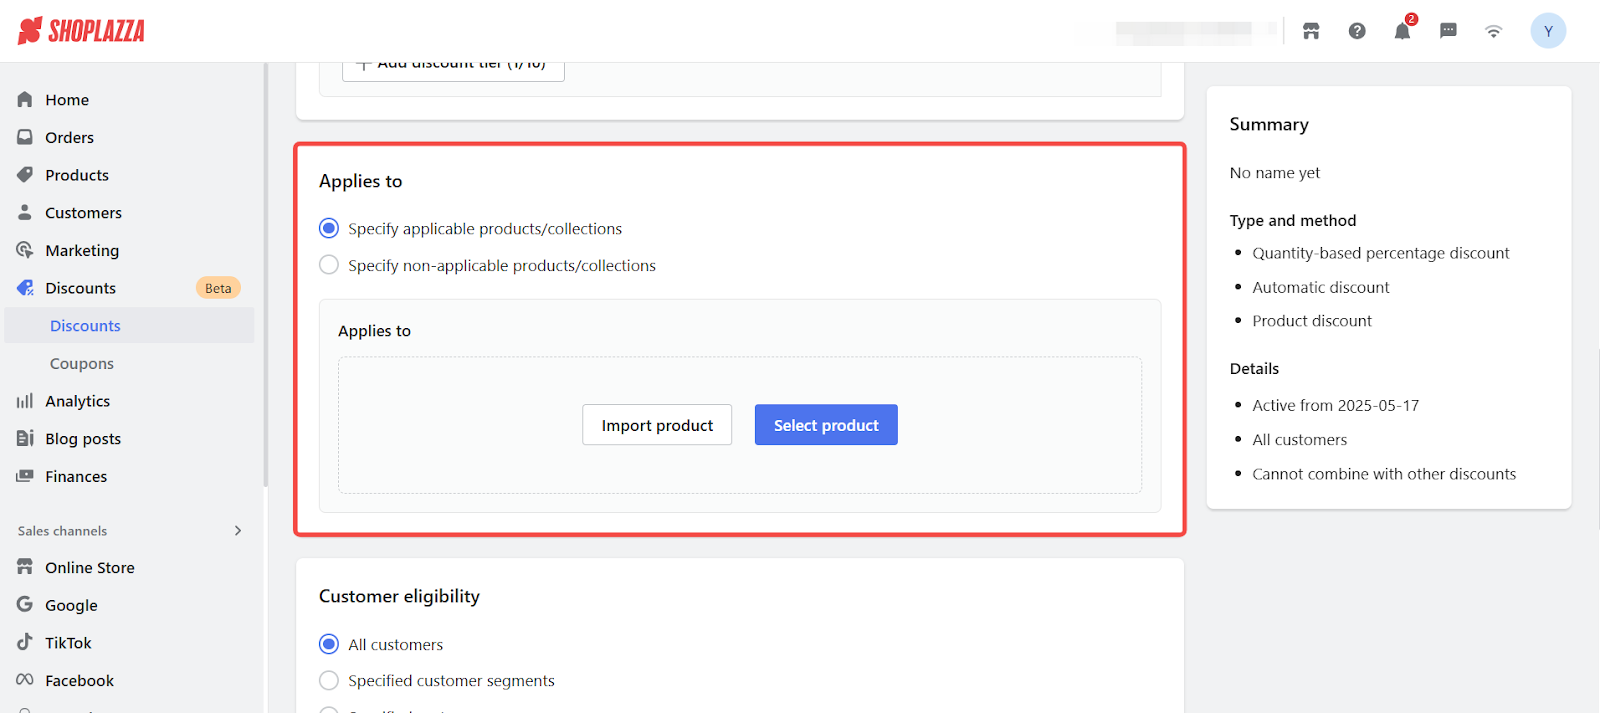
3. Choose eligible products (Product Discount only)
If you chose Product Discount, define the product scope:
- Choose Specific products or collections to include or exclude items.
- Use the Import or Select product tools to add products.
For Order Discount codes, this step is skipped since the promotion applies to all products by default.
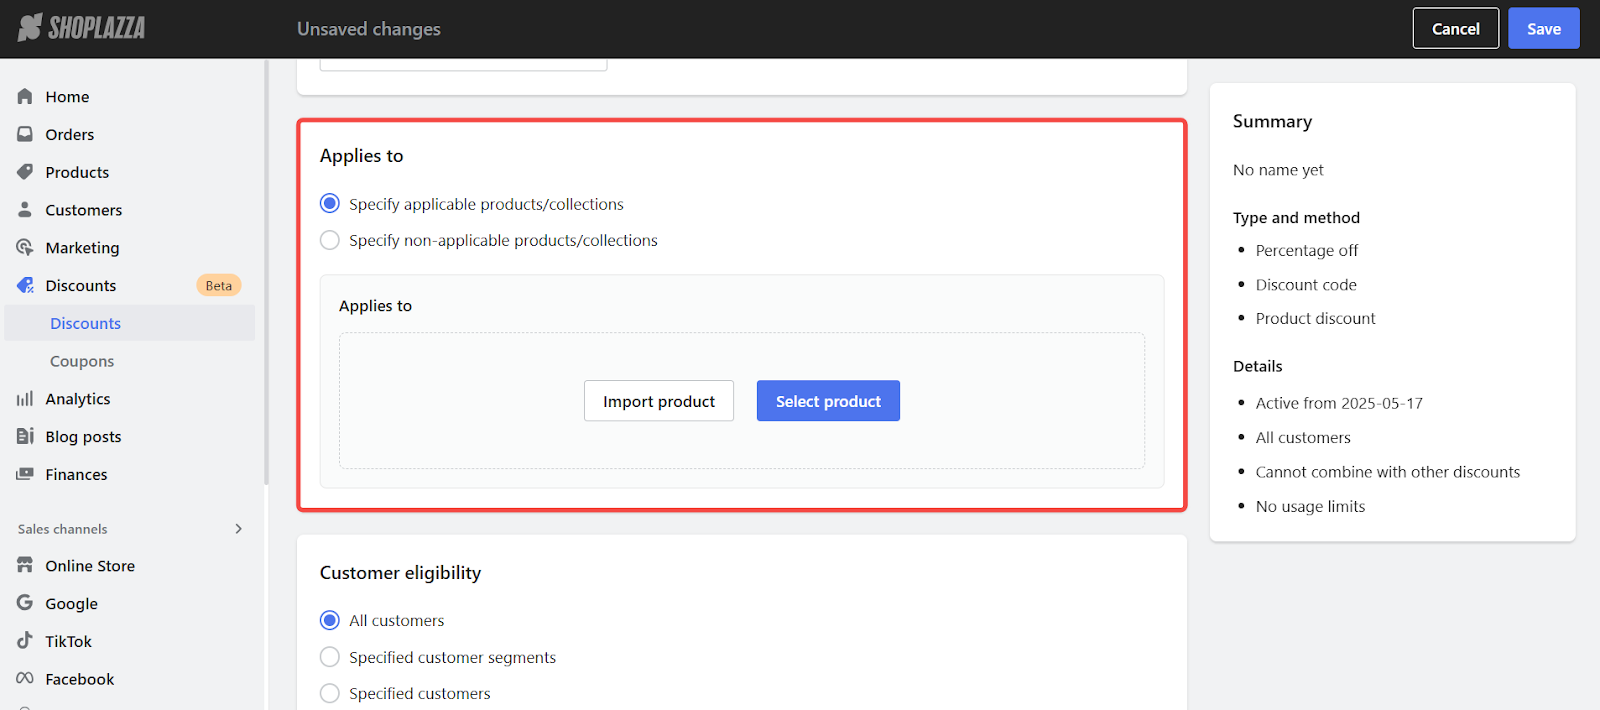
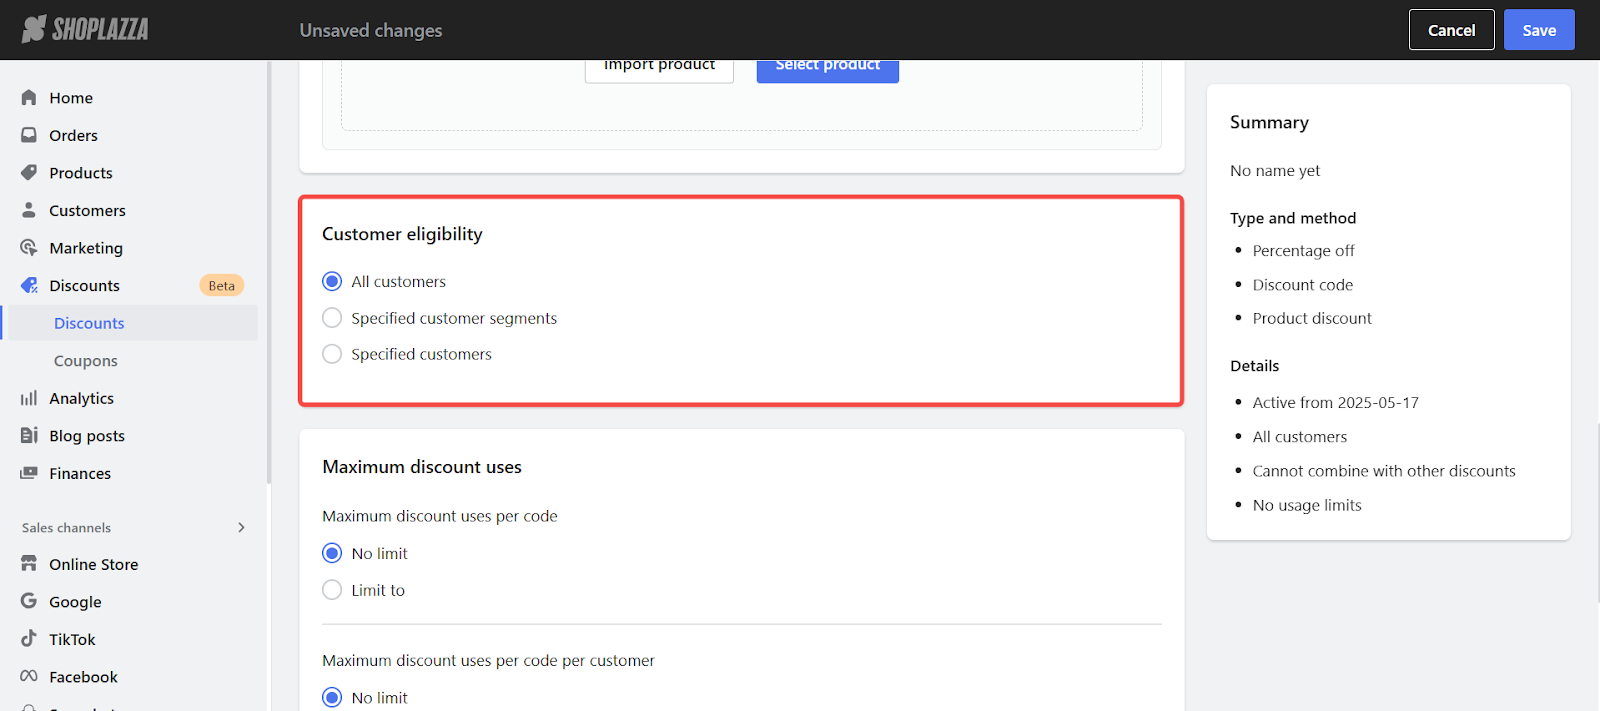
4. Target customers
Choose the customers who are eligible to apply this discount.
- All customers: The code can be used by anyone who shops at your store.
- Specific segments: Target predefined groups such as newsletter subscribers, loyalty tiers, or geographic regions.
- Selected individual customers: Manually assign the discount to specific people.
Use segmentation to personalize your offers for VIP customers, repeat buyers, or specific marketing campaigns.
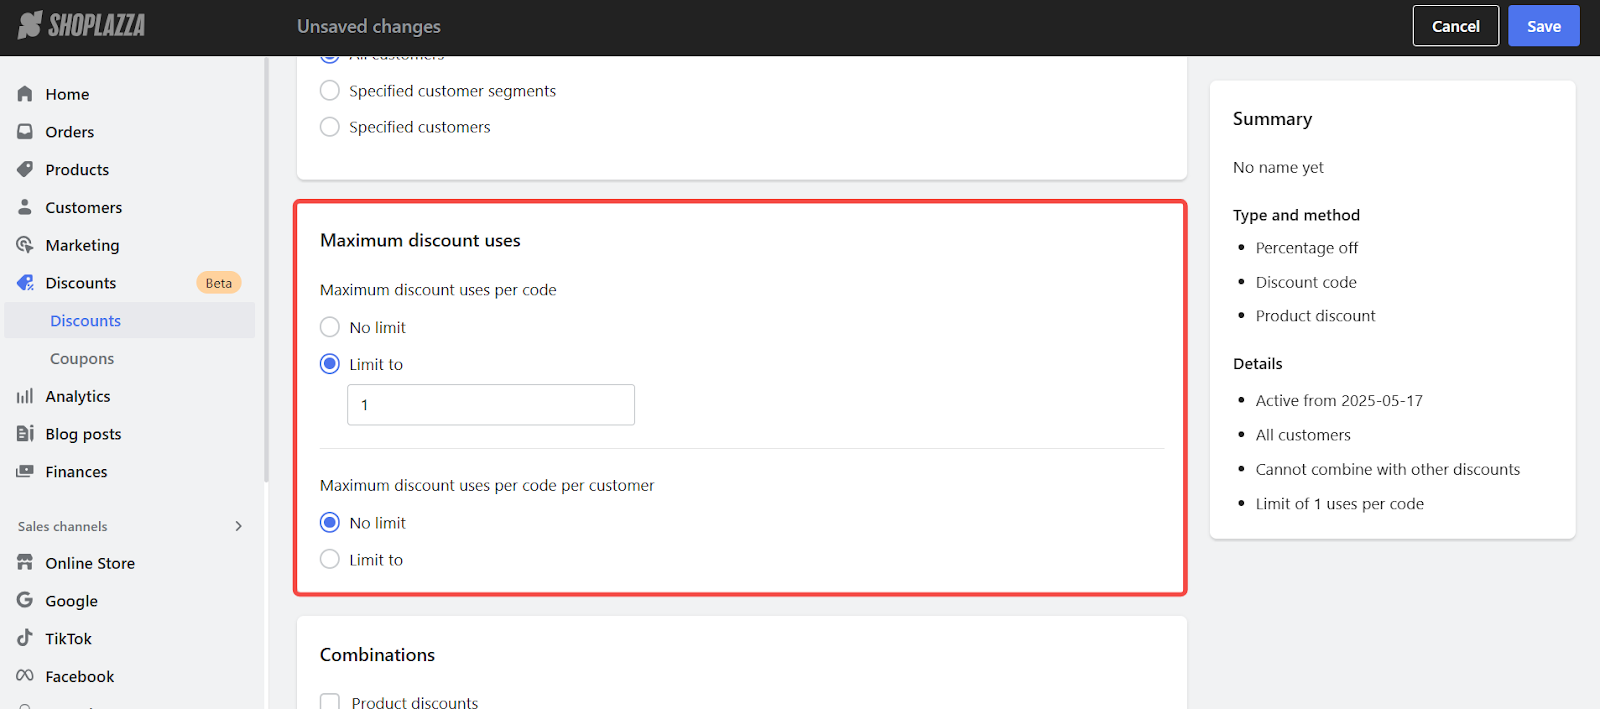
5. Set usage limits Control how many times the discount can be used, both in total and per customer.
-
For single-code campaigns (a shared code used by everyone):
- Set the total number of uses for the campaign
- Set the maximum uses per customer
-
For multi-code campaigns (each user gets a unique code):
- Configure how many times each code can be used
- Set how many times each customer can use their assigned code
Example: Limit each unique code to 5 uses, and allow each customer to use it up to 2 times.
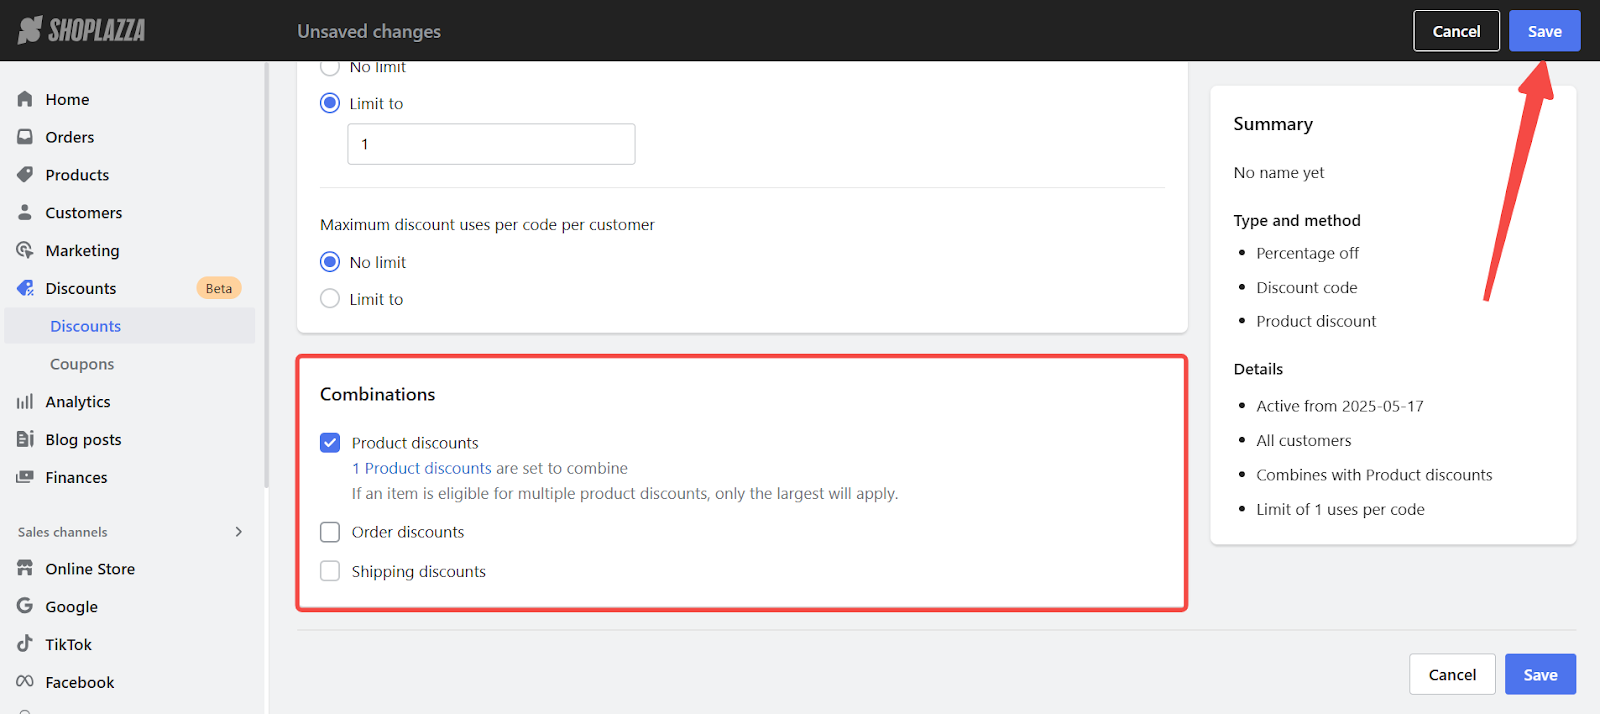
6. Enable discount combinations
Go to the Combinations section to allow your Discount Code campaign to stack with other promotions. Supported combinations:
- Product discounts: e.g. 10% off specific items
- Order discounts: e.g. Spend $200, save $20
- Shipping discounts: e.g. Free shipping over $100
To enable stacking:
- Check the boxes next to the discount types you want this campaign to work with.
- Make sure the other discount campaigns also allow stacking for the combination to apply.
- Once enabled, Shoplazza will display a list of compatible promotions. You can expand this list to review the details of each campaign. Click Save to complete your combination settings.
To learn how stacking logic works behind the scenes, see Discounts | Discount stacking and calculation rules.
Customize storefront display
Control how your Discount Code campaigns are displayed across your storefront. You can set global display rules for all campaigns or customize the layout for an individual promotion.
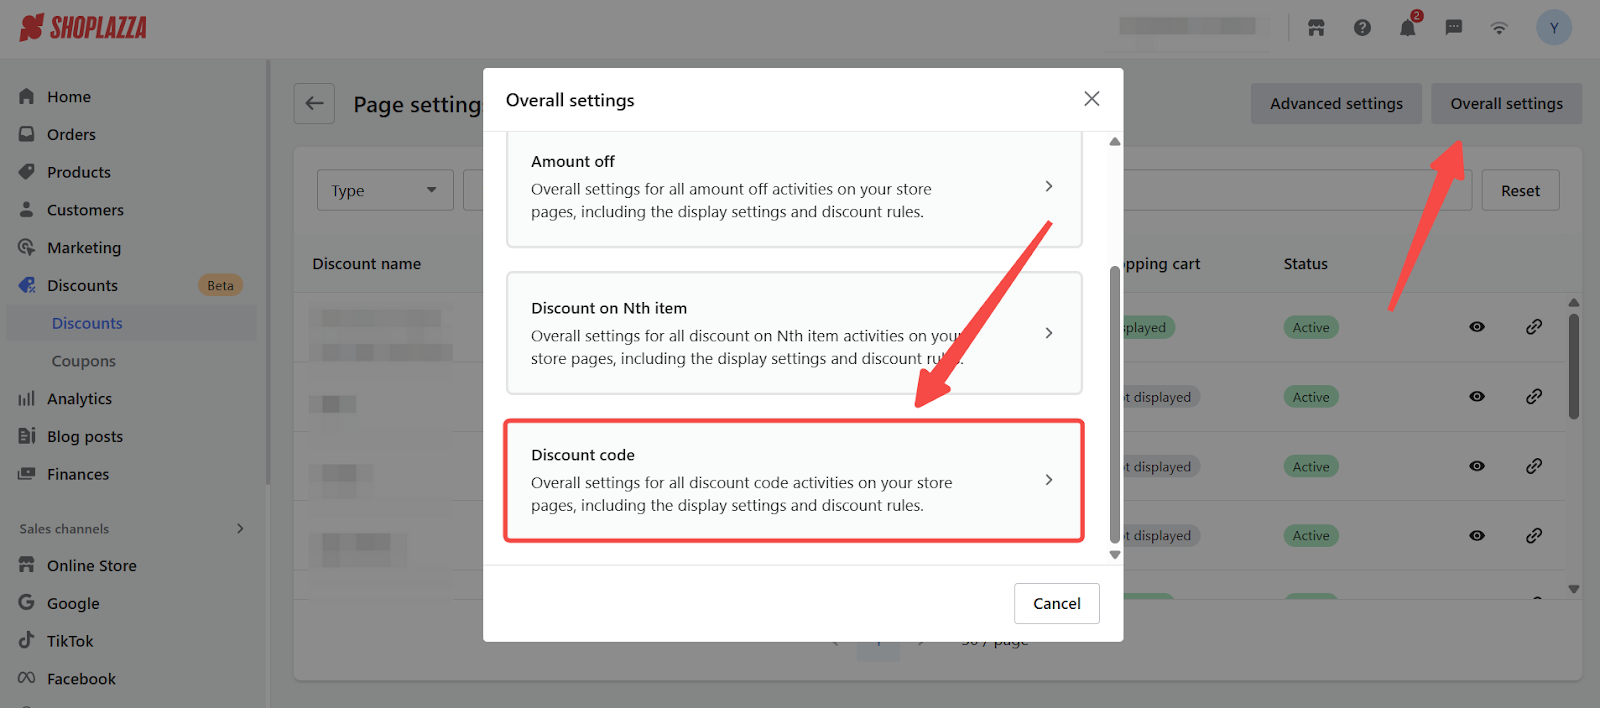
Set up overall display settings for Discount Code campaigns
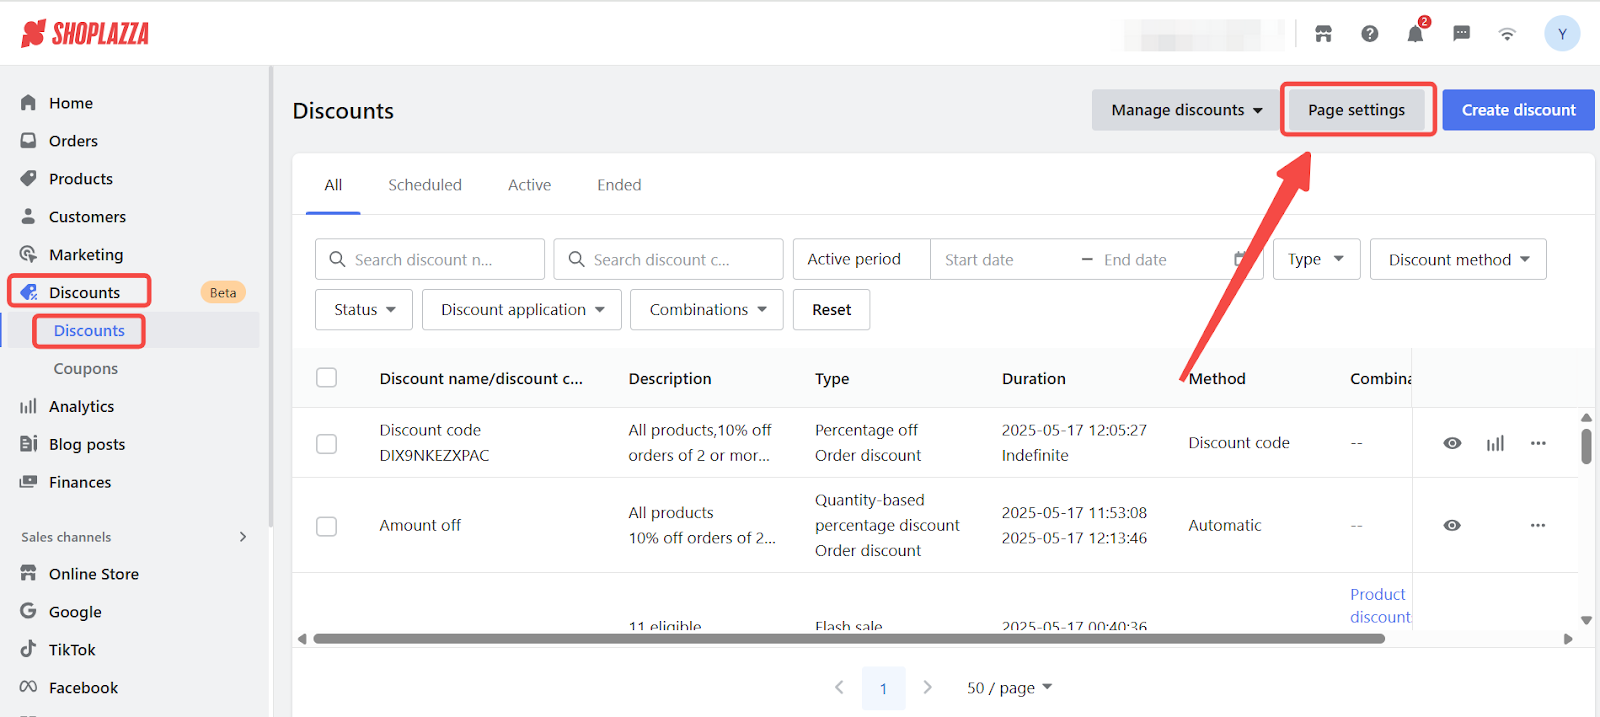
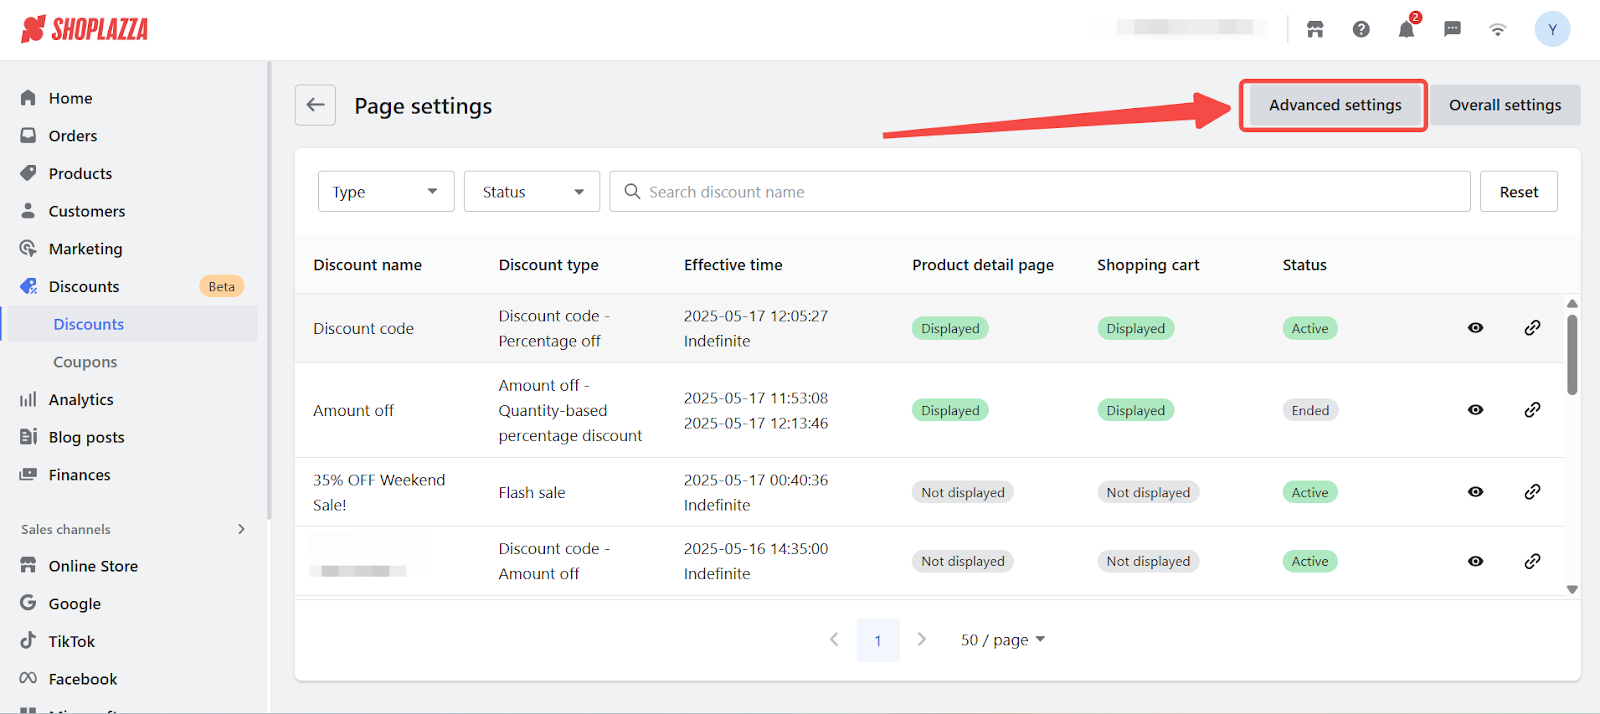
1. Open display settings: Go to the Discounts page in your admin and click Page settings in the top-right corner.

2. Access overall settings: Click the Overall settings tab, then select Discount code to open the global configuration panel.
3. Customize the appearance:
-
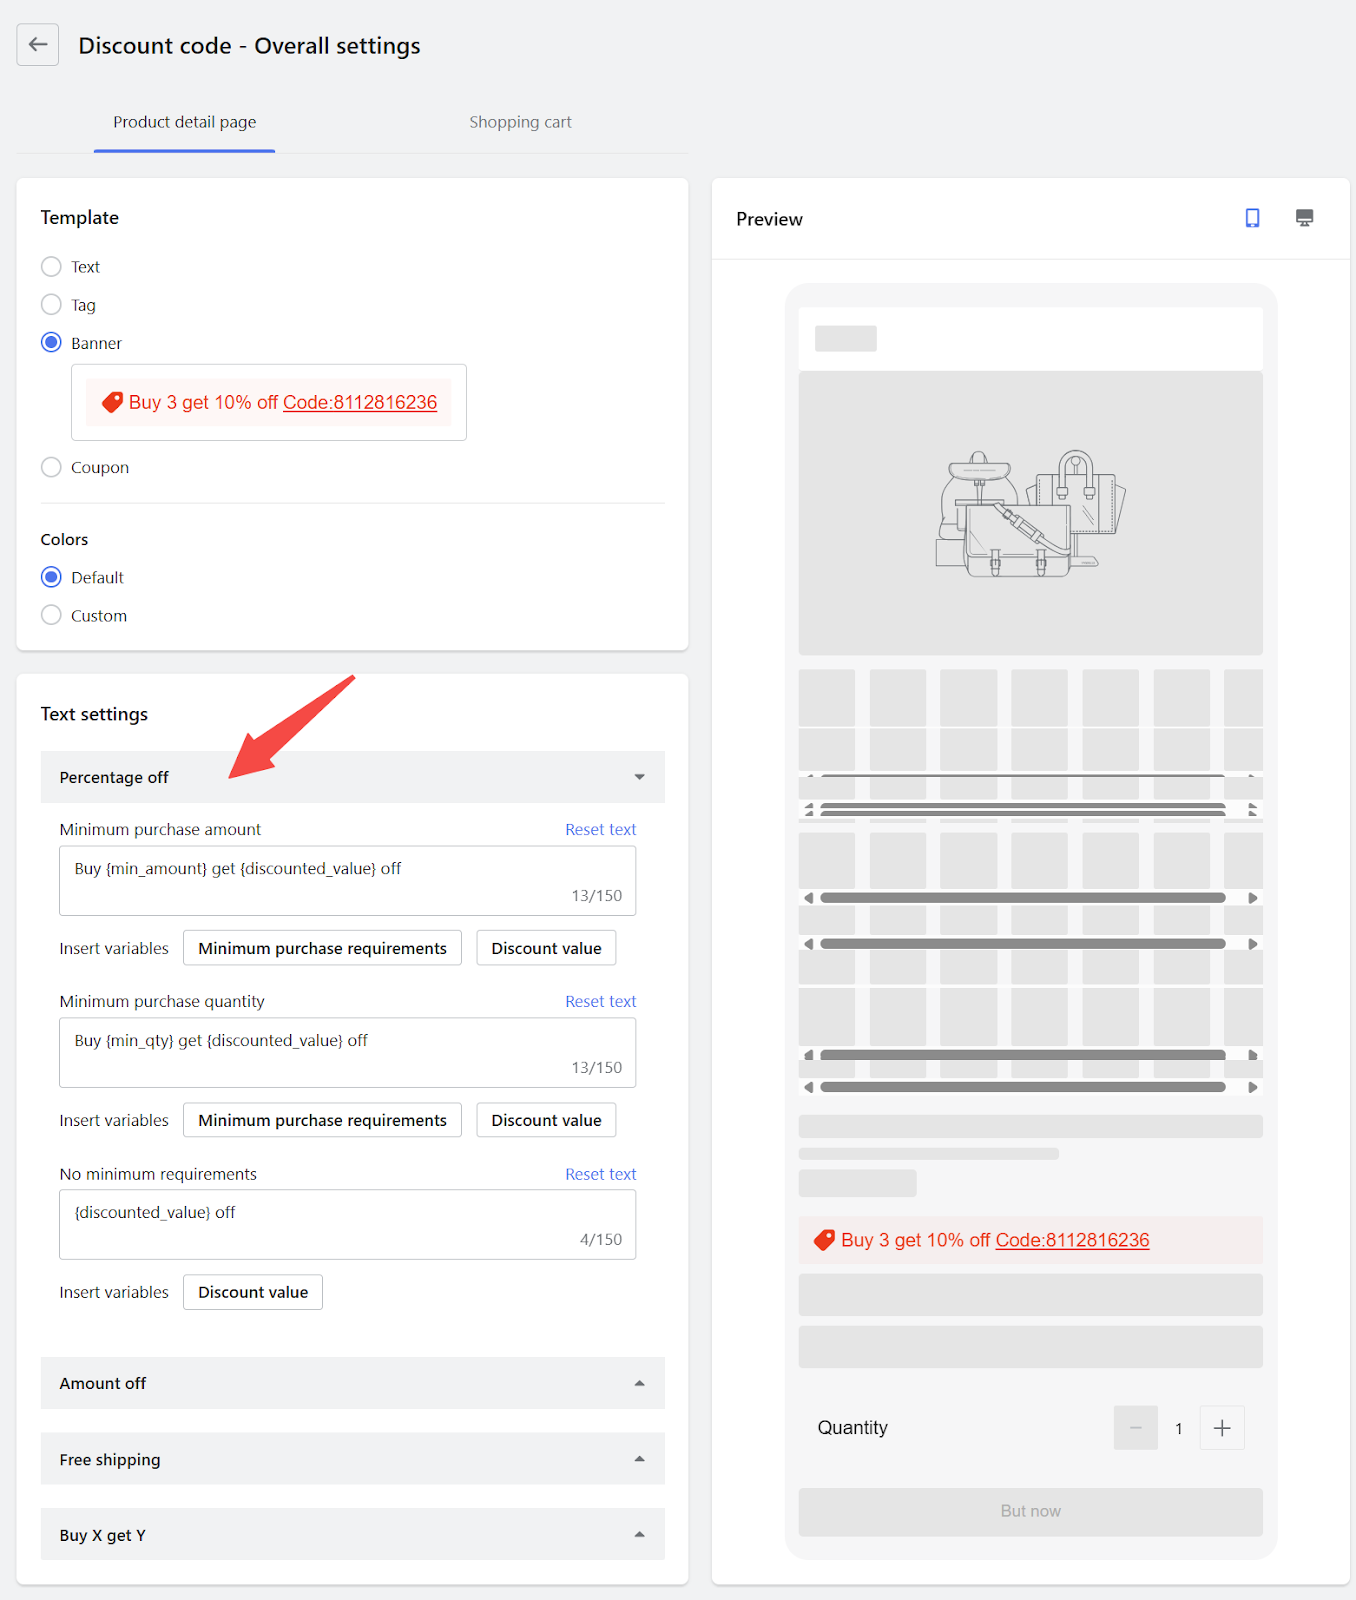
Product detail page: Control how discount codes appear next to eligible products.
- Choose a layout in the Template section:
- Options include Text, Tag, Banner, or Coupon.
- Under Text settings, choose Percentage off and define how your message appears for different discount conditions:
- Minimum purchase amount: Use variables like {min_amount} and {discounted_value} to generate messages such as “Buy 3, get 10% off”.
- Minimum purchase quantity and No minimum requirement messages can be edited individually.
- Use the Preview panel on the right to review how the discount code will display on the product detail page in real time.
- Select a Color scheme:
- Choose between Default or Custom based on your brand style.
- Choose a layout in the Template section:
-
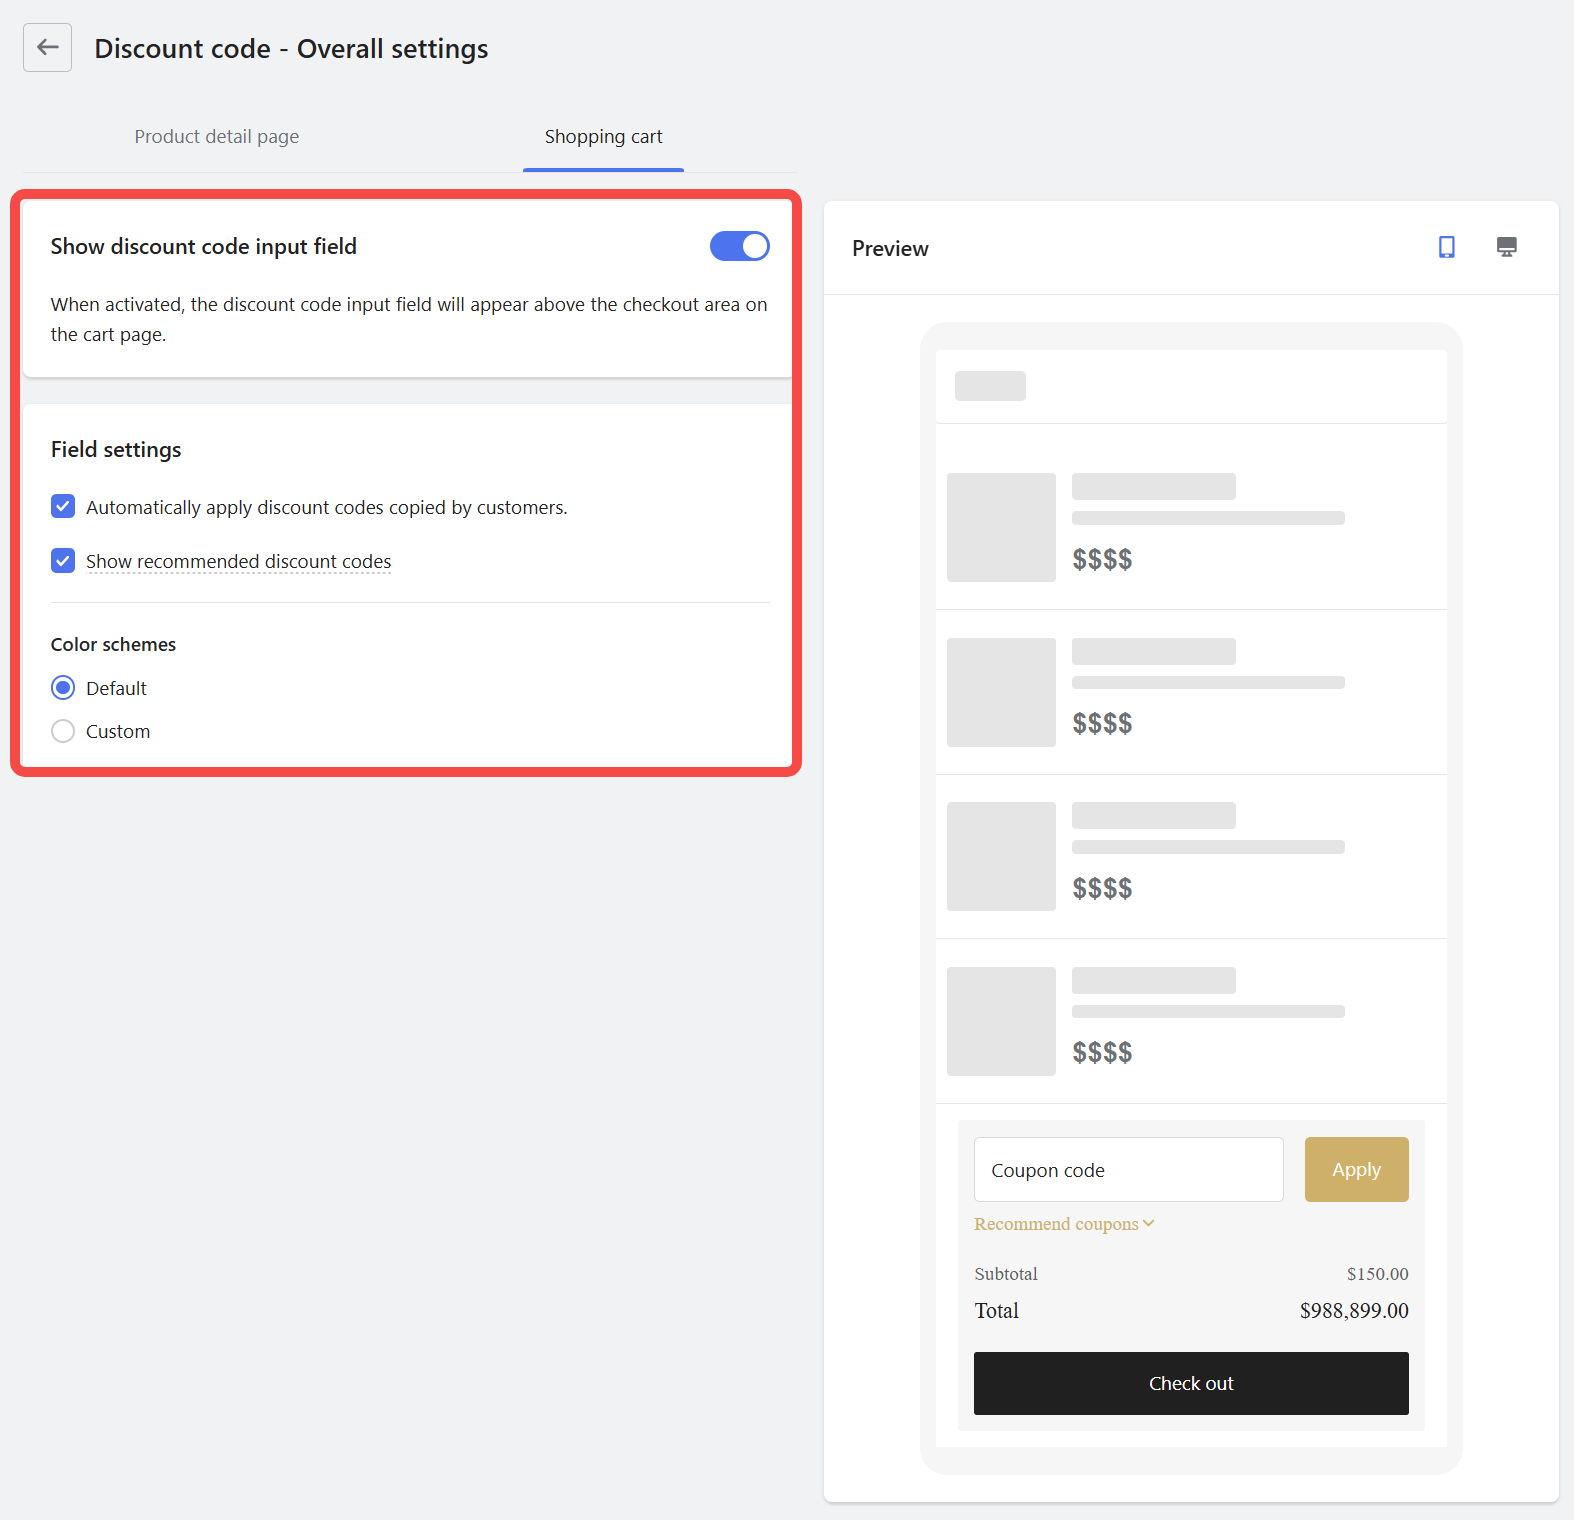
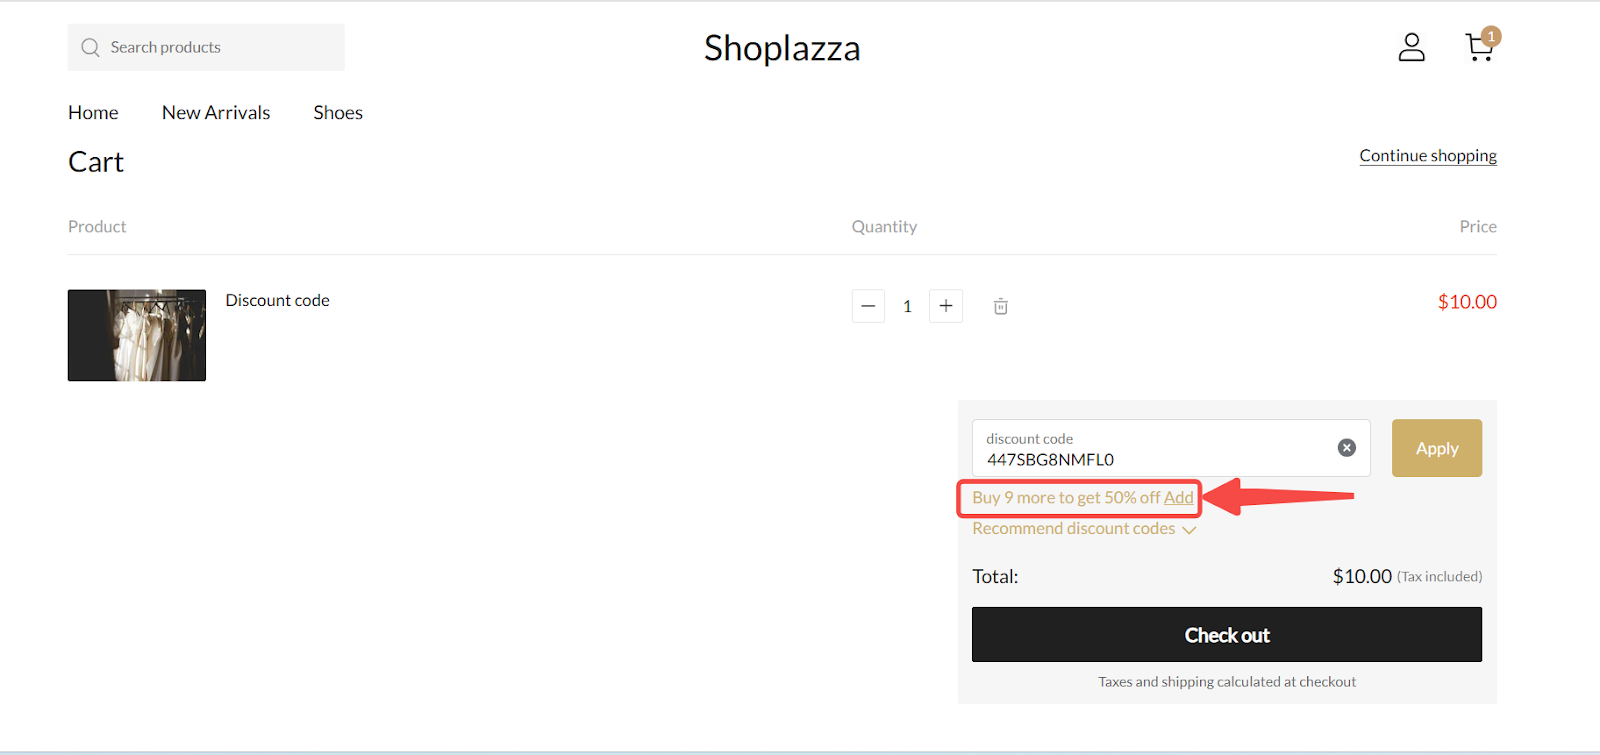
Shopping Cart: Make discount codes easy to apply before checkout.
- Enable the Show discount code input field toggle:
- This displays a coupon input field directly on the cart page above the checkout area.
- Turn on both of the following options for better conversion:
- Automatically apply discount codes copied by customers: Detects and applies a copied code.
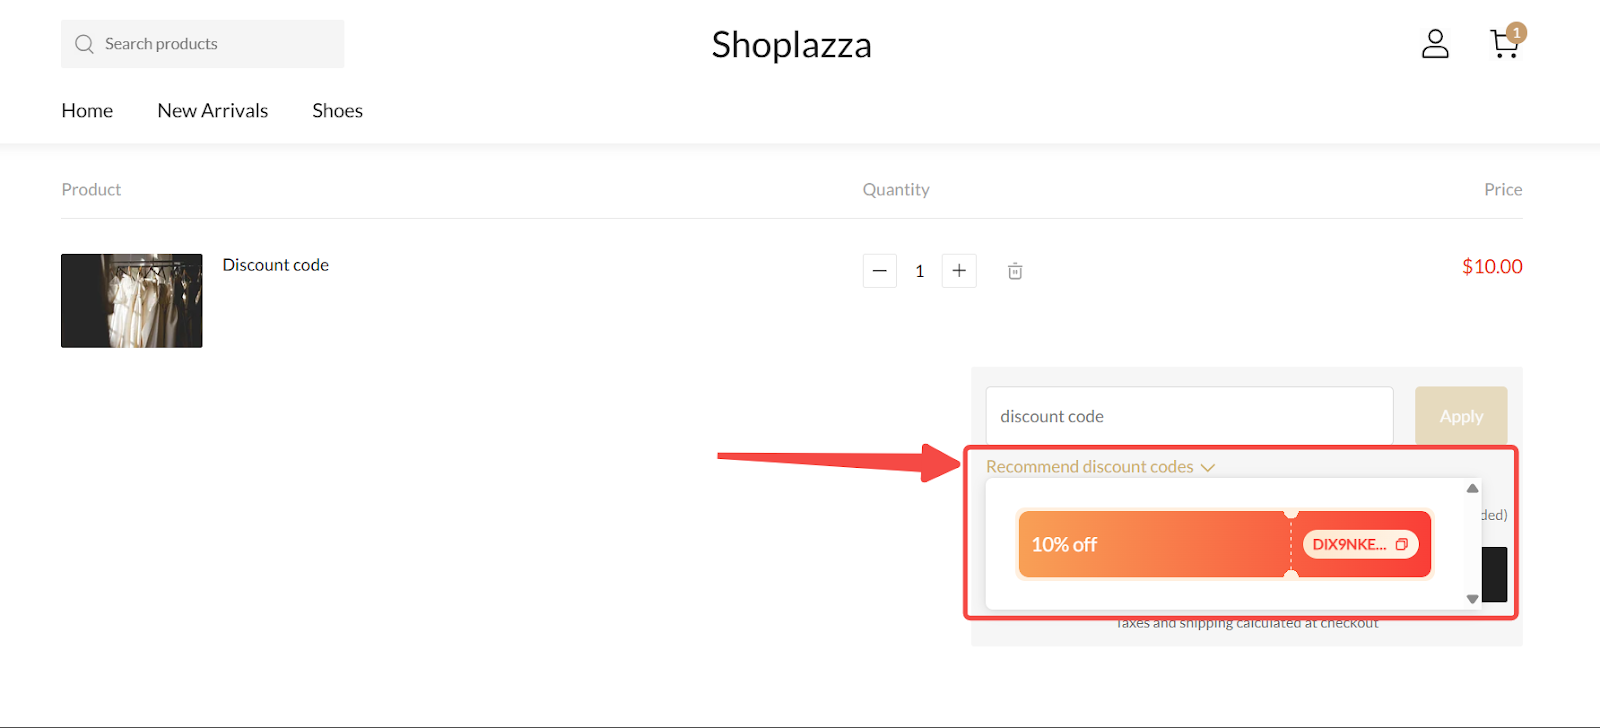
- Show recommended discount codes: Displays suggested codes below the coupon field.
- Select a Color scheme for the cart display:
- Choose Default for standard styling or switch to Custom for a personalized look.
- Use the Preview panel to check how the code input field and coupon recommendation area will appear in the cart.
- Enable the Show discount code input field toggle:
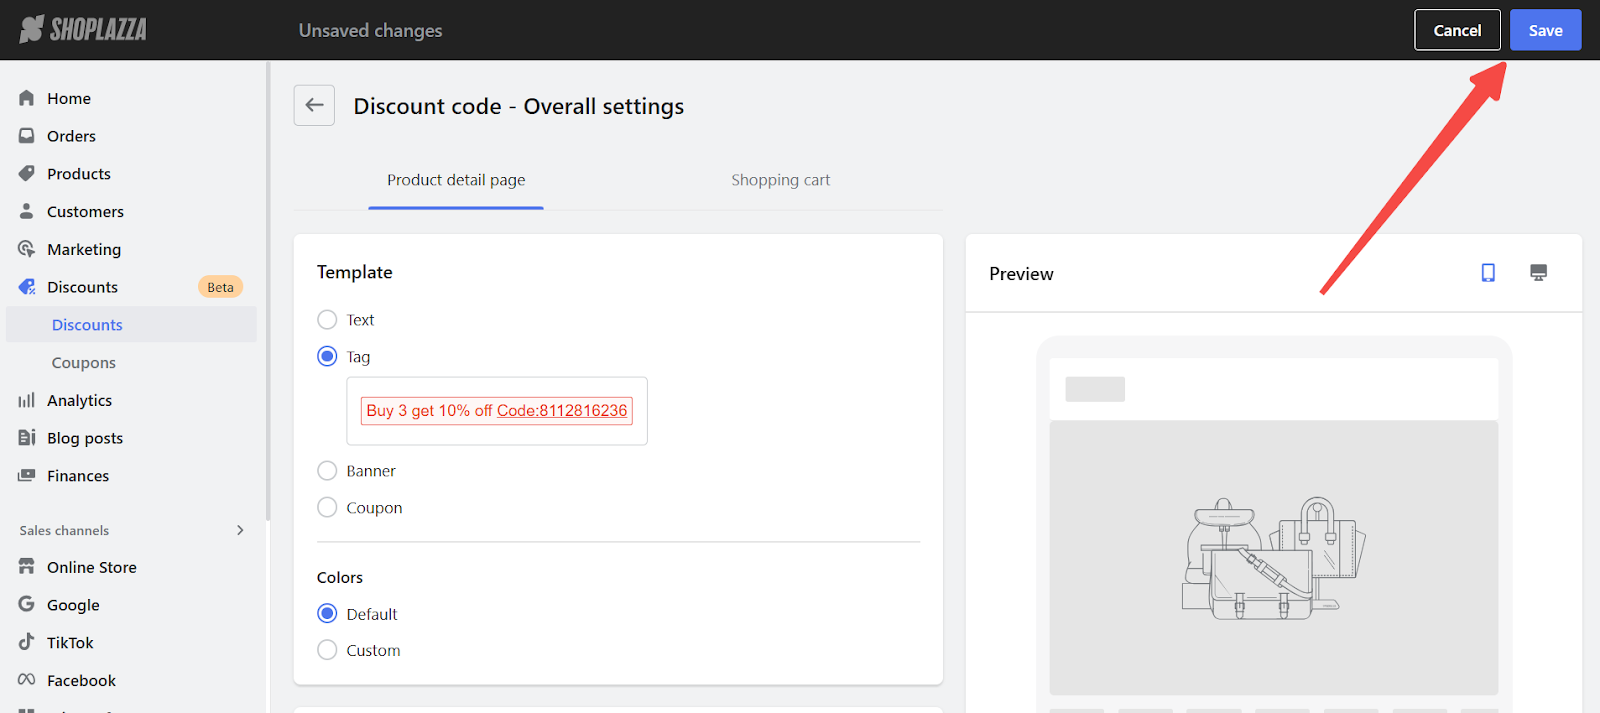
4. Save your changes: Click Save to apply your updates to all Discount Code campaigns.
Configure display settings for your campaign
After saving the campaign setup, configure how the discount is displayed on your store pages. This step ensures that the promotion appears correctly on the product detail page, the shopping cart page, and the activity landing page. These settings can be customized per campaign or inherit your overall display rules.
1. Open Page settings and select your campaign: Go to Discounts, then click Page settings in the upper-right corner of the screen. From the list, find the discount you just created and click into it to begin configuring the display.
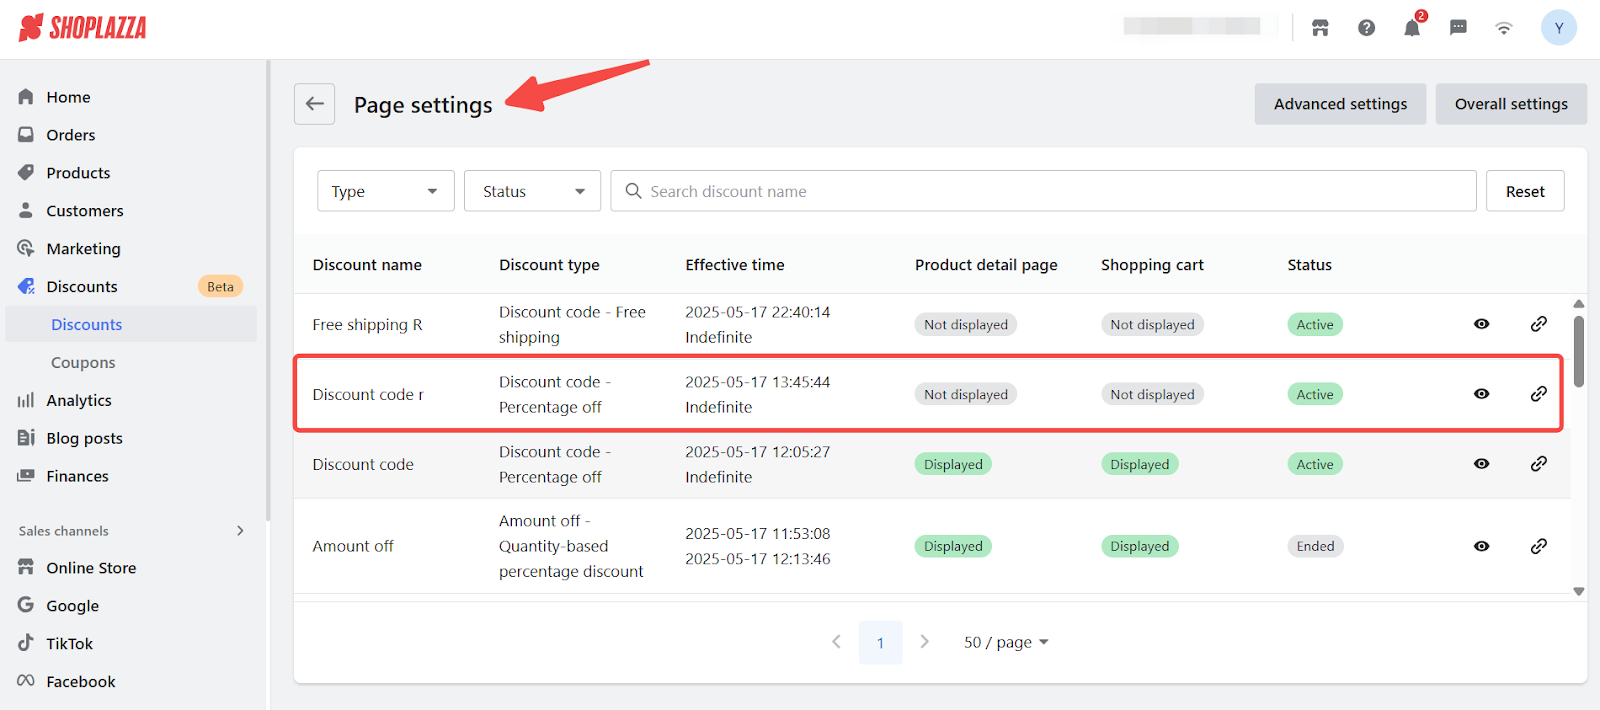
2. Enable display on the product page and cart page:
- Under the Product detail page tab, turn on the switch labeled Display discount code. This ensures the promotion appears on product pages next to eligible items.
- Under the Shopping cart tab, turn on Display discount code to show the promotion directly in the cart before checkout. This reinforces the value of the discount and reminds customers of the offer.
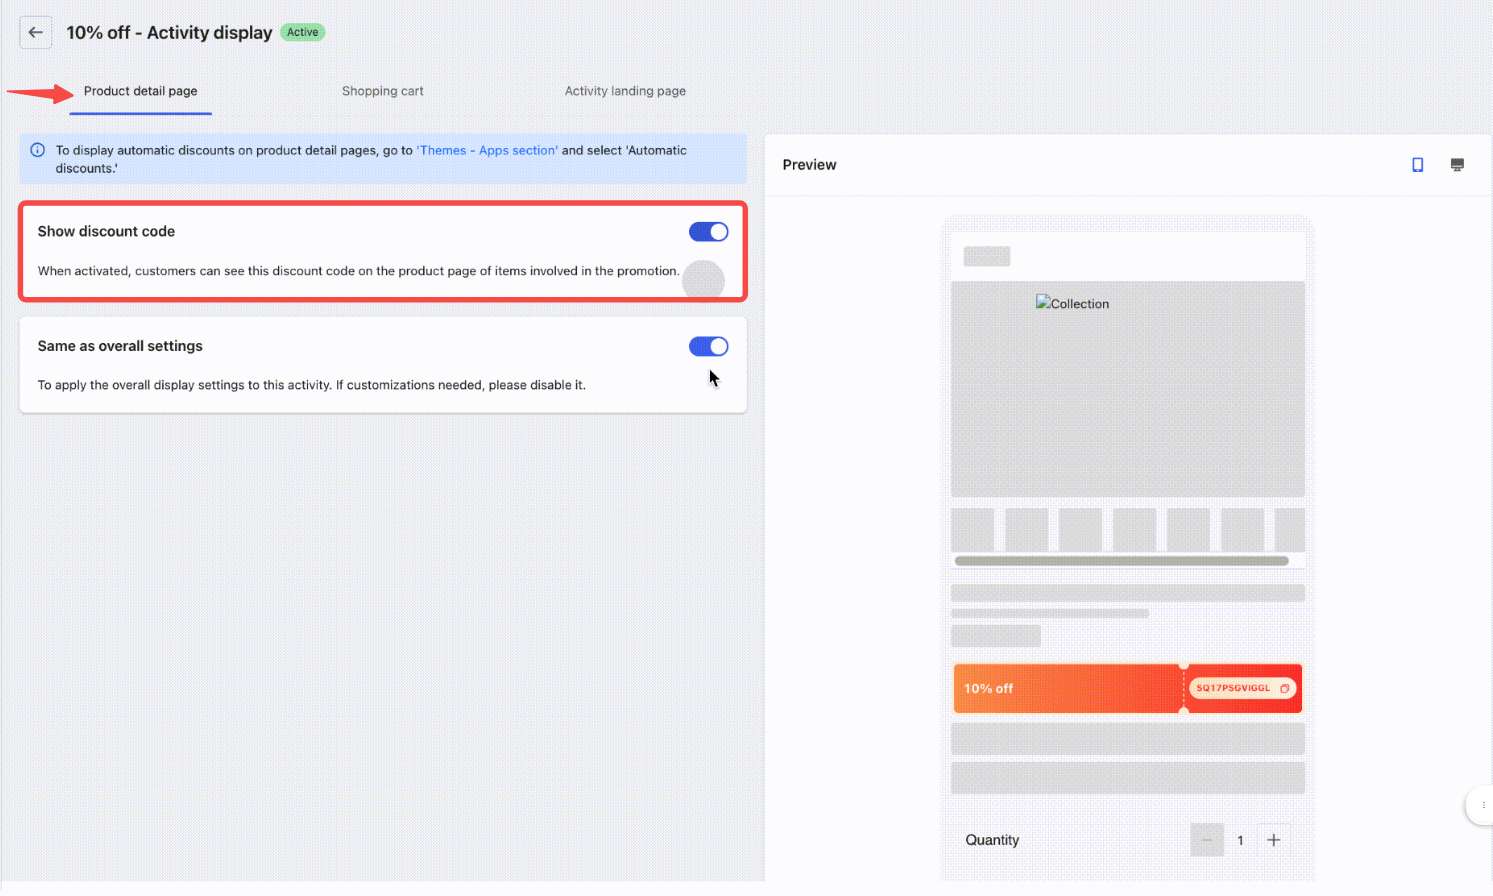
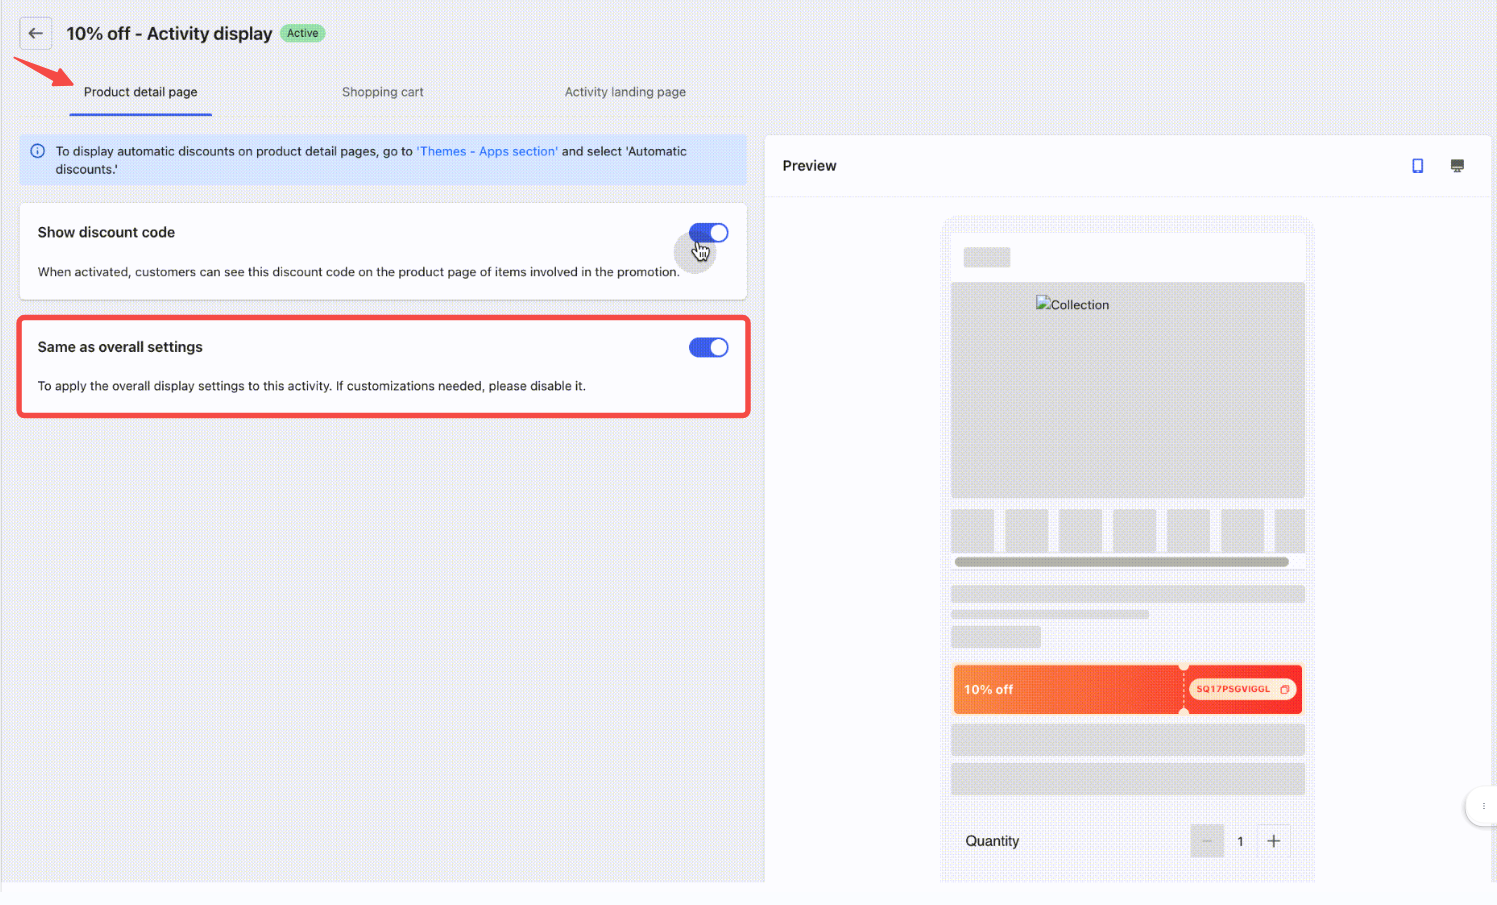
3. Apply overall or custom display settings: If your campaign should follow the design settings defined in Overall settings, leave the Same as overall settings toggle enabled. If you want to override the display for this specific campaign, disable the toggle to unlock independent customization options.
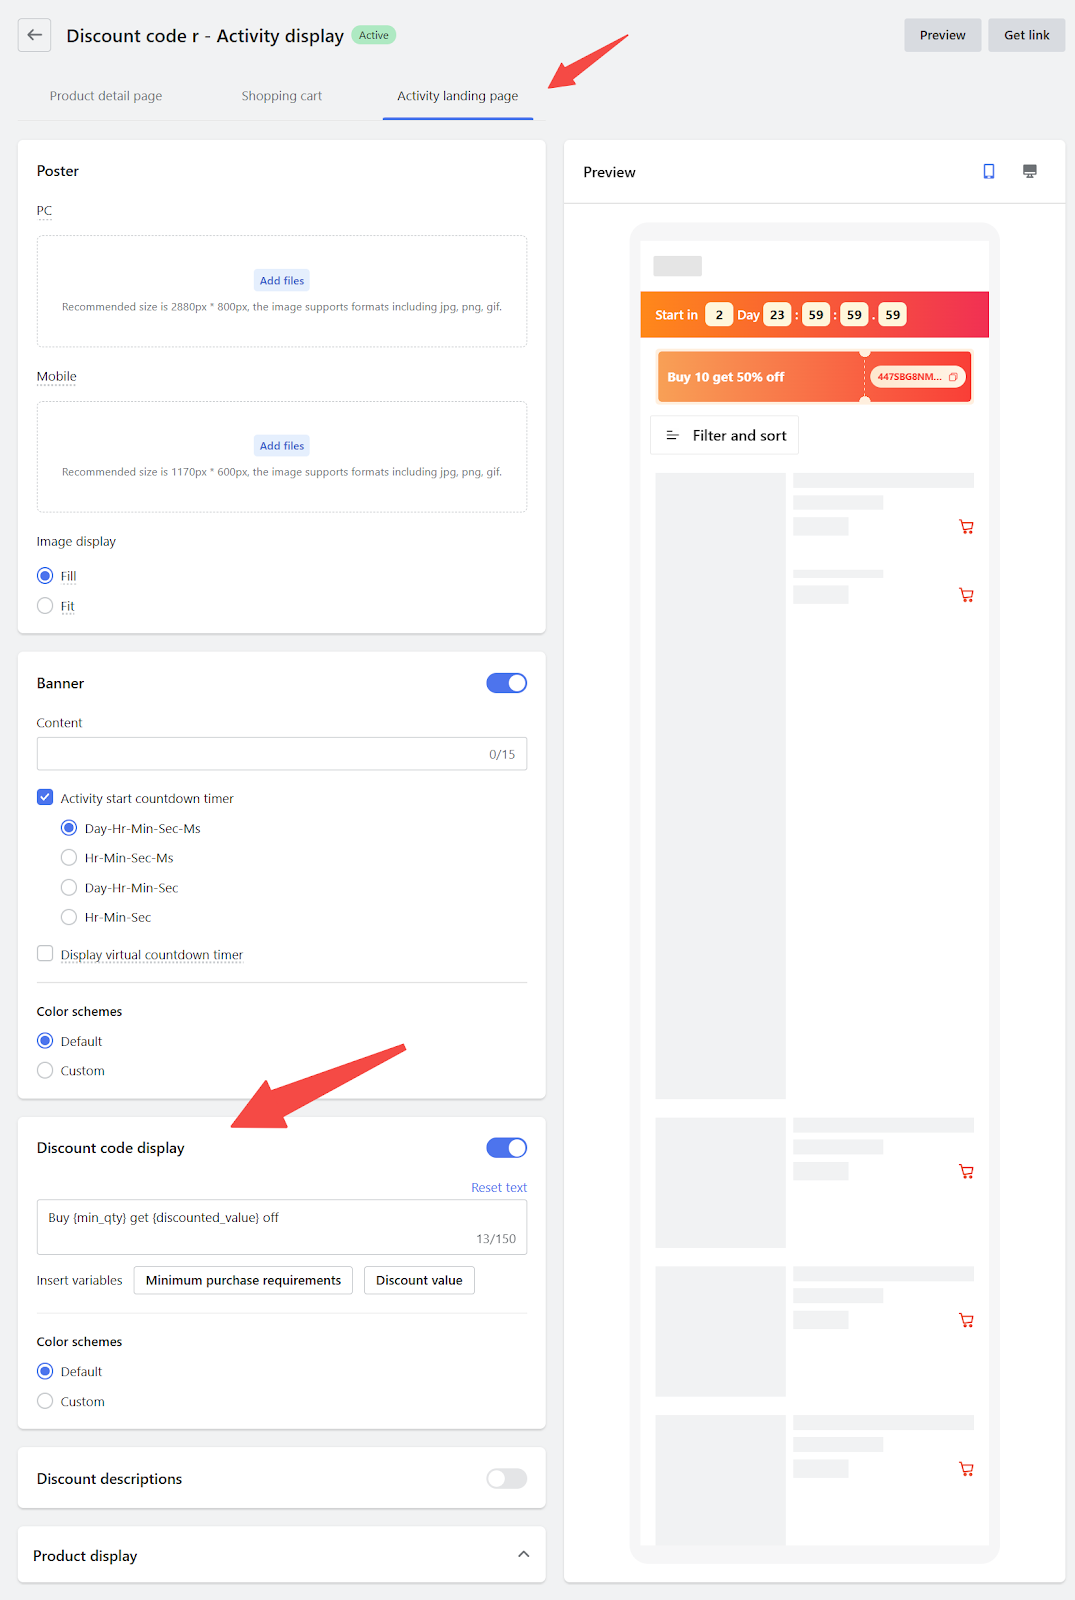
4. Customize the activity landing page display (optional): Click into the Activity landing page tab to configure how the promotion appears on its dedicated landing page.
- Upload banners for desktop and mobile views.
- Enable a countdown timer to add urgency if the promotion is time-limited.
- Use the Discount display section to write or edit promotional text. Variable tags such as {discounted_value} and {discounted_item} will dynamically update based on your discount rules.
Configure multi-tier display layout (optional)
If your campaign offers multiple discount codes or tiers, you can customize how they appear on the product page.
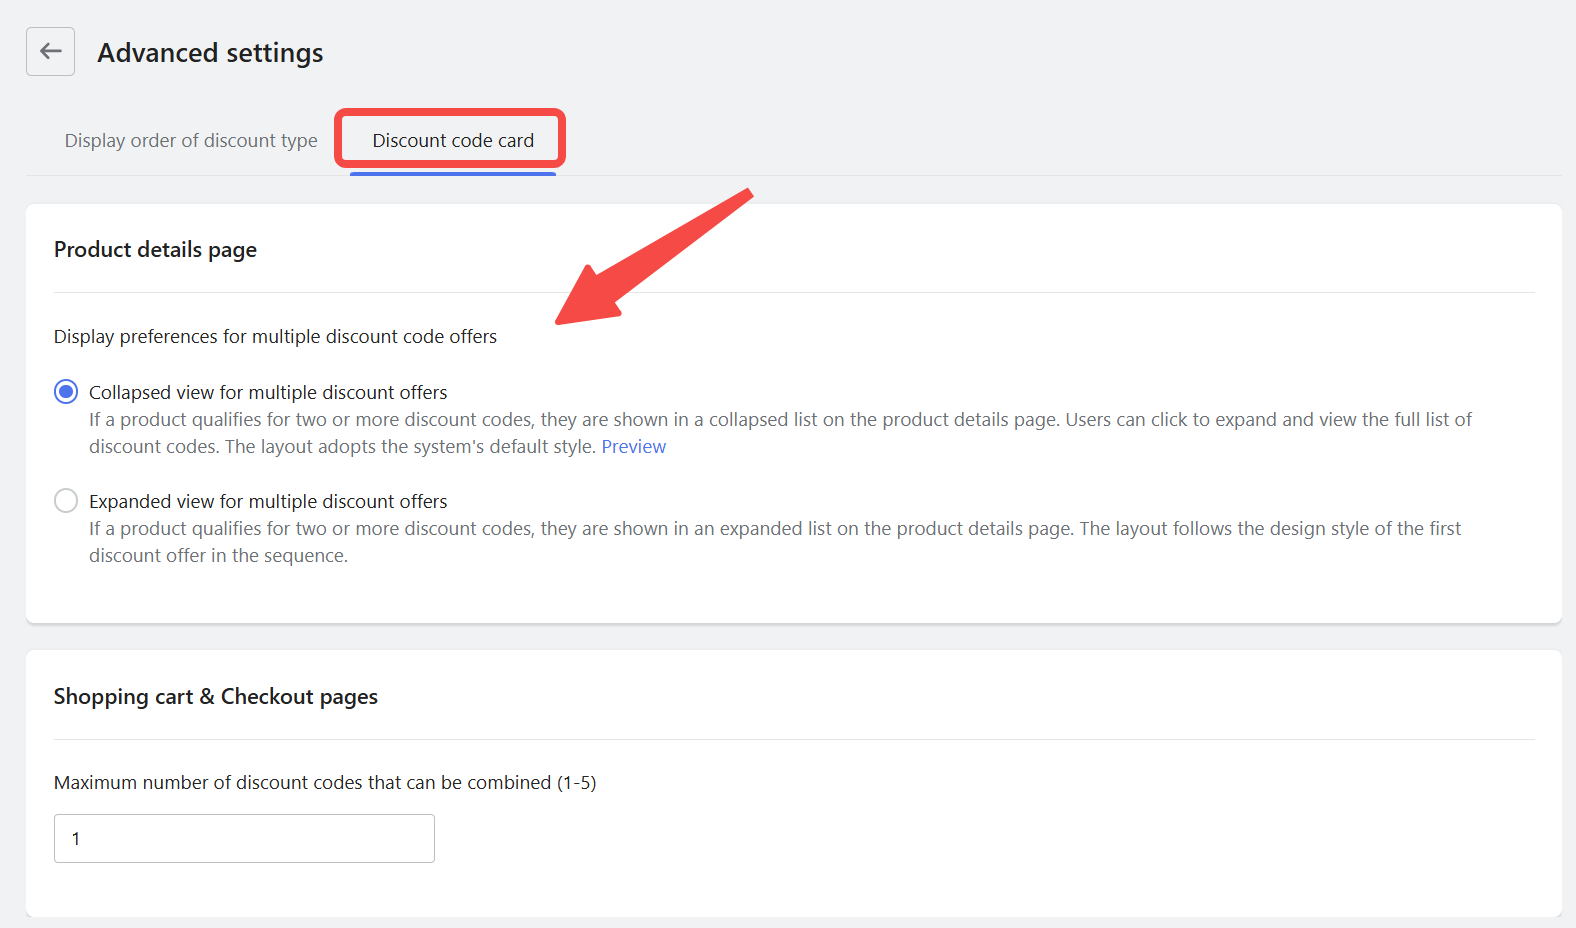
- Open Discount code layout settings: Go to Discounts > Page settings > Advanced settings > Discount code card to customize how multiple discount offers appear on the Product detail page.
Choose one of the following layout options:
-
- Collapsed view (default):
Displays a condensed list of available discount codes. Customers can expand the list to view full details. Recommended for a cleaner interface.
-
- Expanded view:
Shows all eligible discount codes in full. The layout follows the format of the first offer in the sequence. Recommended for campaigns where visibility of all offers is important.
Publish campaign
After your campaign is fully configured, make sure it's visible to customers by adding display components to your store theme.
Note
Display components are shared across discount code campaigns. You only need to install each block once per page.
Add display cards to your theme
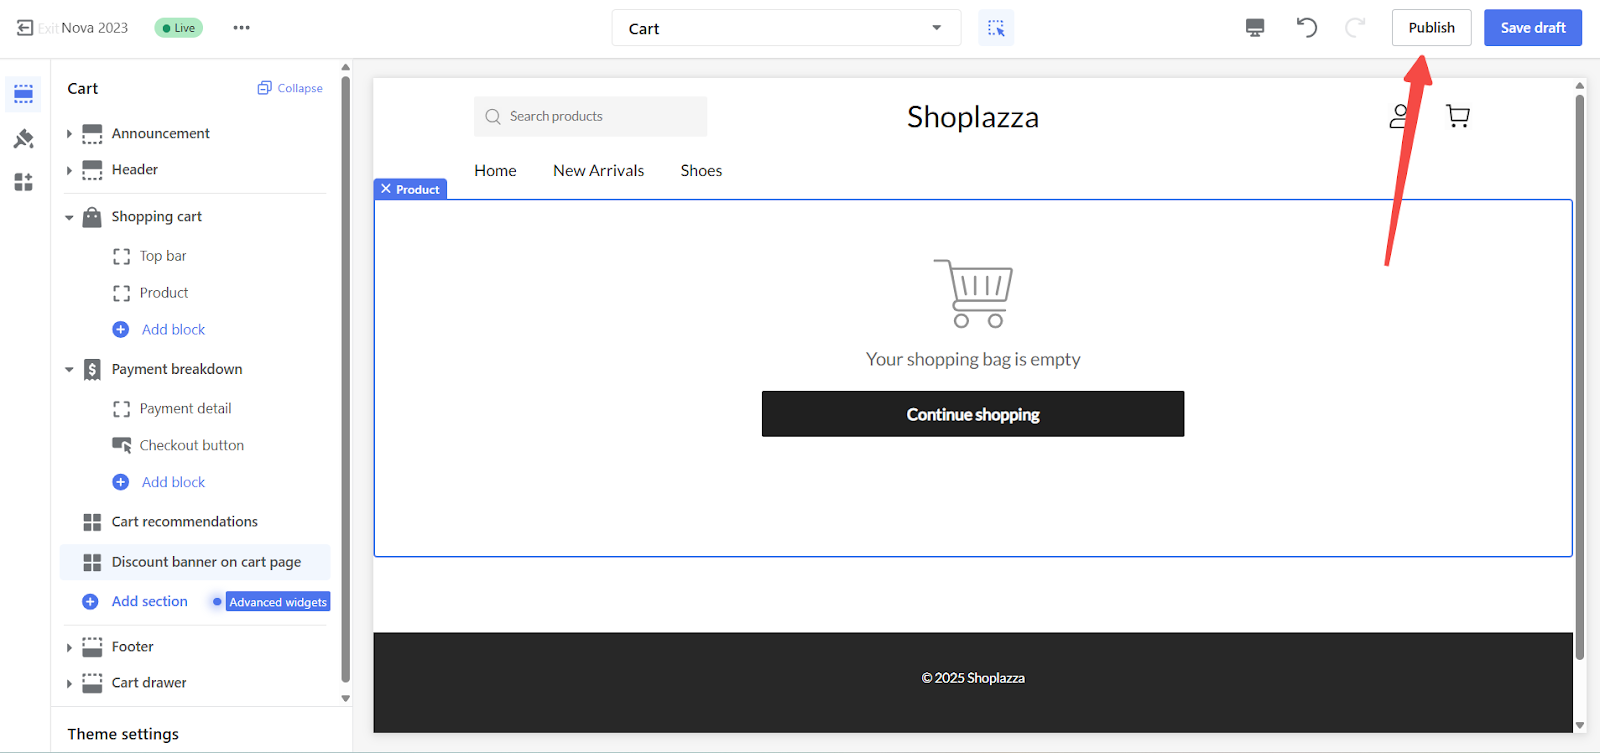
1. Access the theme editor: In the Product detail page tab, click the Themes - Apps section link to open the theme editor directly on the product layout. Shoplazza will automatically insert the discount block if it hasn’t been added before. From there, you can move the block as needed.


2. Publish your theme: Once everything is set, click Publish in the theme editor to push your updates live. Your campaign is now live. Customers will see real-time savings on product and cart pages, driving faster checkout and higher order value.
Use Theme-specific features
The following features are only available on supported theme versions.
1. Show recommended discount codes in cart: Display a section on the Shopping Cart page that suggests available discount codes.
- Supported on: Nova2023, Geek, Hero
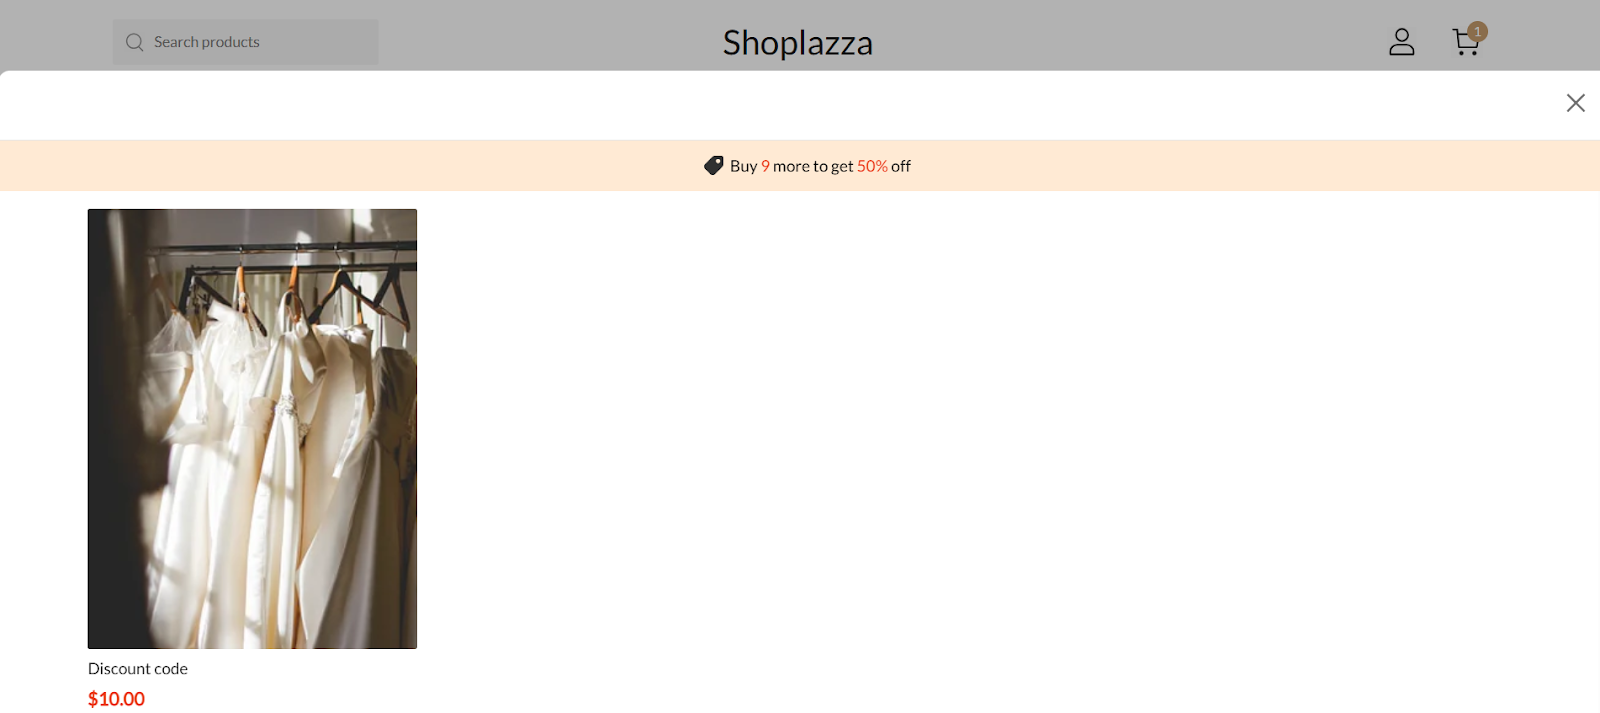
2. Display progress bar for order threshold: Show a progress bar in the cart that visually tracks how close a shopper is to unlocking a discount.
3. Auto-Apply clipboard discount codes: Automatically applies any discount code the shopper copied before visiting the cart.
-
Minimum theme version required:
- Nova: 3.6.12 or higher
- Geek: 3.2.7 or higher
- Hero: Latest version
Upgrade to the latest version of Nova, Geek, or Hero to access these features. To check your theme version or upgrade, go to Other Settings | Upgrading your theme.

Percentage Discount Code campaigns help you increase order value and drive more conversions with targeted, customizable offers. Set your conditions and launch effective promotions that align with your store goals.


Comments
Please sign in to leave a comment.