
Set up your Product Detail Page to display only variant images that match the selected color variant. This creates a more organized and focused shopping experience, especially for stores with multiple color options. By grouping and assigning images per variant, you enable color-based image switching and ensure the correct visuals appear with each selection while maintaining a clean, consistent layout across the page.
Note
The following themes do not support color-based image switching: Onepage, Farida, and Flash. If your store is using one of these themes, the variant-specific image setup described below will not function as intended. Please consider switching to a compatible theme to enable this feature.
Purpose of this setup
Displaying images from multiple color variants at once can be confusing for consumers. When a consumer selects “Green,” they expect to see only green product images. By matching gallery content to the selected color, you create a more intuitive browsing experience and support faster, more confident purchasing decisions.
Organize product images by variant
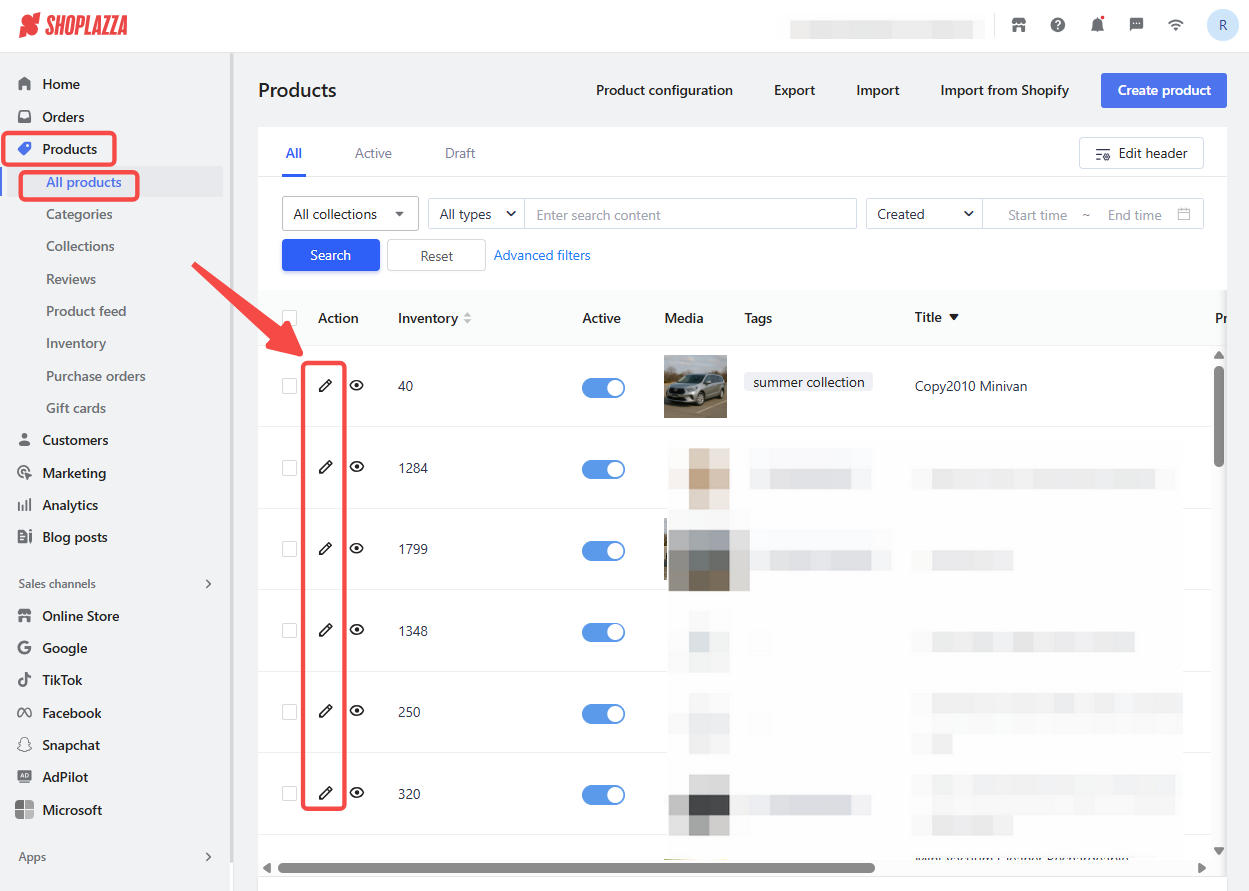
1. Open your Shoplazza Admin: Go to Products > All Products, then click the edit icon next to the product you want to update.
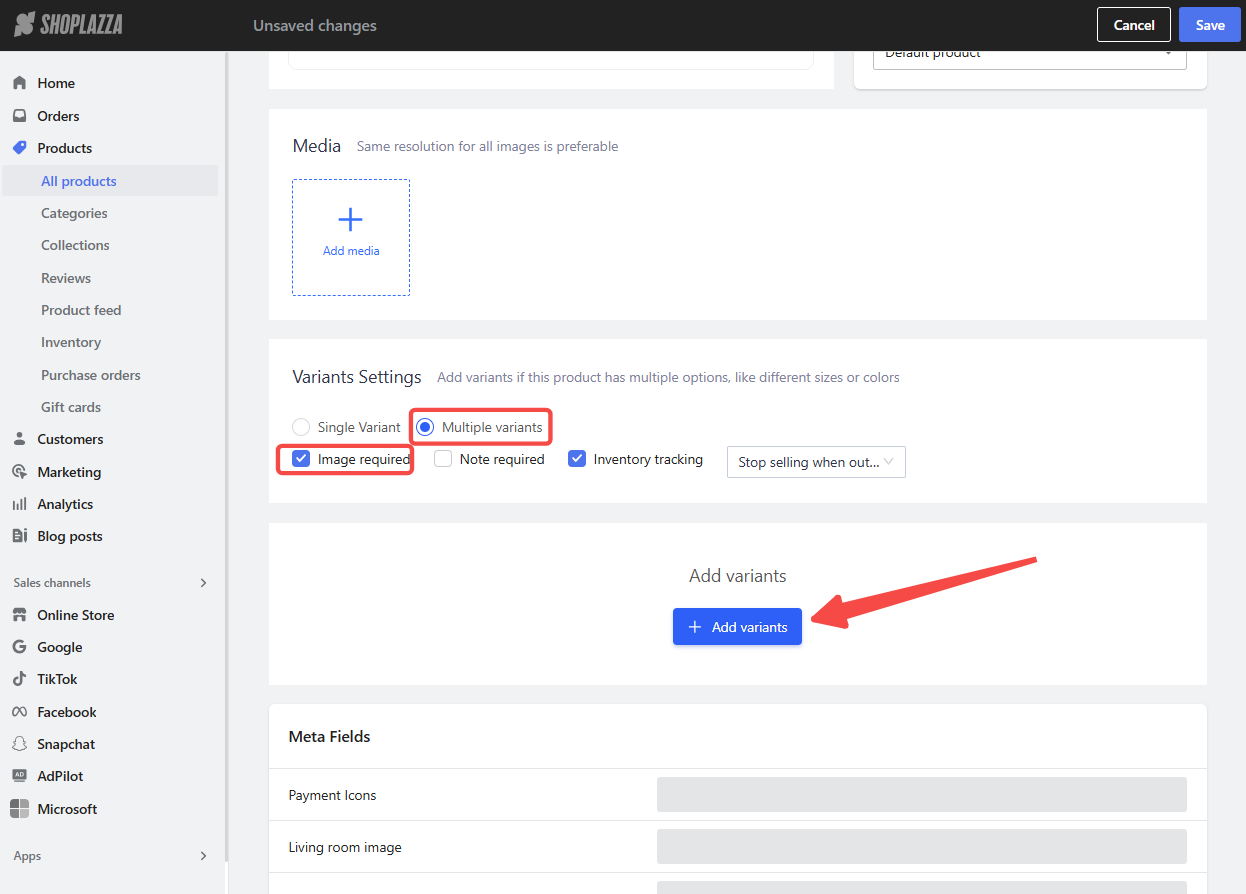
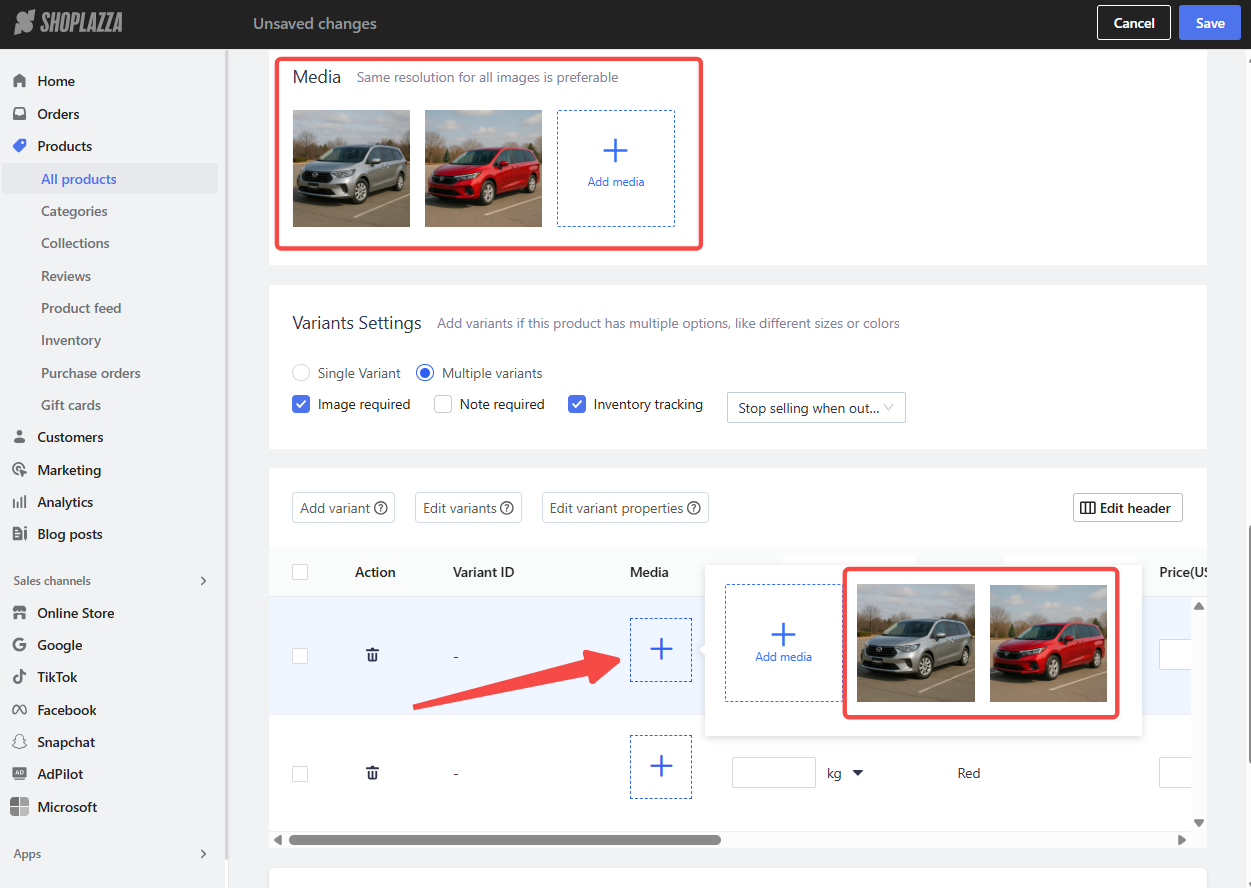
2. Enable image-per-variant settings: Scroll to the bottom of the product edit page. Enable Mulitple variant and check the Image required.
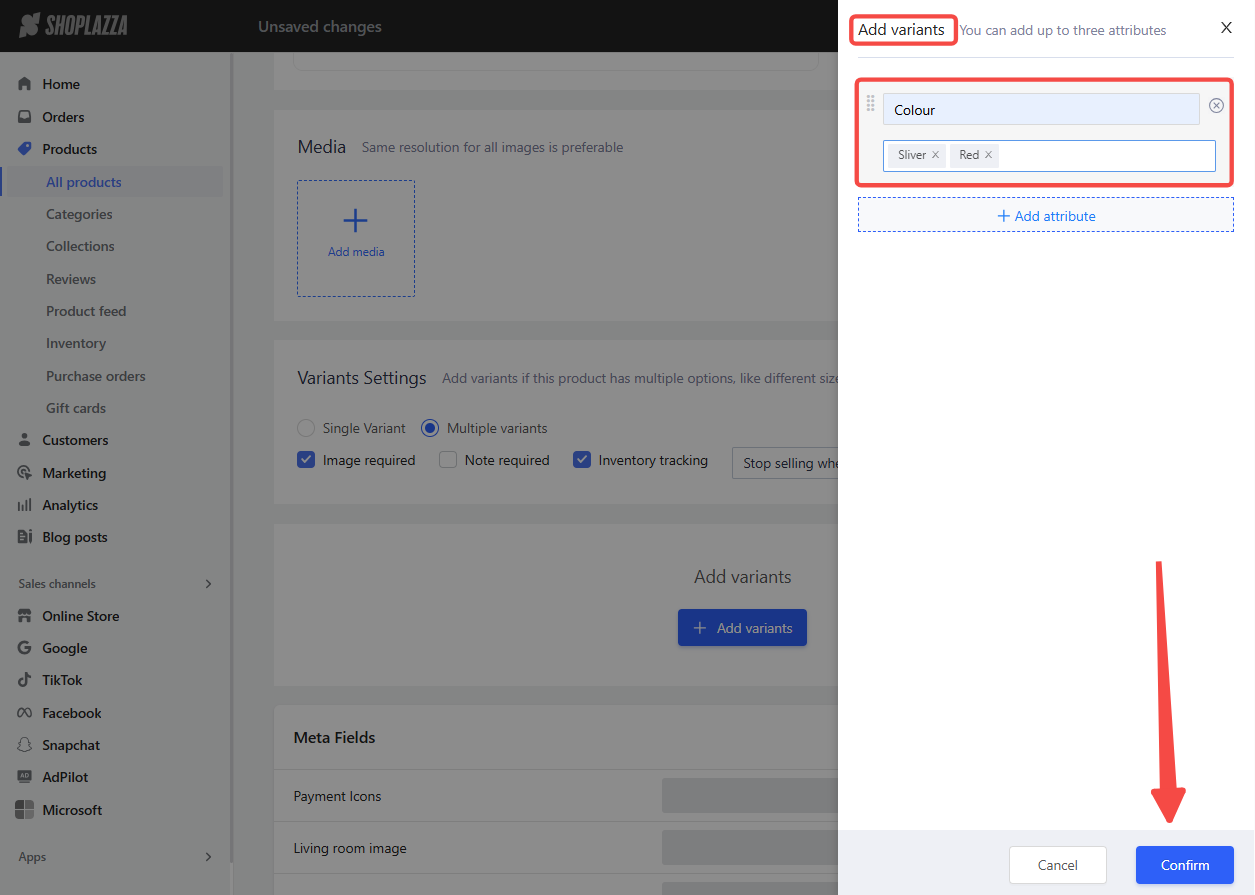
3. Add product variants: Click Add variants, set the option to Color, and enter each color variant name (e.g., Silver, Red). Click Confirm to save.
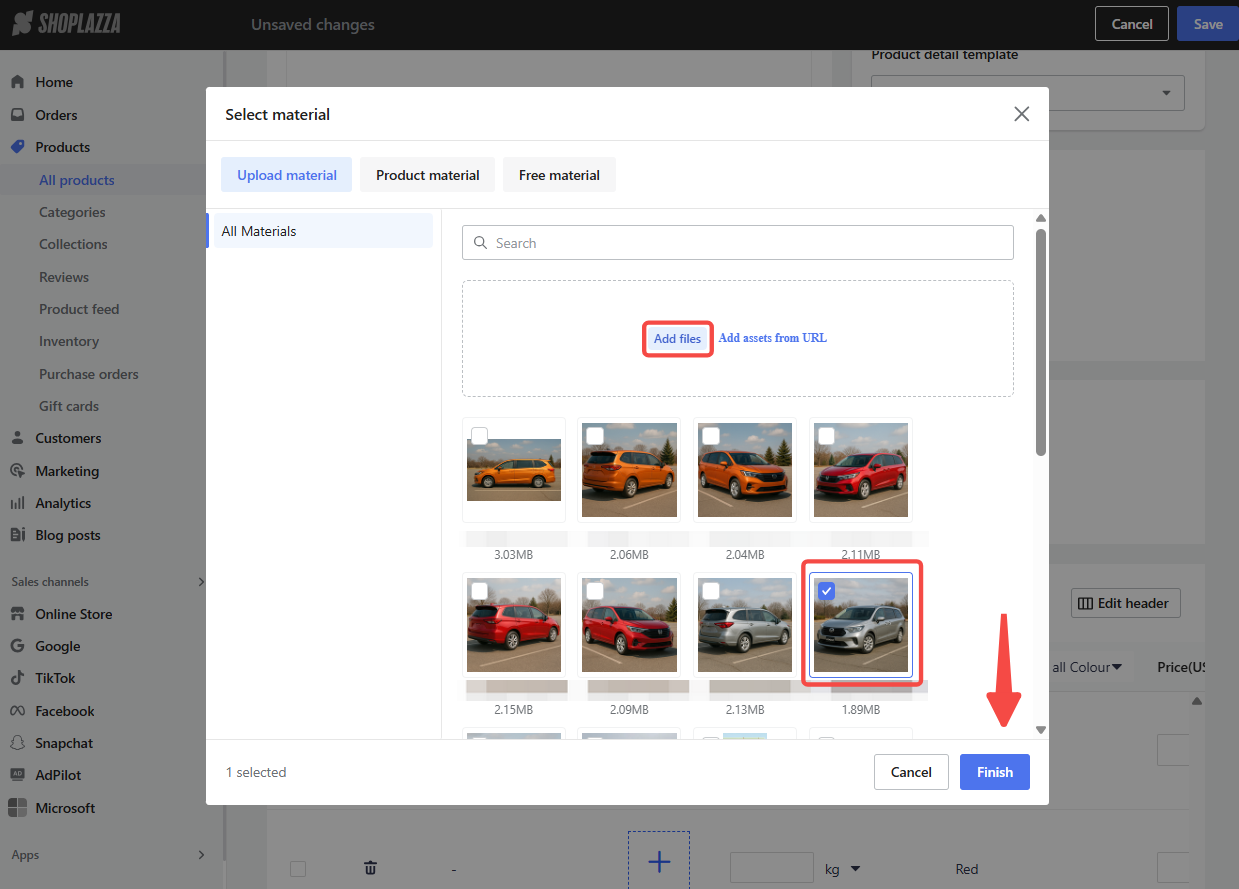
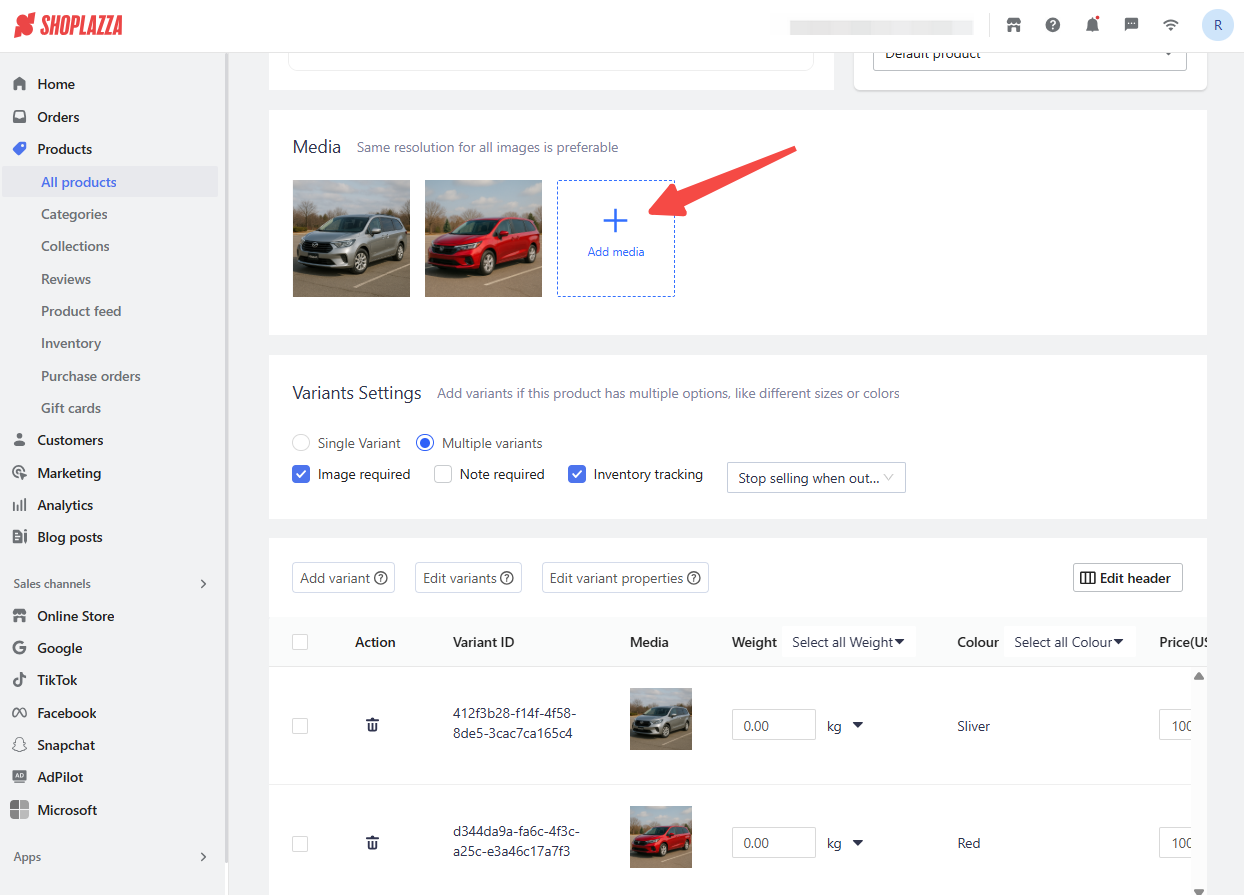
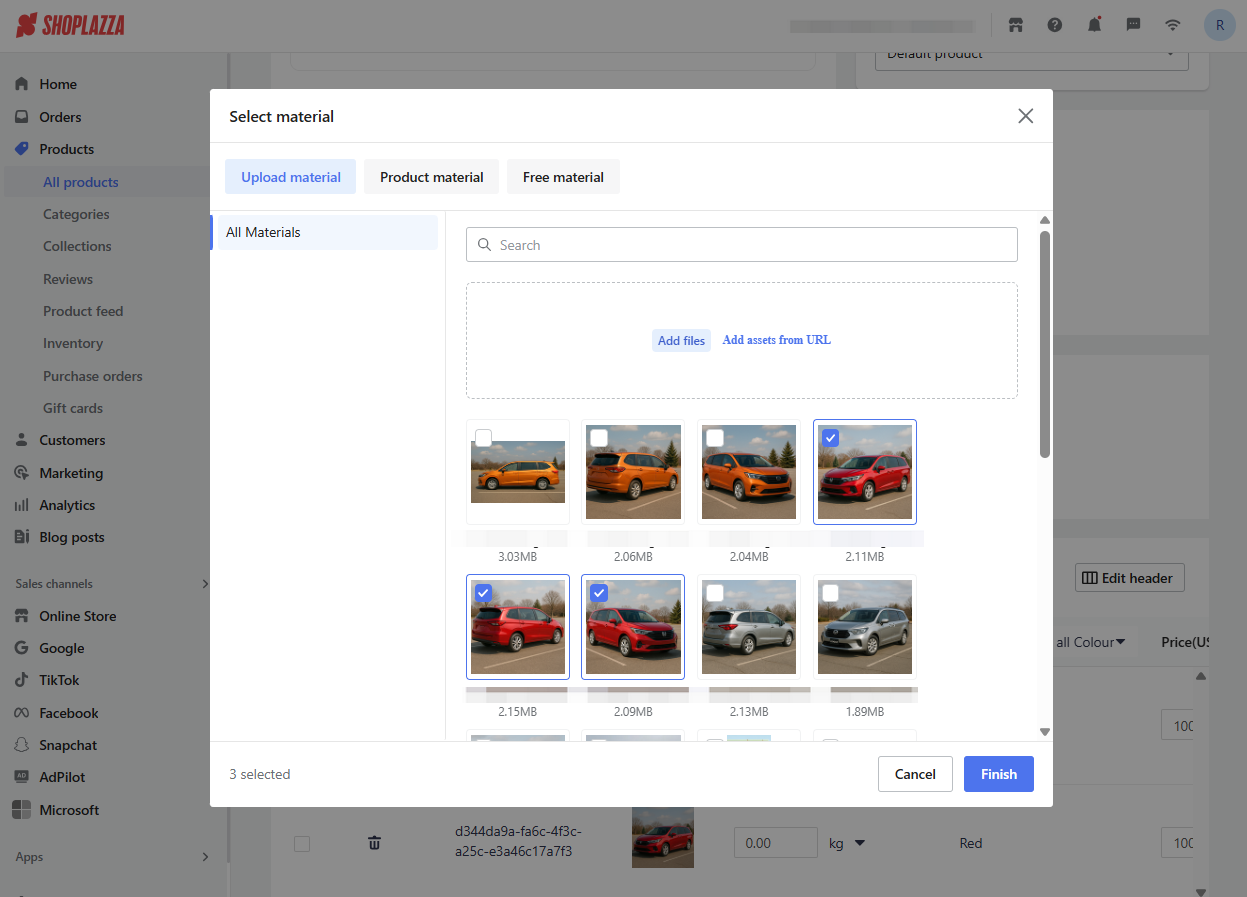
4. Upload main product images: In the Media section, click Add media to upload images from your device, a URL, or your image library.
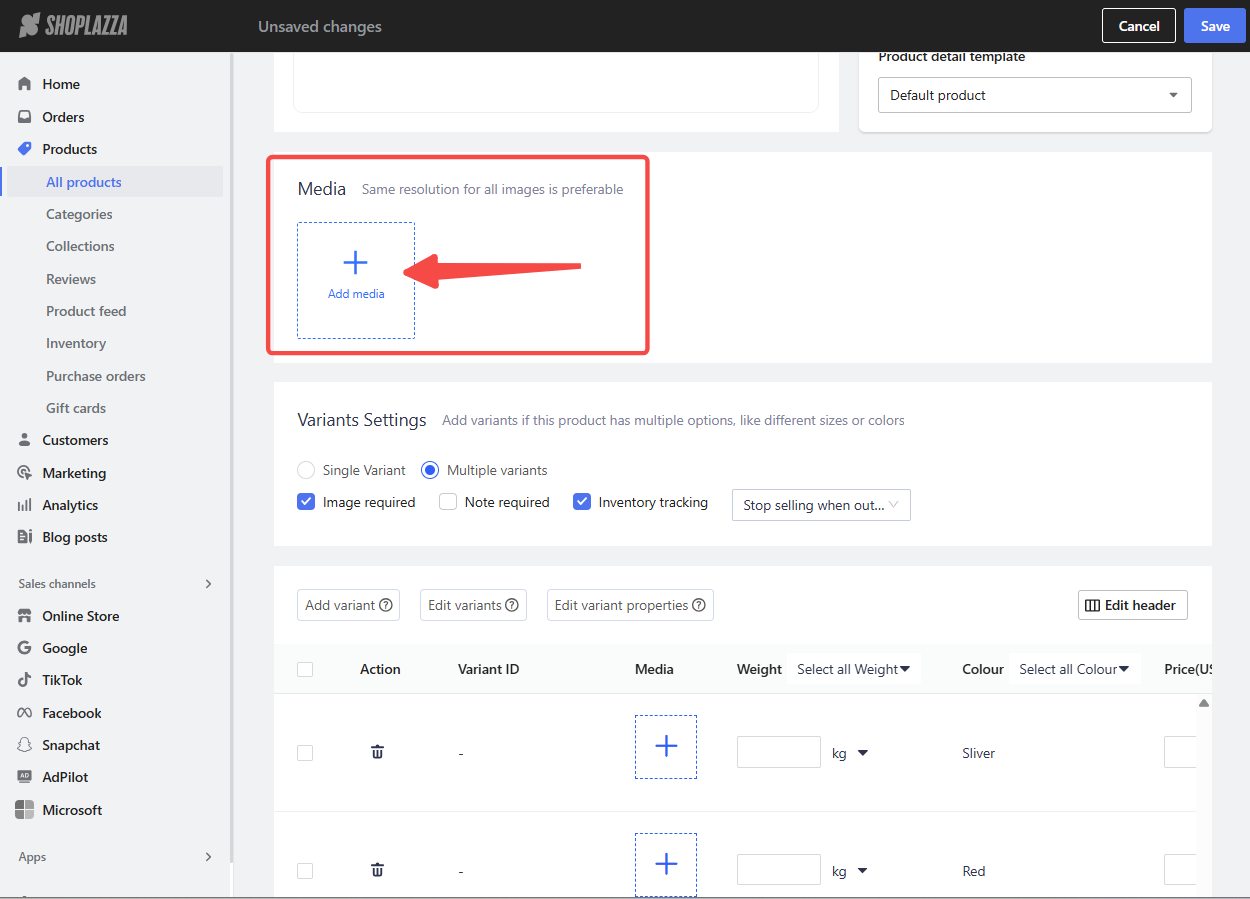
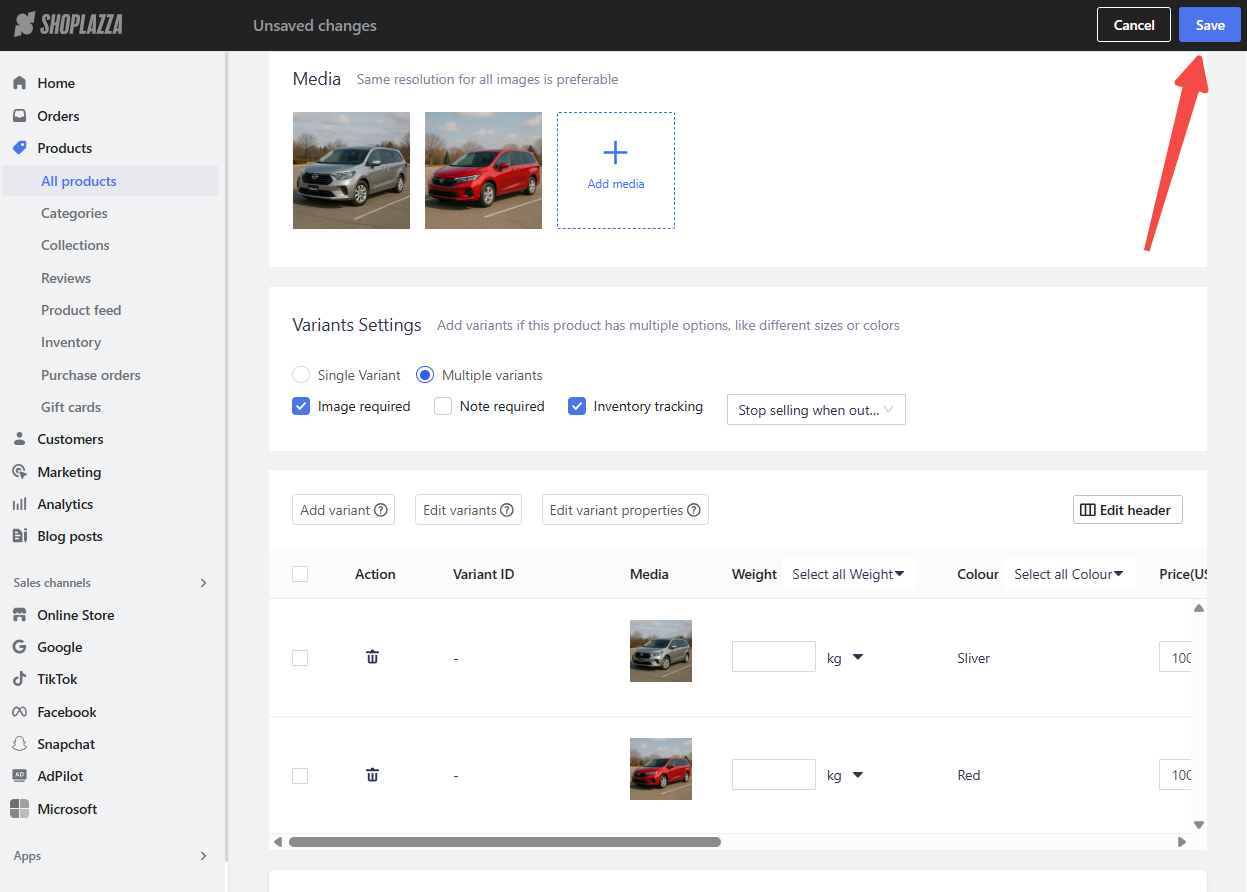
5. Assign images to each variant: In the variant list, assign one main image per variant. Make sure it represents the correct color. Click Save after uploading.
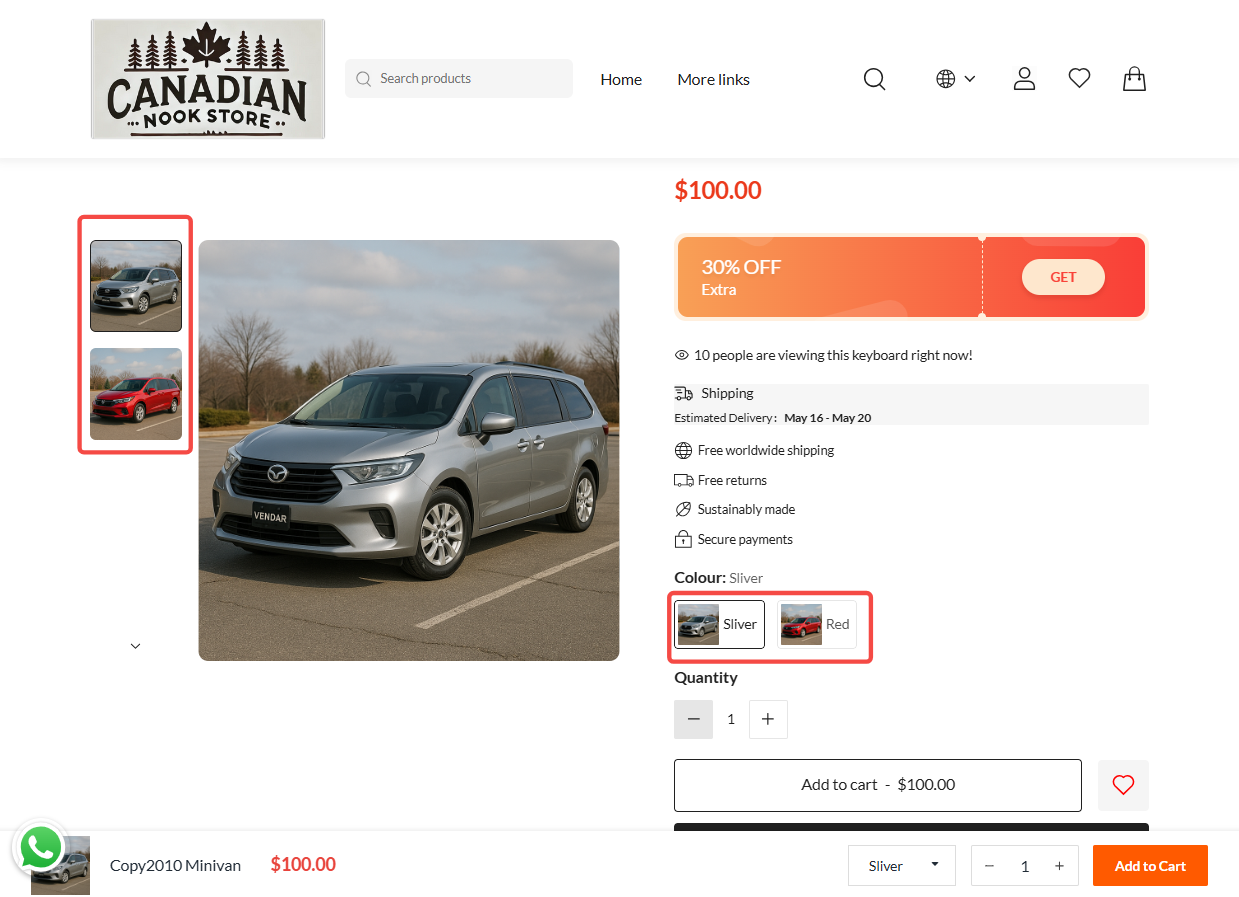
6. Preview your storefront: Confirm that selecting a variant updates the main product image as expected.
Enable image switching for the gallery
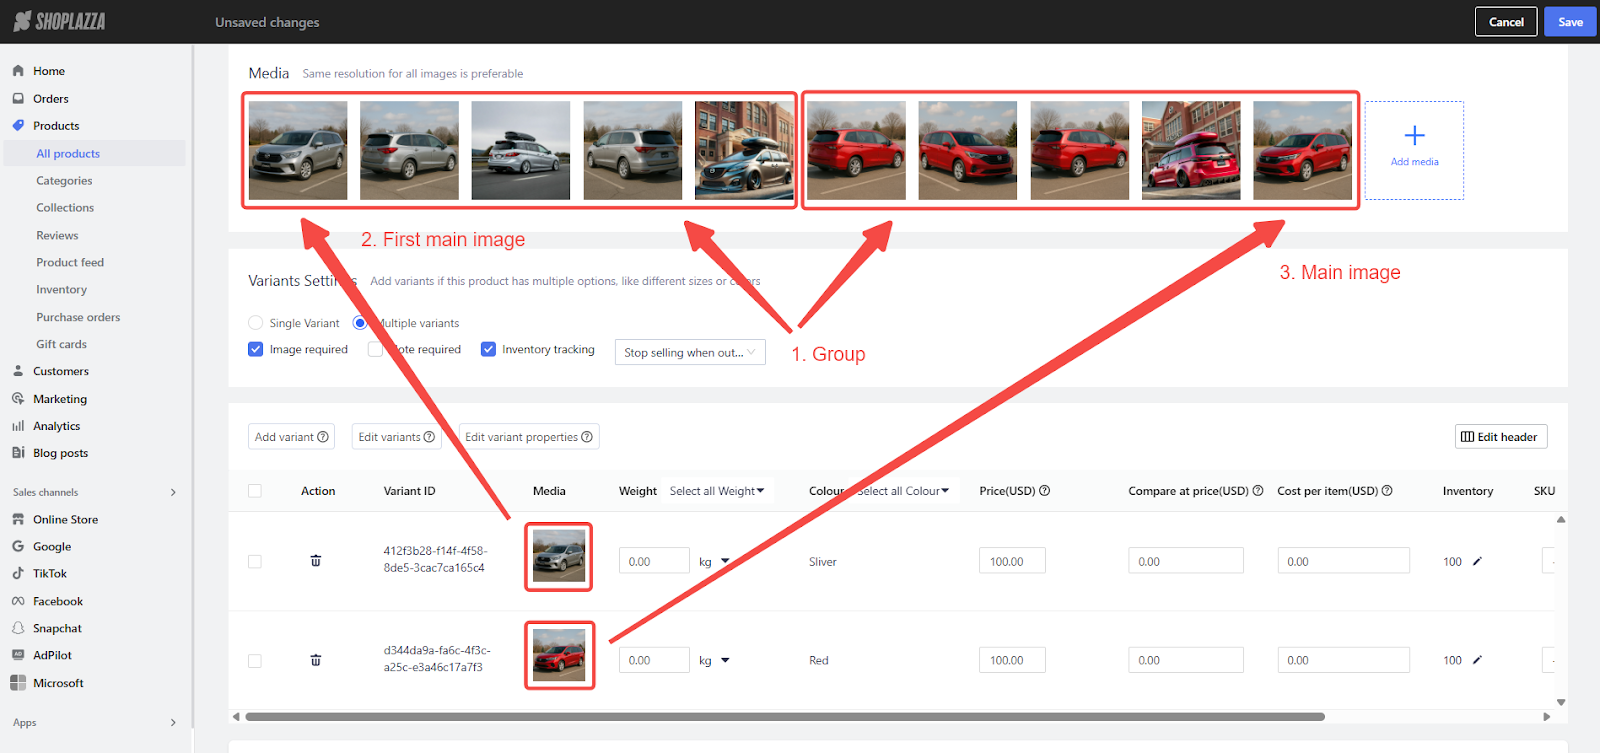
To display a full image set that matches the selected color variant, upload all related images in structured groups. For best results, include at least five images per color: one main image and four detail shots.
1. Return to the Media section: Upload images in grouped order. For example, upload all Silver images first, followed by all Red images.
2. Follow this upload structure:
- Group all images by variant
- For the first variant, place the main image first
- For all other variants, place the main image last
- Do not repeat the main image in the same group
- Adjust image order if needed to avoid showing the wrong image as the thumbnail
3. Preview your storefront: When a consumer selects a different color, the full gallery should now update accordingly.

Important consideration: Clear variant selection matters
When images update by color selection, only matching photos are shown. This keeps the display consistent, but some consumers may still rely on visuals instead of selecting a swatch.
If someone sees silver product images but doesn't select the "Silver" option, they might accidentally order the wrong color.
- To help prevent this:
- Use clear and visible swatch labels
- Add a short reminder like “Please select your color before checkout”
- Test the selection flow yourself to ensure it feels intuitive

Keep your images organized by color variant to ensure a smooth and focused product page. Test the consumer journey from selection to checkout, then publish with confidence. A consistent visual experience helps consumers make the right choice—every time.


Comments
Please sign in to leave a comment.