Before launching your store, ensure you’ve completed the setup process and reviewed a few final details. This step helps you prepare for a smooth launch and gives your customers a professional shopping experience from day one.
Confirm that you’ve completed onboarding
If you haven’t already done so, review the Merchant Onboarding Guide. It walks you through all the essential steps, including:
- Getting to know your dashboard
- Adding and organizing products
- Setting up your homepage
- Verifying your domain
- Configuring payments and shipping
- Testing the ordering process
Each step builds toward a complete and functional online store. If anything is incomplete, go back and finish those steps before continuing.
Review your storefront
Before launching, take time to review your store’s appearance and functionality:
- Ensure your homepage reflects your branding and preferred layout
- Check that product images, prices, and descriptions are accurate
- Organize collections for easy navigation
- Verify that all menu links and navigation items work properly
- Remove any placeholder or demo content
You can preview your storefront using the View store button in your Shoplazza admin.
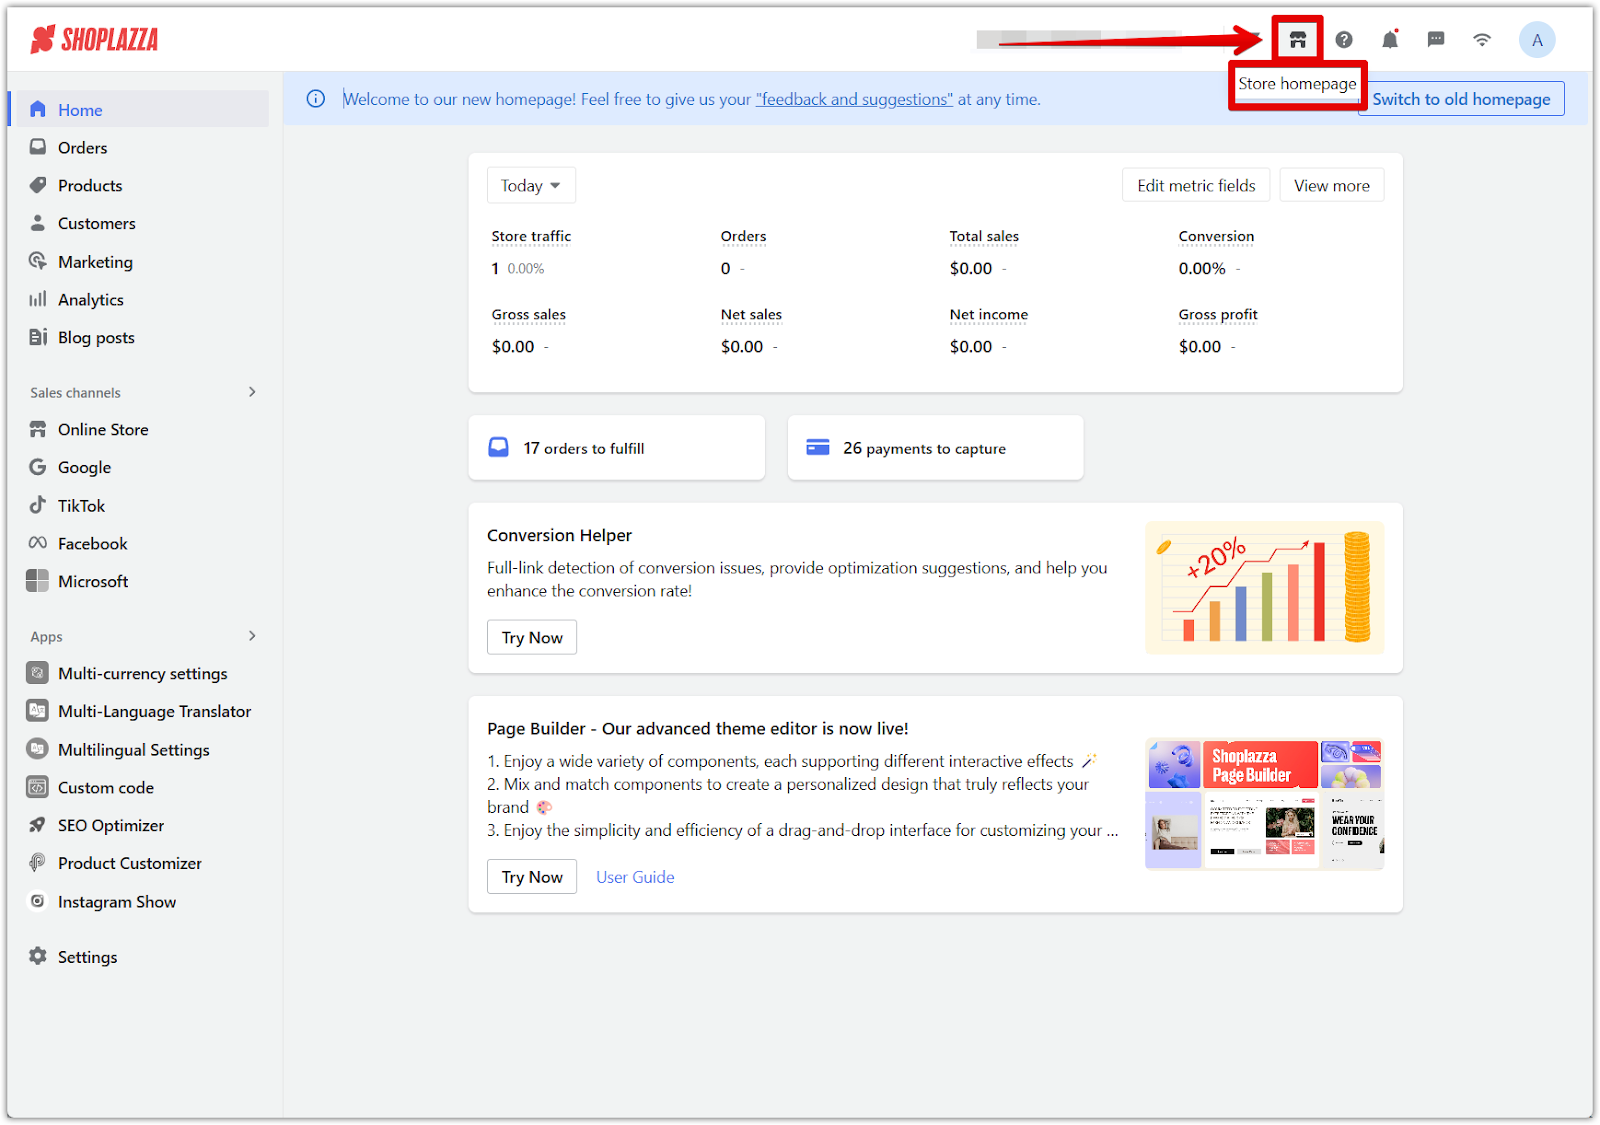
Add your store policies
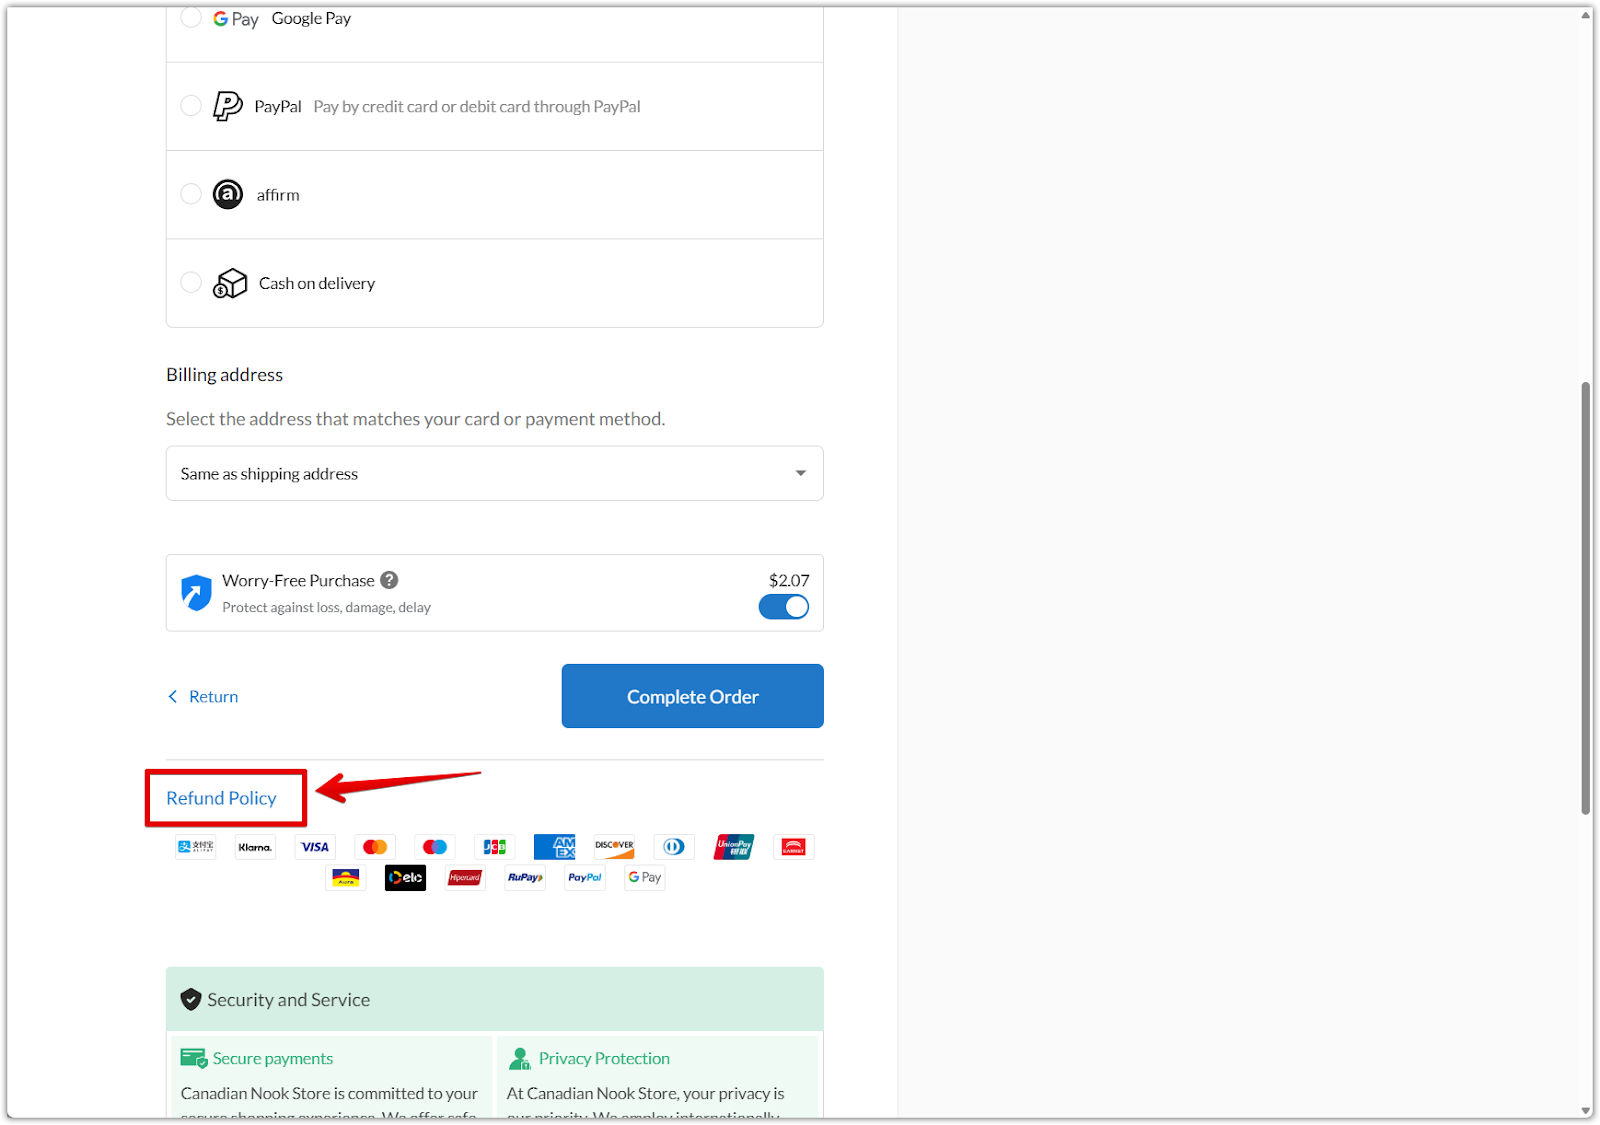
Store policies build customer trust and ensure legal compliance. Shoplazza provides two ways to display your policies, and both should be updated. This ensures that customers can easily access your policies both at checkout and throughout your store.
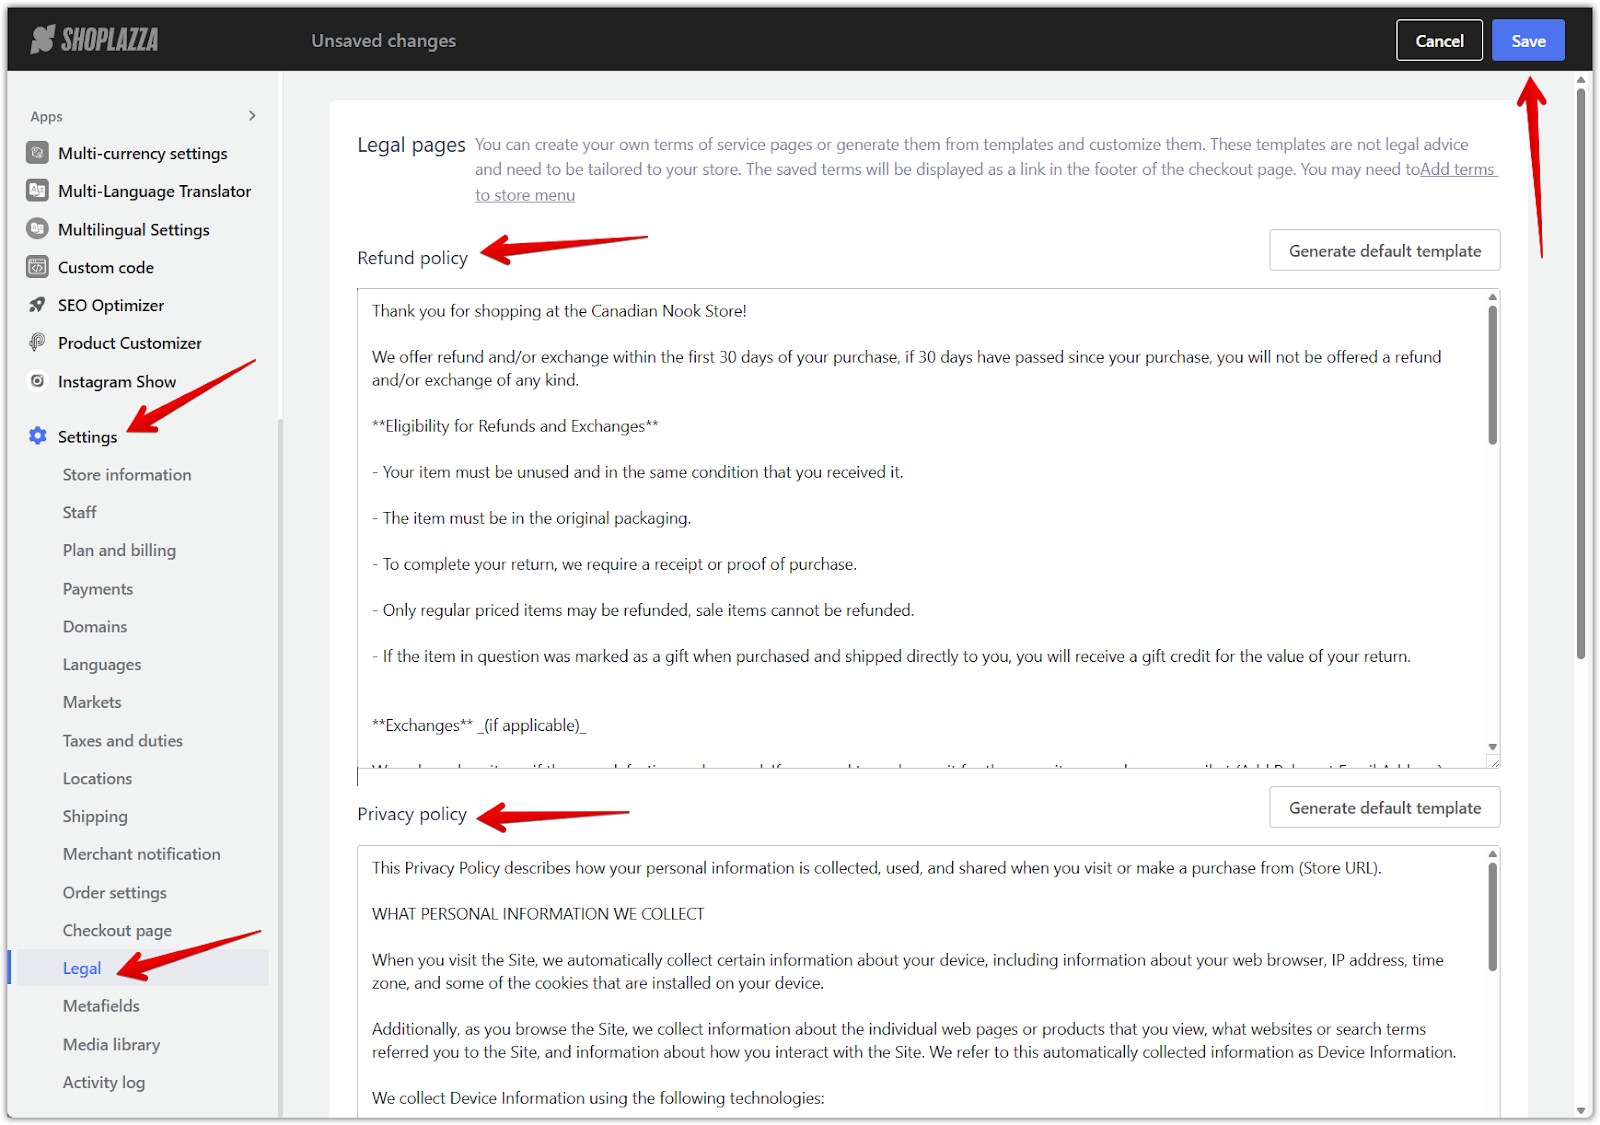
1. Update the policies shown at checkout: These policies appear during checkout and help customers understand your terms before purchasing.
- Go to Settings Legal in your Shoplazza admin.
- Enter your Refund Policy, Privacy Policy, and Terms of Service.
- Use the provided templates or add custom text.
- Save your changes.
2. Create standalone policy pages: For better accessibility, create separate policy pages that customers can view anytime.
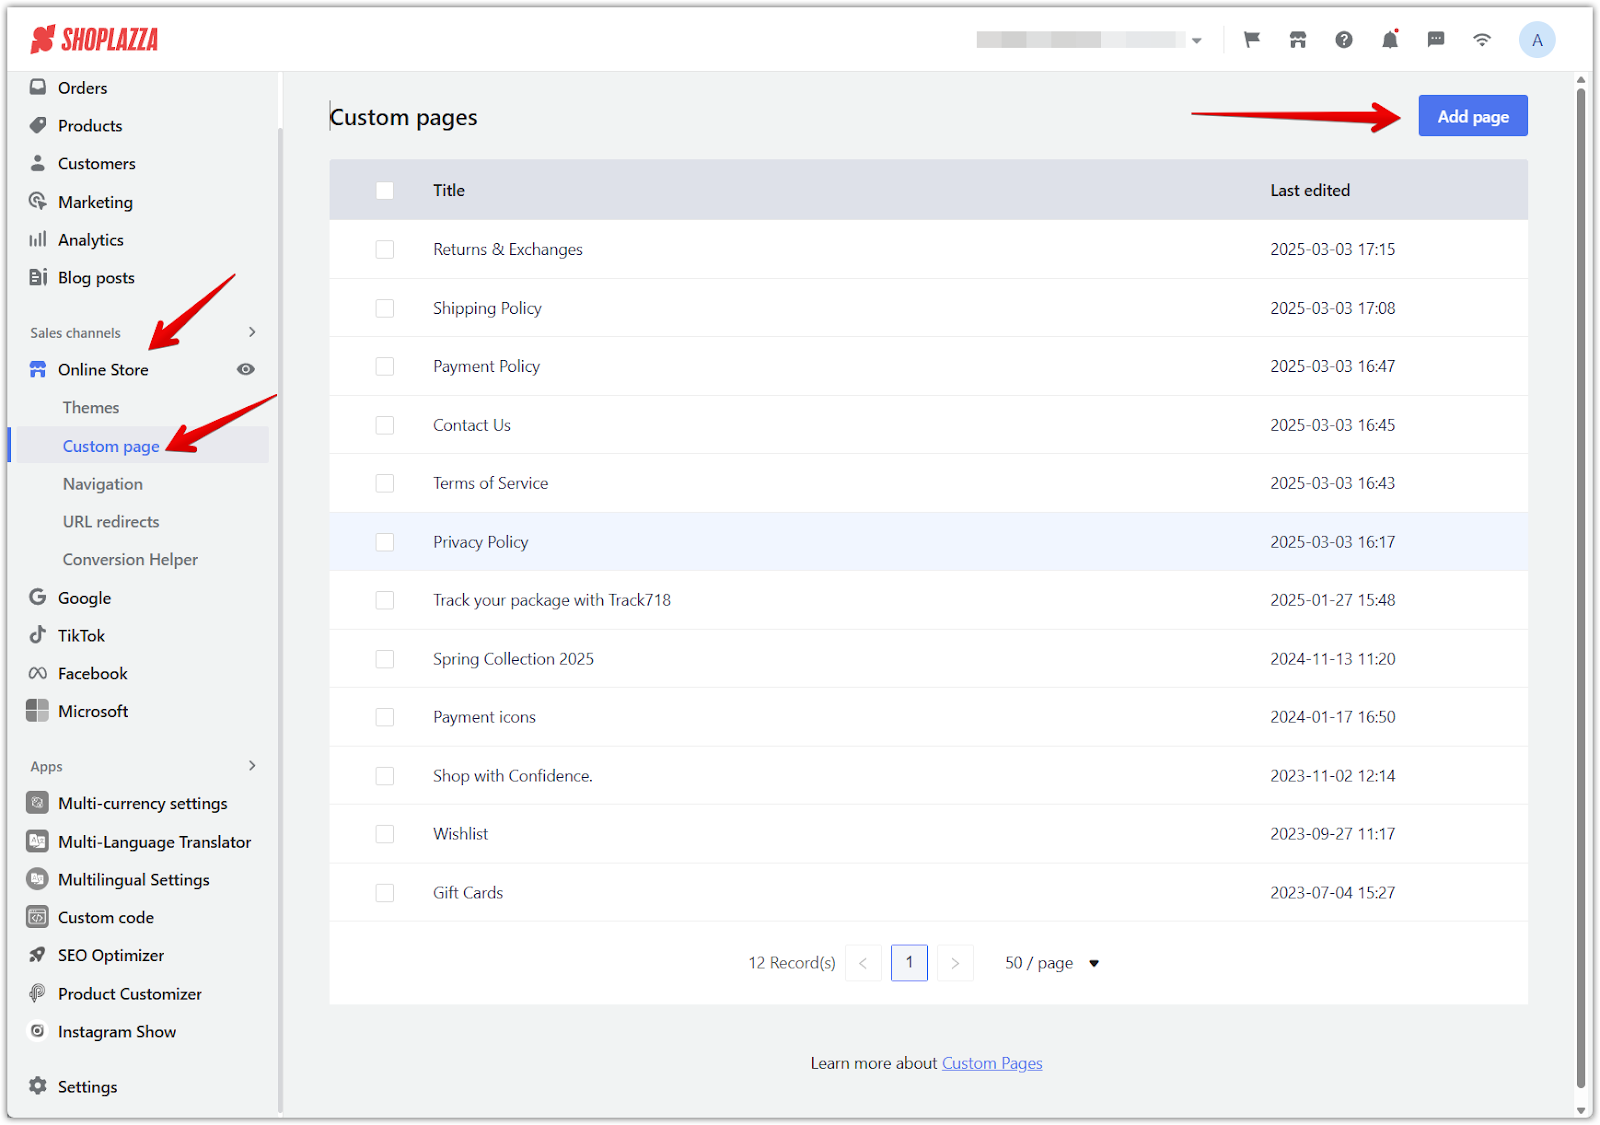
- Go to Online Store Custom Pages.
- Click Add Page and create pages for your Refund Policy, Privacy Policy, Terms of Service, and Shipping Policy.
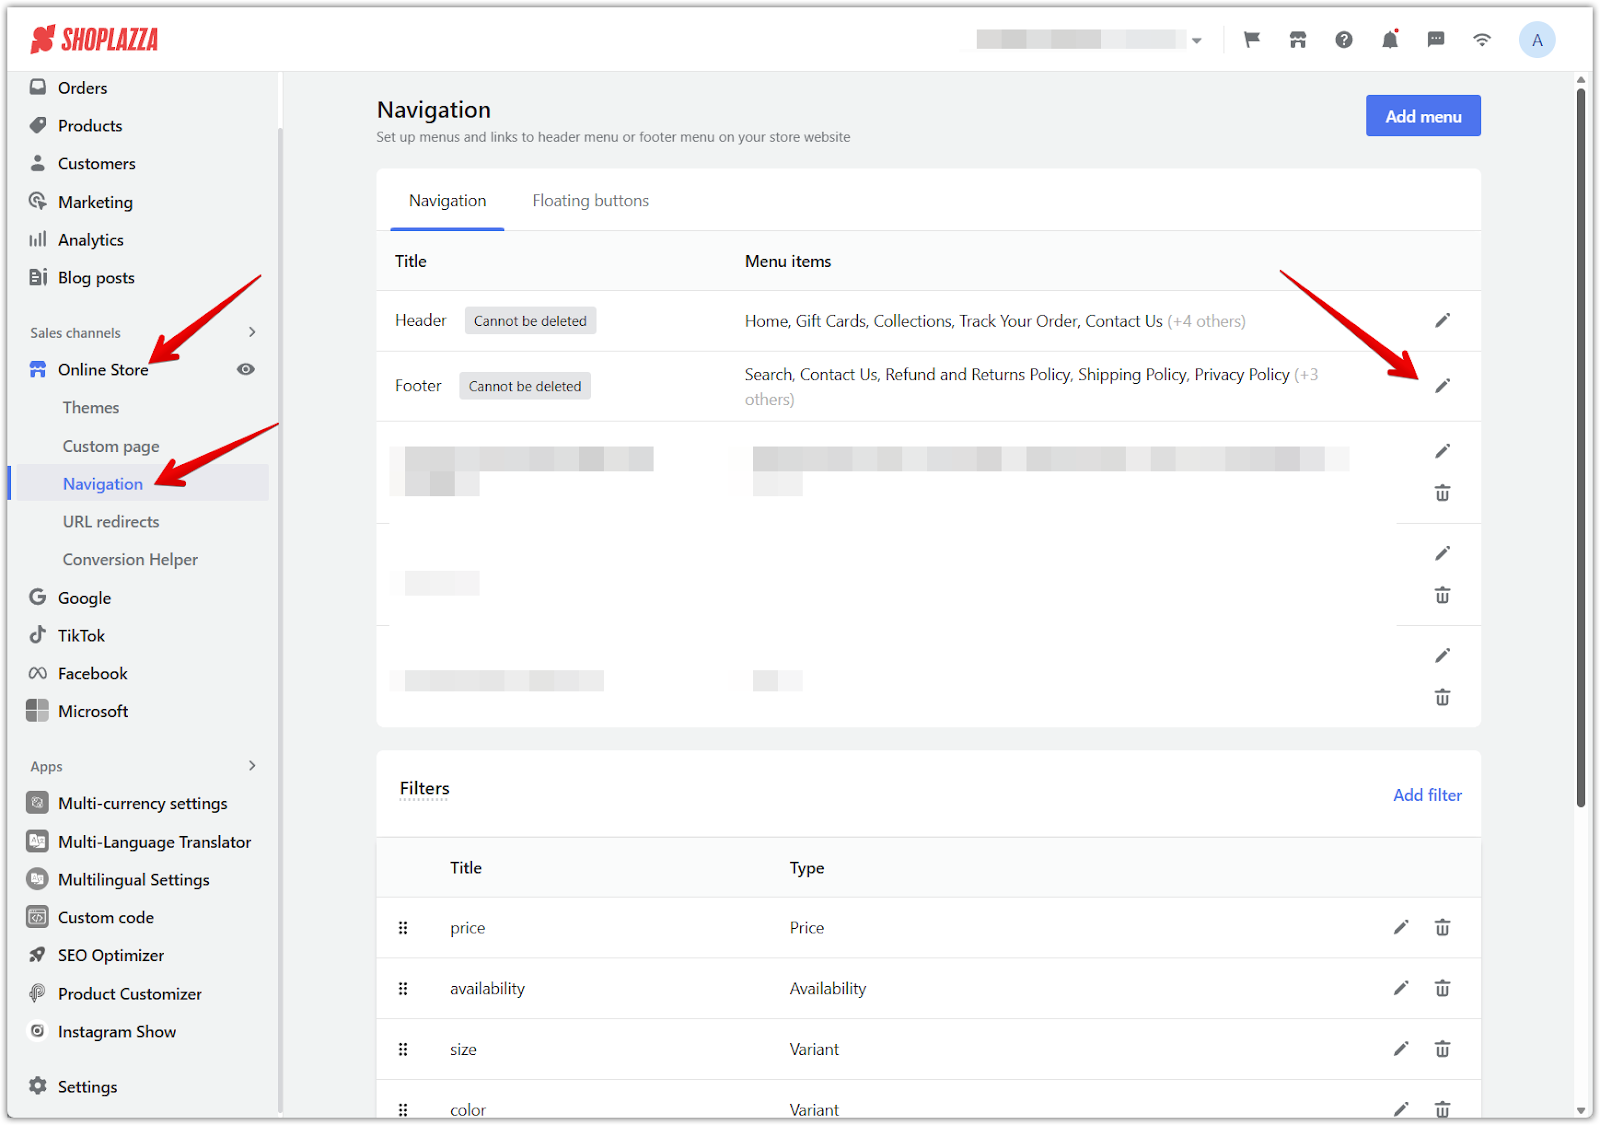
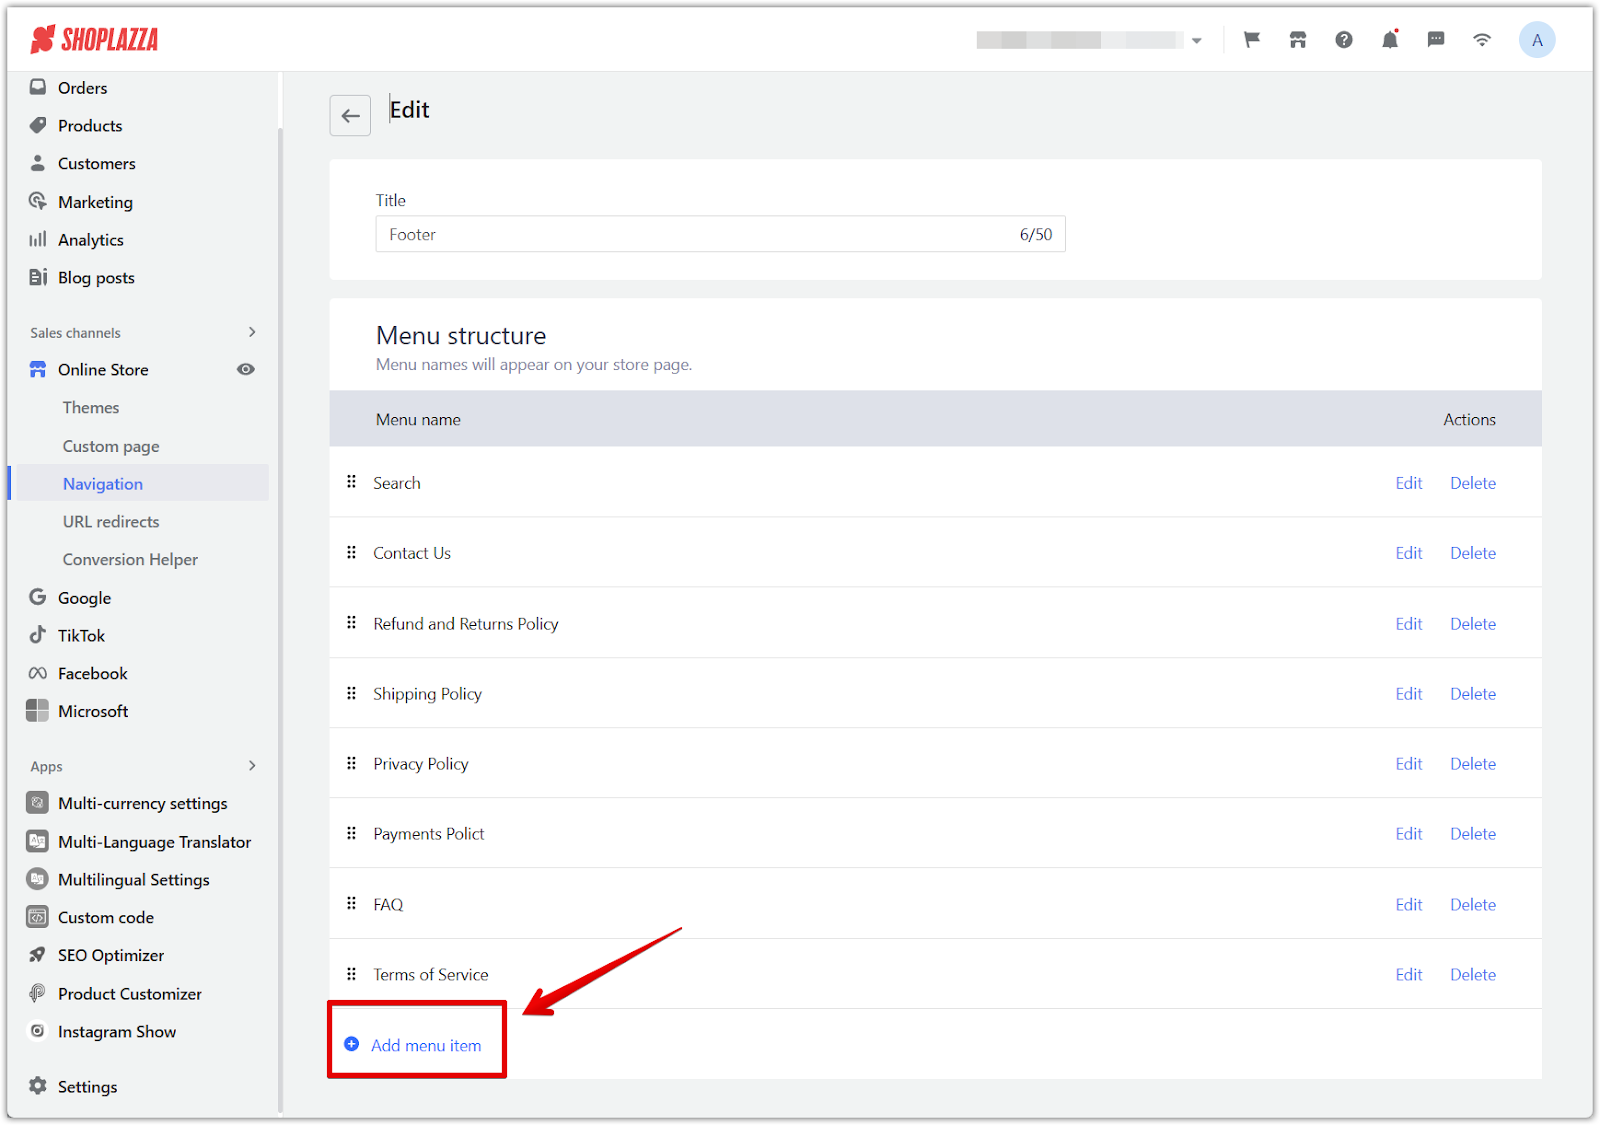
- Navigate to Online Store > Navigation and add these pages to your footer menu.
Add a billing method (if required)
If you haven’t added a billing method yet, you’ll need to do this before launching. Your store remains password-protected until a billing plan is in place.
To add billing:
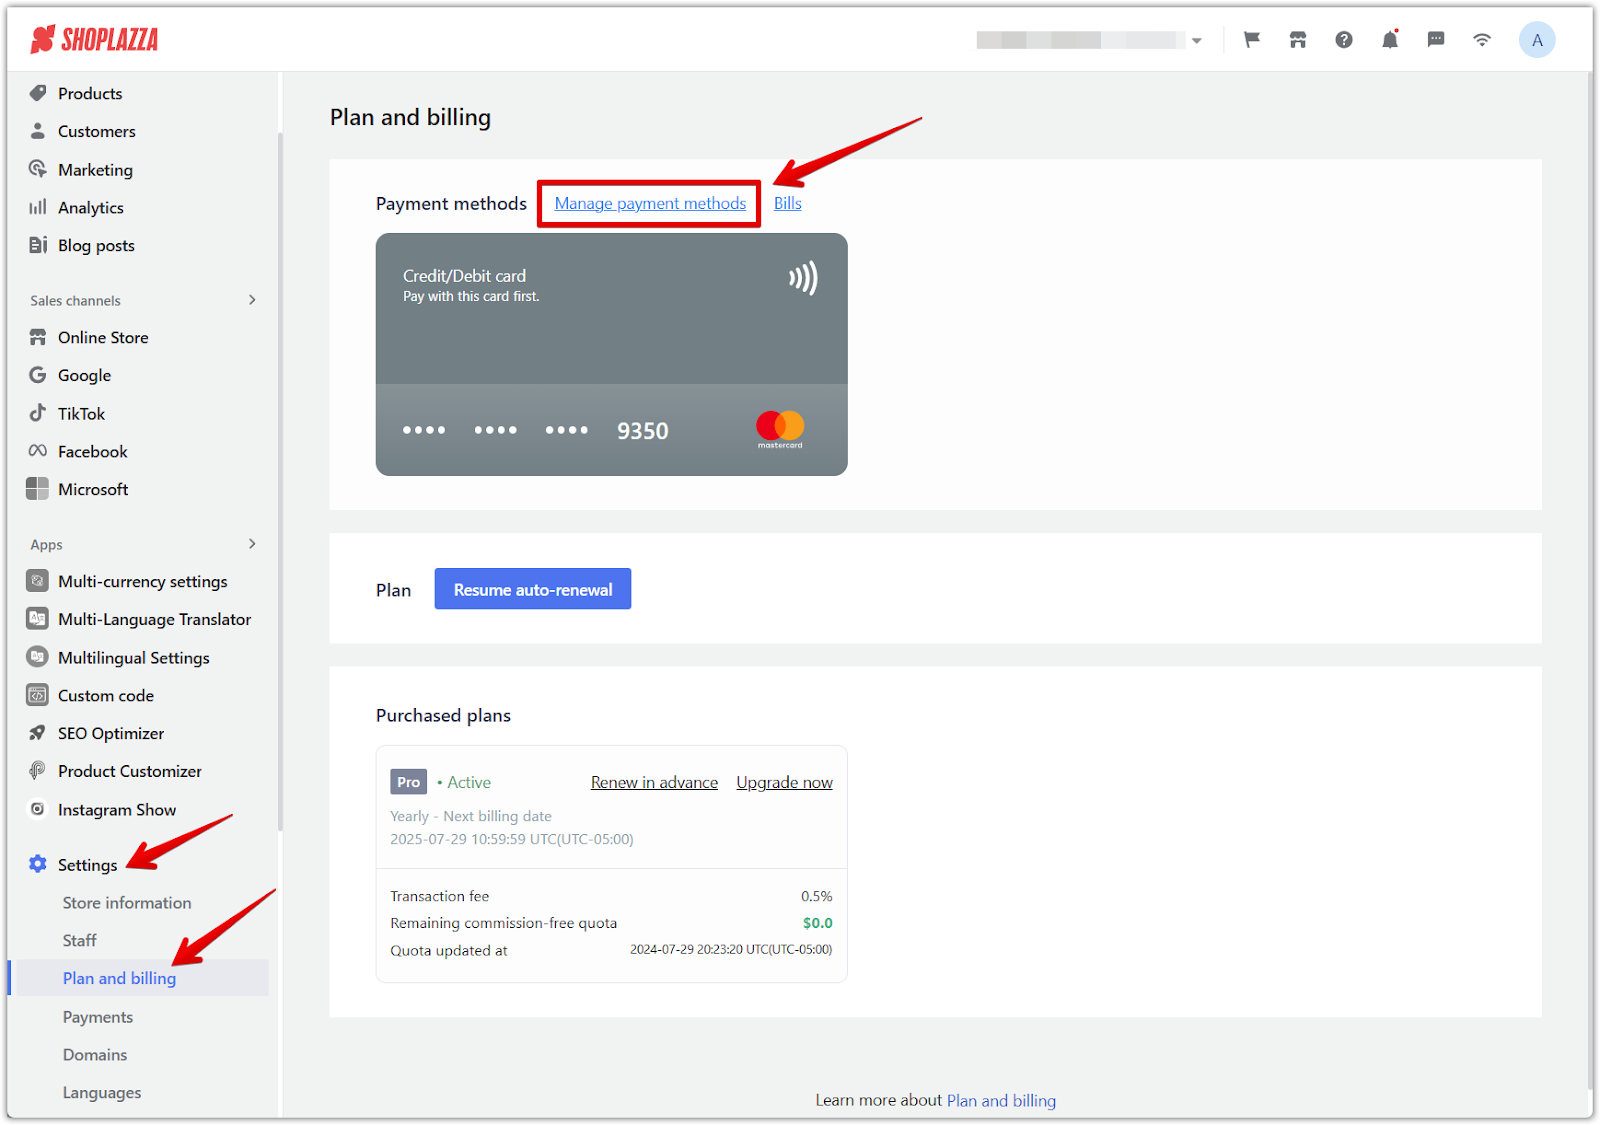
- Go to Settings > Plan & billing.
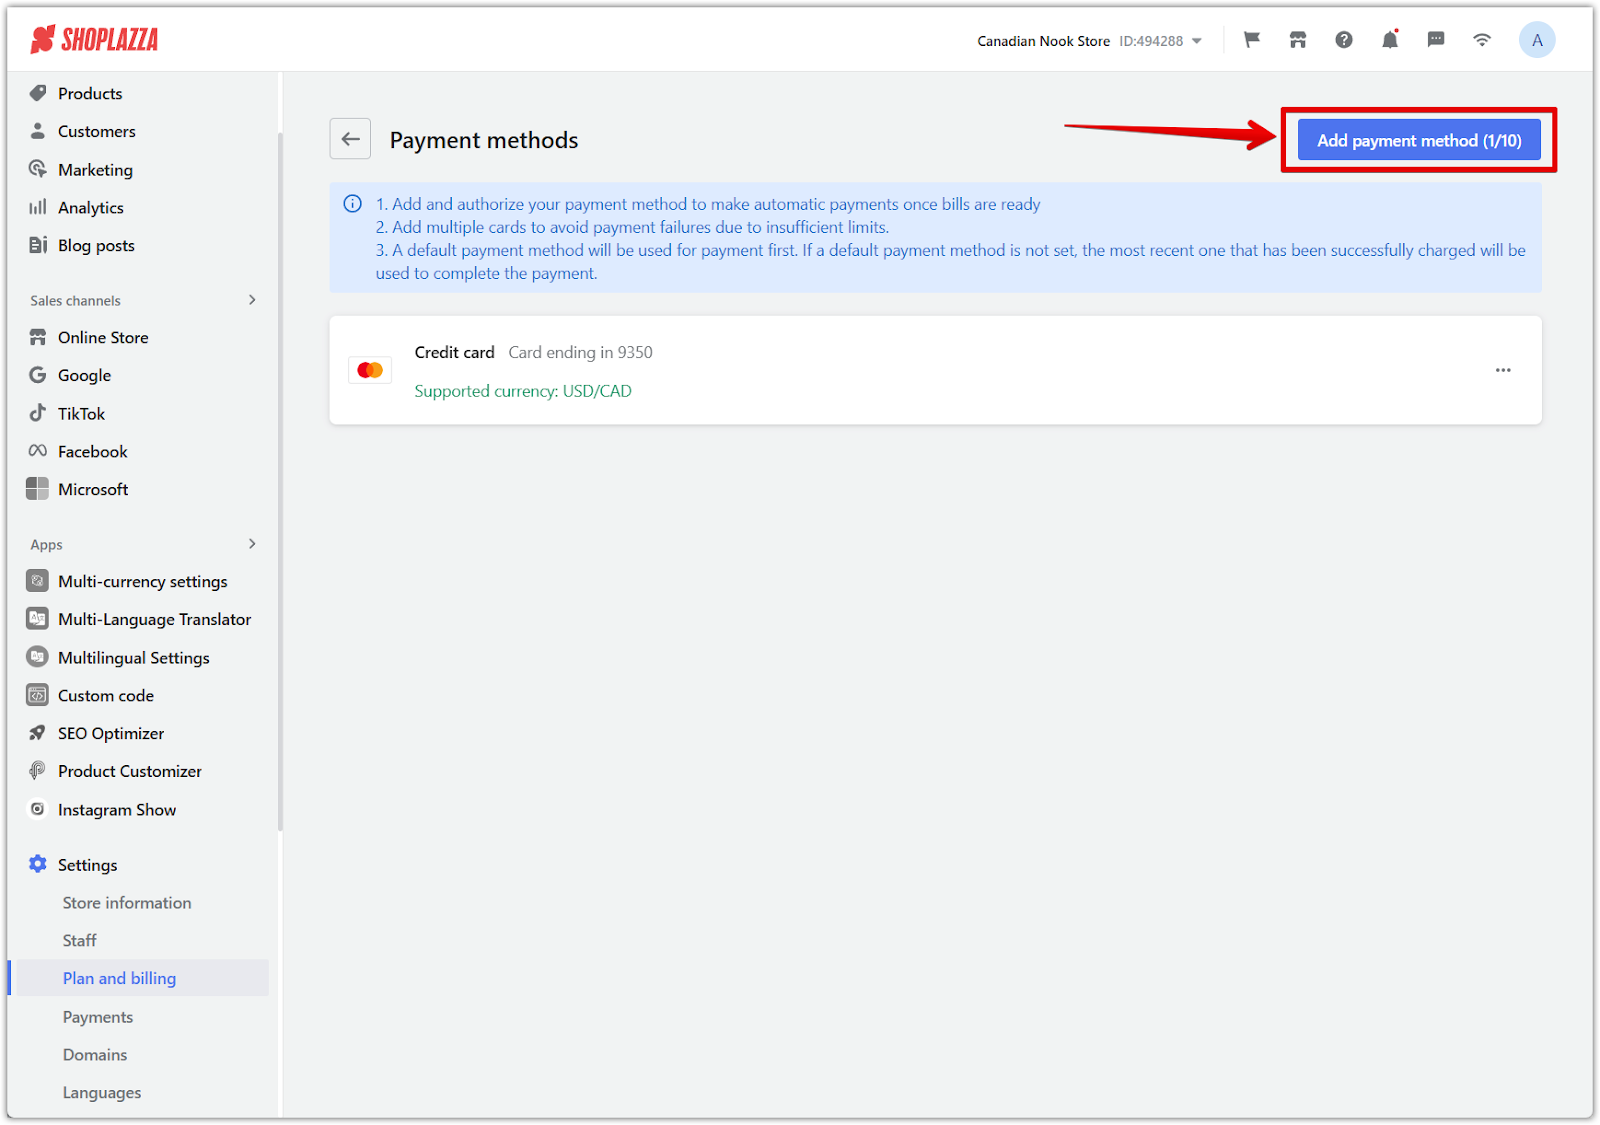
- Click Manage payment methods and select Add payment method.
- Enter your payment details and save your changes.
Remove password protection
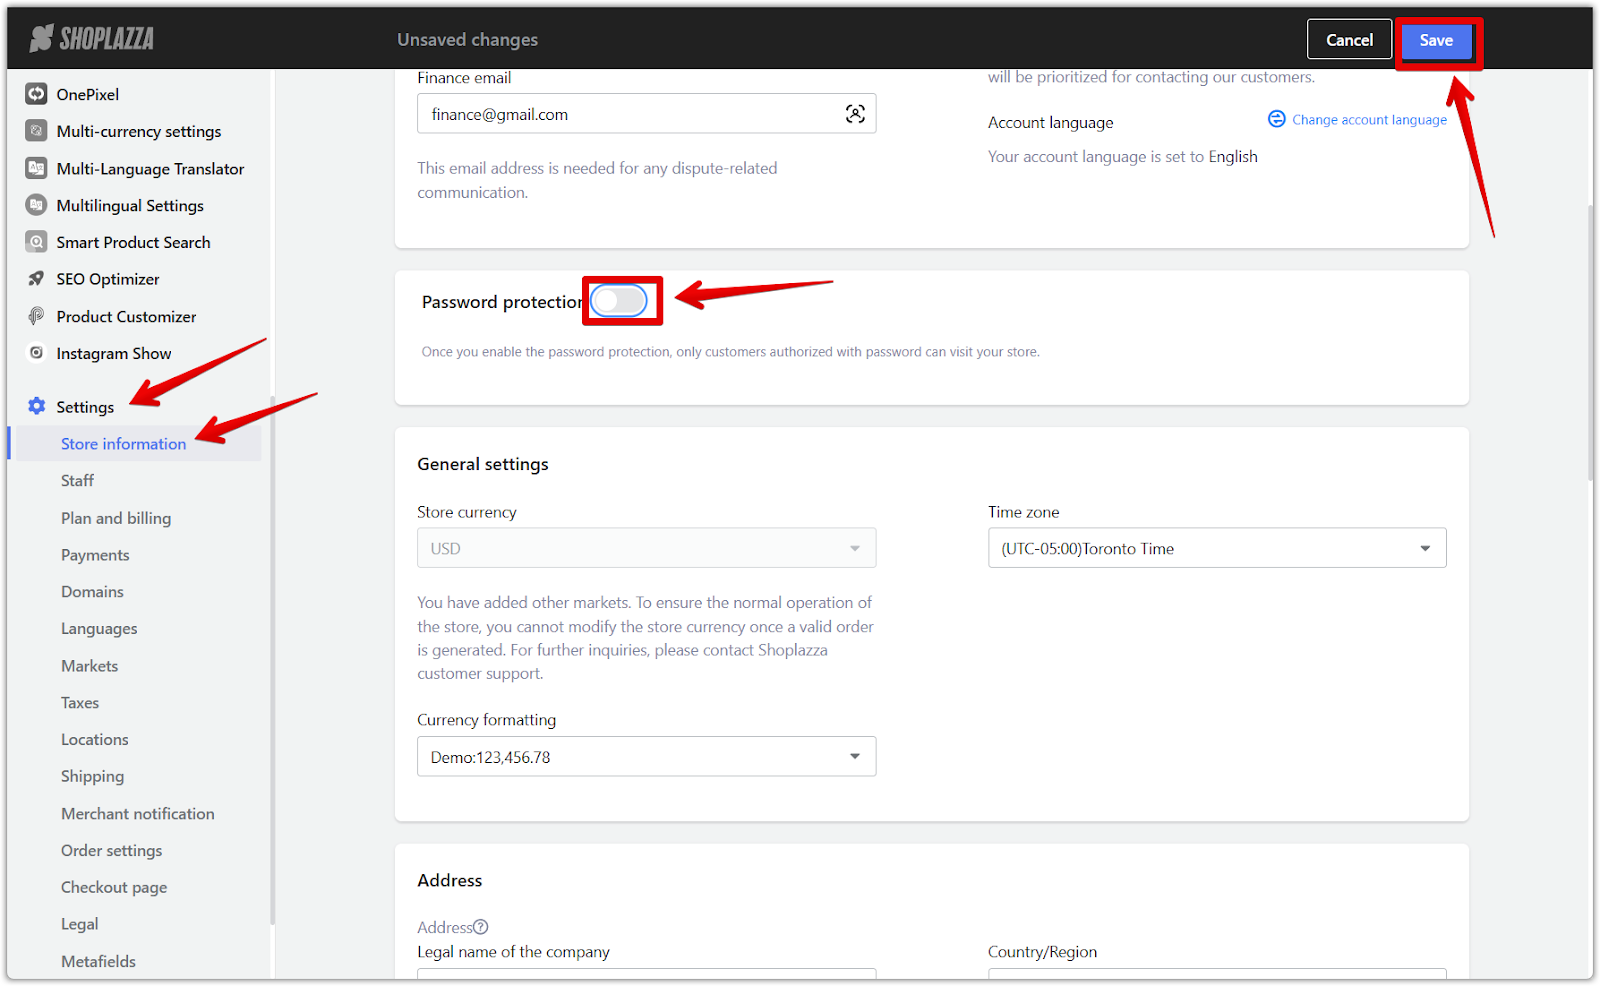
By default, your store is password-protected during setup. When you're ready to go live, disable this setting to allow customers to access your store.
To remove password protection:
- Go to Settings > Store information.
- Scroll to Password protection.
- Uncheck the option and click Save.
Once you've completed these steps, your store is officially ready to launch! You can begin promoting your products, accepting orders, and growing your brand.
For further guidance, visit our Help Center.


Comments
Please sign in to leave a comment.