Creating stunning product images has never been easier. With Pixmaker’s AI-powered tools, you can remove backgrounds, generate unique backdrops, and create lifelike model images in just a few clicks. Whether you need multiple variations of a single product or want to showcase items in different styles, Pixmaker provides the flexibility and efficiency required for eCommerce, marketing, and branding. Follow this guide to install Pixmaker and start transforming your product visuals today.
Installing Pixmaker and accessing the dashboard
Getting started with Pixmaker is straightforward. The app is designed to be intuitive and easy to use, allowing you to streamline product image enhancement with minimal effort. Follow these steps to install the app and access your dashboard, where you can begin transforming your product visuals instantly.
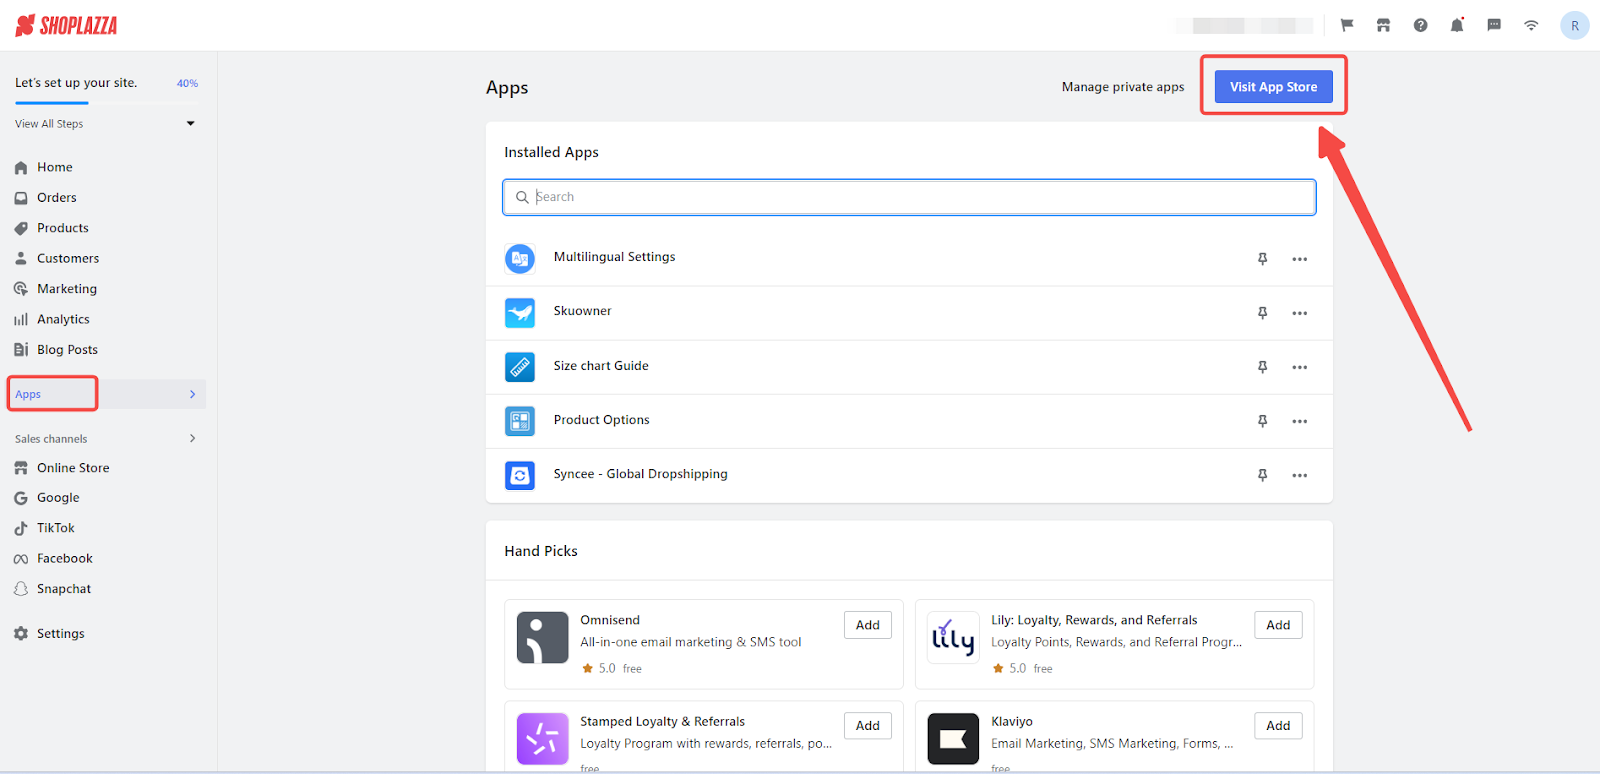
1. Navigate to the App Store: From your Shoplazza Admin > Apps, Visit App Store to find and install Pixmaker.
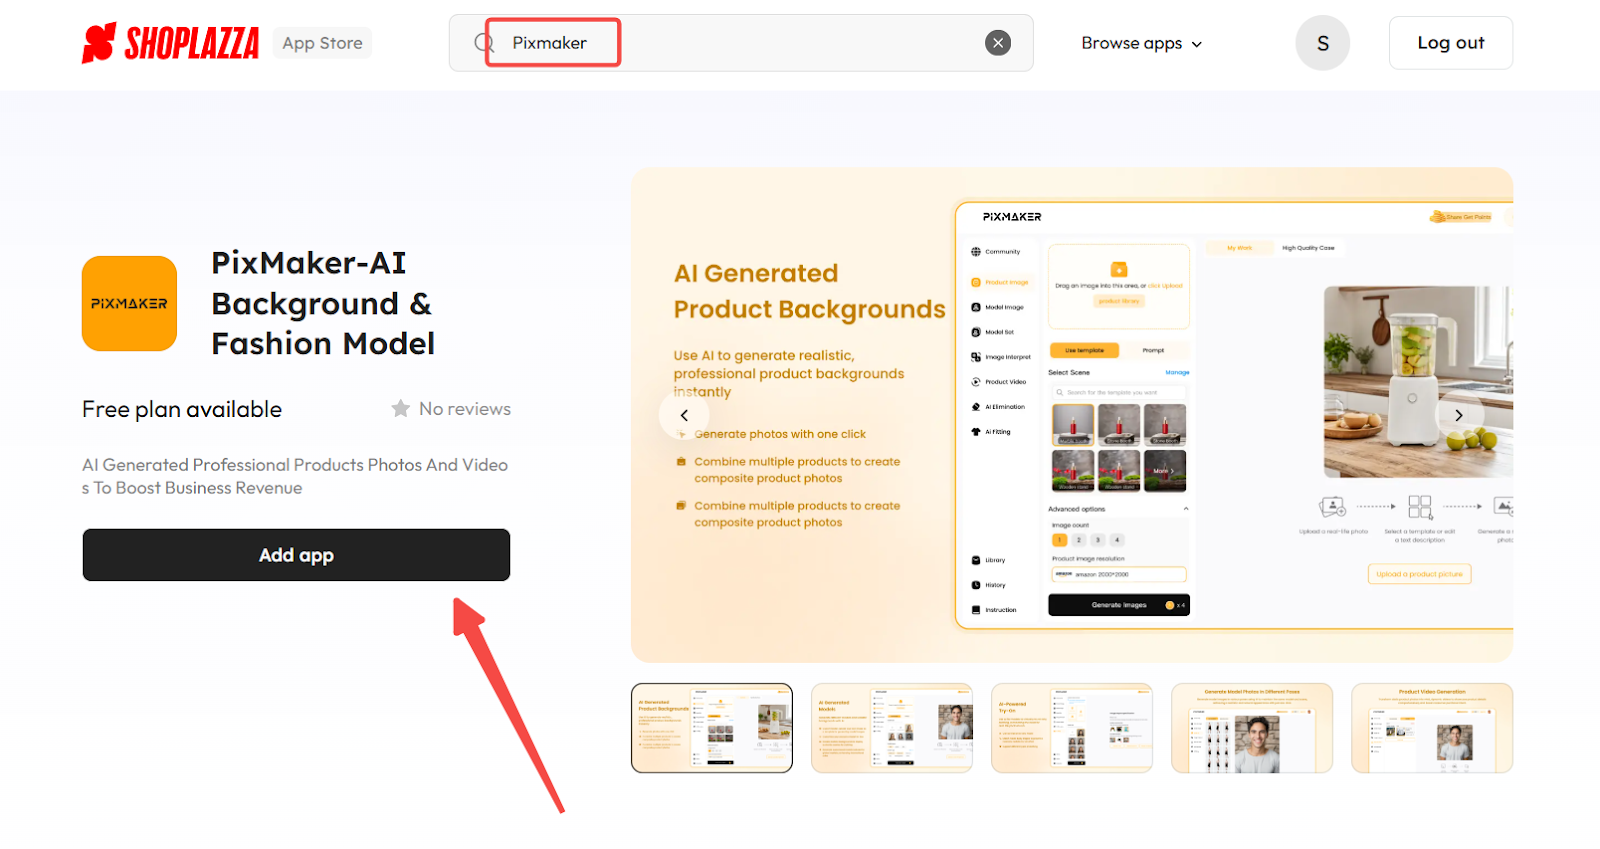
2. Find the app: Search for Pixmaker in the search box and click Add app to begin the installation.
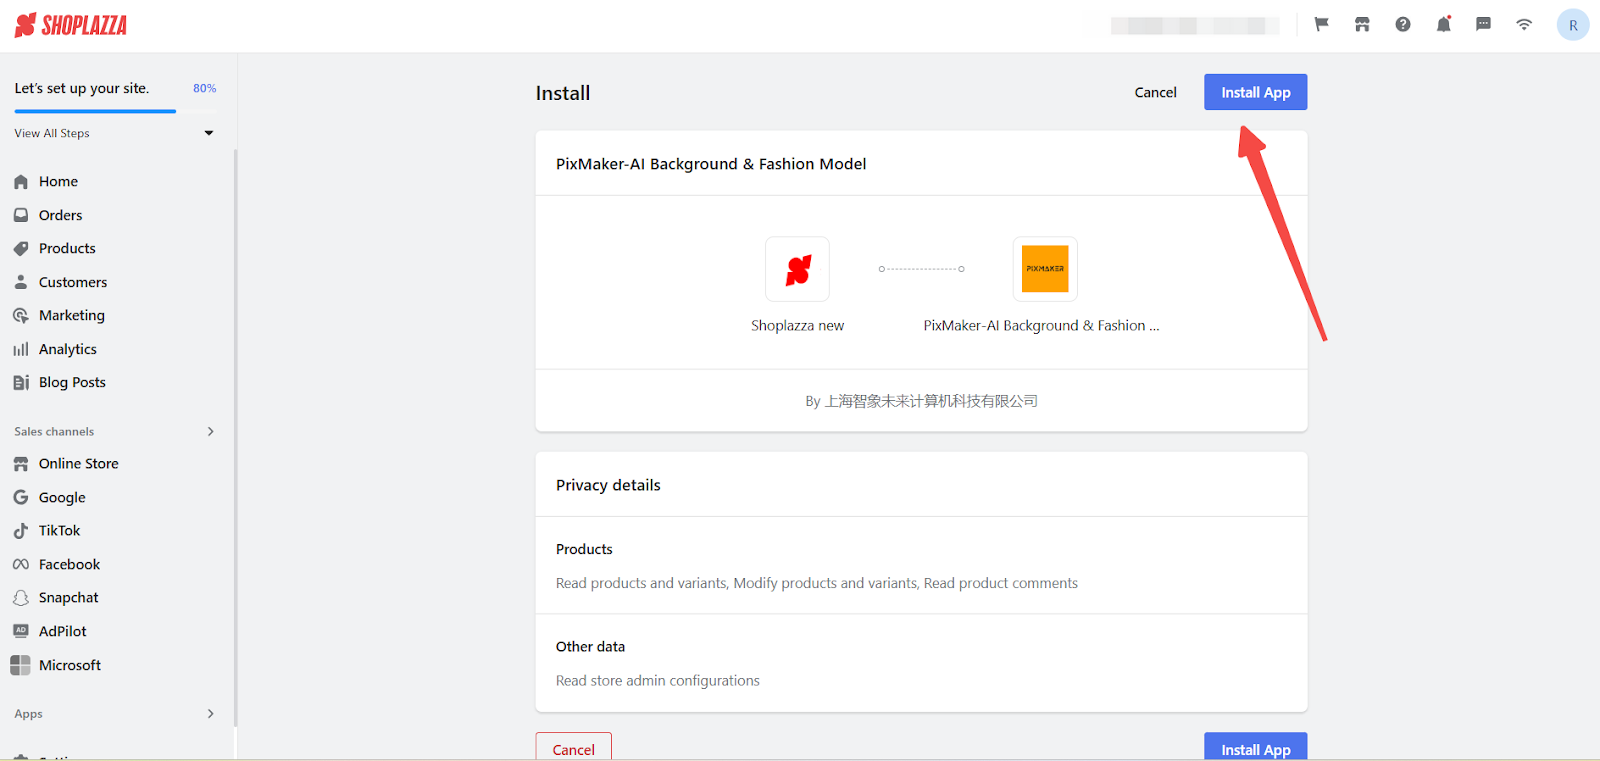
3. Install Pixmaker: Click Install app, and the setup will be completed automatically.
4. Complete the setup: After installation, Pixmaker redirects you to its official website. Click Try for Free to sign up.
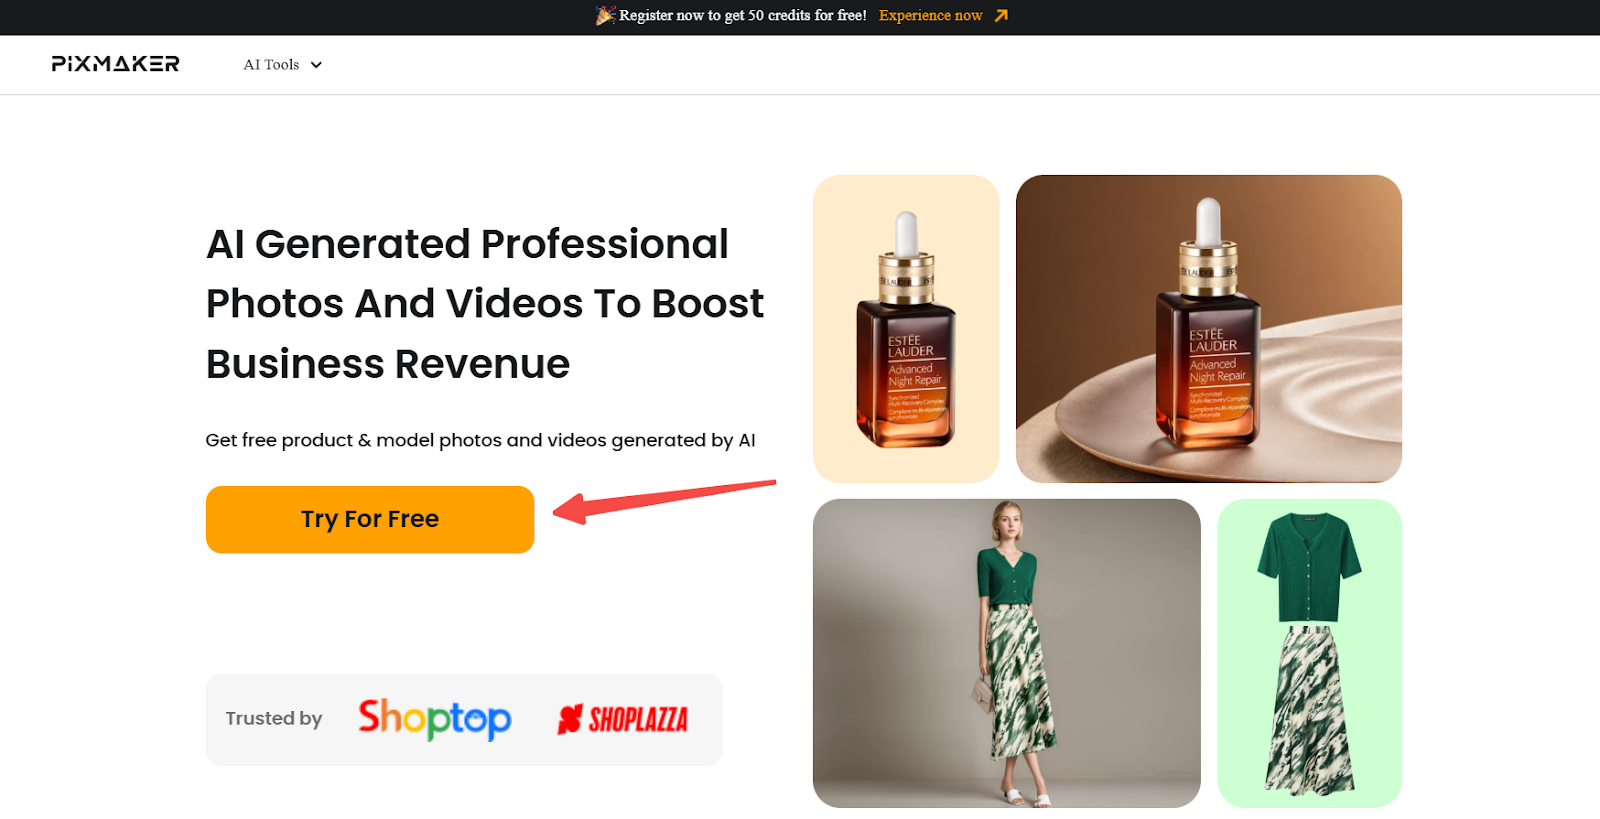
5. Free credits: New users receive complimentary credits to test AI image generation.
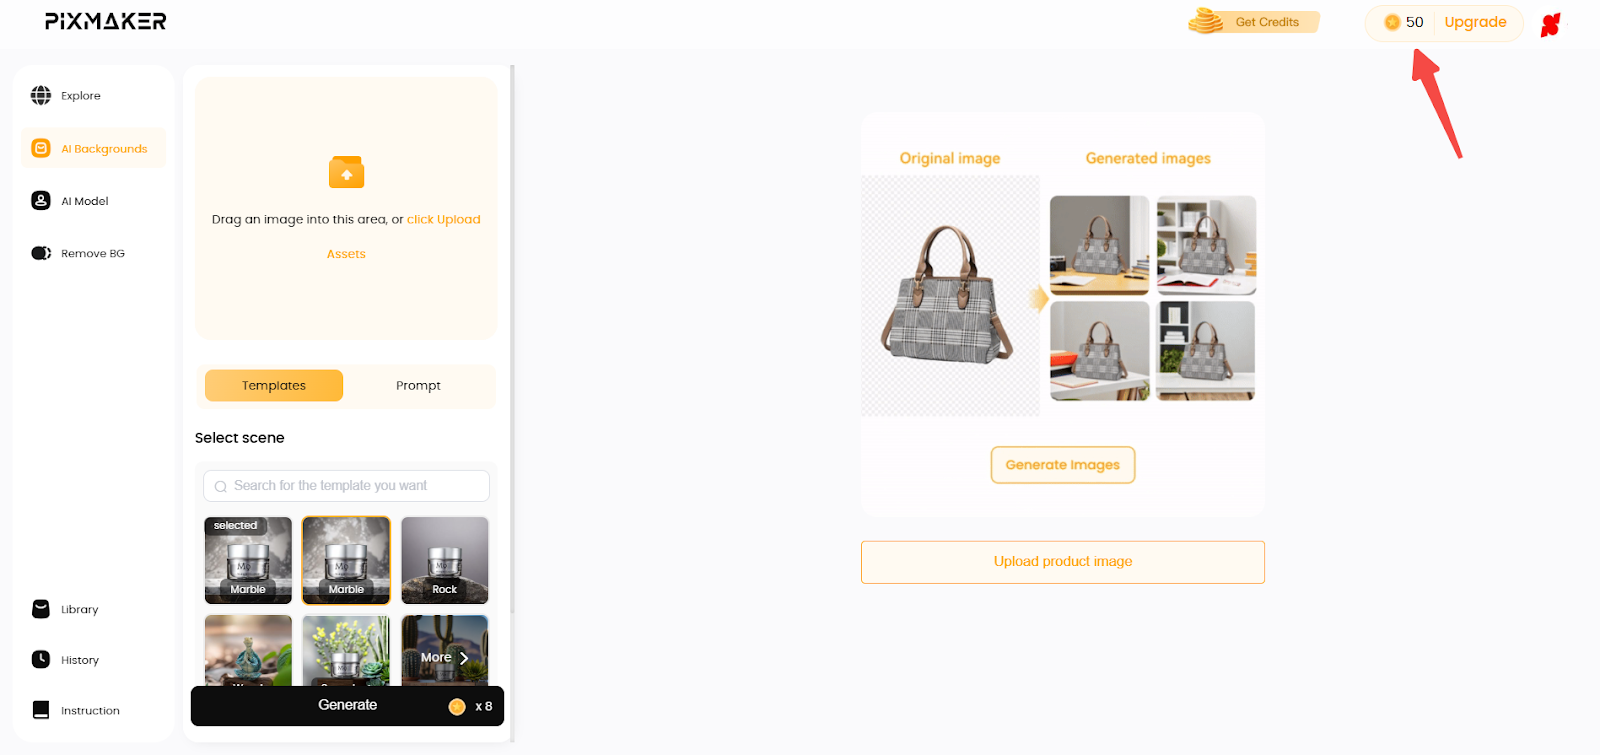
Use AI backgrounds to enhance product images
Instantly remove backgrounds and apply AI-generated scenes to create high-quality, professional product images. These are perfect for store listings, social media, and marketing materials.
Remove background & edit product images
High-quality product images require a clean and distraction-free background. Pixmaker allows you to remove backgrounds instantly and refine product images to enhance their appearance. Follow these steps to edit and optimize your product visuals.
1. Access the AI Backgrounds editor. Click AI Backgrounds from the left menu to open the image editing workspace.
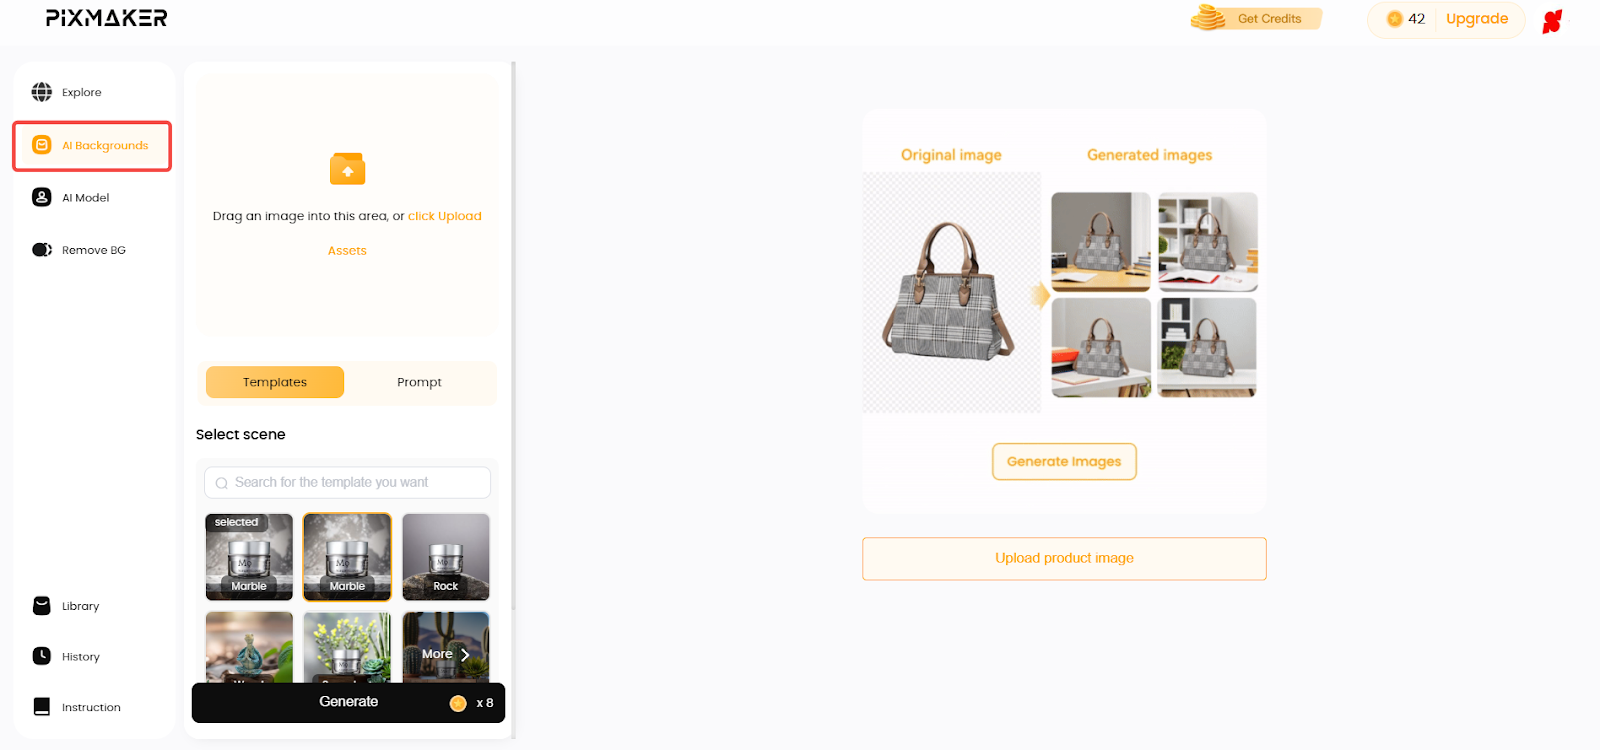
2. Upload a product image. Drag and drop or manually upload a product image. Pixmaker automatically removes the background for a clean cutout.
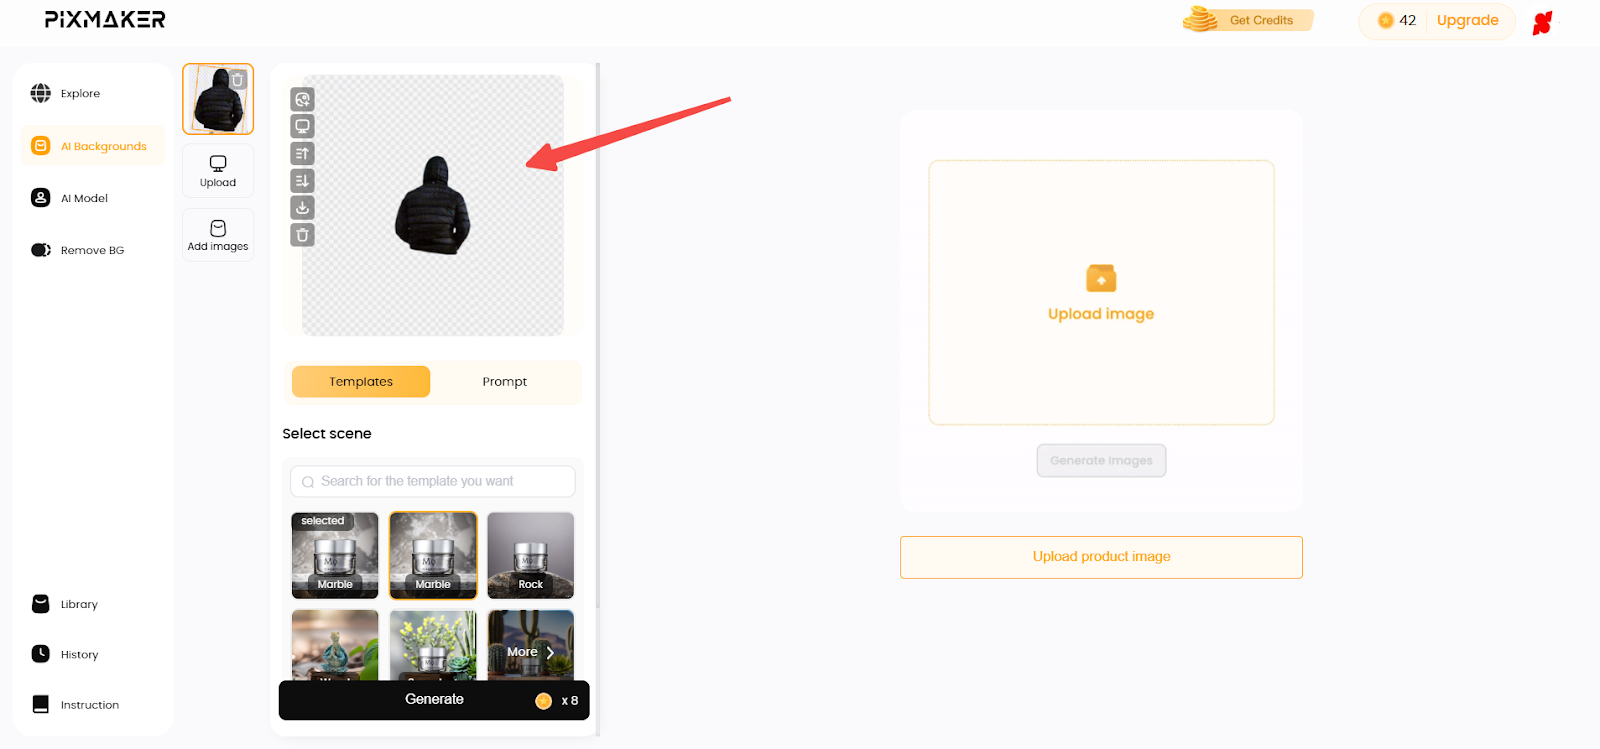
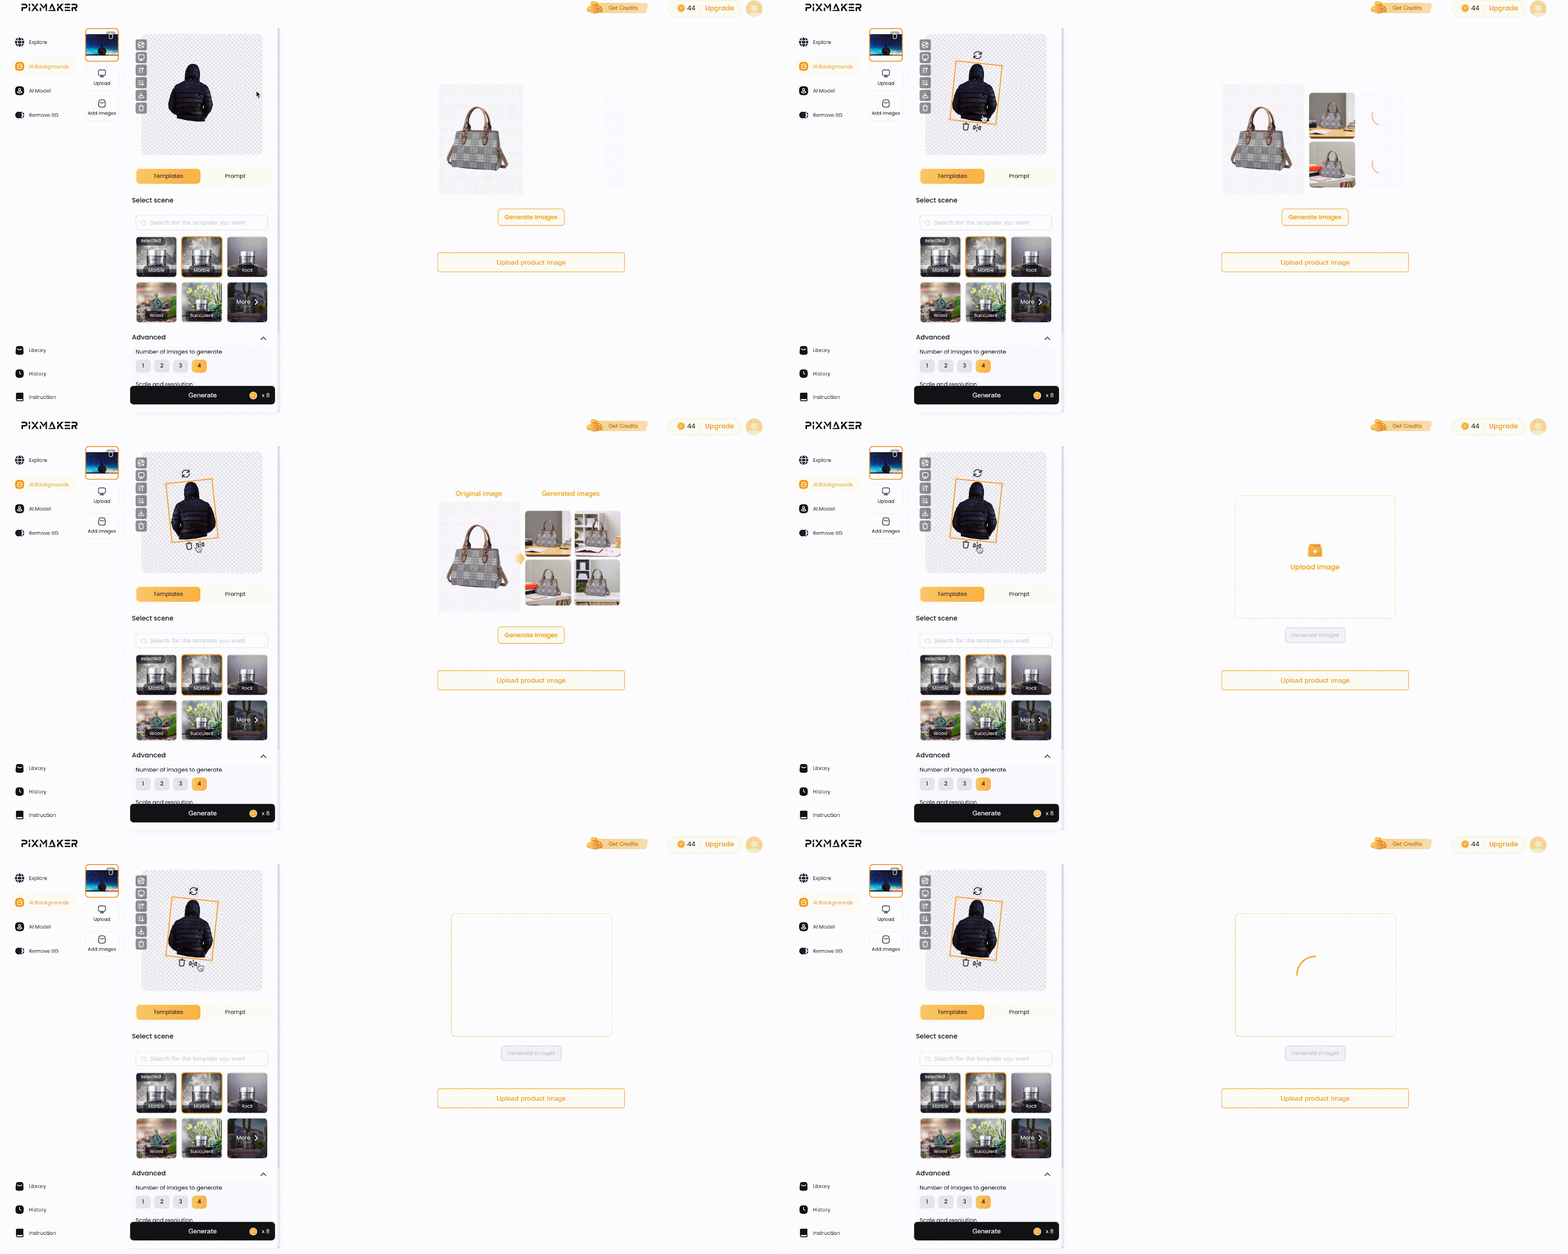
3. Adjust image positioning and size:
- Rotate: Drag the rotation button to tilt the image.
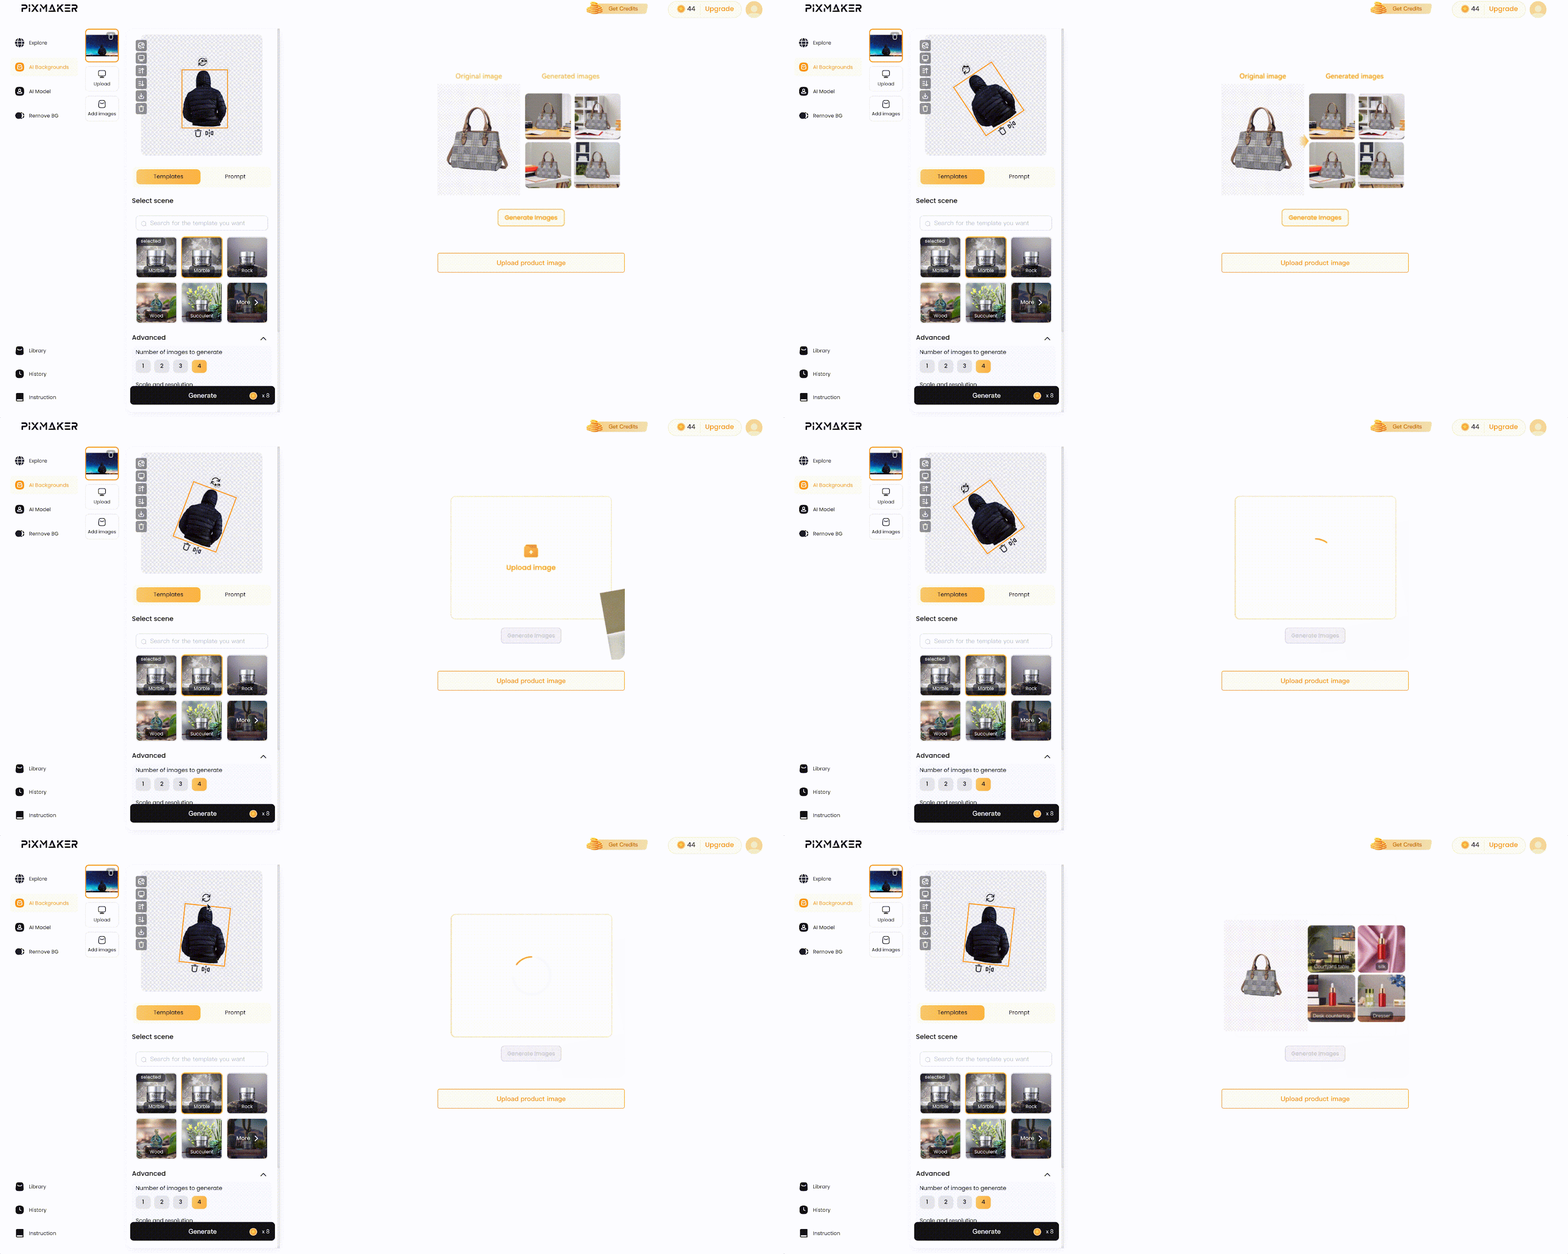
- Move: Click and drag to reposition the product.
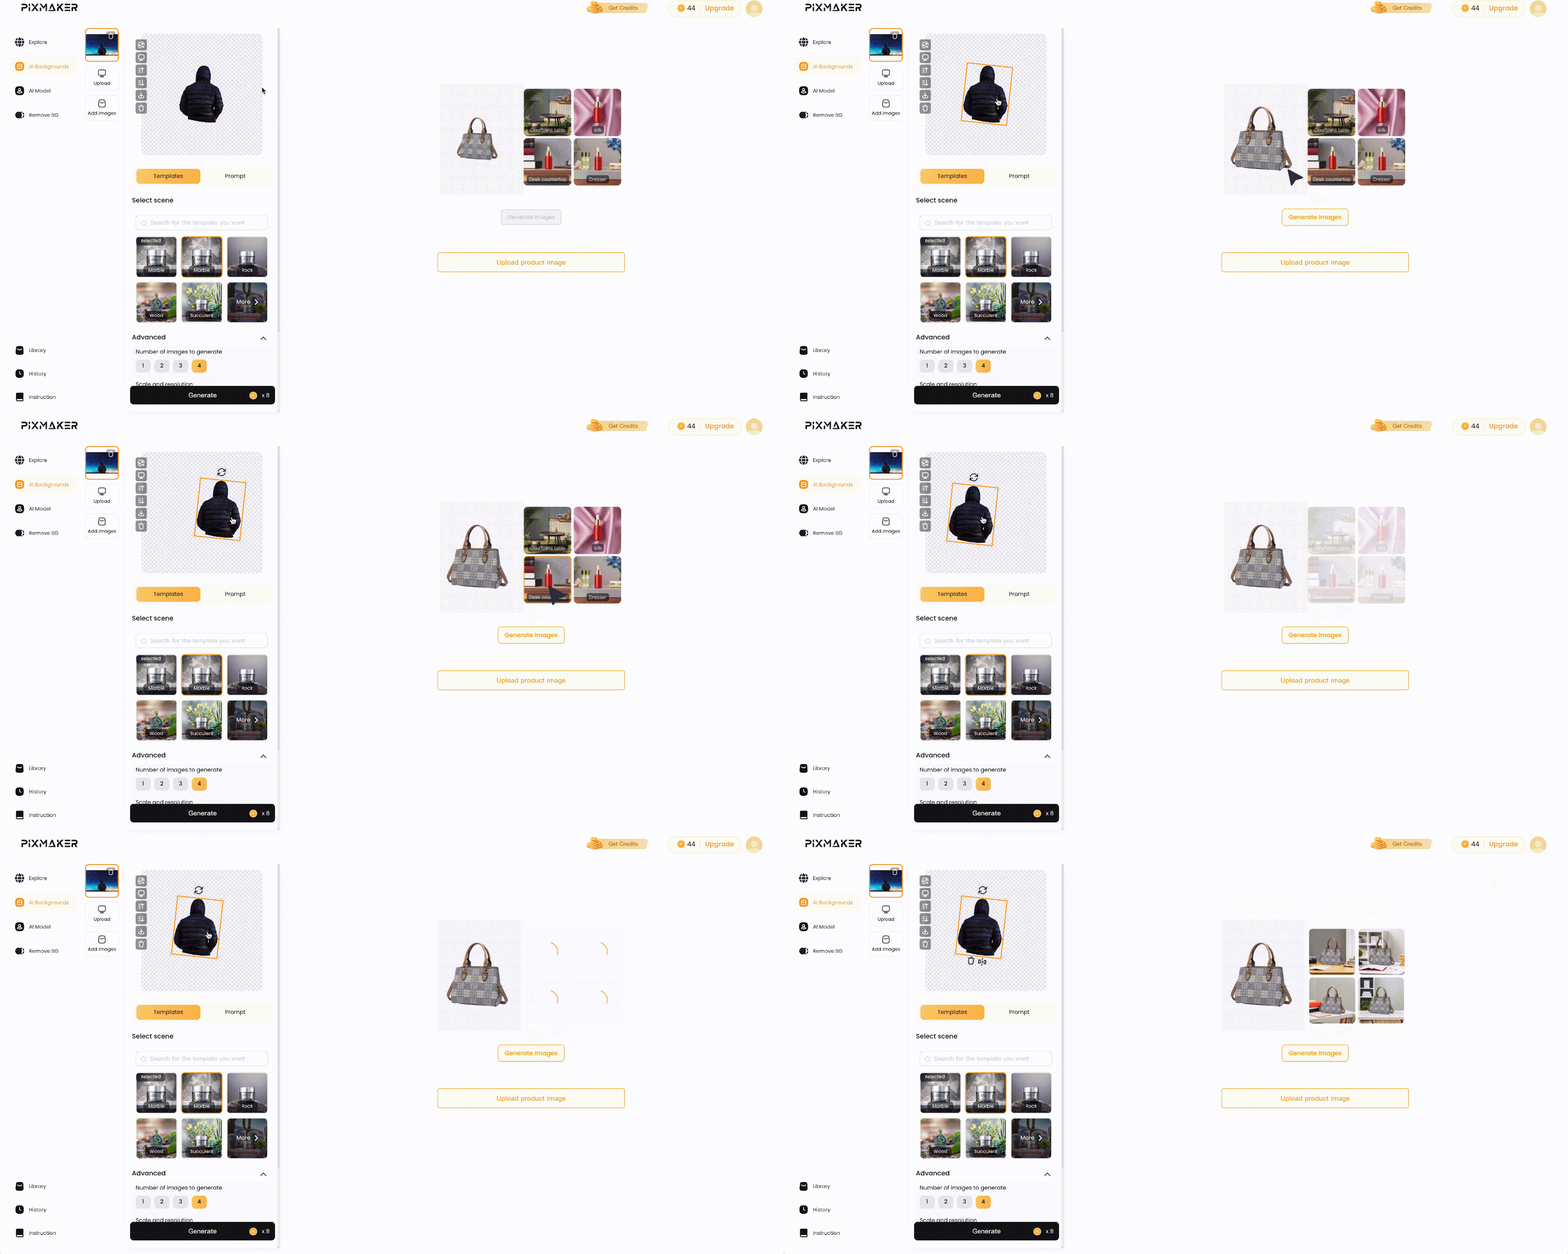
- Resize: Adjust the corners to make the image larger or smaller.
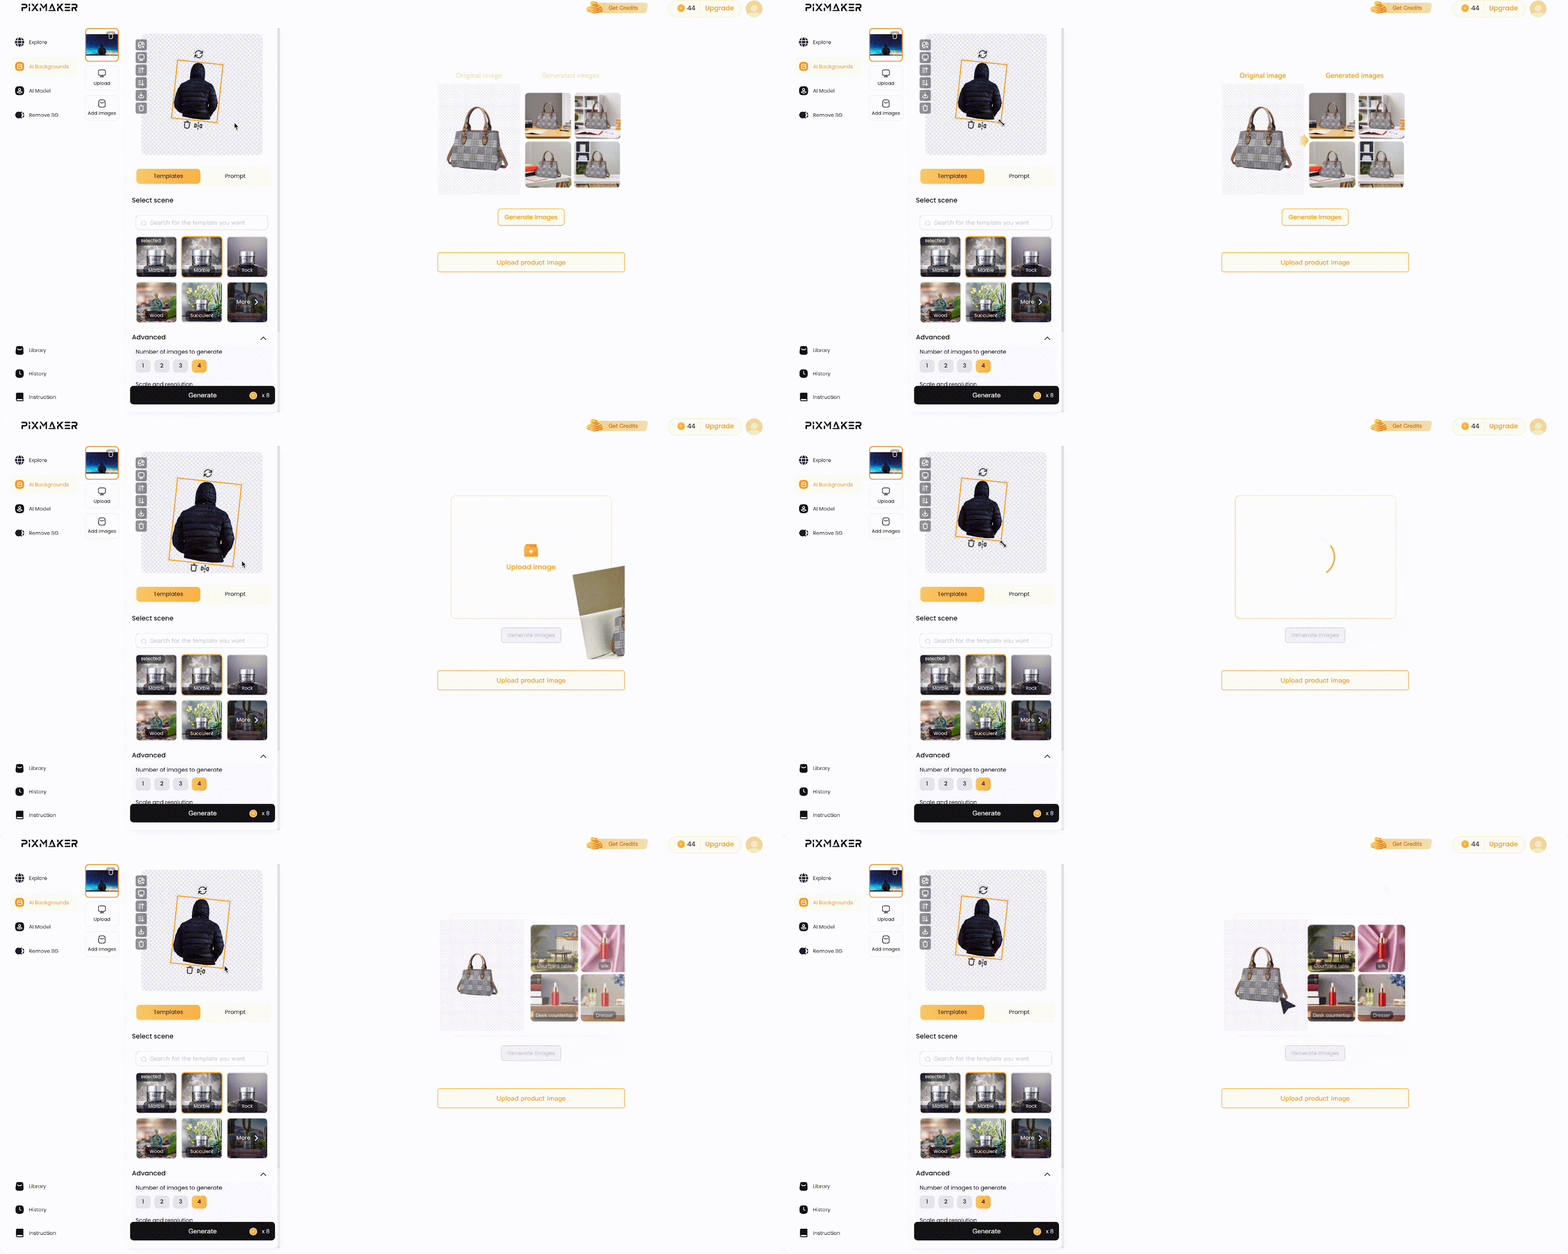
- Flip: Use the mirror button to change the orientation.
- Add multiple products: Place multiple items in one image for better composition.
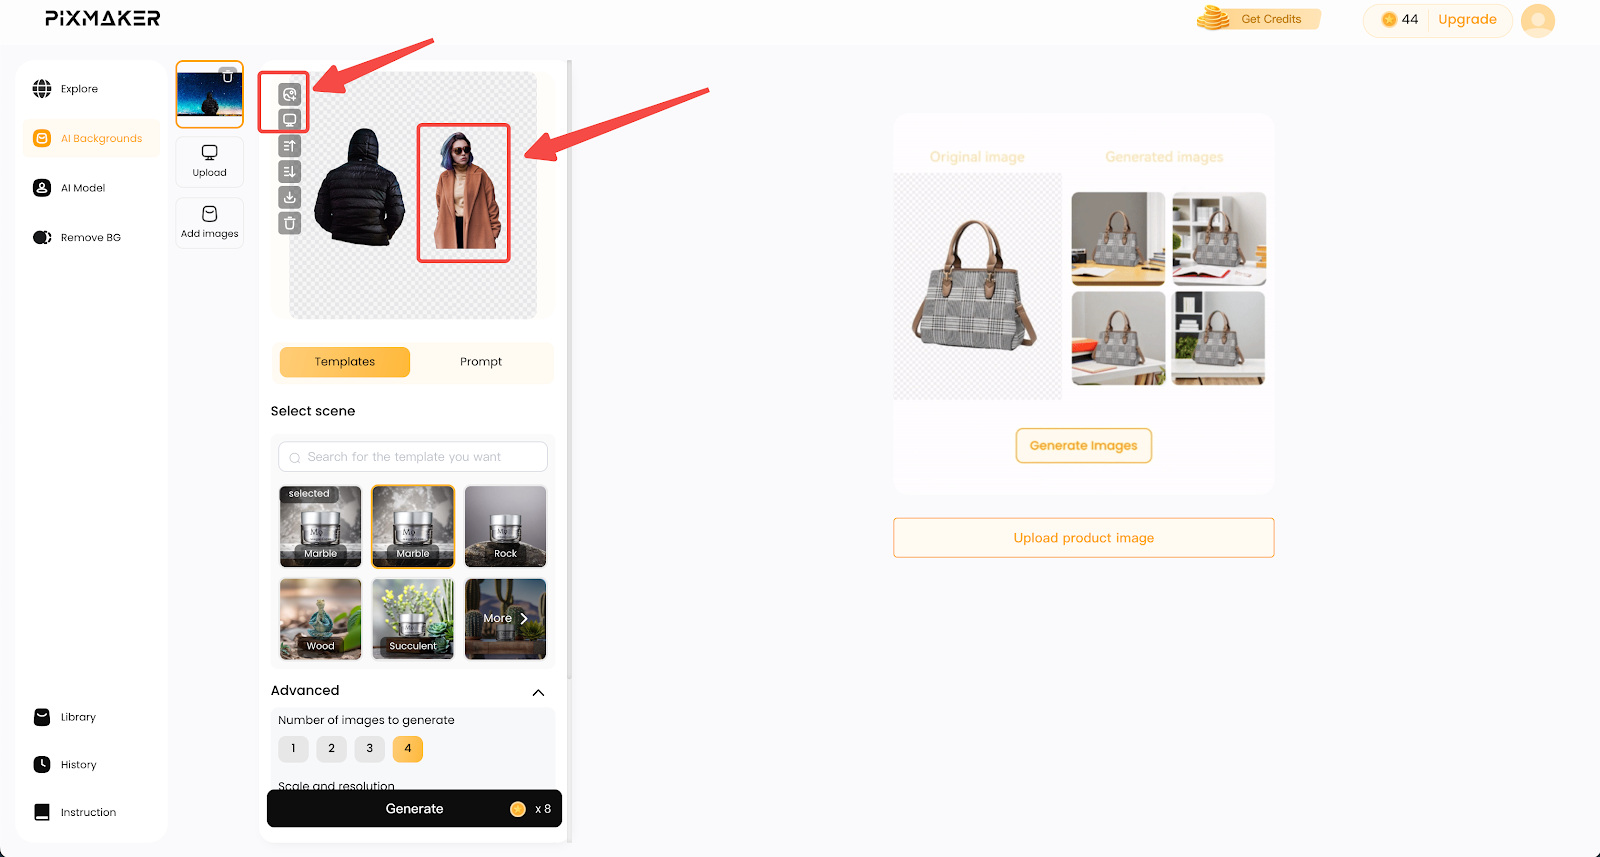
- Rearrange layers: Organize elements for a well-balanced visual.
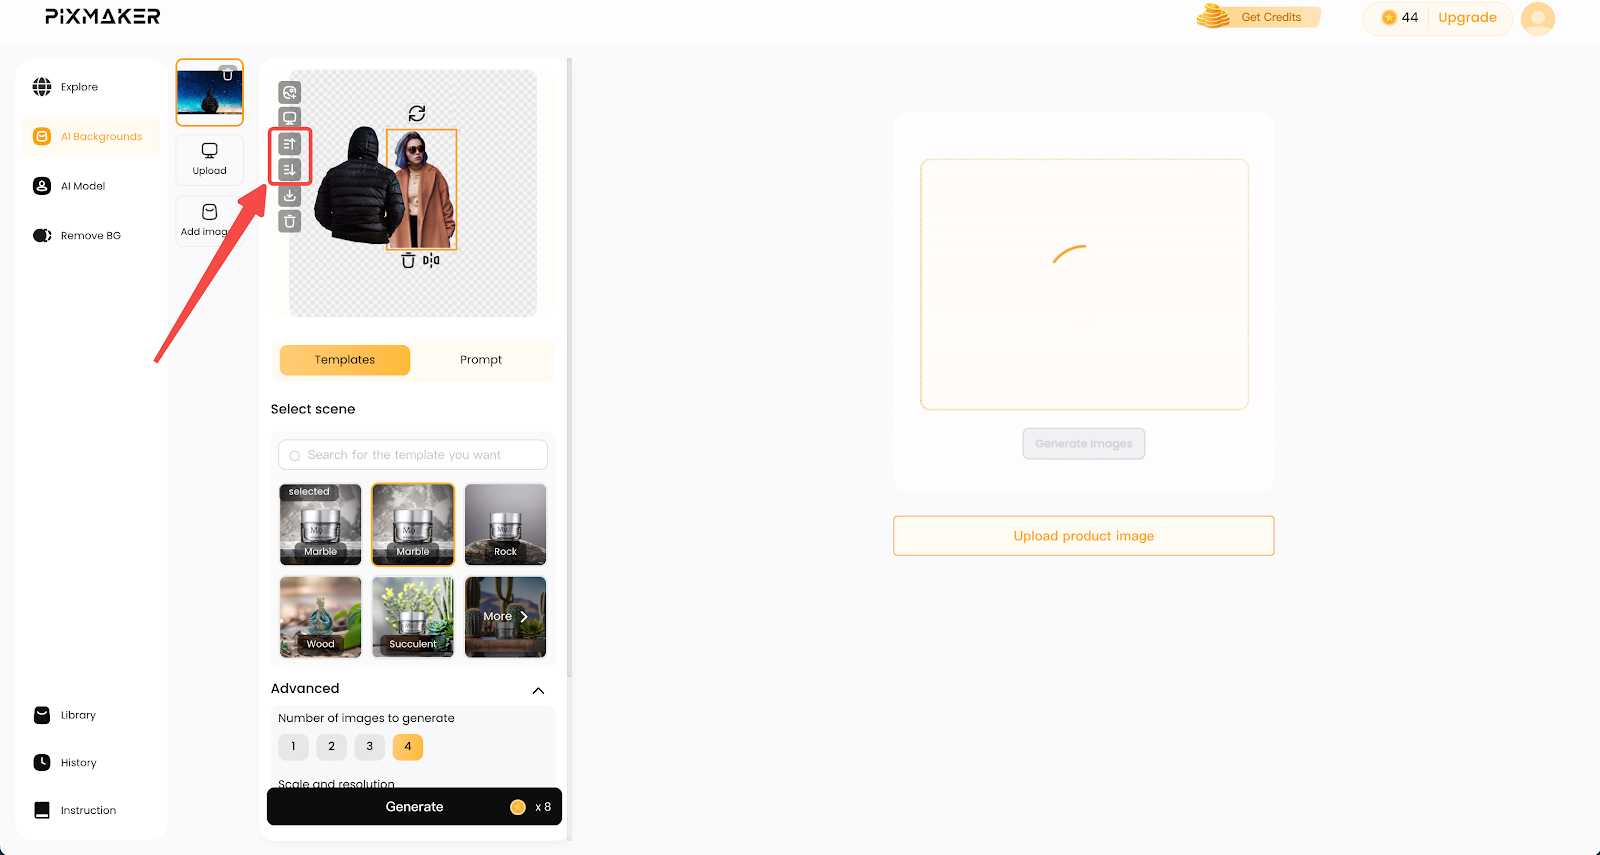
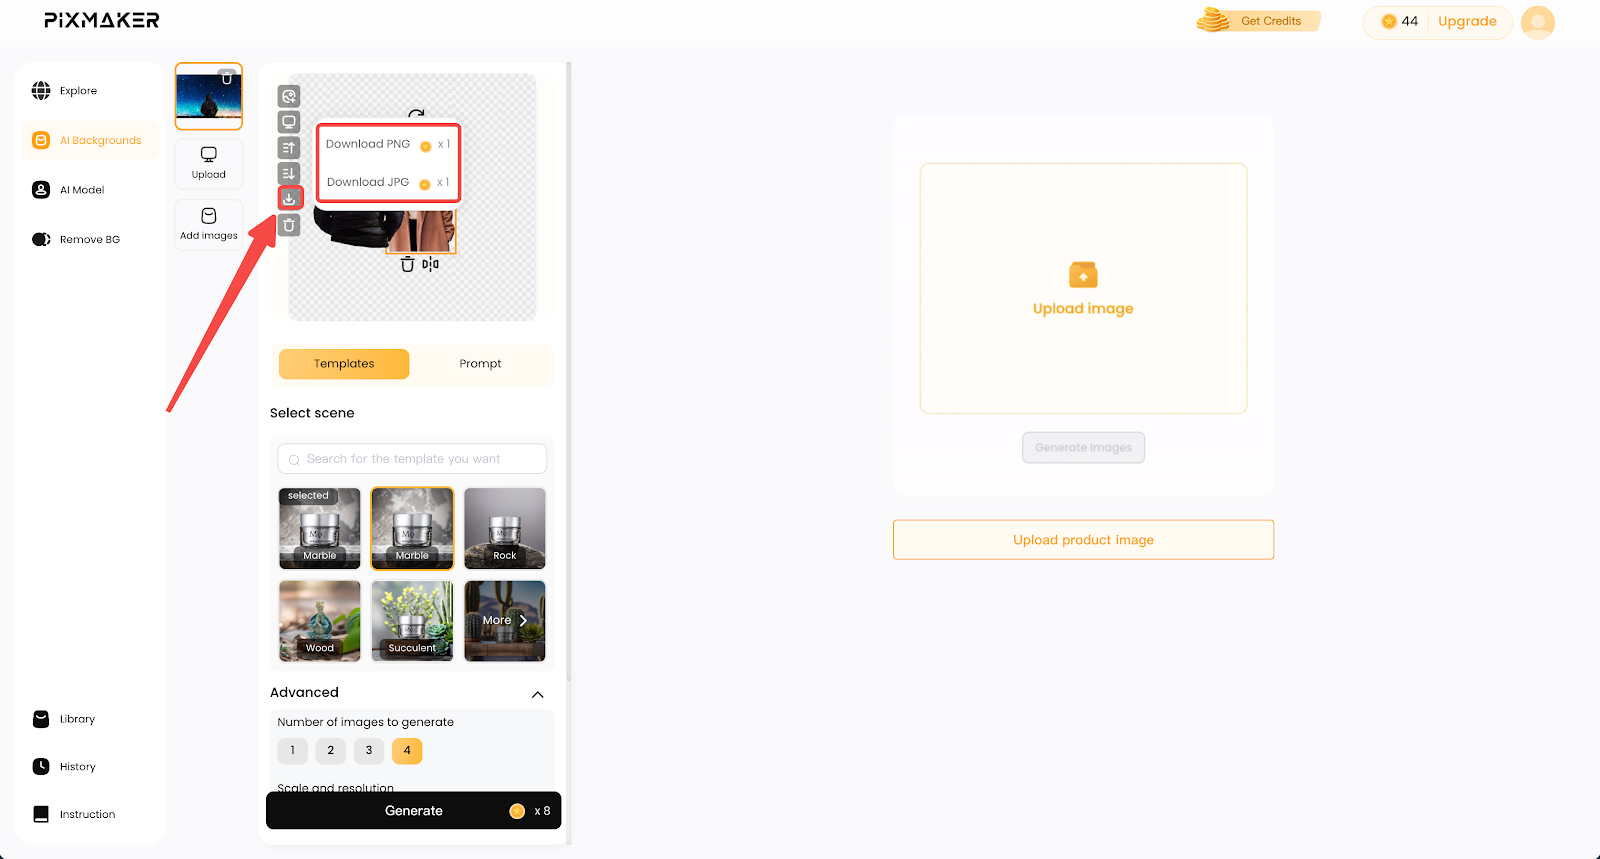
4. Download the final image: Click Download to save your AI-processed image.
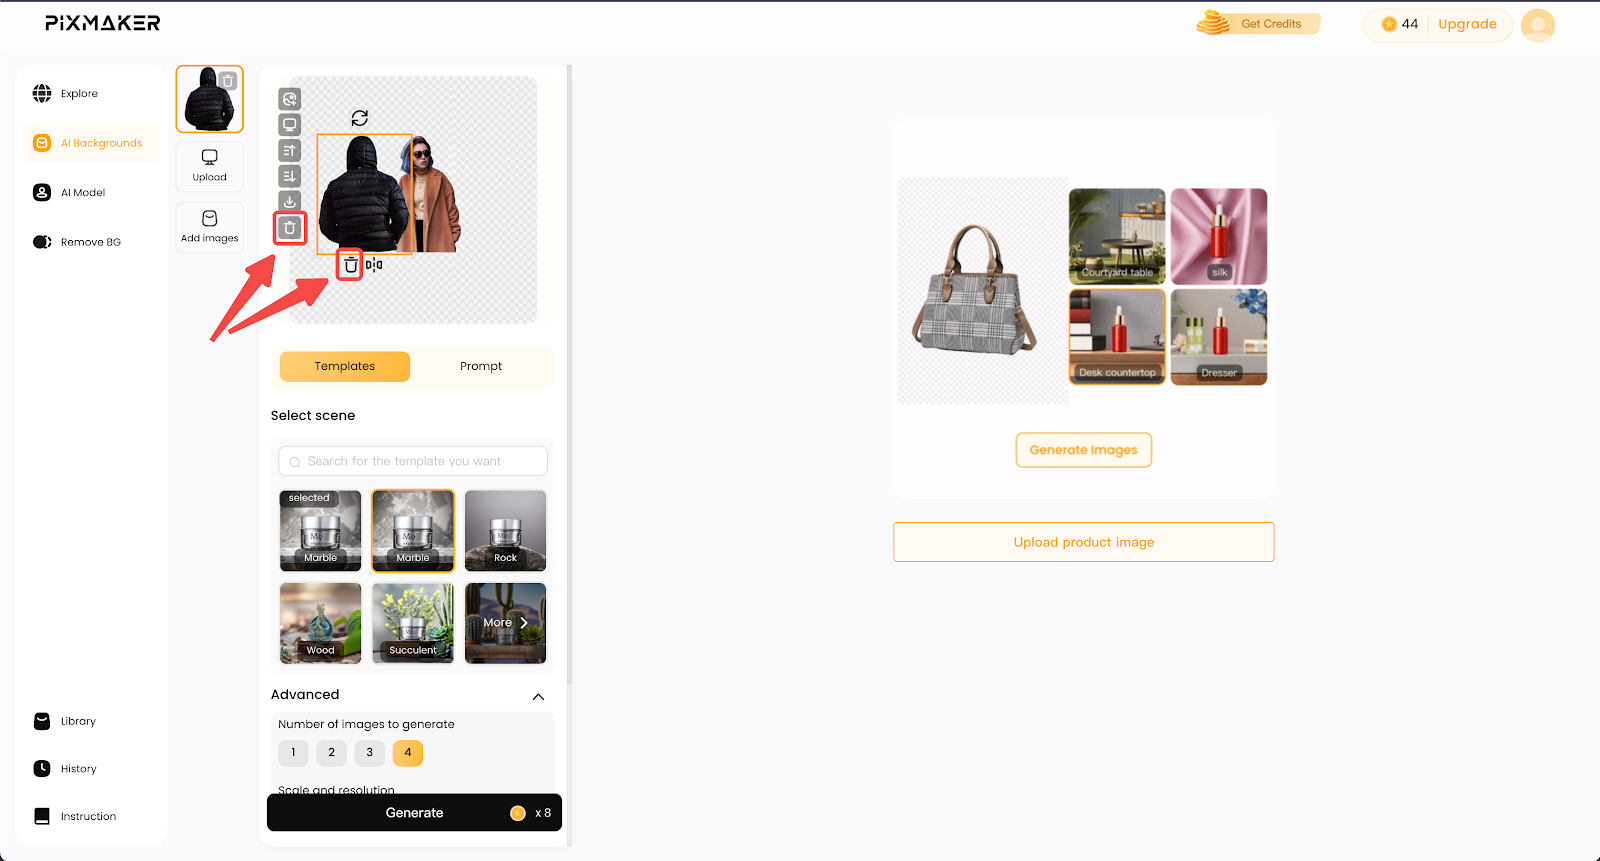
5. Delete unwanted elements: Remove specific images or reset the design to start fresh.
Apply a new background to the product image
Enhance your product visuals by applying new AI-generated or custom backgrounds. Choose from pre-designed templates or upload a unique background to match your brand aesthetics.
1. Option 1: Use AI templates for quick backgrounds
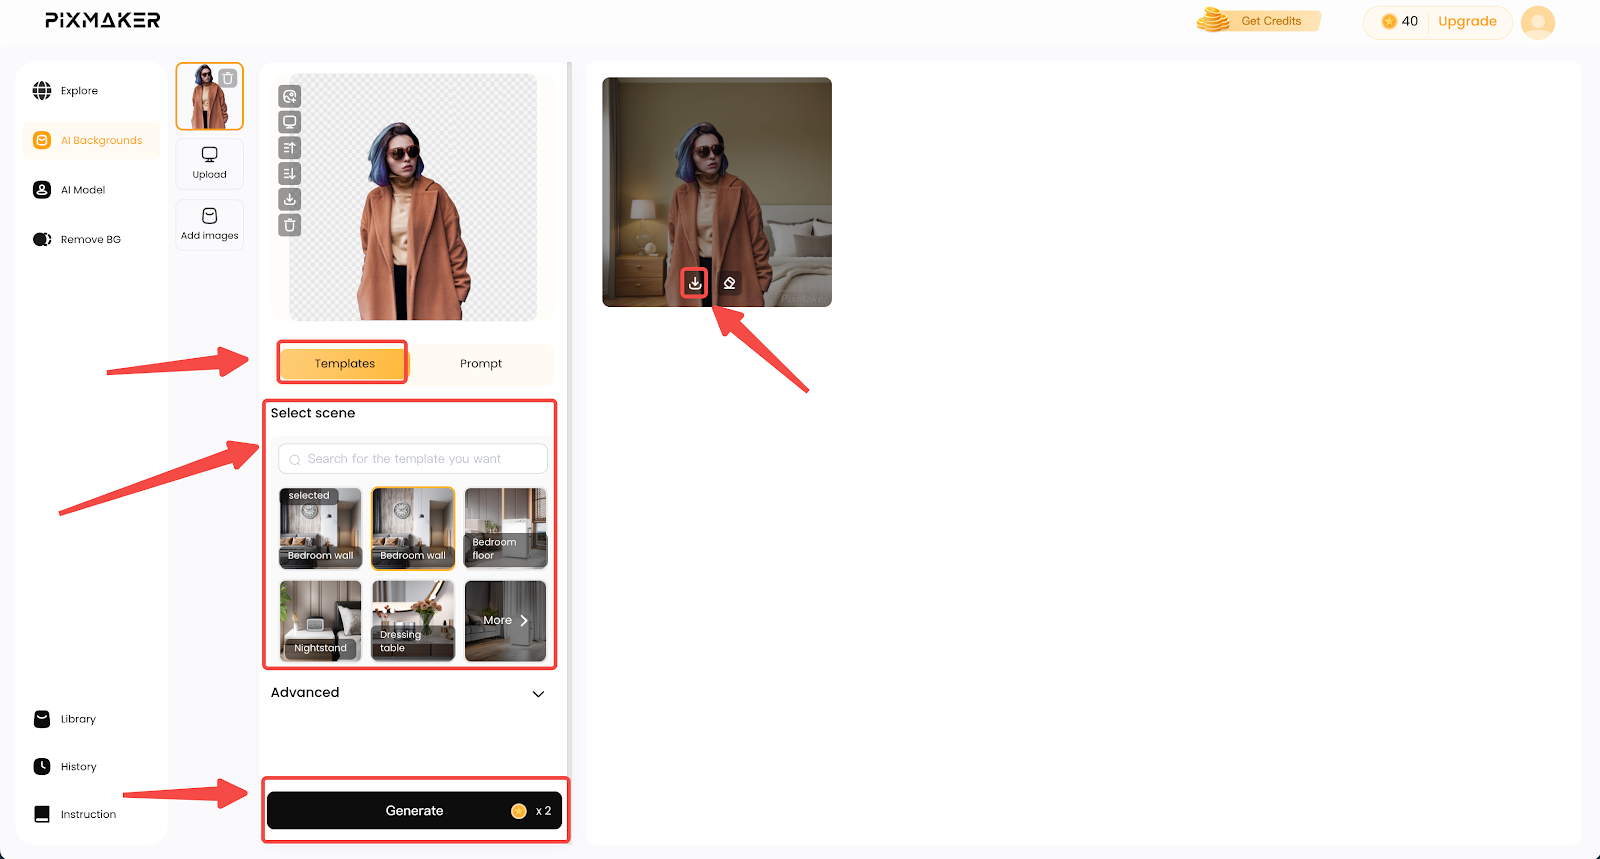
- Browse AI-generated backgrounds: Click Templates to view pre-designed backgrounds.
- Select a background template: Under Select Scene, choose a template that best fits your brand.
- Generate and apply the background: Click Generate, and Pixmaker will instantly apply the selected background.
- Download the final image: Once satisfied with the result, click Download to save it.
2. Option 2: Upload a custom background & Use AI prompts
- Upload your background: Click Prompt and select Upload image from your local files.
- Enter a descriptive AI prompt: In the Prompt field, describe how the AI should enhance the image with lighting, mood, or visual effects.
- Define what to exclude: Use the Negative prompt field to specify elements you do not want in the final image.
- Generate the AI-enhanced background: Click Generate and review the result.
- Download the AI-generated image: Click Download to save it.
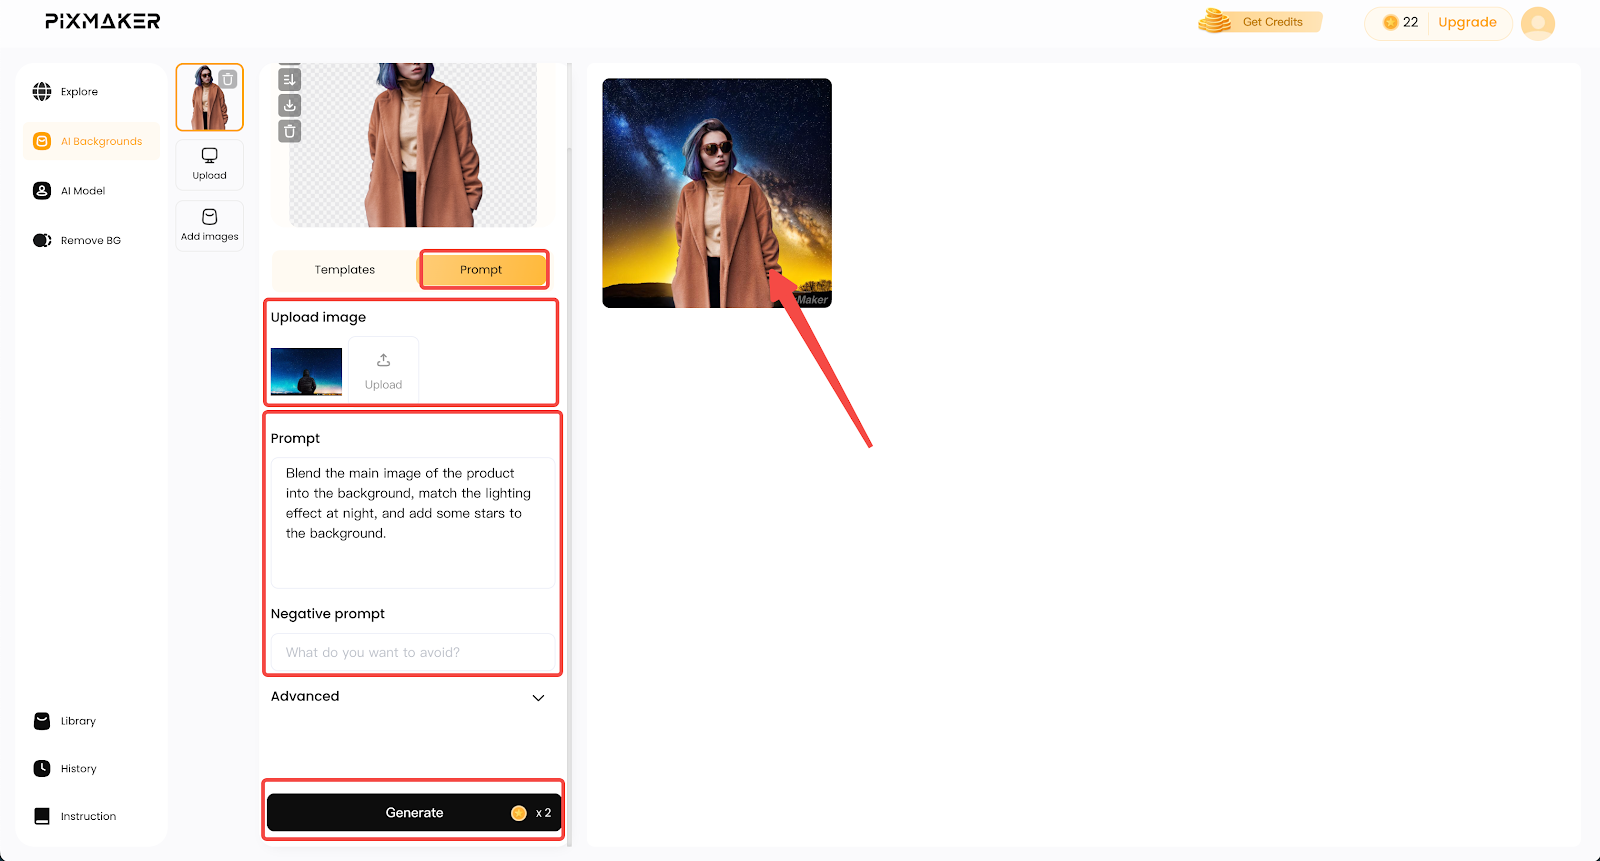
Note
Use English prompts for better AI accuracy.
Customize Advanced settings for more control
Take full control over your image output by adjusting the number of variations, resolution, and background styles. These settings help you achieve a polished, professional look for your product images.
1. Customize with advanced settings:
- Number of images to generate: Set the number of images to generate.
- Scale and resolution: Choose high resolution for sharp, clear images.
-
Choose a background style:
- Classic Style – Detailed and dynamic backgrounds.
- Simple Style – Clean, minimal backdrops.
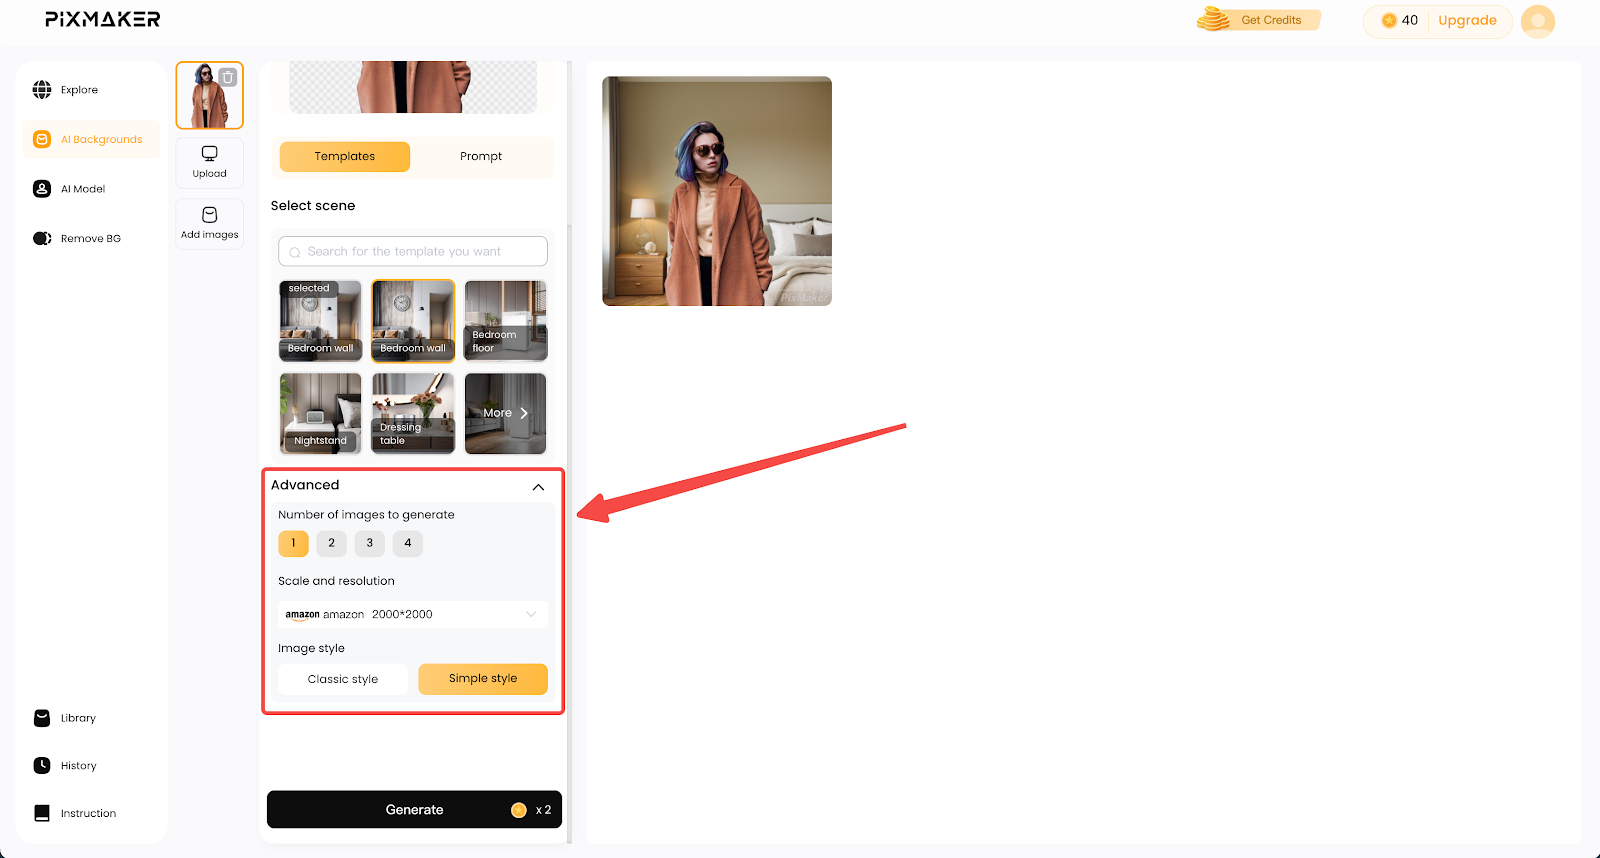
Note
Upload high-resolution product images and maintain a consistent aspect ratio (1:1 or 2:3) for uniform visuals. Preview AI-generated results and select the best fit for your brand.
Use AI models to create virtual product shoots
Eliminate the need for traditional photoshoots by leveraging AI-enhanced models. Display your products on lifelike AI-generated models for diverse, high-quality visuals.
Generate AI Models for product presentation
Create AI-powered models to showcase products without traditional photoshoots. With customizable AI models, you can craft diverse, professional product visuals effortlessly.
1. Open the AI Model editor: Click AI Model from the left menu to enter the workspace.
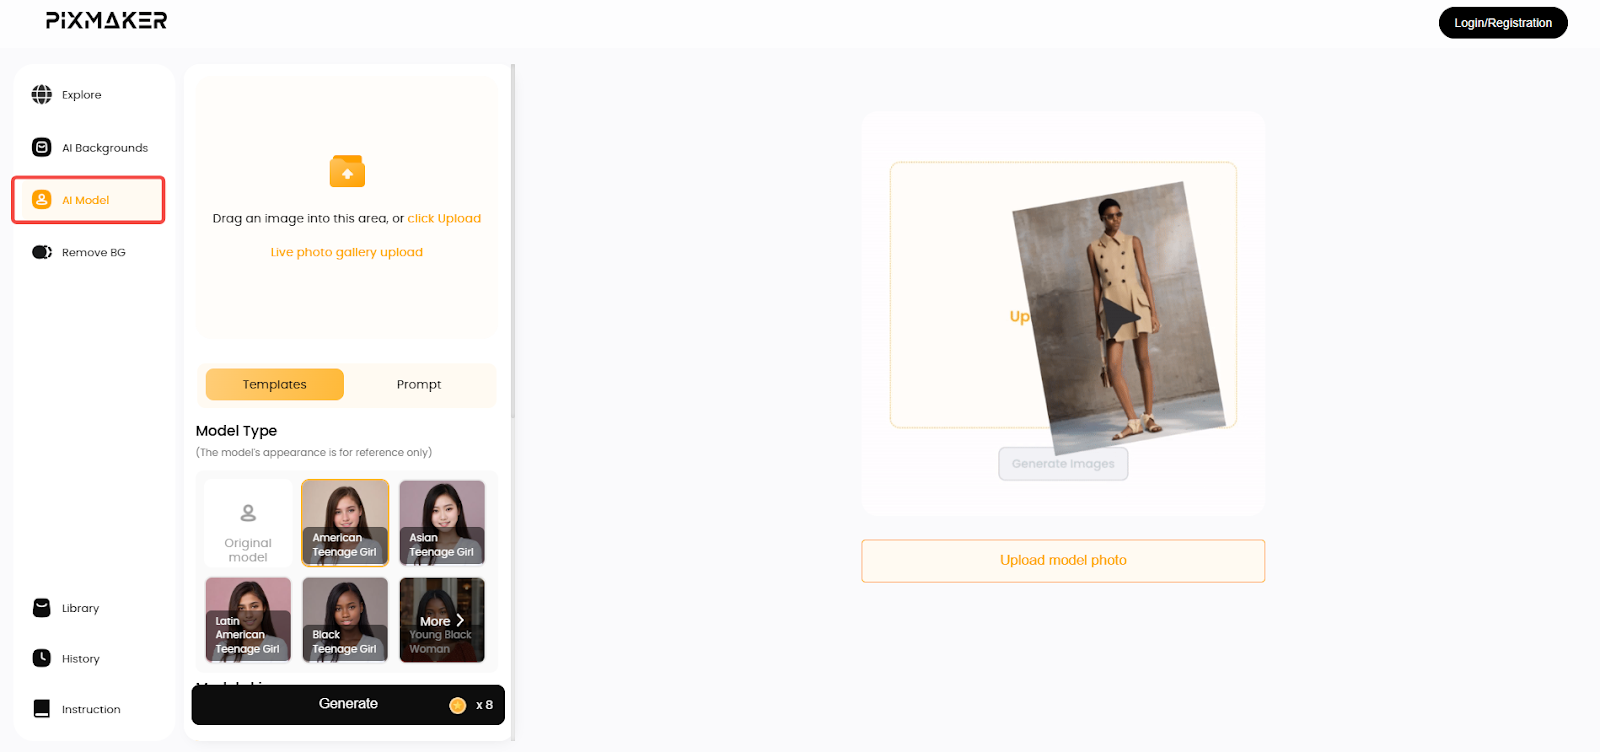
2. Upload a product image. Drag and drop or manually upload a product image, and Pixmaker will automatically cut out the product for placement on AI-generated models.
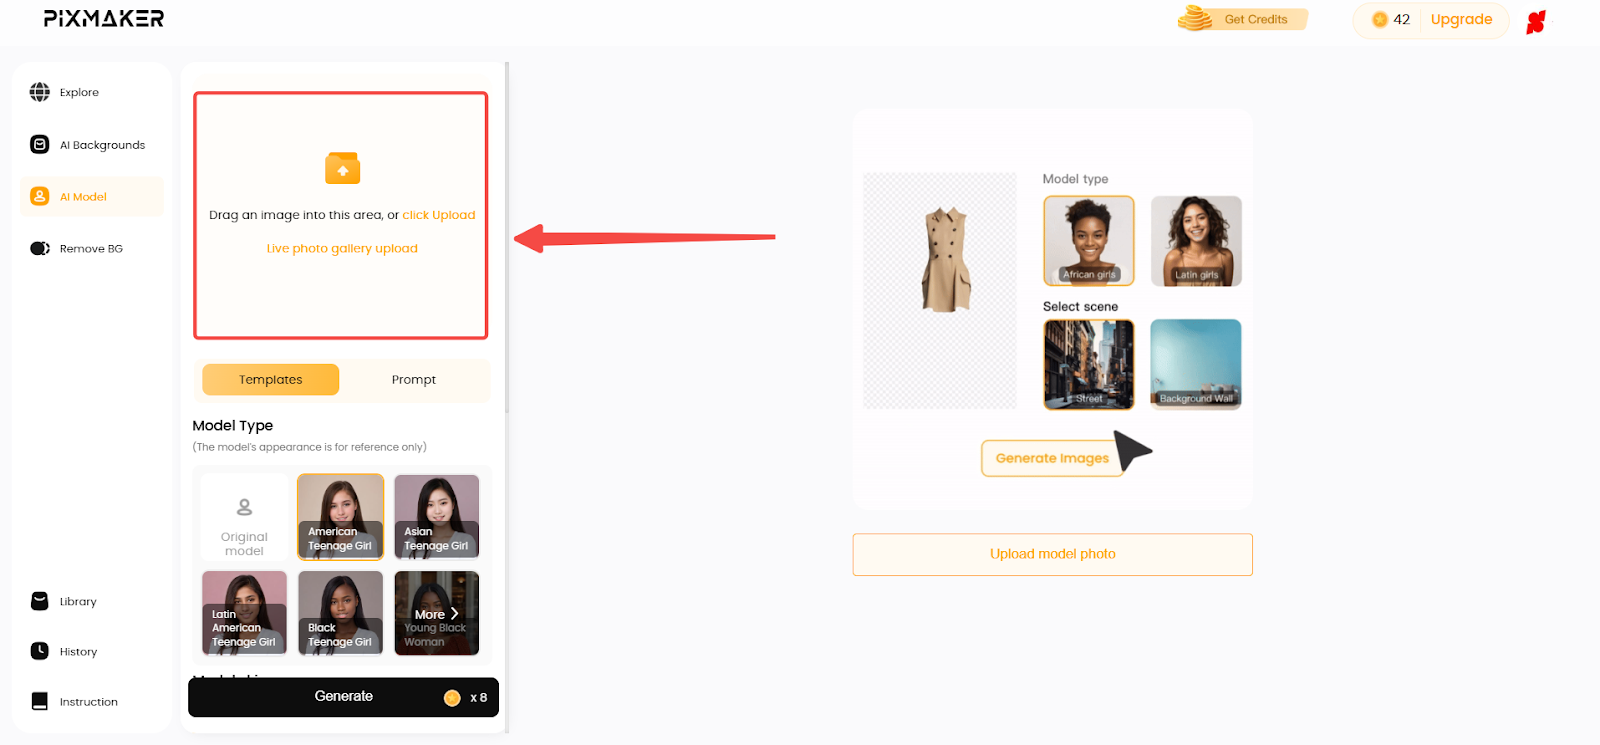
Choose a model type for your product
Selecting the right model type helps showcase your products in the most effective way. Whether you prefer AI-generated model templates or custom-designed models, Pixmaker provides flexible options to match your branding and aesthetic preferences.
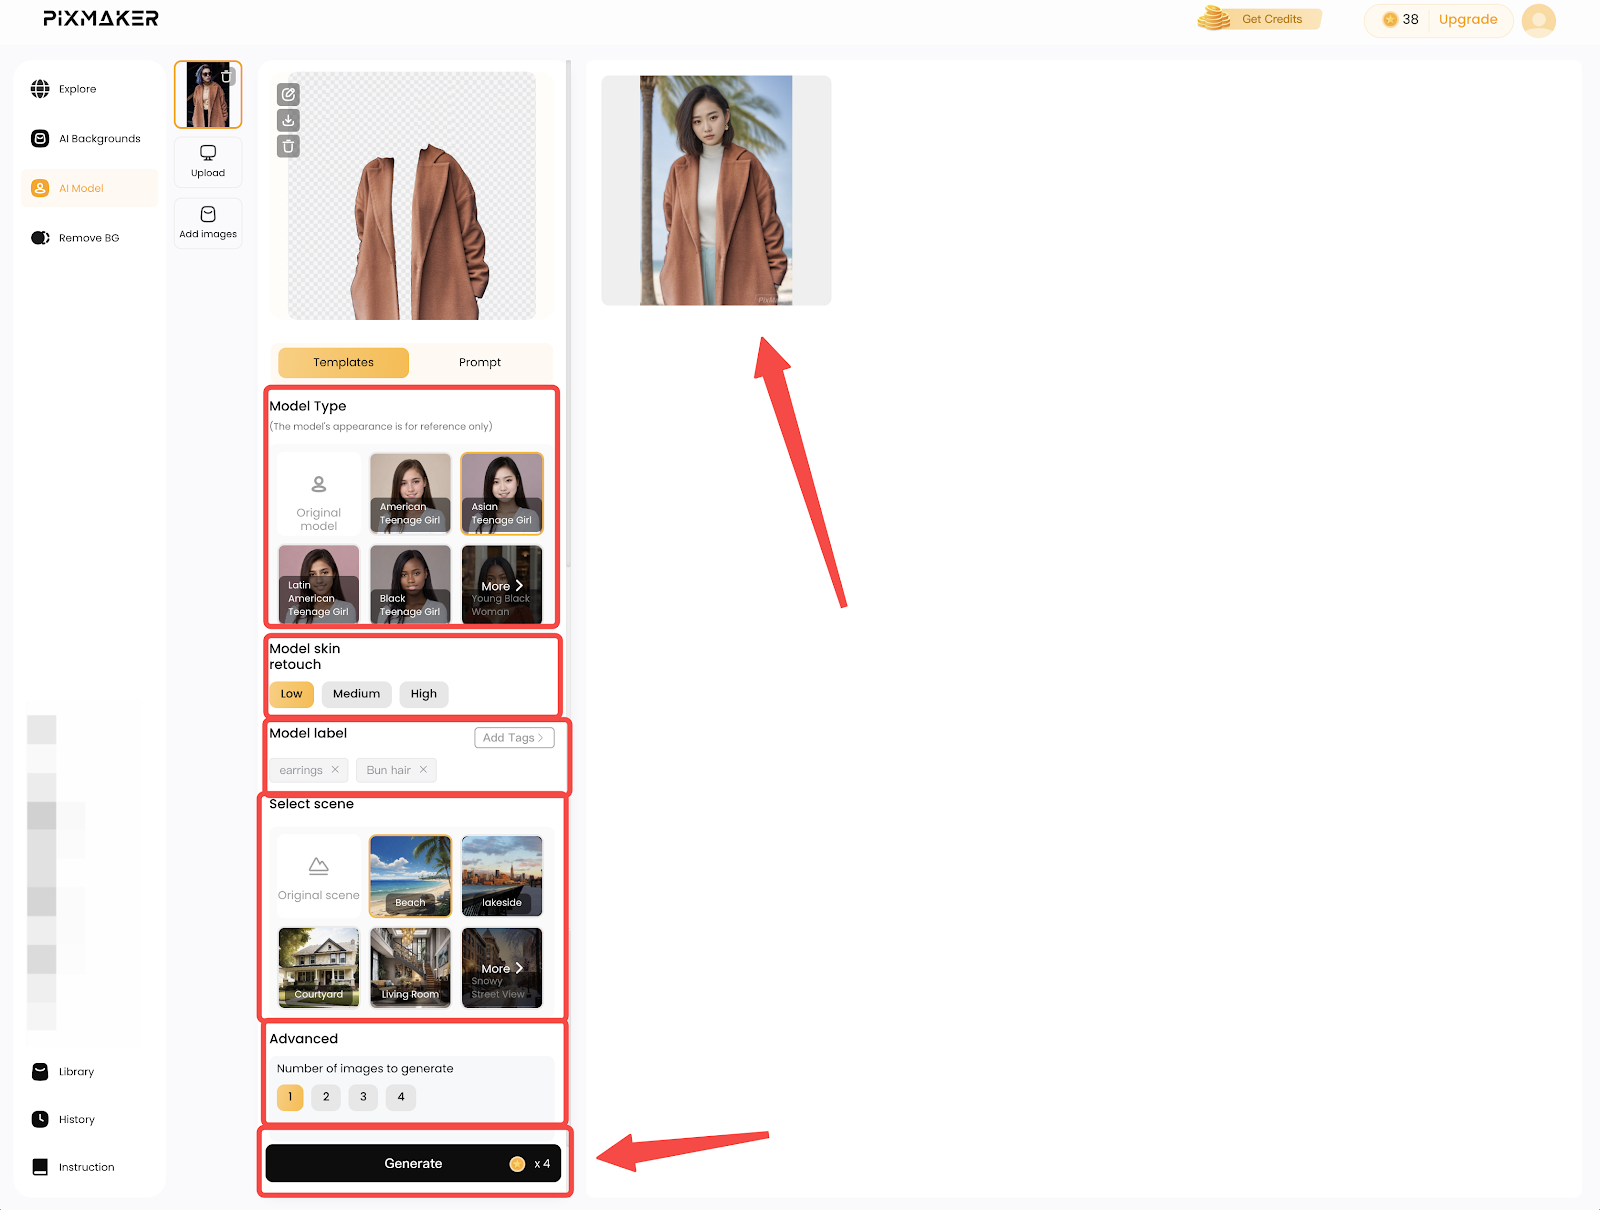
1. Option 1: Use AI-Generated Model Templates
- Click Templates: Browse available AI-generated models.
- Select a Model Type: Choose one that matches your product.
- Adjust model appearance: Modify skin retouch levels to enhance facial smoothness.
- Customize model labels: Select features such as hair color, makeup style, or accessories.
- Choose a background: Keep the original or apply an AI-generated backdrop.
- Set the number of images: Adjust the Advanced to generate multiple variations.
- Generate the model image: Click Generate and review the result.
- Download the final image: Click Download to save it.
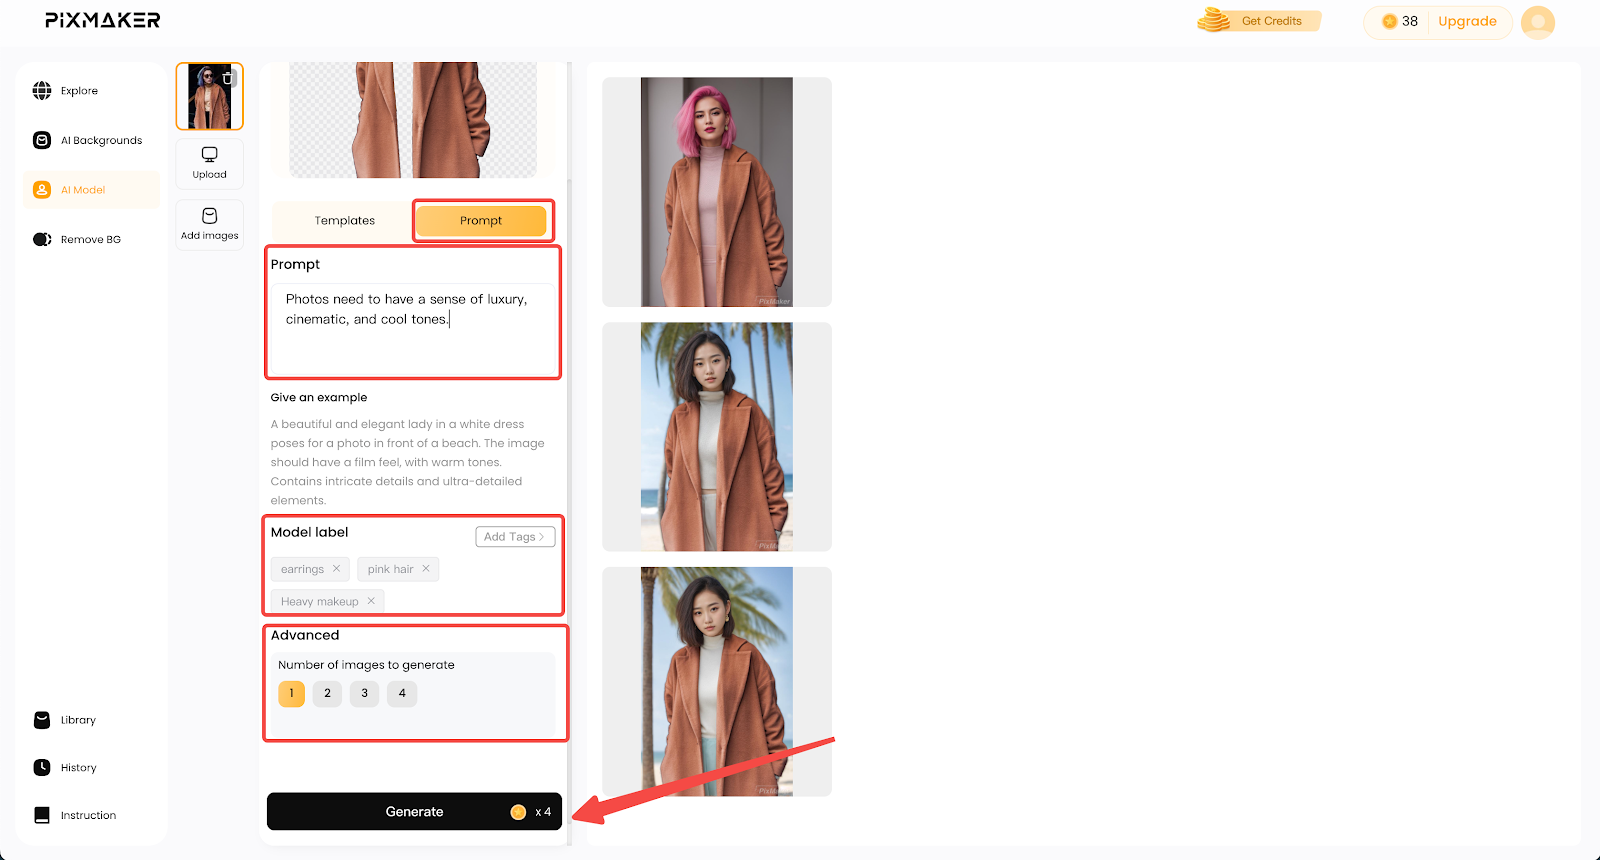
2. Option 2: Create a custom model using AI prompts
- Describe the model in detail: Click Prompt and enter details such as facial features, clothing style, and mood.
- Customize model labels: Adjust hair color, makeup, and accessories.
- Set advanced controls: Define how many images to generate.
- Generate and refine the model: Click Generate, review, and edit if needed.
- Download the AI-generated model image: Click Download to save the final image.
Note
Use English prompts for better AI accuracy.
Use AI background removal for clean cutouts
Ensure a seamless, professional look by removing backgrounds from product images. This feature is perfect for eCommerce listings, social media, and marketing materials.
1. Open the Remove BG tool. Click Remove BG from the left menu.
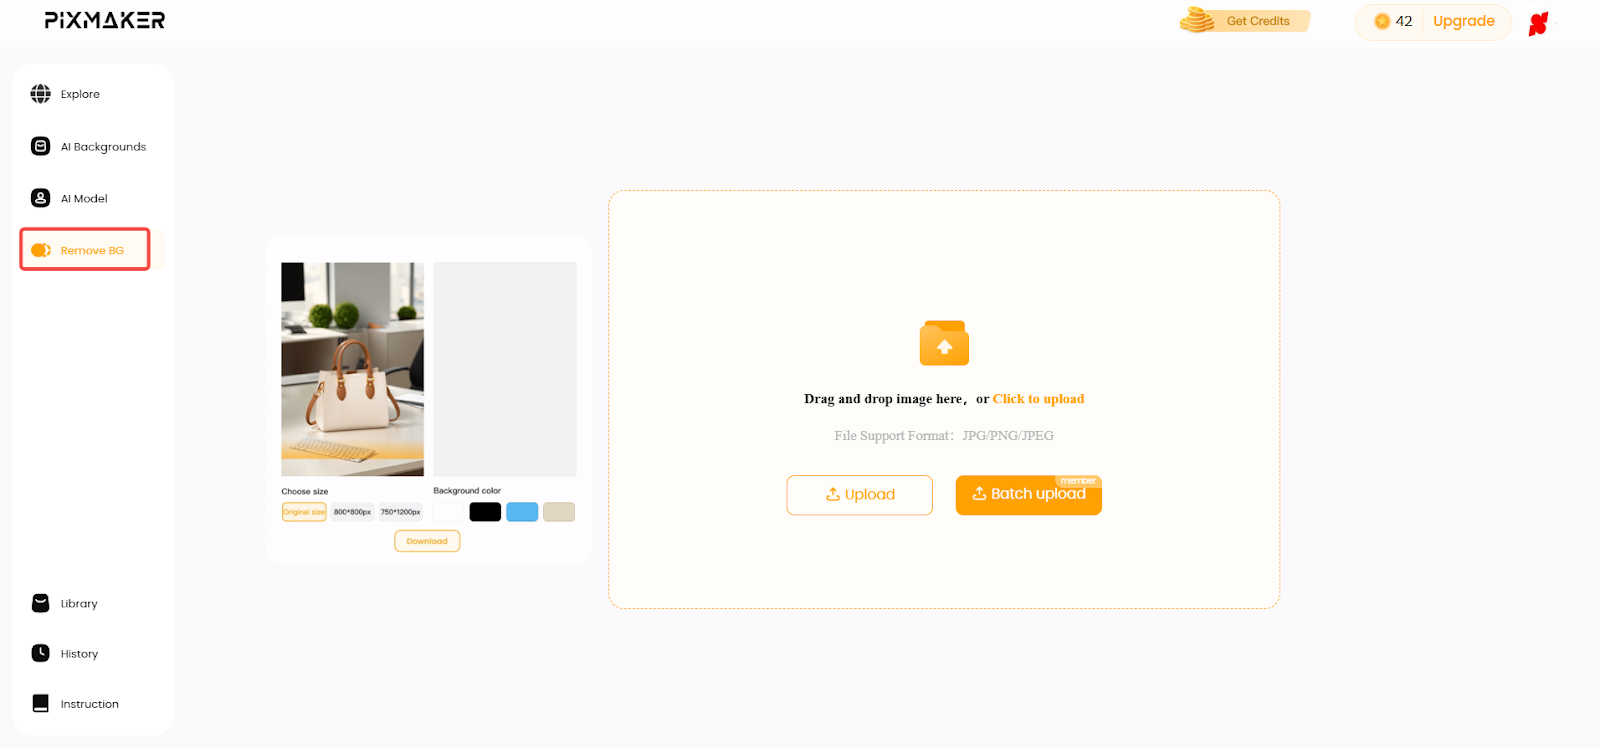
2. Upload an image for background removal. Drag and drop or manually select a product image. Pixmaker will automatically detect and isolate the subject.
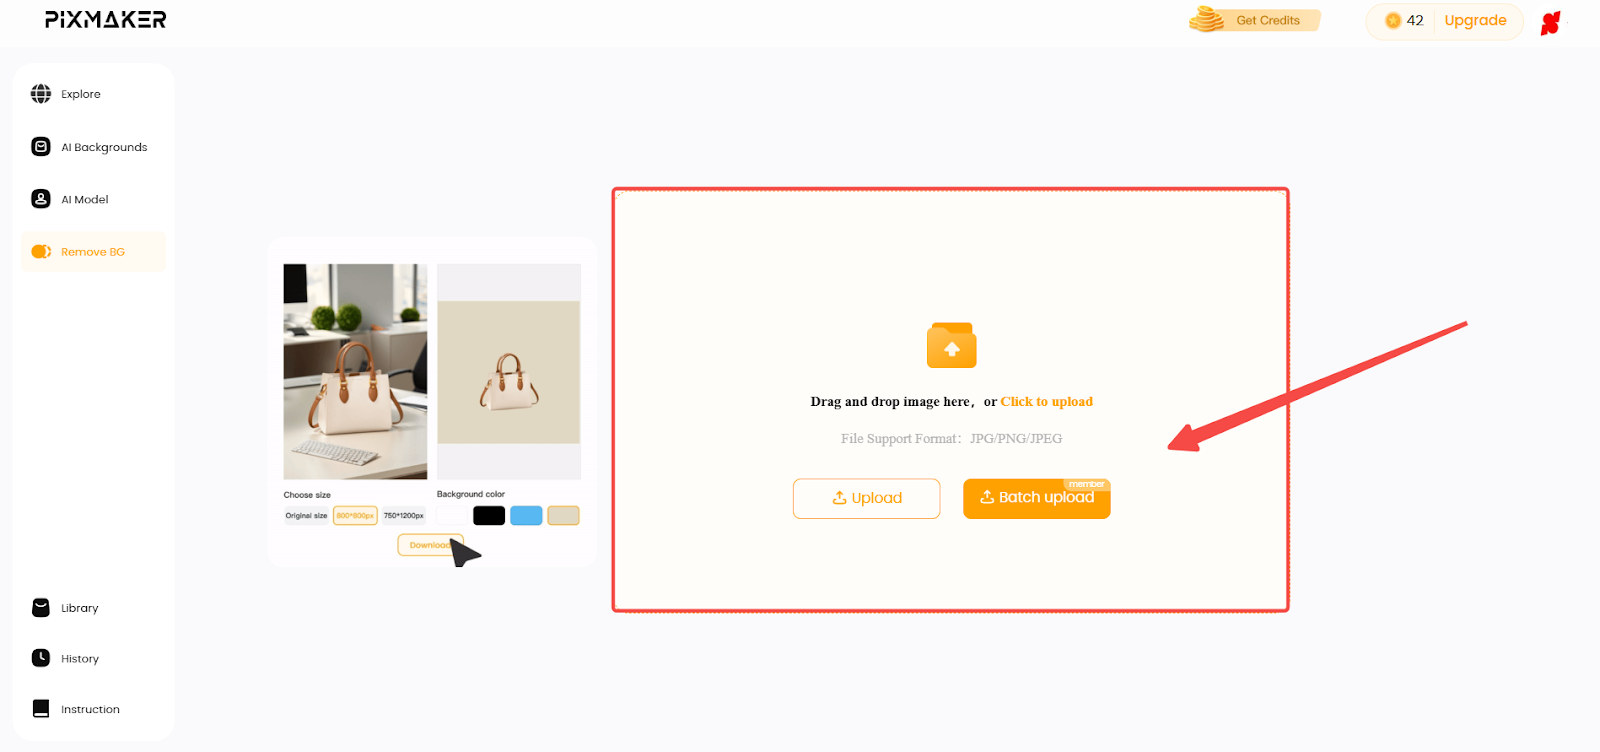
3. Refine the cutout using editing tools:
- Brush tool: Adjust cutout edges.
- Erase tool: Remove unwanted sections.
- Zoom & Move: Make precise refinements.
- Undo/Redo: Adjust changes as needed.
- Reset: To revert all changes.
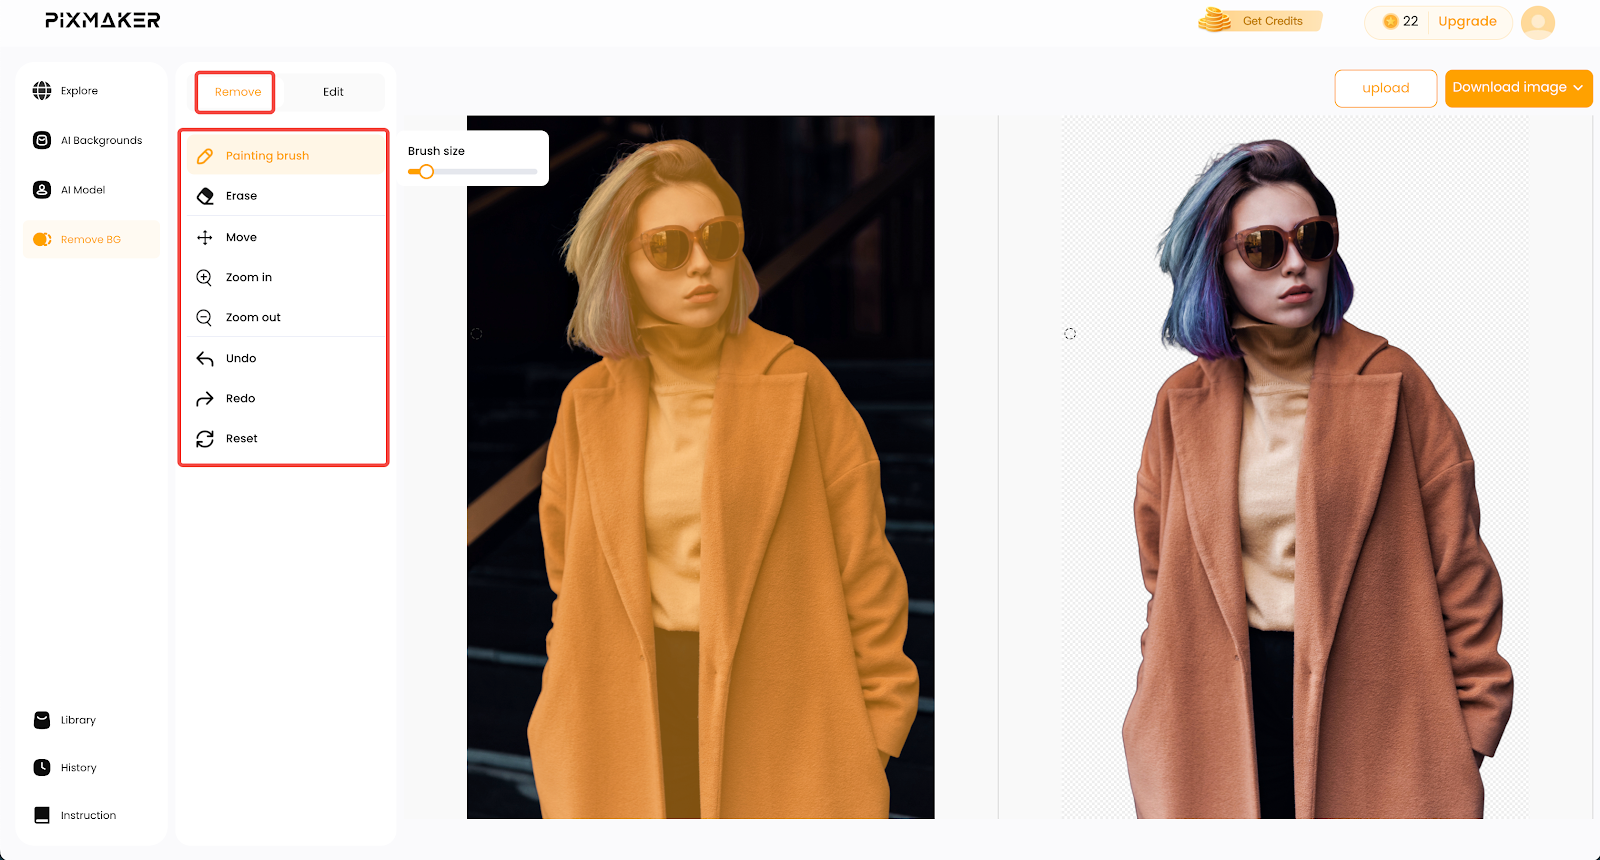
4. Apply edits & download the processed image:
- Modify the background: Adjust or replace it using the Edit tab.
- Set the desired image dimensions: Resize the final image for better compatibility.
- Download the finished image: Save it in the preferred format for eCommerce or marketing use.
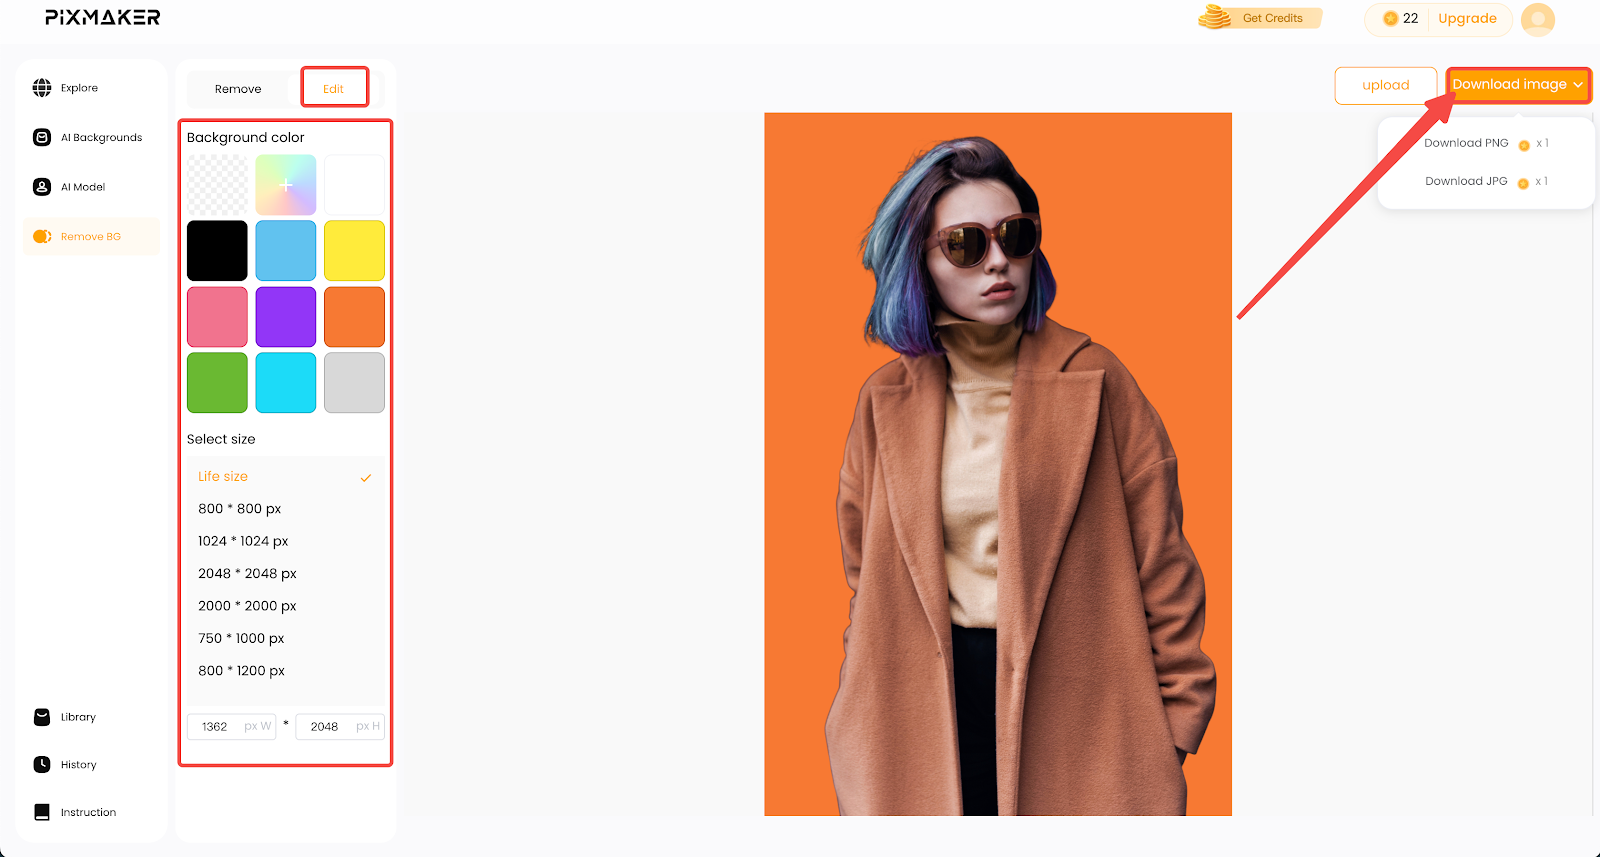
Explore AI-generated inspiration with Explore mode
Browse AI-generated backgrounds and models for fresh ideas. Apply pre-made templates instantly to create stunning product visuals.
1. Browse AI backgrounds and models: Click Explore from the left menu to access various AI-generated designs.
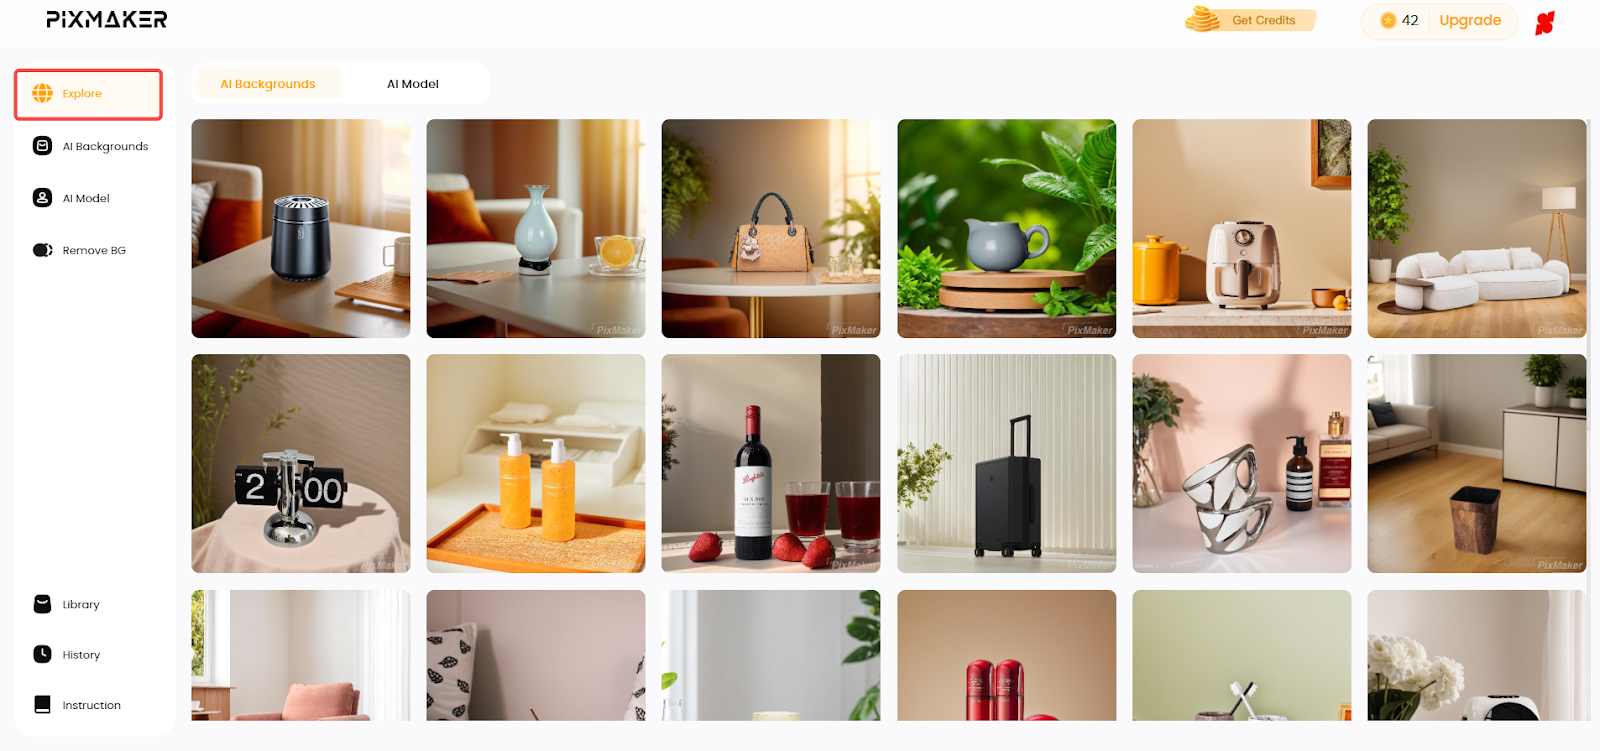
2. Select a template: Browse AI Backgrounds or AI Models, then click Use template to apply it to your project instantly.
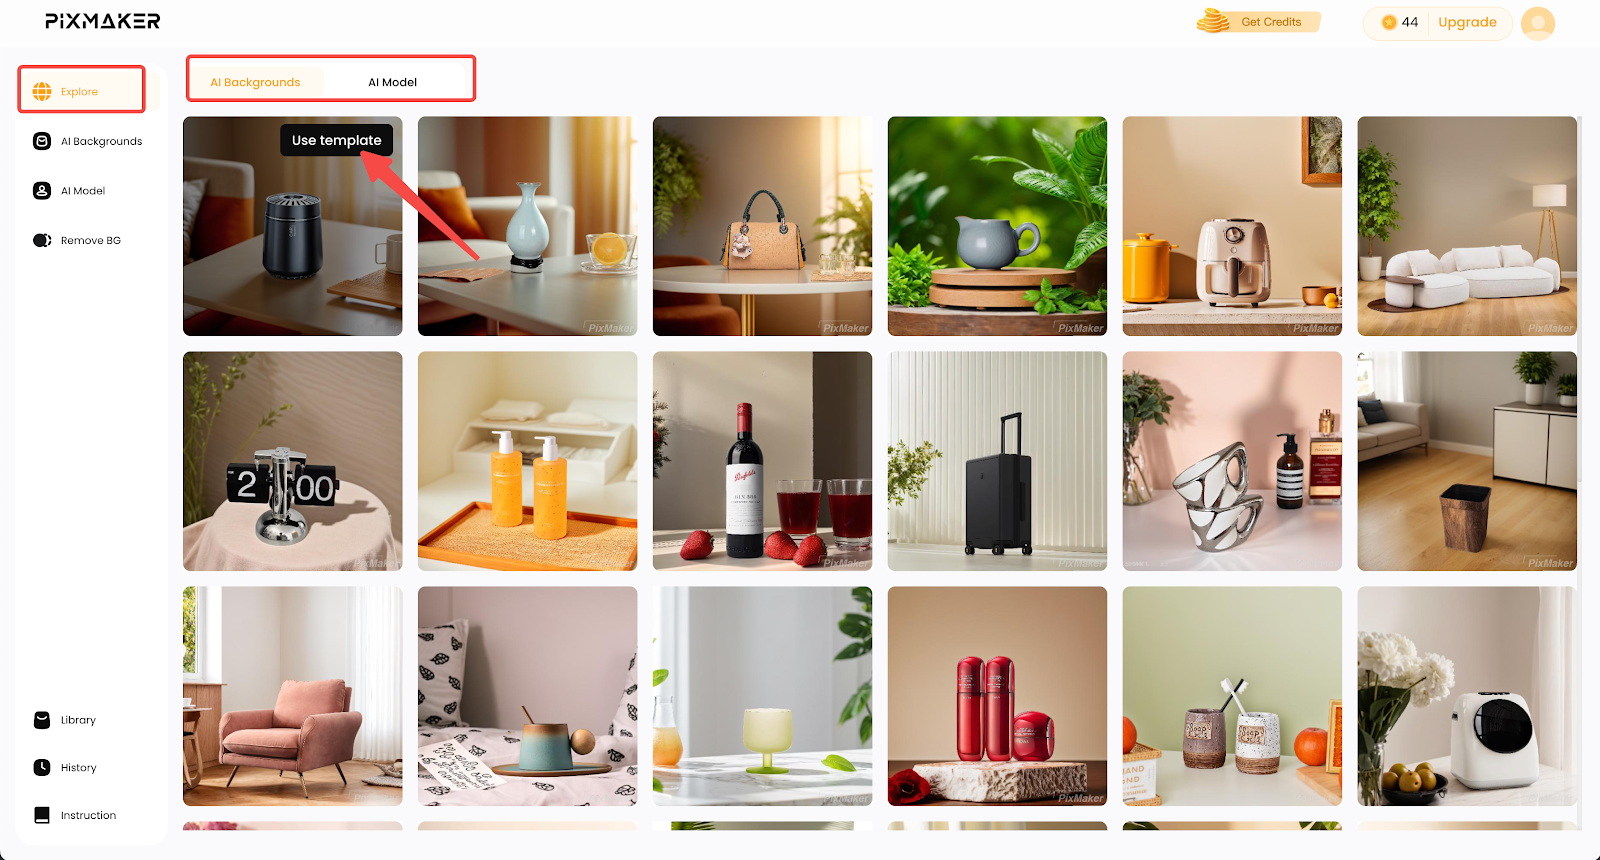
Manage your image library
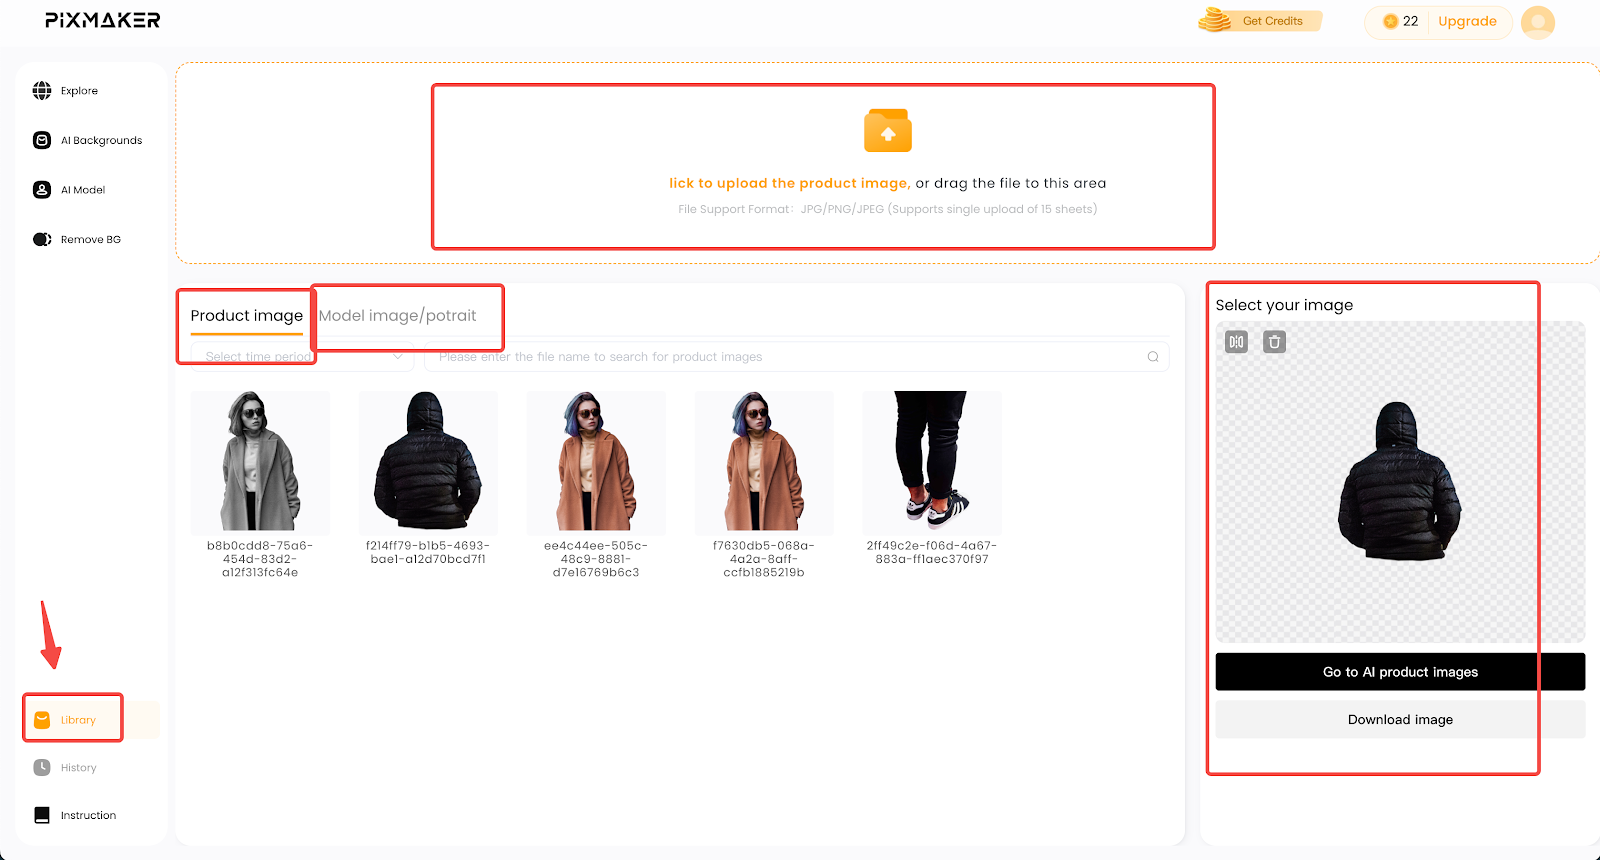
Organize and store all your uploaded and AI-edited images in one place. The image library allows you to access, edit, and download your images anytime.
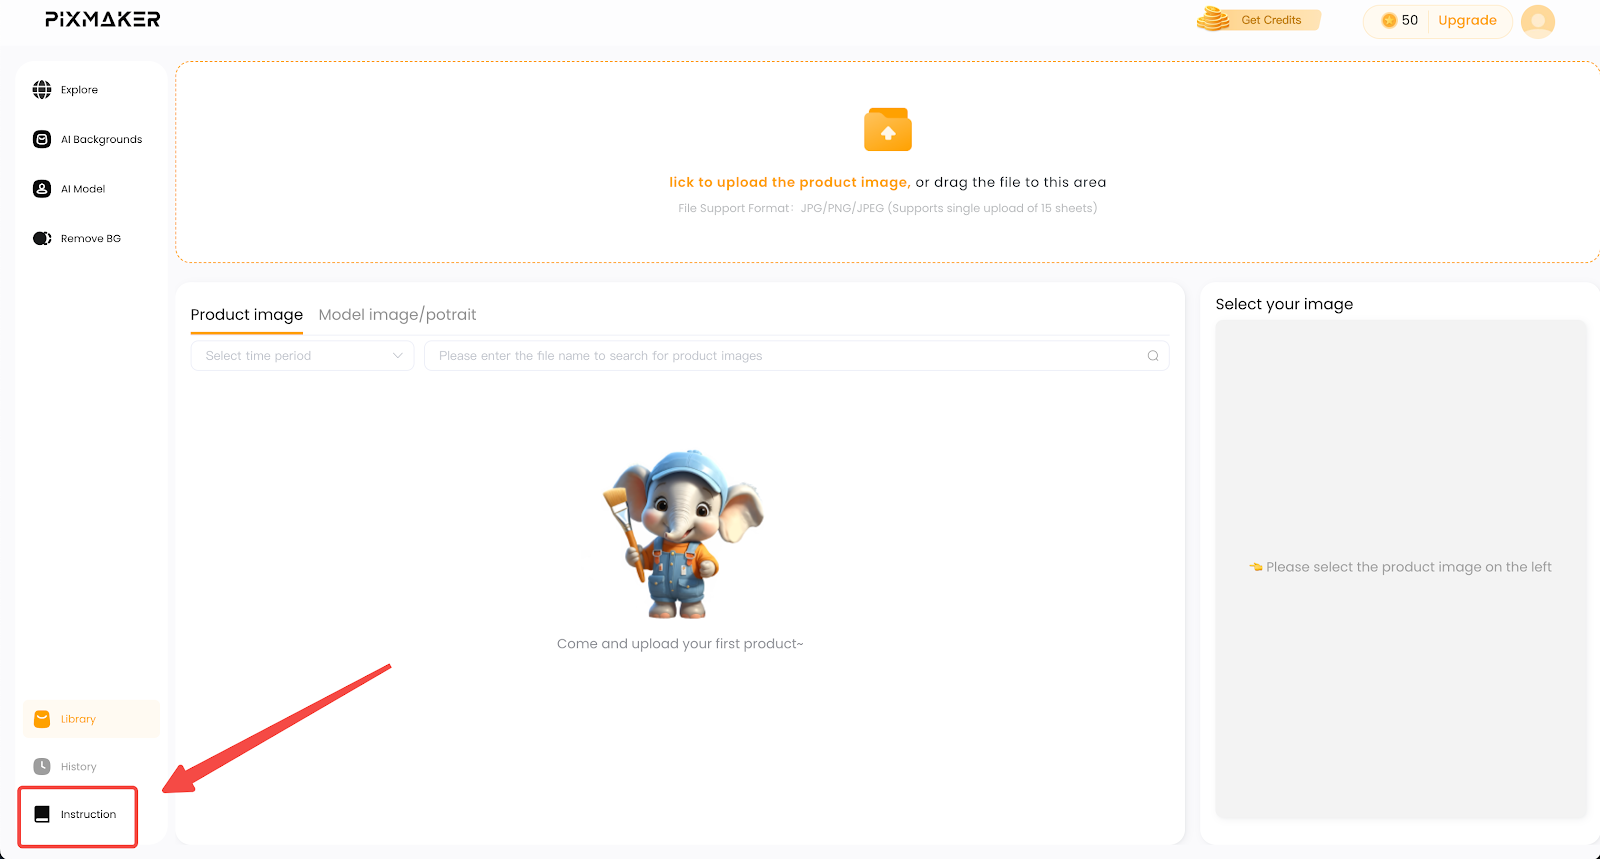
- Access saved images: Click Library in the bottom left corner to view all stored files.
- Upload and organize images: Drag and drop new images into the upload area and categorize them under the Product image, Model image/Portrait sections.
- Edit and download stored images: Access previously uploaded assets and make quick modifications before saving.
Track your image history
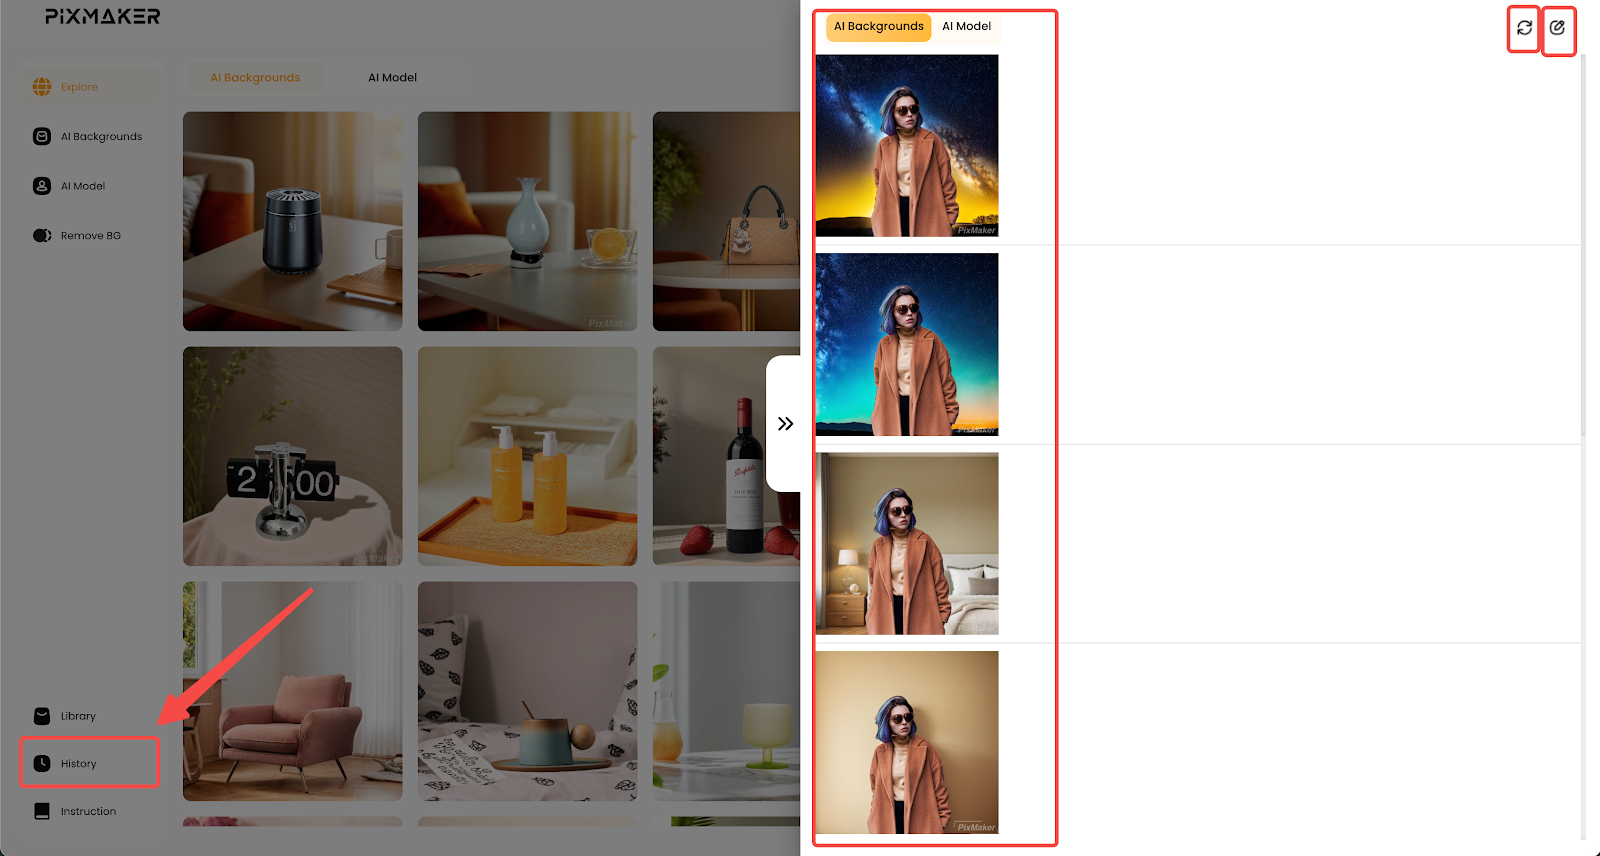
View and manage previously generated images. Keep your workspace organized by refreshing or deleting records.
- Review previously generated images: Click History in the bottom right to access the full record of generated images.
- Refresh or delete records: Keep only the necessary images by removing outdated or unused files.
Upgrade and get more credits
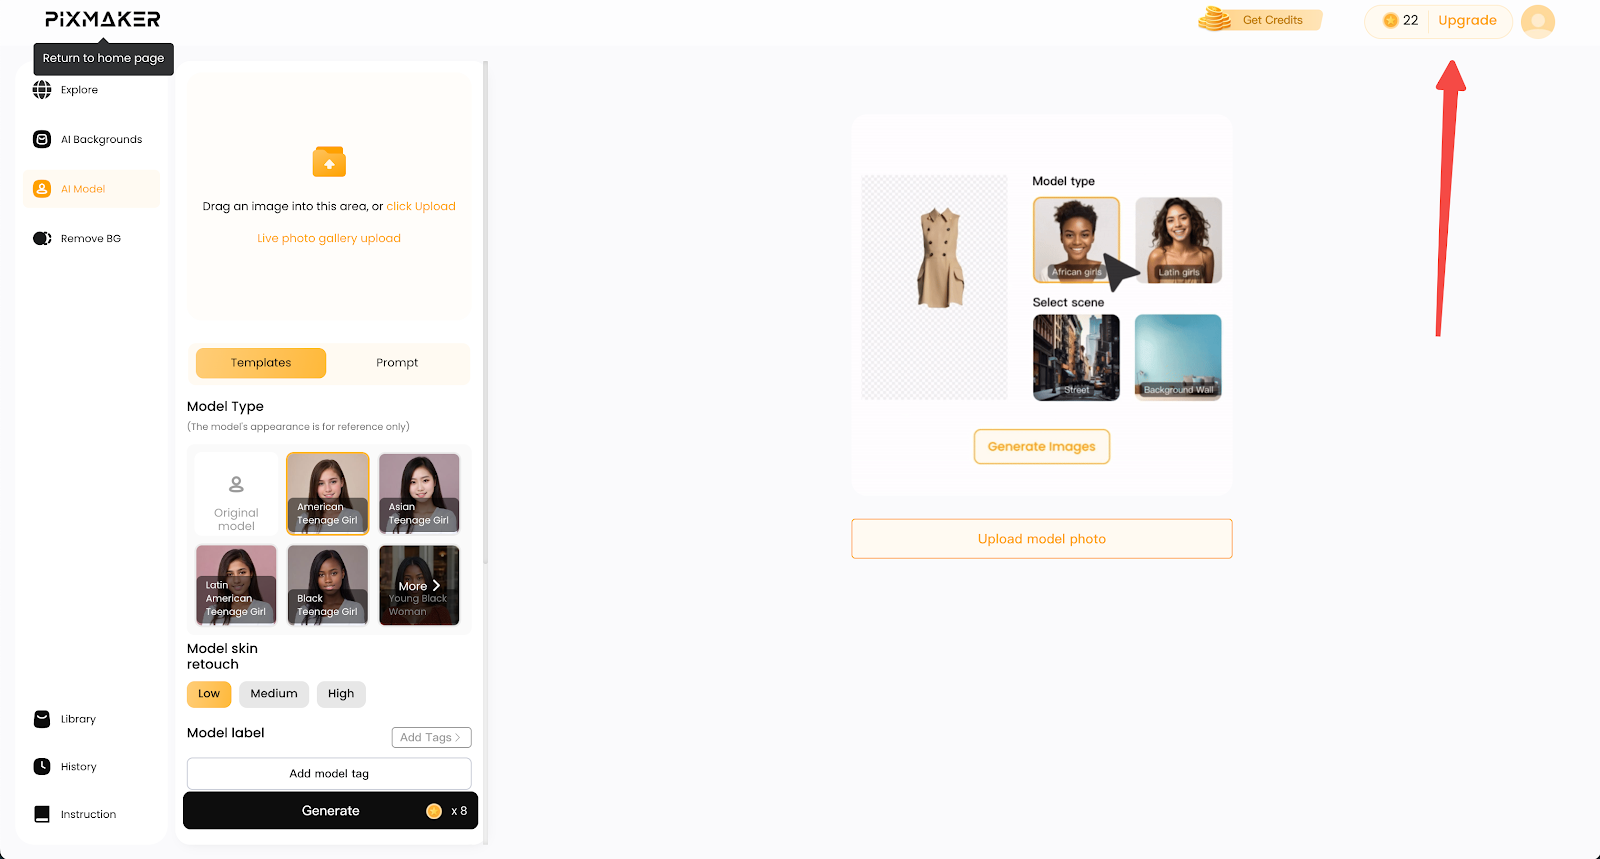
Unlock premium features and generate more images by upgrading your plan. Track credit usage and manage subscriptions easily.
1. Unlock advanced features: Click Upgrade in the top right to explore available subscription options.
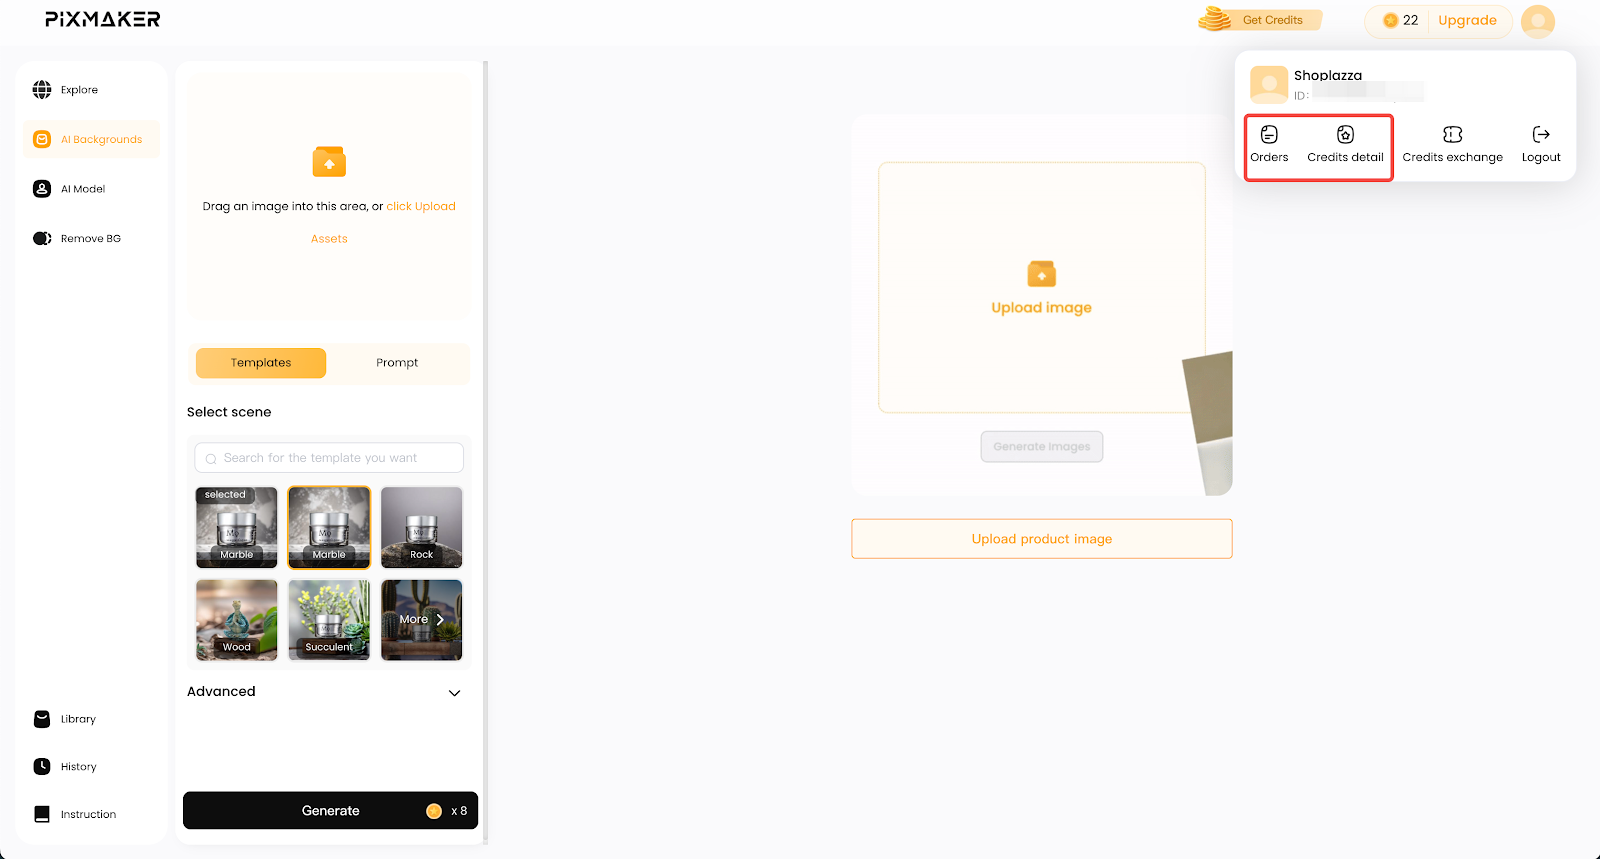
2. Manage your subscription and credit usage: Click Profile icon > Orders to check billing details, and select Credits detail to track credit consumption.
Learn with video tutorials
Access step-by-step video guides to maximize Pixmaker’s features.
- Watch step-by-step training videos: Click Instruction to access YouTube tutorials with detailed guidance.
Contact Pixmaker for support
- Get help from the Pixmaker team: Click here to contact support.
Pixmaker streamlines product image creation with AI-powered tools. It helps you remove backgrounds, generate realistic models, and create stunning visuals in minutes. Whether updating your store, running ads, or enhancing your brand, Pixmaker provides the efficiency and quality you need.


Comments
Please sign in to leave a comment.