
Automatic collections help you streamline product organization in your Shoplazza store, especially when managing a large product catalog. Instead of adding items manually, you define smart filtering rules that automatically include qualifying products. This ensures your collection pages stay up to date as your inventory grows, saving time and keeping your storefront efficient and well-organized.
Setting up automatic collections
Follow the steps below to create an automatic collection and define how products are added based on rules you set:
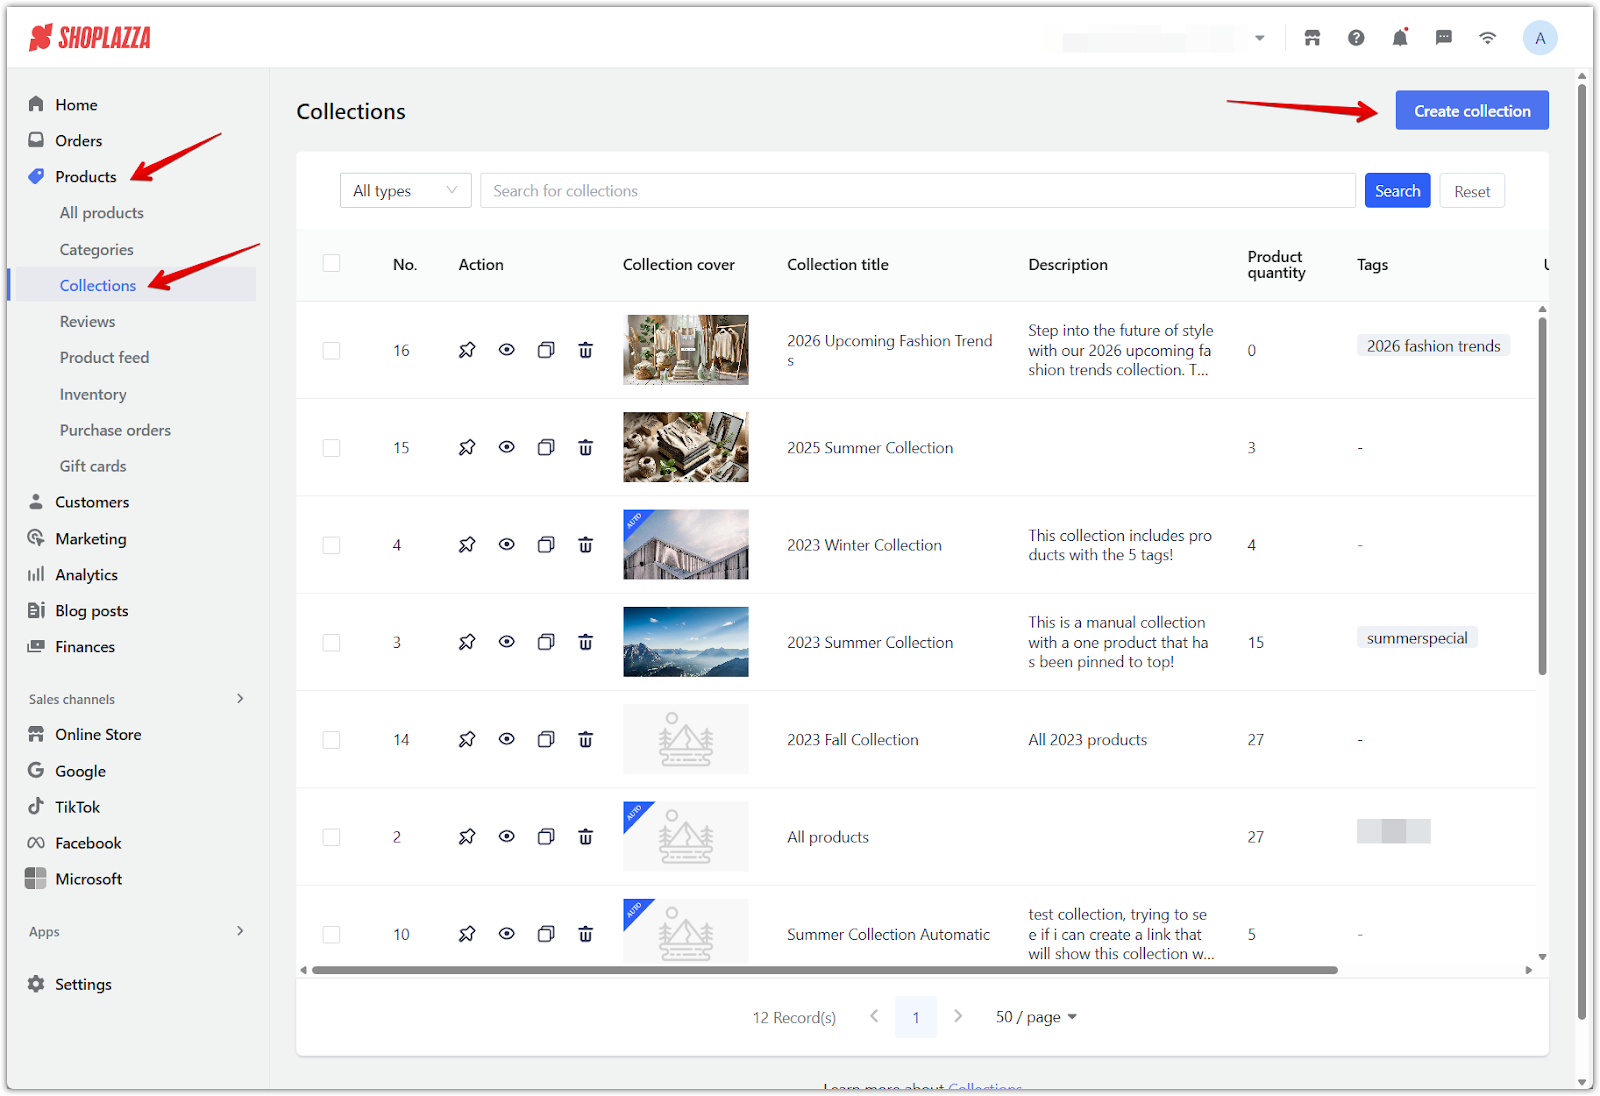
1. Go to your Collections section: From your Shoplazza Admin, click Products > Collections, then click Create collection to begin creating a new collection.
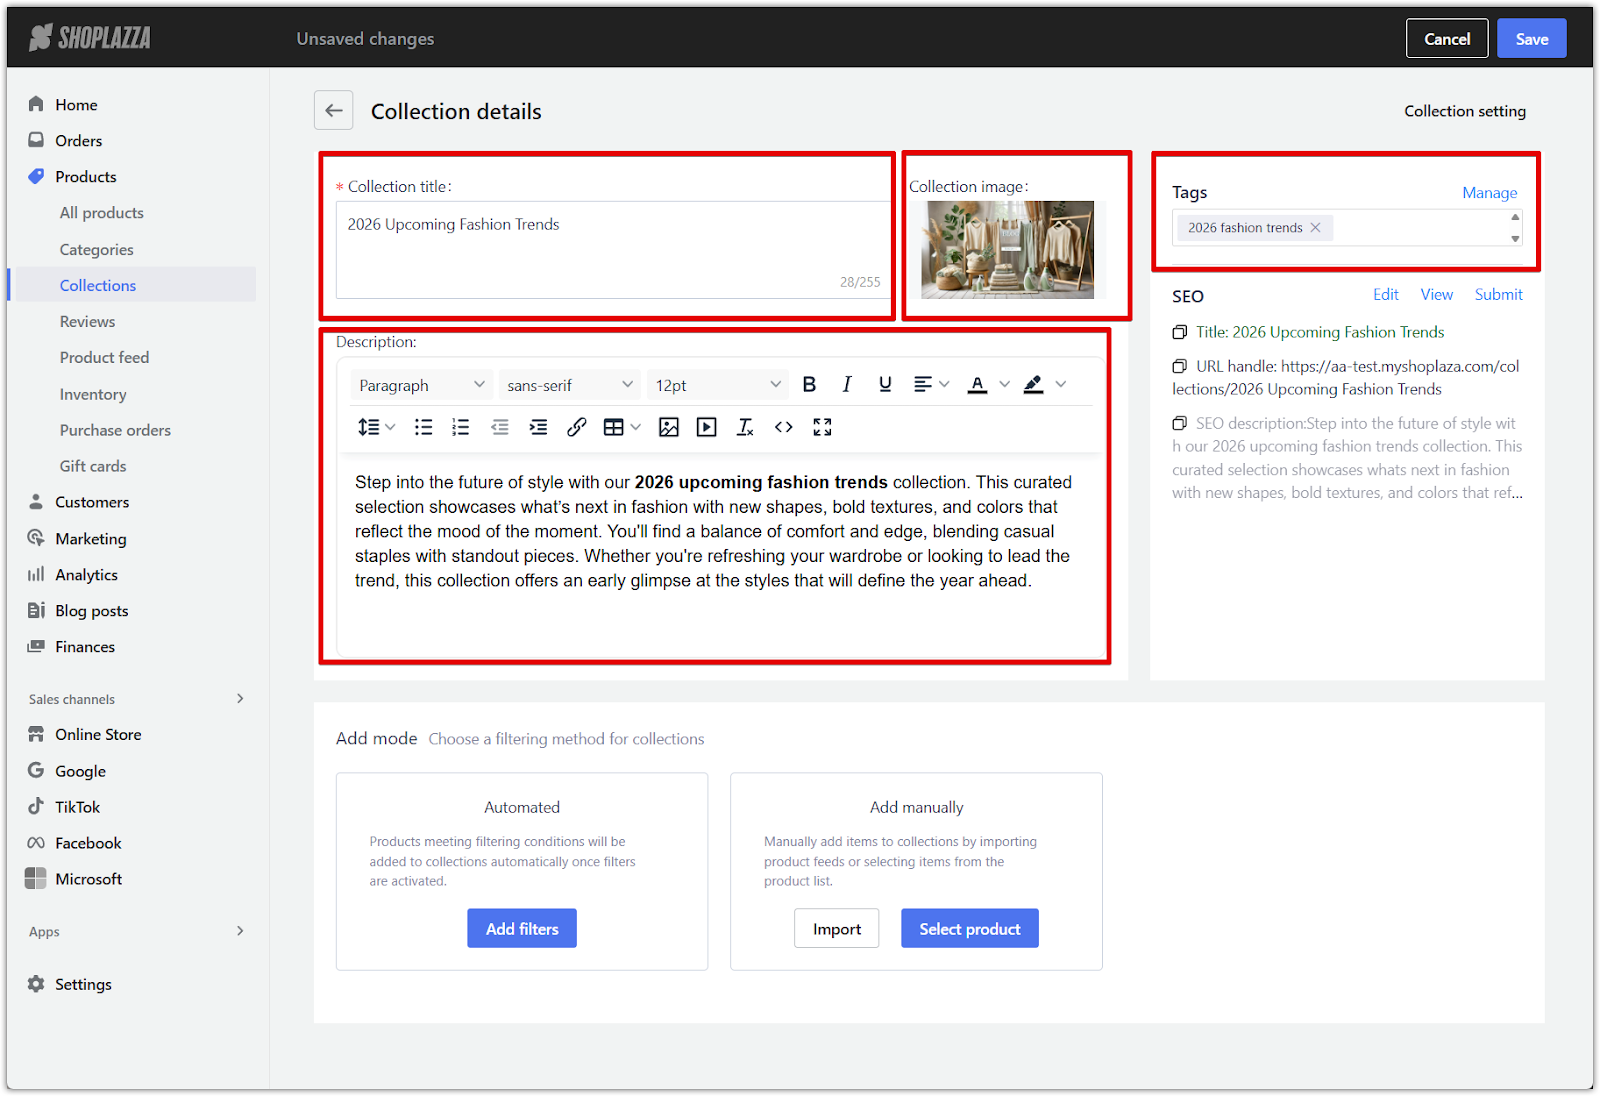
2. Set collection details: Add a collection name that reflects the product group, upload a cover image to represent the collection visually, and write a short description to introduce the collection to your customers. This information appears on the collection page and can improve both branding and SEO.
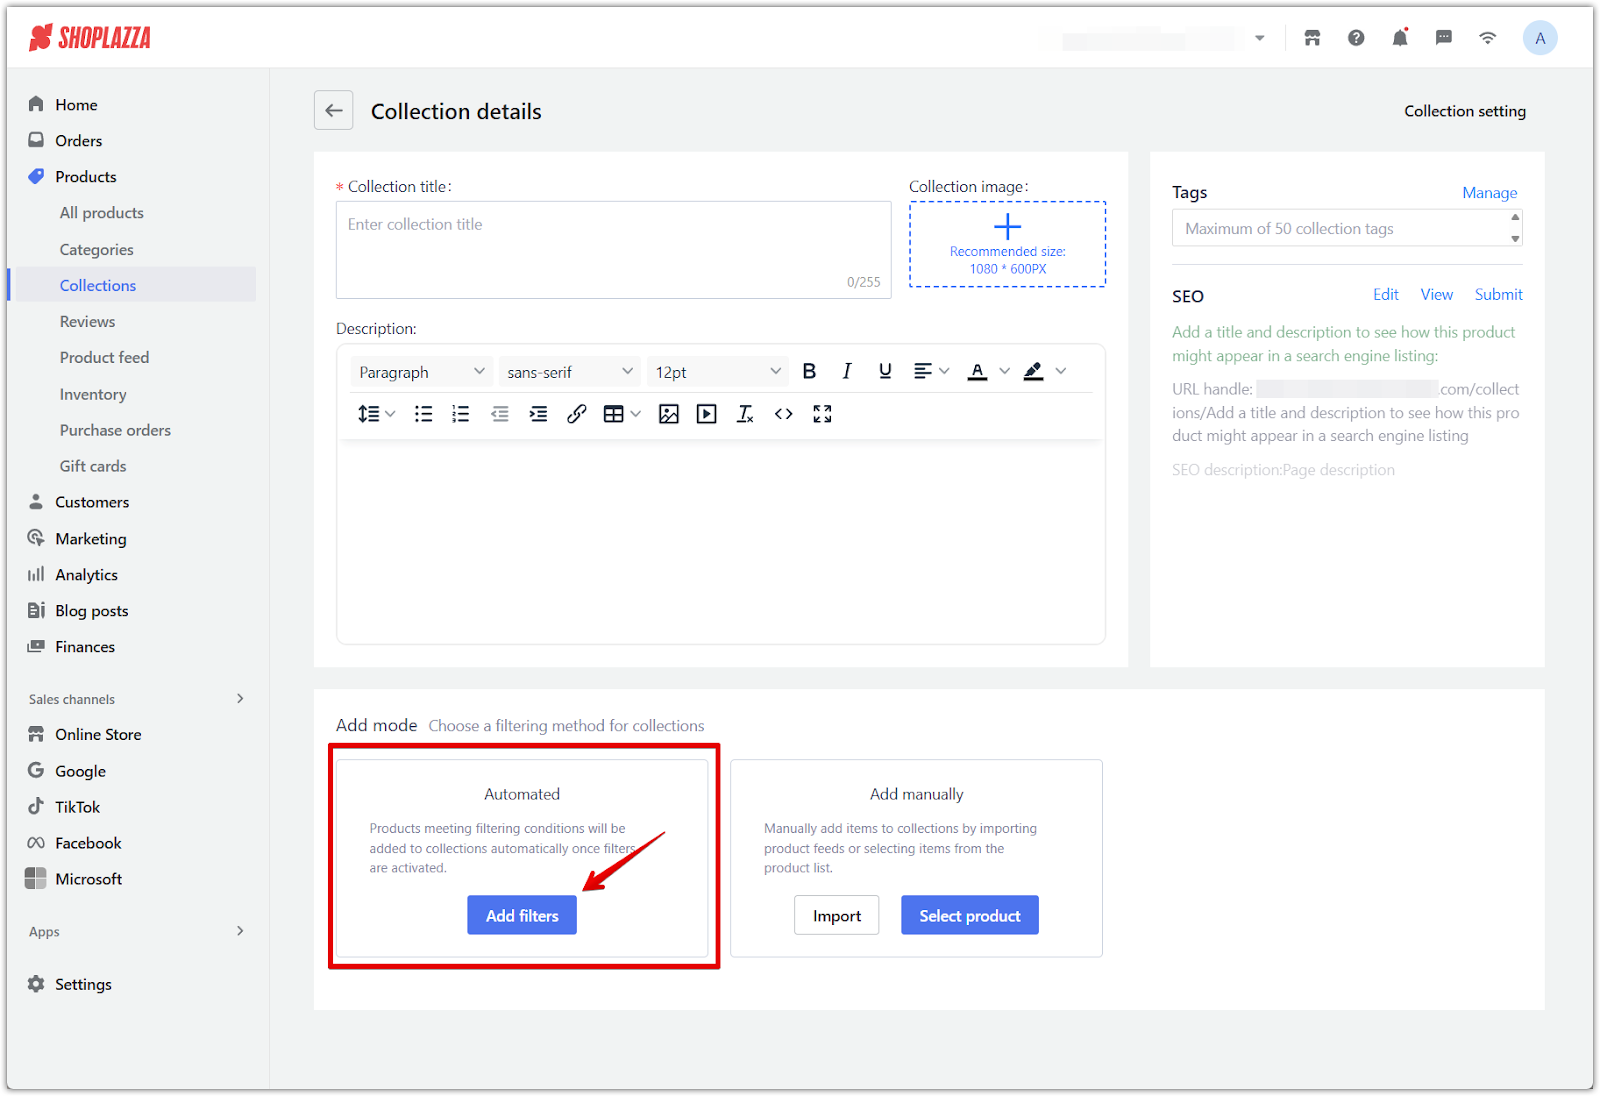
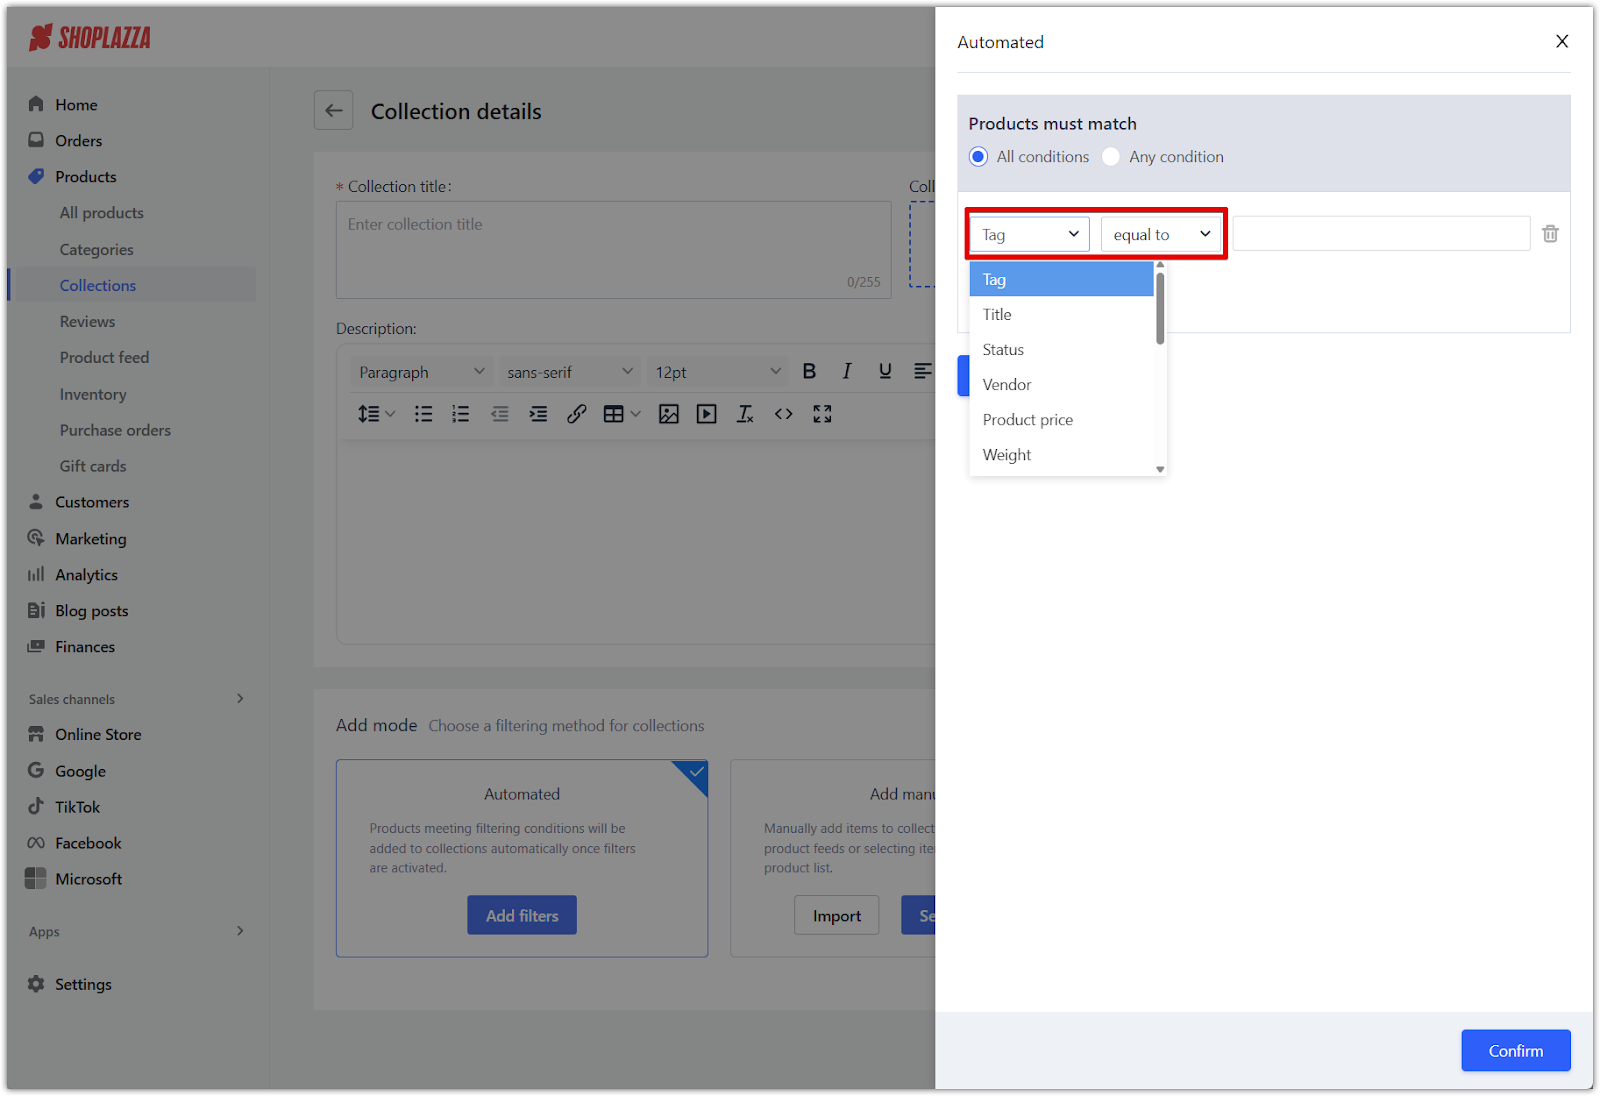
3. Add automatic conditions: In the Add mode section, under Automated, click Add filters to define the product rules. You can filter based on attributes like tags, price range, availability, vendor, or product type. These filters automatically include any future products that match your conditions.
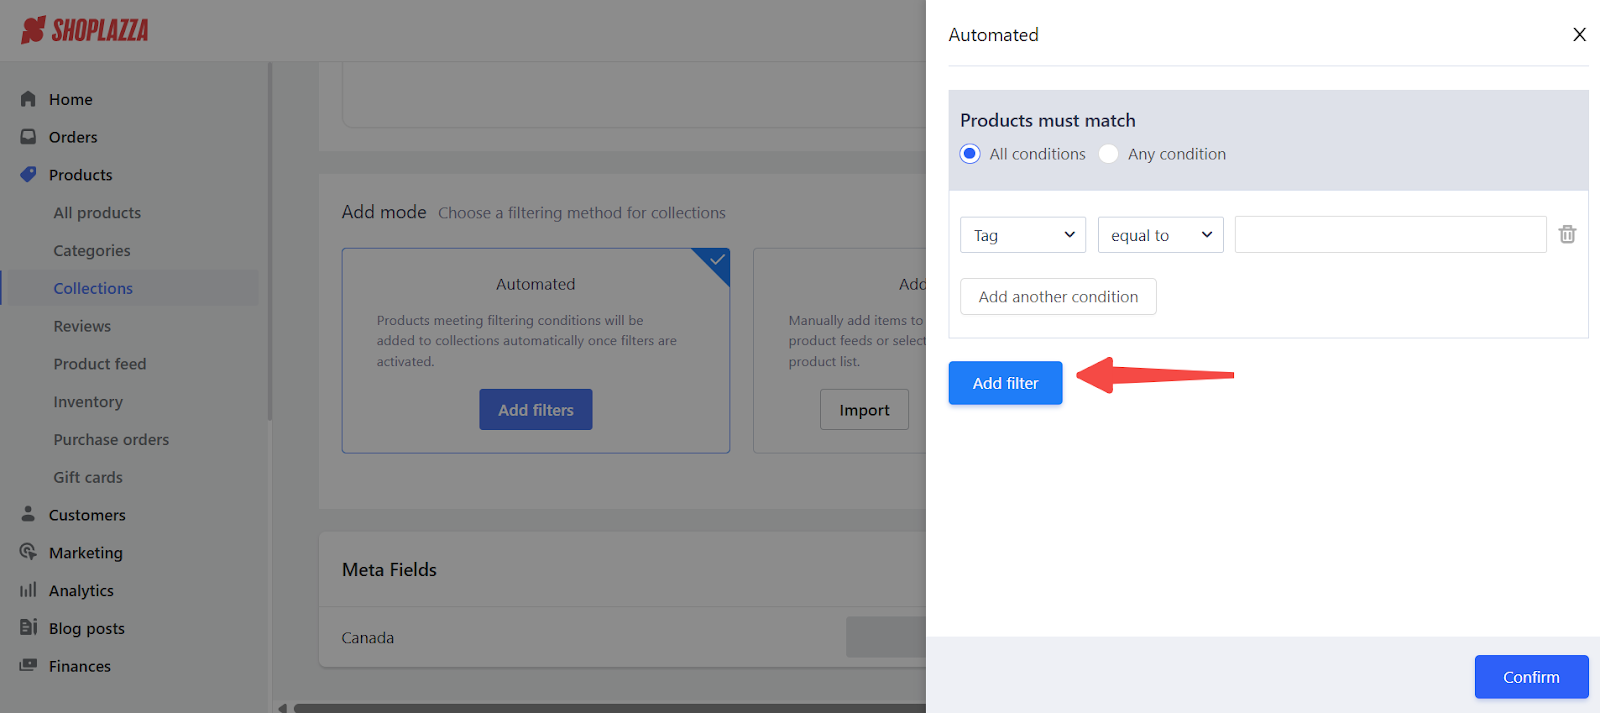
4. Set filter logic: Choose how filters are applied for your automatic collection.
- All conditions: Products must meet every filter you've added. This is best for creating tightly defined groups.
- Any condition: Products only need to match one of the filters. This is more flexible and includes a broader range of items.
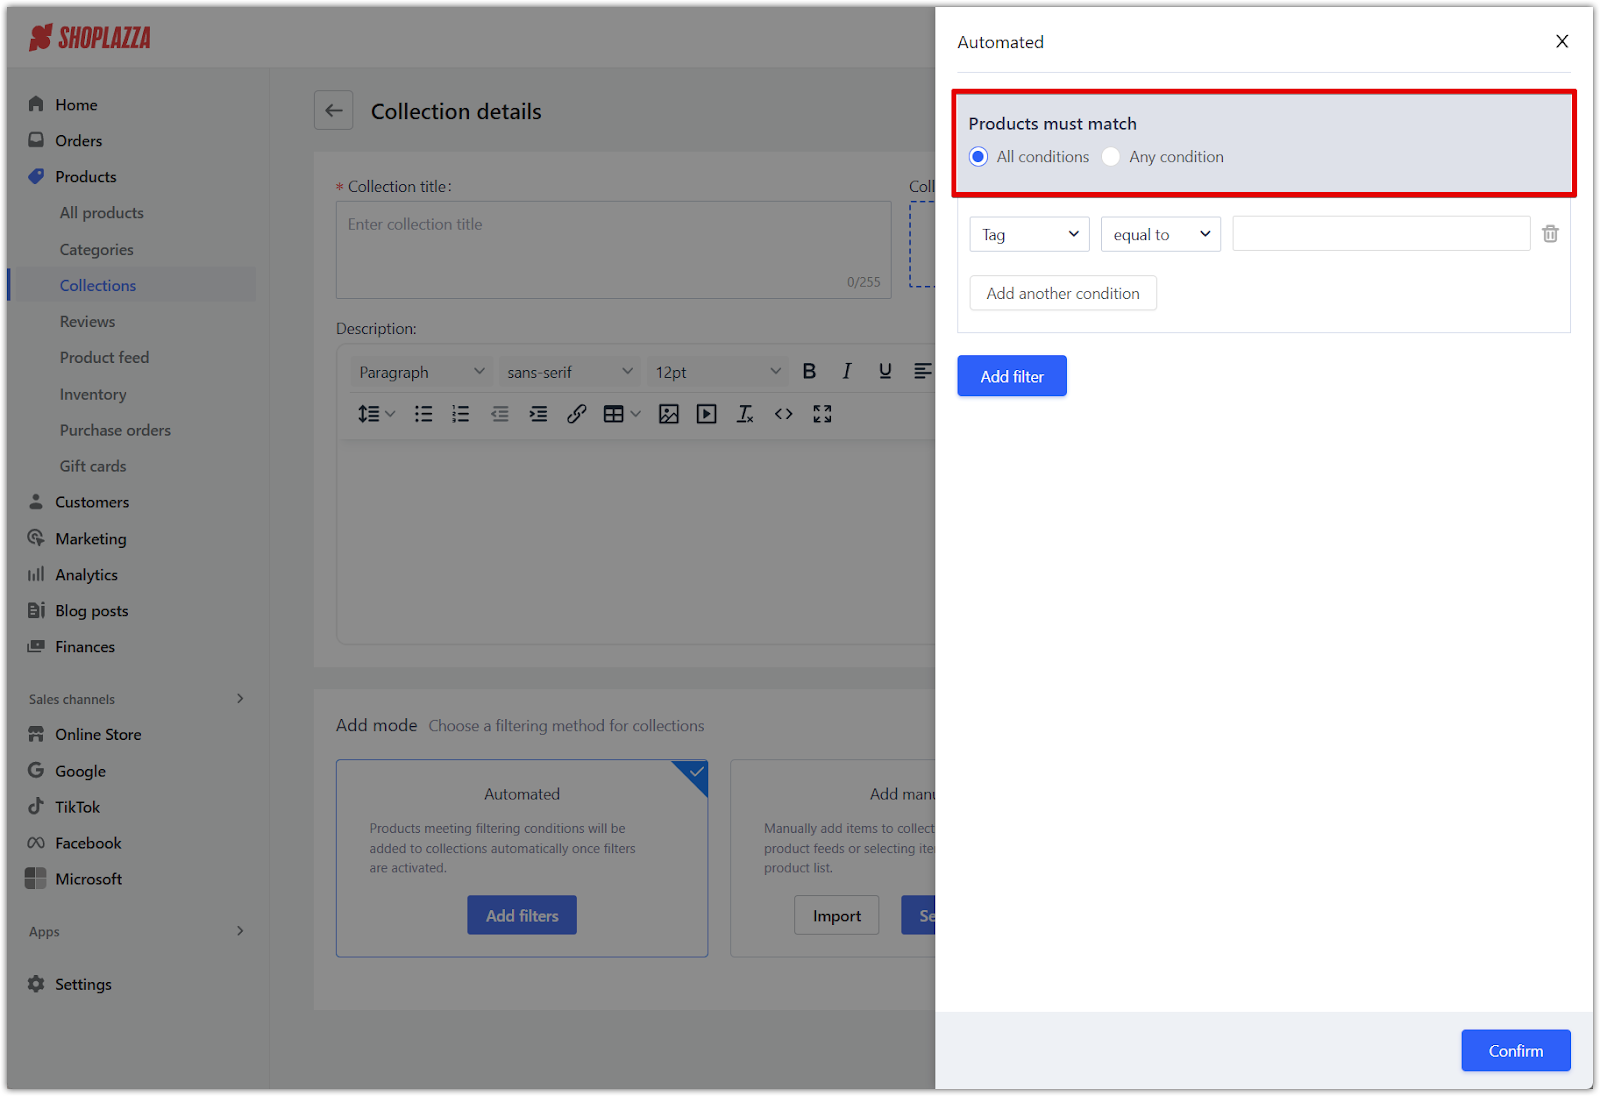
5. Set condition type: For each filter, choose whether the value should be equal to or not equal to your input. This allows you to precisely include or exclude products based on specific attributes like tags, vendors, or product types.
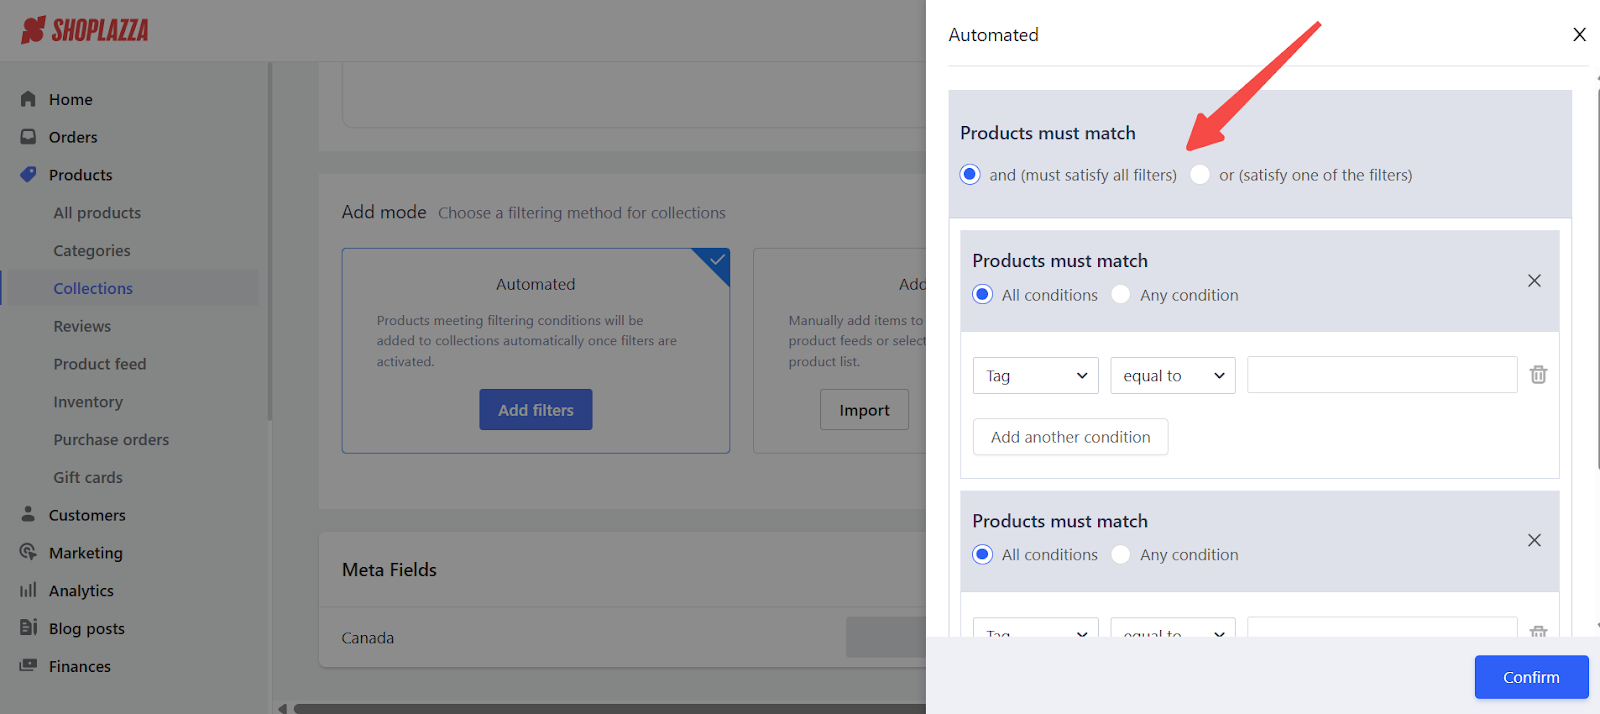
6. Add additional filters: To further refine your collection, click Add filter to create multiple filter modules. Each module can have its own set of filters, and you decide how they work together:
- AND mode: Products must meet criteria in all modules.
- OR mode: Products only need to meet criteria from any one module.
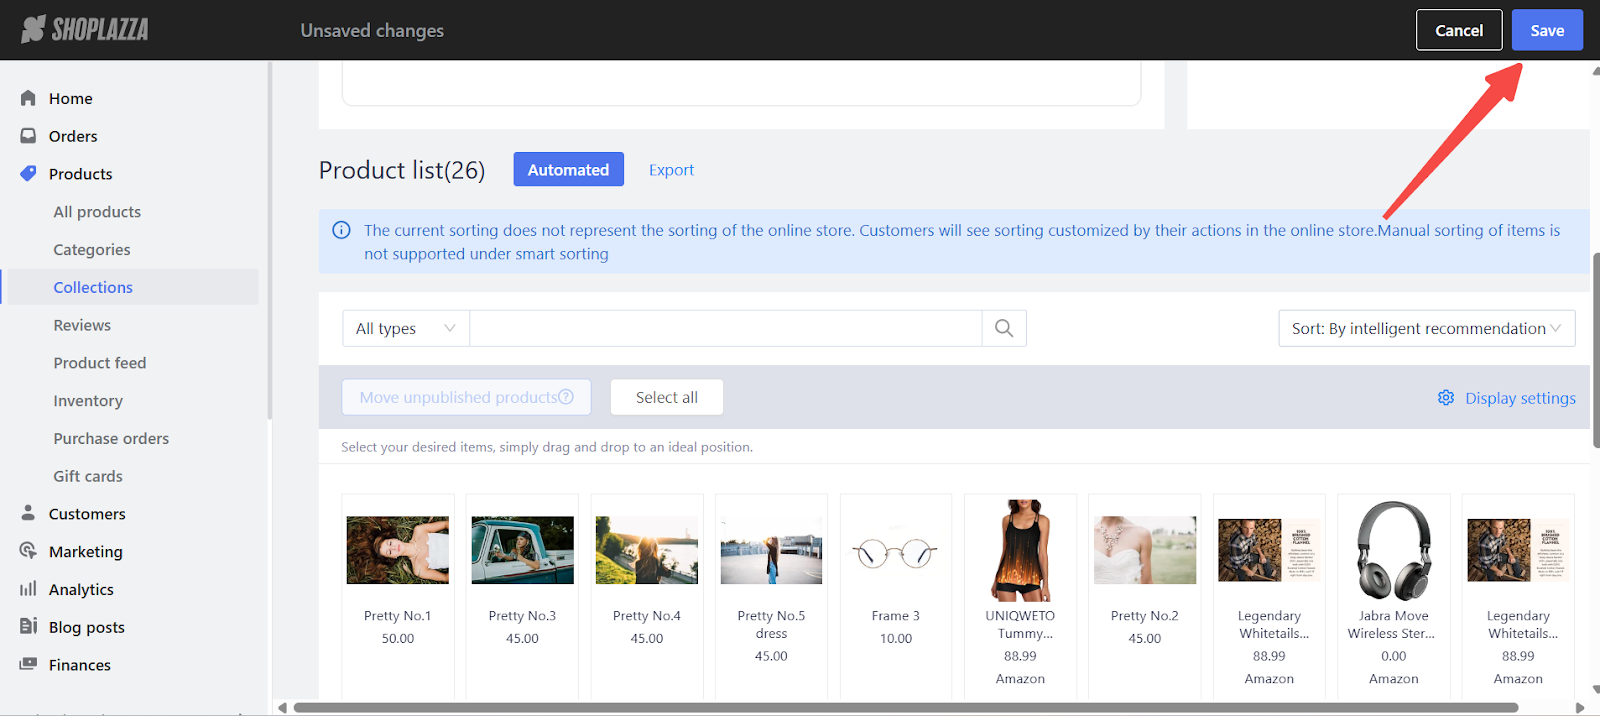
7. Save your collection: Once you’re done setting filters and adjusting your product list, click the Save button in the top-right corner to apply the filters and finalize your collection.
Note
Products are automatically included in the collection when they meet your defined conditions. To remove an item, you'll need to update the filters or adjust the product so it no longer qualifies. Keep in mind that once a collection is set to Automated, it cannot be switched to Manual.
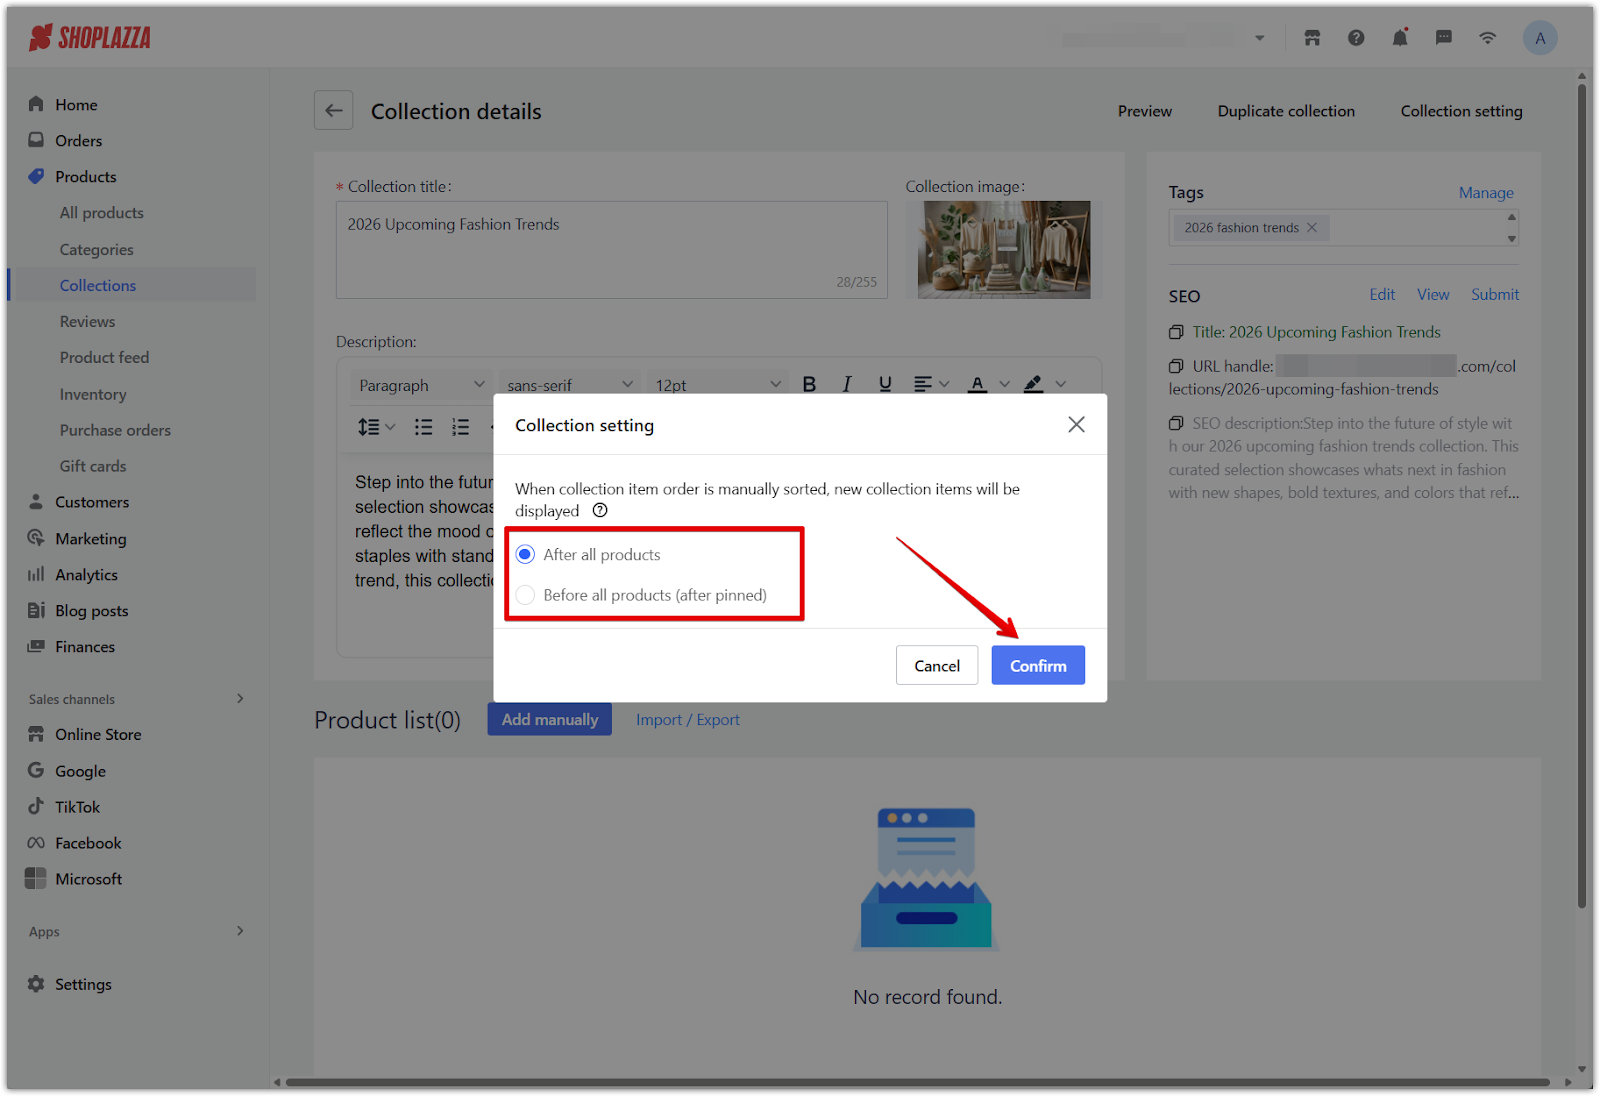
Setting product display order
After adding products, you can customize how new items appear in the collection. This setting applies to both manually selected and imported products. Items pinned to the top will retain their position regardless of the chosen order for new items.
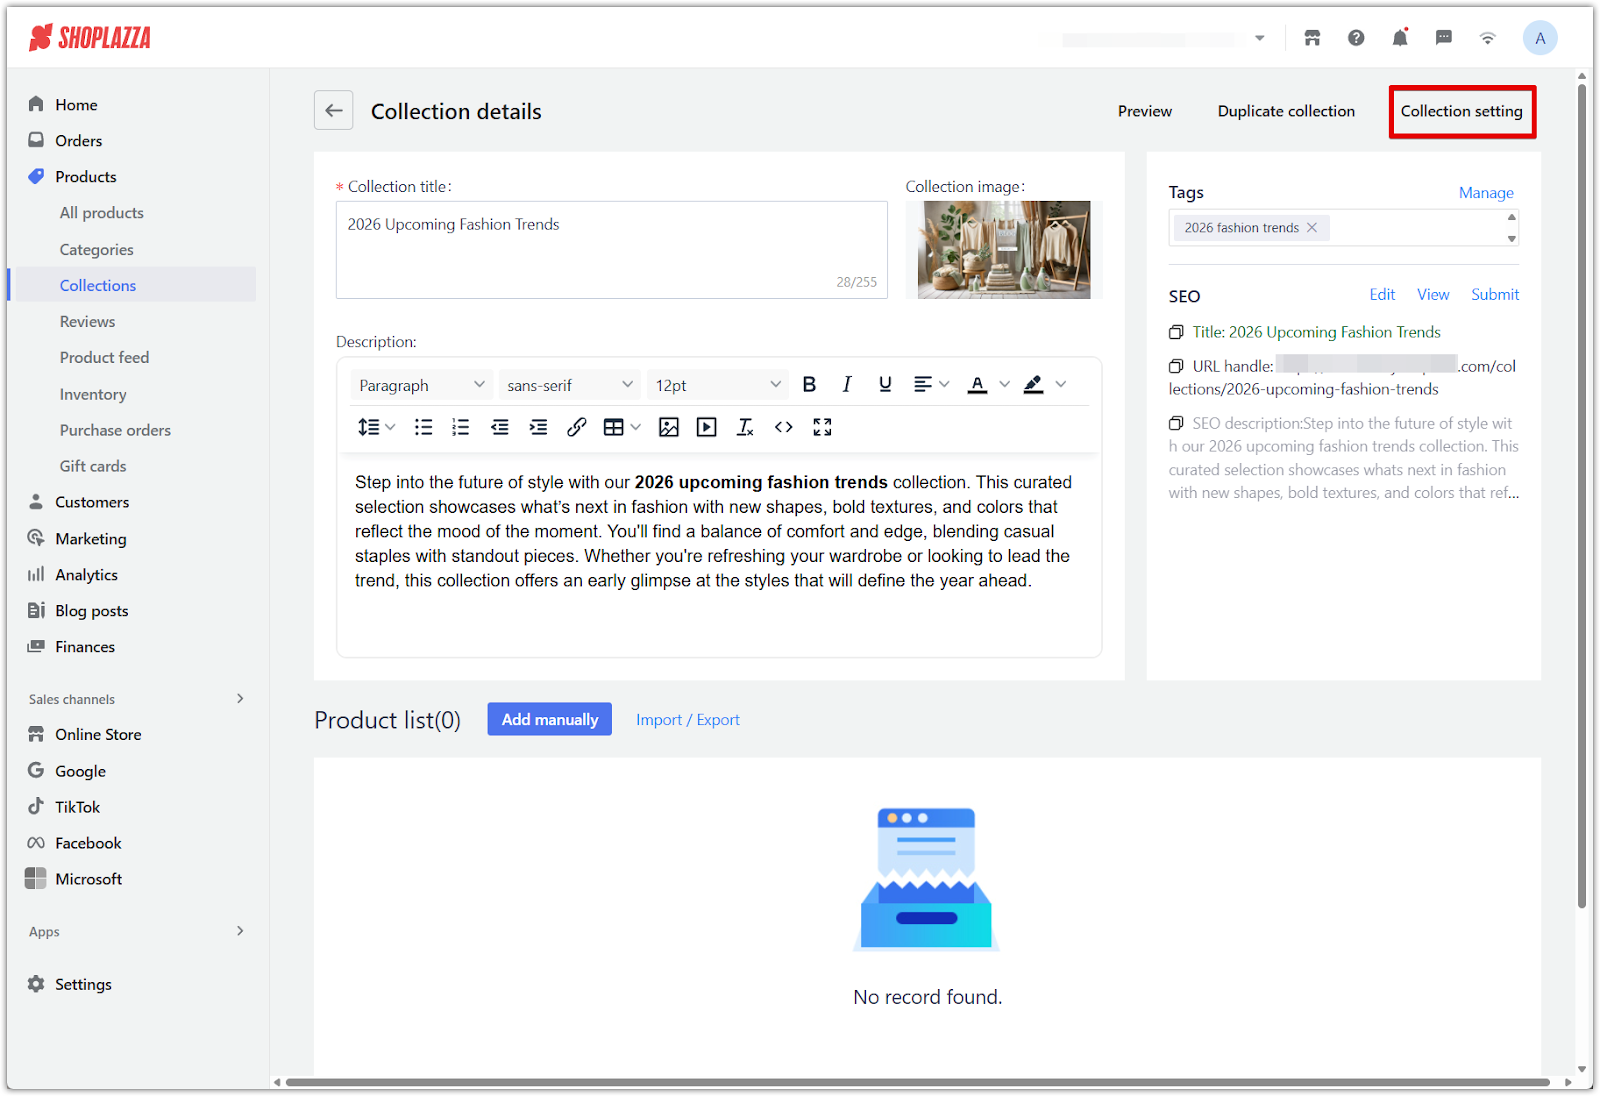
1. Click Collection setting: In the top-right corner of the collection editor, click Collection setting.
2. Choose the display order: Set whether newly added items appear After all products or Before all products (after pinned). Click Confirm when done.
Automatic collections offer a reliable and efficient way to manage your catalog. Clear conditions help ensure your store stays organized, products remain easy to find, and your workflow becomes more streamlined without the need for manual updates.


Comments
Article is closed for comments.