
Integrating a Snapchat Pixel into your website is a straightforward process that significantly improves your marketing strategy. By placing this small piece of code on your website, you can track and understand the actions of Snapchatters when they visit your site. This enables you to refine your marketing campaigns, craft custom audiences, and gain valuable insights from real-time data.. This article will walk you through the details of setting up a Snapchat Pixel for your store.
Steps
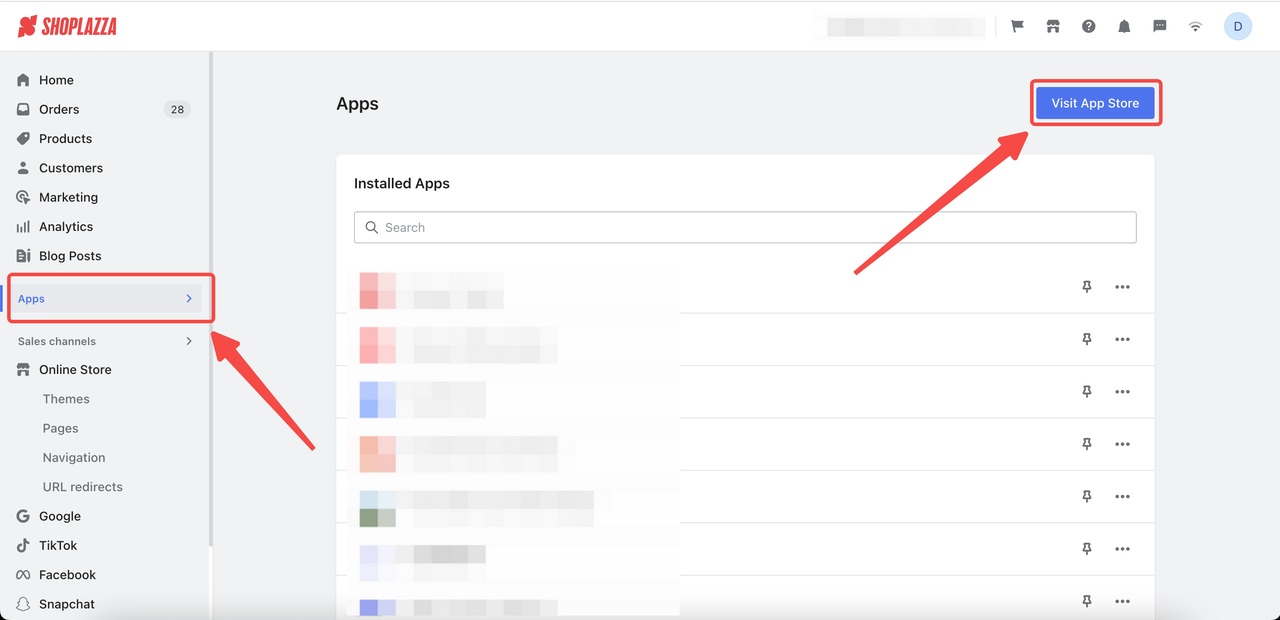
1. From your Shoplazza admin > Apps, click on Visit App Store.
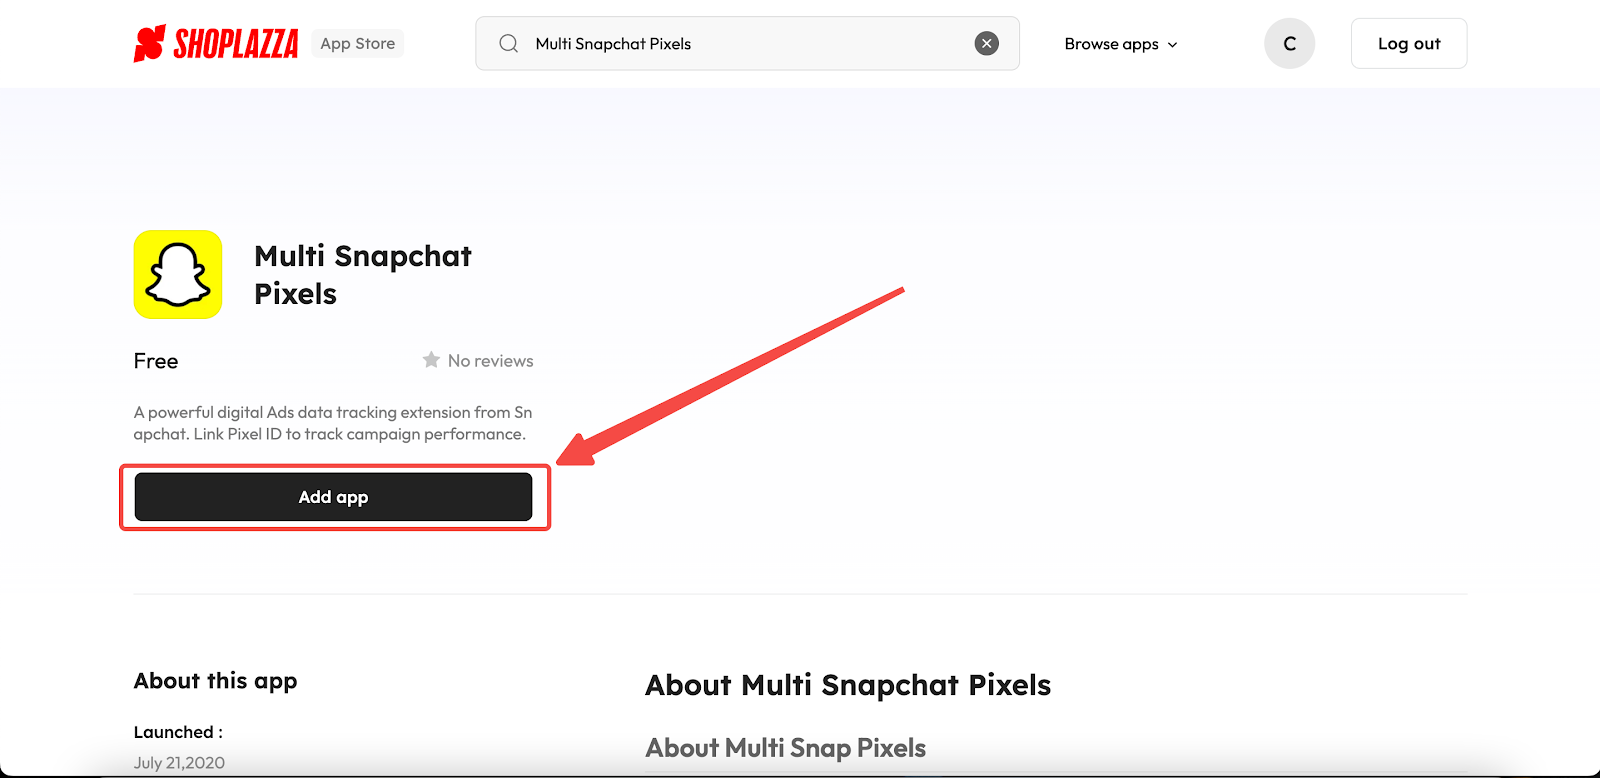
2. Enter the app name Multi Snapchat pixels in the search box and click on Add app.
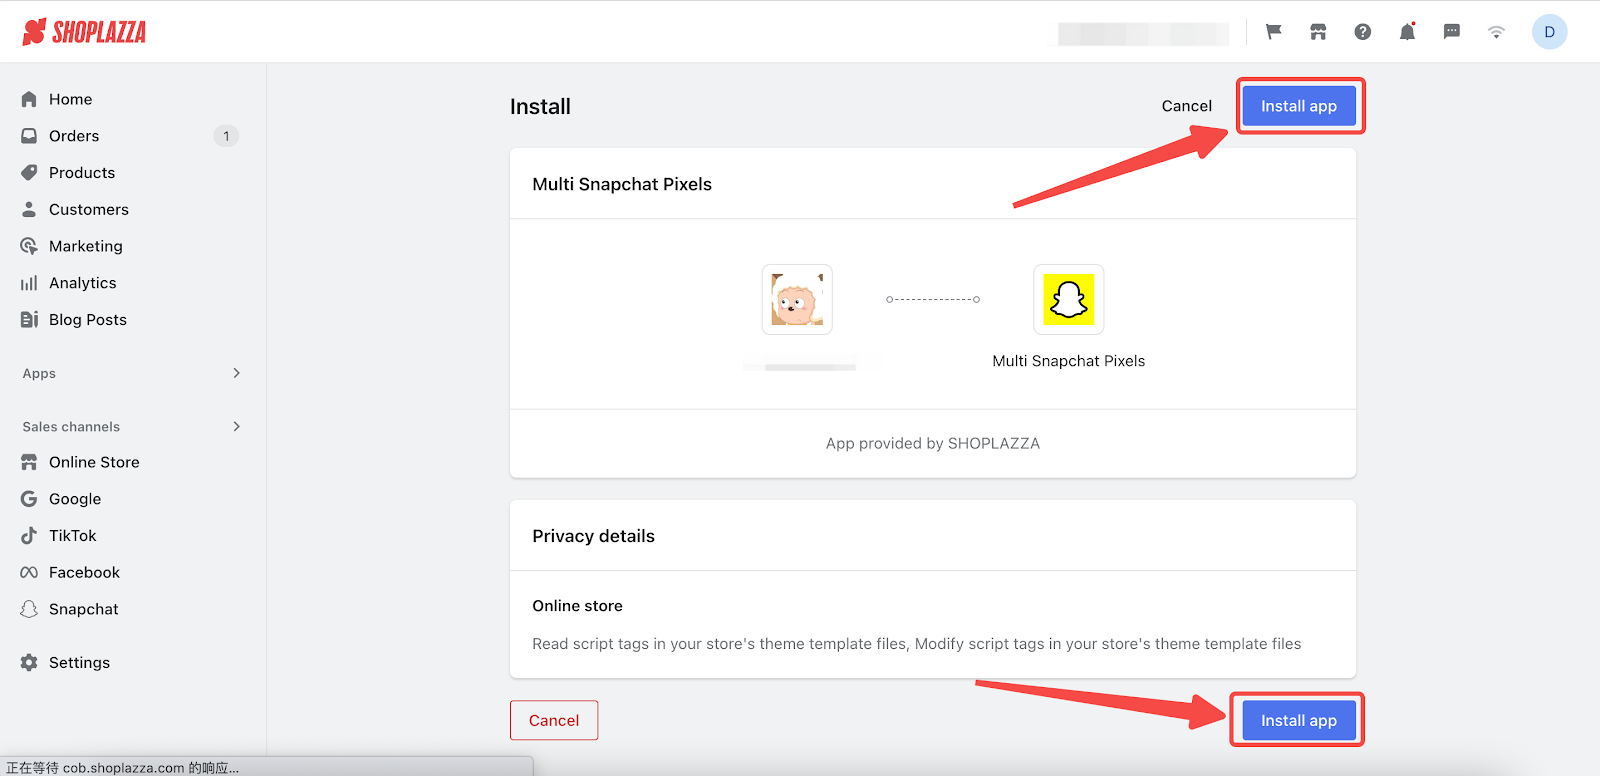
3. Click on Install app.
4. Go to Snap Ads Manager to log in or sign up for an account.

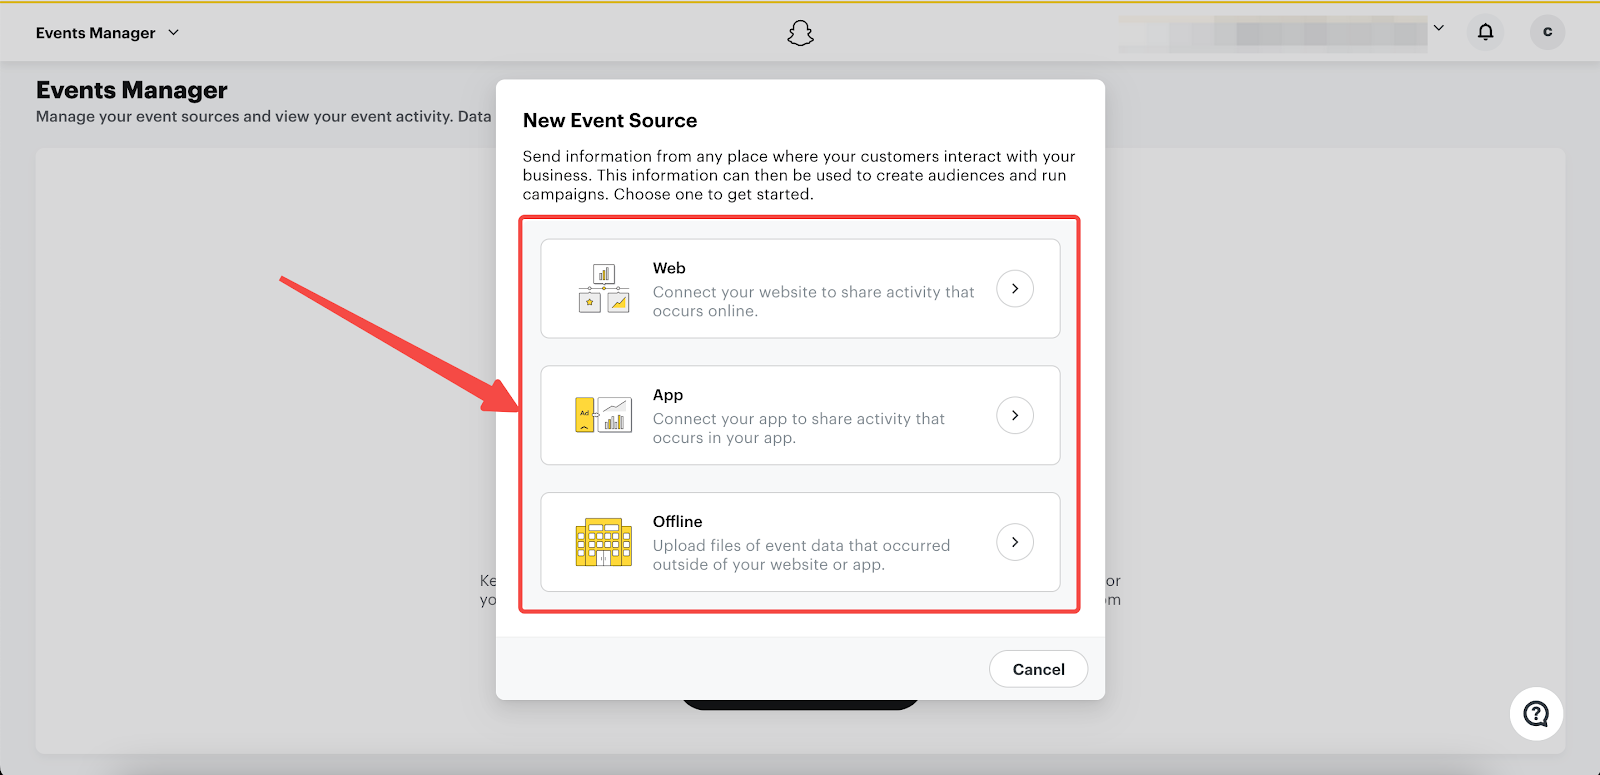
5. Navigate to Create Ads > Events manager, and click on New Event Source if you don't already have one.

6. Choose Web to begin setting up your event source.
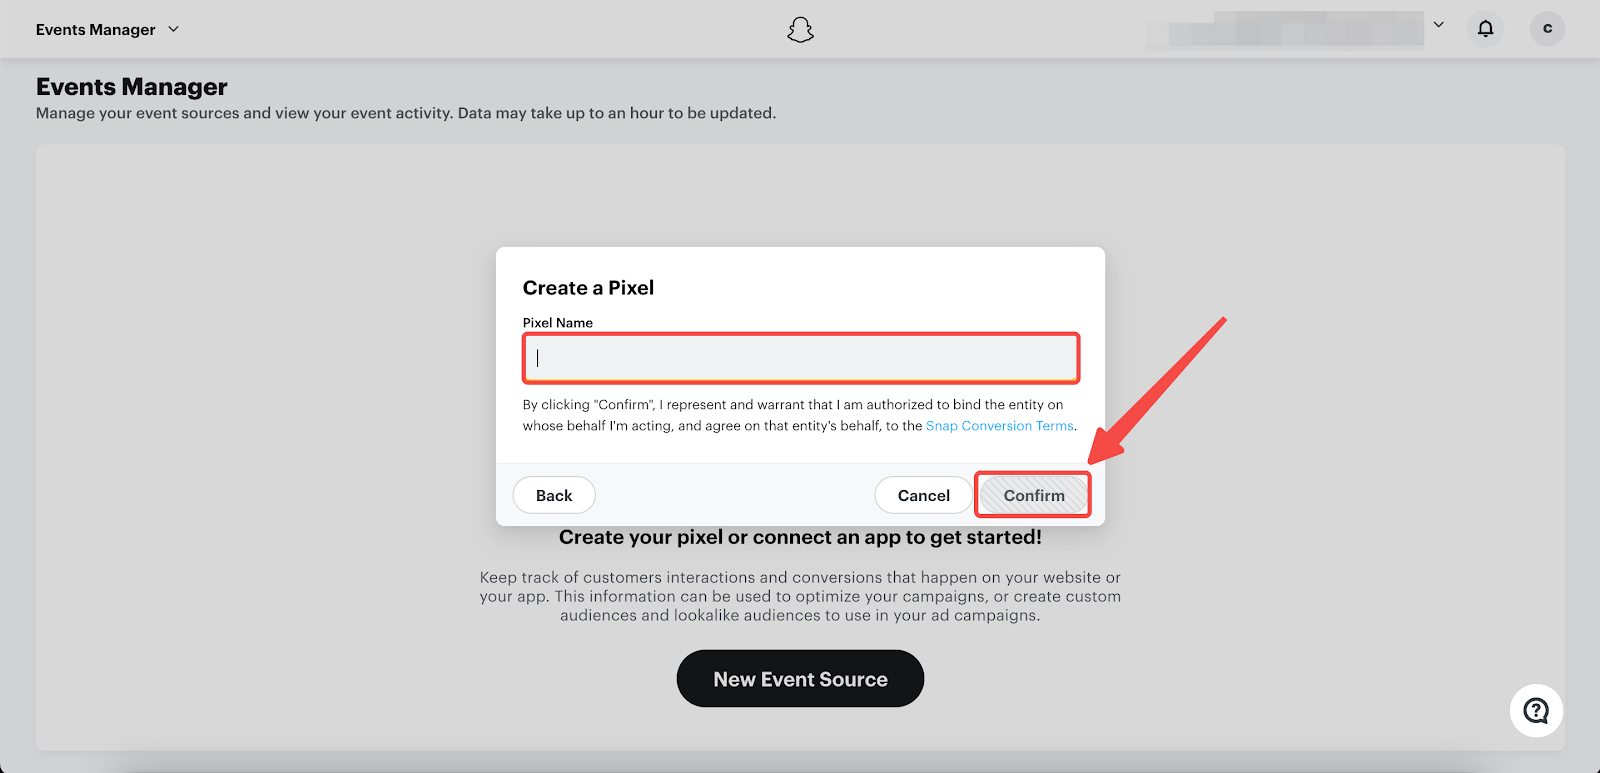
7. Enter the Pixel Name and click Confirm to continue.
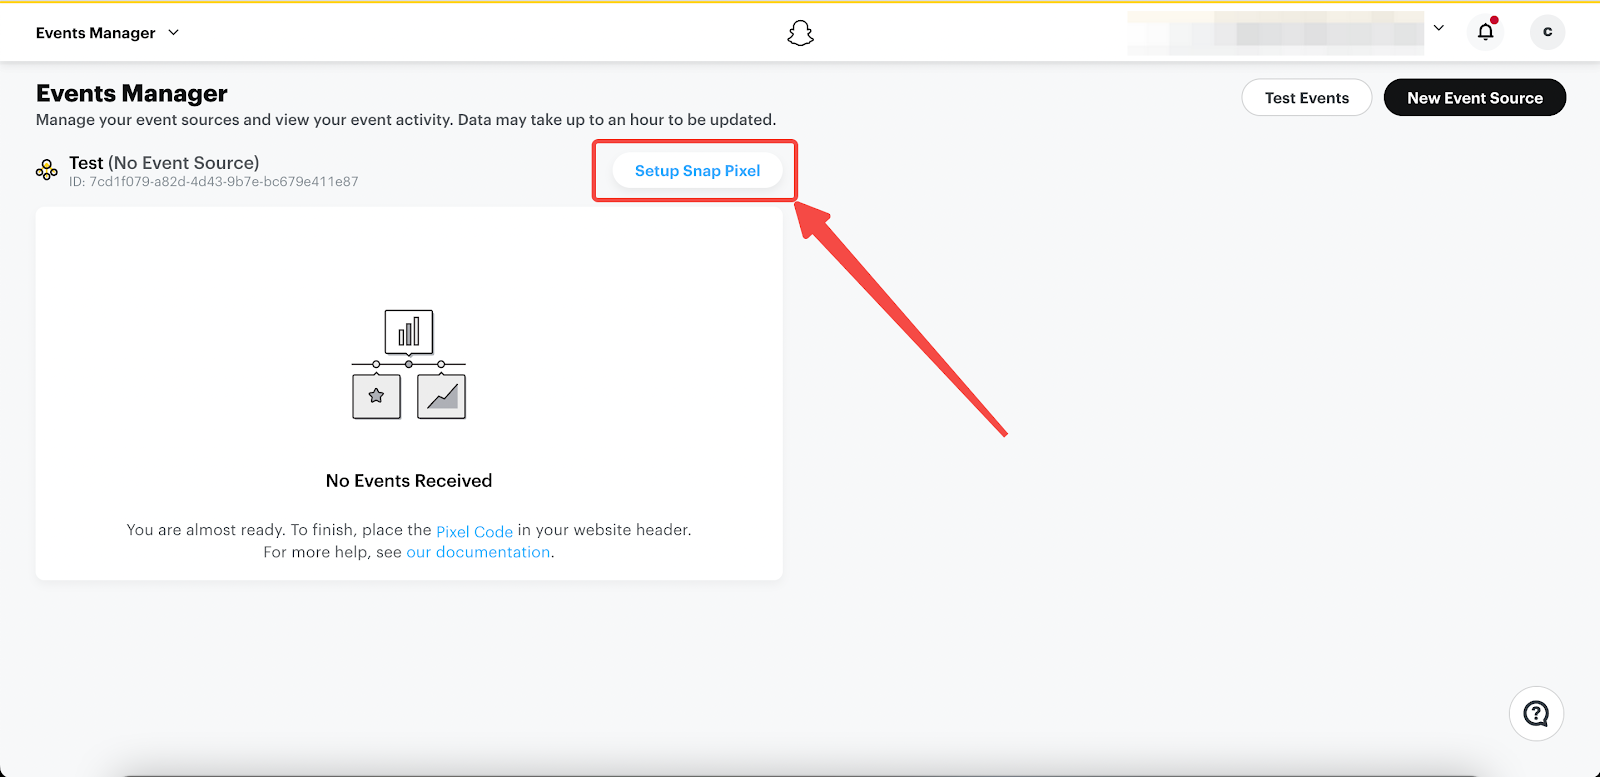
8. Click on Setup Snap Pixel.
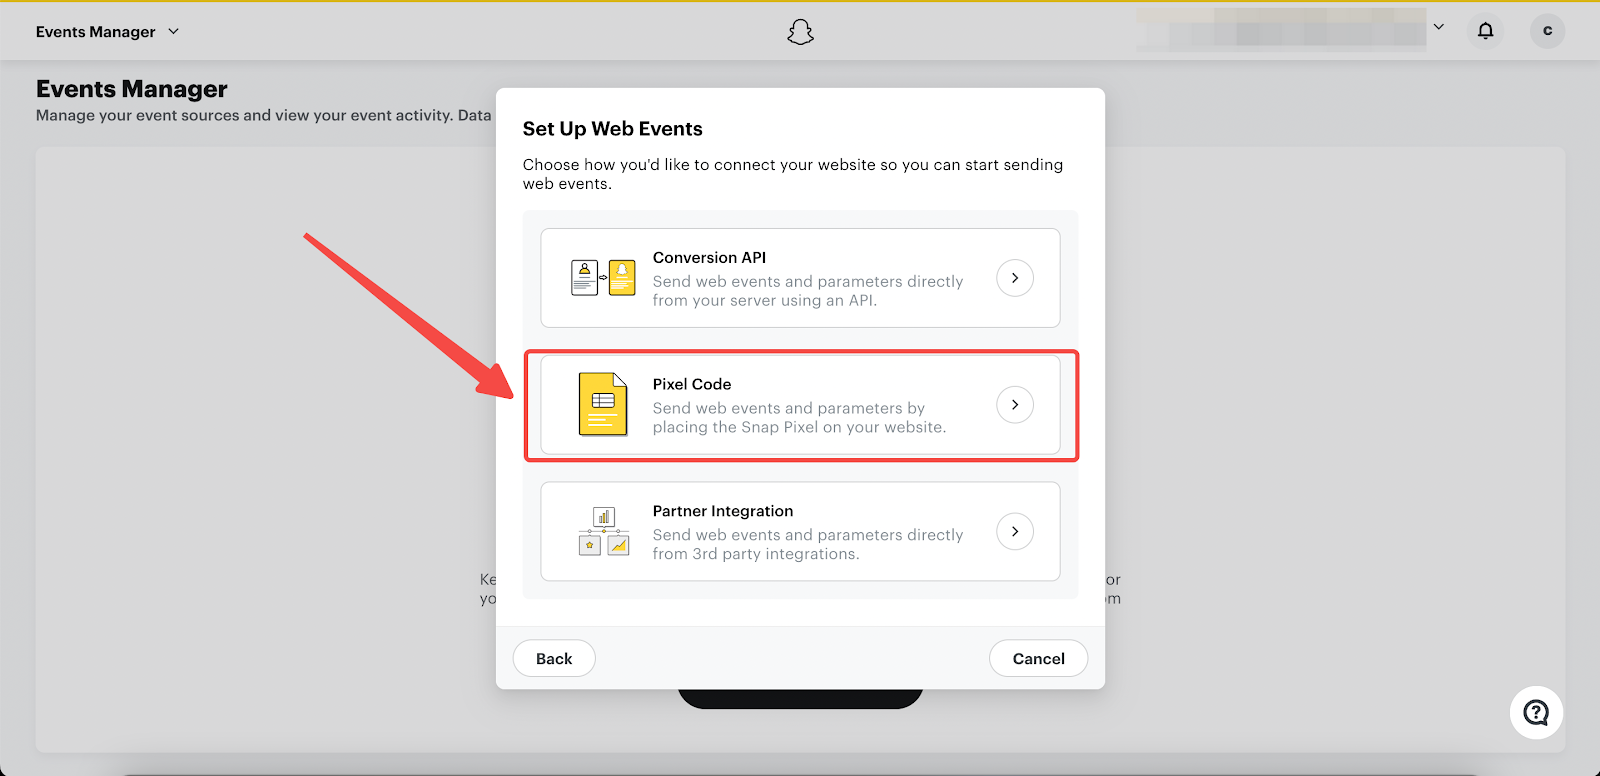
9. Click on Pixel Code.
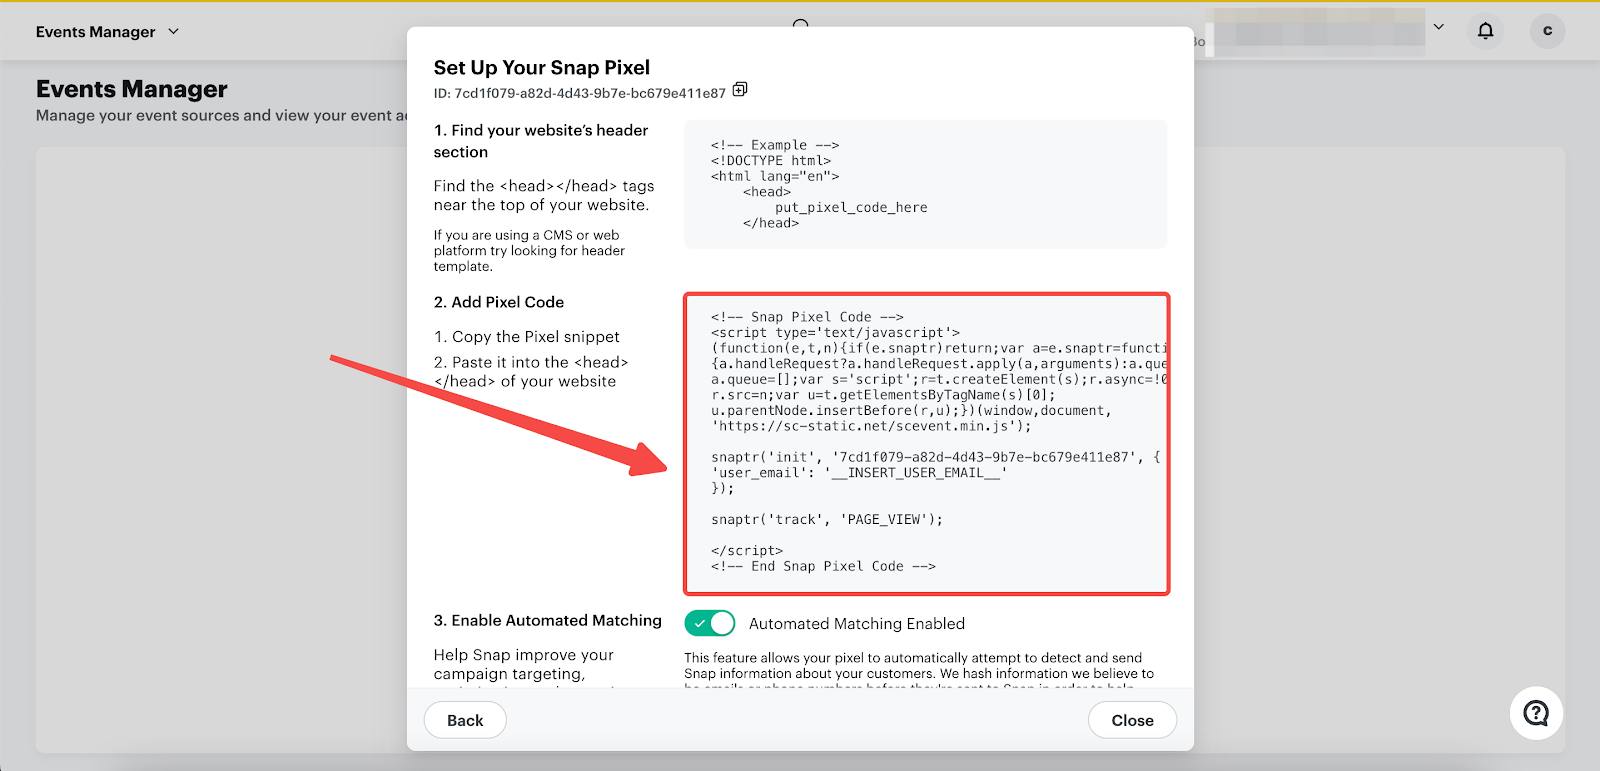
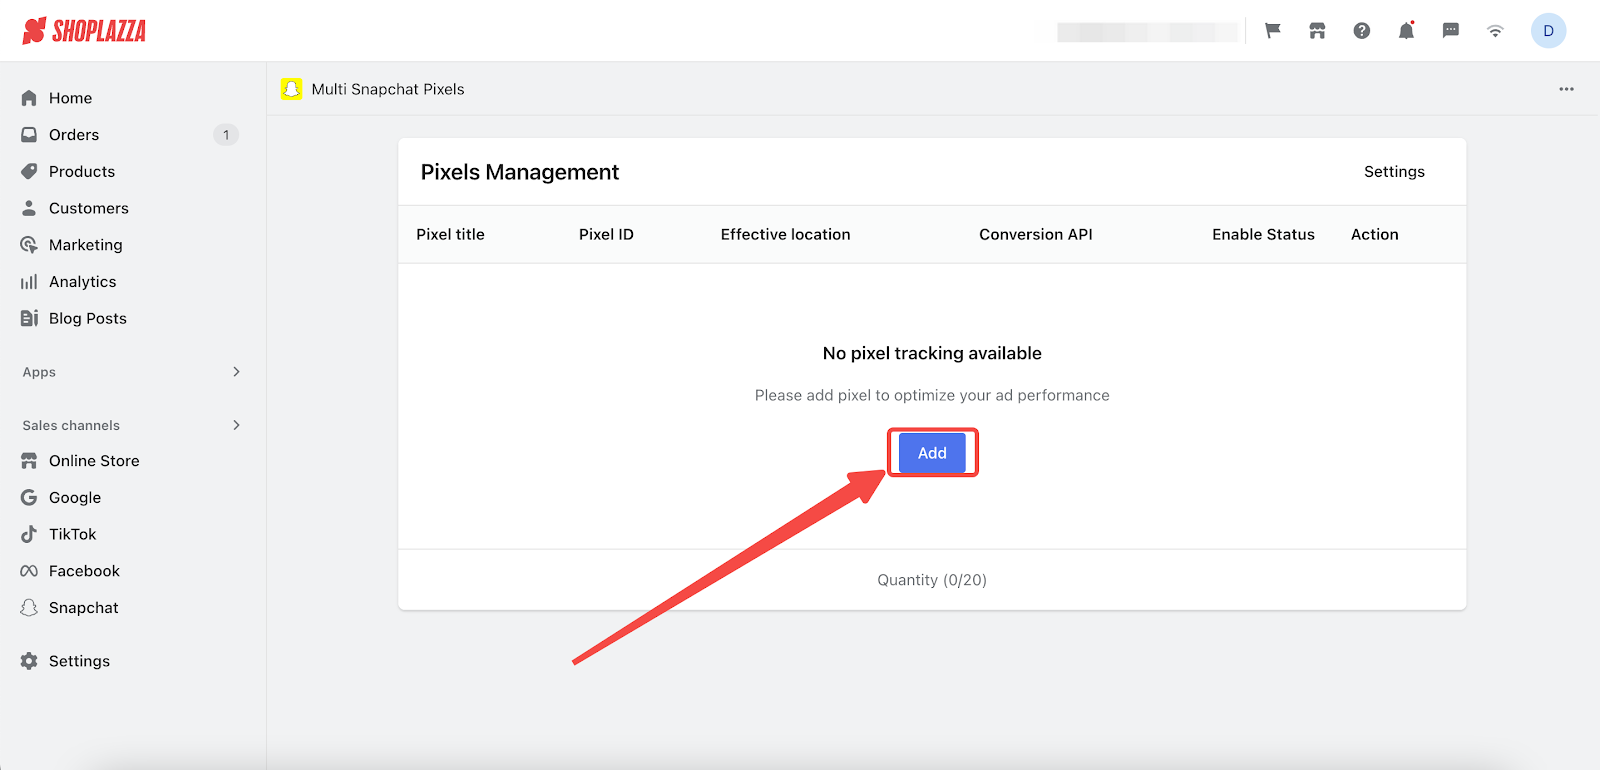
10. Copy the pixel code to your clipboard.
11. Return to the Multi Snapchat Pixels app and select the Add button.
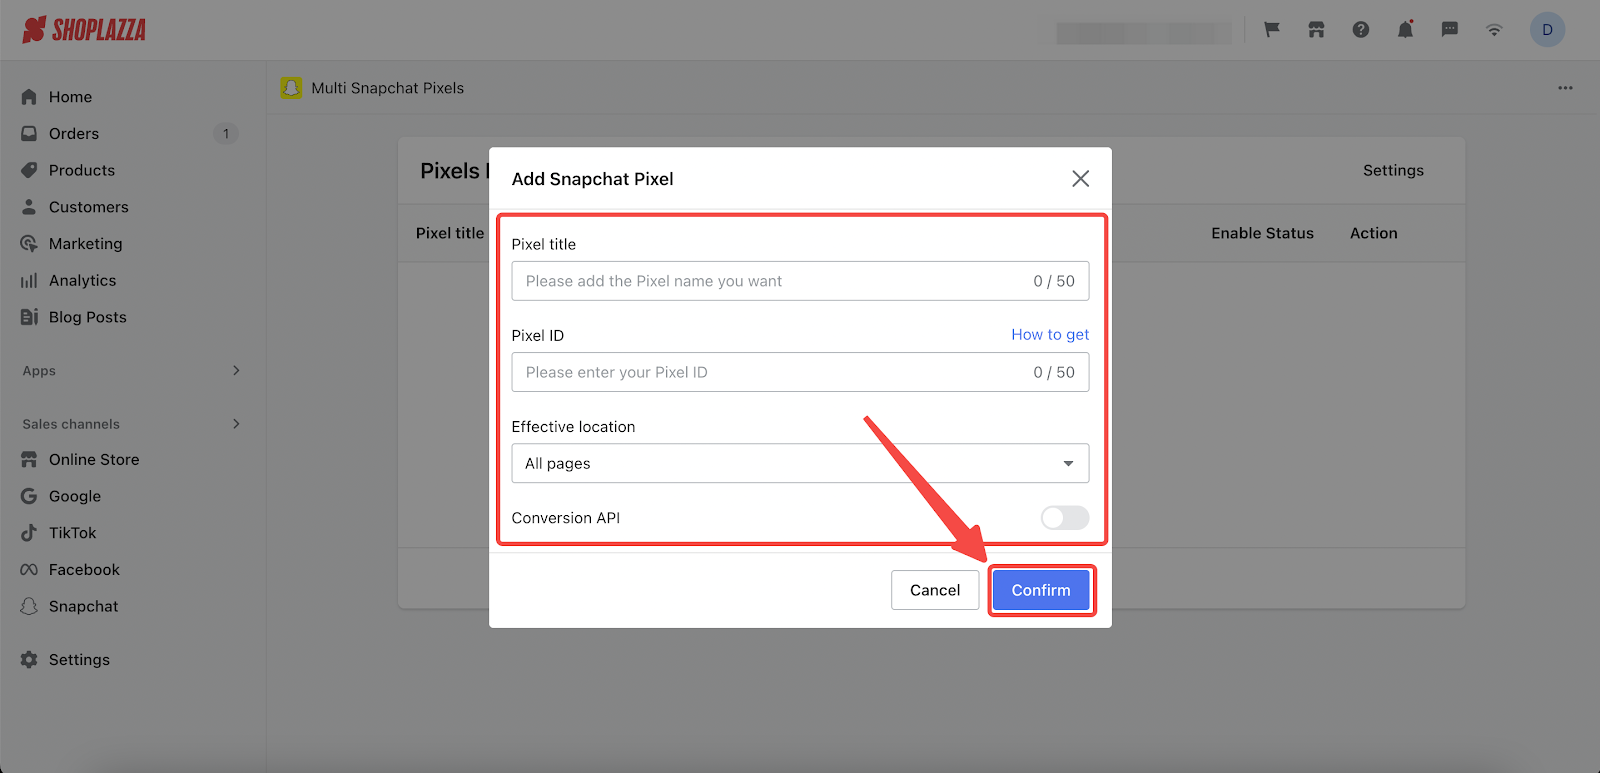
12. In the Pixel ID section, paste the copied pixel code from step 11 and adjust other settings as needed. Click Confirm to finalize.
By following the above steps, you can easily set up Snapchat pixel. This will help you track and gain data insights from your Snapchat. Install the Snap Pixel Helper to ensure that Snap Pixel is properly installed on your website.


Comments
Article is closed for comments.