Pop-ups are interactive elements on a website that, when used effectively, can significantly enhance customer engagement and contribute to business growth. These small windows appear while customers browse your store's website. Their primary uses include advertising new products, capturing sales leads, promoting special offers, and more. With the right approach, pop-ups can boost sales, grow your email list, and improve the overall visitor experience.
Creating campaigns
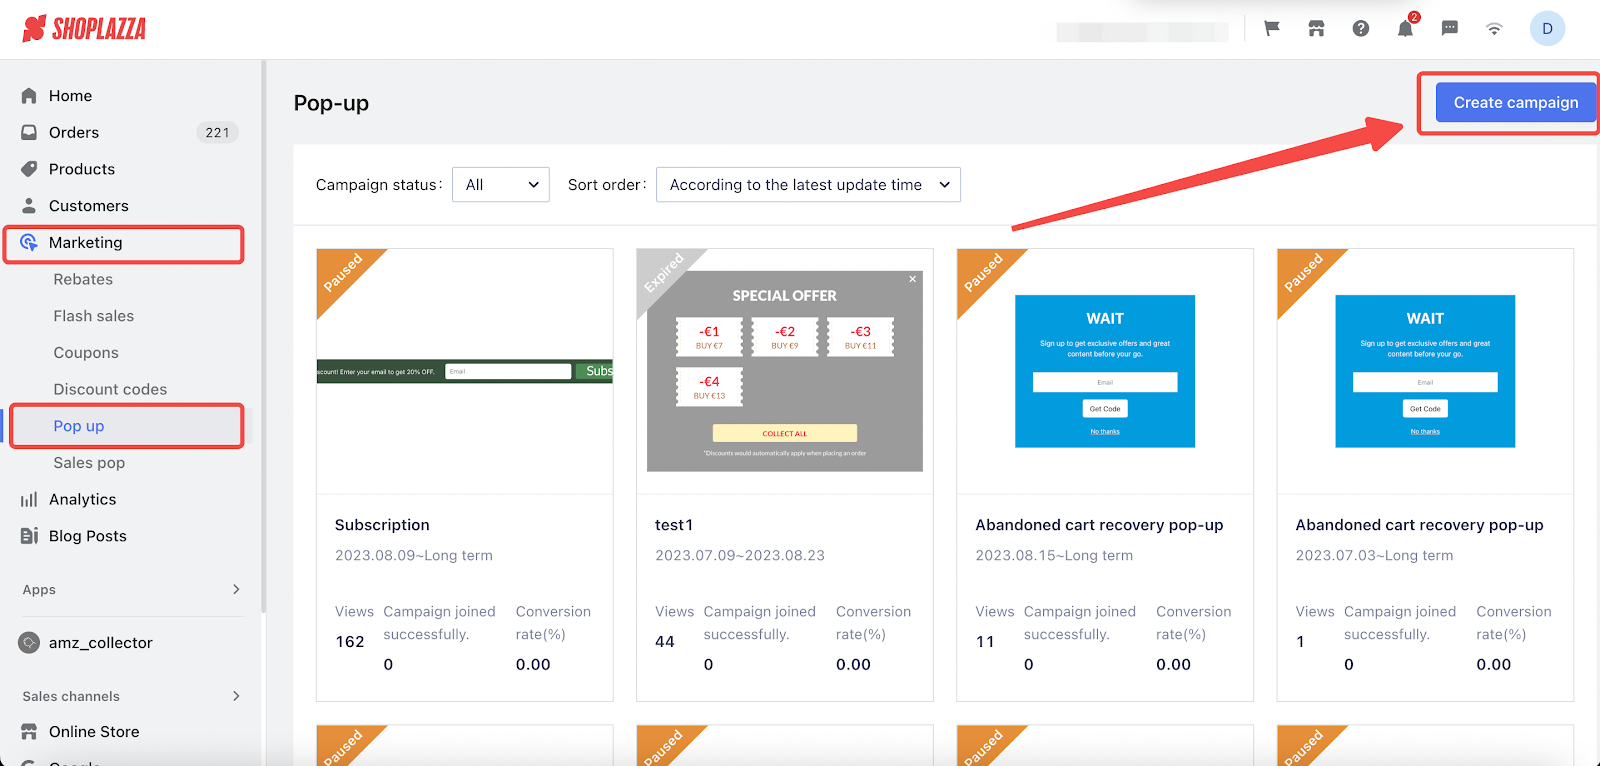
From your Shoplazza admin > Marketing > Pop up, click on Create campaign.

Choosing templates
On the Pop-ups tab, preview or choose a template. Main template types include:
- Rebates: This pop-up automatically displays the original price and the reduced price in your store, and discounts apply automatically at checkout.
- Subscriptions: This pop-up allows customers to enter their email to subscribe to your store's updates.
- Customer Retention: Similar to subscription pop-ups, this pop-up includes a discount field in the prompt, making it more appealing for customers to subscribe.
- Abandoned Cart Retention: This is a pop-up for the shopping cart page, where you can set up a discount code to encourage customers to complete their orders.
- Flash Sales: This pop-up displays a countdown and discount details. Customers can click the entry button to enter the flash sales page.
- Holiday Discounts: This pop-up directly shows the discount rate. Customers can click the entry button to proceed to the checkout page.
- Marketing Campaigns: This pop-up displays specific marketing promotions, like 'Buy 2, Save $15'. Customers can click the entry button to go directly to the campaign page and start shopping.
- Discount: This pop-up simply displays the discount rate on products. Customers can click the entry button to start shopping.

Layout settings
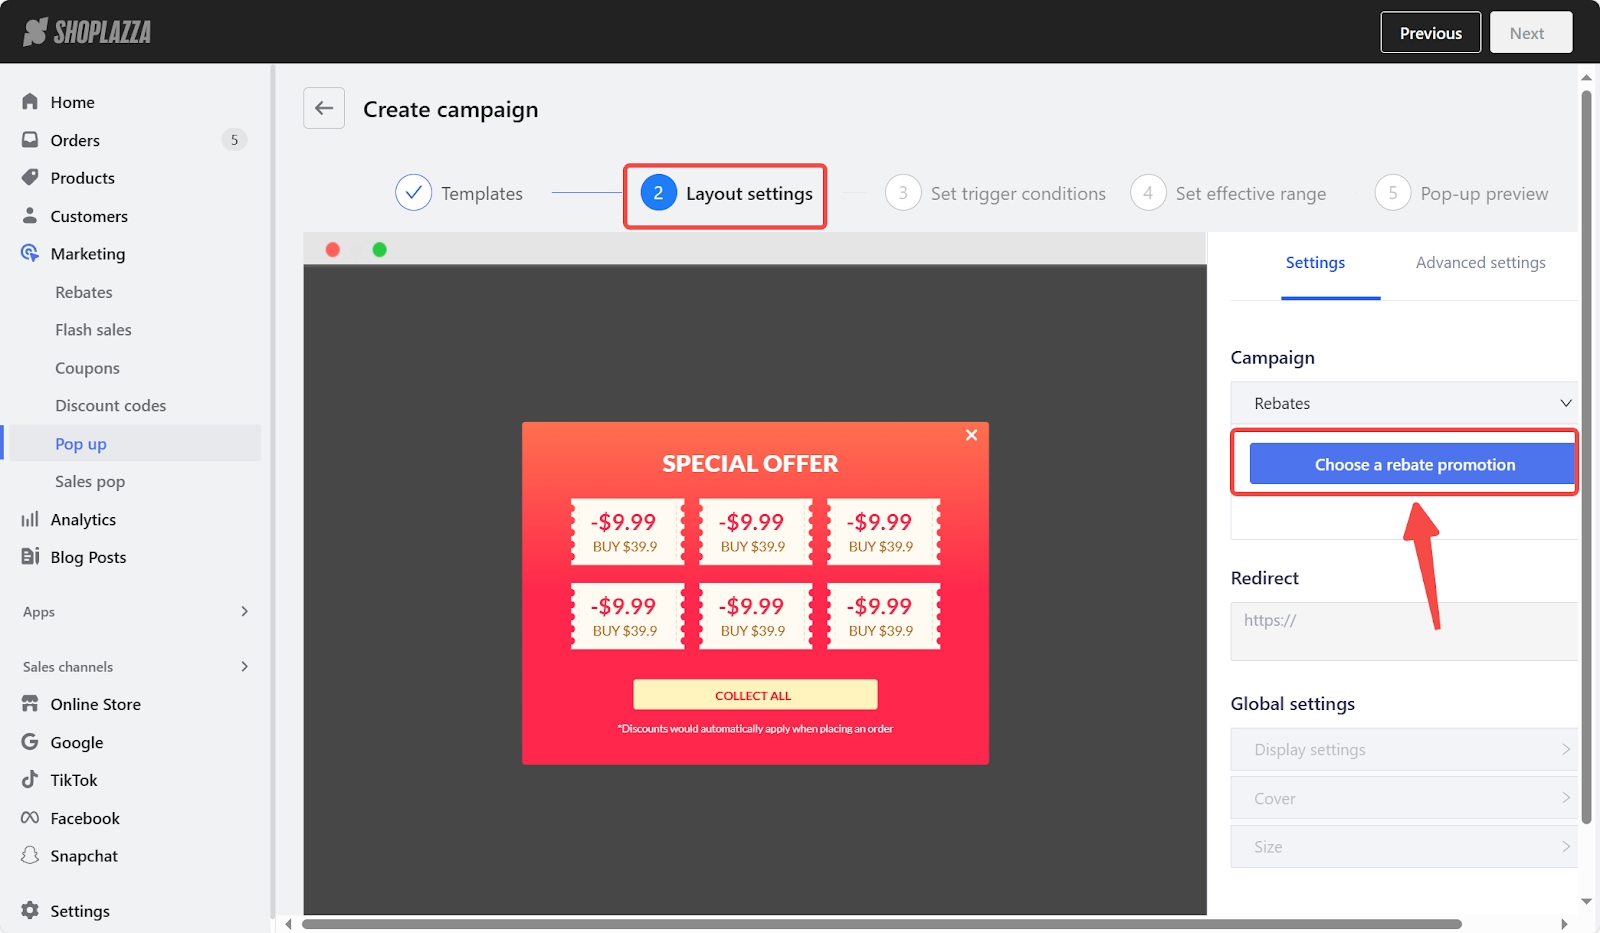
1. In layout settings, click Choose a campaign.

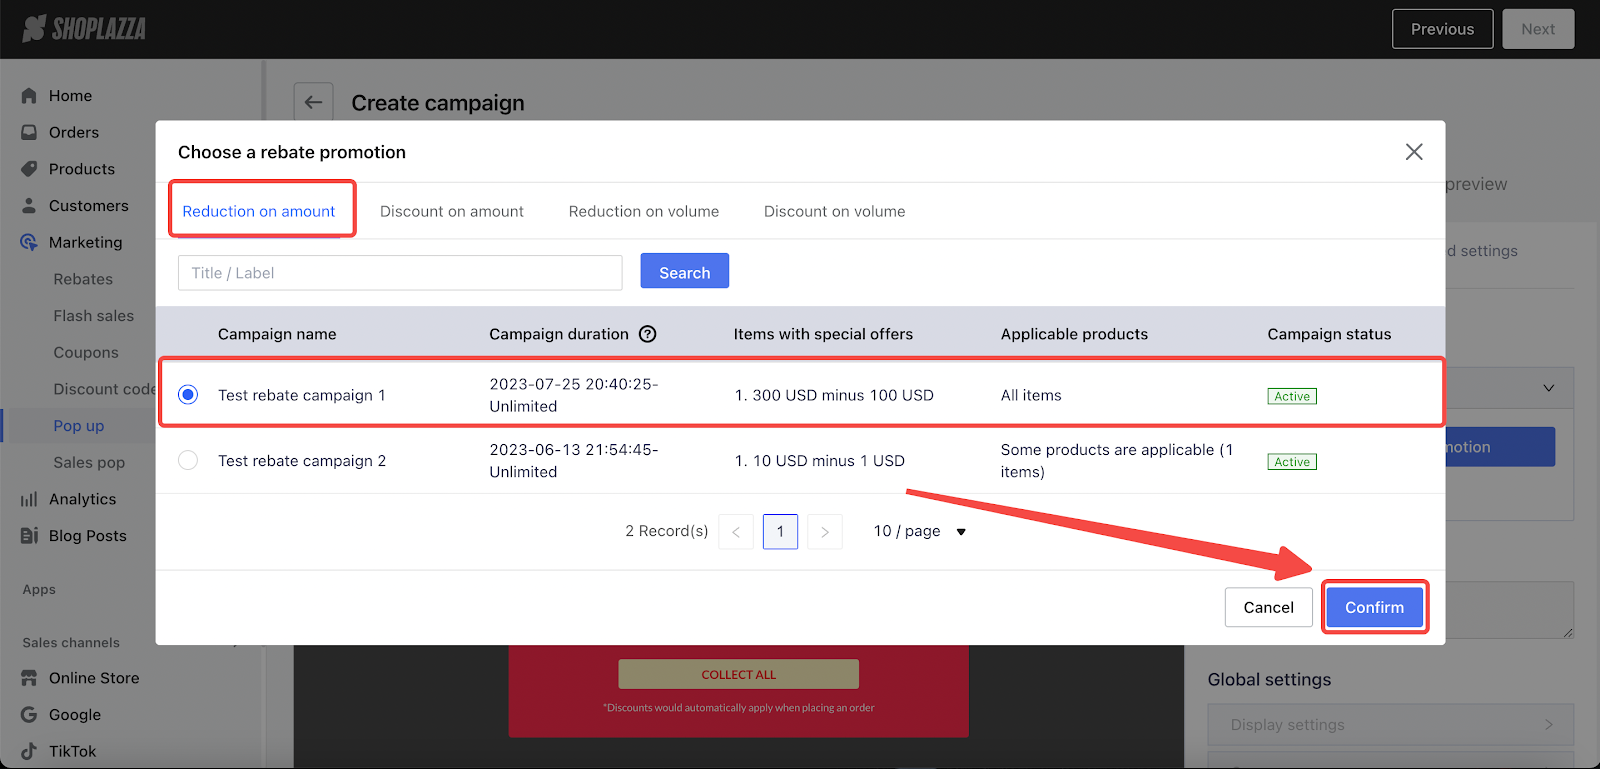
2. Choose a rebate type and specify the campaign. Once done, click Confirm.

3. Add a Redirect link and edit the Global settings section to set up display settings, cover, and size.

Advanced settings
1. In Advanced settings, modify colors for Text, Subtitle, Description, Button, and Discount coupon. Change the Base picture and its color. Once completed, click Next.

2. Select your display page as either All pages (excluding Payment and Registration) or a Specific page. For specific pages, choose by type (Home, Collection, Product, Cart, Flash Sale, Coupon Activity, etc.) or by URL. Up to 10 URLs can be added.

Setting trigger conditions
1. Set trigger timing for pop-ups as Enter the page or Leave the page.
- Enter the page activates the pop-up when the customer lands on the page.
- Leave the page works only for desktop views.
- Adjust the delay time to No delay or Delay (from 1 to 10 seconds).
- By default, Leave the page disables the delay.

2. Set display frequency to: Every time, Once, Daily, Weekly, or Monthly.
- Stop condition can be set up as After pop up (number of times), After closing, and After participating in the campaign.
- Click Next to define the effective range.

Setting an effective range
Here you can click Edit to set the target customer.
- The time zone when the campaign is active is the same as that of the store.
- The campaign title is only used for admin and will not be displayed on the user end.
- Click Next to go to the preview page.

Pop-up preview
At the final step, click Preview to view the effect of the pop-up display. Once confirmed, click Save.

Note
When targeting customers, categorize new visitors within 24 hours as New Users, returning visitors as Existing Users, email submitters as Subscribed Users, and others as Unsubscribed Users.
Pop-ups can effectively drive your store's sales and conversions, expand your customer email database, and enhance your visitor's experience. This tool is a game-changer for your business growth. Harness its potential to drive success in a user-friendly way.


Comments
Please sign in to leave a comment.