
Boost your Shoplazza store's holiday spirit and create a memorable shopping experience for your customers! With these simple code snippets, you can easily add fun visual effects and festive designs to your store pages. A little holiday magic can go a long way in increasing customer engagement and conversions.
Note
This code is provided as a reference. If you encounter any issues with your store's appearance after adding the code, it might be due to incompatibility with your current theme or conflicts with other customizations. If this happens, remove the added code or contact your technical team for help. Some code snippets require adding the Custom Code app to your store.
Adding code to the HTML section
Before we dive into the festive effects, let's quickly review how to add code to the HTML section of your Shoplazza theme editor.
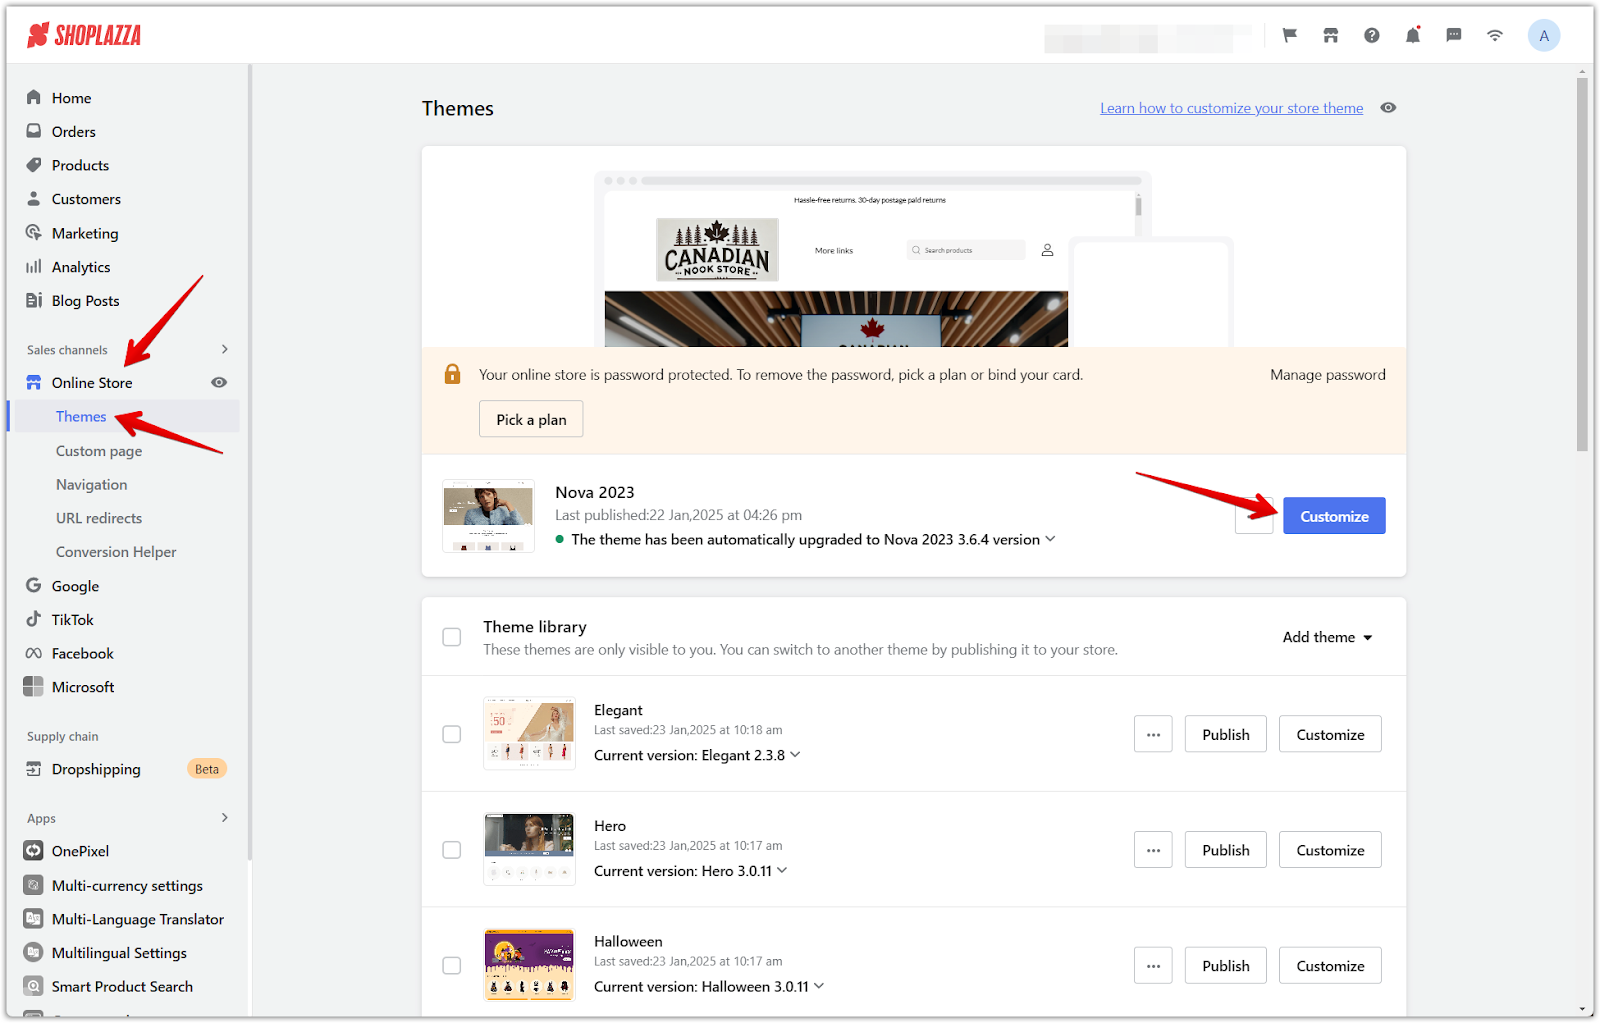
1. Access the theme editor: Go to your Shoplazza Admin > Online store > Themes. Click Customize.
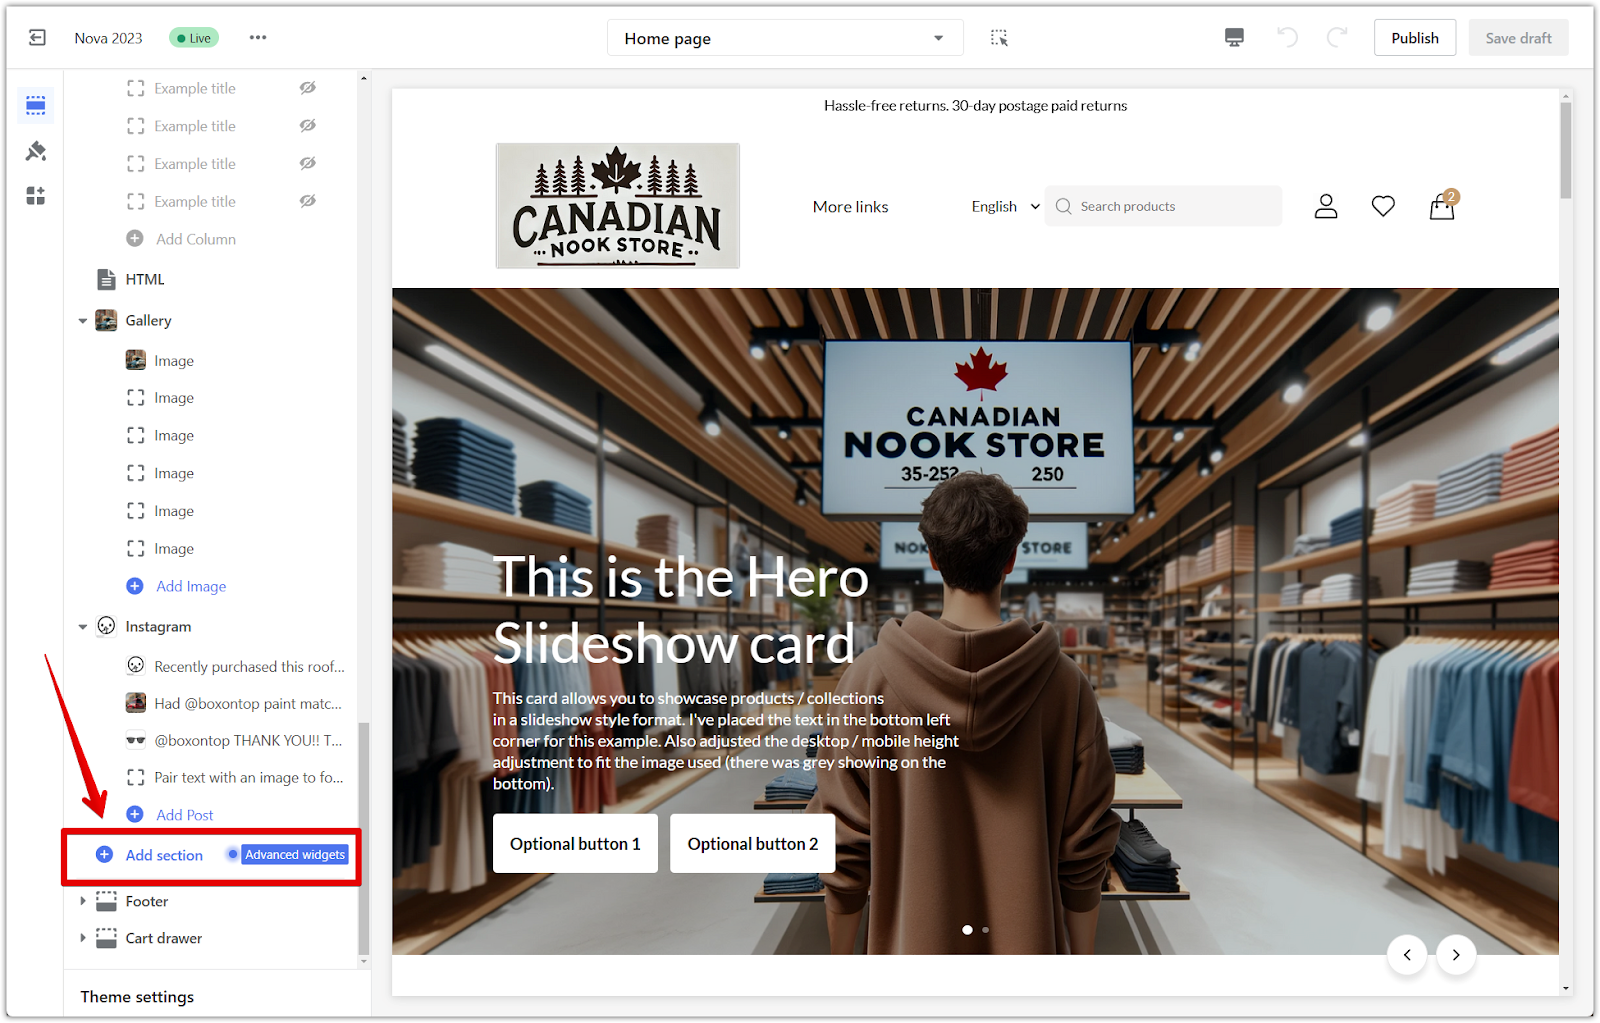
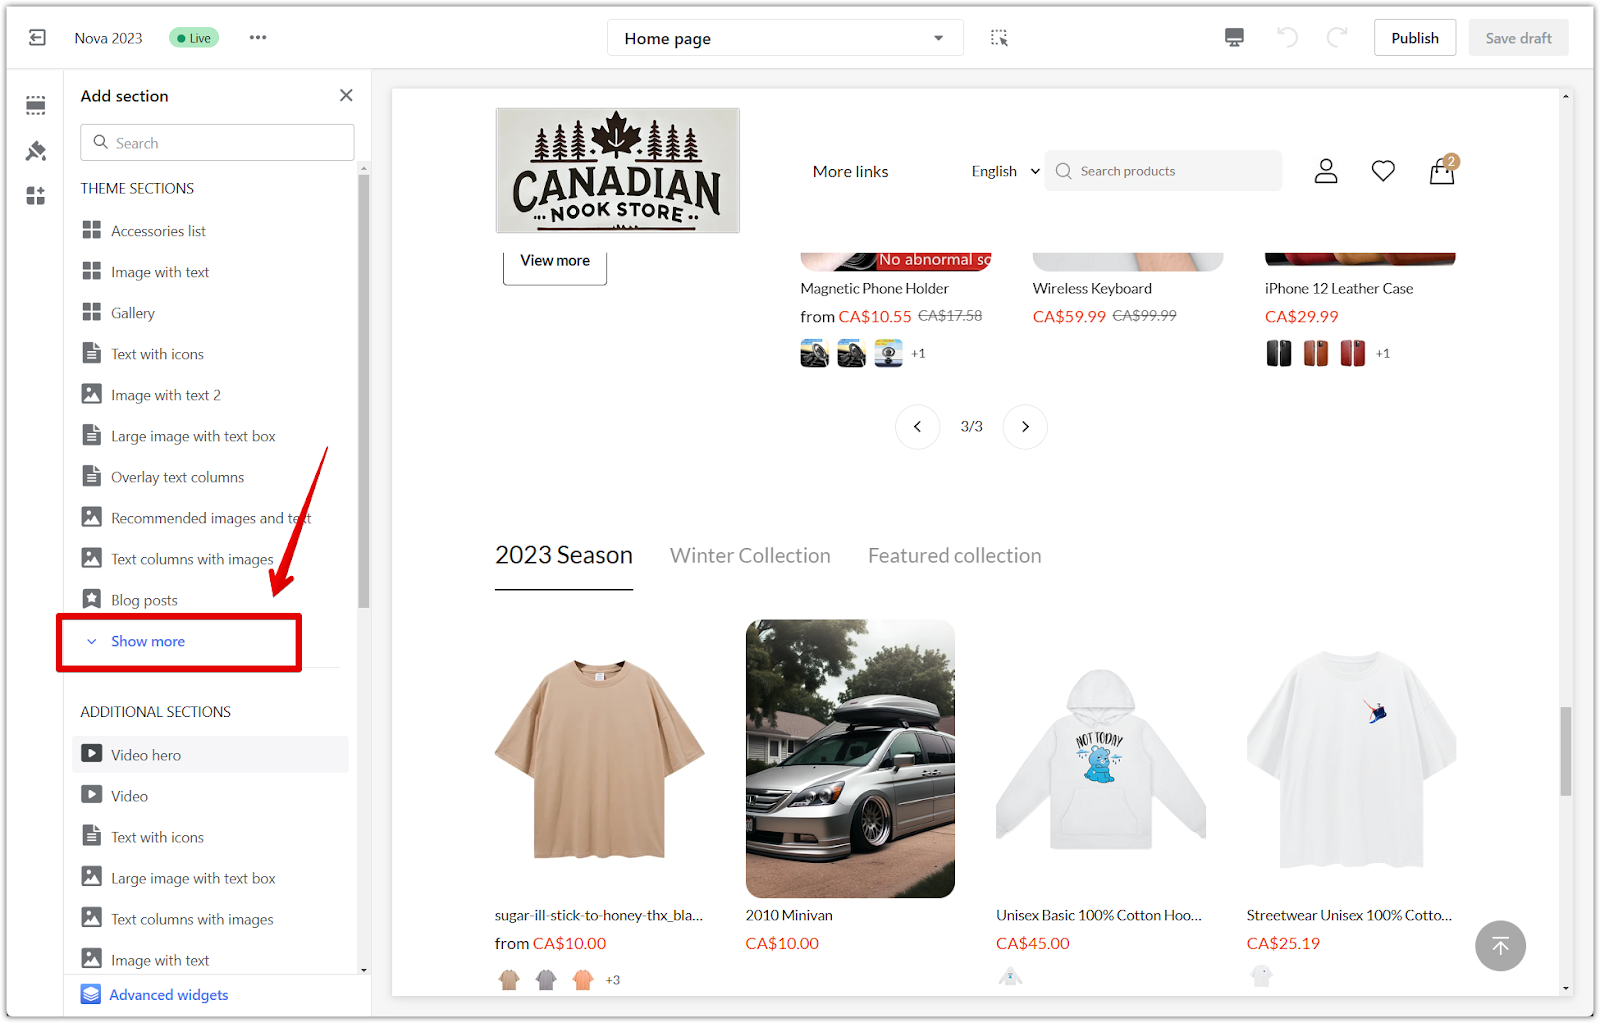
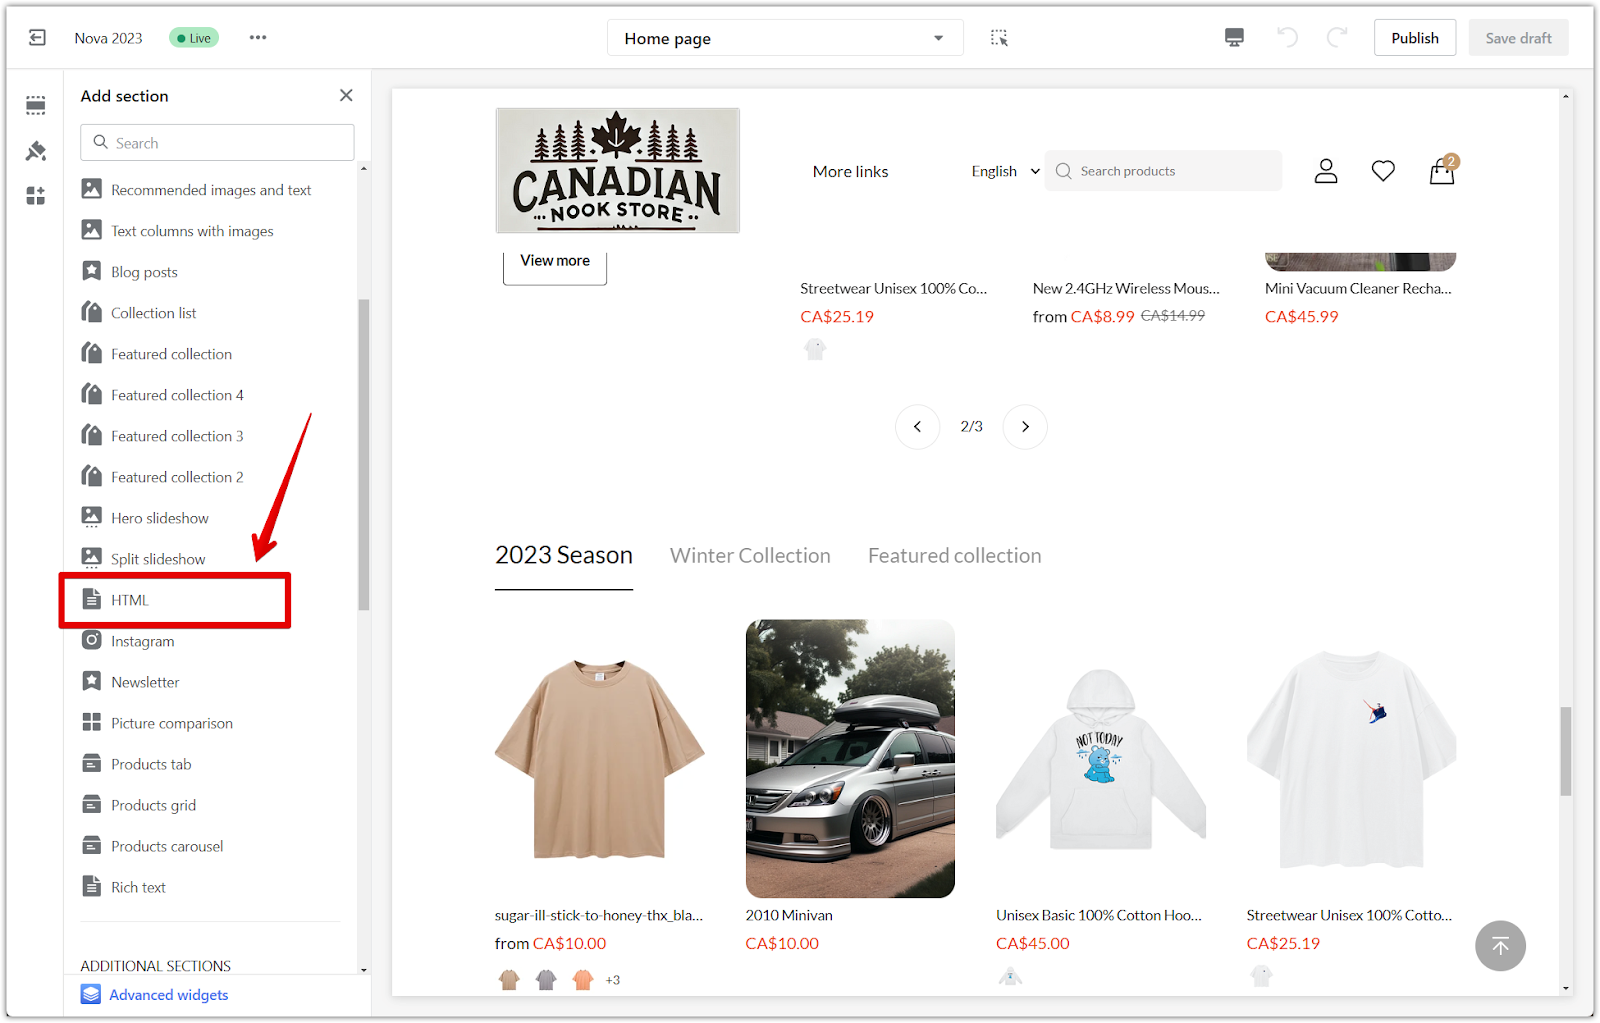
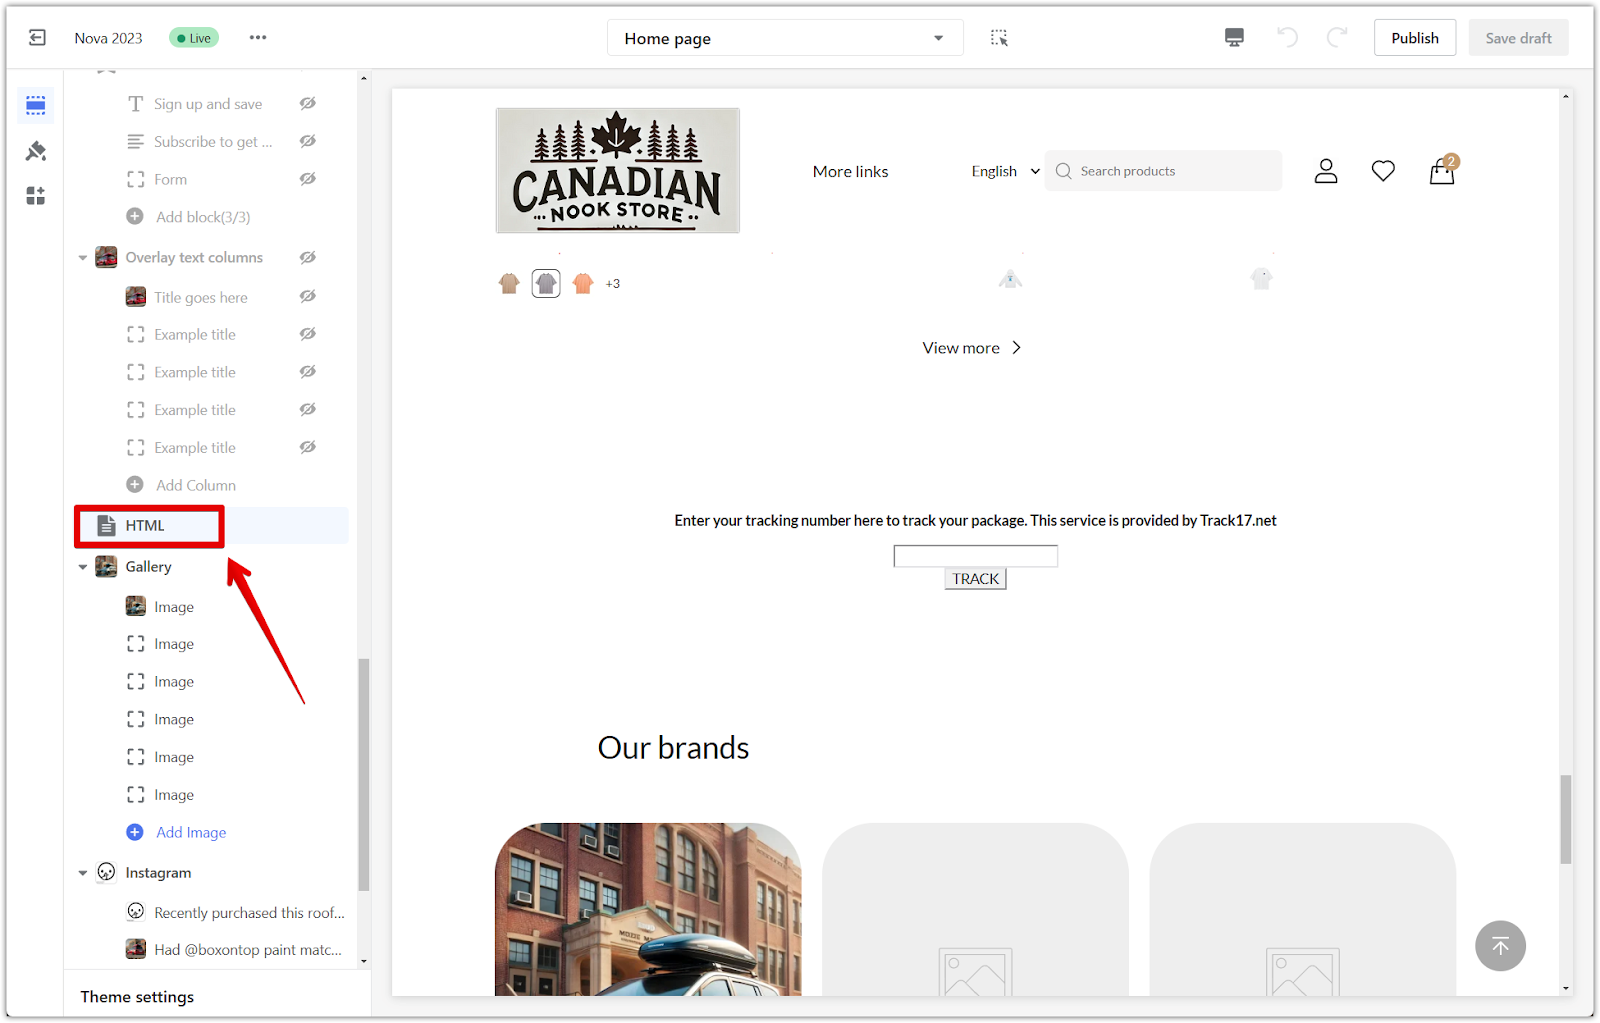
2. Add an HTML section: Scroll down to the bottom of the page and click Add section. Click Show more and select HTML from the list of sections.
3. Configure the HTML section: Click the HTML title in the left-hand sidebar to configure the section. You'll see a content box where you can paste the provided HTML code snippets.

Animated reindeer
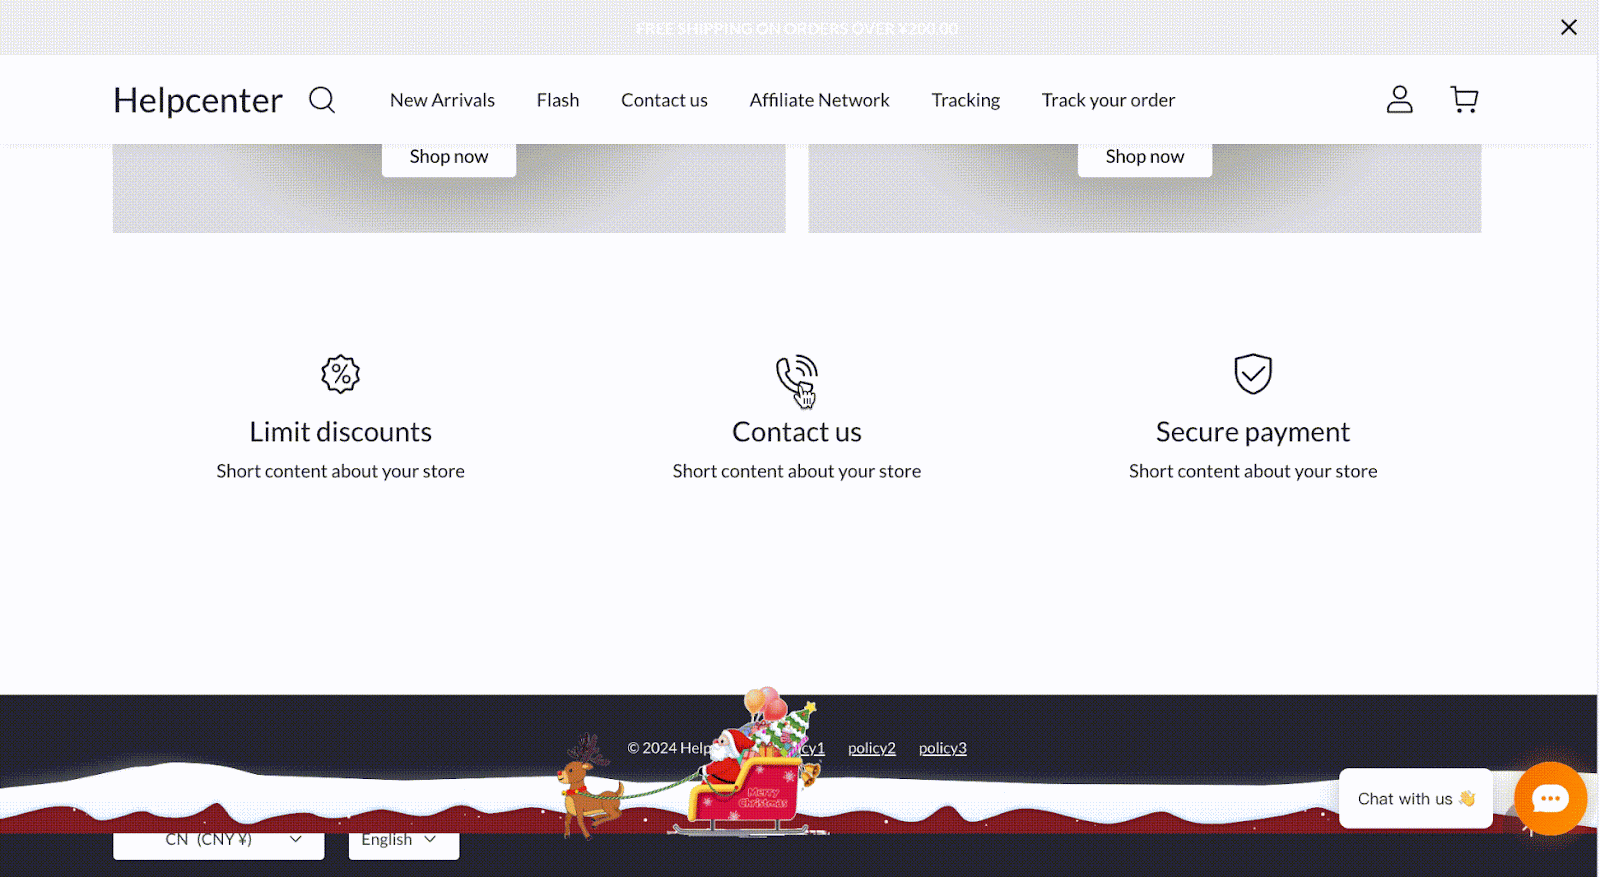
Add a touch of whimsy with an animated reindeer flying across your store!
This effect uses a combination of HTML and CSS to create the animation.
1. Add the HTML code: Paste the following code into the HTML content box of an HTML section (as explained in the section above):
HTML:
<div class="image-container"><img class="santa-claus-38KN6X" src="https://cdn.shoplazza.com/a6fd723fec8ce328ef798d1d8f43b198.gif" alt=""><img class="bg-luluzi" src="https://cdn.shoplazza.com/c97ce4d1e88f5e787d55199915ce0657.svg" alt="" style="background:repeat"></div>
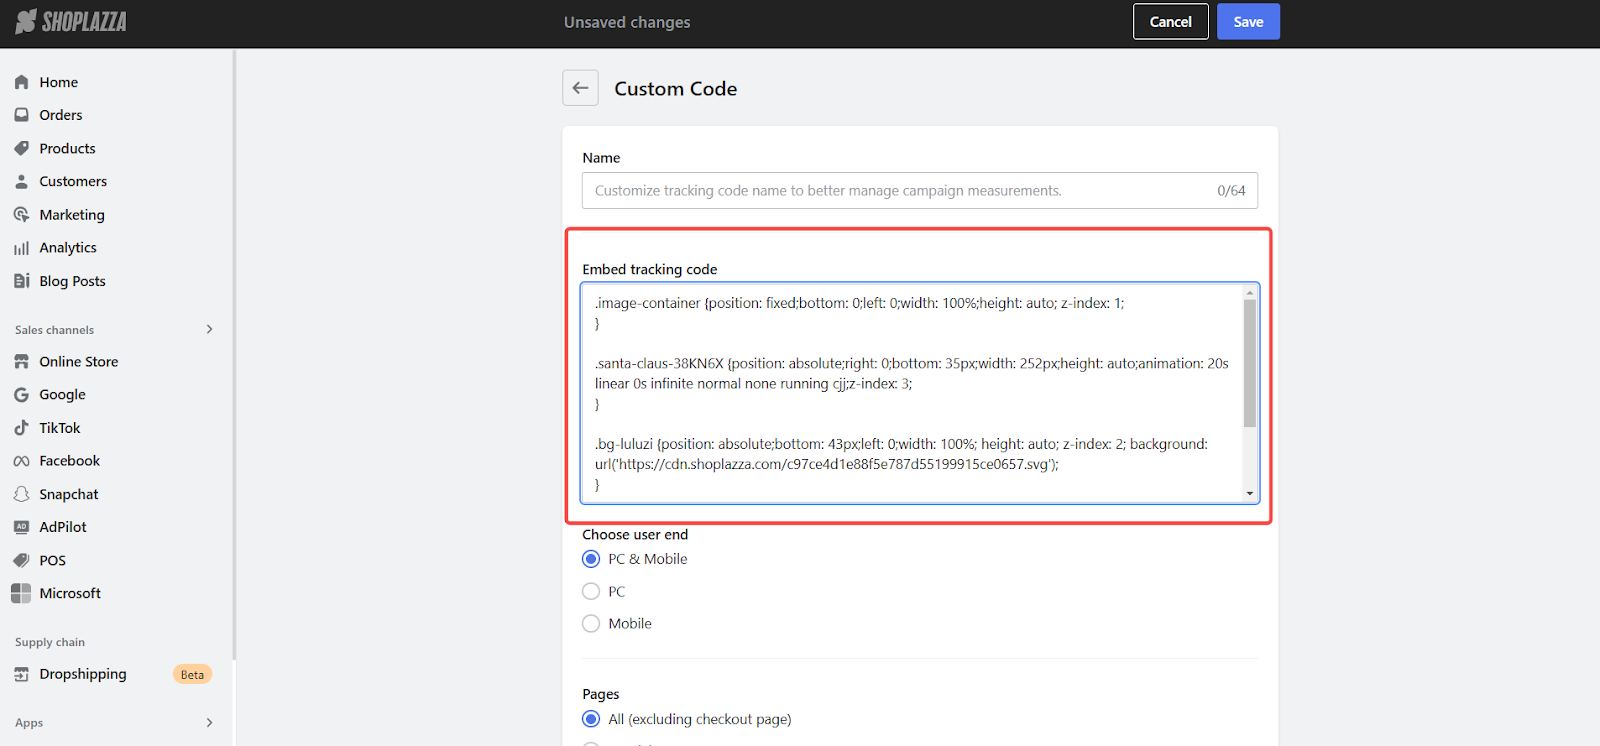
2. Add the CSS code: Head to the Shoplazza App Store and install the Custom Code app.
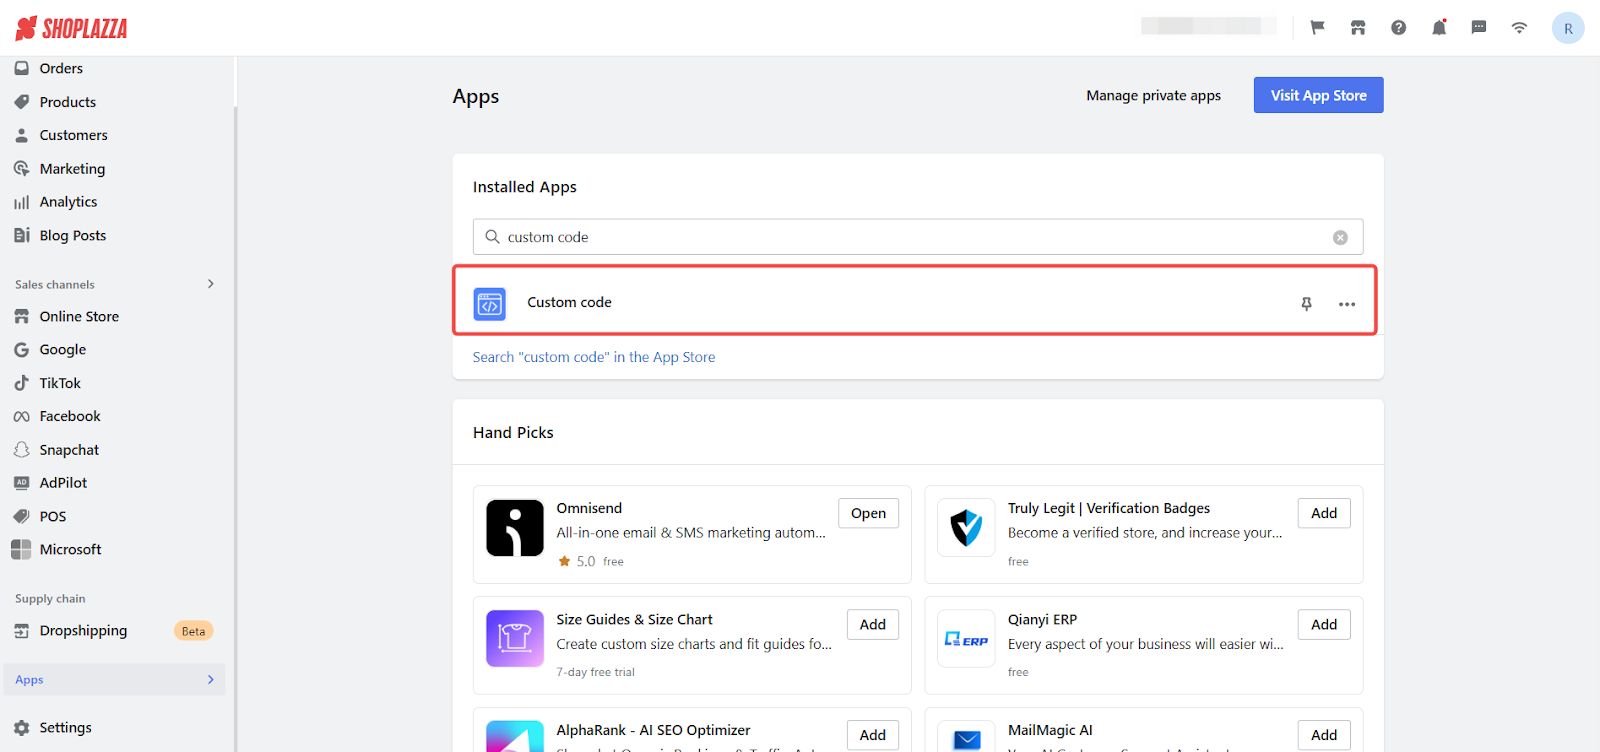
- Open the Custom Code app and click + New code.
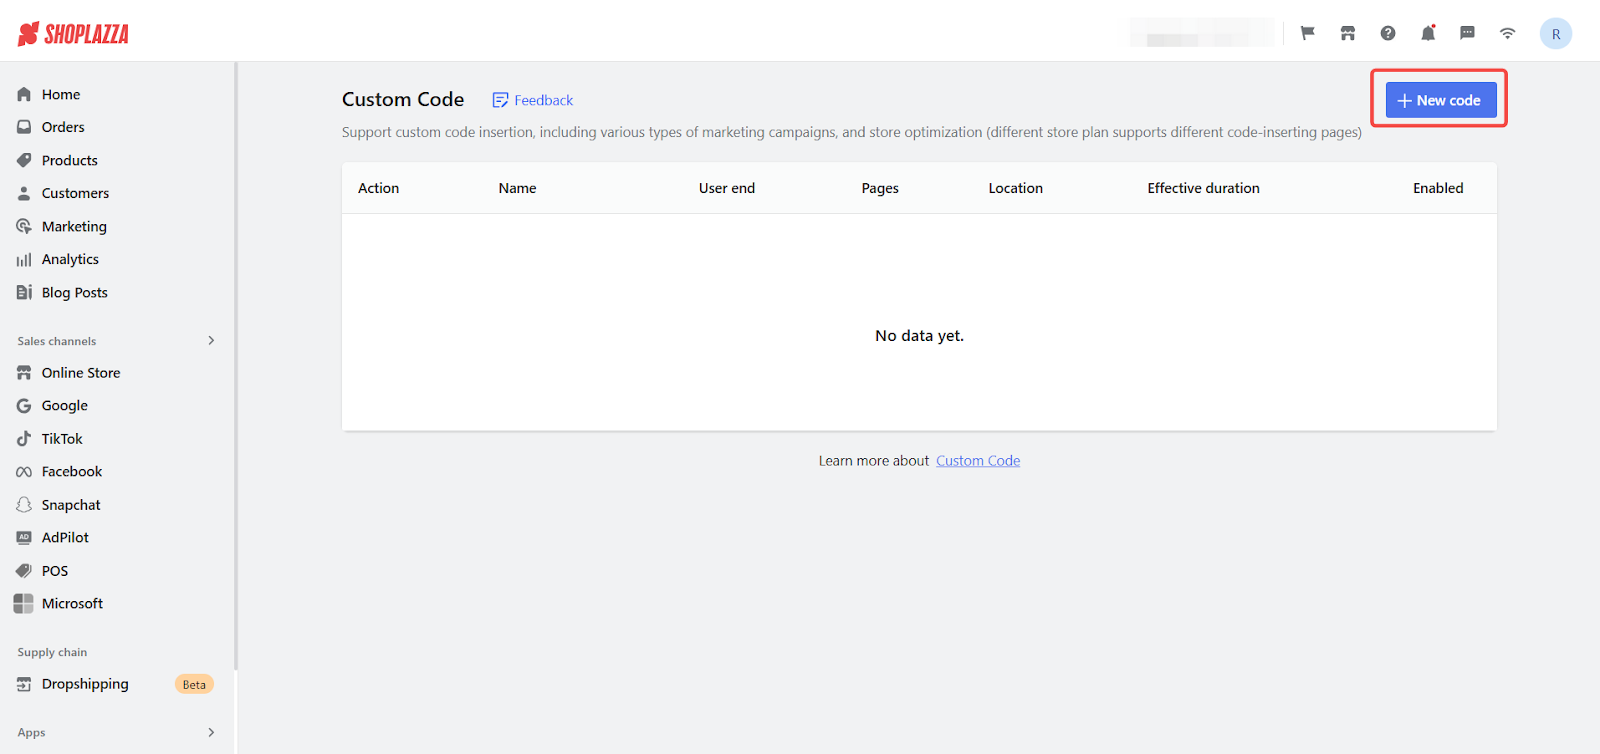
- Paste the following CSS code into the code editor:
CSS:
.image-container {position: fixed;bottom: 0;left: 0;width: 100%;height: auto; z-index: 1;
}

.santa-claus-38KN6X {position: absolute;right: 0;bottom: 35px;width: 252px;height: auto;animation: 20s linear 0s infinite normal none running cjj;z-index: 3;
}

.bg-luluzi {position: absolute;bottom: 43px;left: 0;width: 100%; height: auto; z-index: 2; background: url('https://cdn.shoplazza.com/c97ce4d1e88f5e787d55199915ce0657.svg');
}

@keyframes cjj {0% {transform: translateX(100vw);
  }100% {transform: translateX(-100vw);
  }
}
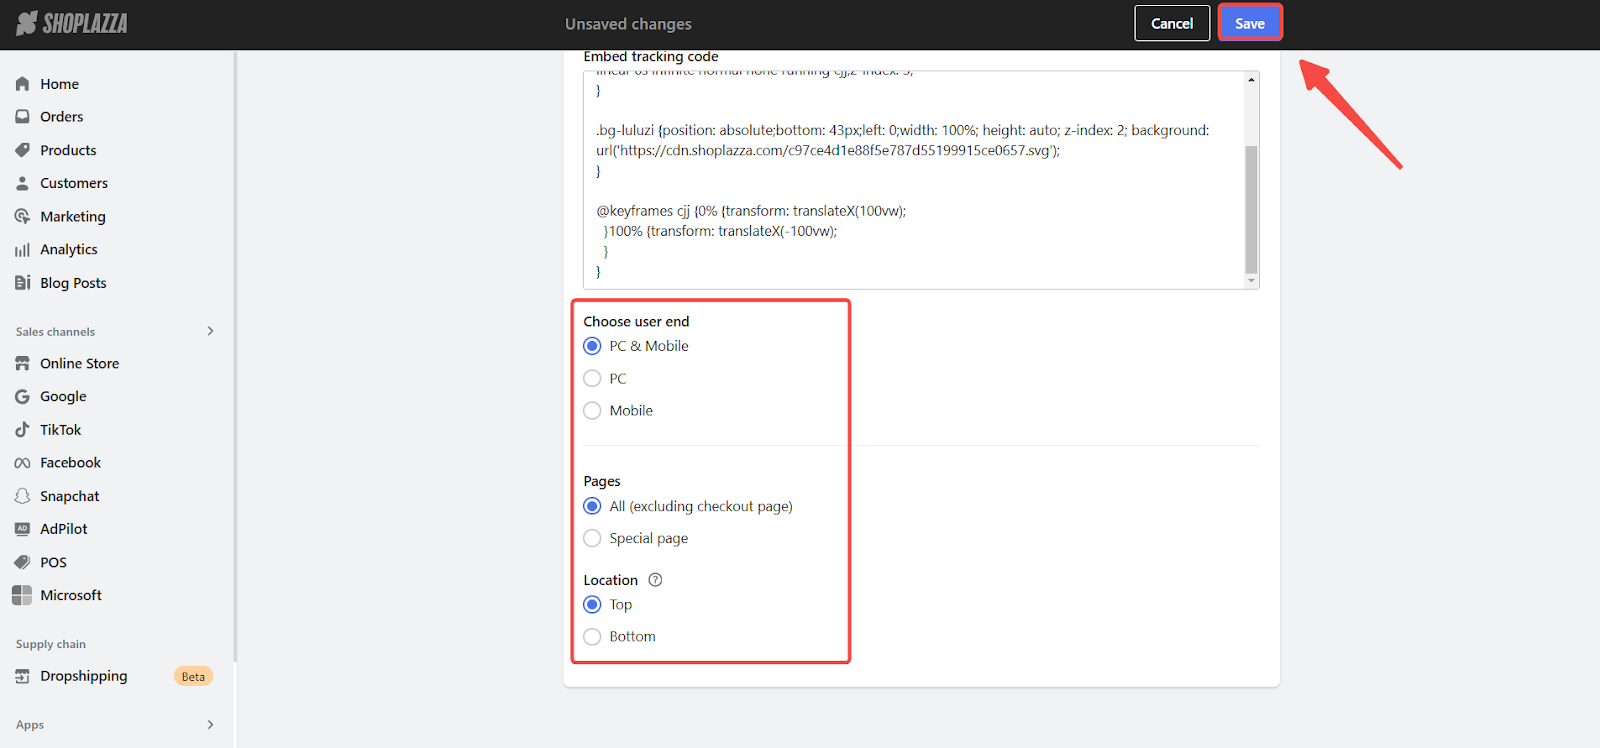
3. Configure the CSS settings:
- In the Choose user end settings, select PC & Mobile.
- In the Pages settings, select All (excluding checkout page).
- In the Location settings, choose Top. Click Save.
Falling snowflakes
Create a winter wonderland atmosphere with gently falling snowflakes.
1. Add the HTML code: Paste the following code into the HTML content box of an HTML section:
HTML:
<div class="xuehua"><script src="https://unpkg.com/magic-snowflakes/dist/snowflakes.min.js"></script><script>new Snowflakes({color: 'rgb(255,255,255)'});</script></div>
2. Change the snowflake color (optional): To change the color of the snowflakes, modify the color parameter within the new Snowflakes() function in the code you just pasted. For example, new Snowflakes({color: 'rgb(255,0,0)'}) will make the snowflakes red.
Gentle rain effect
Add a touch of serenity with a calming rain effect.
This effect requires both HTML and CSS code.
1. Add the HTML code: Paste the following code into the HTML content box of an HTML section:
HTML:
<div id="rainBox"></div>
<div class="content"></div>
<script>
  const box = document.getElementById('rainBox');let boxHeight = box.clientHeight;let boxWidth = box.clientWidth;

  window.onresize = function() {
    boxHeight = box.clientHeight;
    boxWidth = box.clientWidth;
  }
setInterval(() => {const rain = document.createElement('div');
    rain.classList.add('rain');
    rain.style.top = 0;
    rain.style.left = Math.random()boxWidth + 'px';
    rain.style.opacity = Math.random();
    box.appendChild(rain);
let race = 1;const timer = setInterval(() => {if (parseInt(rain.style.top) > boxHeight) {clearInterval(timer);
        box.removeChild(rain);
      }
      race++;
      rain.style.top = parseInt(rain.style.top) + race + 'px'
    }, 20)
  }, 50)
</script>
2. Add the CSS code: Open the Custom Code app and click + New code. Paste the following CSS code into the code editor:
CSS:
{margin: 0;padding: 0;
}

.content {width: 0;height: 0;
}

#rainBox {position: fixed;top: 0;left: 0;width: 100vw;height: 100vh;pointer-events: none;
}

.rain {position: absolute;width: 2px;height: 50px;background: linear-gradient(rgba(255, 255, 255, .3), rgba(255, 255, 255, .6));
}
-
Configure the CSS settings:
- In the Choose user end settings, select PC & Mobile.
- In the Pages settings, select All (excluding checkout page).
- In the Location settings, choose Top. Click Save.
Festive confetti
Celebrate the season with a burst of colorful confetti!
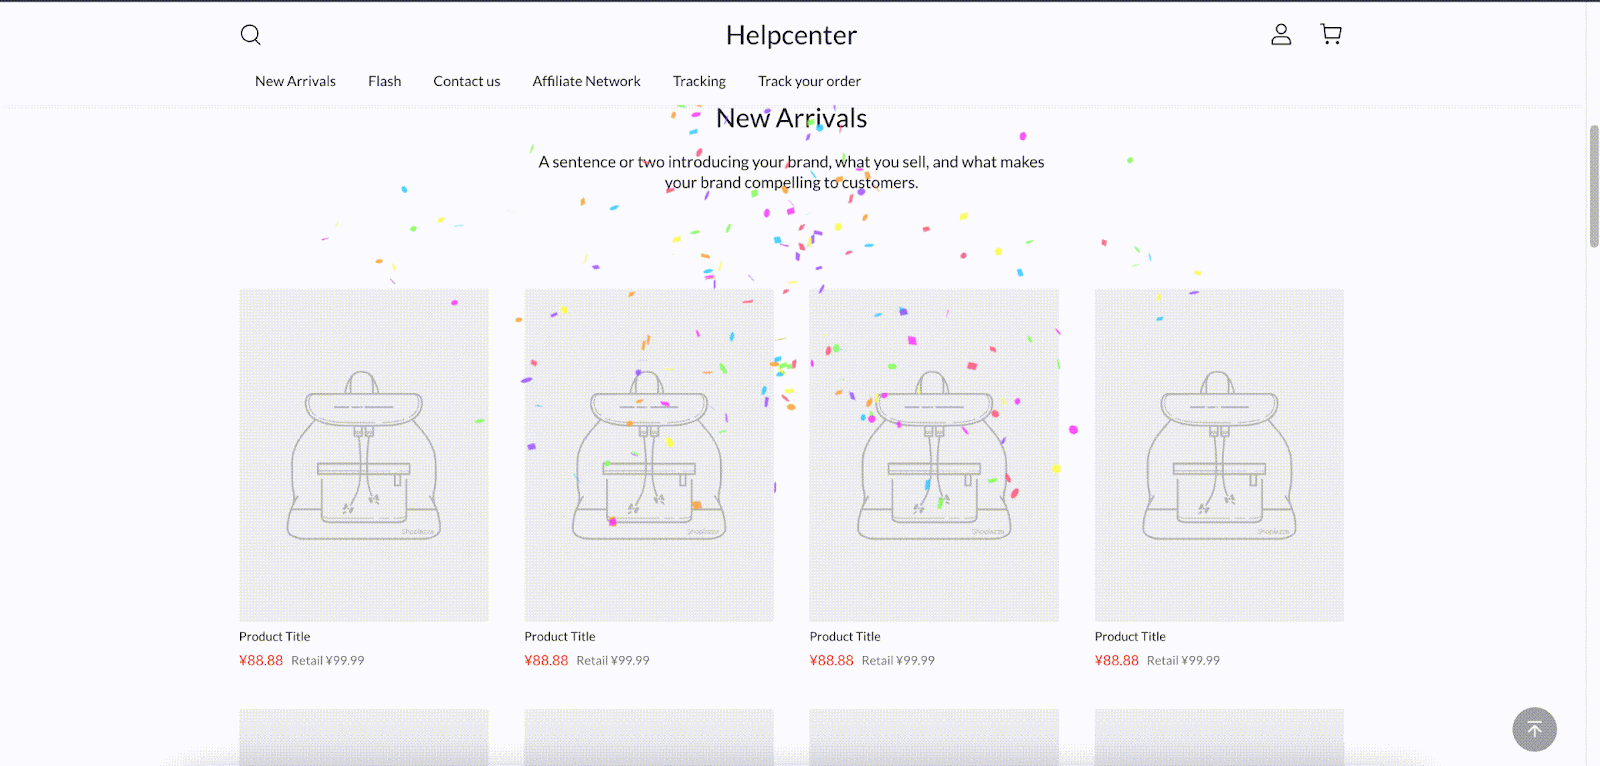
1. Add the HTML code: Paste the following code into the HTML content box of an HTML section:
HTML:
<script src="https://cdn.jsdelivr.net/npm/canvas-confetti@1.9.2/dist/confetti.browser.min.js"></script>
<script>
  var count = 200;var defaults = {origin: {y: 0.7
    }
  };
function fire(particleRatio, opts) {
    confetti({
      ...defaults,
      ...opts,particleCount: Math.floor(count * particleRatio)
    });
  }
  fire(0.25, {spread: 26,startVelocity: 55,
  });
  fire(0.2, {spread: 60,
  });
  fire(0.35, {spread: 100,decay: 0.91,scalar: 0.8
  });
  fire(0.1, {spread: 120,startVelocity: 25,decay: 0.92,scalar: 1.2
  });
  fire(0.1, {spread: 120,startVelocity: 45,
  });
</script>
Warm flame particles
Add a cozy touch with flickering flame particles.
This effect uses both HTML and CSS code.
1. Add the HTML code: Paste the following code into the HTML content box of an HTML section:
HTML:
<div class="fire-container"><script src="https://cdn.jsdelivr.net/npm/animejs@3.2.1/lib/anime.min.js"></script><script>
    anime({targets: '.fire-container .fire',translateX: {value: '*=2.5',duration: 1000
      },translateY: {value: '-=1.25',duration: 1000
      },opacity: {value: [1, 0],duration: 1000,easing: 'easeInSine'
      },delay: anime.stagger(100),complete: function(anim) {
        anim.reset();
      }
    });</script></div>
2. Add the CSS code: Open the Custom Code app and click + New code. Paste the following CSS code into the code editor:
CSS:
.fire-container {position: fixed;top: 0;left: 0;width: 100%;height: 100%;overflow: hidden;pointer-events: none;
}

.fire-container .fire {position: absolute;bottom: 0;left: 50%;transform: translateX(-50%);width: 10px;height: 10px;background-color: #ff0000;border-radius: 50%;opacity: 0;
}
- Configure the CSS settings:
-
- In the Choose user end settings, select PC & Mobile.
- In the Pages settings, select All (excluding checkout page).
- In the Location settings, choose Top. Click Save.
With these festive effects, you can transform your Shoplazza store into a holiday wonderland and create a more engaging experience for your shoppers. Remember to test the effects on different devices to ensure they display correctly and create the desired atmosphere for your customers. Happy holidays!


Comments
Please sign in to leave a comment.