Managing your store and warehouse locations efficiently is essential for streamlined order fulfillment and inventory management. In the Shoplazza Center admin, you can easily add and configure locations to handle product storage, shipping, and in-store operations. Follow these steps to set up and manage your locations seamlessly:
Steps
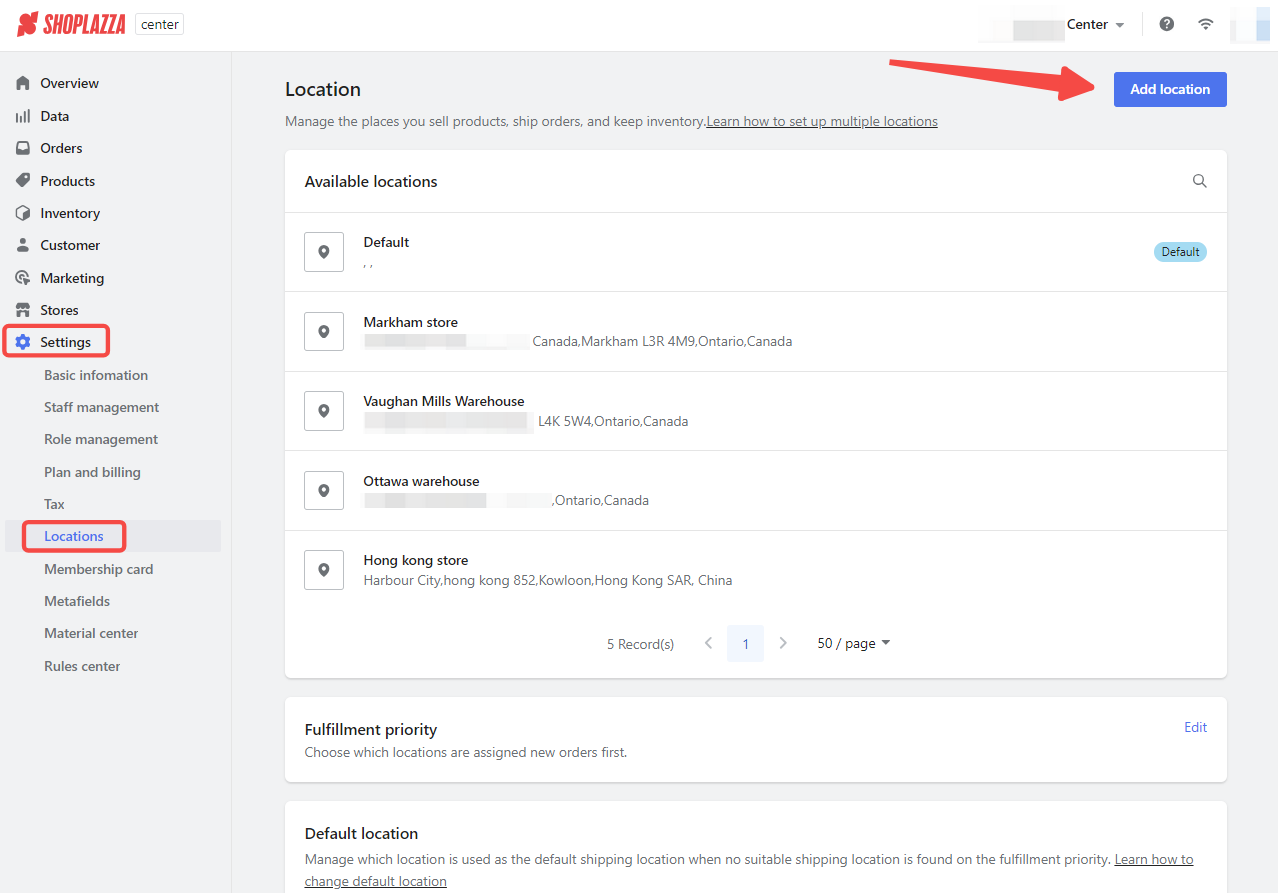
1. Access the location settings: In the Center admin, go to Settings and select Locations. This will take you to the location management page, listing all existing locations. Click the Add location button in the top-right corner to create a new location.
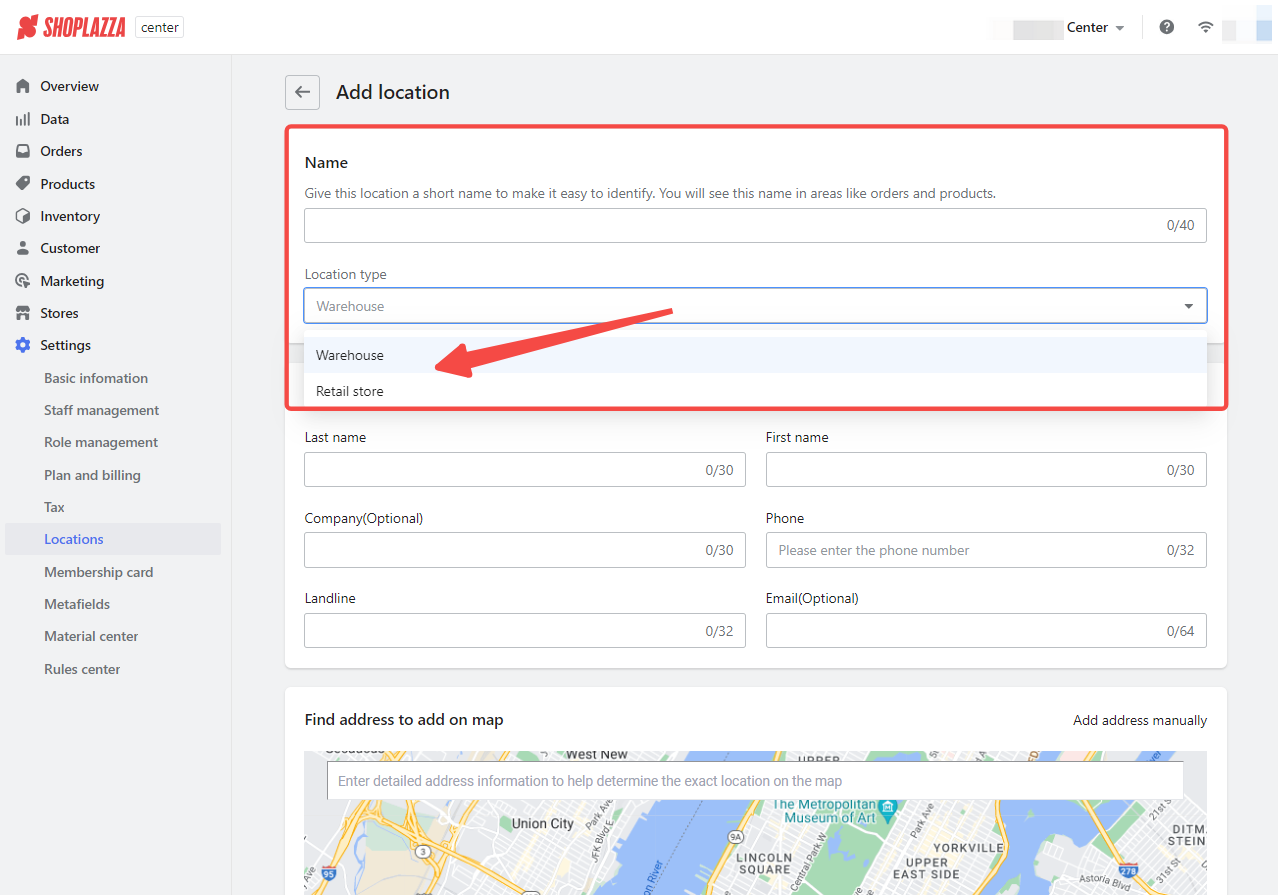
2. Enter basic information for the location: In the Add location page, start by providing a short, identifiable Name for the location. This will help distinguish it in areas like orders and product management. Next, select the Location type from the dropdown menu. You can choose between a Warehouse or Retail Store, depending on how the location will be used.
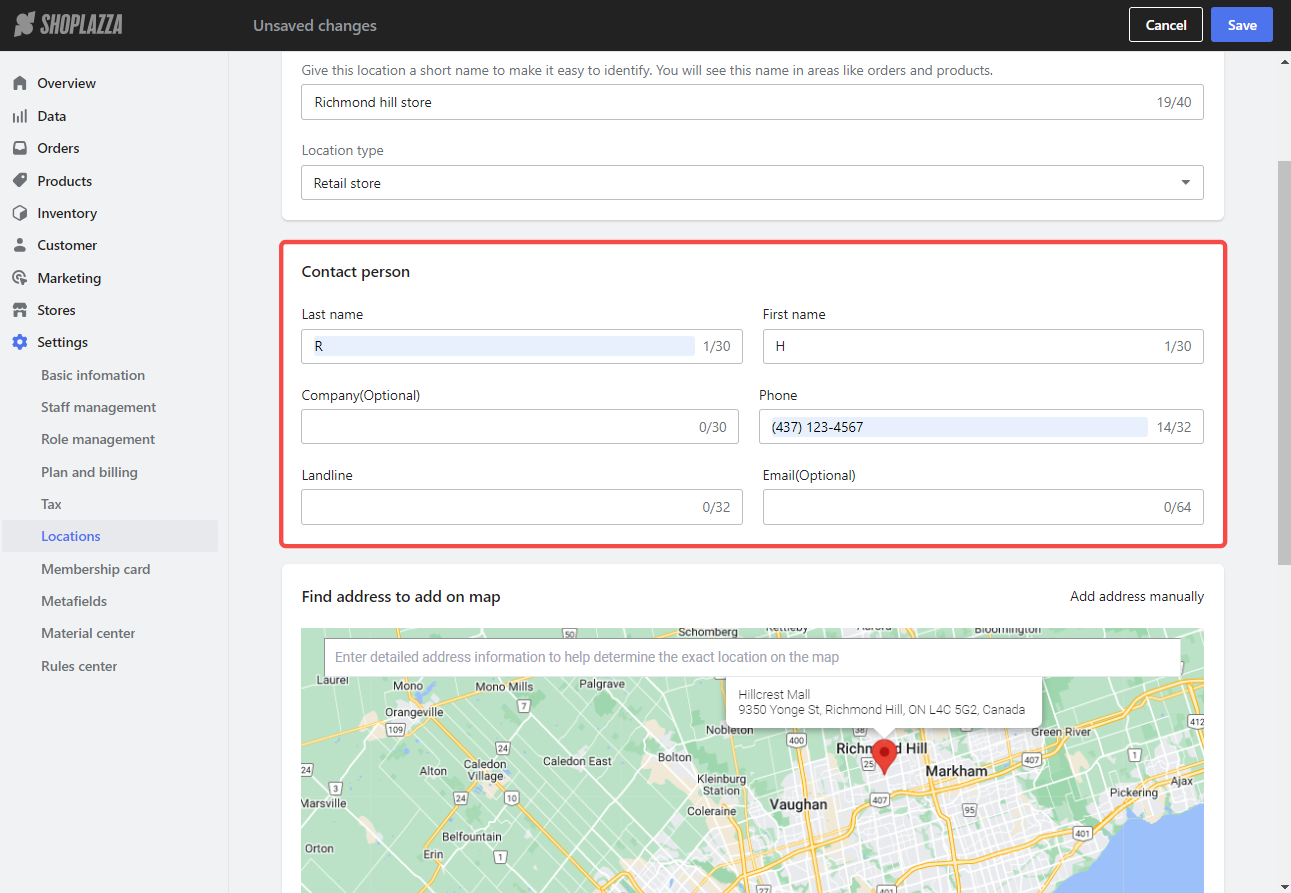
3. Fill in contact details: Under the Contact person section, enter the name, phone number, and other contact details for the person responsible for this location. This information is important for communication during shipping and fulfillment processes.
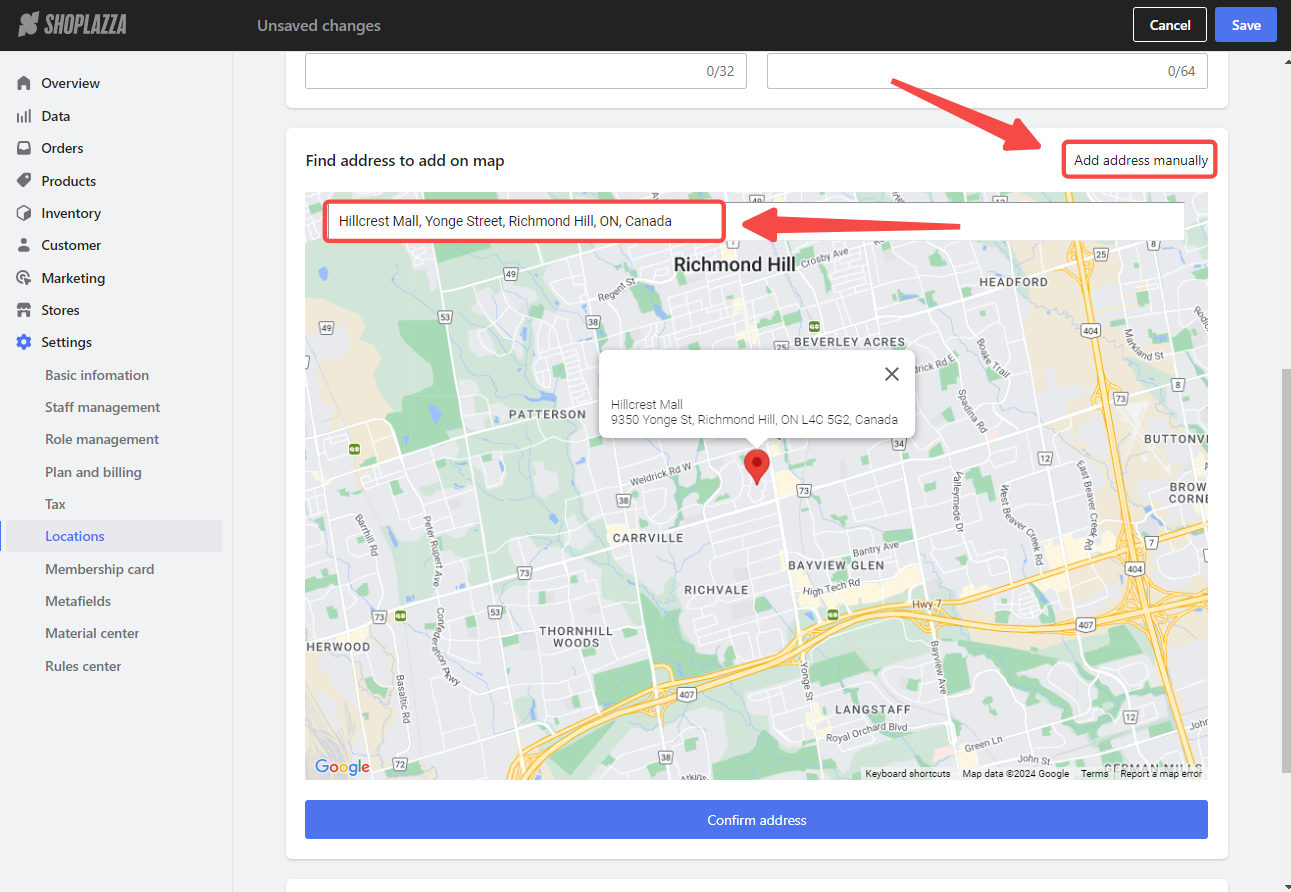
4. Add the location address: In the Find address to add to the map section, enter the location's address. The map will automatically pinpoint the area based on the address entered. Alternatively, you can manually input the address by clicking Add address manually and then fill out the required fields such as street, city, and postal code. Once the address is correctly entered, click Confirm address to finalize it.
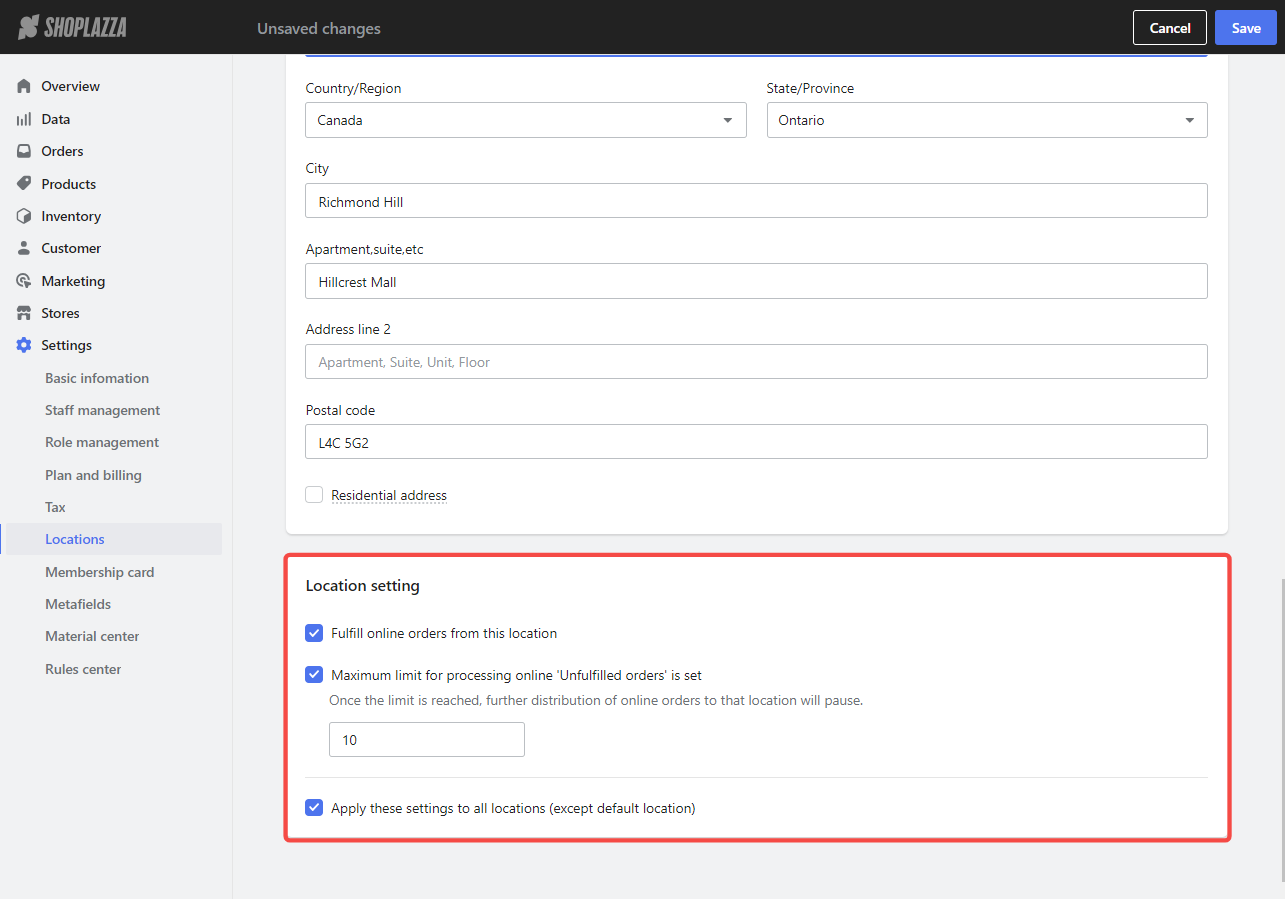
5. Configure location settings: In the Location settings section, you can define how this location will handle online orders and fulfillment:
- Fulfill online orders from this location: Enabling this option allows the location to process and fulfill online orders.
- Maximum limit for processing online 'Unfulfilled orders': You can limit the number of unfulfilled orders this location can handle. Once the limit is reached, no more orders will be assigned to this location until further notice.
- Apply these settings to all locations: By selecting this option, you can apply these fulfillment settings to all locations except the default one.
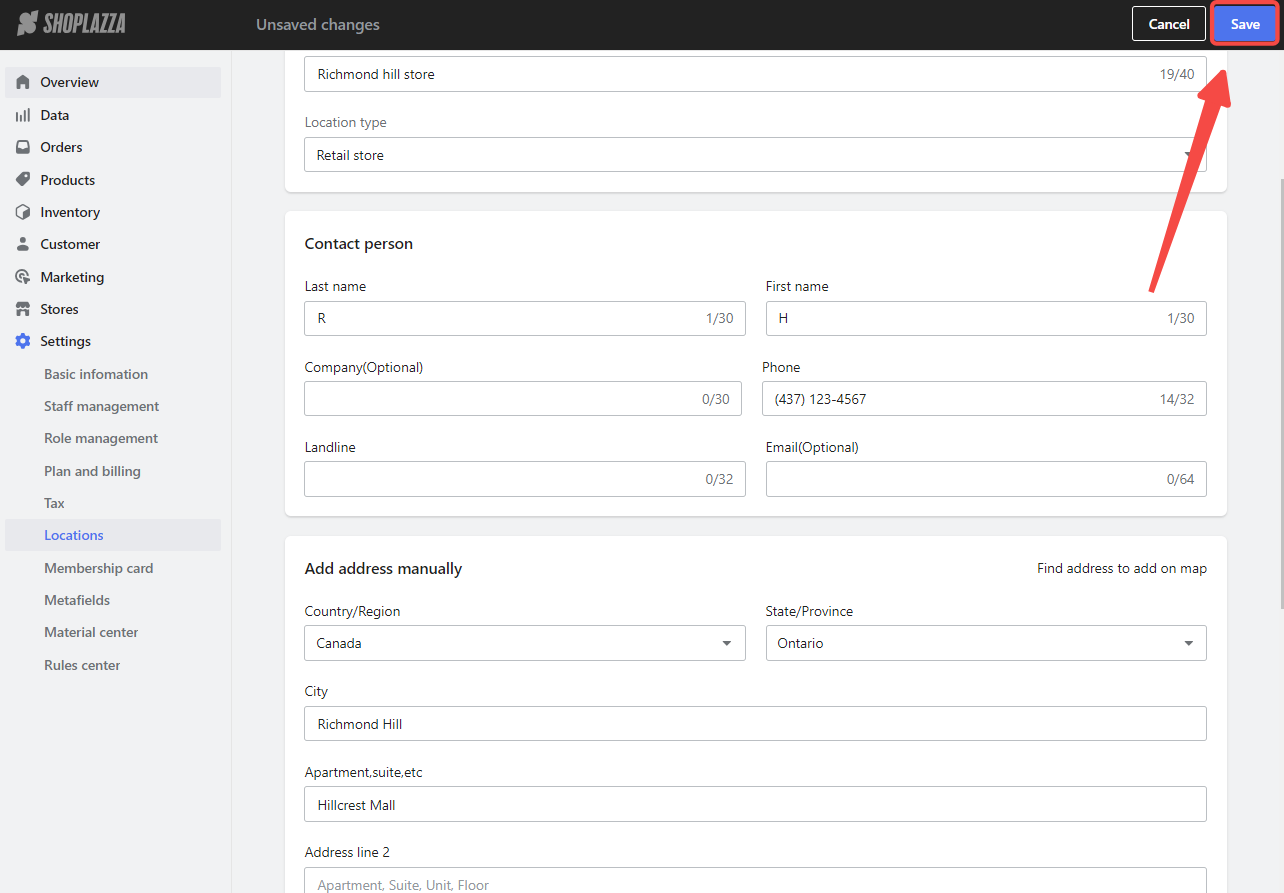
6. Save the location: After verifying all the details, click the Save button in the top-right corner to store the new location in your system.
Following these steps, you can efficiently manage your store and warehouse locations in Shoplazza, ensuring smooth order processing and inventory control.


Comments
Please sign in to leave a comment.