Setting up accurate tax configurations in Shoplazza is essential for ensuring compliance and displaying correct pricing to customers. Whether you use Avalara’s automated tax calculation feature or manually configure tax rates, setting up taxes properly helps create a seamless checkout experience.
Note
Avalara automated tax options are available only with a PRO plan subscription.
Integrate with Avalara for automatic tax calculations
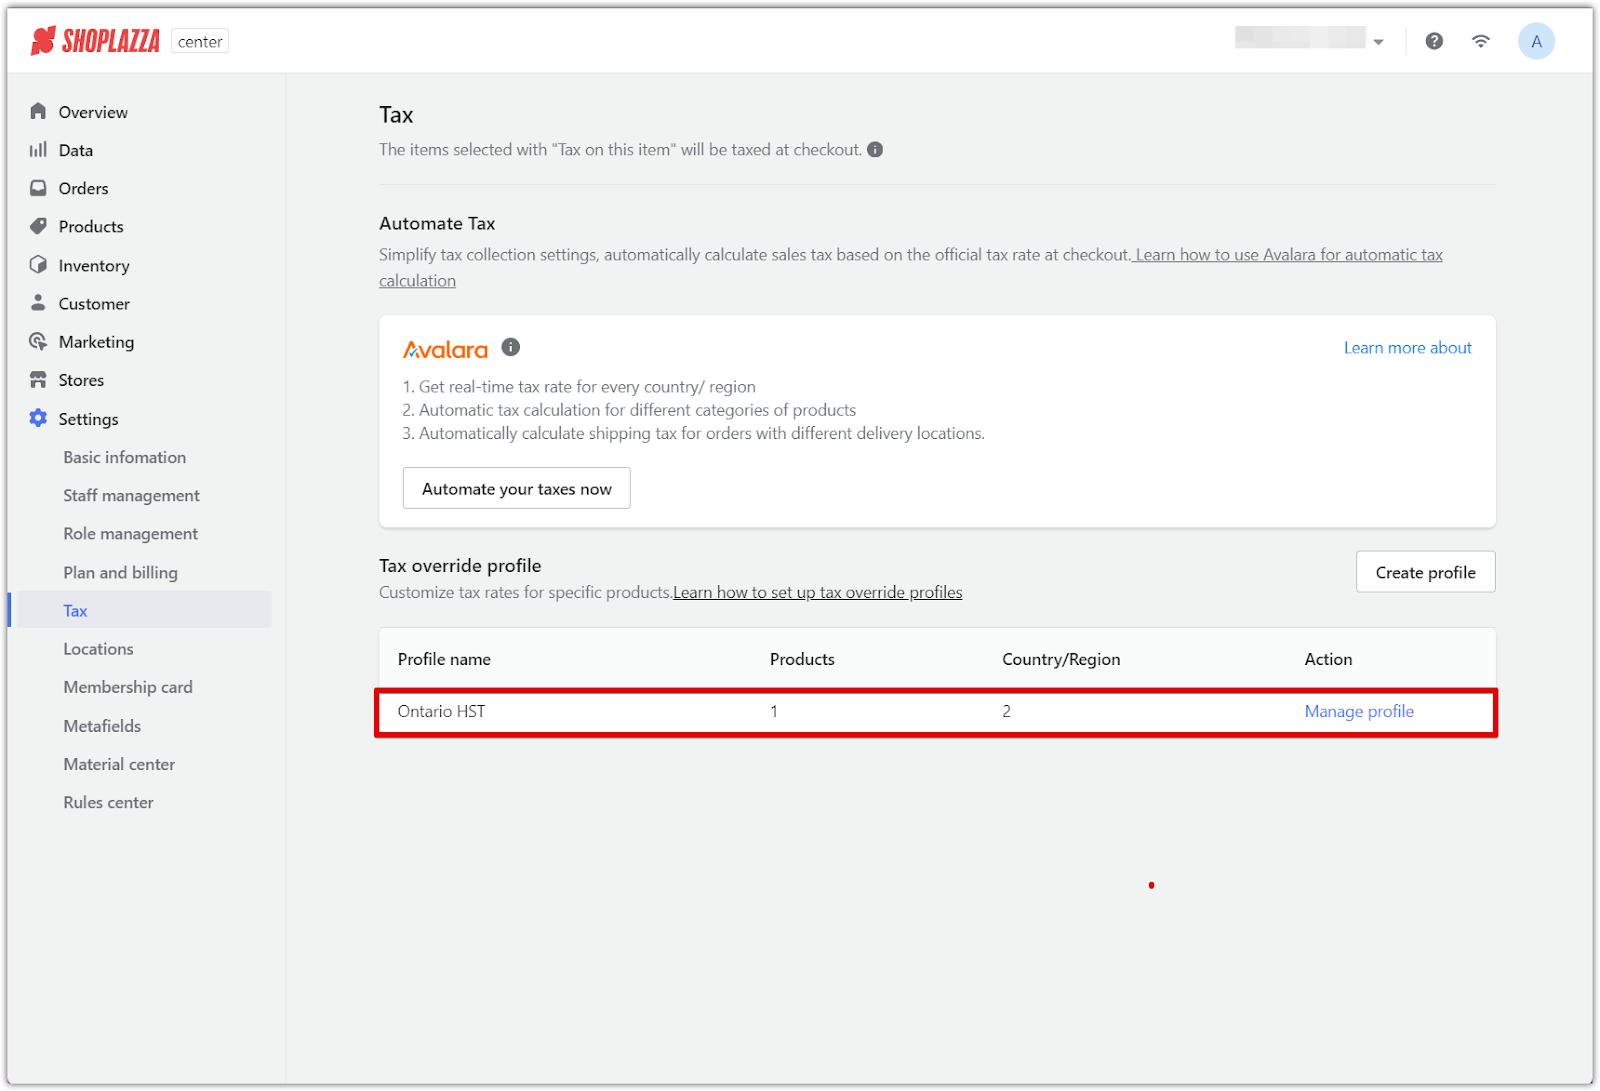
1. Access tax settings: Go to Center Admin > Settings > Tax to begin the tax configuration process.
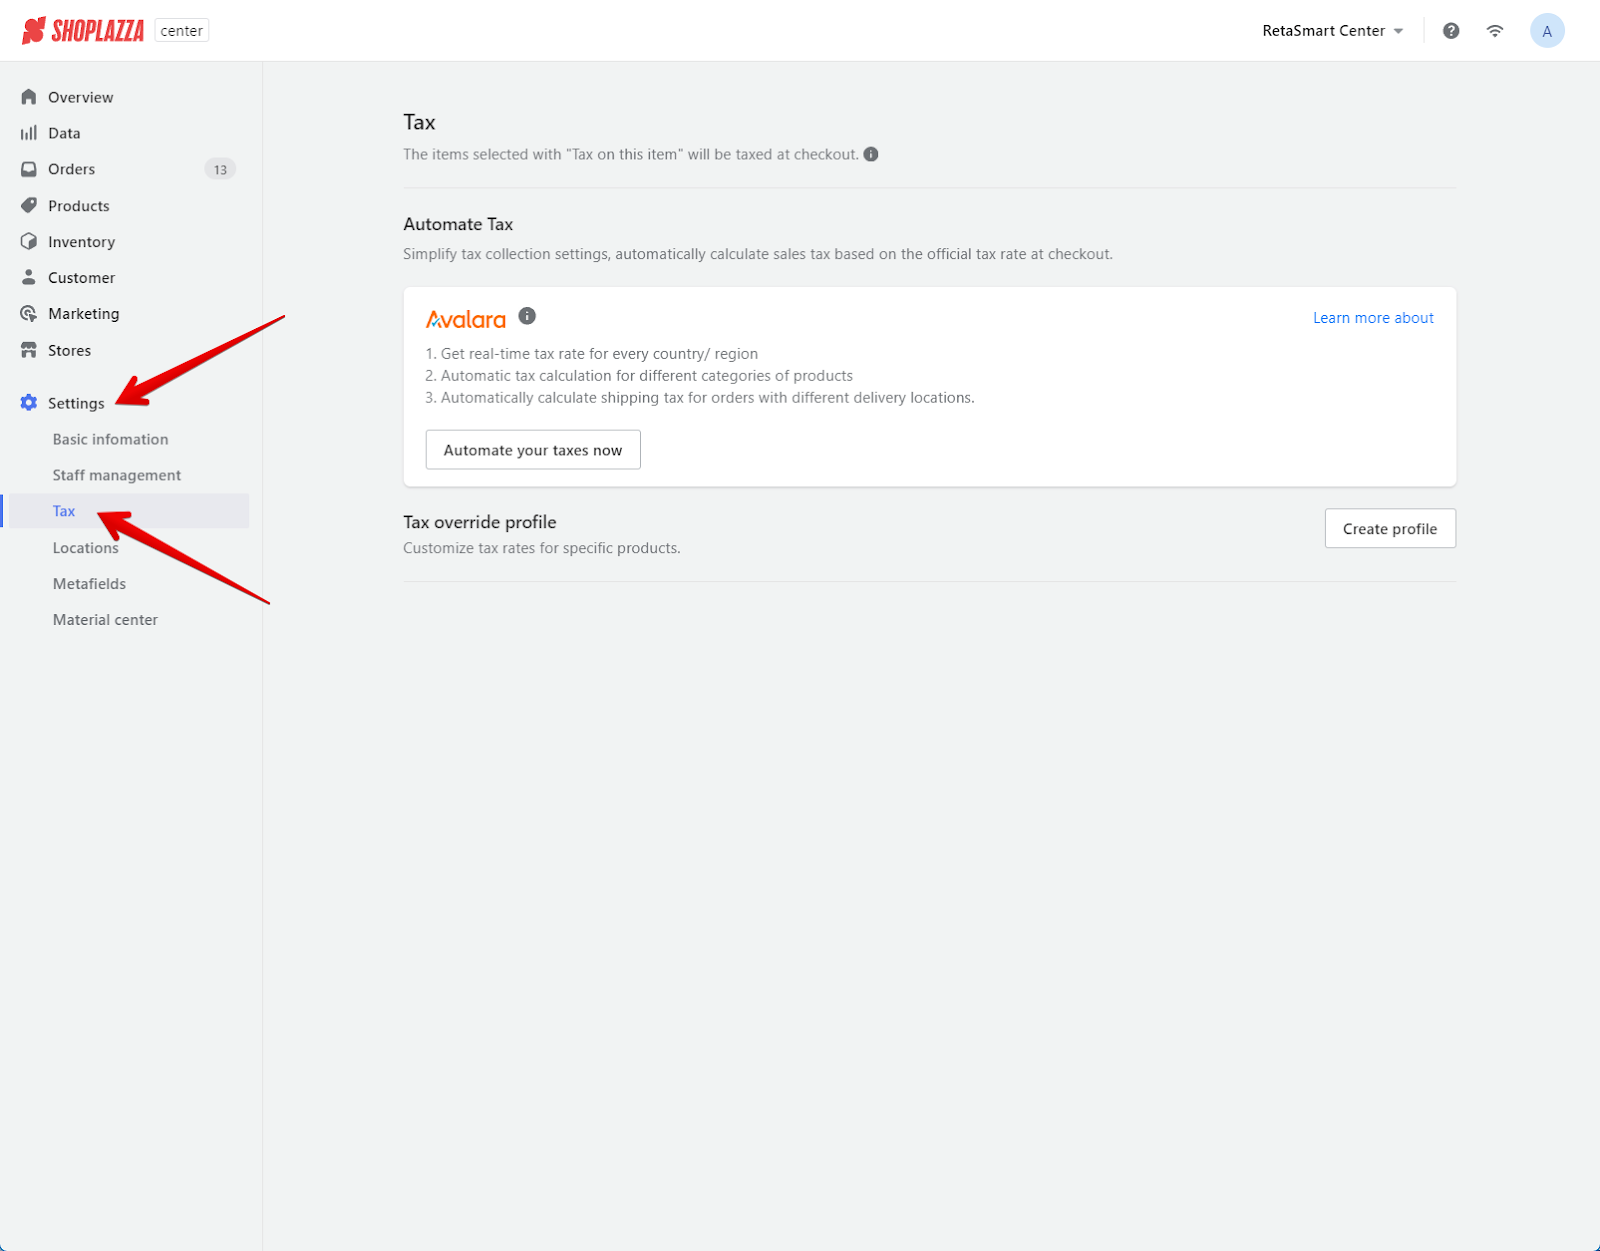
2. Automate your taxes: Click on the Automate your taxes now button, where you’ll be prompted to log in to an existing Avalara account or register a new one to enable automated tax handling.

Customize your tax rates manually
For businesses that require more control over their tax settings, manual tax configuration allows you to set specific tax rates for different products, locations, and scenarios. Follow the steps below to customize your tax rates:
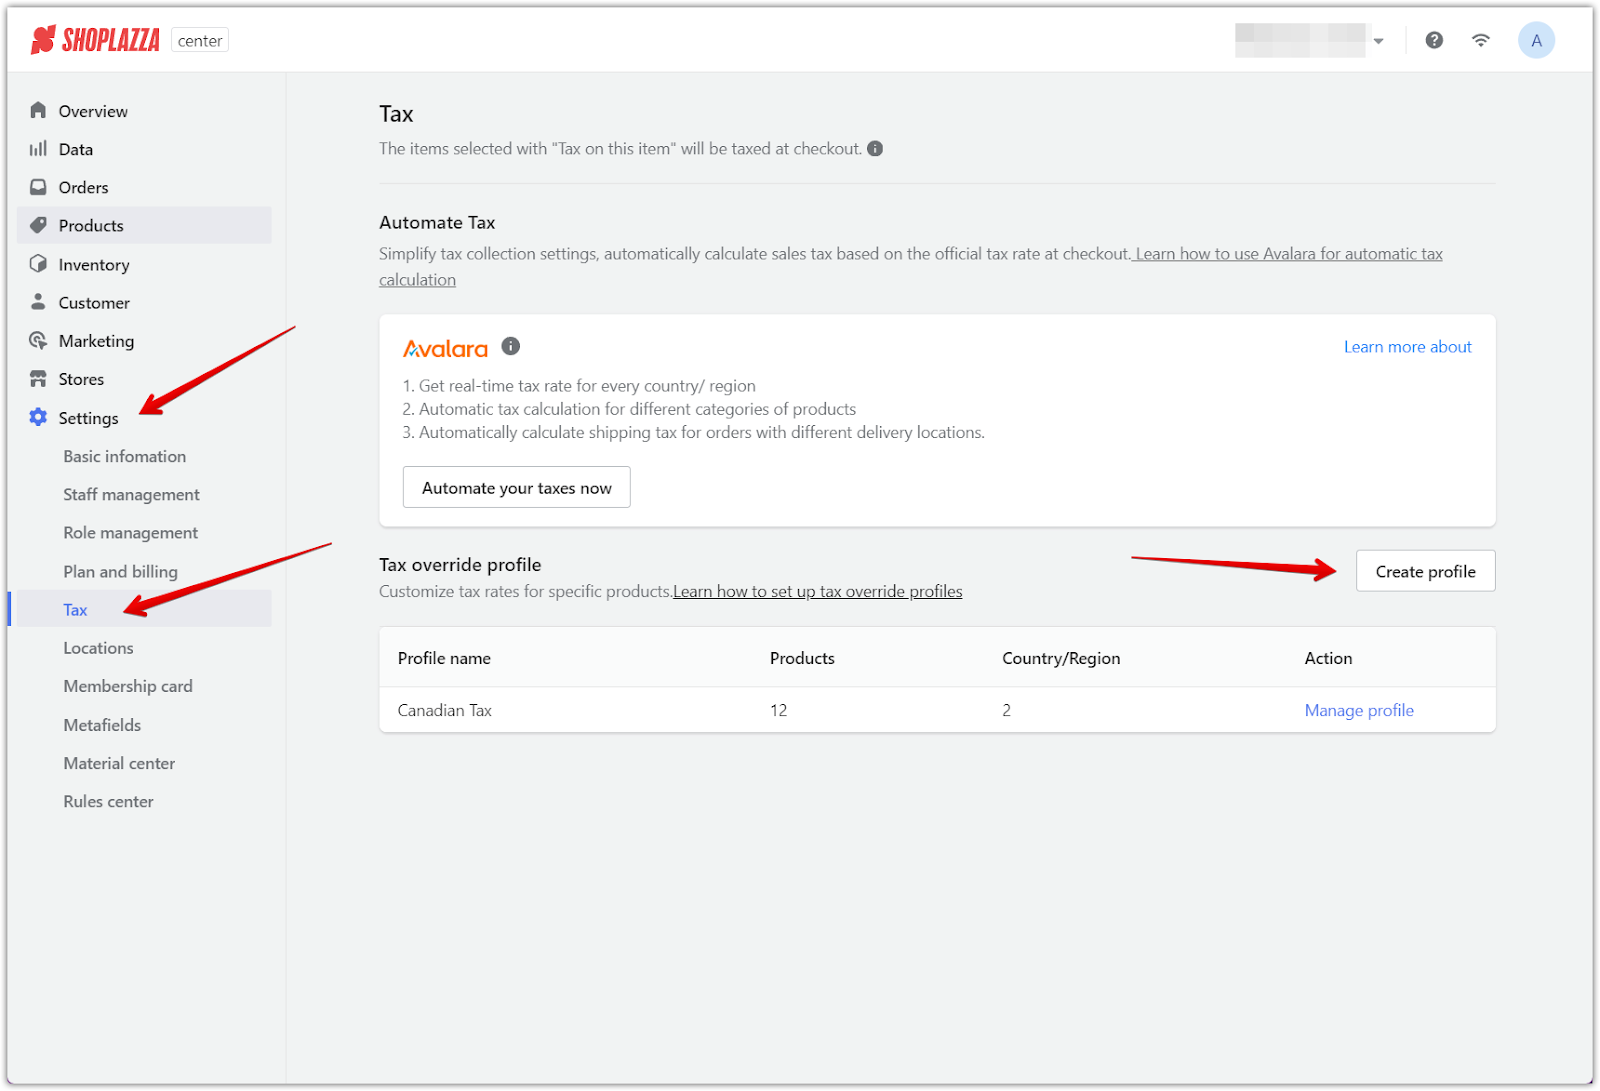
1. Navigate to tax settings: Go to your Shoplazza POS Center admin > Settings > Tax. Click on Create profile to start setting up a tax override profile, which allows you to customize tax rates for specific products or regions.
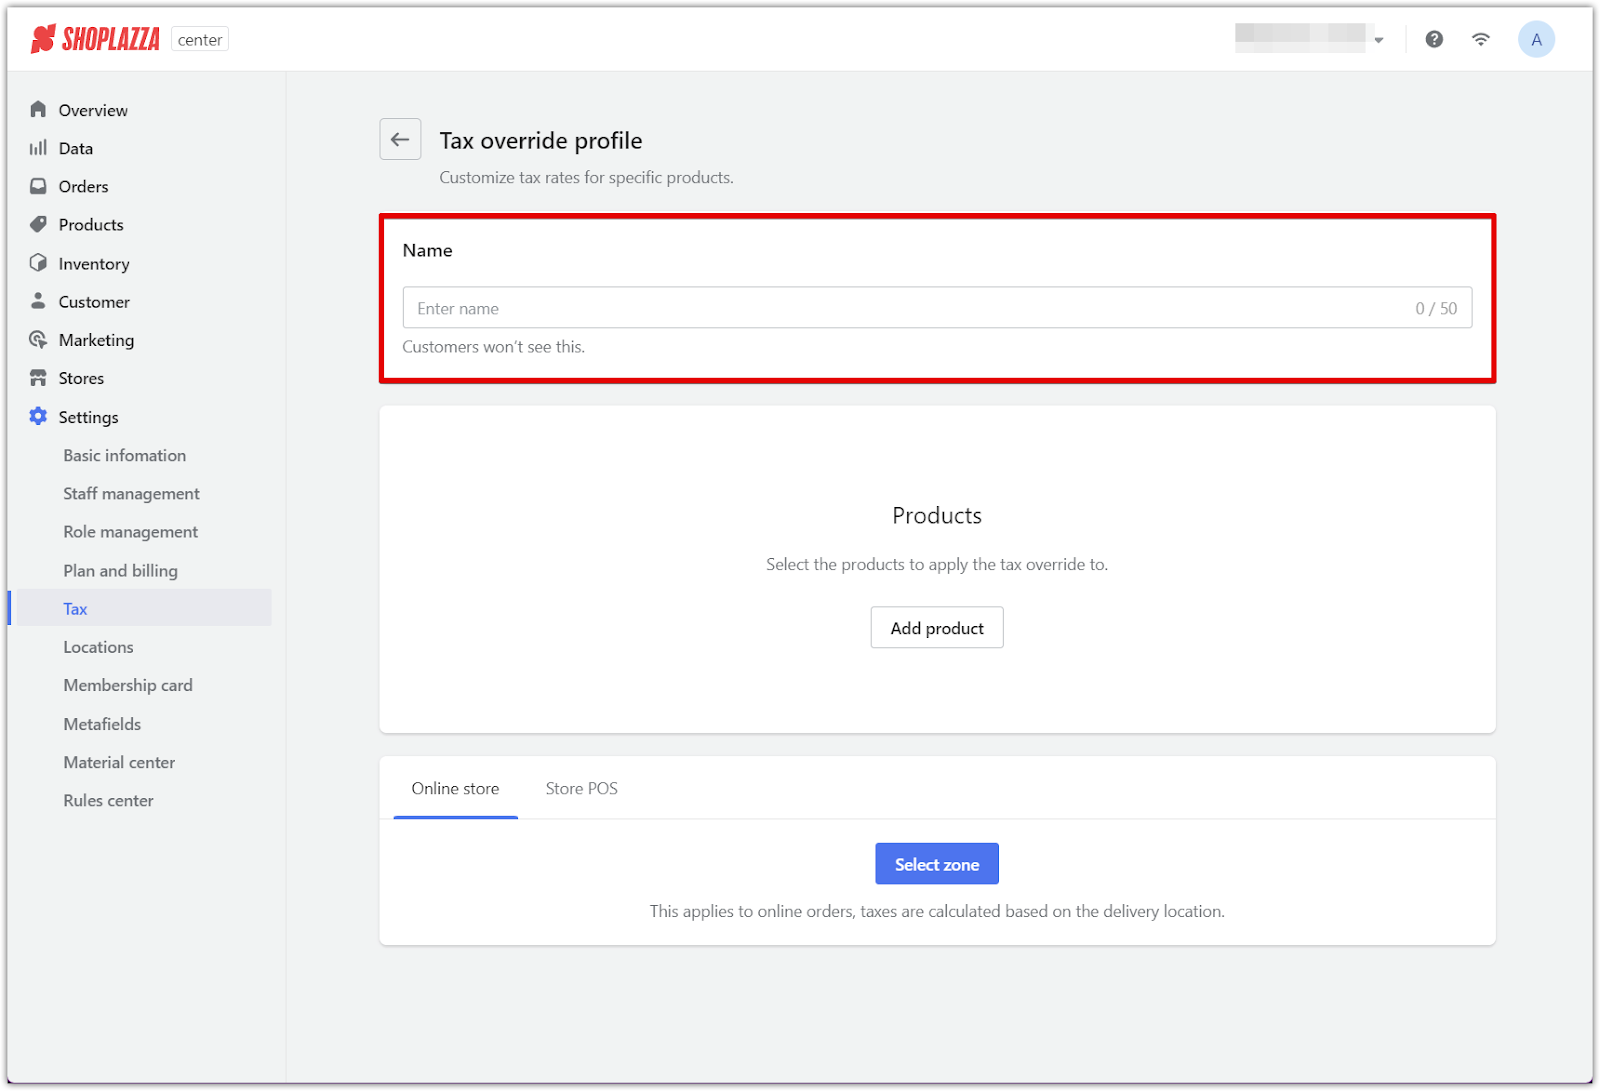
2. Name the tax profile: Enter a name for your tax profile. This name is for internal use only and won’t be visible to customers, making it easy to manage multiple profiles.
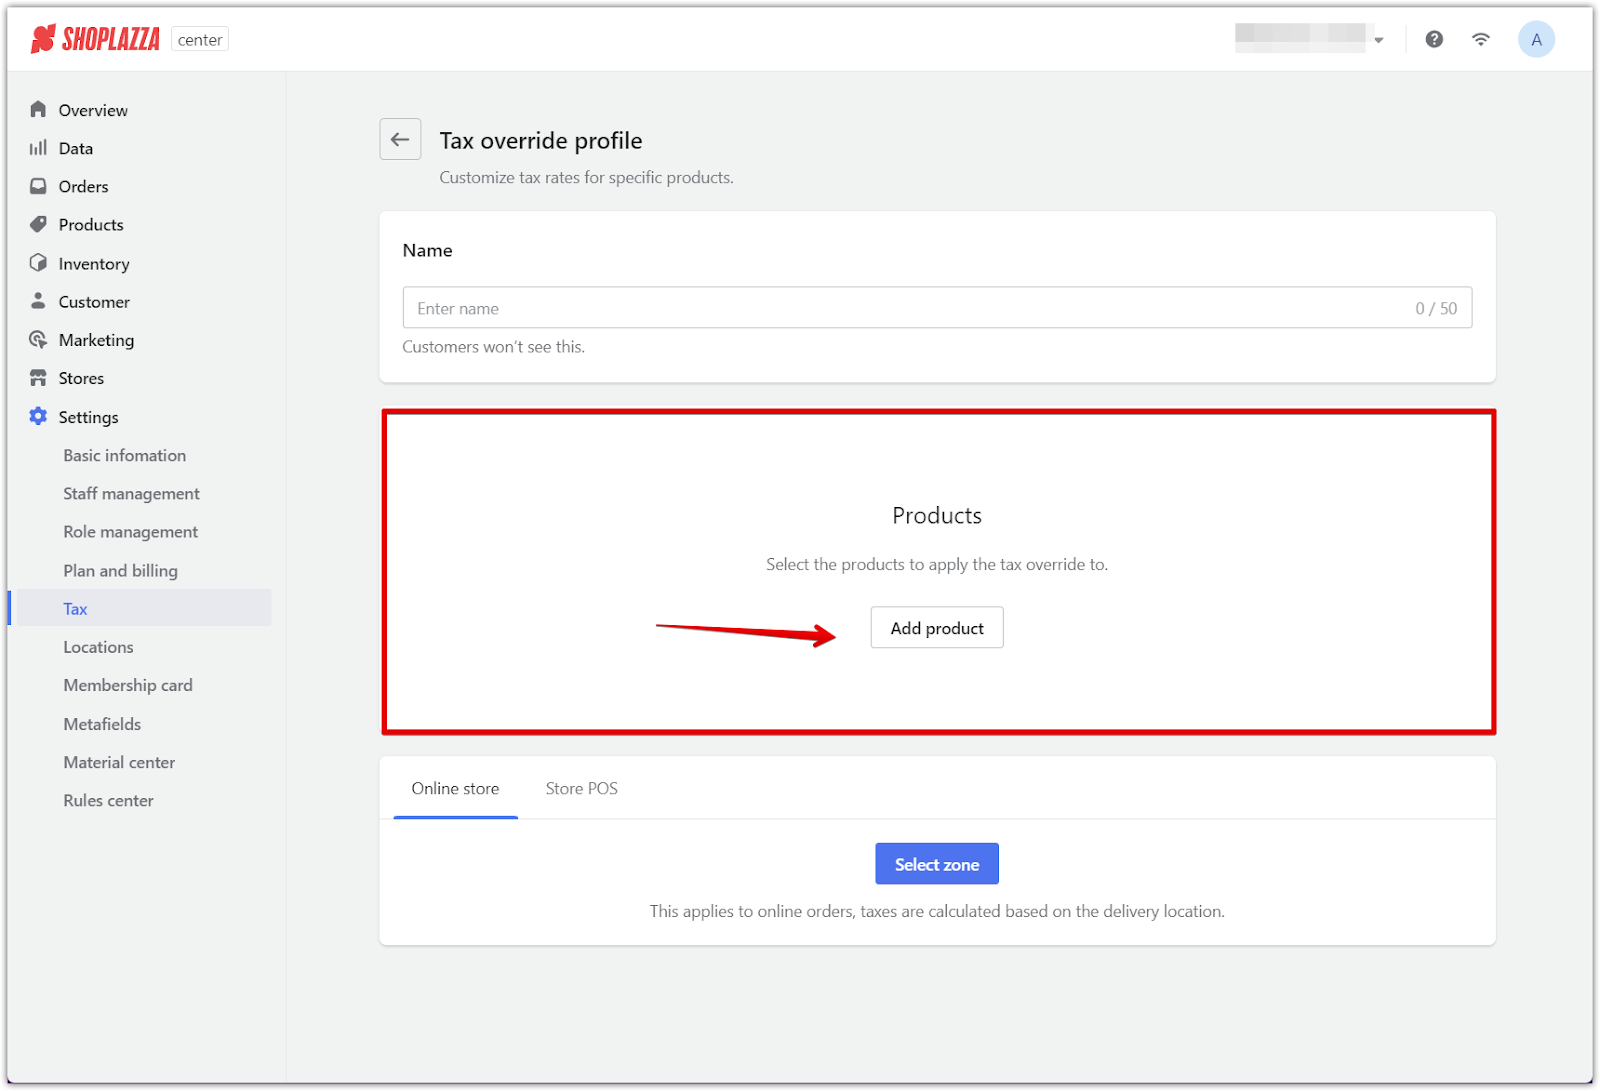
3. Add products to the profile: Select Add product to choose the items that will use the custom tax rates. Multiple products can be selected from your inventory, allowing you to apply the profile broadly or narrowly as needed.
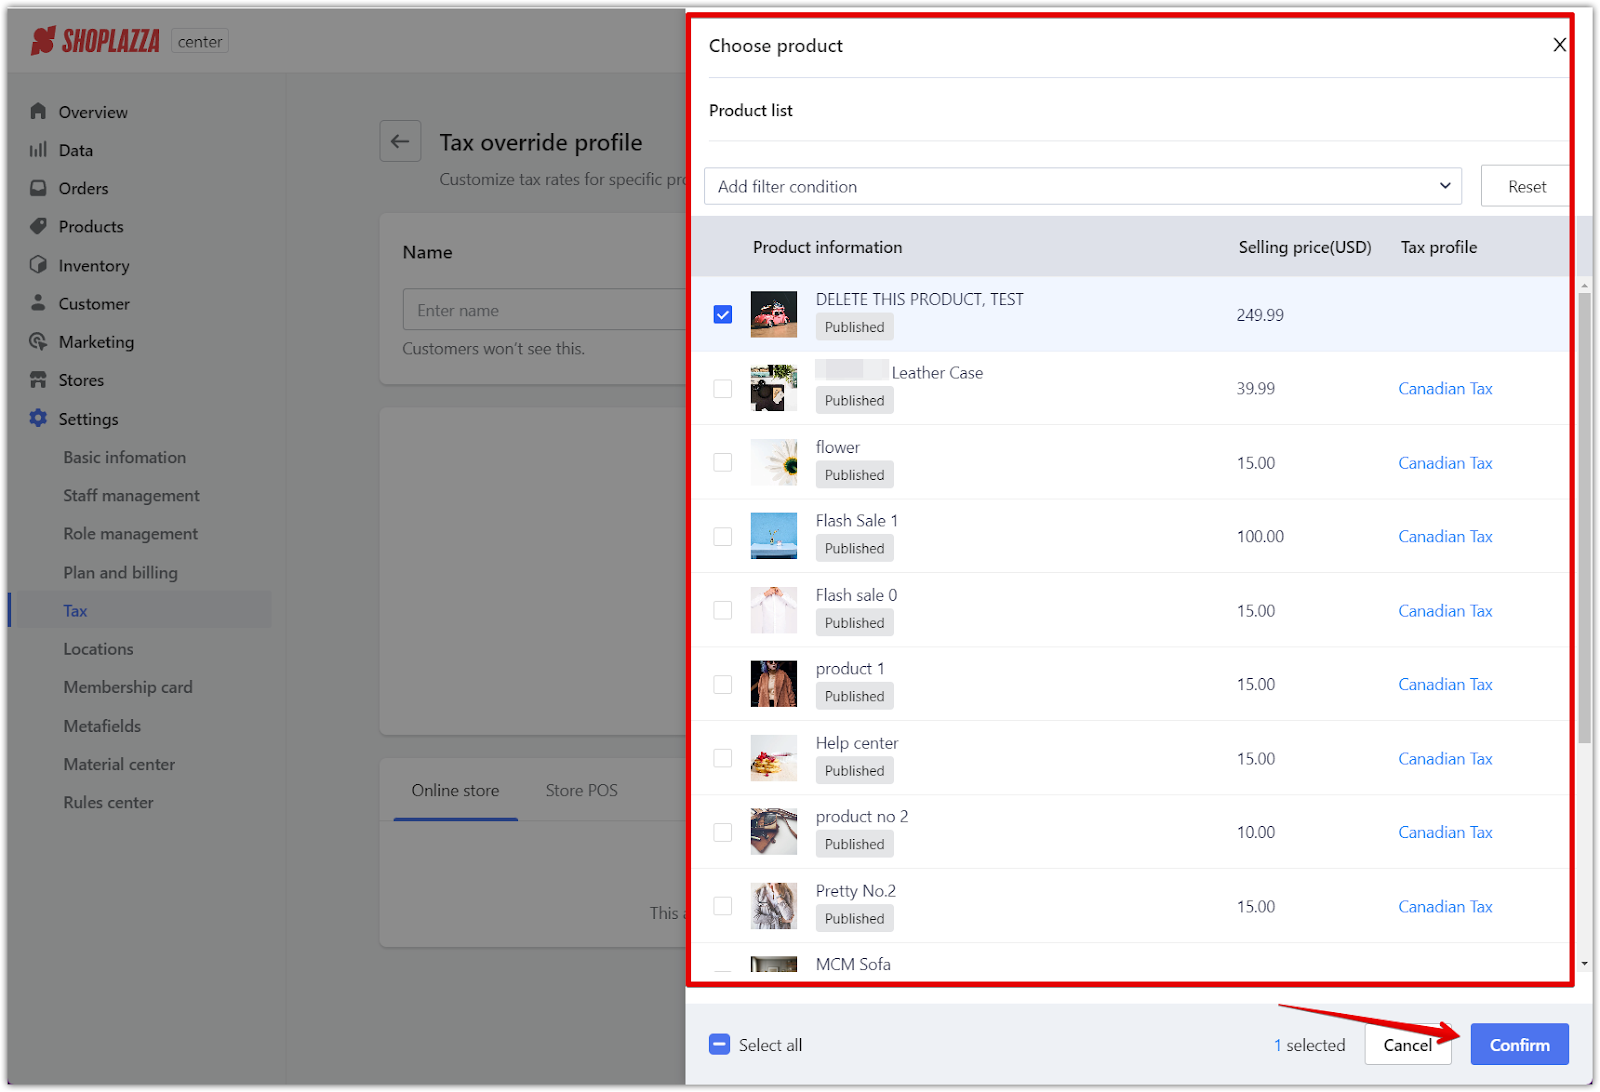
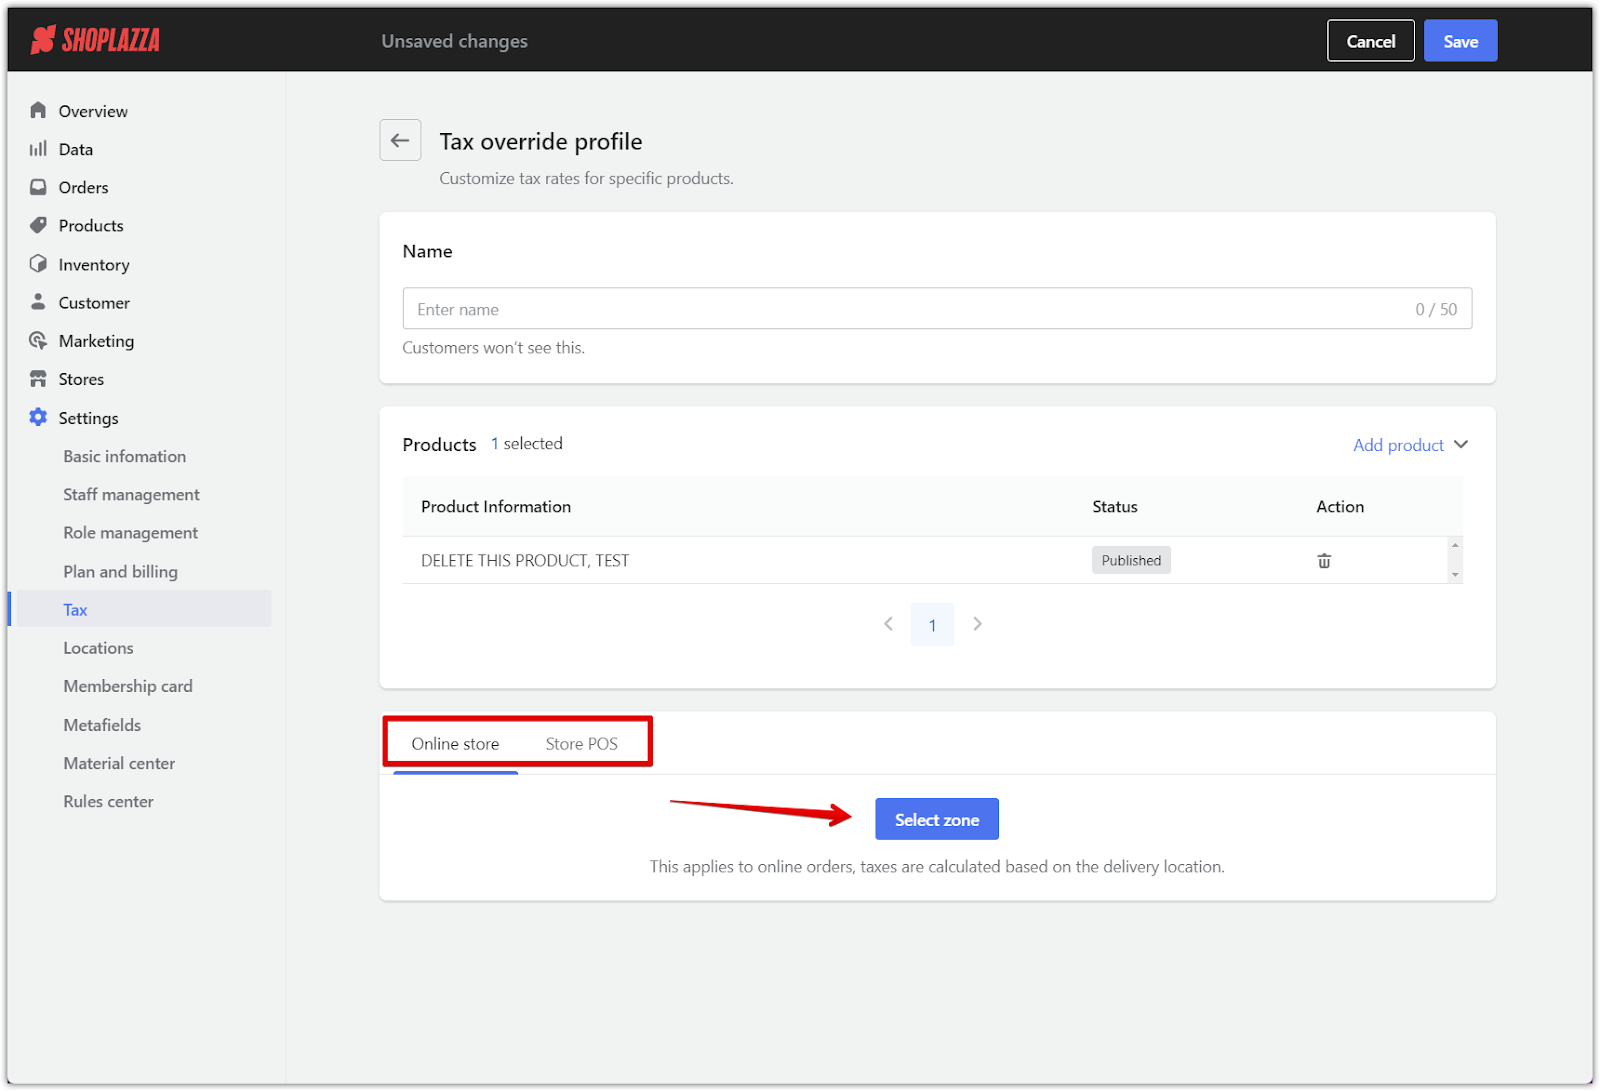
4. Select the applicable zone: Specify the zone where the tax override will apply after adding products. You can choose between Online store and Store POS, typically based on the delivery location for online orders.
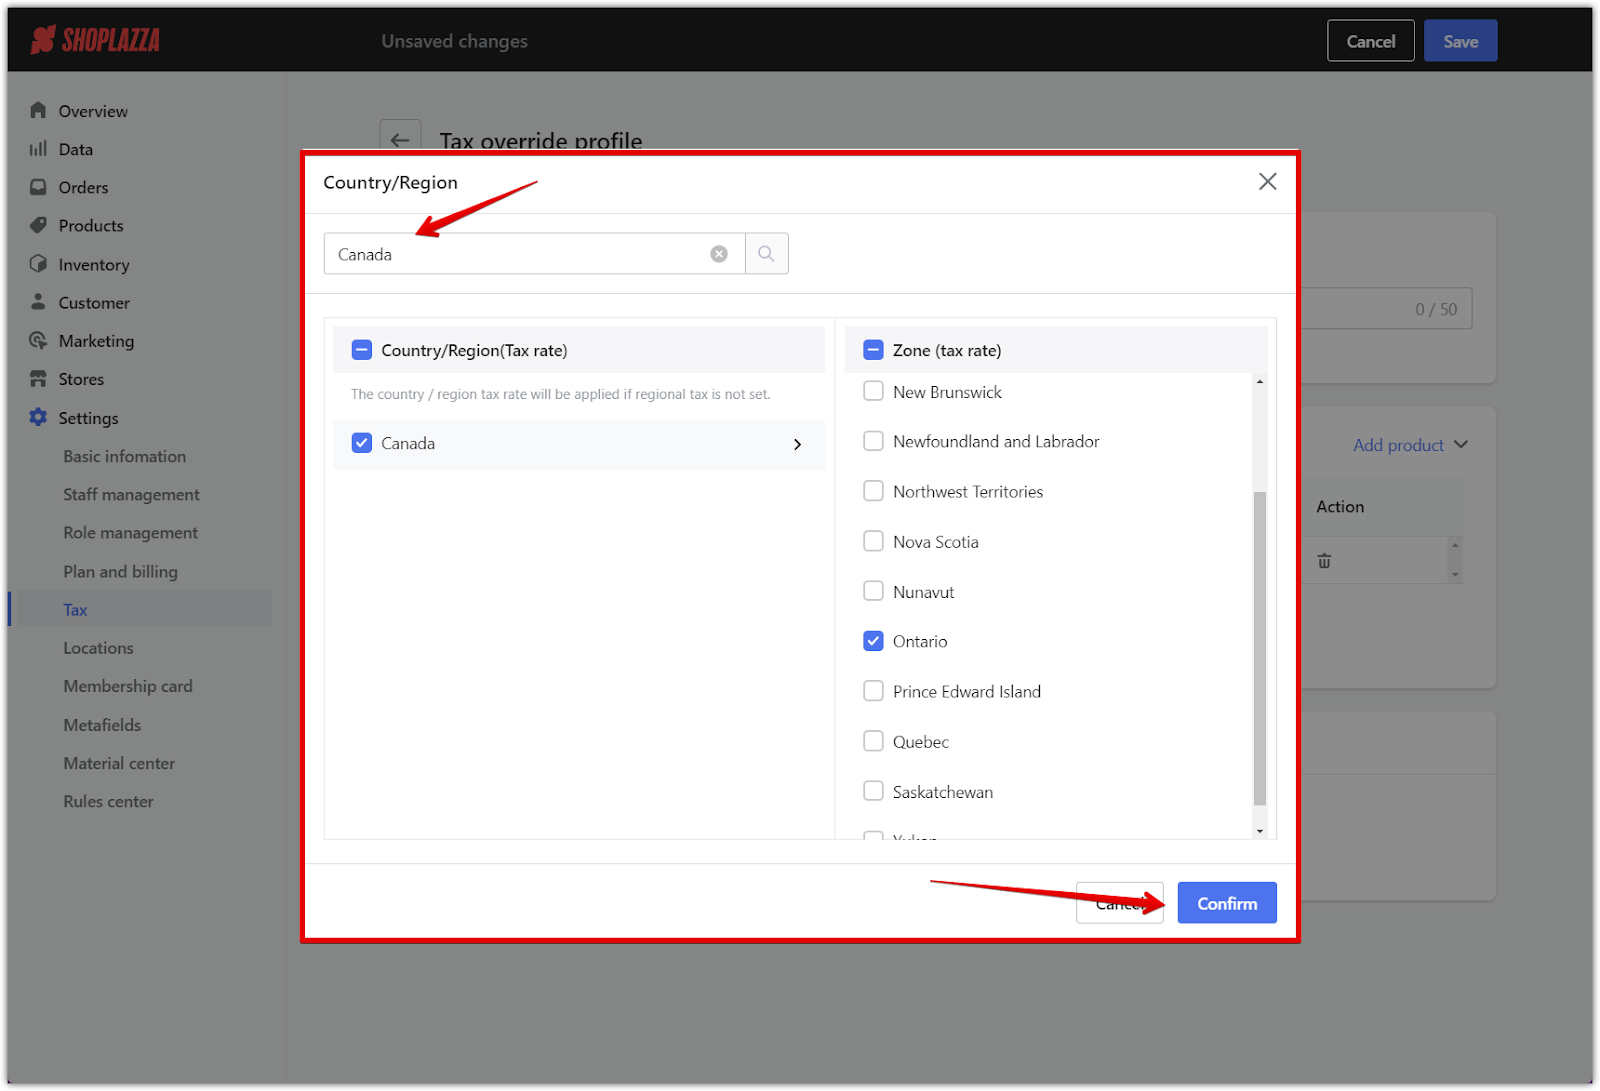
5. Set country/region-specific tax rates: Choose the country or region where this tax override will apply and enter the appropriate tax rates. For example, you can set the HST at 13% for Ontario. Carefully review these settings to ensure they’re accurate.
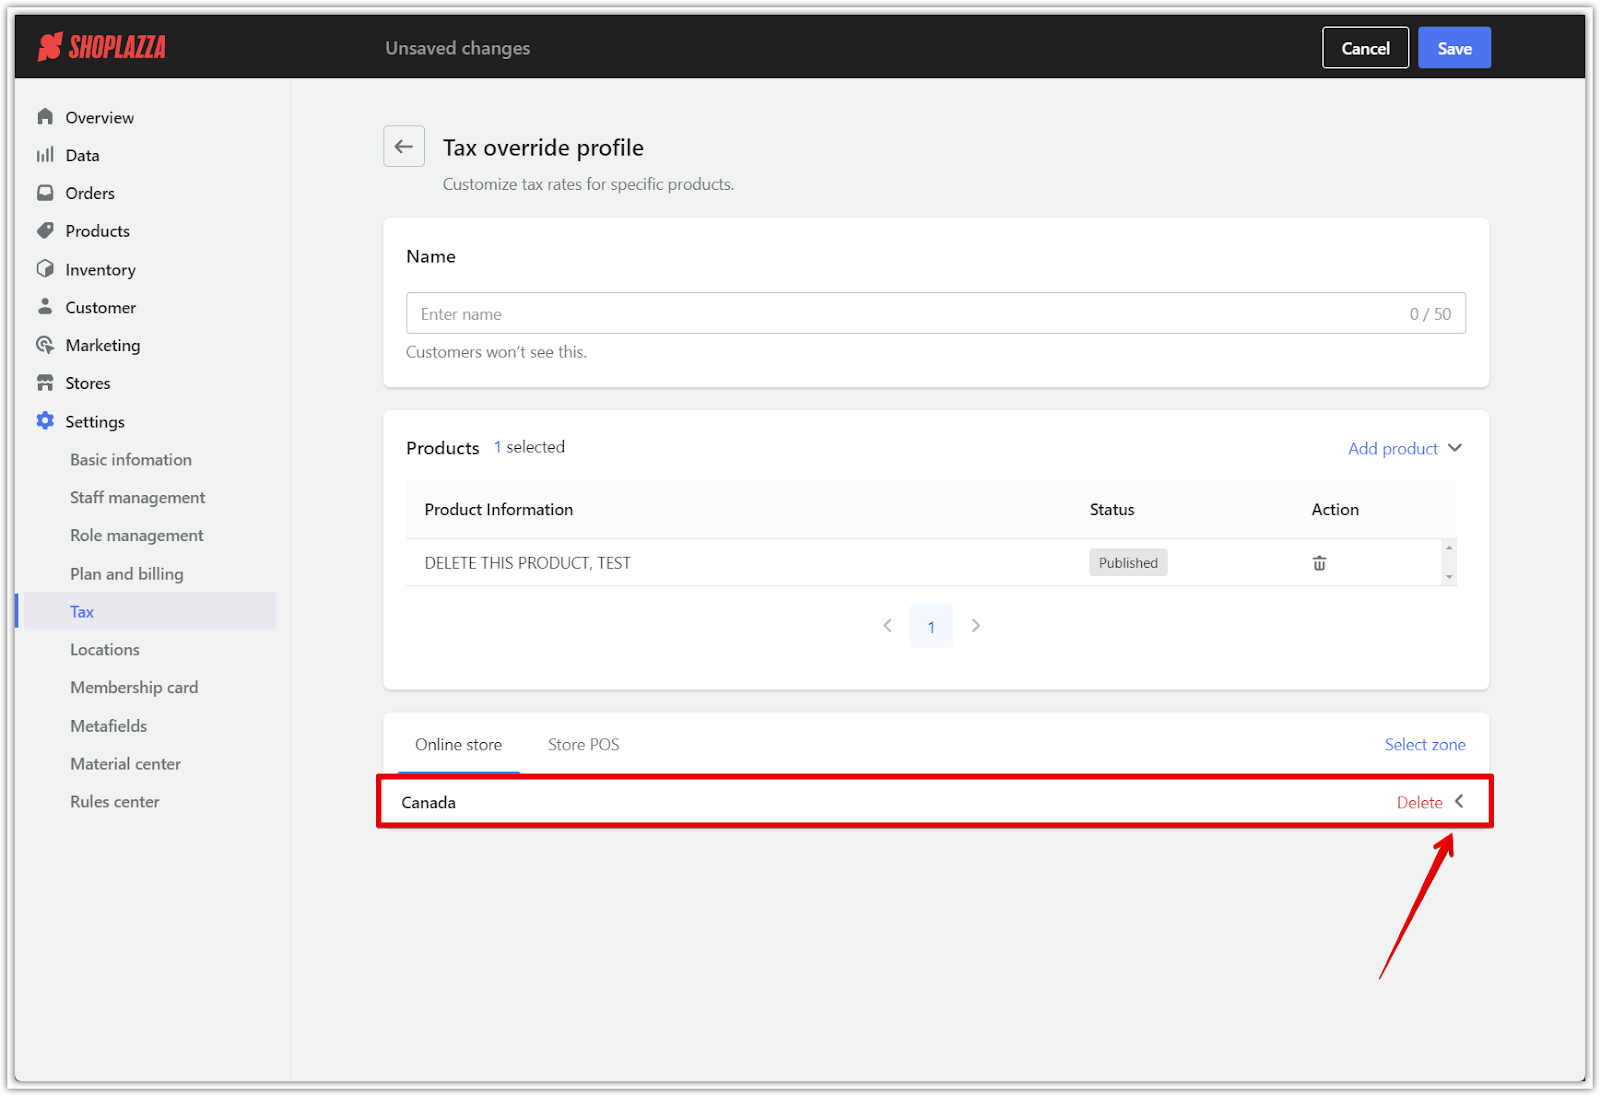
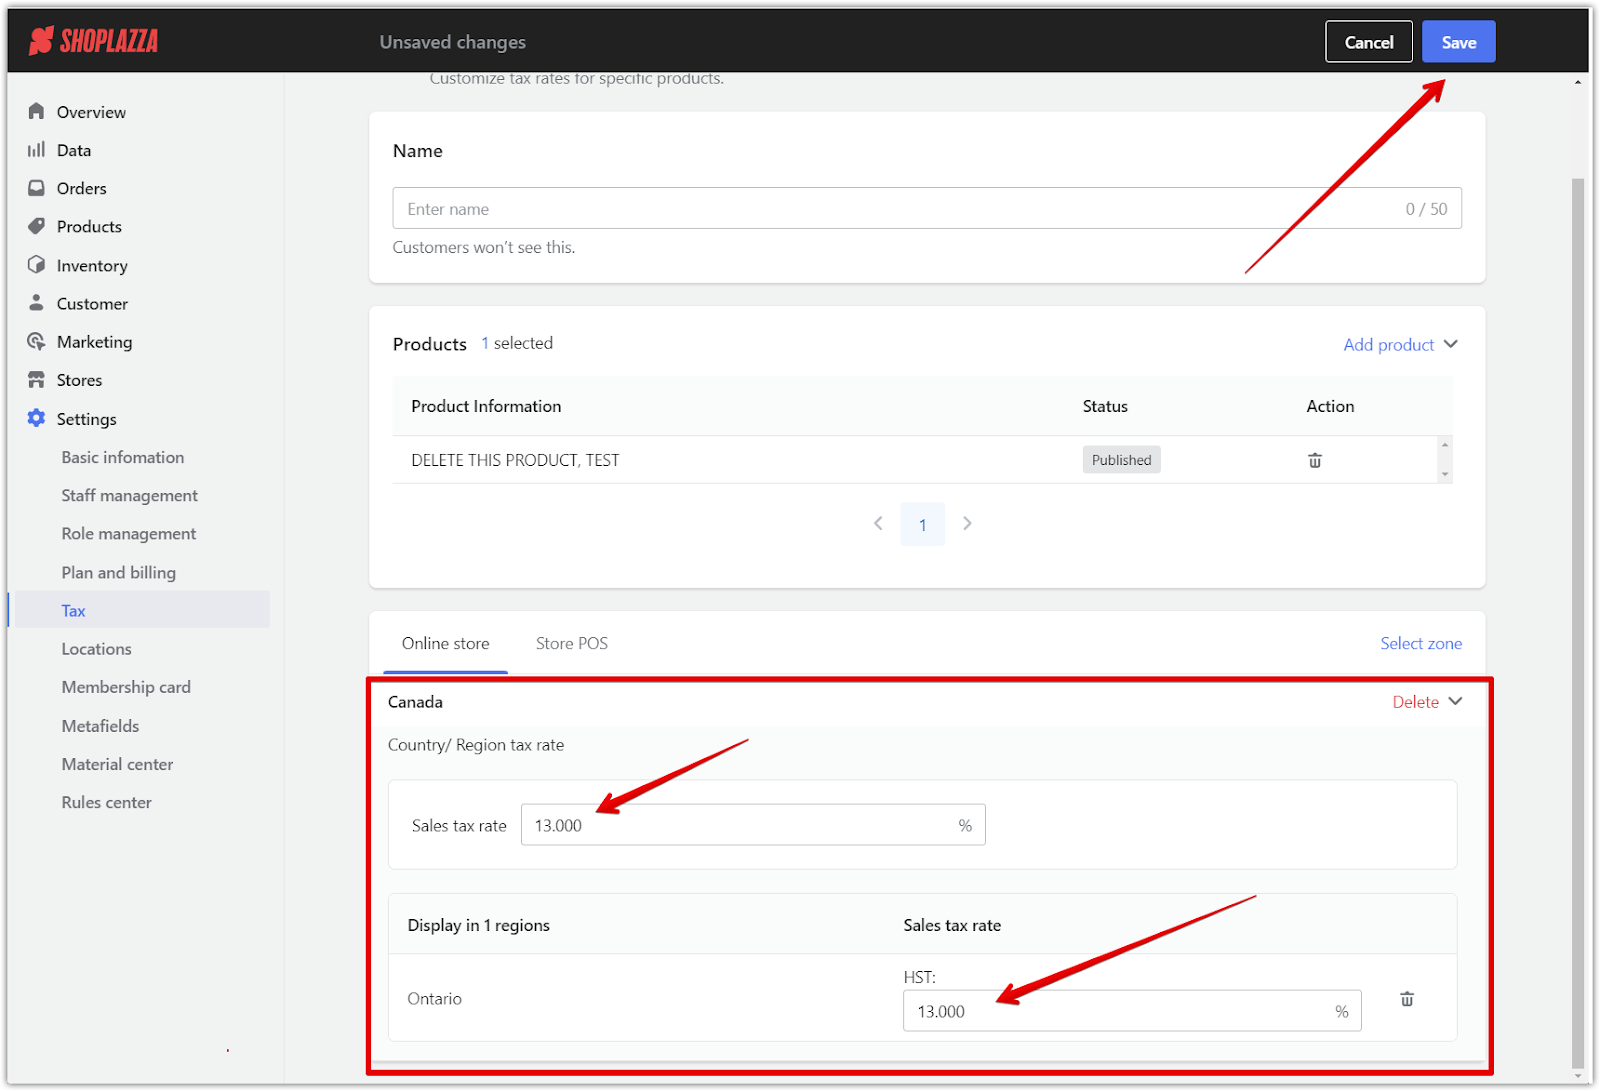
6. Save and manage the profile: Once you’re satisfied with all settings, click Save to finalize the tax profile. After saving, the profile will appear in the Tax override profile section. You can view profile details like name, products, and the applicable country/region here. To make changes to this profile, select Manage profile.
With these configurations—whether automated with Avalara or customized manually—your store will be well-equipped to manage tax requirements accurately and efficiently, creating a seamless customer checkout experience.


Comments
Please sign in to leave a comment.