Managing product categories helps keep your store organized and makes it easier for customers to find what they want. In your Shoplazza admin, you can choose between creating Custom categories or using Google categories to classify your products.
- Custom categories allow you to create a unique structure for your product catalog. This gives you flexibility in organizing up to 3 levels of categories and adjusting the sorting order at any time.
- Google categories are predefined categories provided by Google to help improve product visibility in external listings, such as Google Shopping. Adding Google categories can assist in aligning your products with these listings for better search performance.
Note
If this is your first time setting up categories, you will not see the category selection screen. After your initial selection, you can switch between Google or custom categories, depending on your first choice. Switching between custom and Google categories will clear any previously set categories, so plan ahead to avoid losing your category structure.
Custom categories
Custom categories allow you to create a unique structure for your product catalog. This gives you flexibility in organizing up to 3 levels of categories and adjusting the sorting order at any time.
1. Use custom categories: Navigate to Products Product > management > Product categories in your Shoplazza Center Admin. Choose Custom categories.
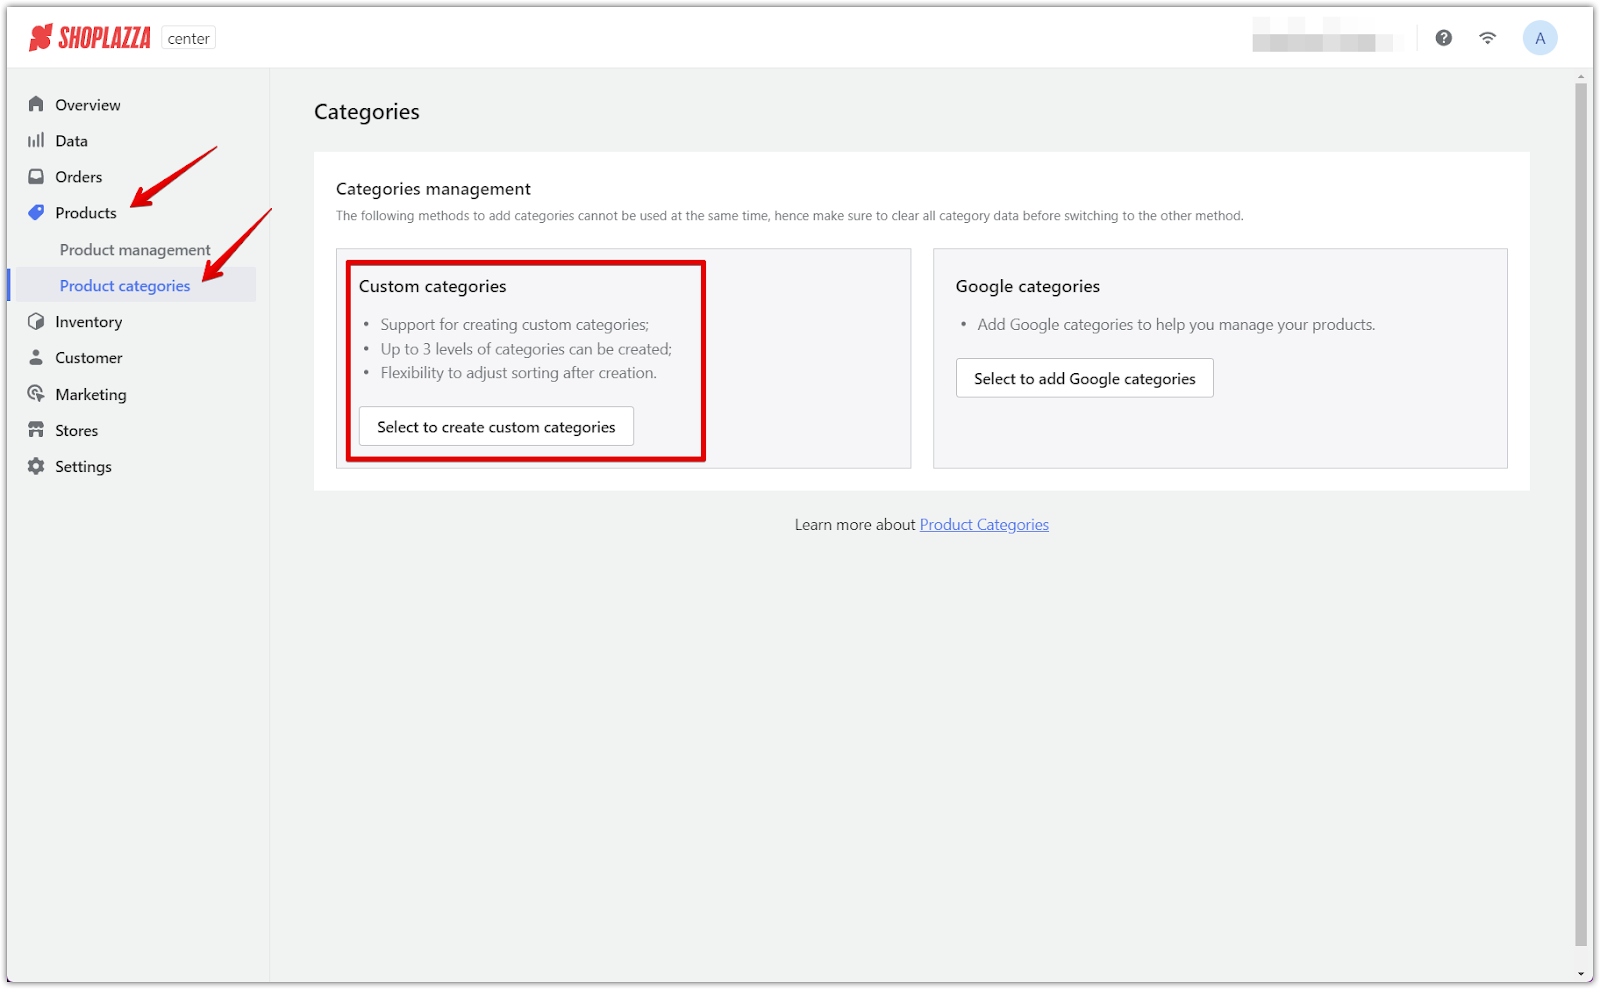
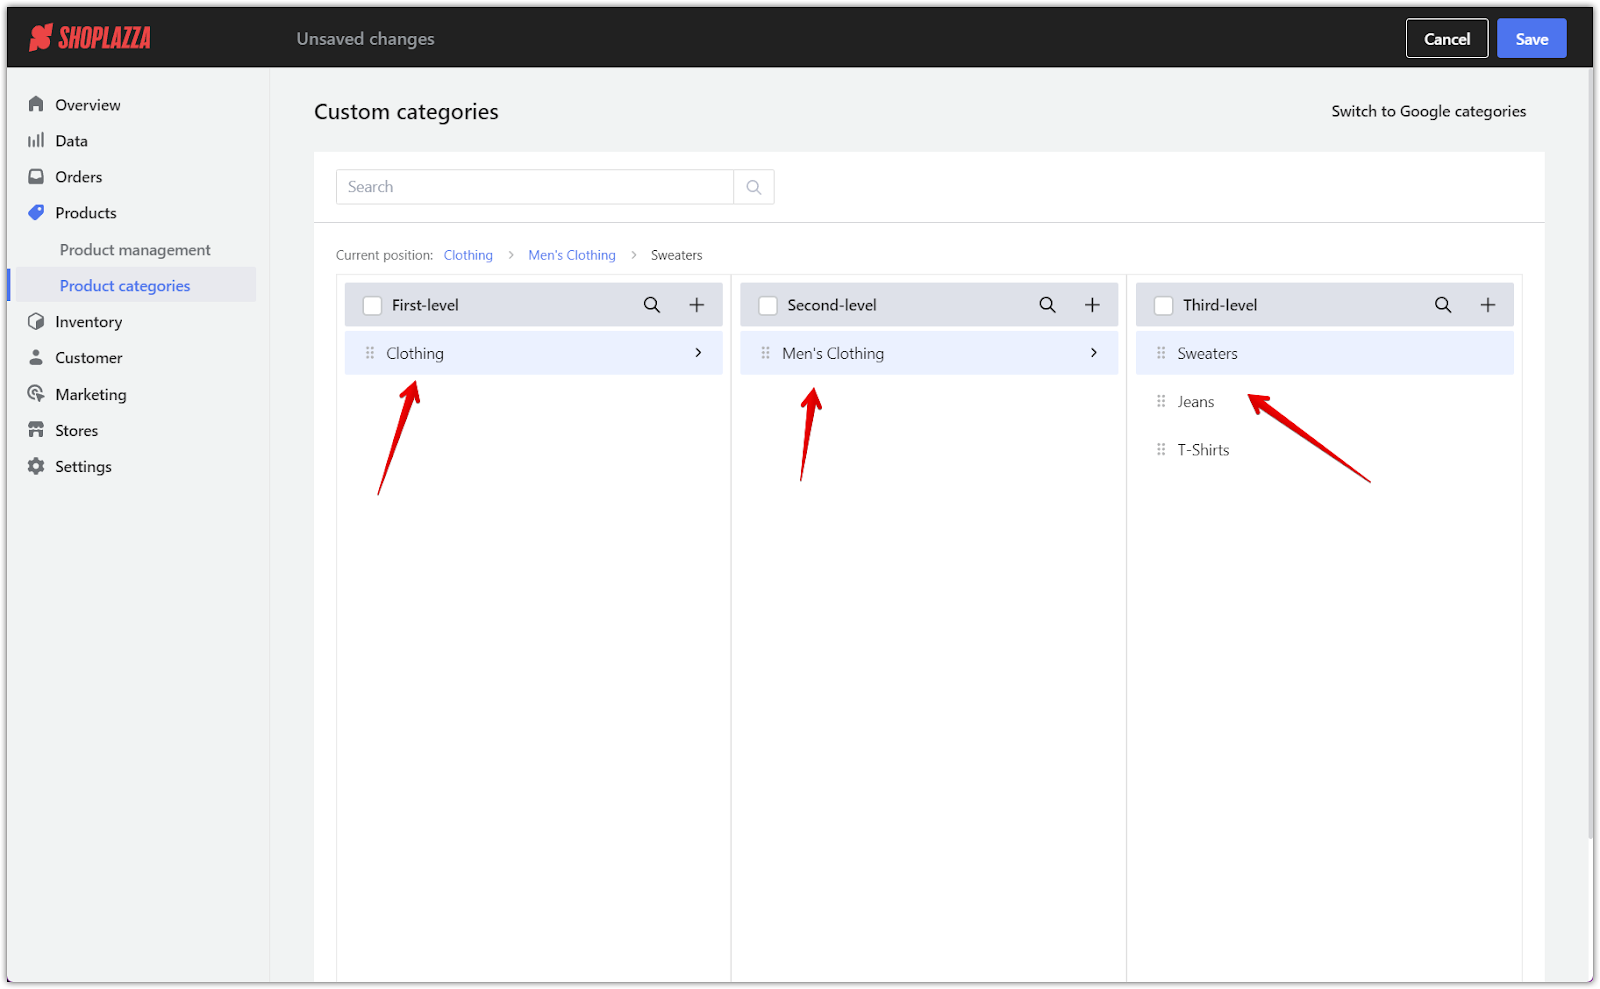
2. Create custom categories: If you've selected Custom categories, start by entering a keyword for your first-level category in the provided field. This first-level category represents the broadest classification for your products, so choose a term that best describes the overall group of products. After adding the first-level category, you'll have the option to add up to two more levels for further detail:
- Second-level category: This should narrow down the products within the first-level category. For example, if your first-level category is "Clothing," your second-level category could be "Men's Clothing" or "Women's Clothing."
- Third-level category: This provides an even more specific classification. Continuing the example, under "Men's Clothing," the third-level category could be "T-shirts" or "Jeans."
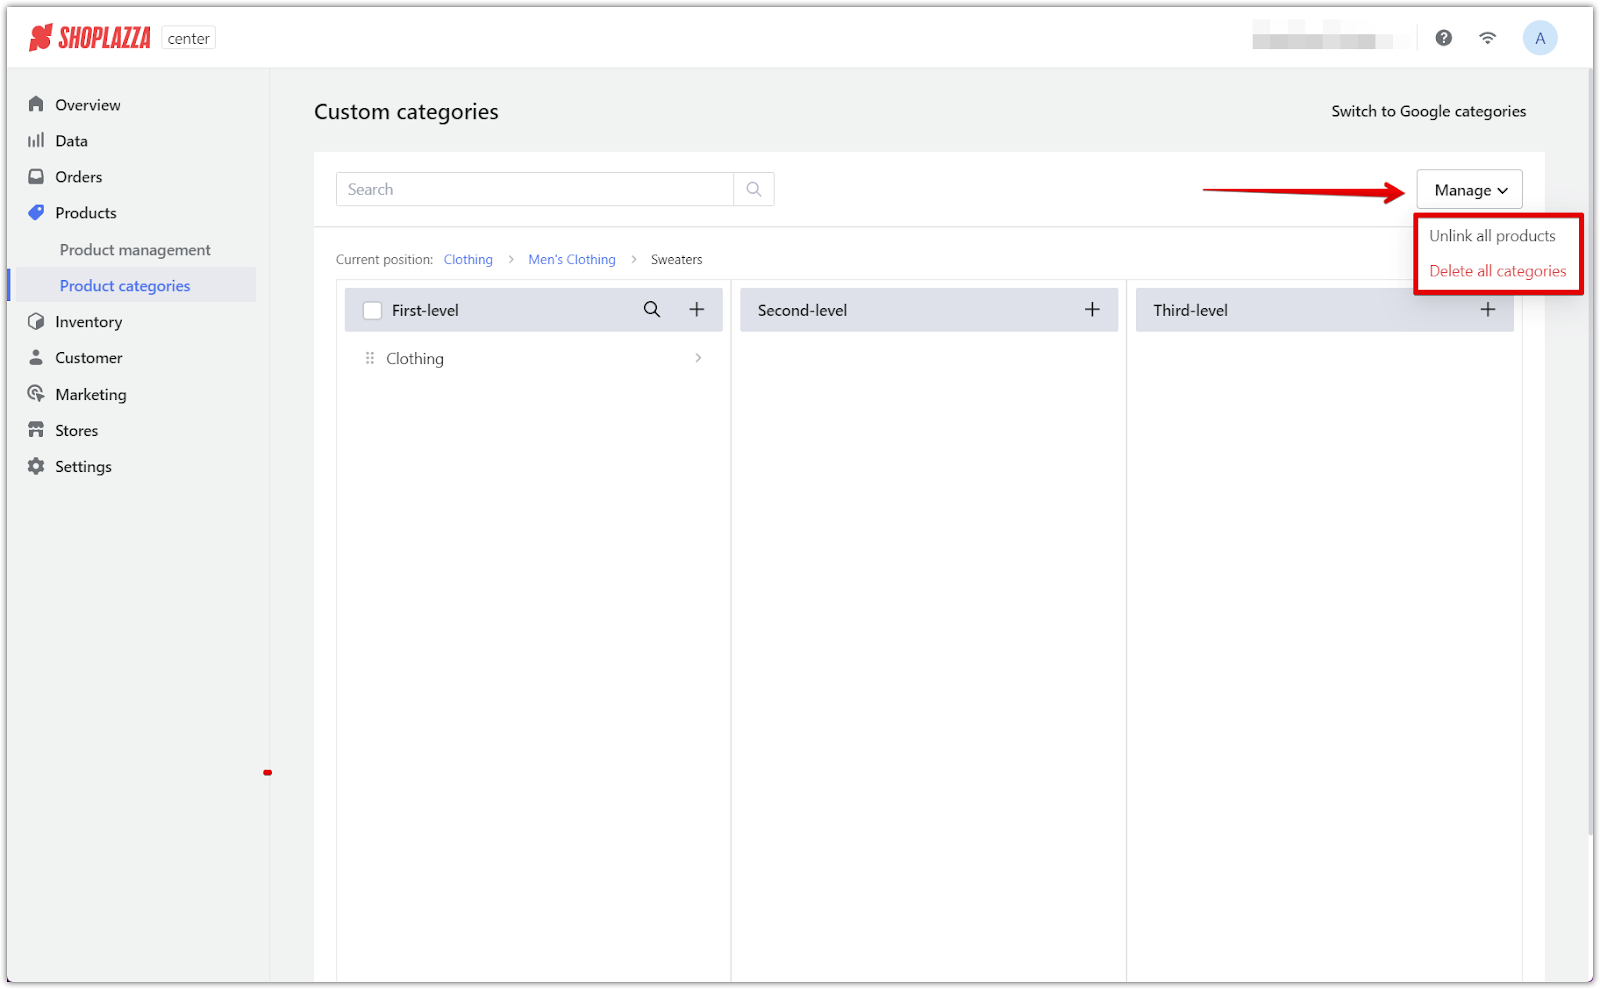
3. Manage your custom categories: After setting up your custom categories, a Manage button will appear in the top-right corner of the screen. Clicking this will provide you with options to:
- Unlink all products: This option allows you to remove all the products currently linked to your custom categories.
- Delete all categories: If you want to reset your categories and start fresh, this option lets you delete all your current custom categories at once.
Google categories
Google categories are predefined categories provided by Google to help improve product visibility in external listings, such as Google Shopping.
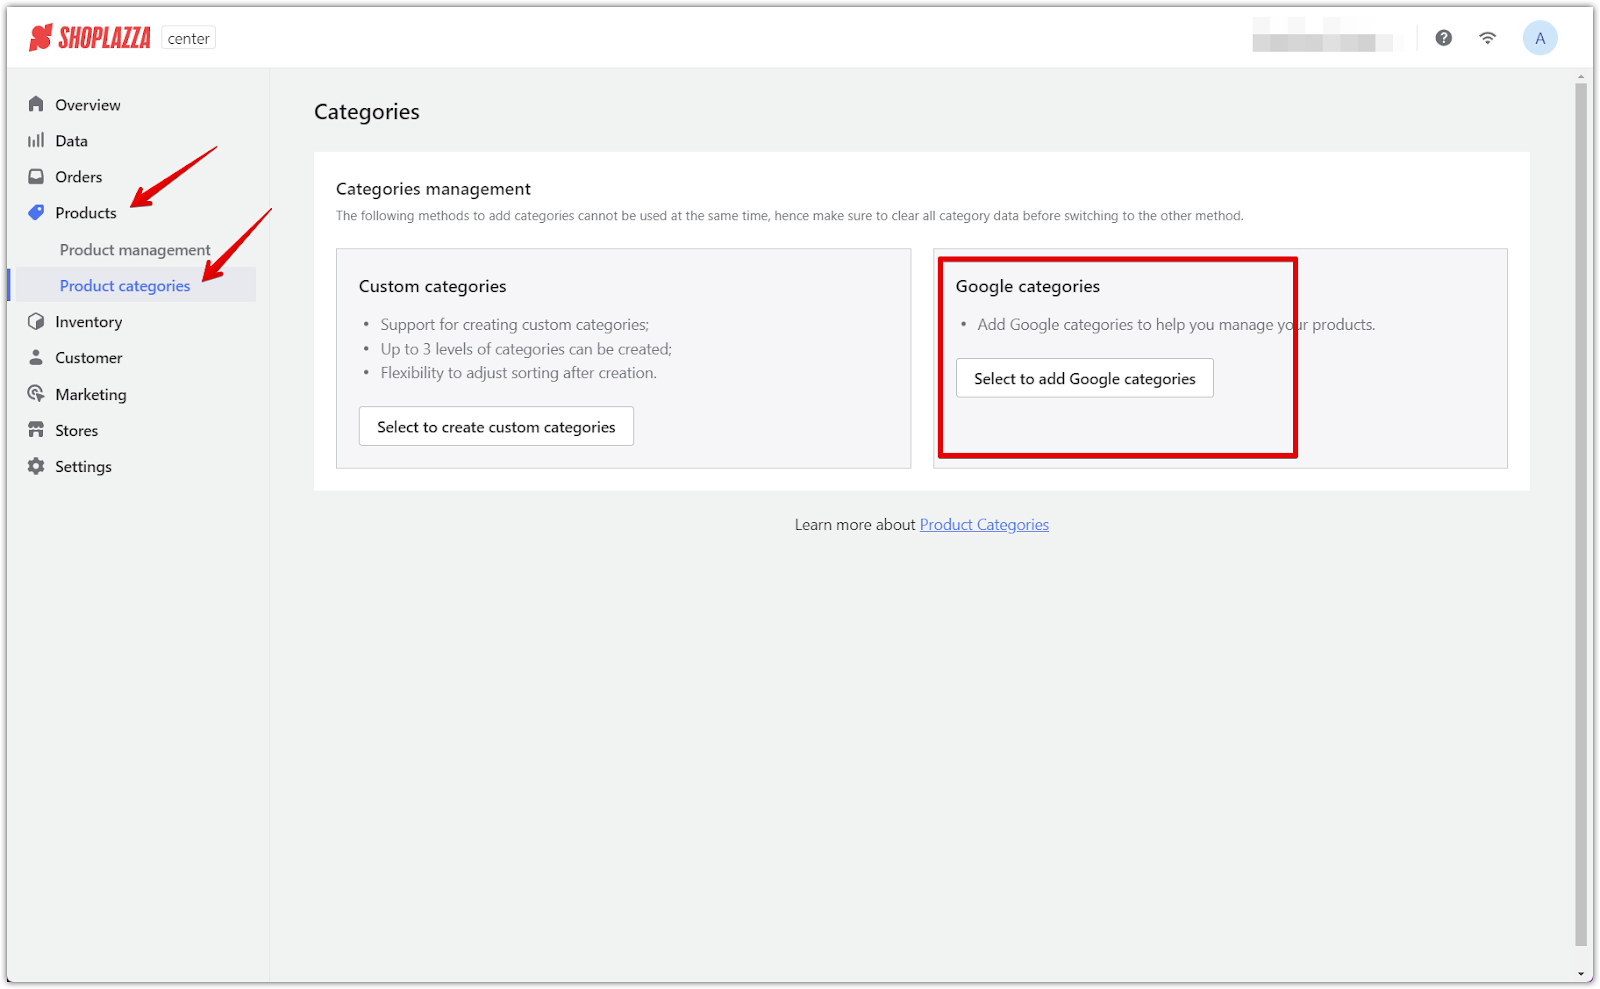
1. Use Google categories: Navigate to Products > Product management > Product categories in your Shoplazza admin. Choose Google categories.
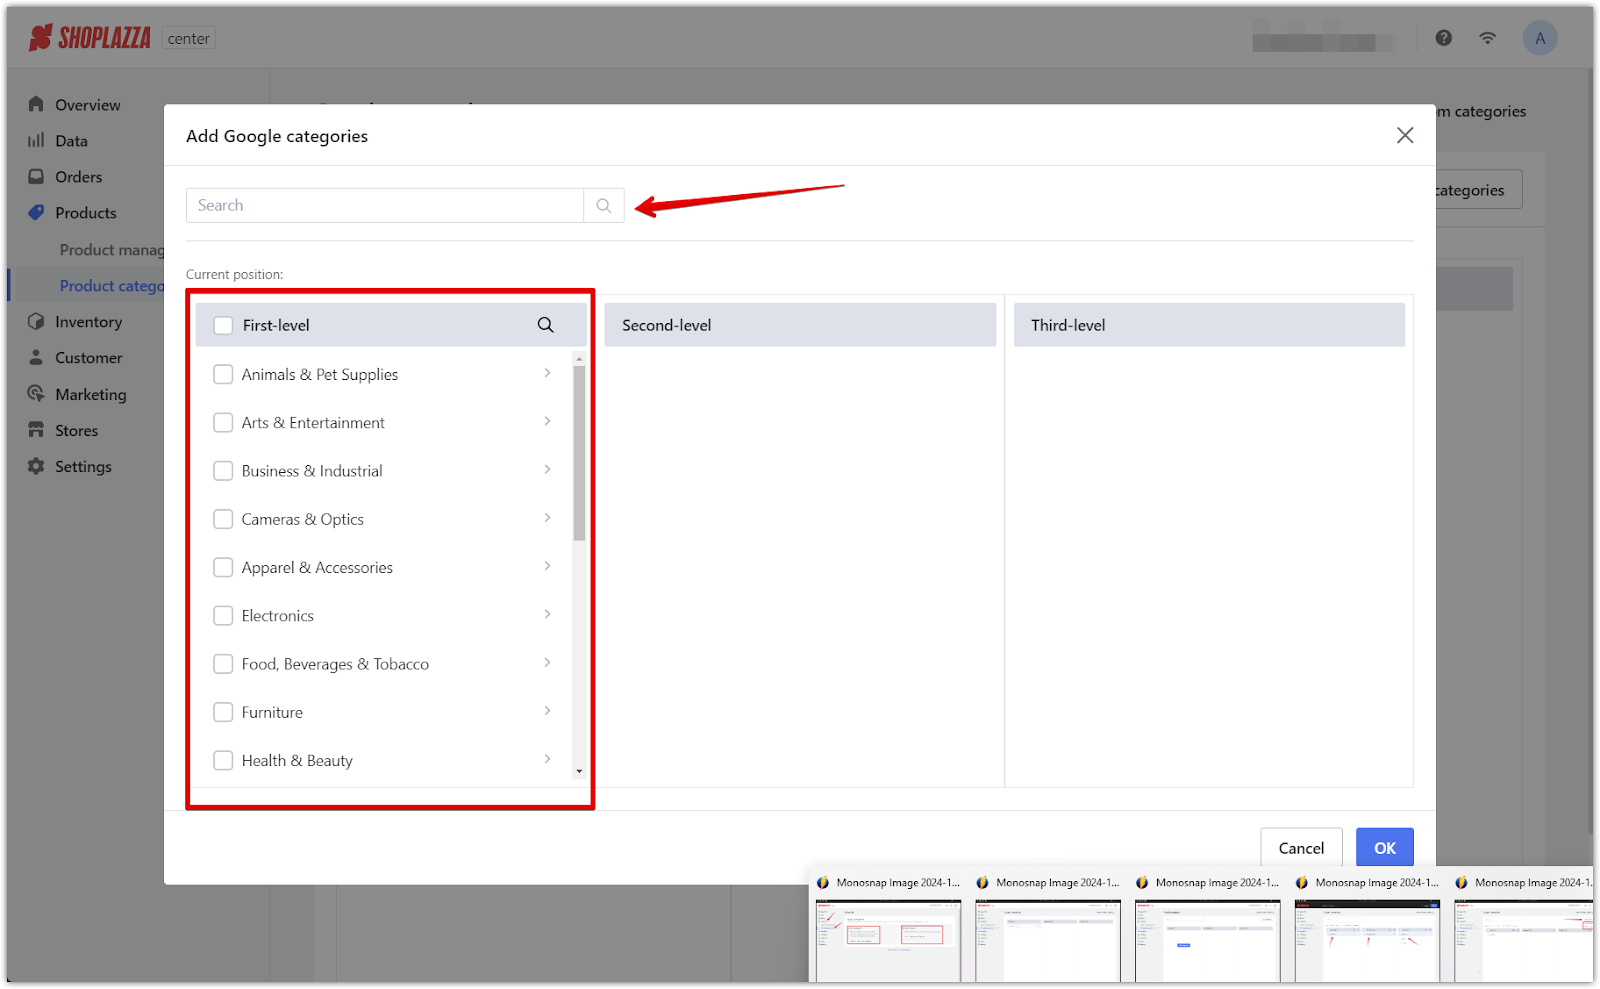
2. Add Google categories:
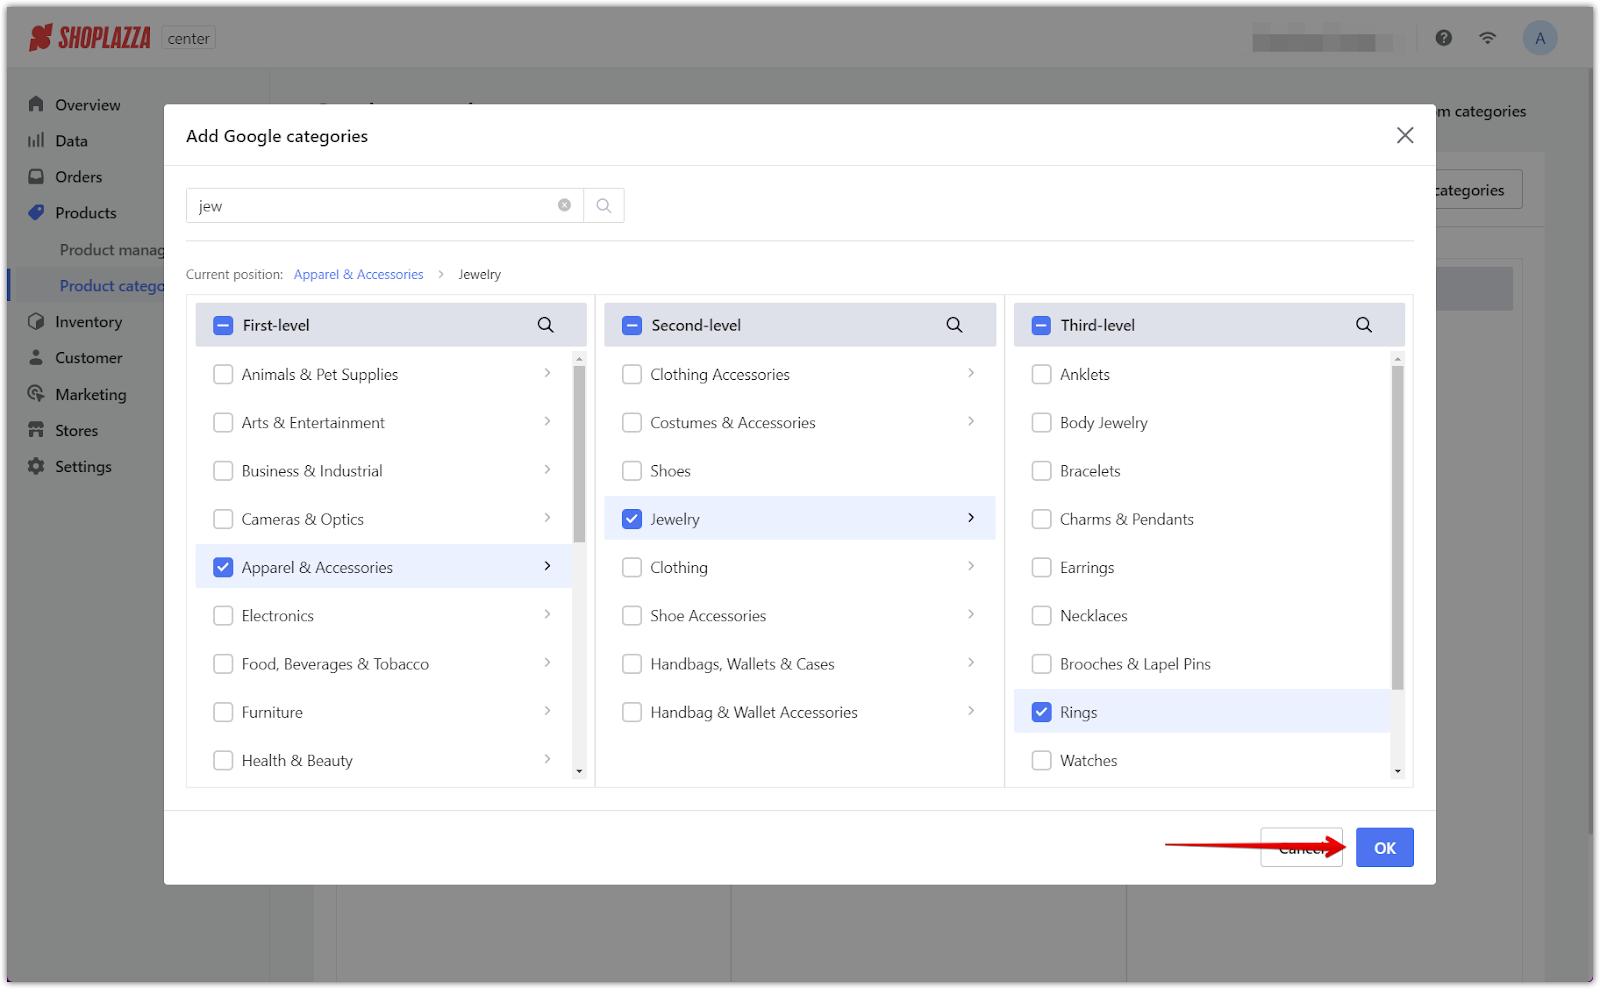
- Use the search bar to find the right category or manually navigate the first, second, and third-level options.
- Choose the relevant category that best matches your product.
- Once selected, click OK and Save to confirm your choices.
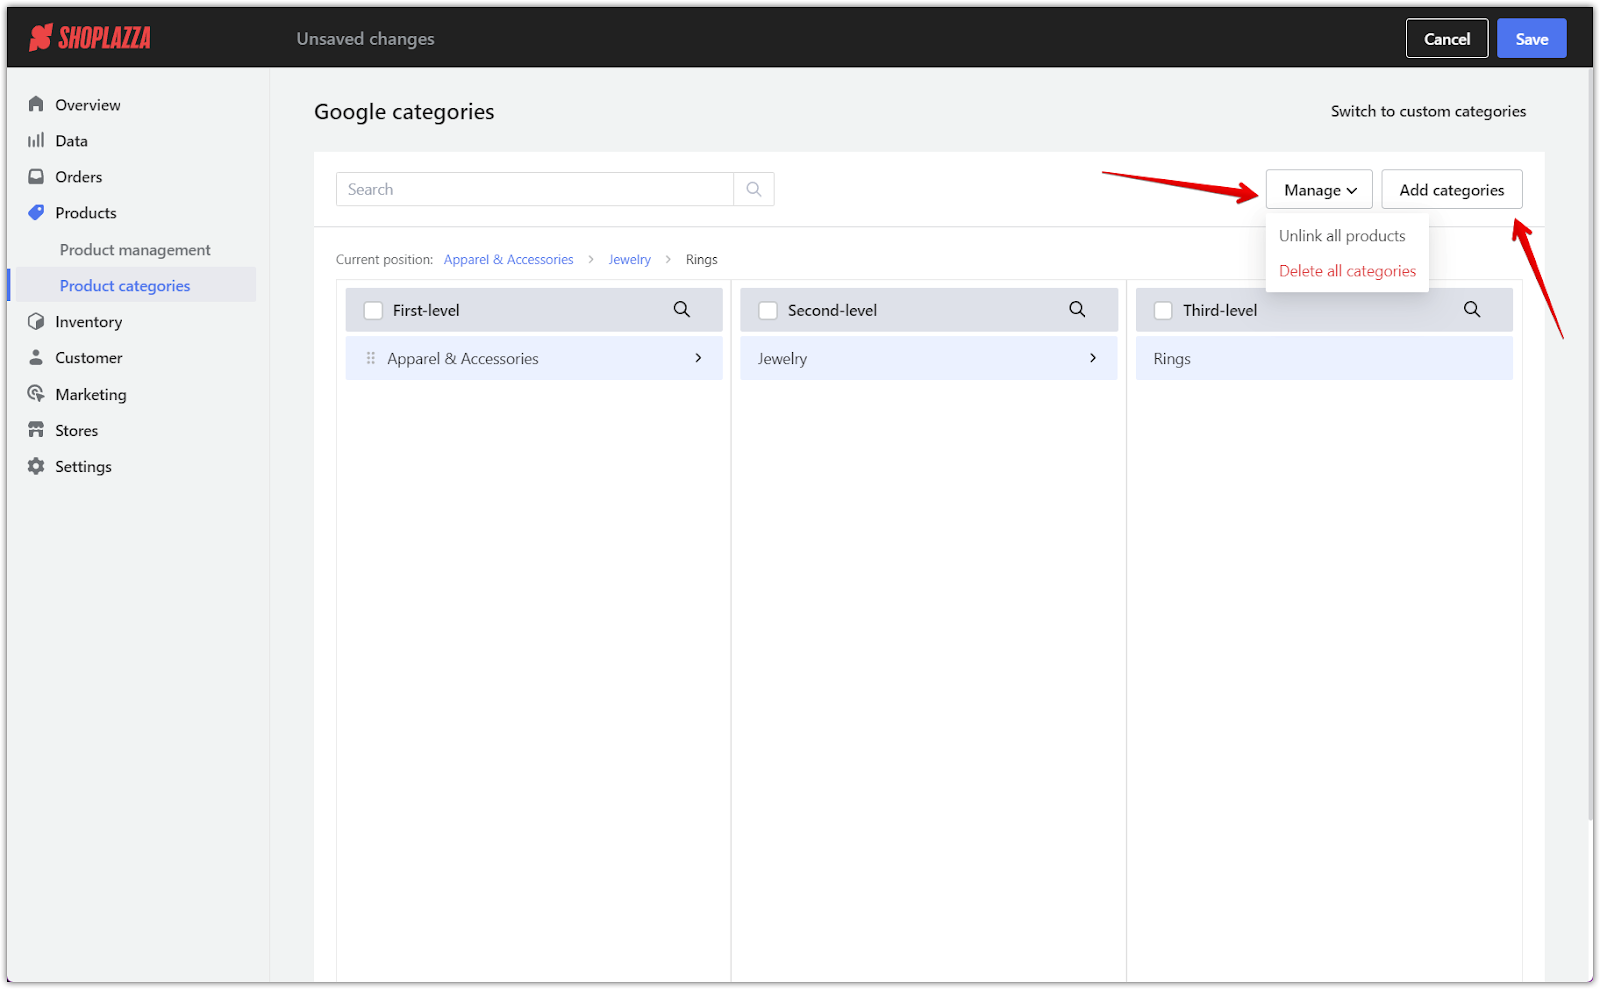
3. Manage your Google categories: After saving your Google categories, you can manage them by clicking the Manage button. Options will include:
- Unlink all products: Remove products linked to the selected Google categories.
- Delete all categories: Clear out your Google categories setup.
Assigning categories to products
Once you've set up your categories, assign each product to the correct category by updating the product information.
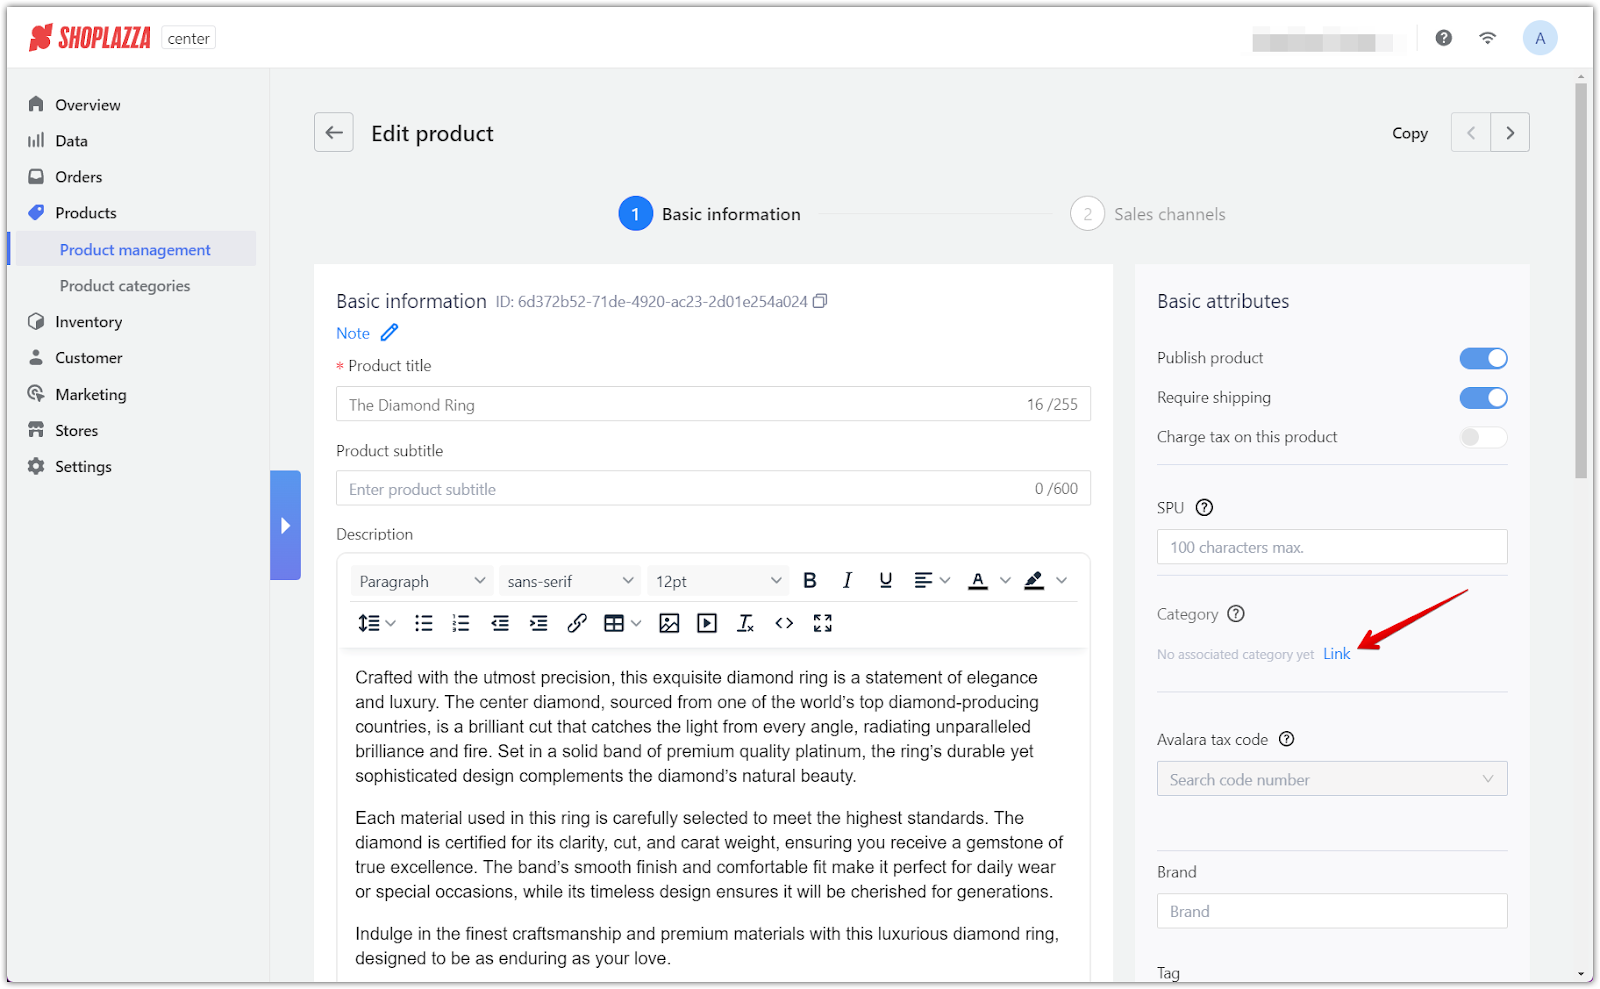
1. Navigate to the product: Navigate to Products > Product management, then select the product you want to edit.
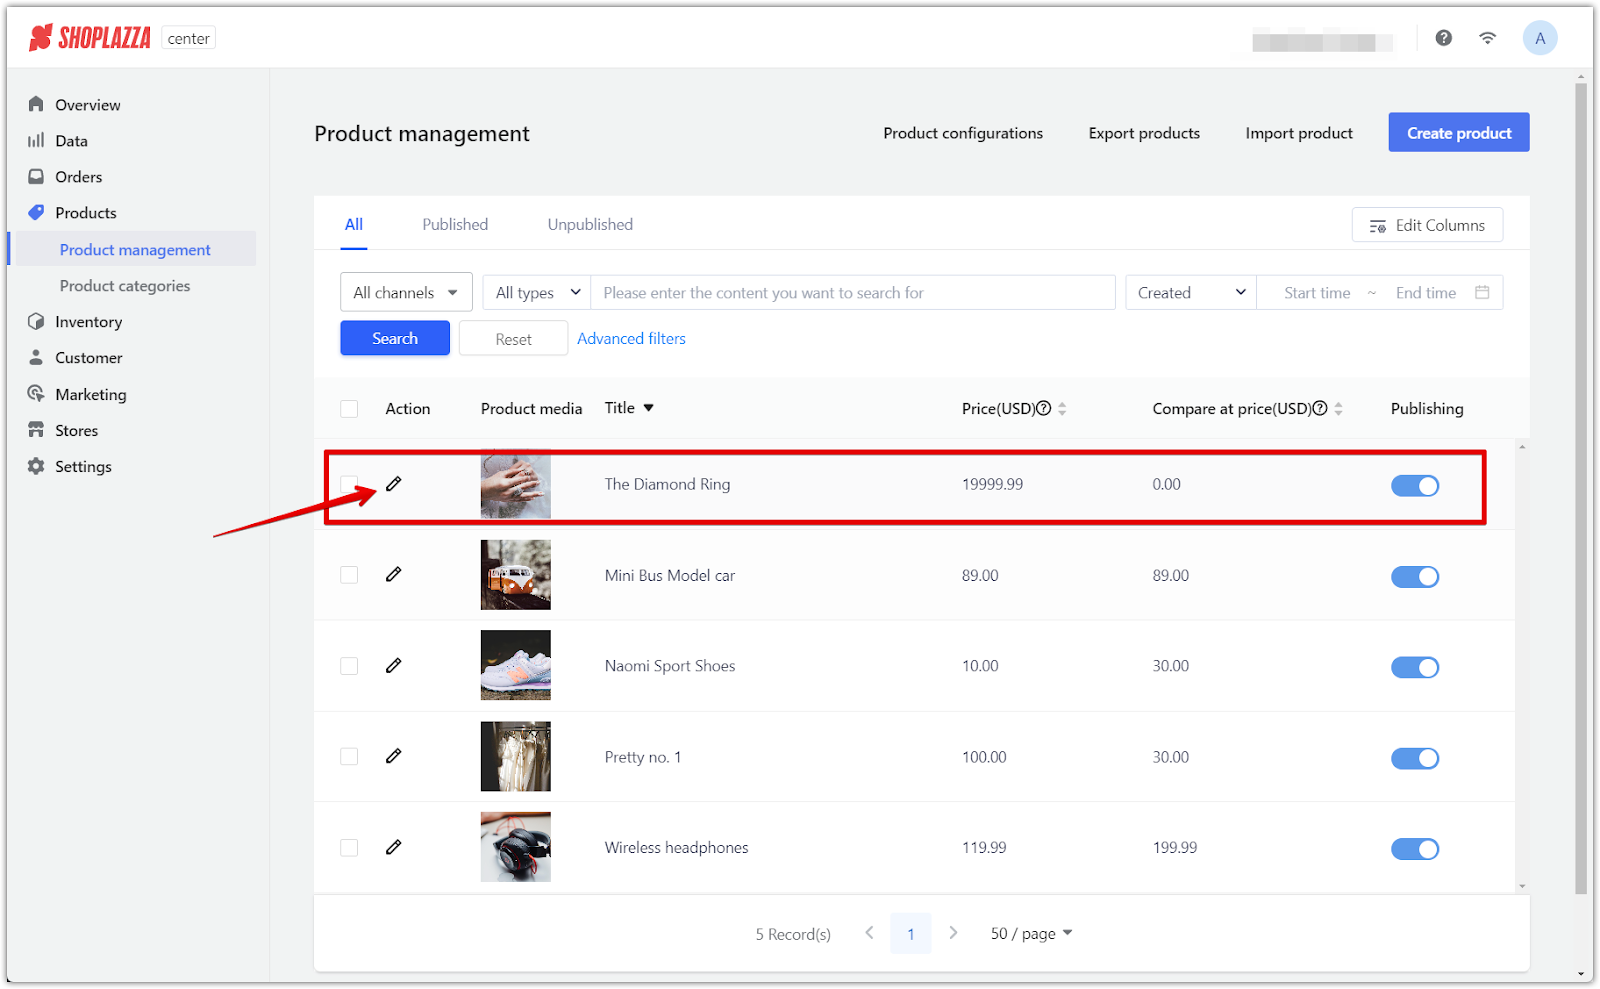
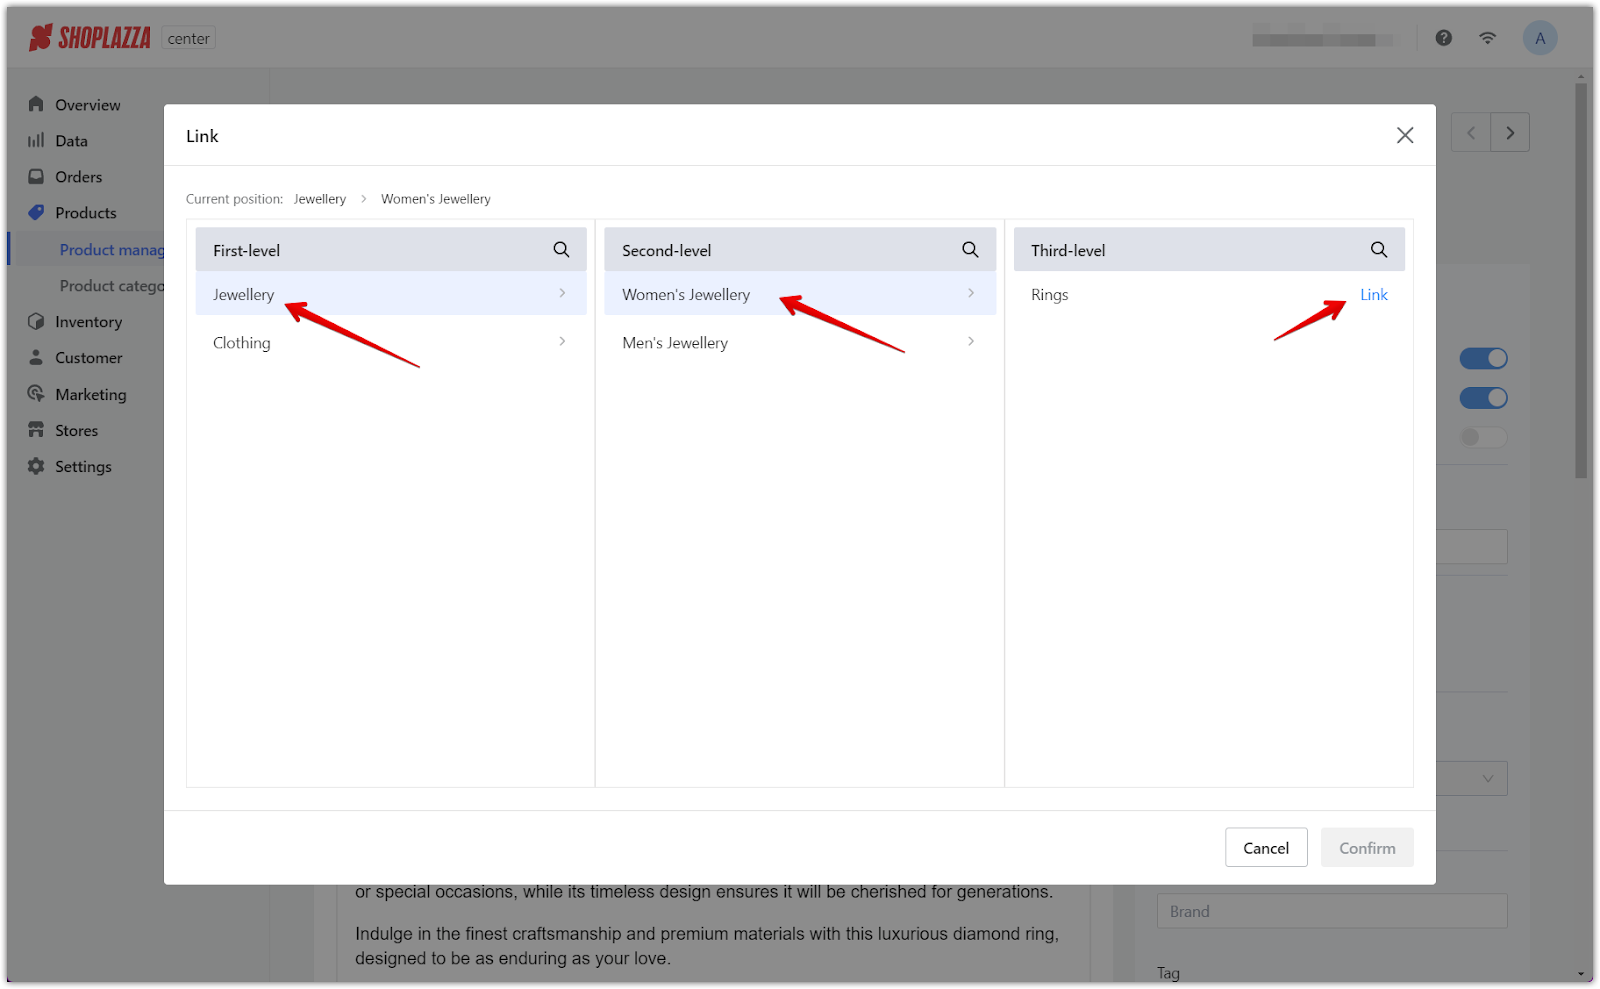
2. Link the category: In the Basic attributes section, under Category, click Link to select the category from the list.
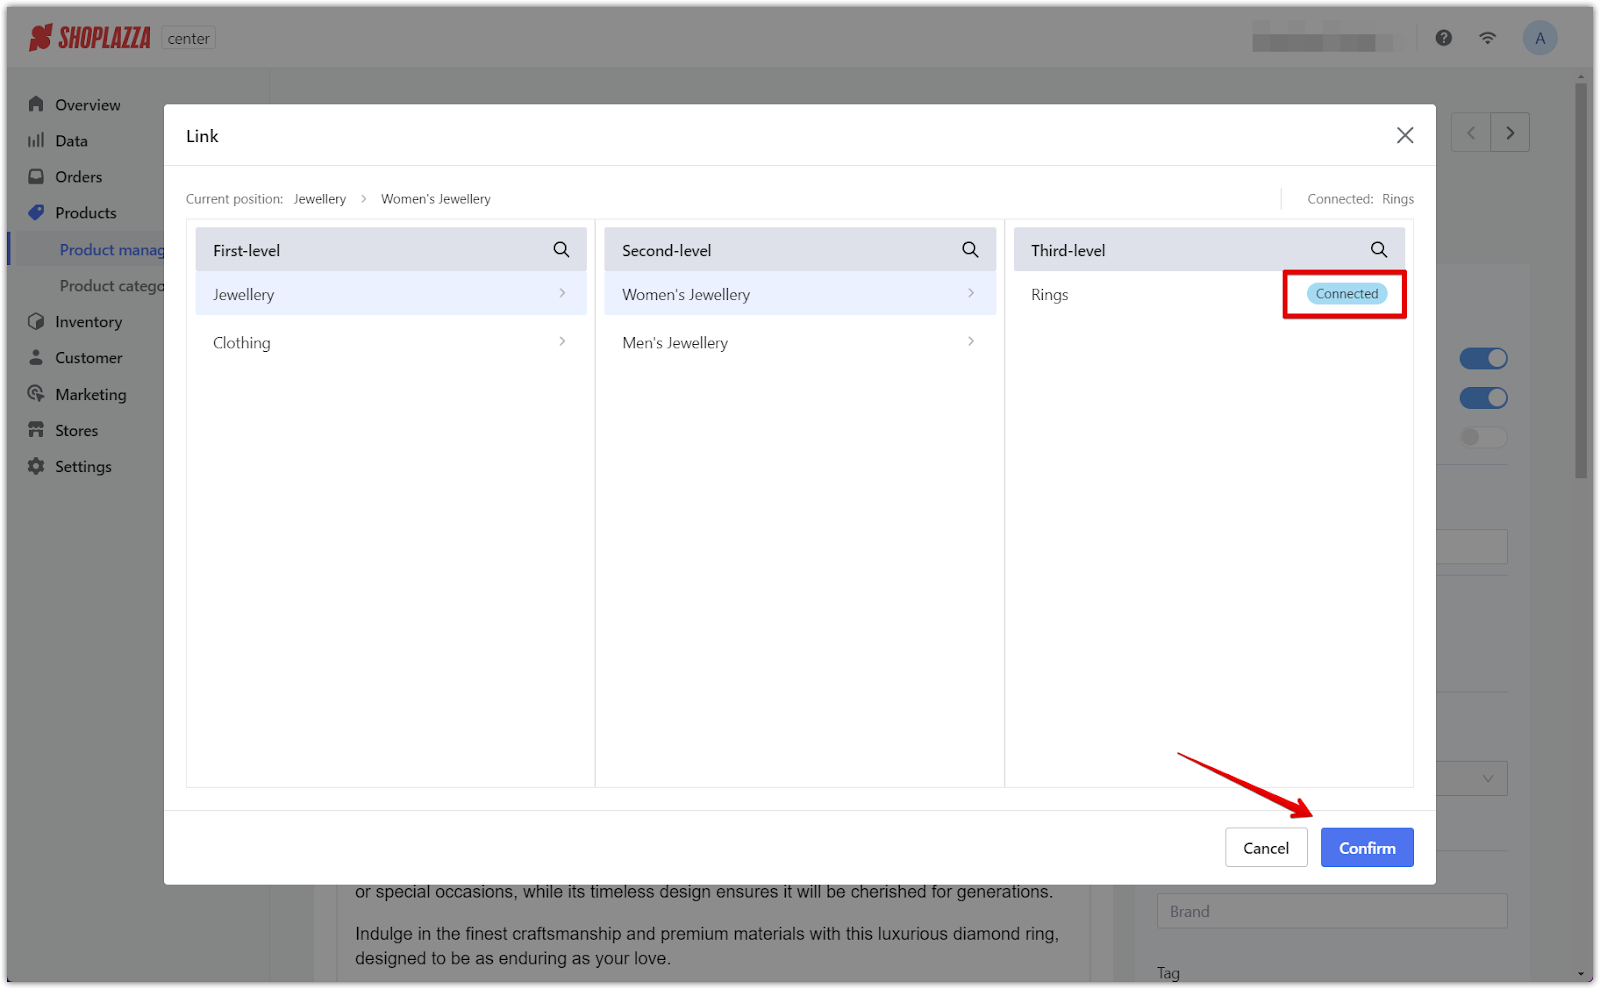
3. Confirm the category: After choosing the appropriate category from the first, second, and third-level categories, the category will show as Connected. Click Confirm to apply the selected category to the product.
Setting up product categories in your Shoplazza store, whether custom or Google categories, is essential for maintaining a well-organized store and ensuring a seamless shopping experience. Customers can easily browse your collections and find what they need by categorizing your products accurately. Regularly review and manage your categories as your product offerings evolve, and always confirm changes to keep your store up-to-date.


Comments
Please sign in to leave a comment.