
To ensure your products are available for sale in retail or online stores, they must first be created in your Shoplazza Center Admin. Once created, you can assign them to the necessary stores.
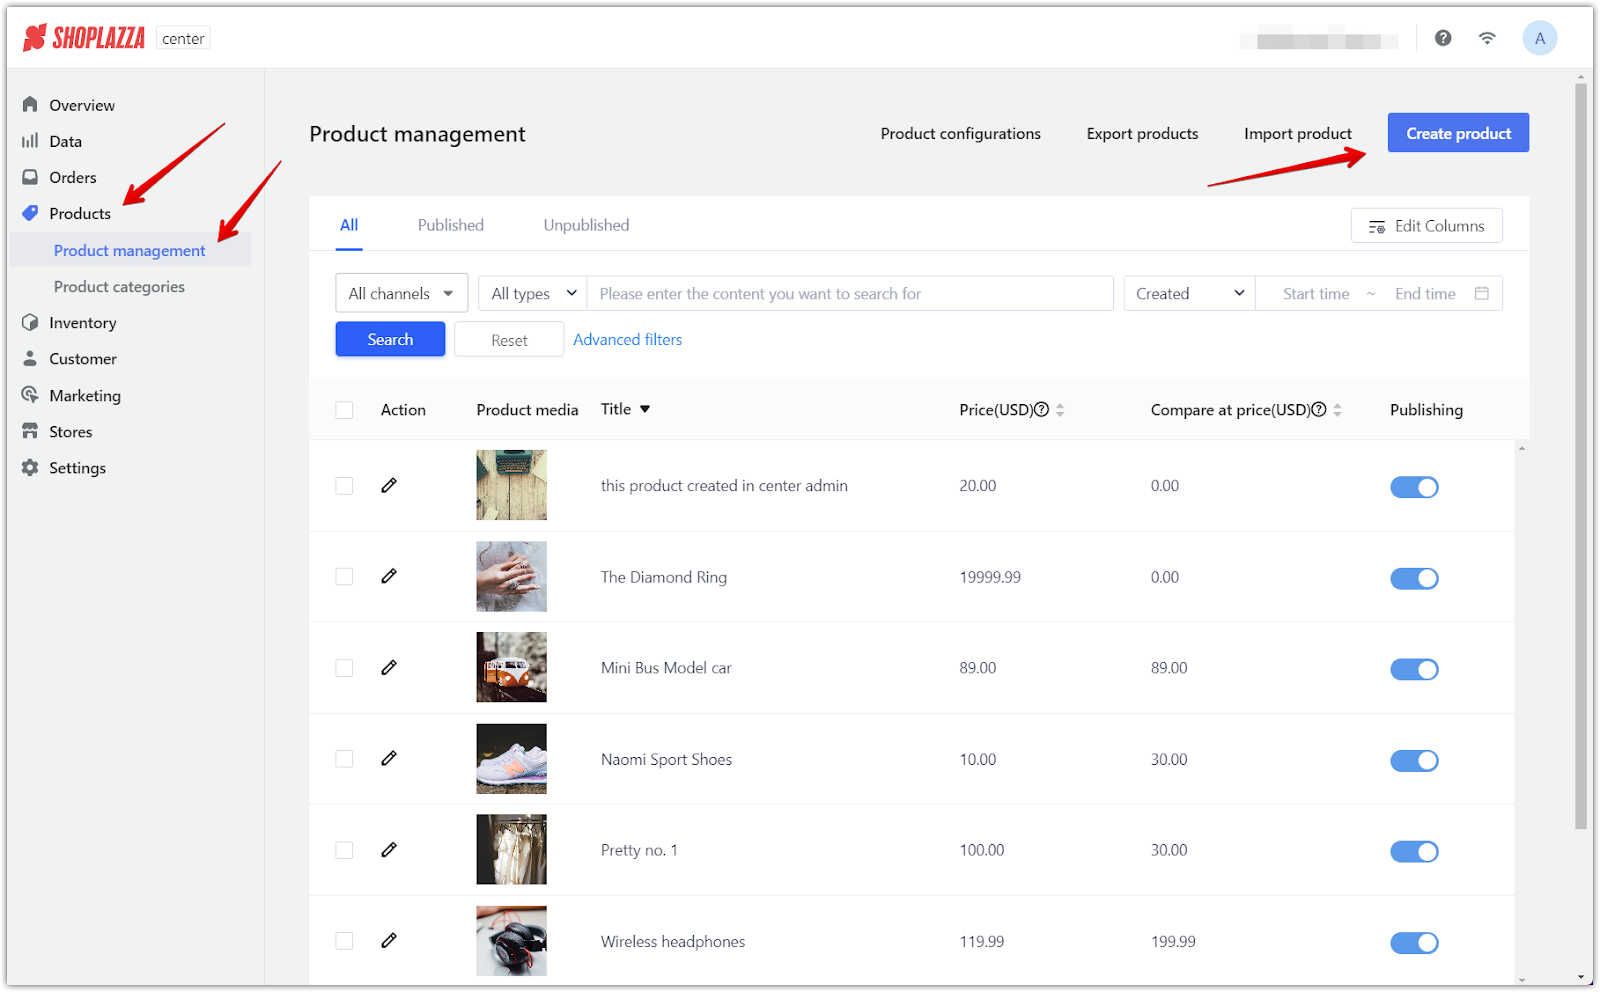
1. Navigate to product management: In your Shoplazza Center Admin, navigate to Products from the sidebar. Select Product management to access the product listing and select Create product.
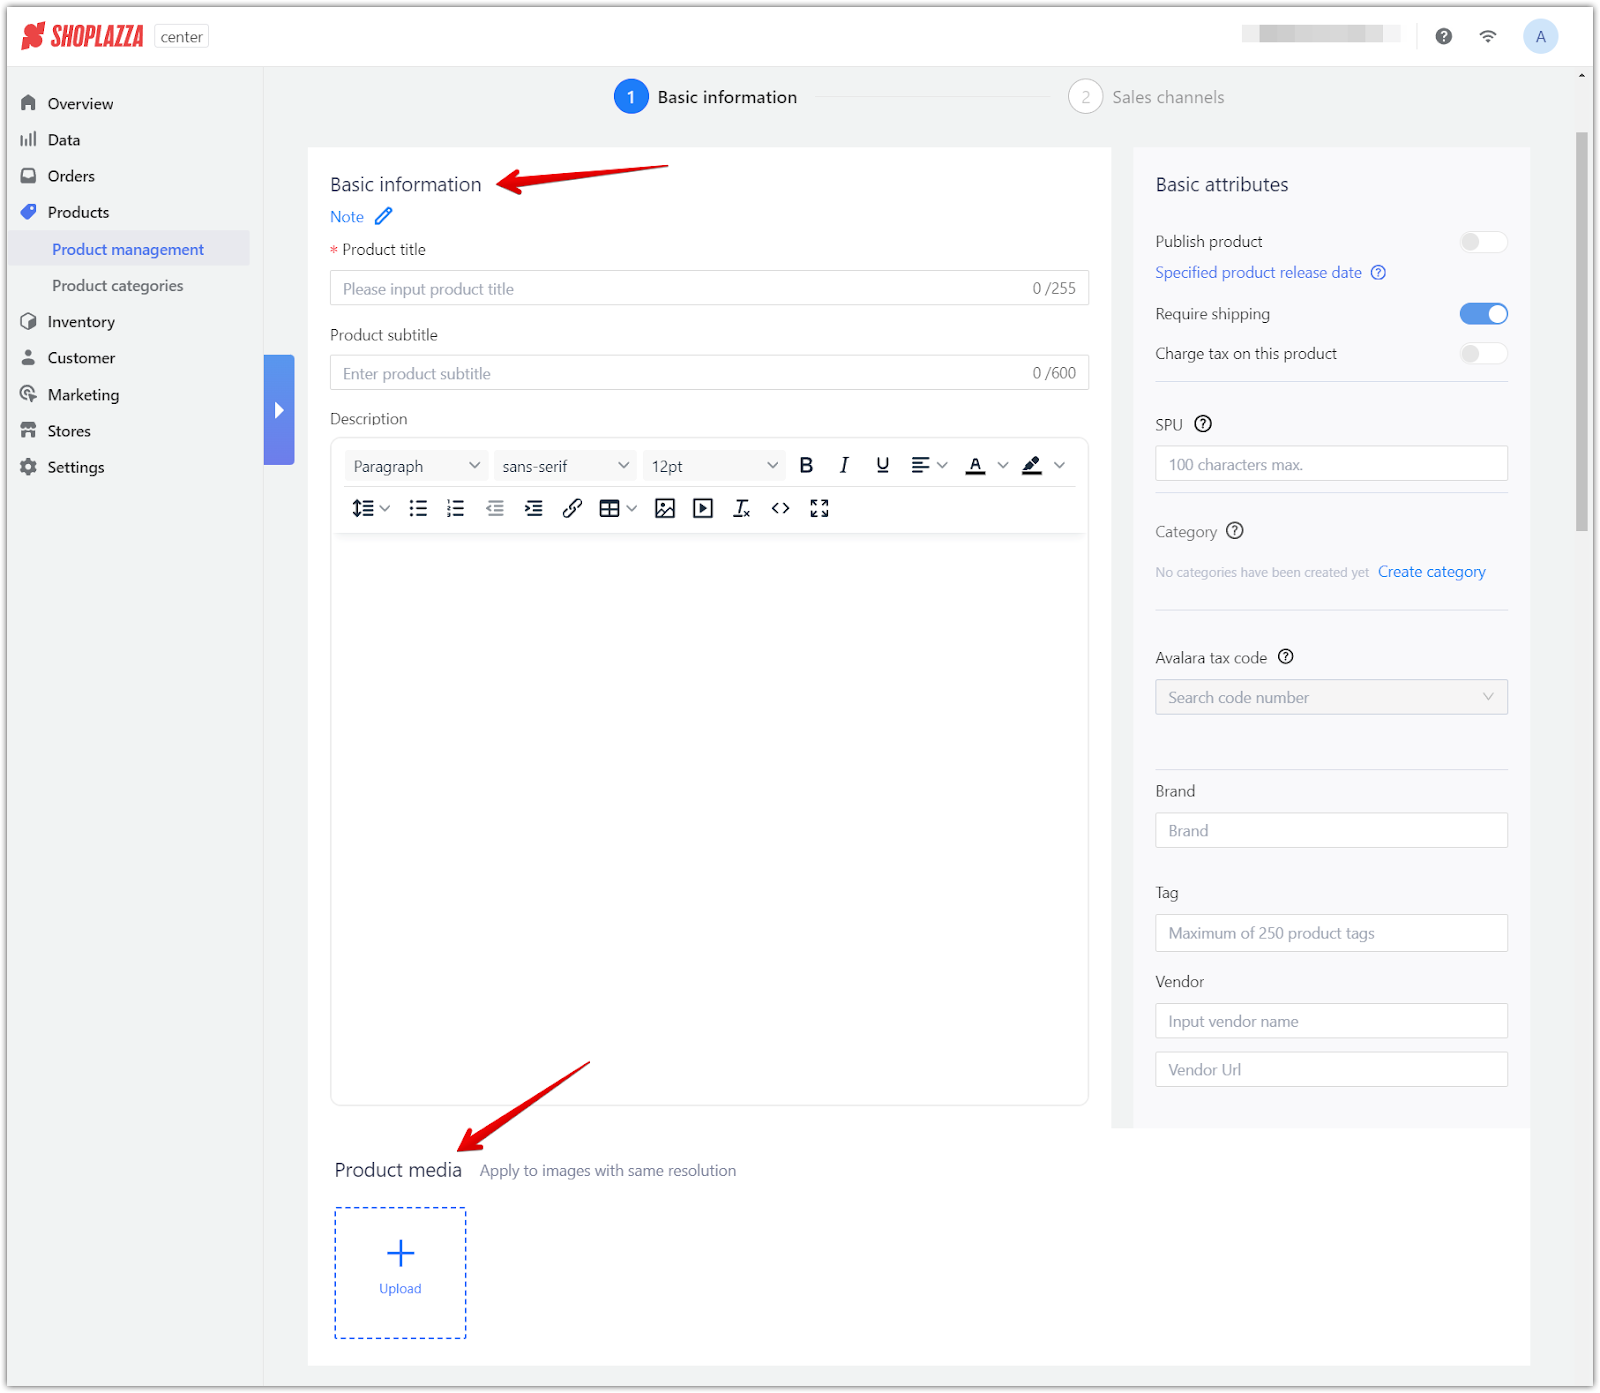
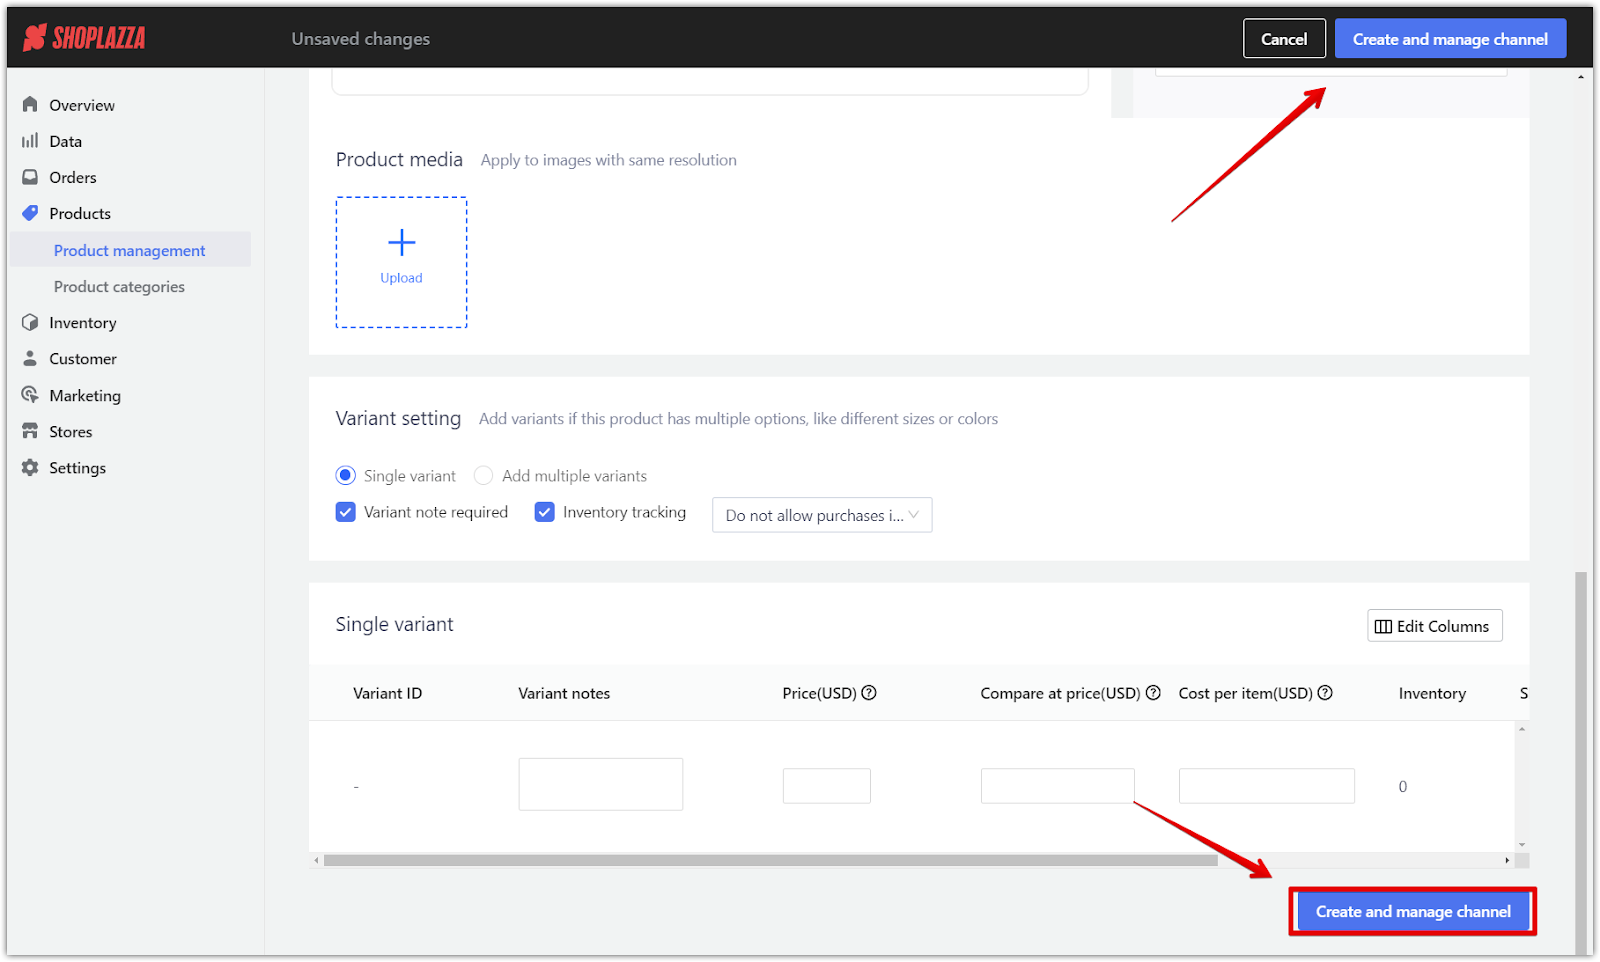
2. Fill in basic product information: Under Basic information, enter the product title, subtitle, and description. Upload images under the Product media section and ensure they have the same resolution for consistency.
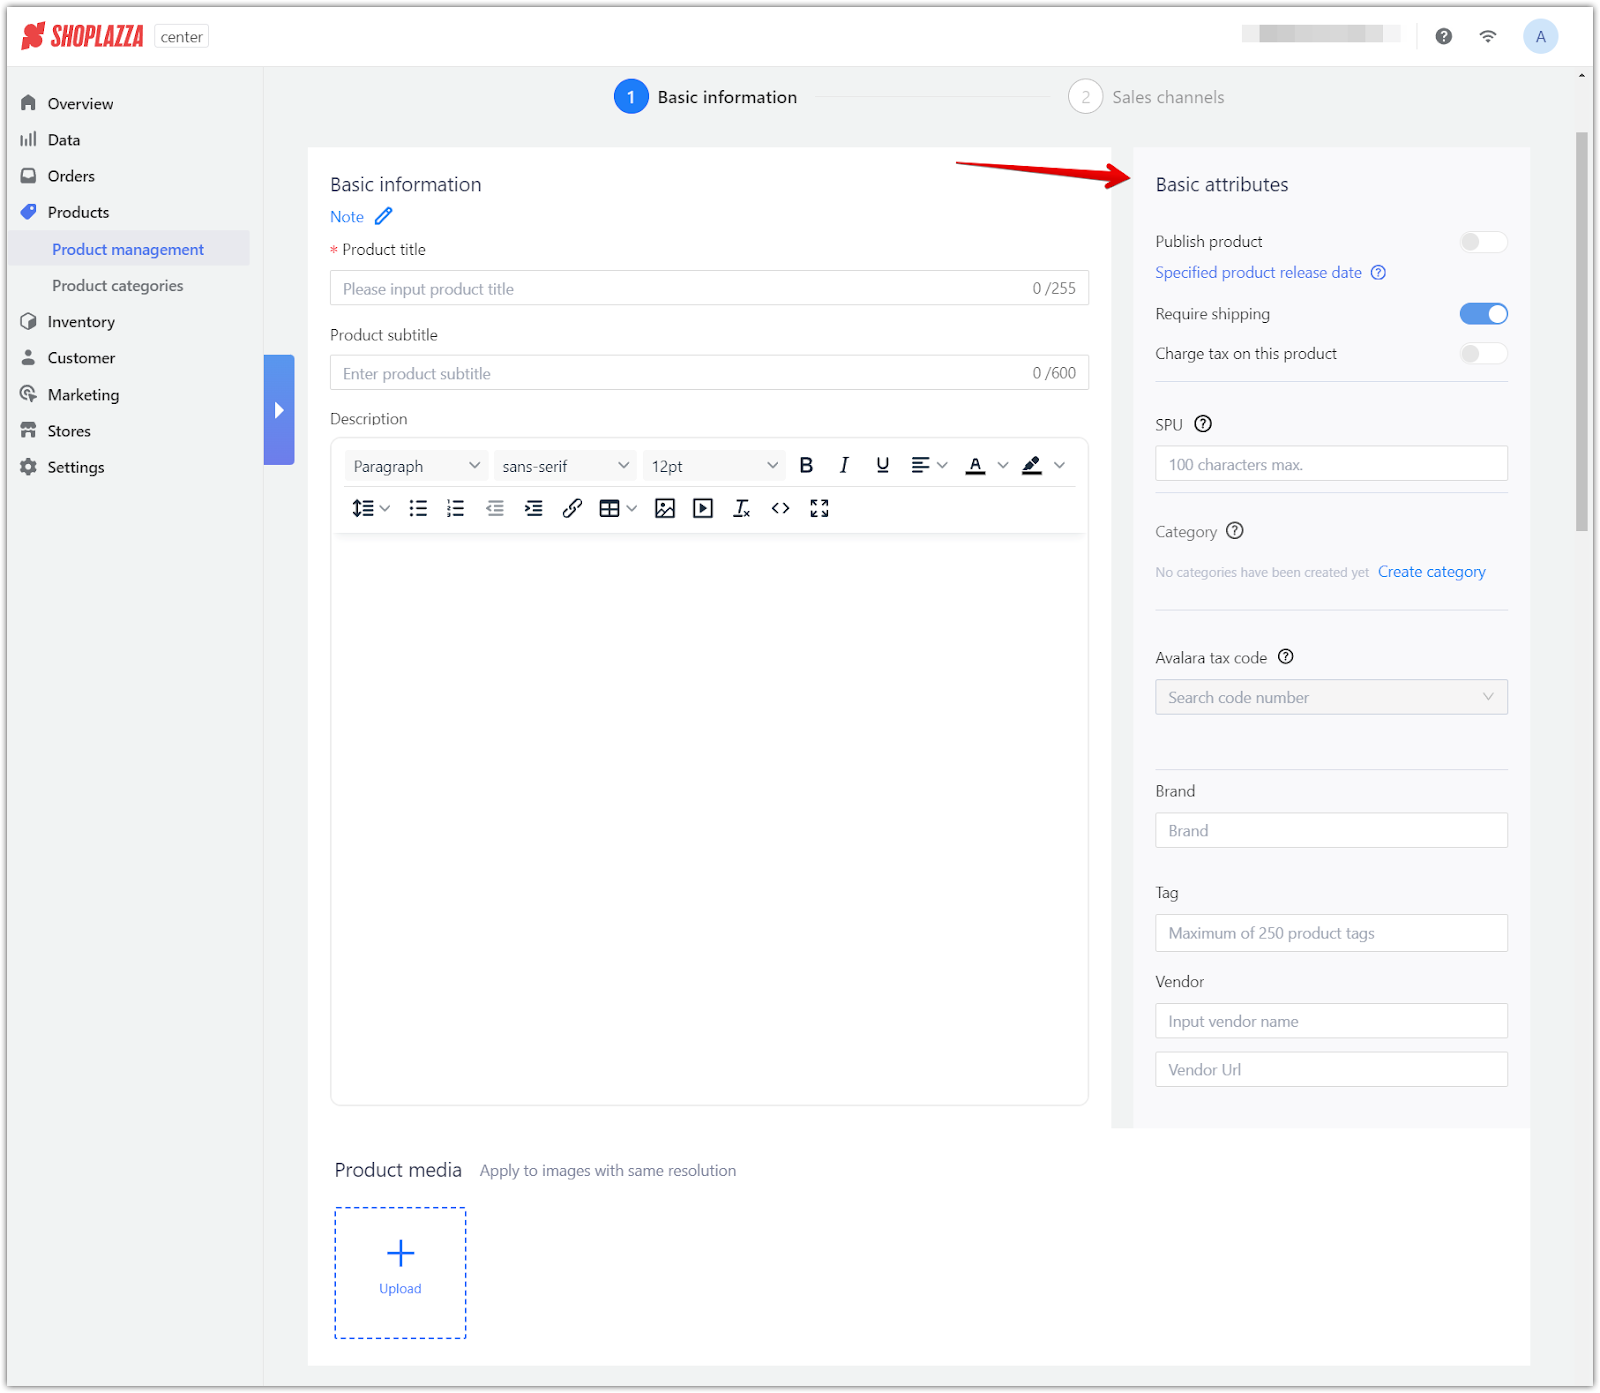
3. Set product attributes: Fill in product attributes such as SPU, Category, Brand, and Vendor. Toggle the switches for Require shipping and Charge tax on this product based on your product's needs.
Managing variants
Variants allow for offering multiple options for a product, such as size or color. Products can be handled as a single variant or with various variants to manage different options effectively.
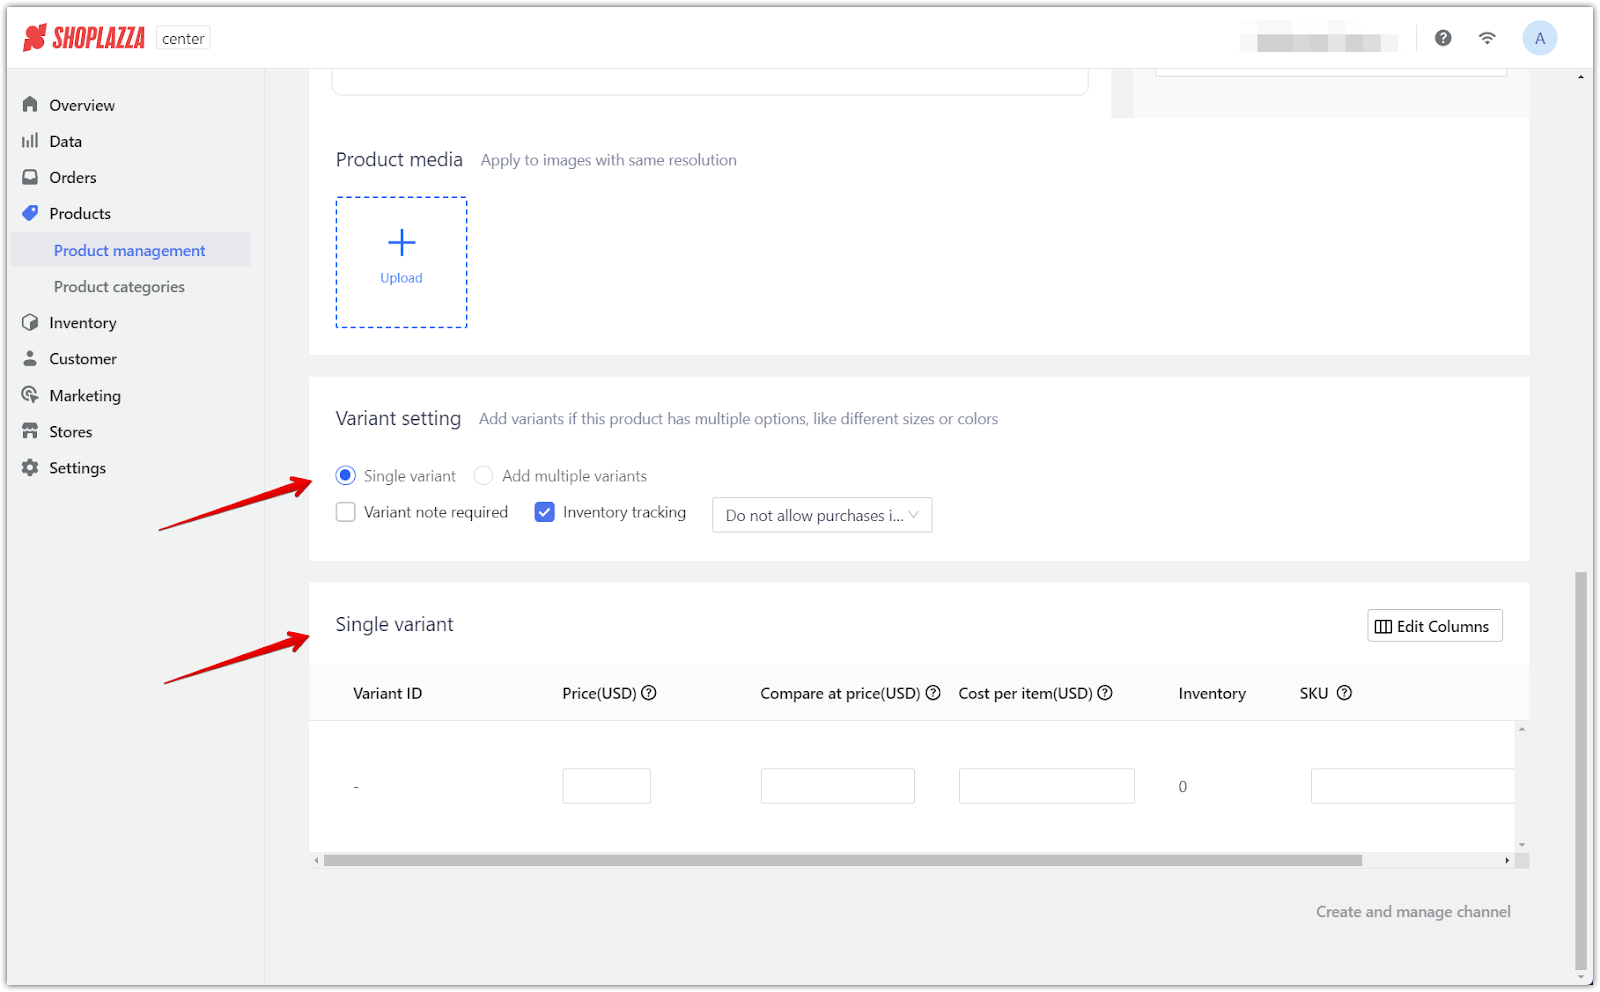
1. Variant setting: Select either Single variant or Add multiple variants:
- For a Single variant, input information like price, SKU, and inventory for one product version.
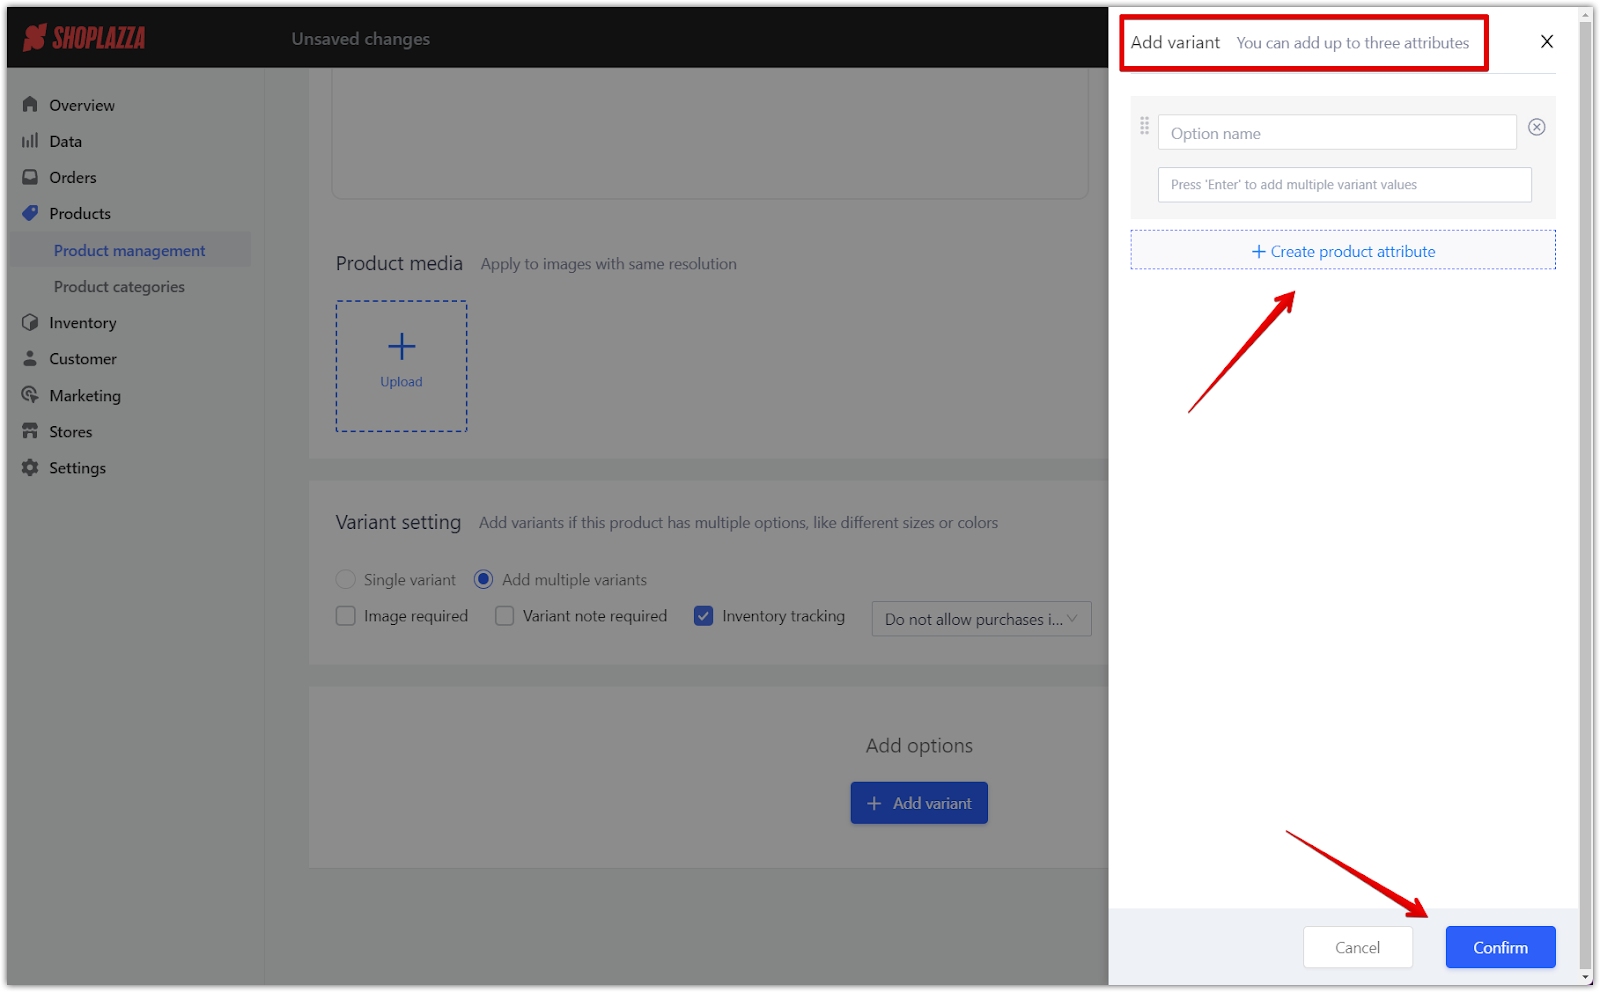
- For Add multiple variants, define different options like size or color for the product. Click the Add variant button to specify options like size or color. Up to three attributes per product can be added (e.g., size, color, material). Enter values for each option (e.g., Red, Green, and White for color and Small, Medium, and Large for size).

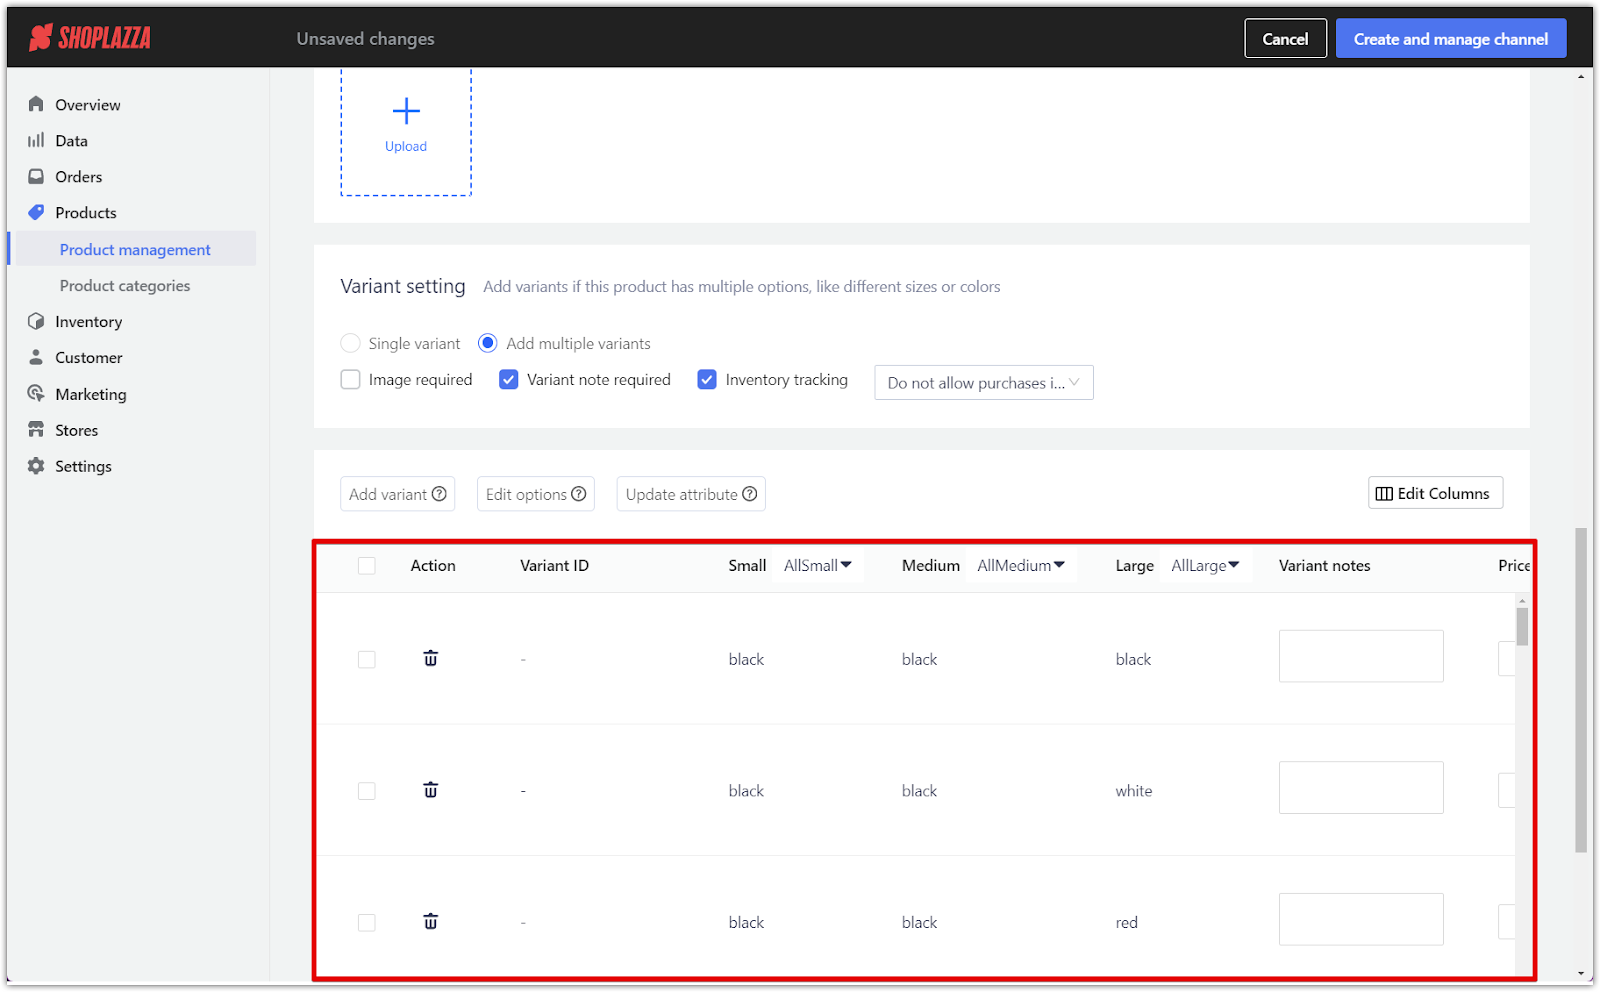
- Managing variant combinations: Once the variants are confirmed, a grid will display for entering details like price, SKU, and inventory for each variant combination.
2. Variant note required: Enable this checkbox if specific notes are needed for each variant.
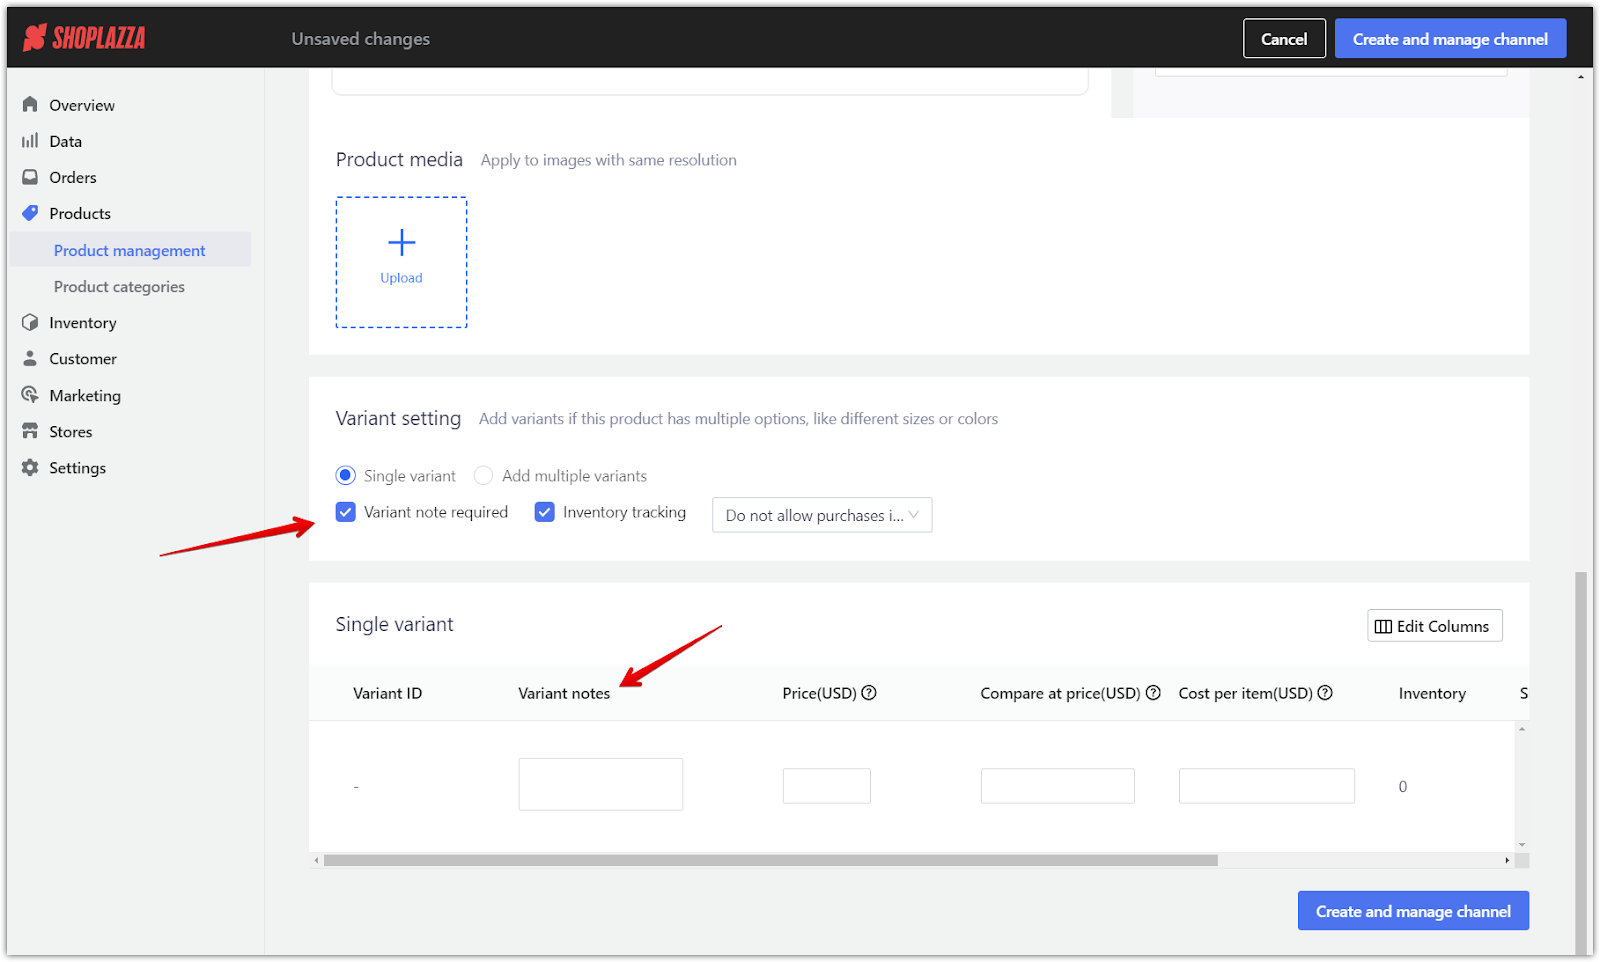
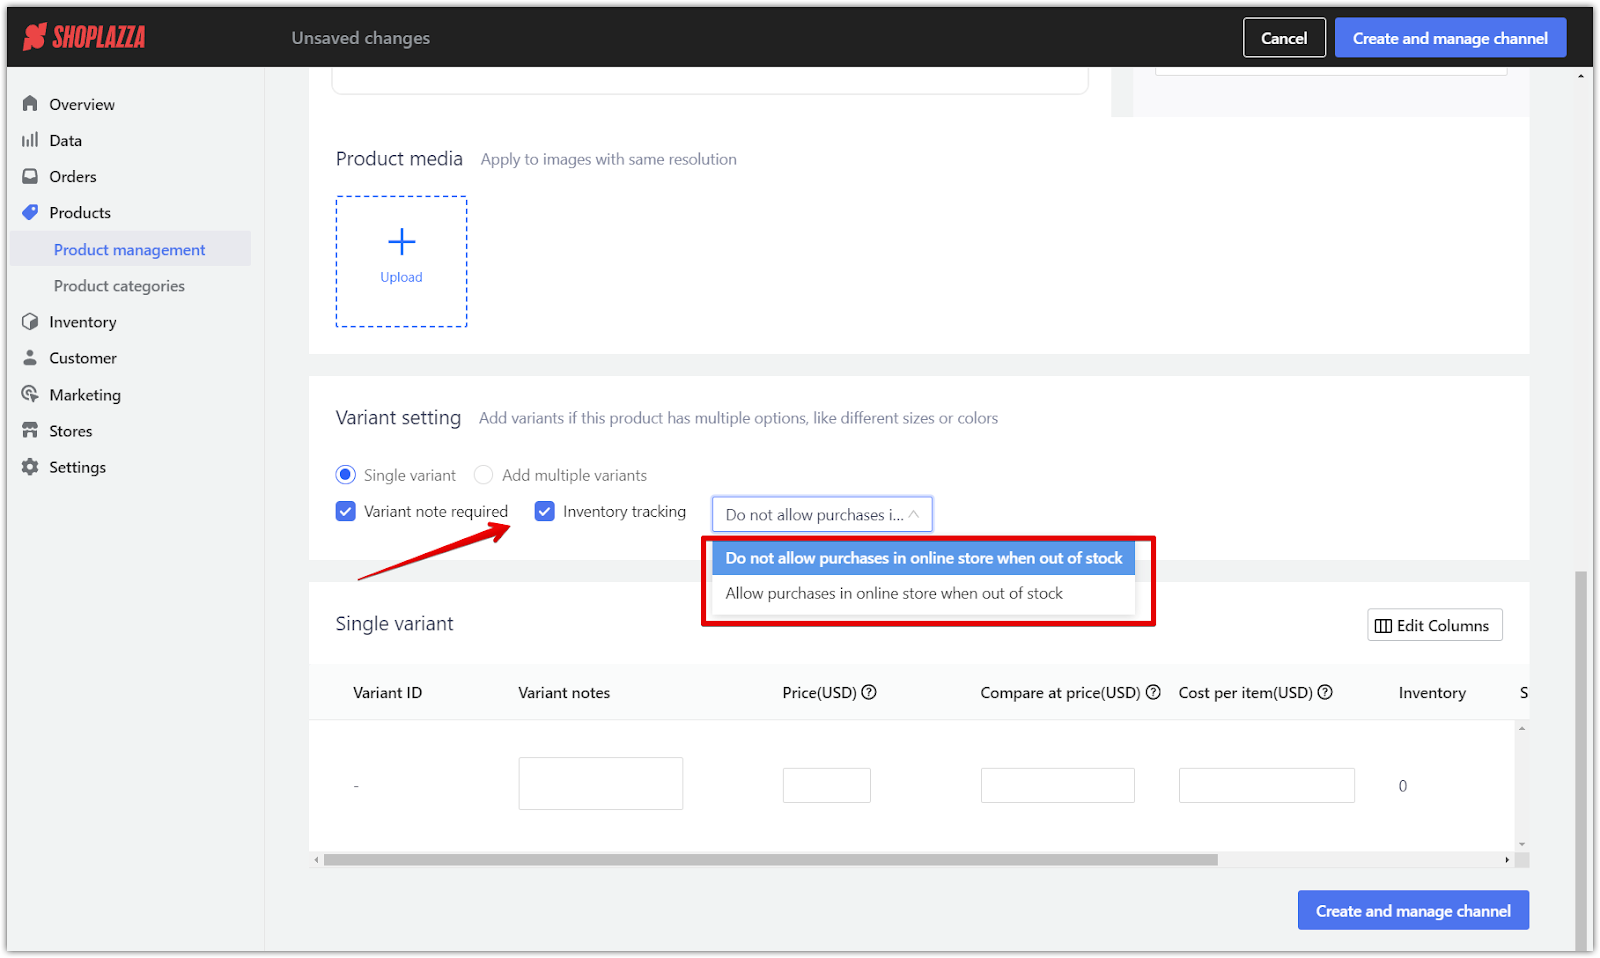
3. Inventory tracking: Activate this setting to track inventory levels and automatically update stock after each sale. Click Create and manage channel to continue to the next step.
- Do not allow purchases in online store when out of stock: Prevents customers from purchasing a product once inventory is depleted.
- Allow purchases in online store when out of stock: Enables customers to place orders even if the product is out of stock, which is helpful for pre-orders or backorders.
4. Finalize Basic information page: Once you have configured your product variants and basic information, click Create and manage channel to continue to the Sales channels page.
Assigning products to stores
After creating a product, assigning it to the correct sales channels, including retail and online stores, is essential. This step ensures products are available for purchase in the appropriate locations.
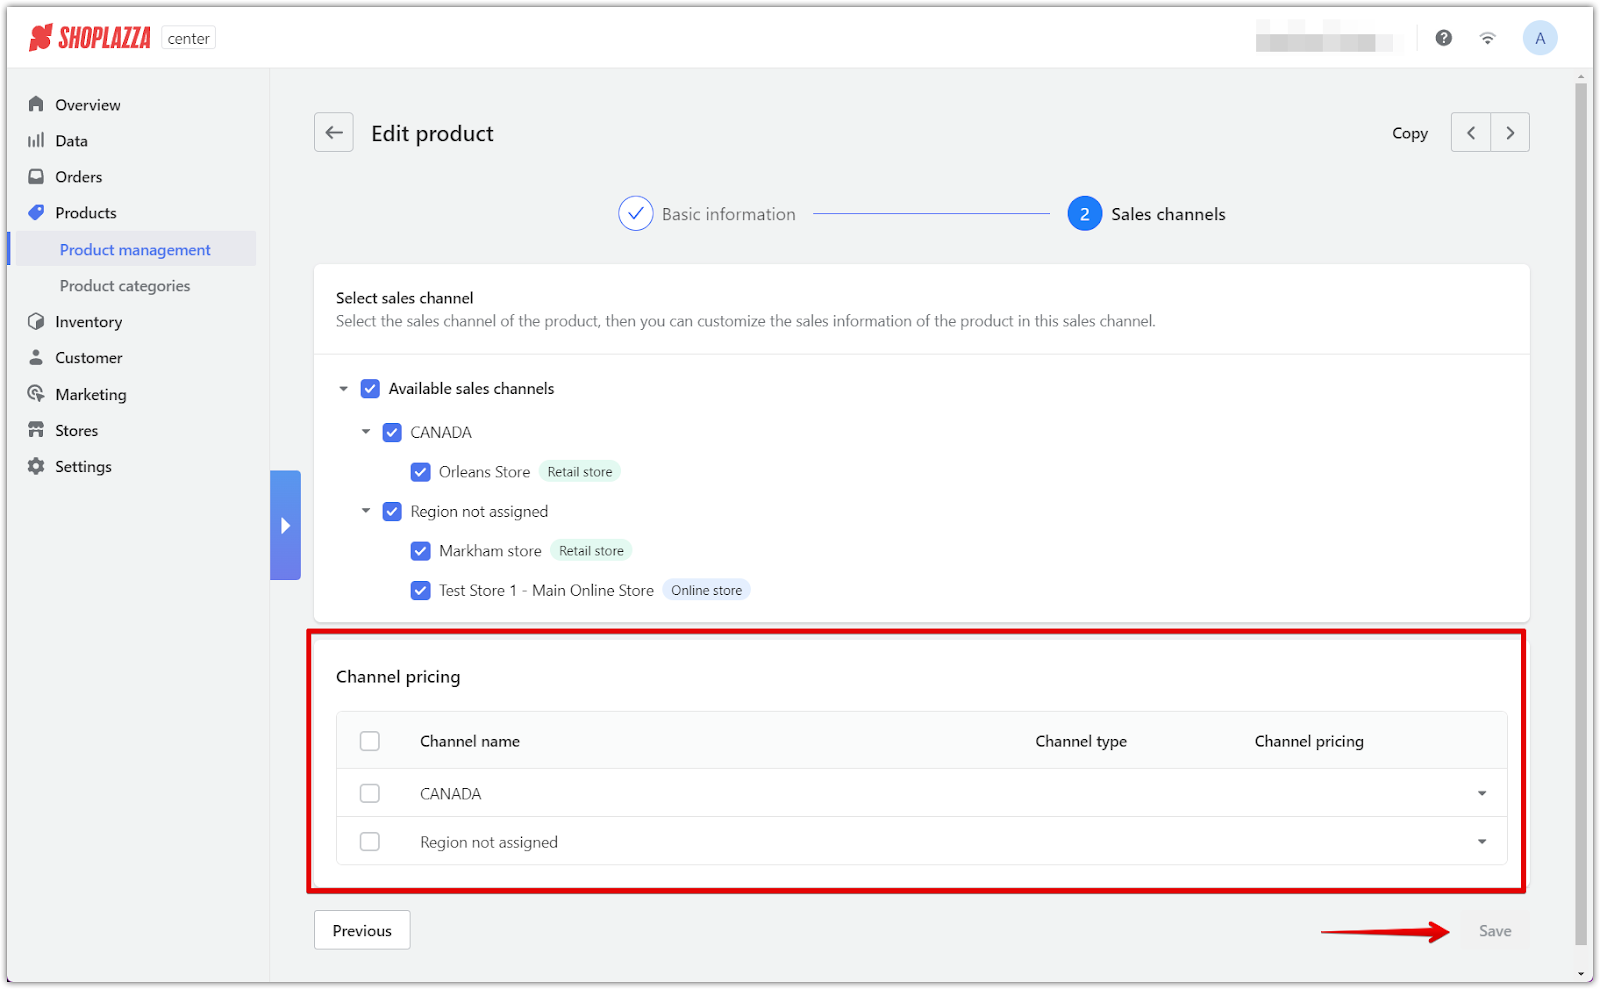
1. Sales channel page: Choose the sales channels where the product will be available by checking the appropriate boxes. Options include retail stores, online stores, and other channels.

2. Channel pricing: Customize the pricing for each sales channel if needed. This allows products to be priced differently across various locations. Once the sales channels and pricing are set, click Save to confirm the settings and assign the product to the selected stores.
By following these steps, products will be properly created, managed, and assigned in your Shoplazza Center Admin, ensuring they are available across all selected stores.


Comments
Please sign in to leave a comment.