The Product Management section is your central hub for organizing and updating your inventory. This tool allows you to easily manage product details, add new items, search and filter through listings, and make bulk edits. Keeping your product information accurate and up-to-date ensures a smooth shopping experience across all your sales channels.
Accessing product listings
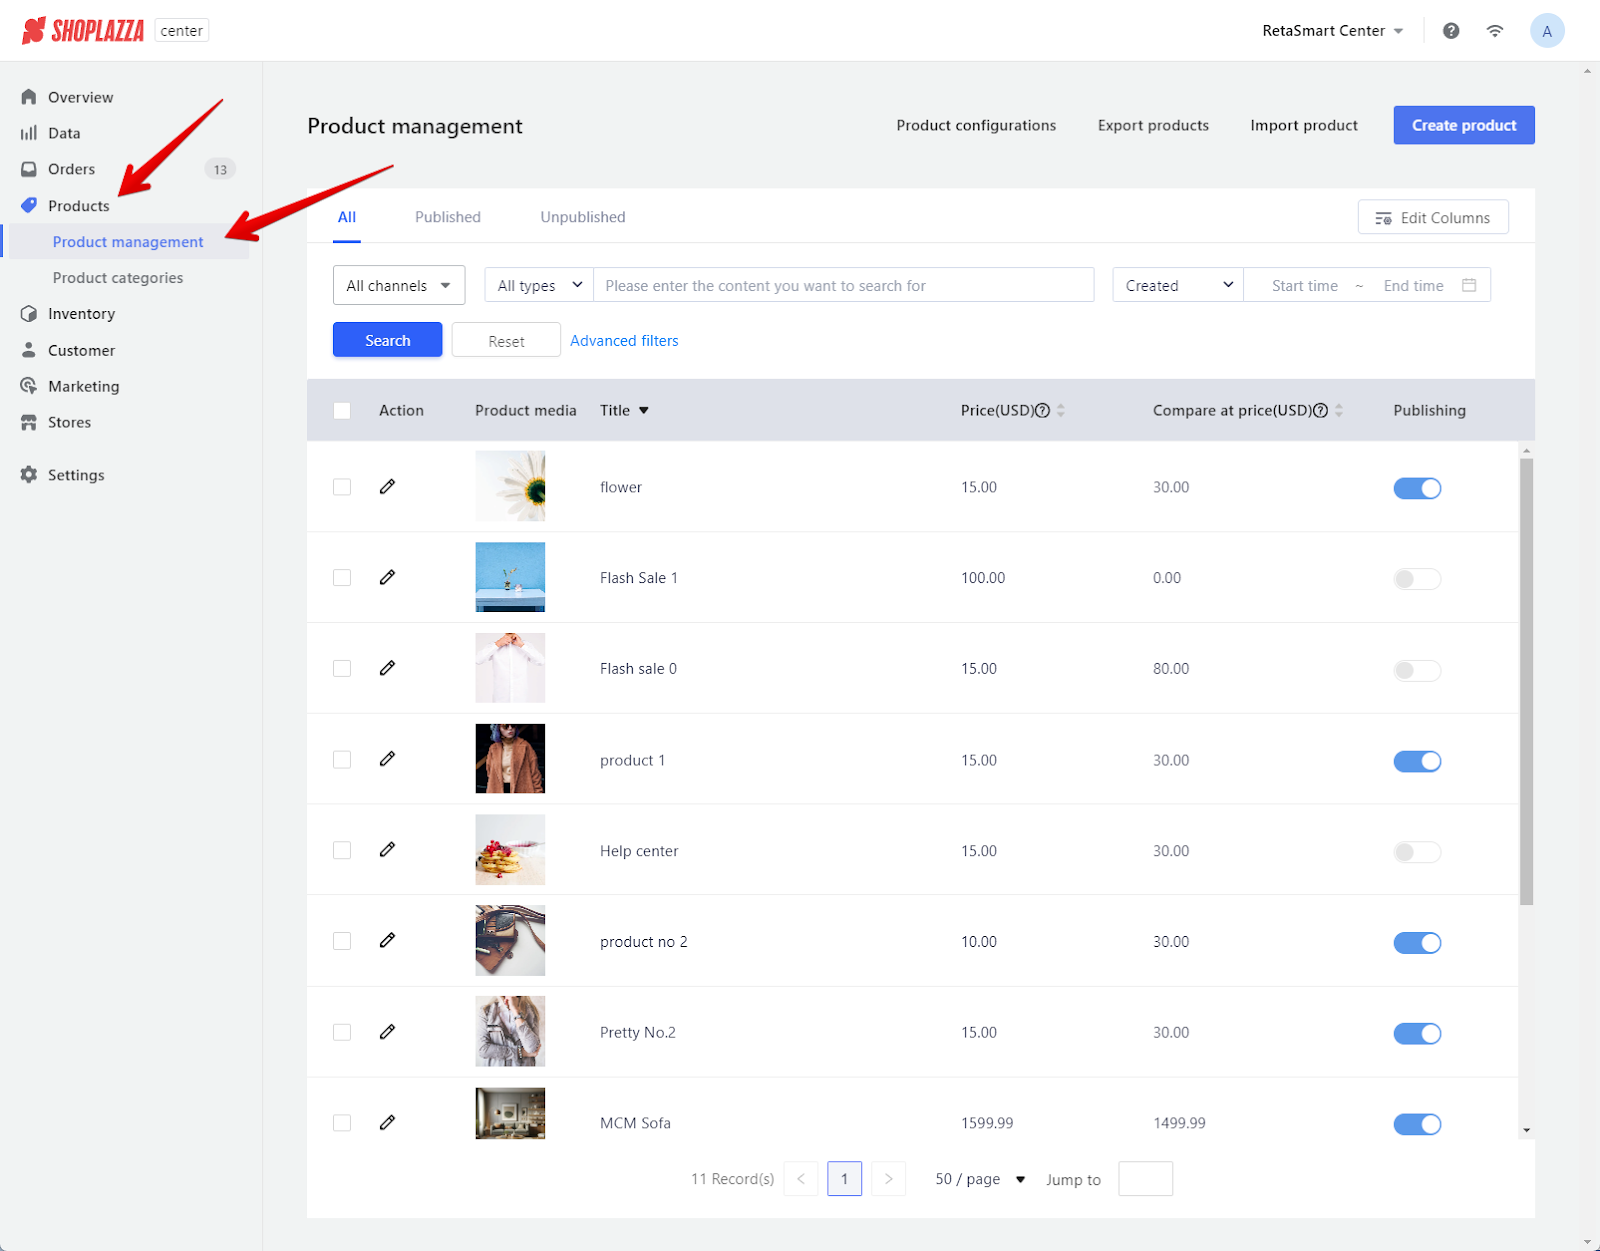
1. Access product listings: Start by entering the Center admin. Click on Products and then Product Management. This view offers a comprehensive listing of all your products, allowing you to manage them easily.
Creating new products
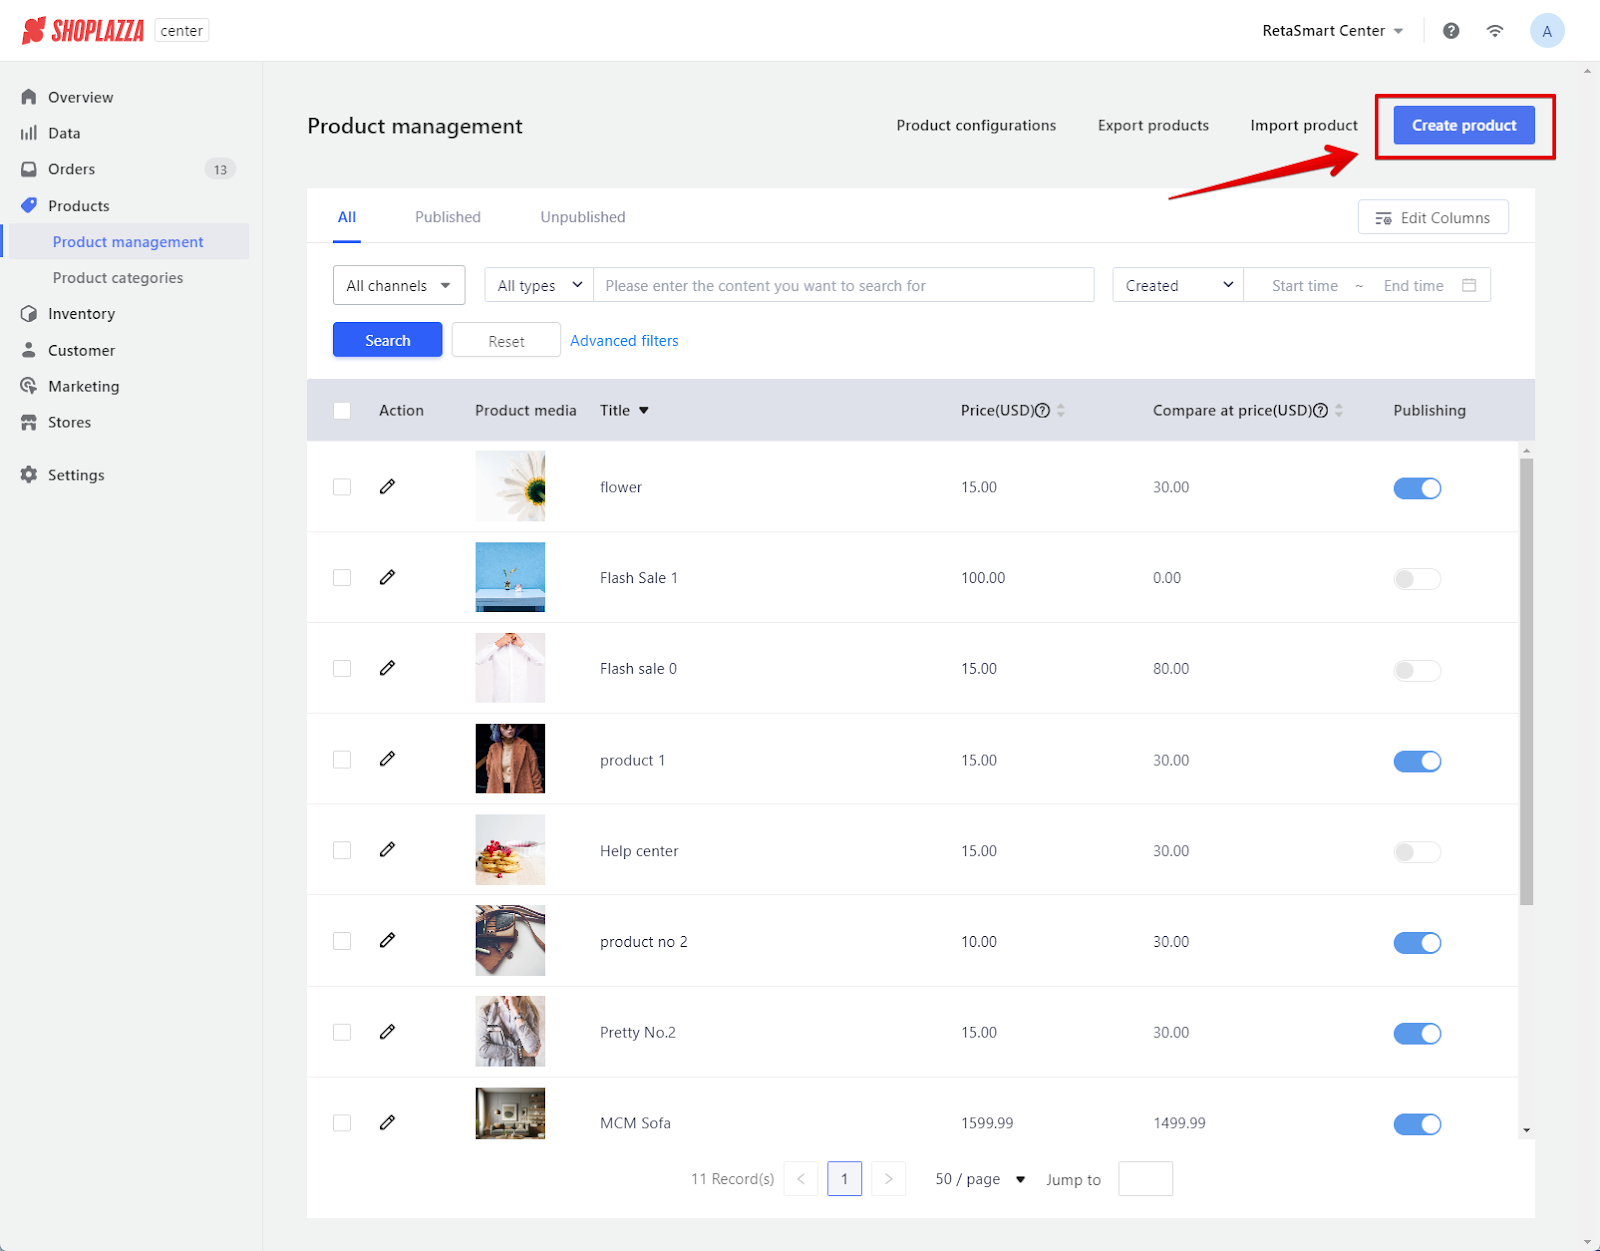
1. Create new products: To add a new item to your inventory, select Create Product. This will lead you to a page where you can input detailed information about the new product.

Note
A product must be created (or imported) here before being added to the inventory section for that product.
Searching and filtering products
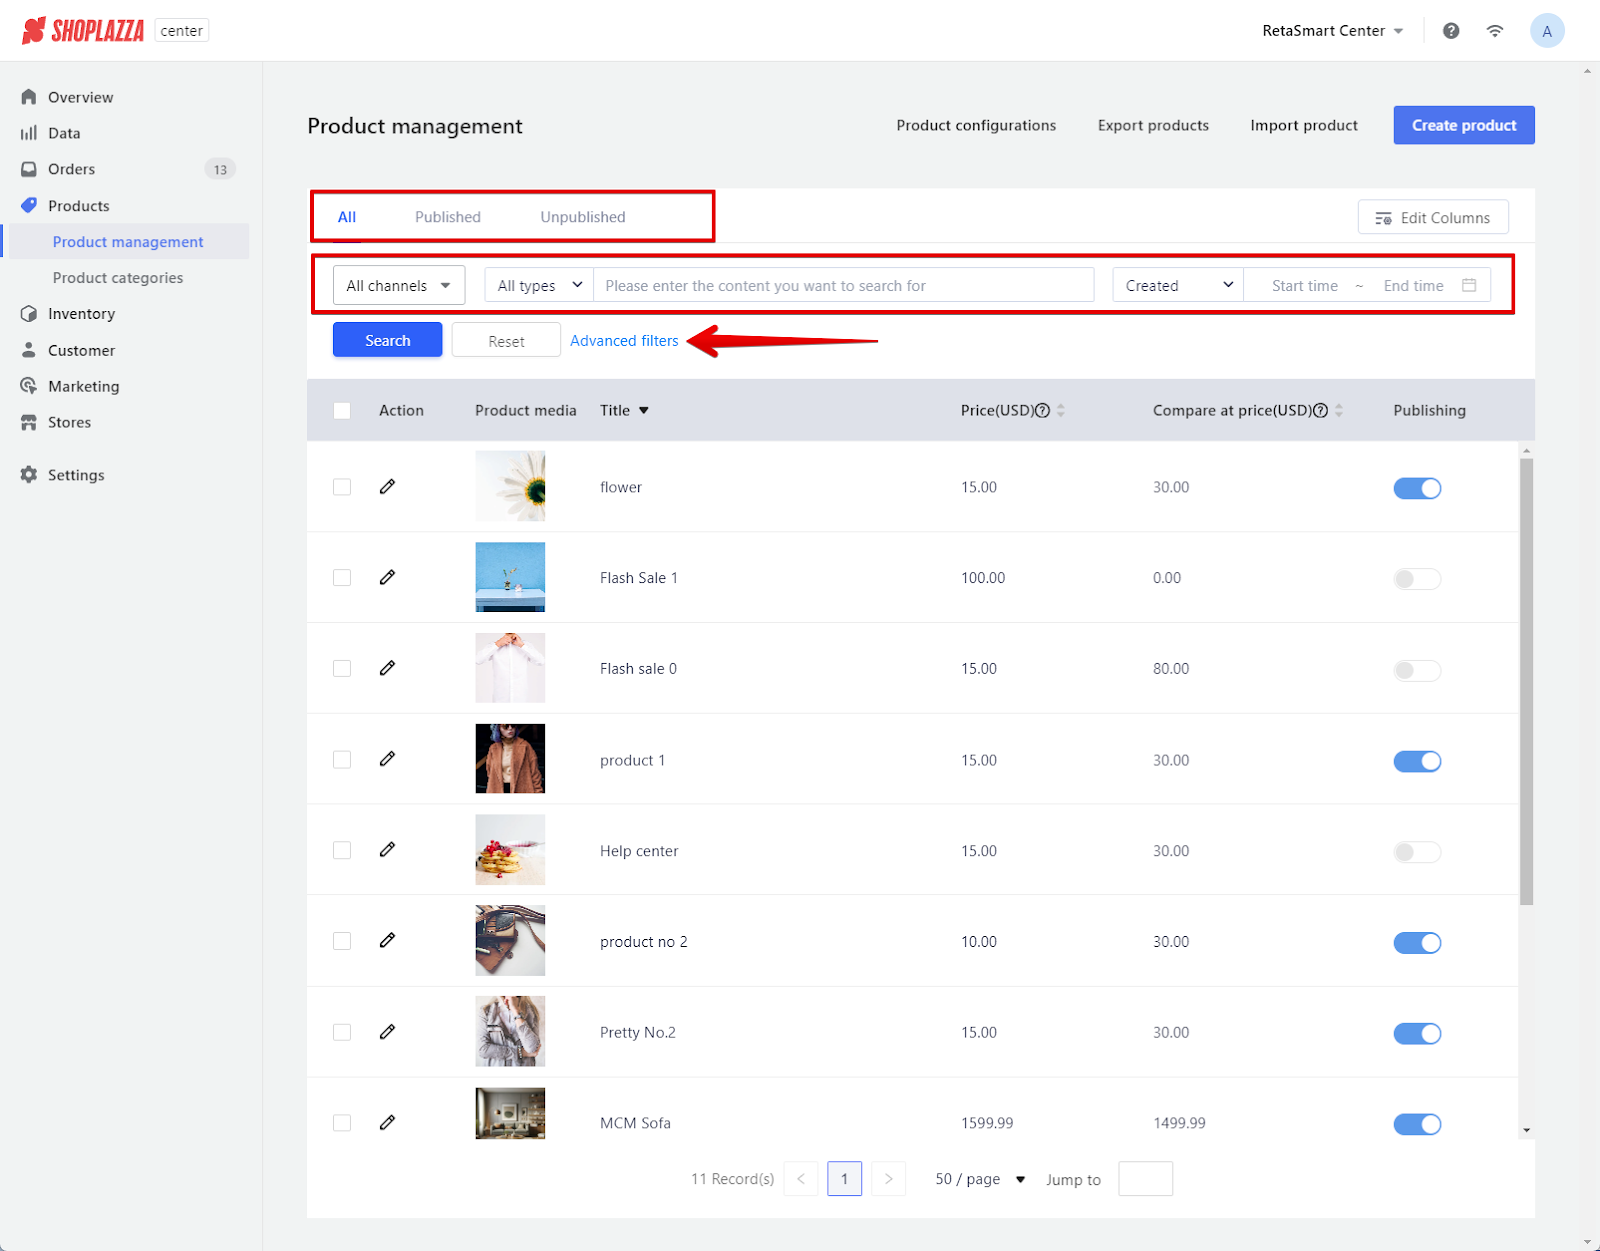
1. Search and filter: Use the search bar to find products quickly or apply filters for a more granular view of your inventory based on the status of publishing or specific attributes. Advanced filters allow more filtering control.
Bulk editing items
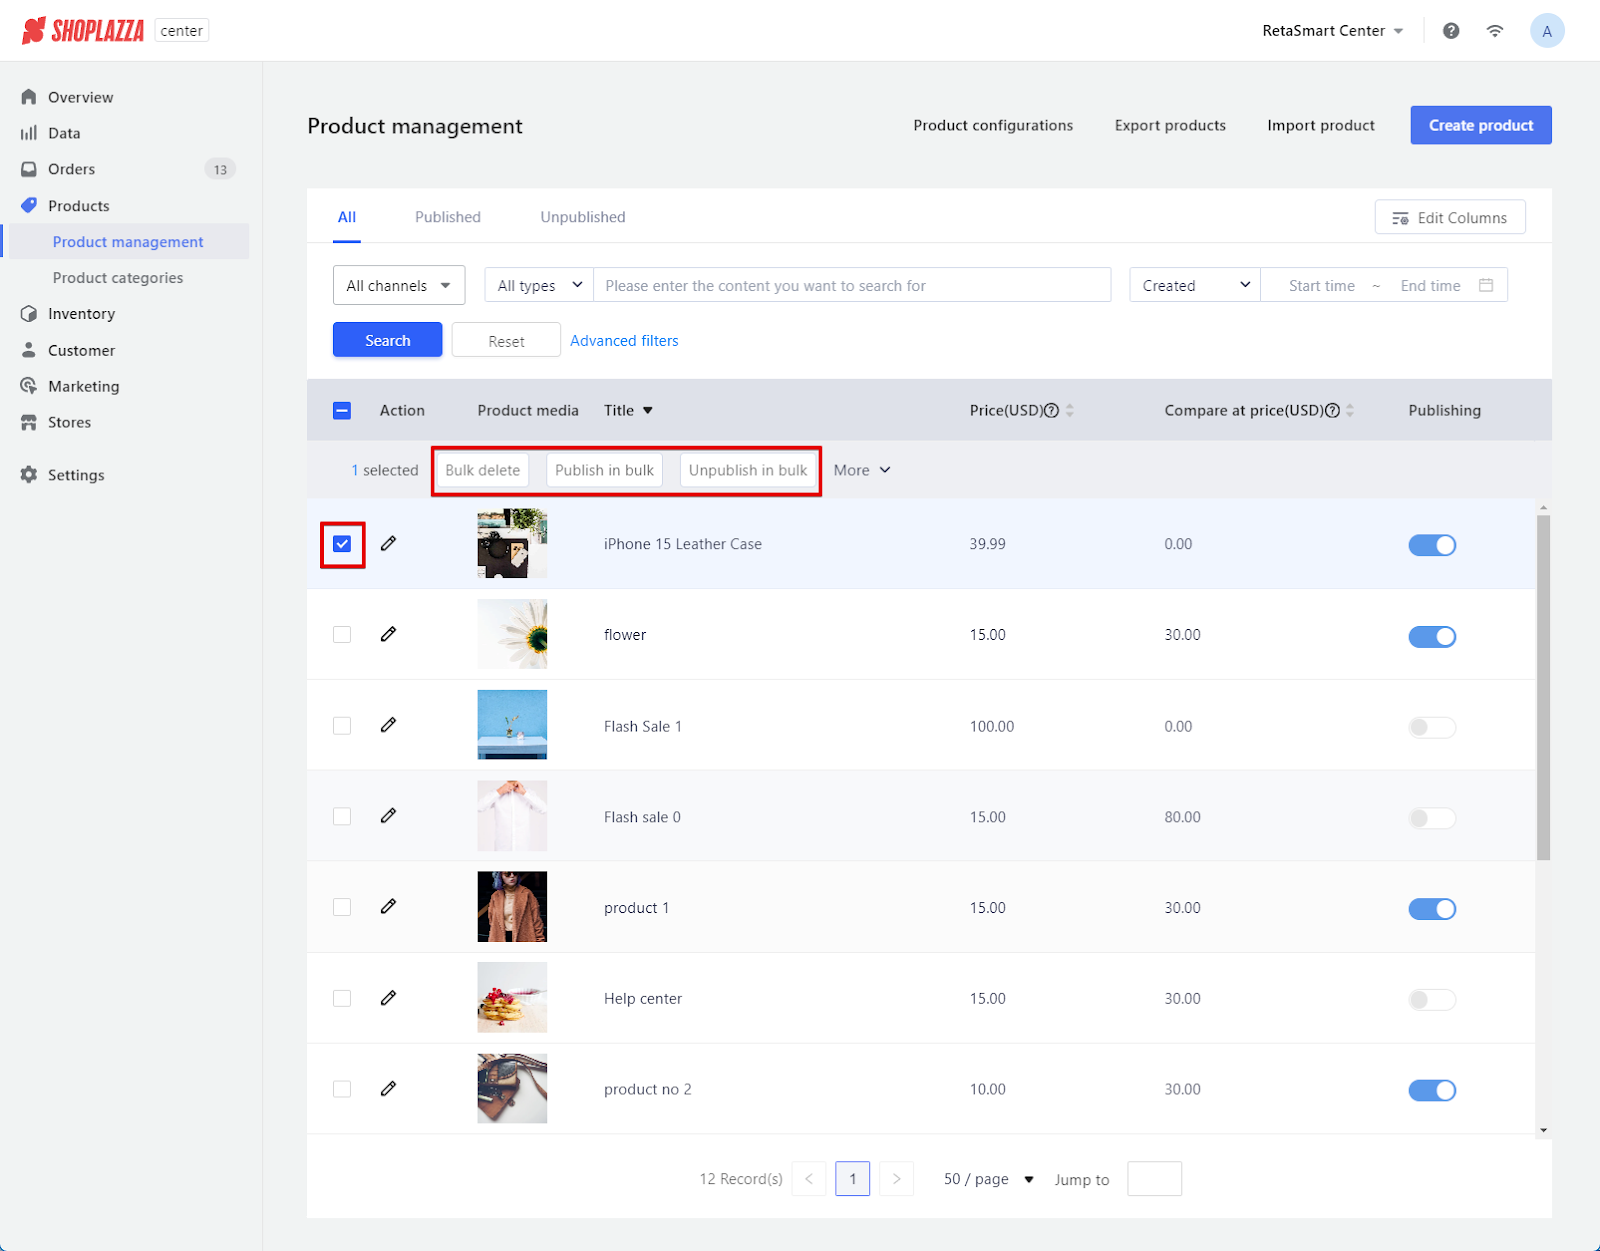
1. Bulk edit items: Select the products no longer needed by checking the box and selecting Bulk delete. You also have the option of bulk publishing and unpublishing.
Product configurations
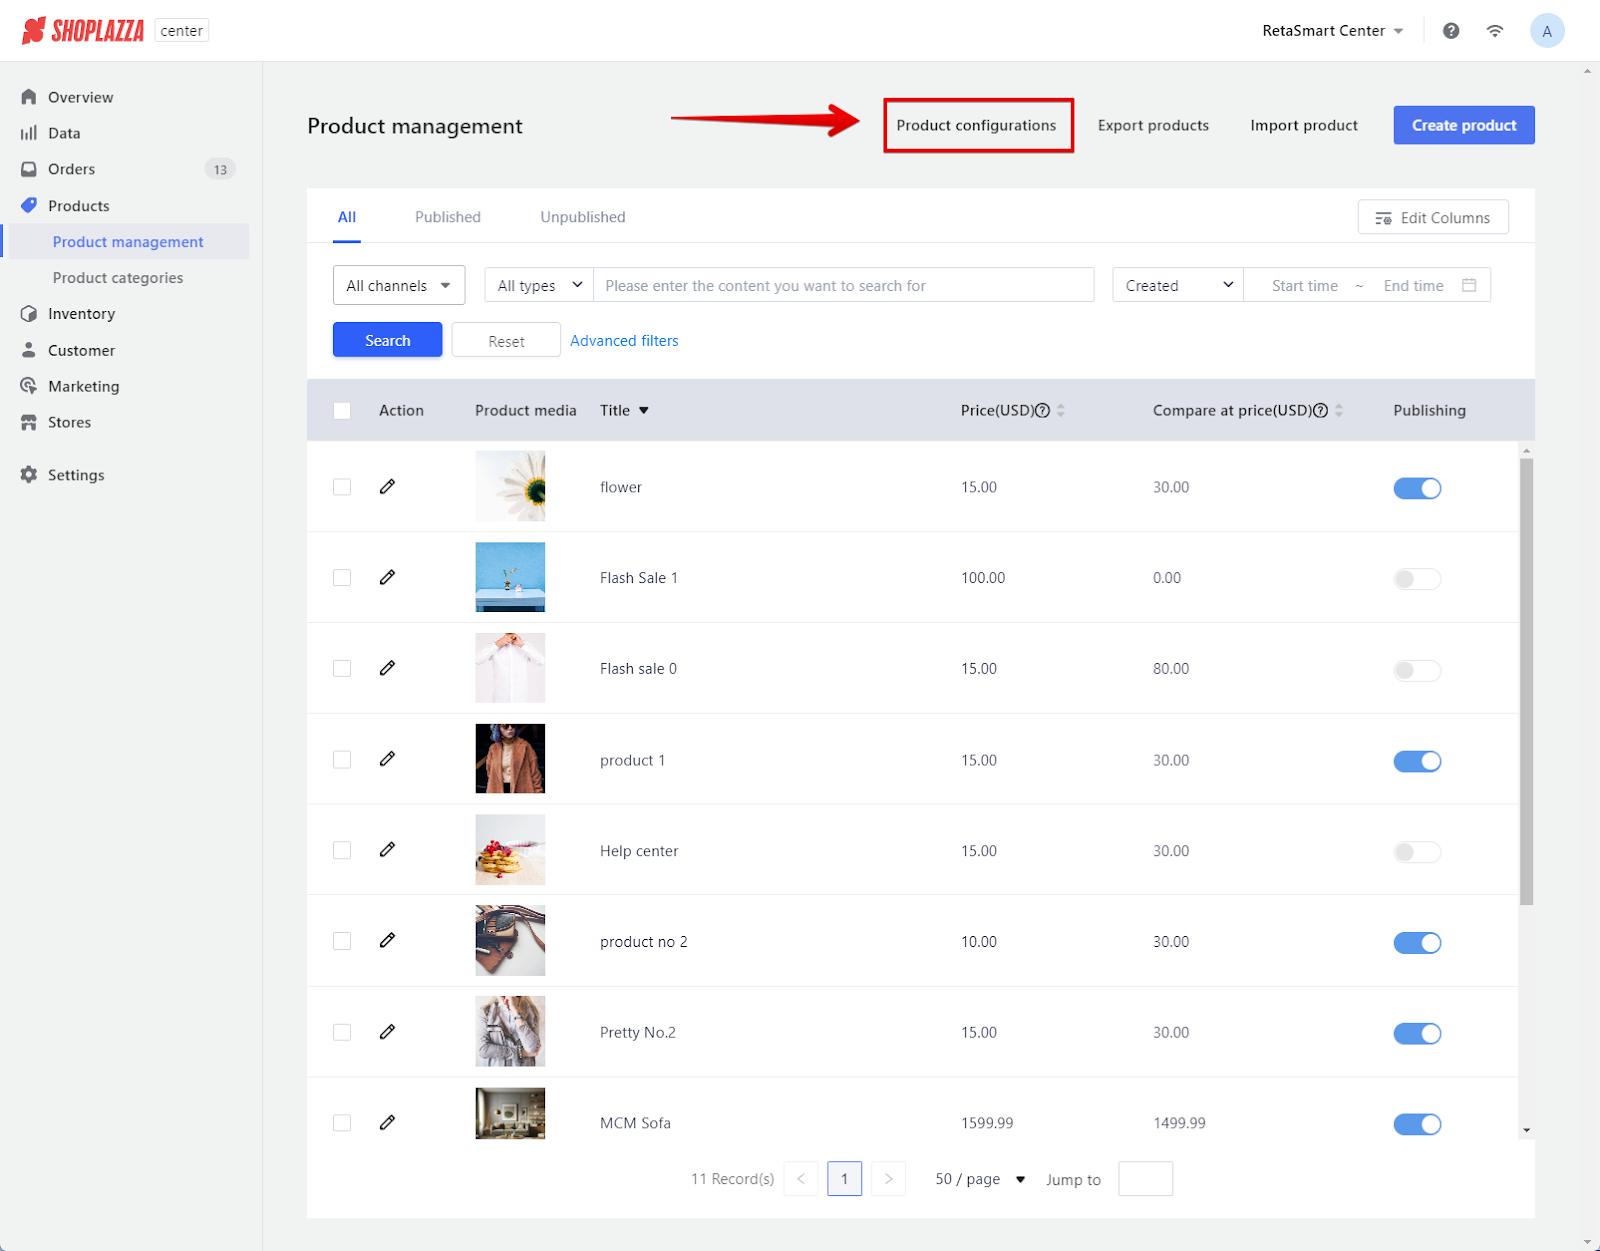
1. Adjust product settings: Click on Product Configurations to set defaults for new products, such as whether they should charge tax by default.
2. Configure taxes: When creating a product, you can decide if you want to enable tax charges by default. Ensure these settings align with your business's tax practices and regulatory requirements.
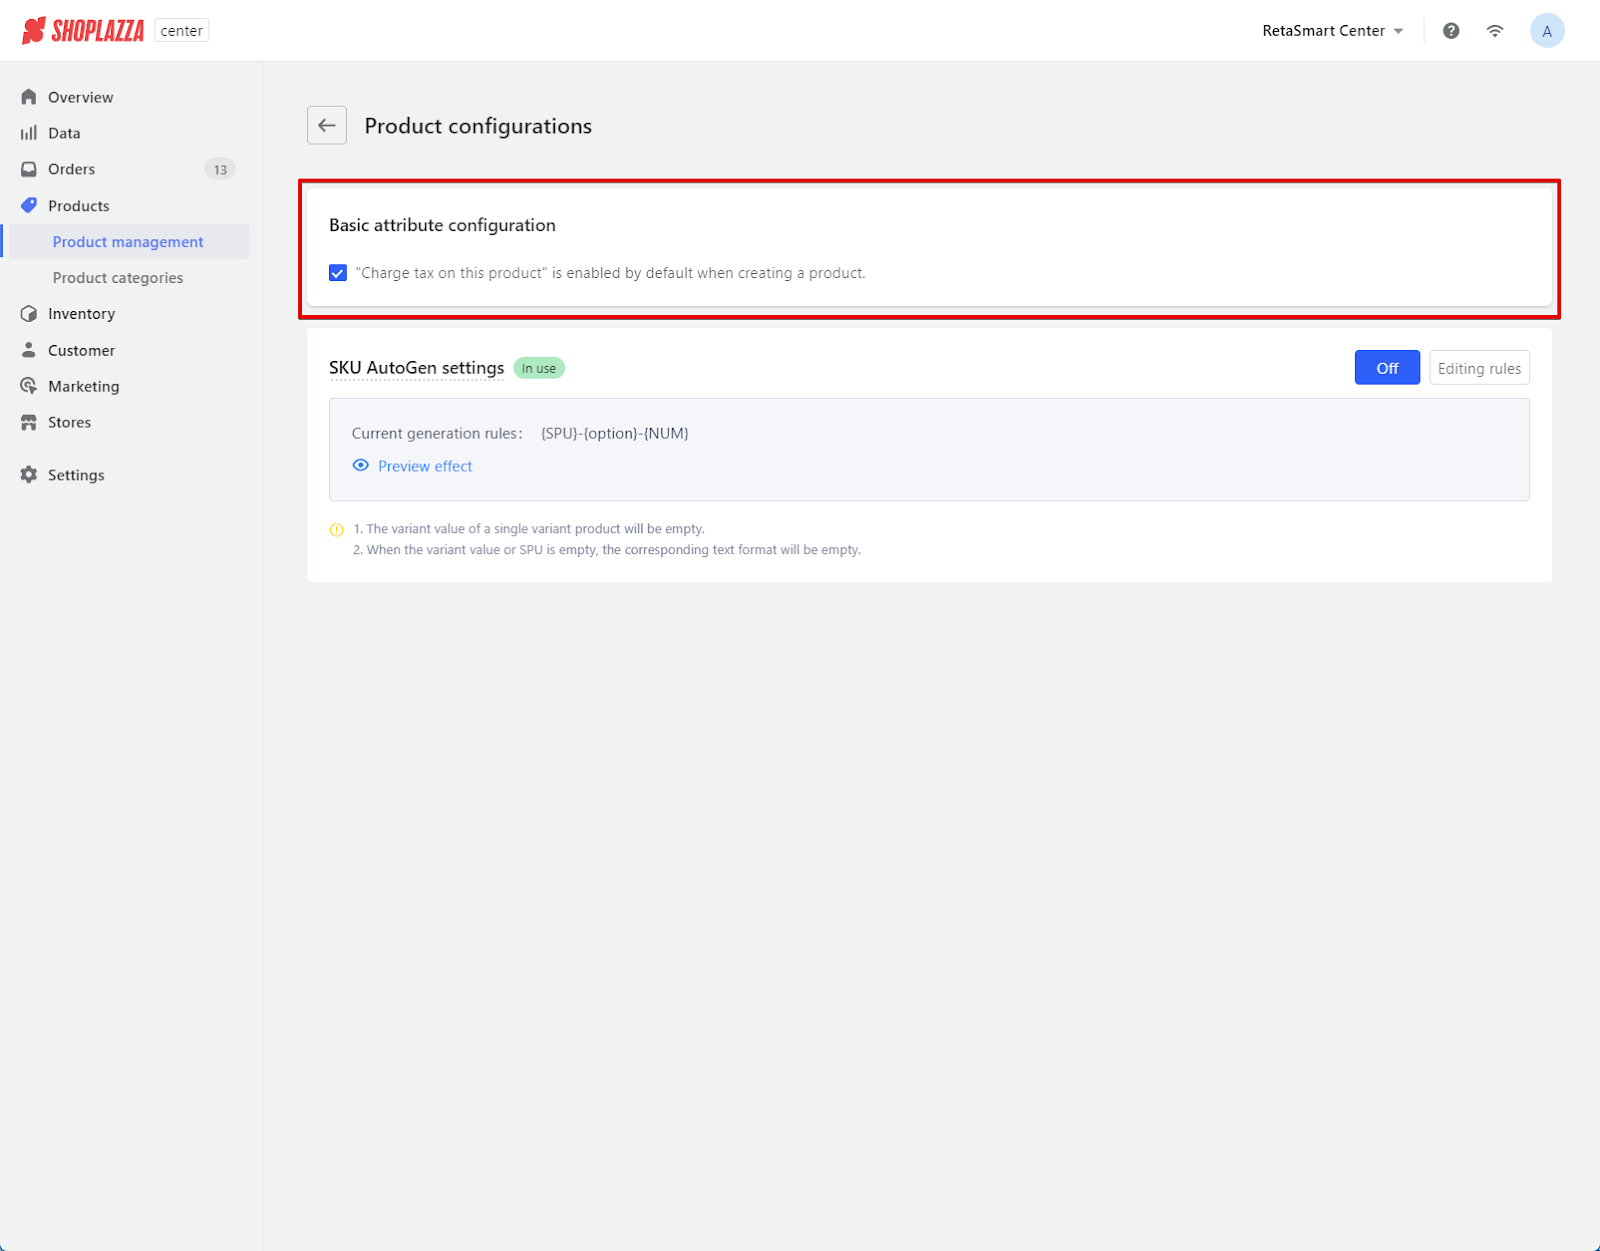
3. Manage SKU settings: If needed, adjust the SKU auto-generation settings to ensure your stock keeping units are consistent and match your inventory tracking methods. The SKU AutoGen feature streamlines the creation of stock keeping units for your products. This will be effective for new products and variants upon enabling. Any future updates will overwrite the existing values with the latest ones, ensuring your product listings stay current.

Duplicating, creating, and editing products
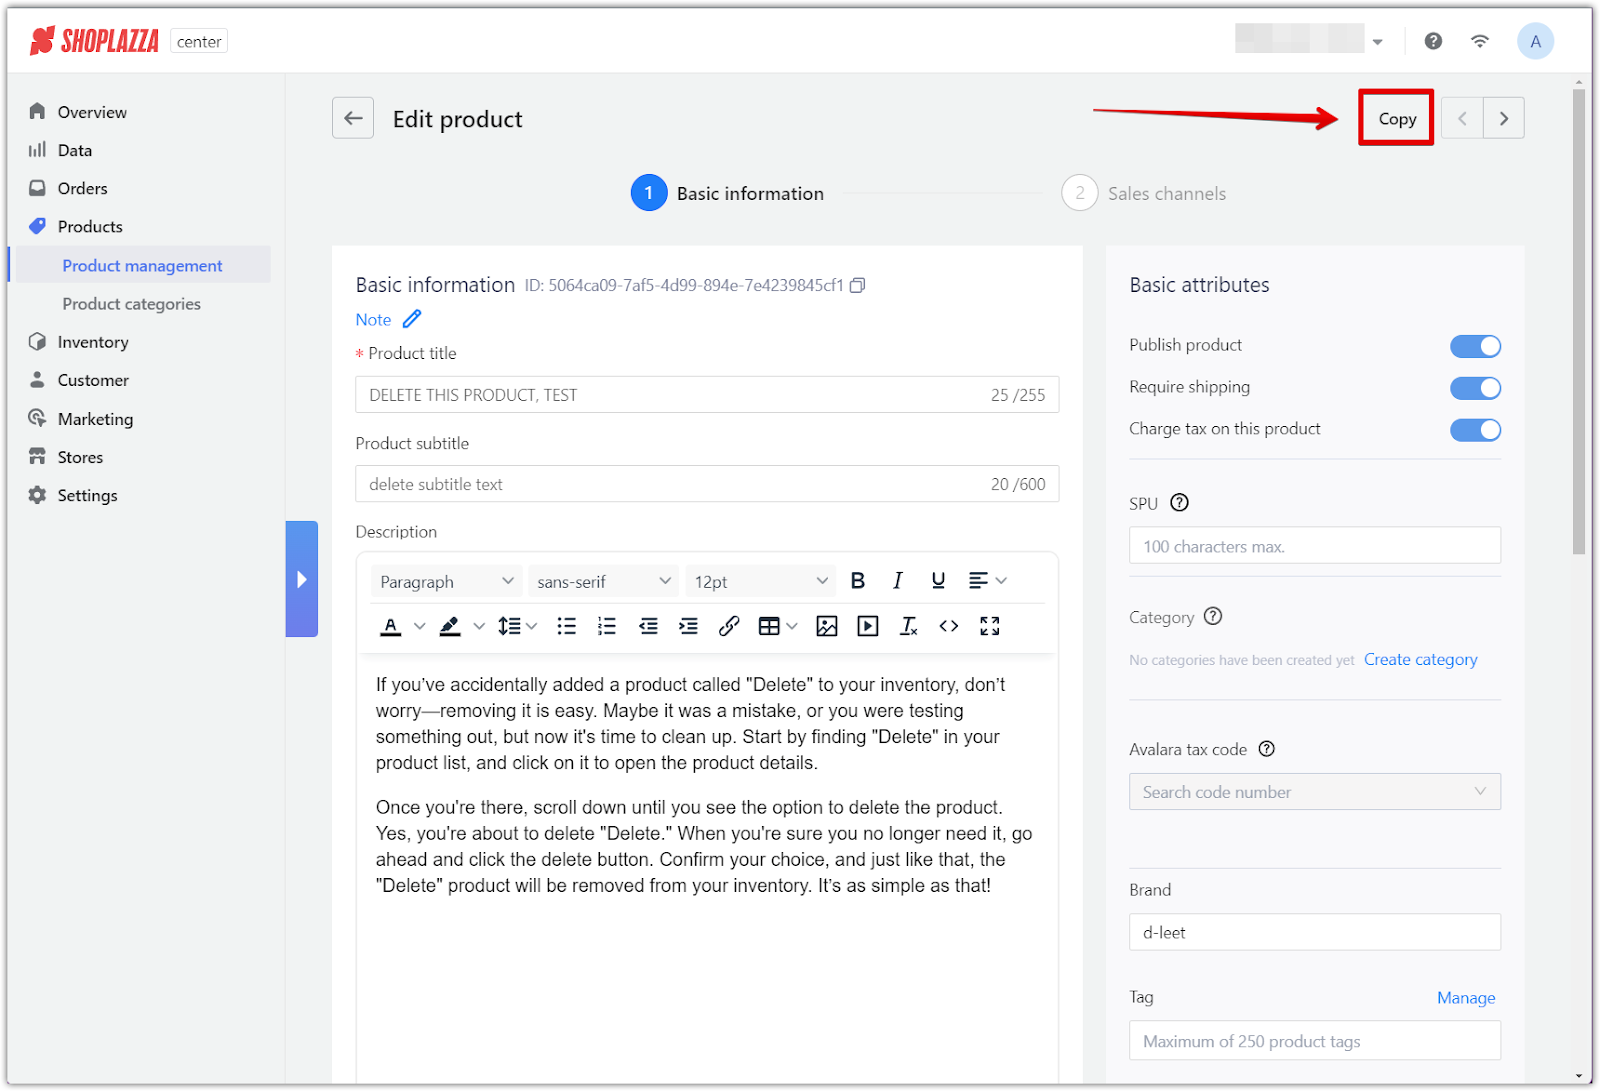
1. Duplicate an existing product: Edit an existing product and select Copy. This will create an exact copy of the product.
2. Create a product: To add a new product to your inventory, click Create product. This action will open a new page where you can begin entering all the necessary details about your product.
3. Input basic information: When creating or editing a product, start with the Basic Information tab, where you can fill in the product title, subtitle, and detailed description. Add images and videos that represent your product accurately by adding Product media. Ensure the media resolution is consistent for a cleaner presentation on your sales channels.

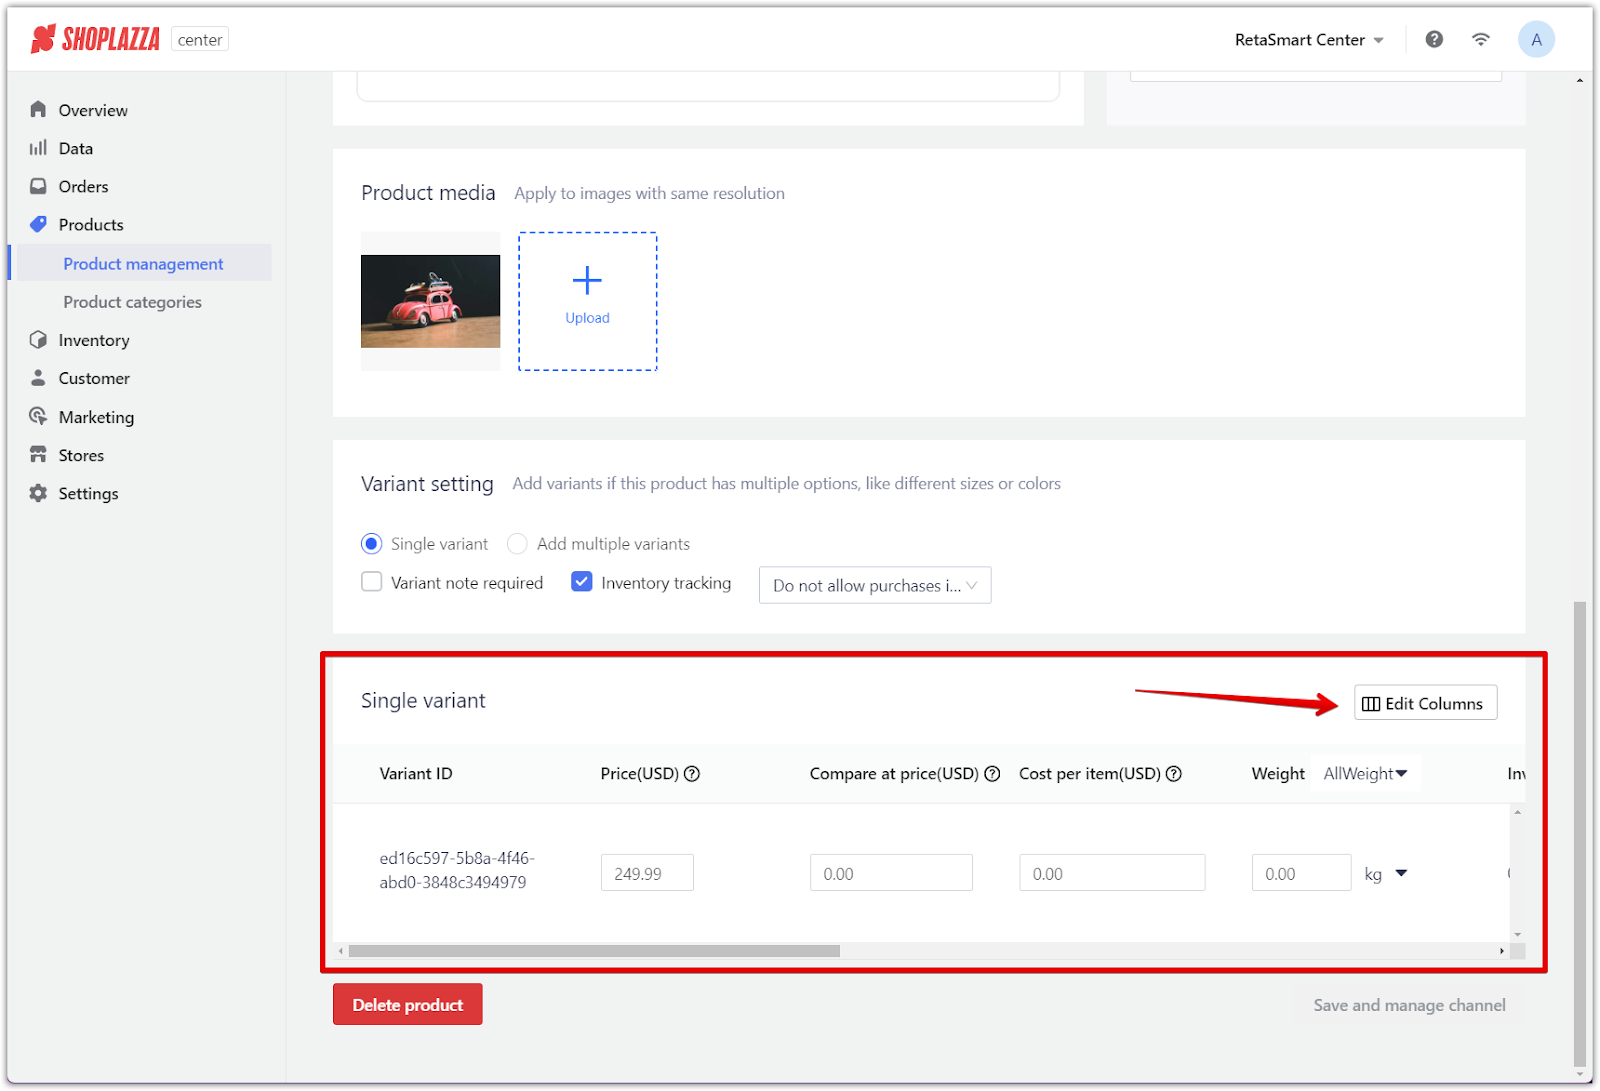
4. Set variant options: Choose between a single or multiple variants for your product, depending on the options like size or color you offer. Choose whether to allow purchases when out of stock or not.
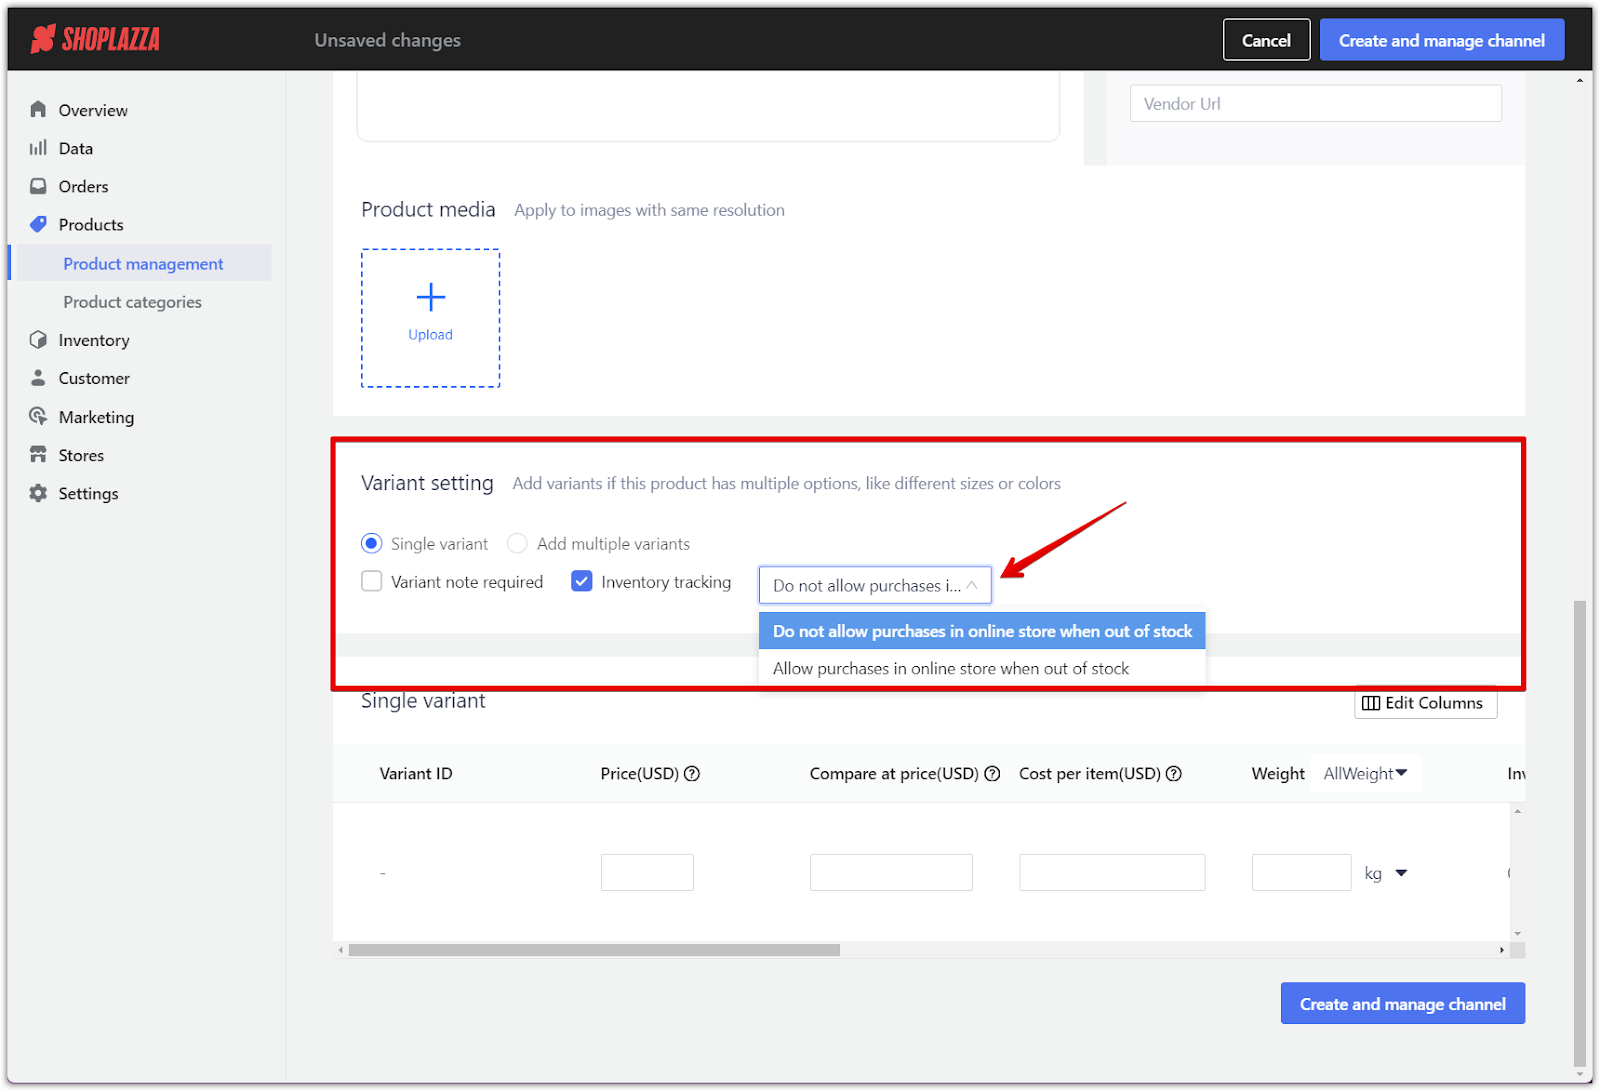
5. Detail single variant information: For products with a single variant, input the price, compare at price, cost per item, and more by clicking on Edit Columns. Assign an SKU for inventory tracking.
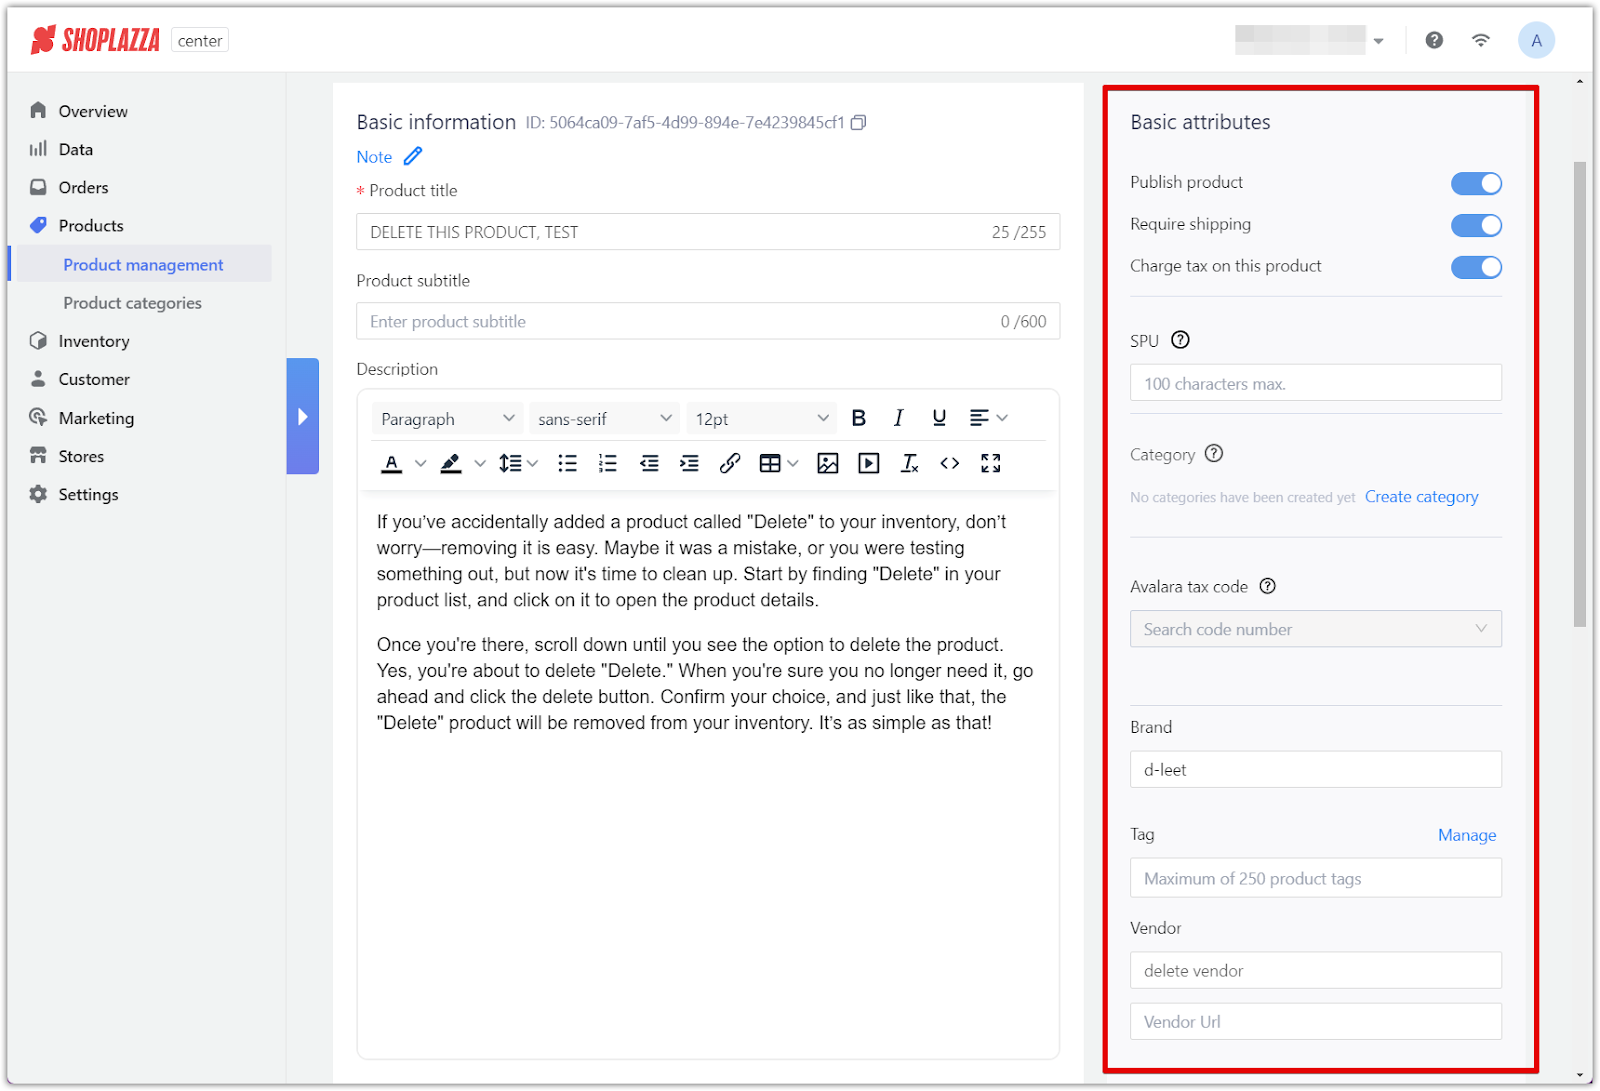
6. Set attributes: You have the option to set whether the product should be published immediately, requires shipping, and if it will charge tax. Additionally, fill in the Stock Product Unit (SPU), category, tax code, brand, and vendor details.
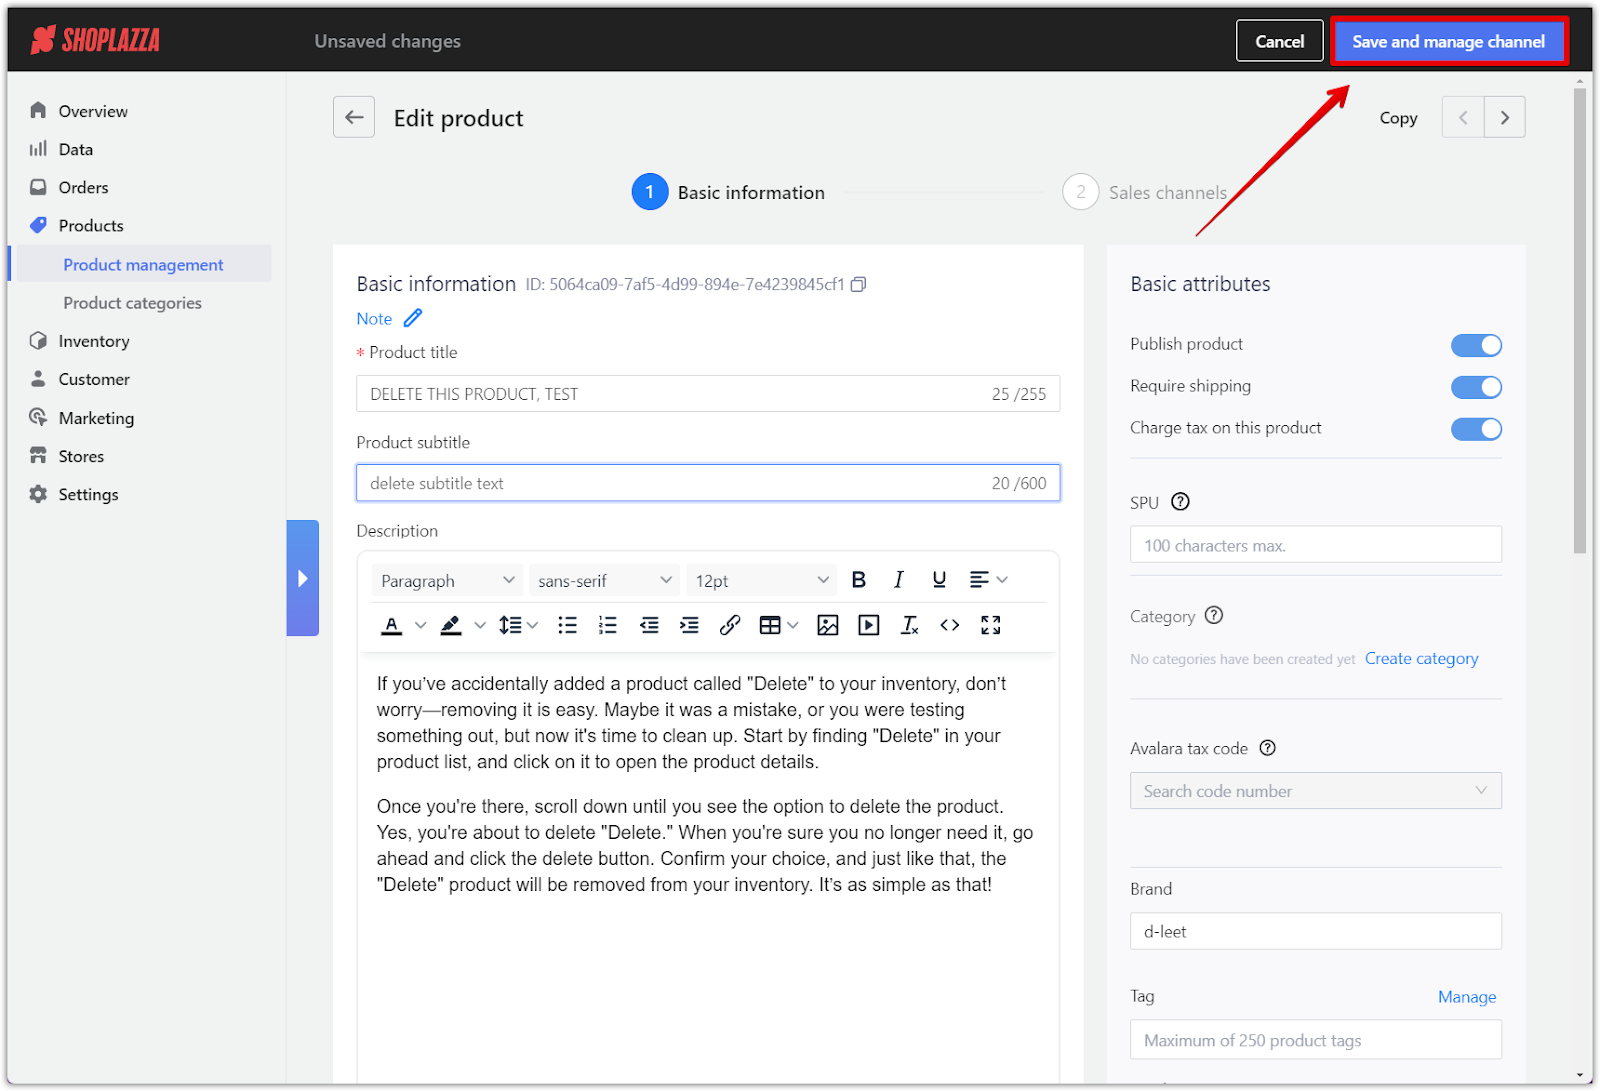
7. Create and manage channels: Review your entries to ensure they are correct. Once ready, click on Create and manage channel which will bring over to the next tab Sales channels.
Sales channels and pricing
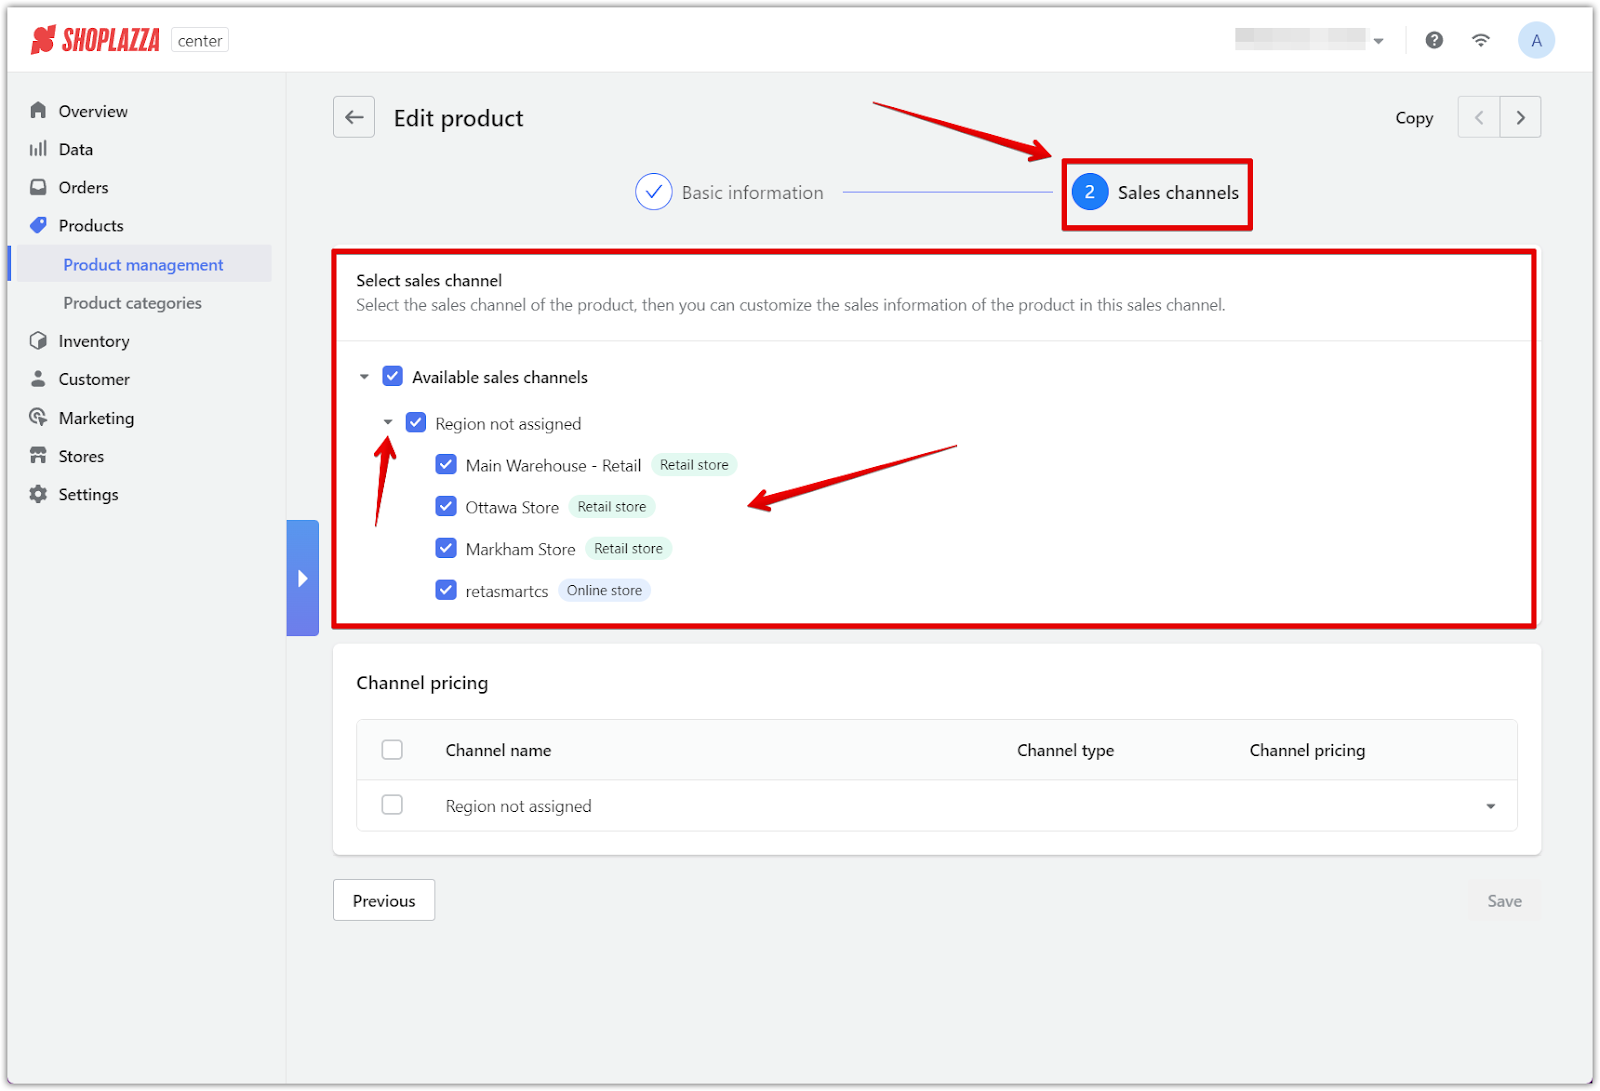
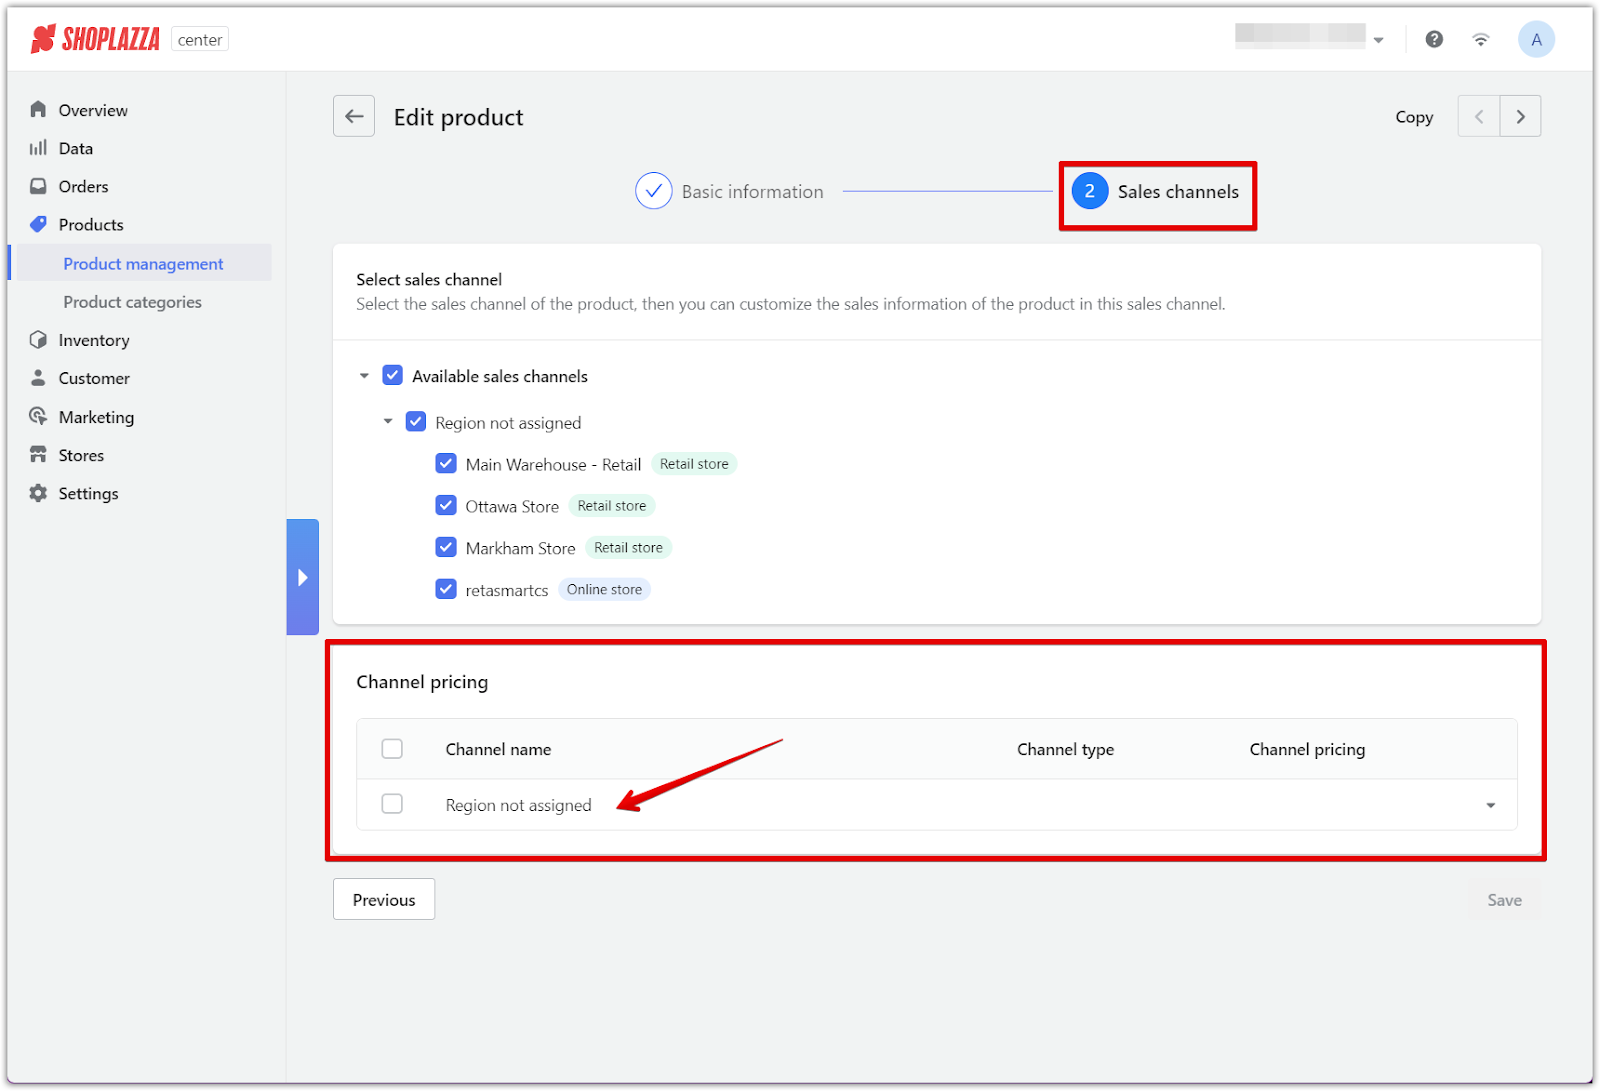
1. Select sales channels: In the Sales Channels section, choose where the product will be sold by selecting the appropriate channels. This ensures that your product appears in the right store or online marketplace.
2. Determine channel pricing: Set different prices for different sales channels if needed, allowing for flexibility in pricing products across various platforms.
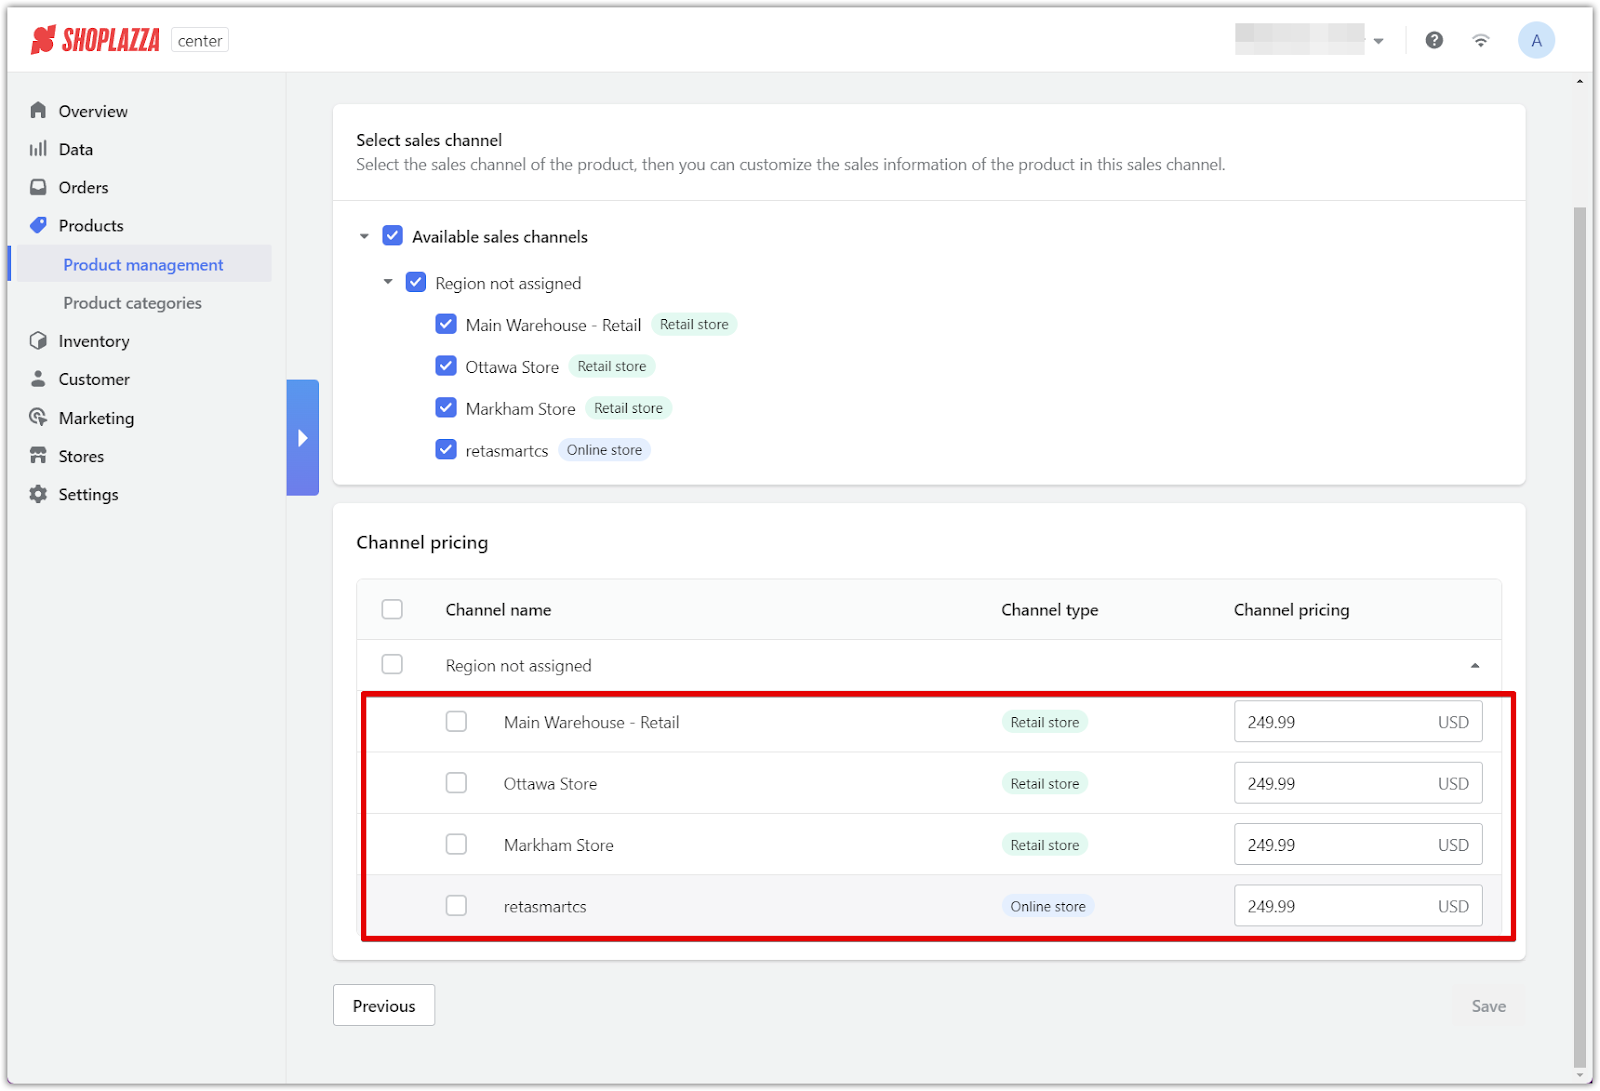
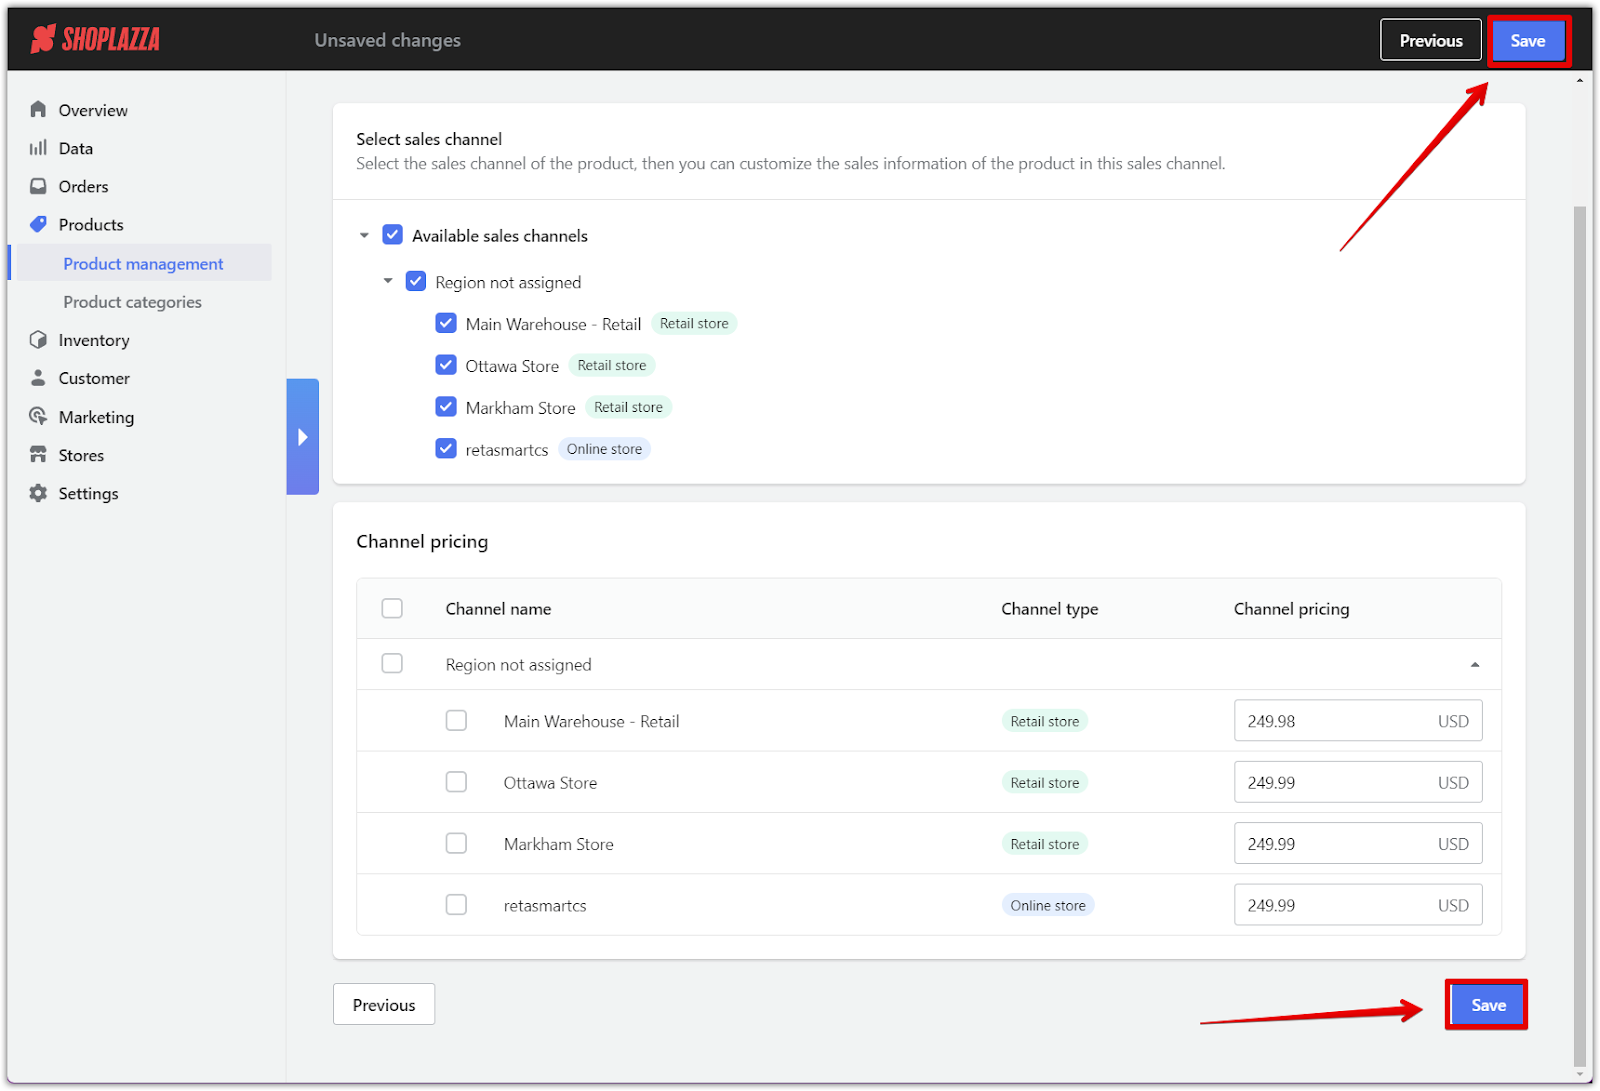
3. Review all details and save: Before saving a new product or changes to an existing one, review all entered information for accuracy to ensure a seamless shopping experience for your customers. Once all details are verified, click Save to update the product listings. Your changes will now be live, and the product will be available for customers to purchase through the channels you've set up.
Following these steps in Shoplazza’s Product Management section will keep your inventory organized, accurate, and ready for customers. A well-maintained product catalog streamlines operations and enhances the shopping experience across your sales channels. Keep products up-to-date; your business will be set for smooth, successful sales.


Comments
Please sign in to leave a comment.