The GEO setting in Shoplazza's POS system is key in managing where products are available and priced and controlling different store types across various locations. By configuring GEO settings, stores can control product visibility, pricing, and store types based on geographical regions. For example, a product may have different prices due to transportation costs or local demand, or certain products may only be available in specific types of stores. Properly setting up GEO ensures your products appear in the right stores' POS systems, optimizing both inventory management and customer experience.
What Is GEO?
GEO stands for "Geographical Region" and allows for assigning specific regions to stores and products. This helps organize and control product availability, pricing, and store types based on location.
Where to find the GEO setting
To access and configure the GEO settings in Shoplazza POS, follow these steps:
1. Navigate to store management: Log in to your Shoplazza Center Admin > click Stores > select Store Management.

2. Access store settings: In Store Management, find the store you want to configure and click Edit.
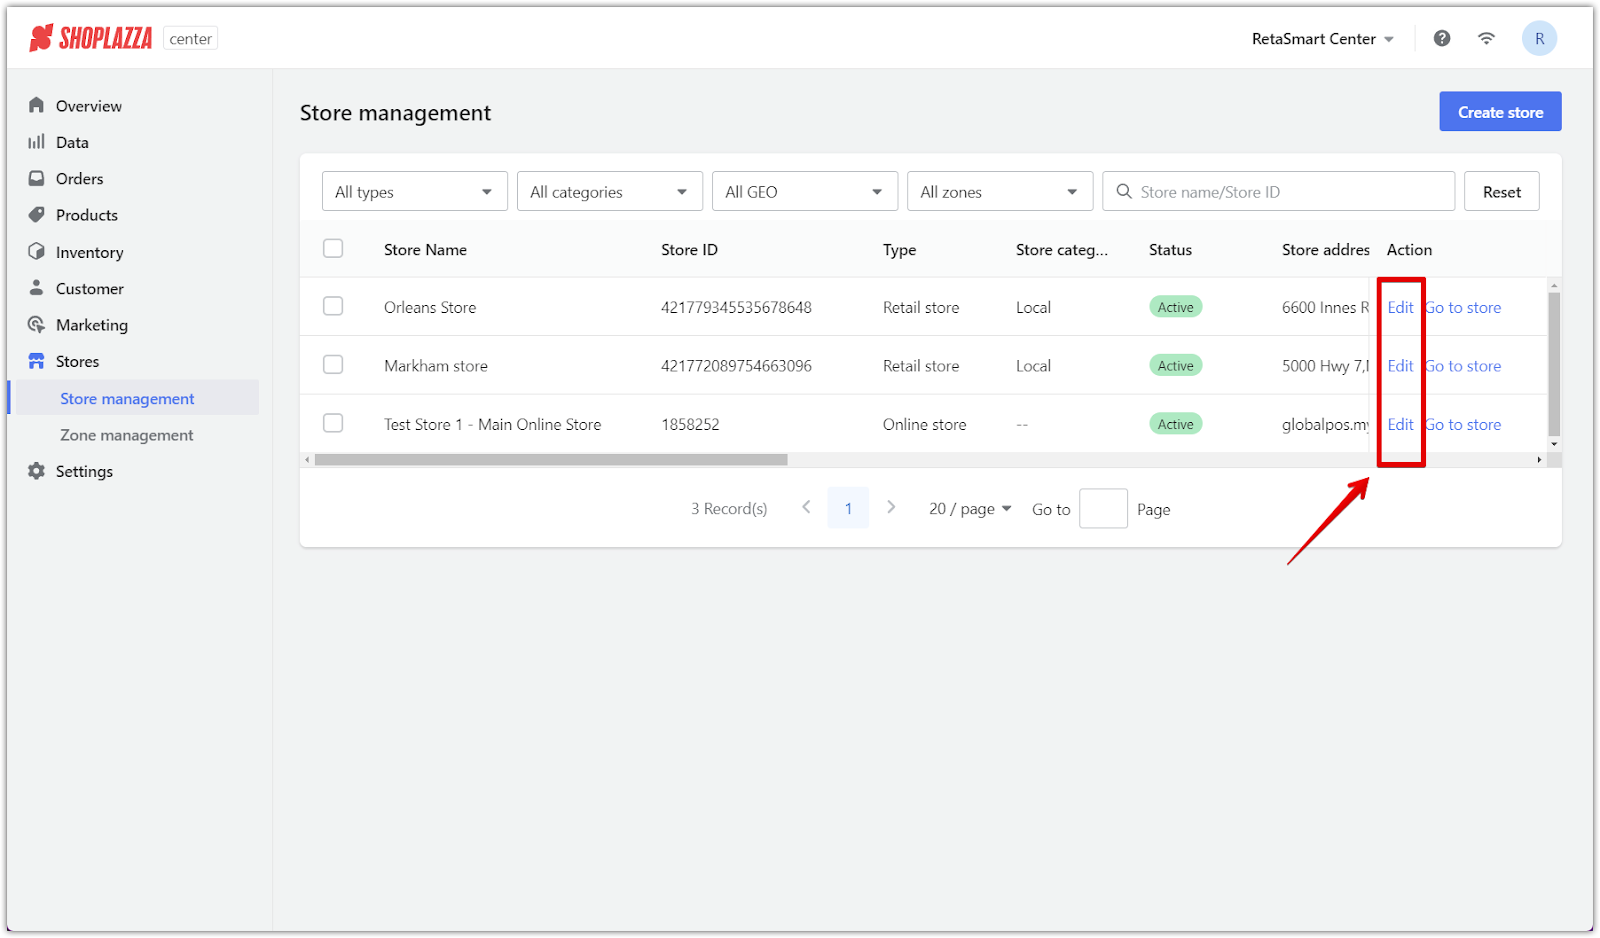
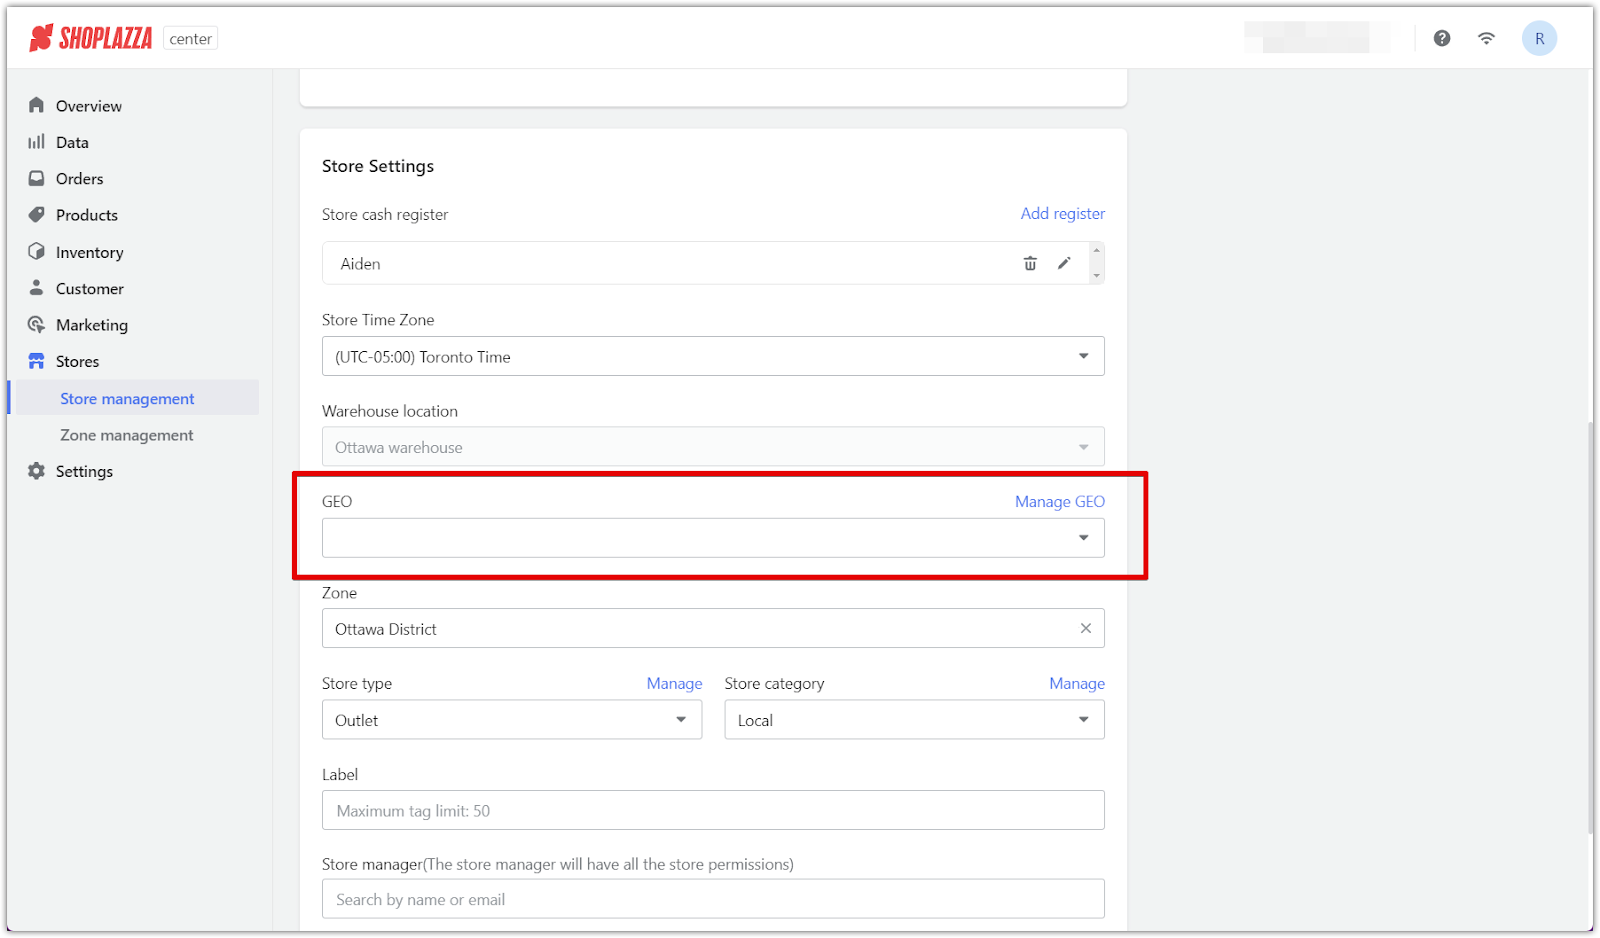
3. Locate the GEO section: In the Store Settings section, scroll down to the GEO field and click on the field box to view existing regions or create a new one by selecting +Add item from the dropdown.

Managing GEO regions
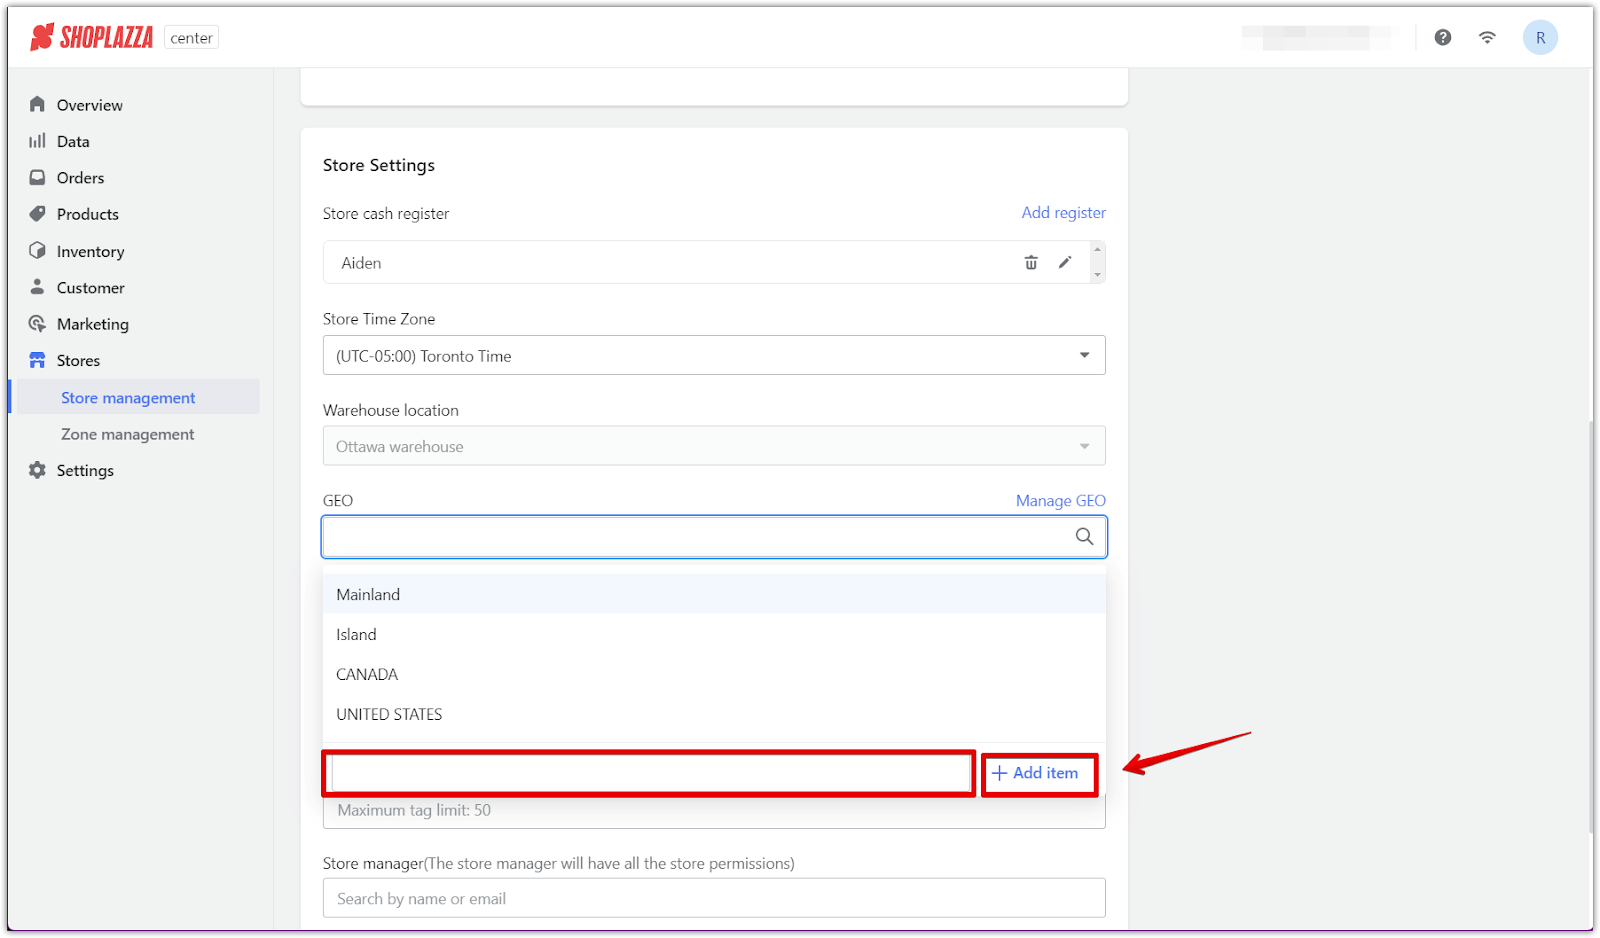
1. Add a new GEO: Click on the field box in the GEO section. Enter the name of the new GEO region and click +Add item to save it.
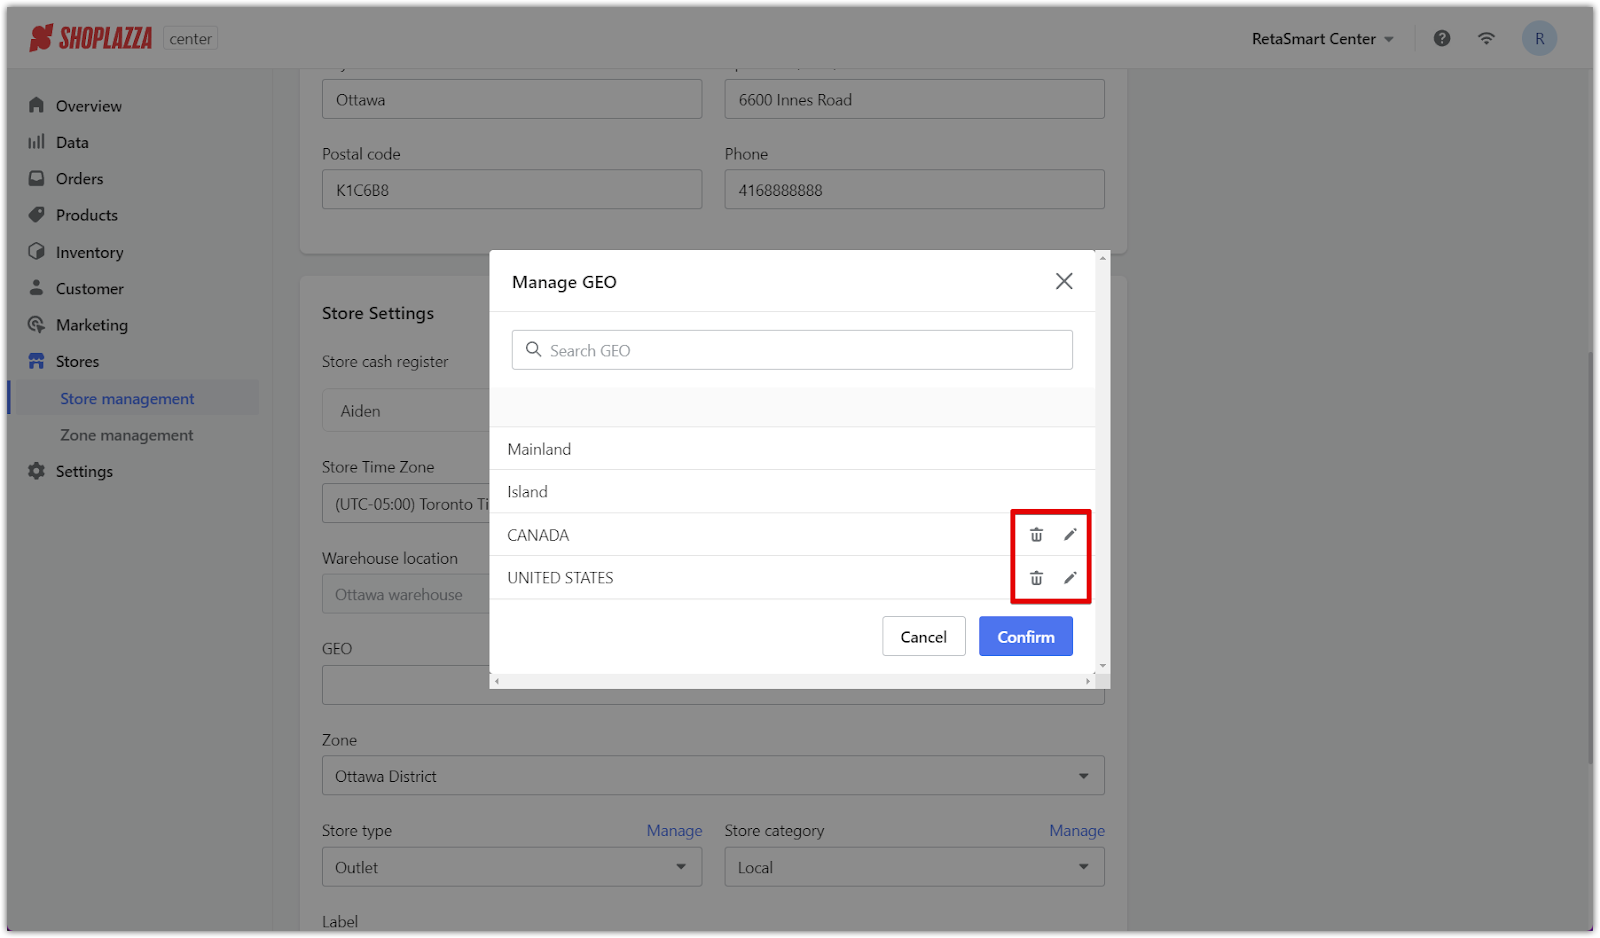
2. Edit or delete a GEO: To edit or delete a GEO region, click the Manage GEO button next to the field box and find the region you want to modify. Click the trash icon to delete it or the edit icon to update the name.
Assigning products to GEO regions
1. Navigate to Product Management: In your Shoplazza Center Admin, go to Products and click Product Management.

2. Add or edit a product: Add or edit an existing product. After entering the product details, go to the Sales Channels page.
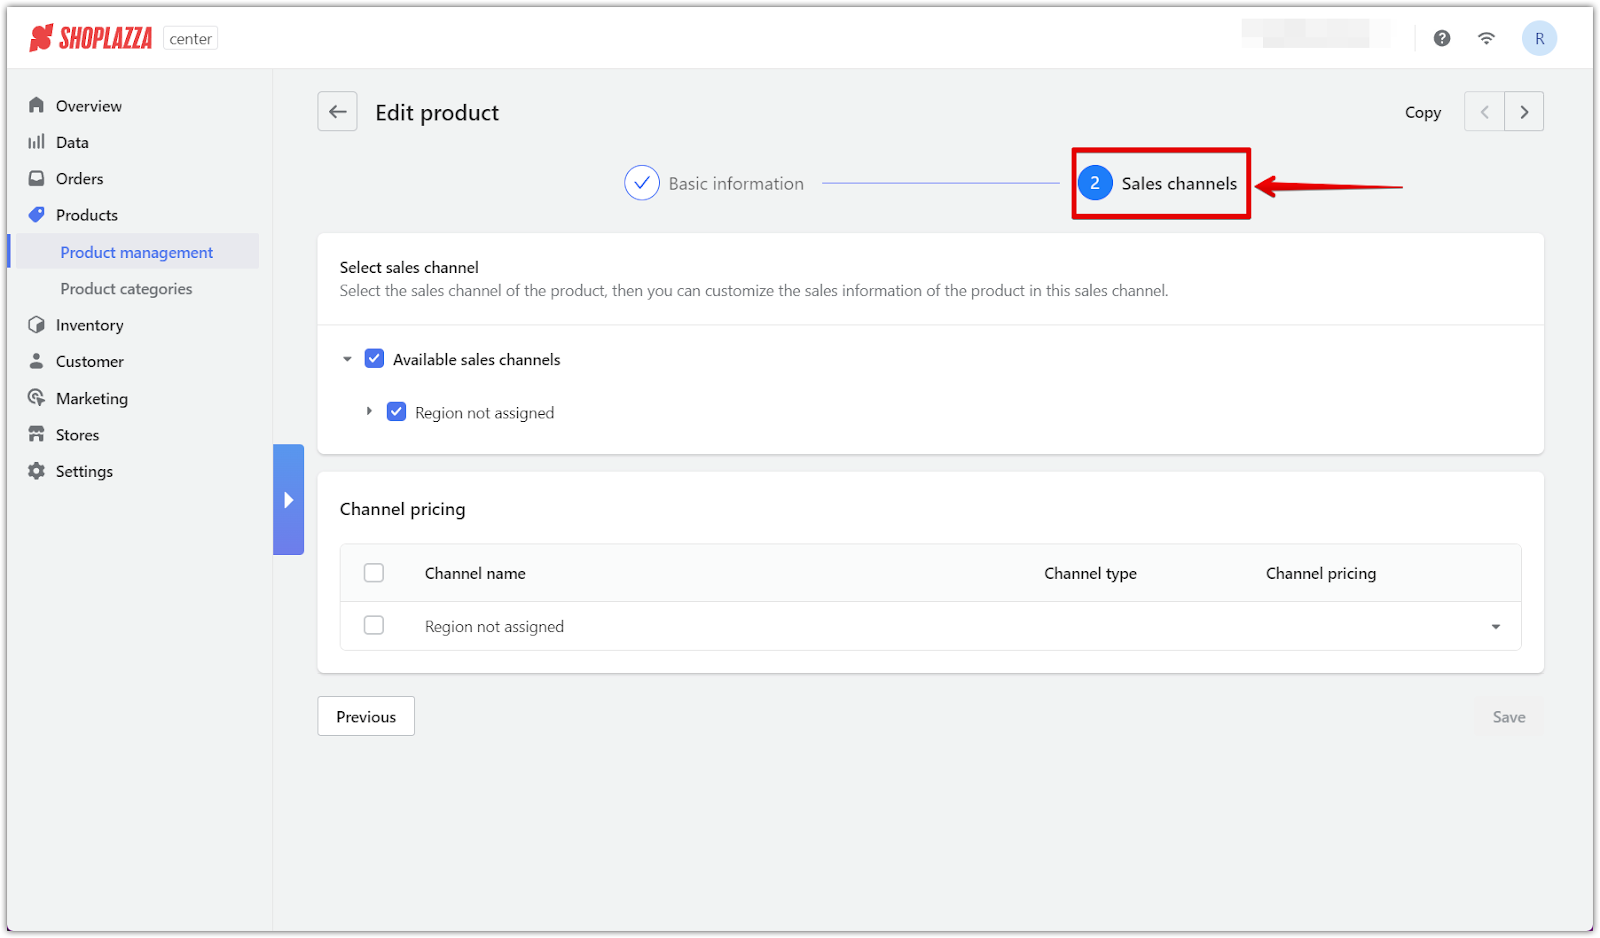
3. Select sales channels: On the Sales Channels page, select the stores or regions where the product will be available. Ensure the product's GEO matches the store's GEO on the Store management page (shown in the second screenshot below).


Note
Ensure the GEO assigned to a product matches the store's GEO so it appears in the POS system. If the store has no GEO assigned, select Region not assigned in the product setup to ensure it appears in the POS. Proper management of GEOs supports inventory control, region-specific pricing, and assigning products to different store types.
How GEO settings can impact your business
Configuring GEO regions ensures full control over product availability, pricing, and store types based on location. For example:
- If 45 stores are managed across the United States, stores may be grouped into regions such as California and New York or by store types like flagship stores or outlets.
- A SKU may sell for $30 in California but only $25 in New York due to higher transportation costs in one region. Additionally, certain products may only be available in premium store types while being excluded from outlets. GEO configuration ensures the correct price and store type assignment at each store’s POS system, reflecting these differences.
This functionality efficiently handles regional variations, transportation costs, store types, and local demand.
Following these steps ensures your products are properly assigned to the correct regions and displayed in the Shoplazza POS system.


Comments
Please sign in to leave a comment.