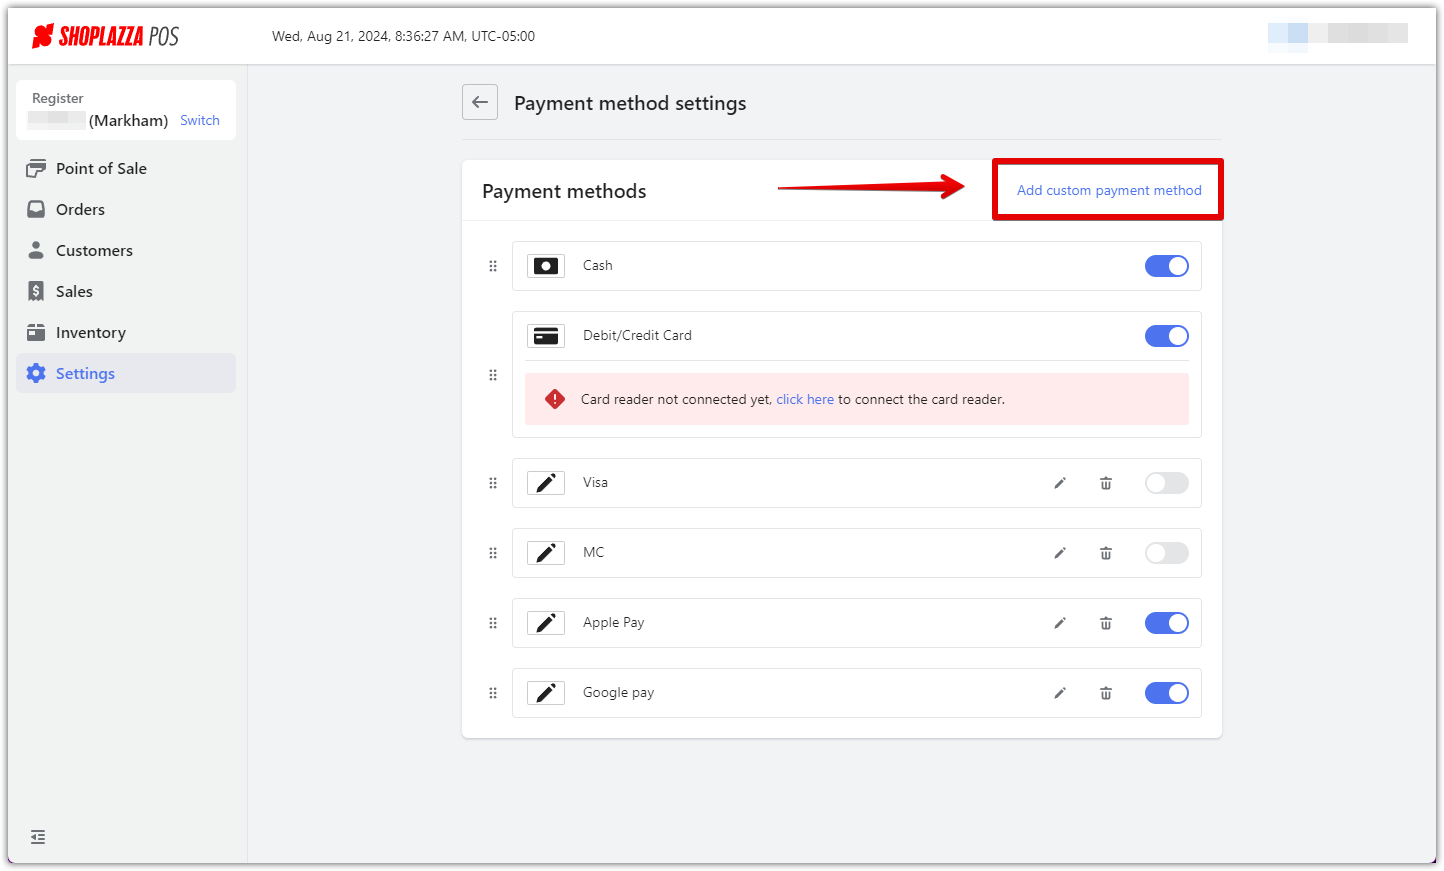
Various payment options are key to enhancing customer satisfaction and streamlining transaction processes. Customizing your payment methods ensures a smoother checkout experience for your customers. Follow these straightforward steps to integrate custom payment options into your system, accommodating your customers' diverse preferences. Here’s how to add a custom payment method:
Steps
1. Access the payment settings: Open your POS admin, proceed to Settings, and select Settings under the Payments section. This action directs you to where you can add new payment methods.

2. Introduce a new payment method: Click on the Add custom payment method button. This step allows you to broaden the range of payment options you offer.

3. Configure and activate the custom payment method: After selecting to add a new payment method, you will be prompted to fill in several fields to configure the method. Click Save after filling out the information:
- Custom payment method name: Enter the name of the payment method as you want it to appear during the checkout process.
- Custom fields: If needed, click the + button to add custom fields related to the payment method, such as a field for transaction IDs. These fields are optional and can be tailored to your specific requirements.
- Open drawer: Toggle this option if the custom payment method should trigger the cash drawer to open upon transaction completion.
- Custom payment method introduction: Optionally, you can provide a brief introduction or description of the payment method for internal reference.

By implementing these steps, you expand your payment options, making your business more adaptable and customer-focused. This approach not only meets the diverse needs of your customers but also enhances the overall user experience.


Comments
Please sign in to leave a comment.