
The first step is to regularly compare the physical inventory with the records in your POS system to identify any discrepancies that might arise from factors such as sales, returns, or errors in recording. Here’s how to effectively adjust your stock levels:
Steps
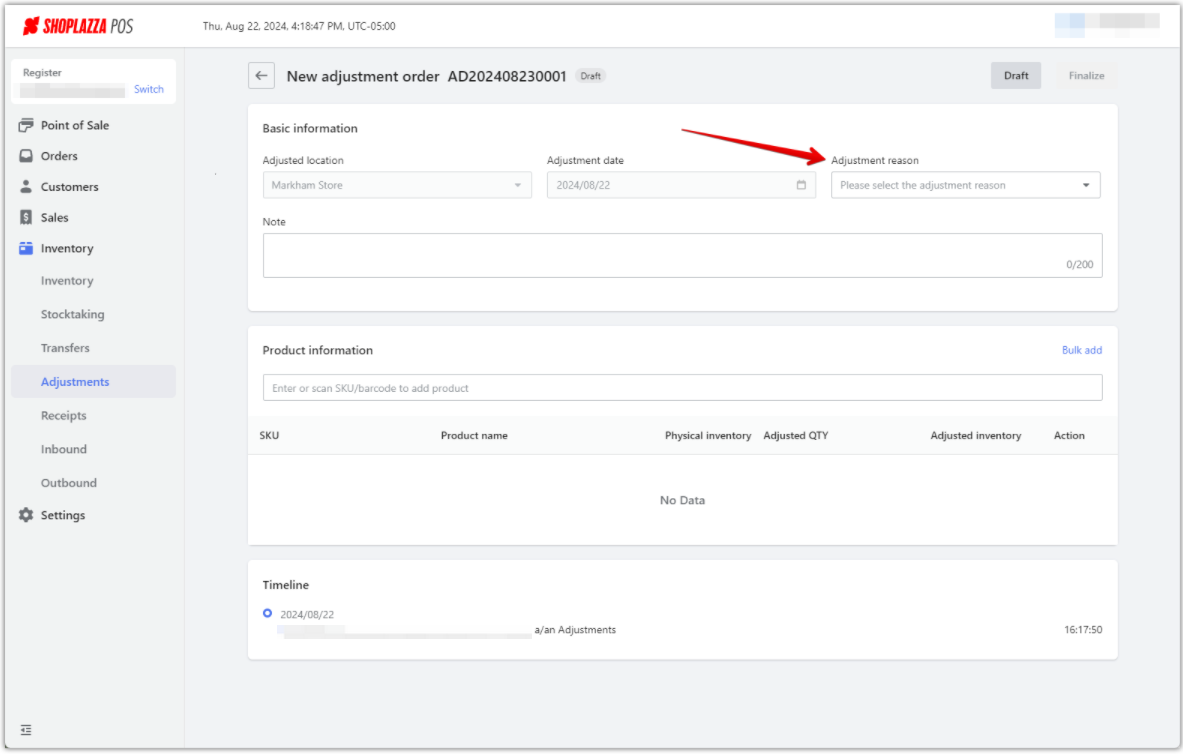
1. Navigate inventory adjustments: For direct adjustments, head over to Adjustments within the inventory section in your POS admin.

2. Create new adjustments: Click Create to start a new adjustment.

3. Specify an adjustment reason: Document the reason for each adjustment to track and audit changes. Always leave detailed notes for each adjustment to maintain accuracy.
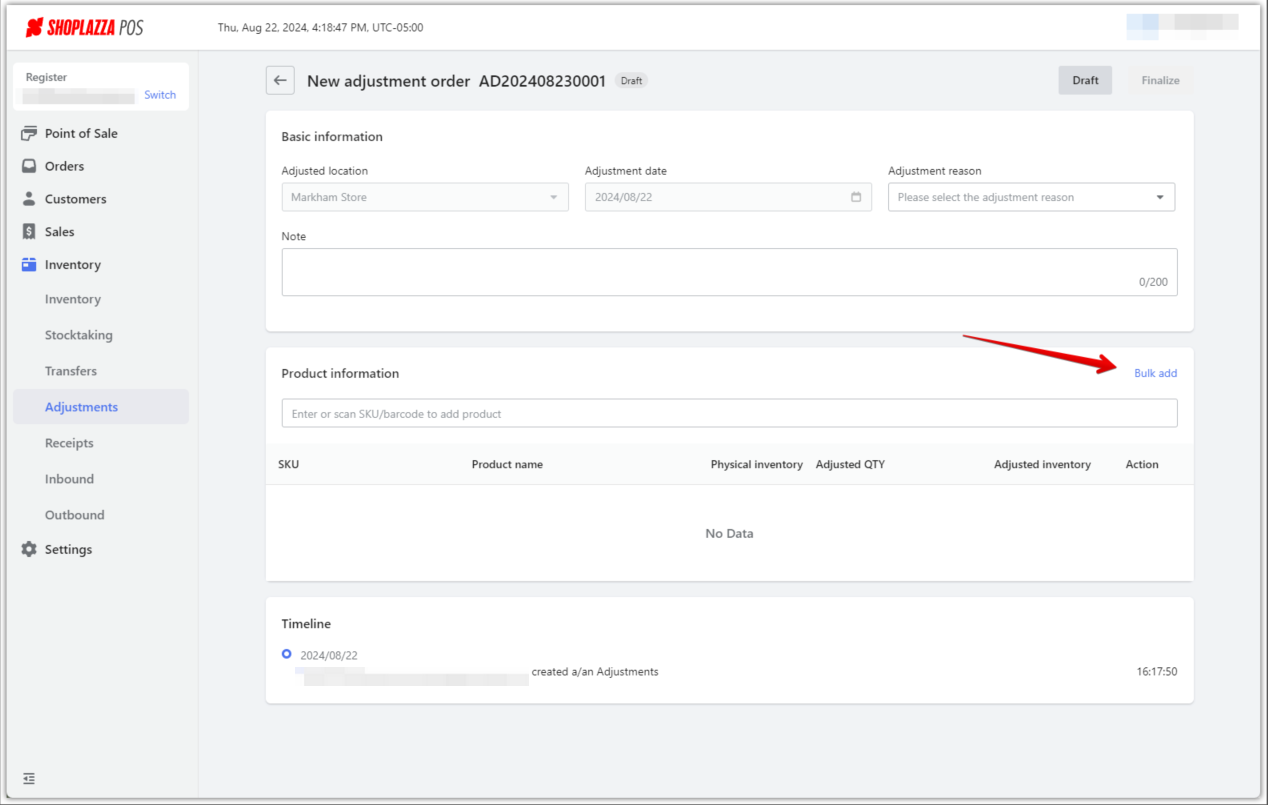
4. Manage inventory adjustments: Add products to the adjustment list and view, edit, or delete adjustments as necessary.
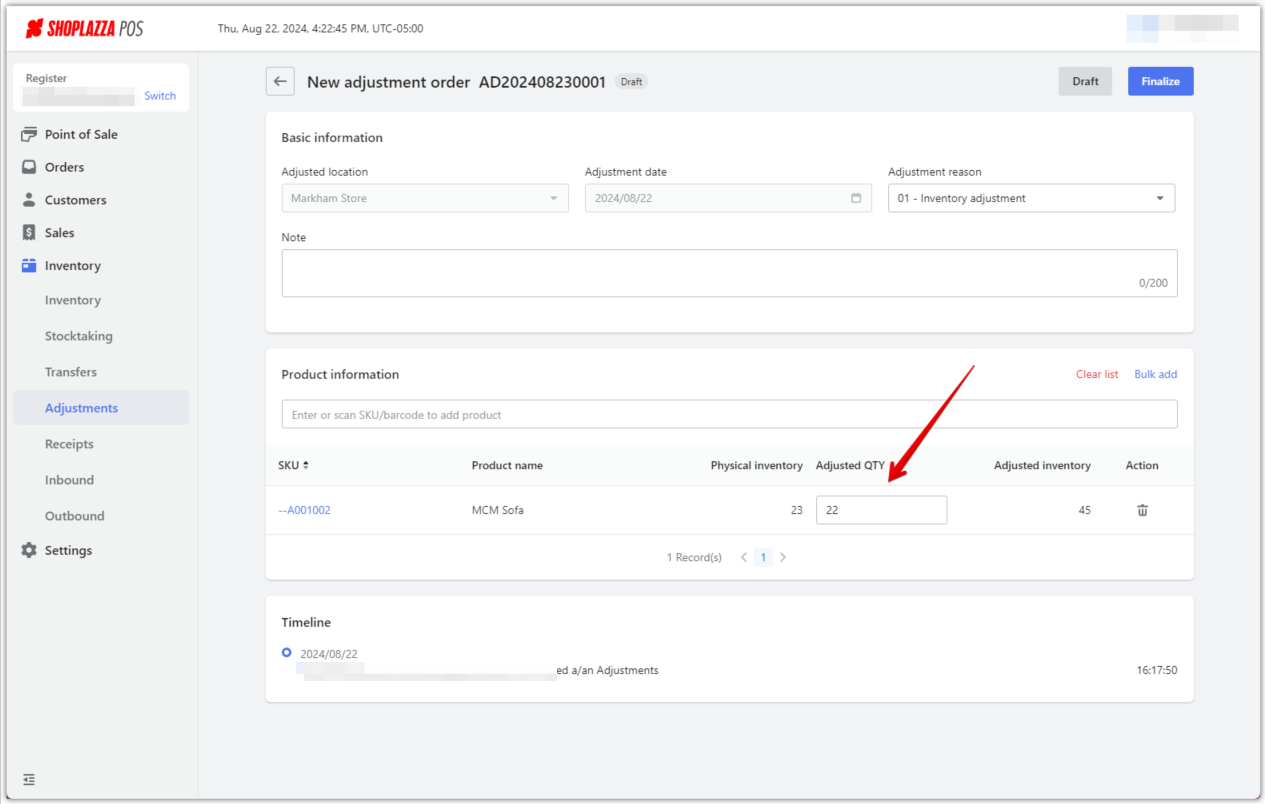
5. Finalize the adjustment: Click Finalize to complete the adjustment process.
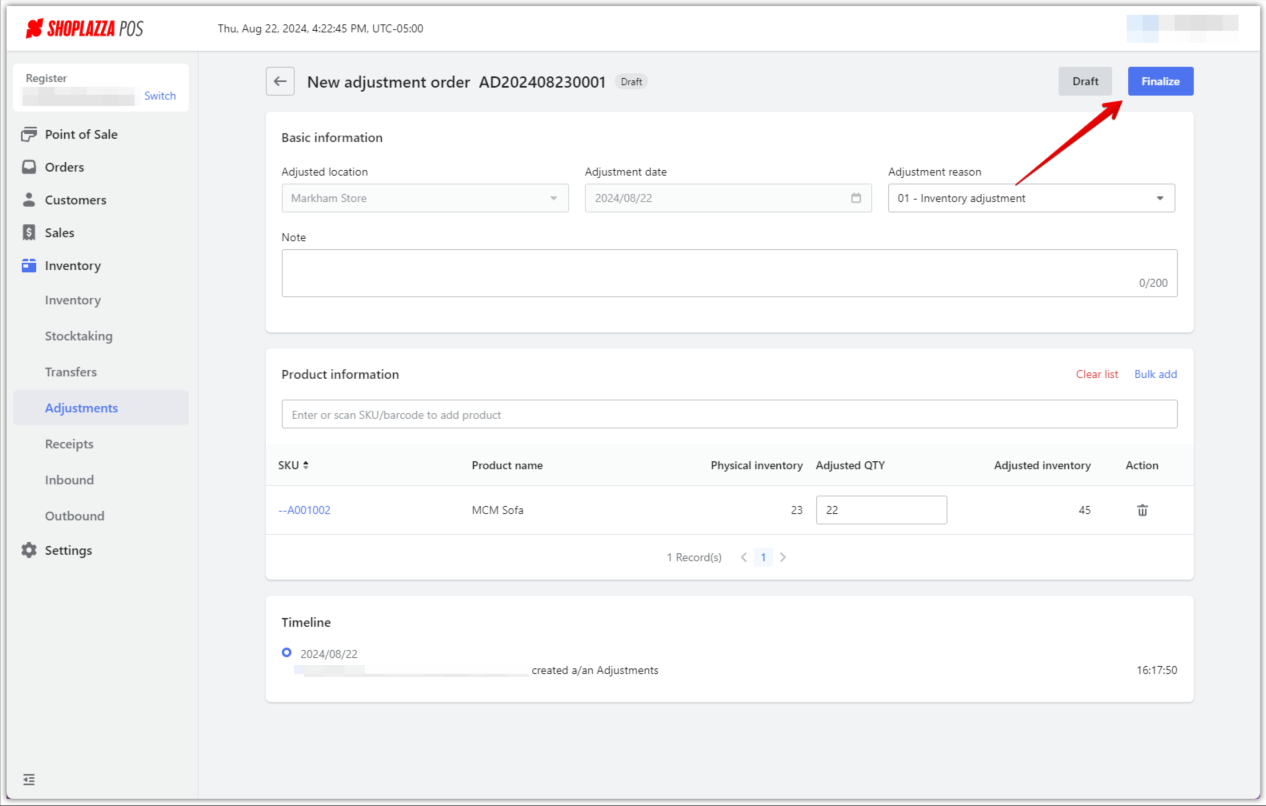
6. Check adjustment logs: After completing the adjustment, your Adjustments page will log the changes, providing a detailed record of recent inventory adjustments.

This process aids in maintaining accurate inventory records and analyzing discrepancy trends, enhancing inventory control and operational efficiency. Doing so ensures businesses can make informed decisions, optimize stock levels, and minimize losses.


Comments
Please sign in to leave a comment.