Managing after-sales services such as returns, refunds, and exchanges is essential to maintaining customer satisfaction. This guide will walk you through how to perform Refund only (when the item is not returned) and Return & refund (when the item is returned and restocked) using two methods: directly from the Point of Sale screen or loading an order from the Orders section.
Refunds and returns from the Point of Sale screen
When processing refunds or returns directly from the Point of Sale screen, you can handle both Refund only (refund without returning the item) and Return and Refund (refund with item return).
Refund without returning the item (Refund only)
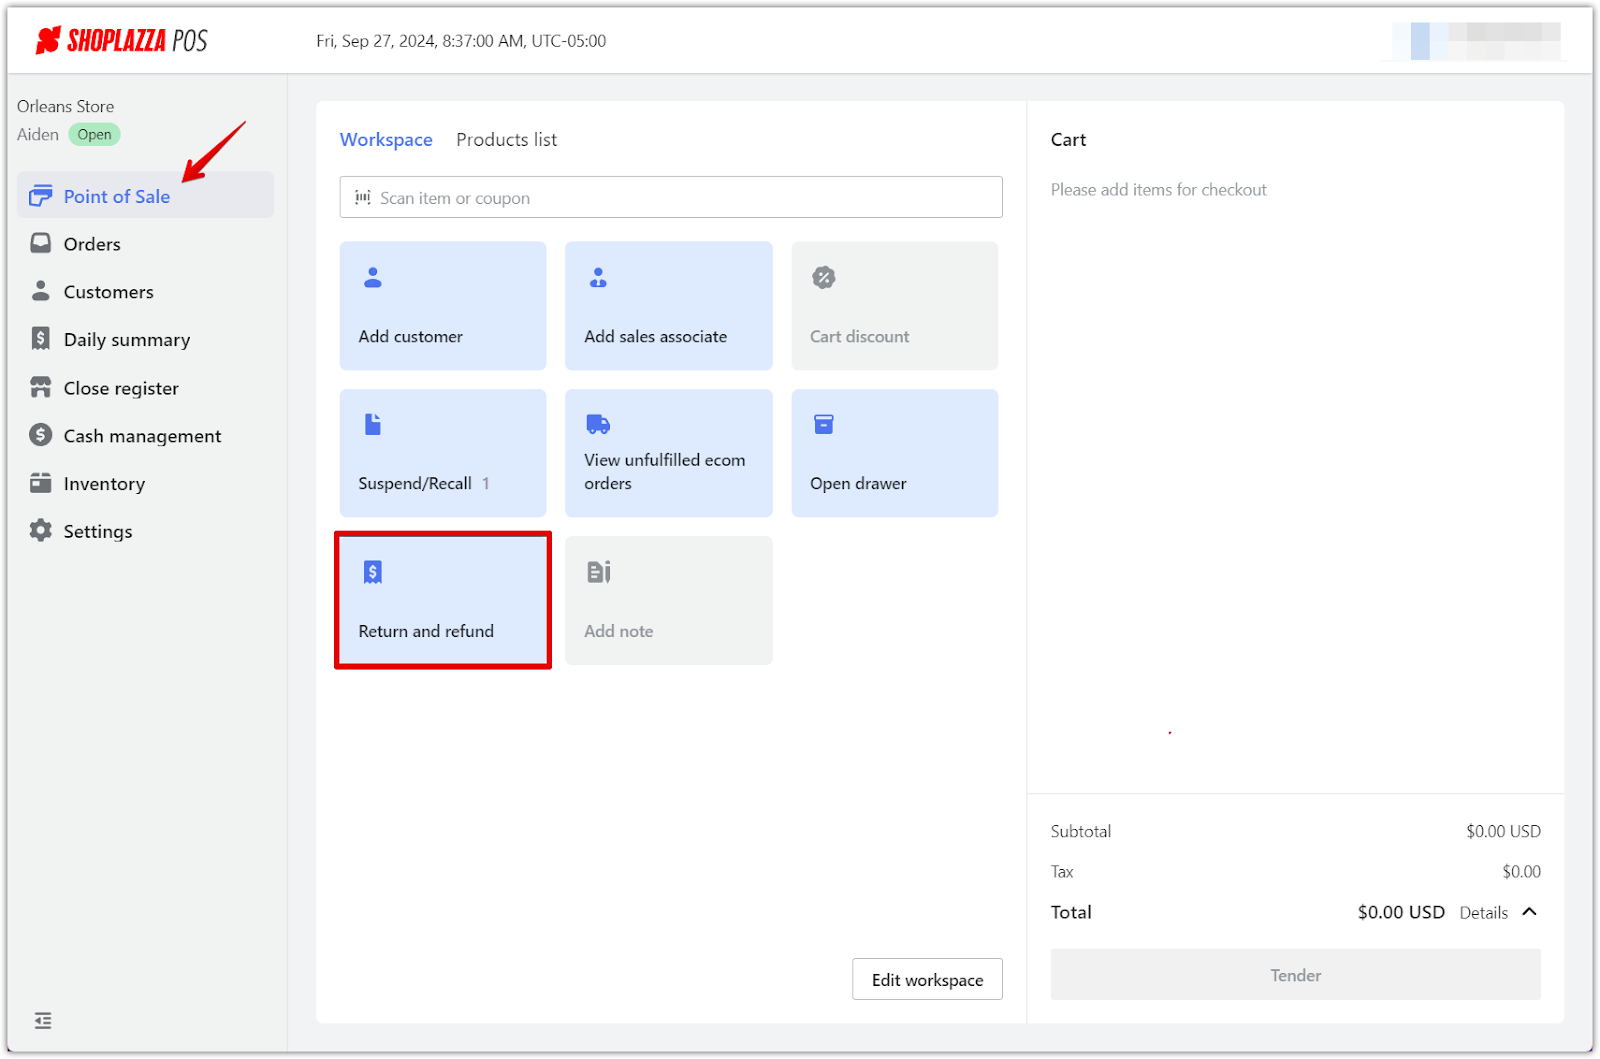
1. Select Return and refund: On the Point of Sale screen, click Return and refund. Enter the order number to locate the transaction.
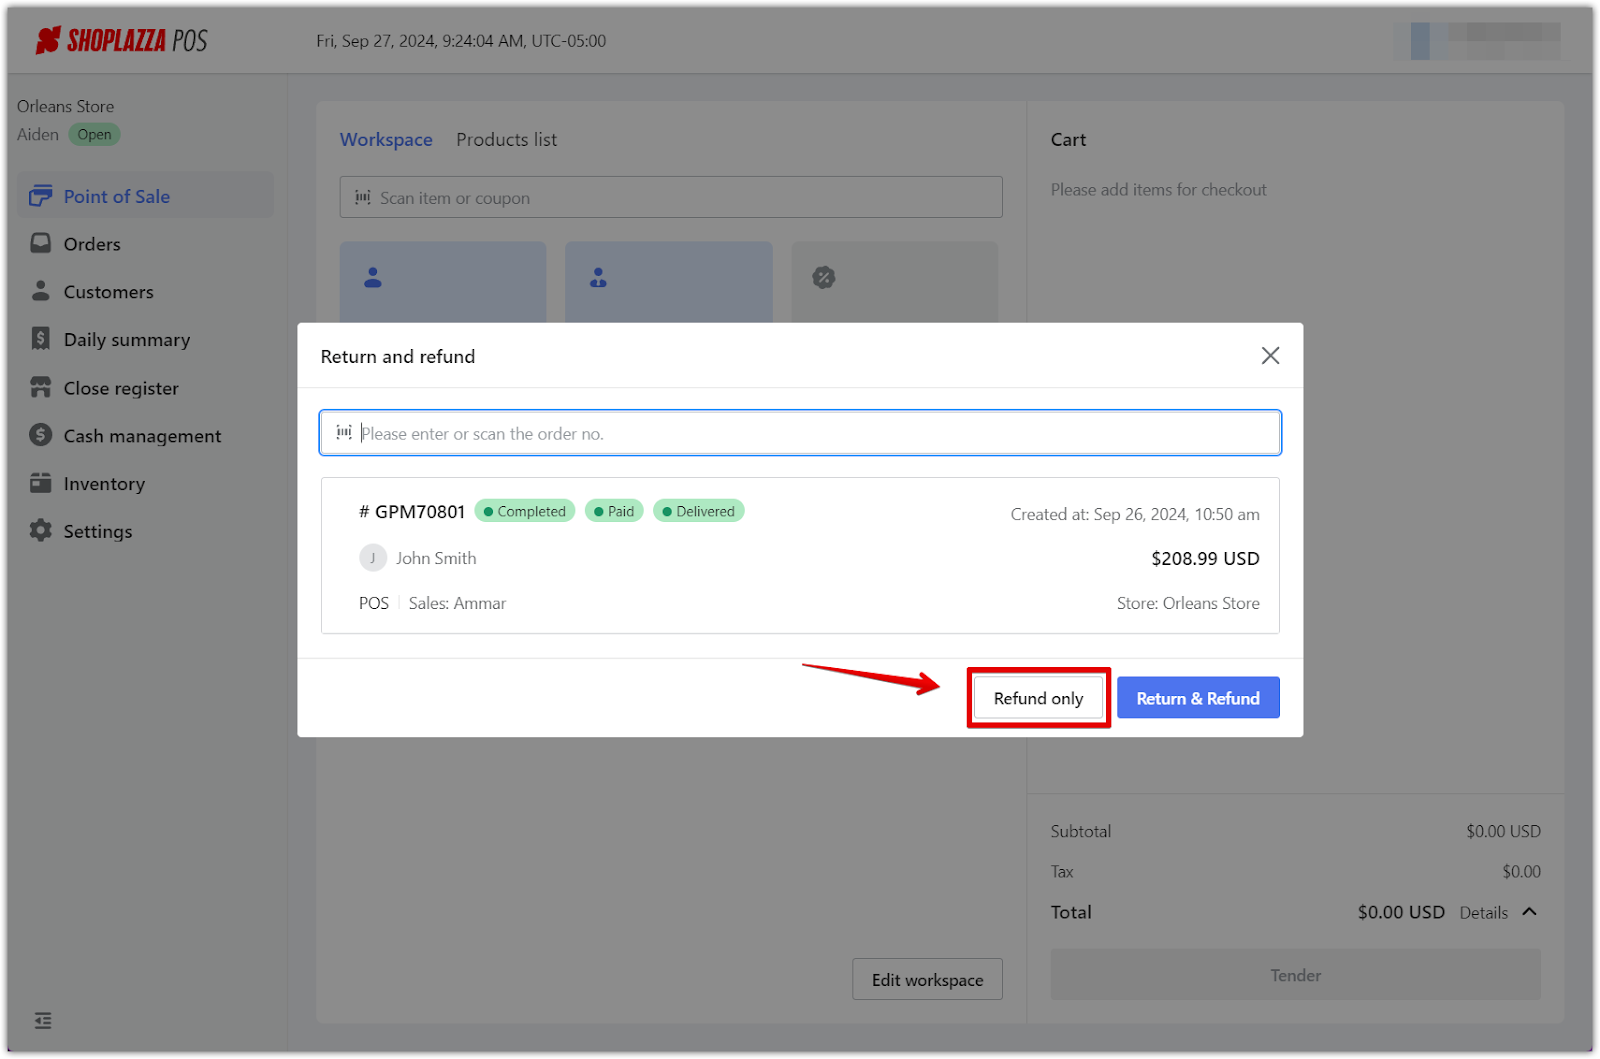
2. Choose Refund only: After the system finds the order, select Refund only. This option processes a refund without requiring the item to be returned.
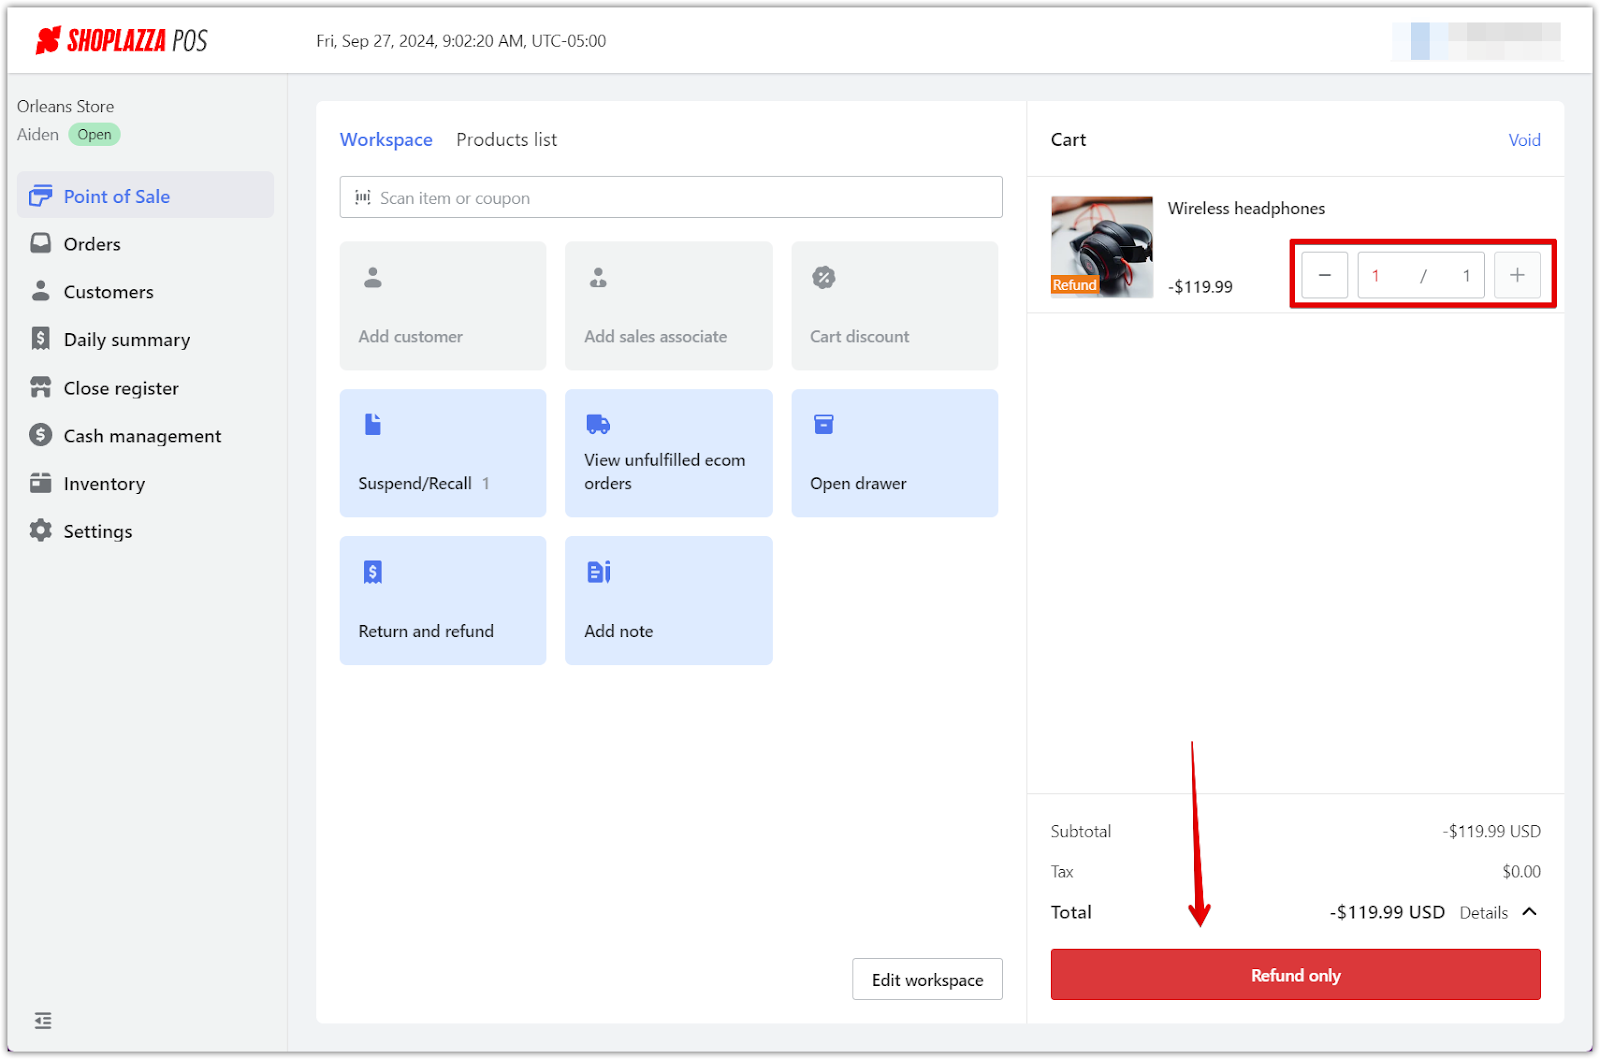
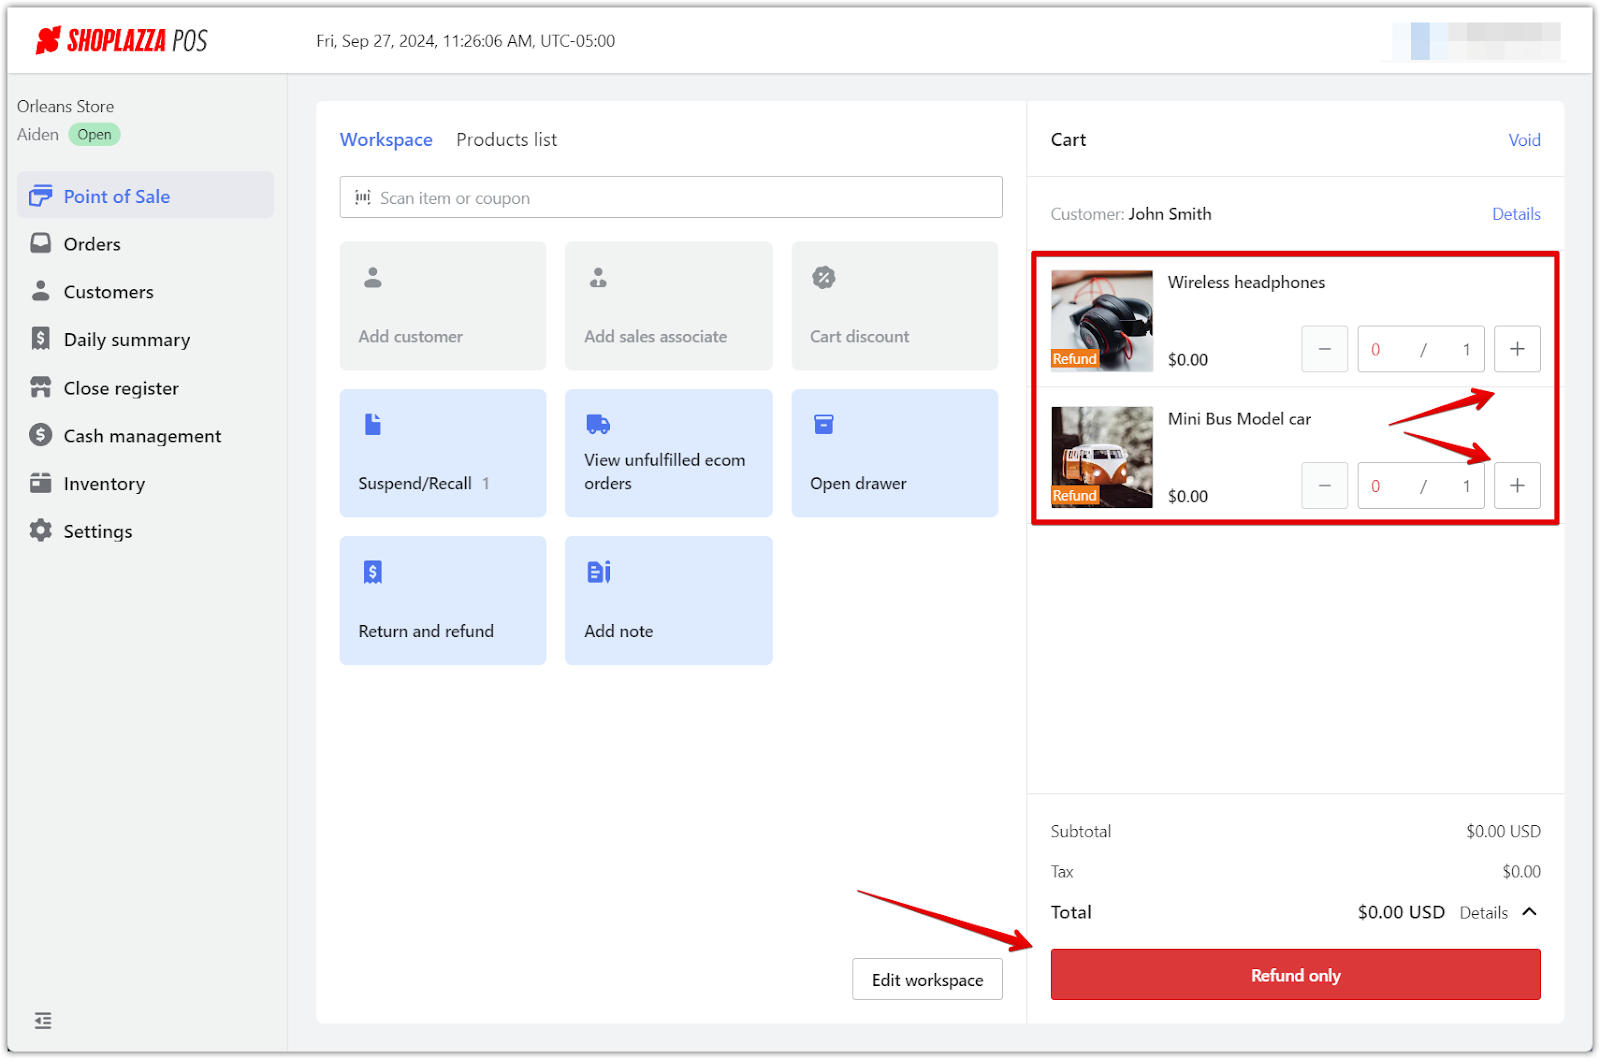
3. Add product to refund: If you previously chose Refund only, the item will automatically be added to the Cart for refund. You will need to confirm the quantities for the refund by adjusting the quantity box. After adding the quantities, select Refund only to continue.
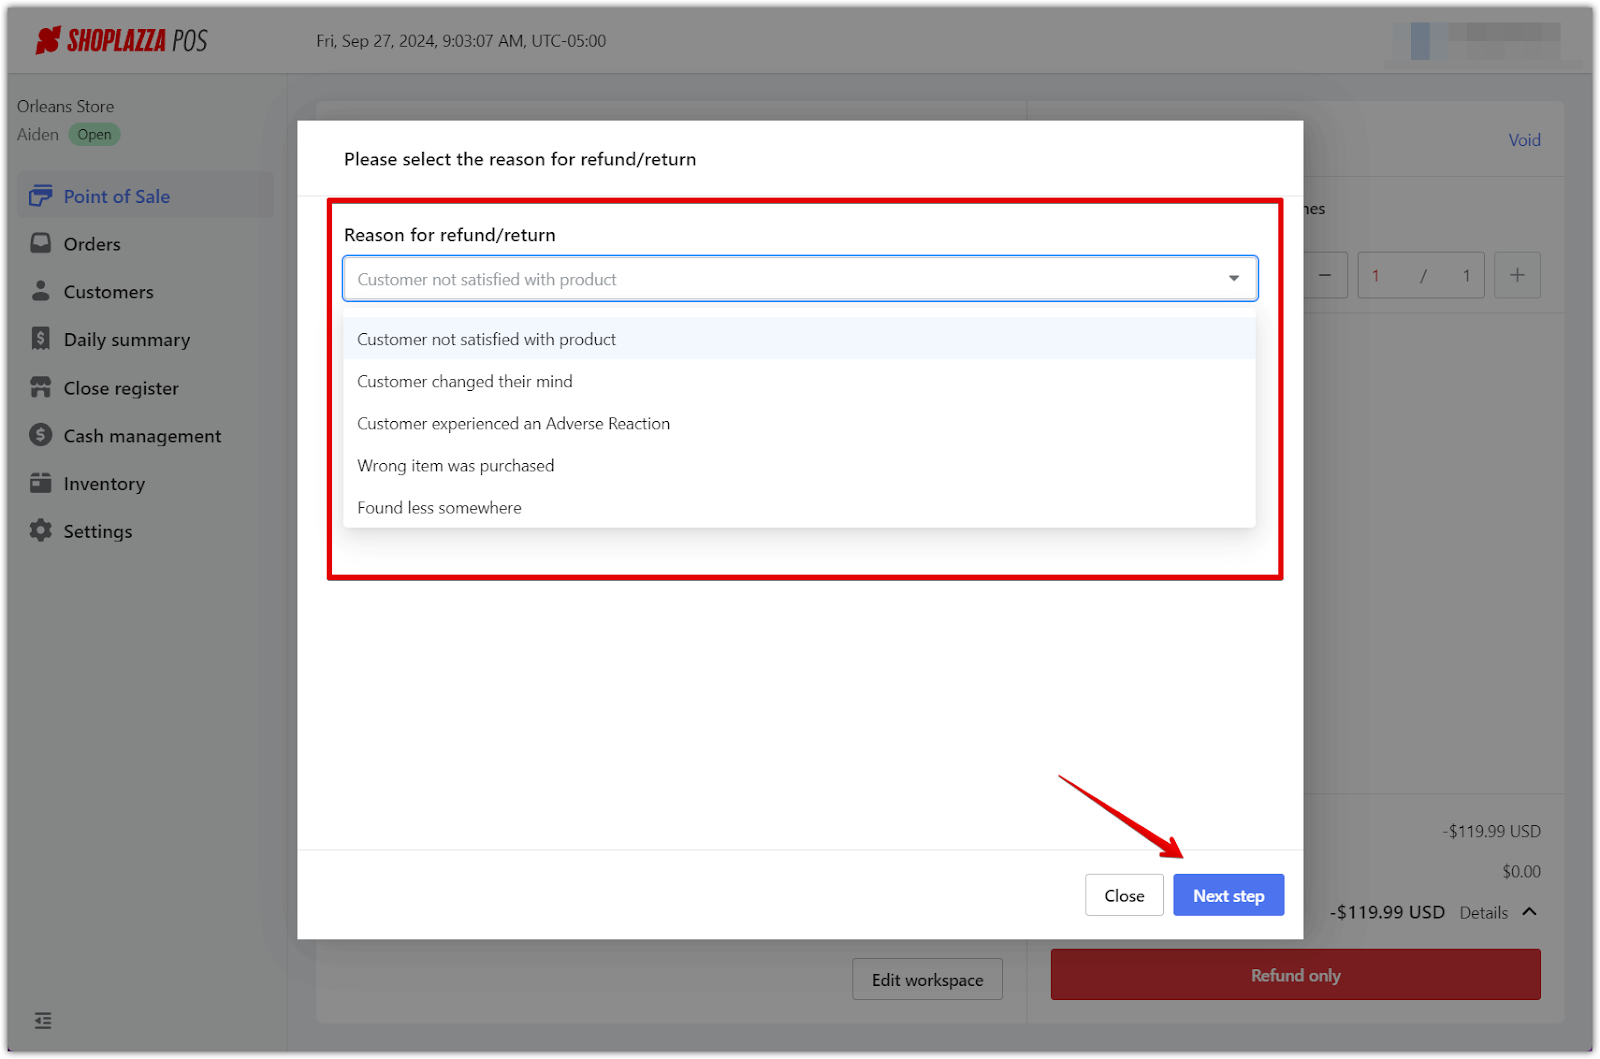
4. Select refund reason: After confirming the item for refund, select a reason for the refund from the dropdown list and click Next step.
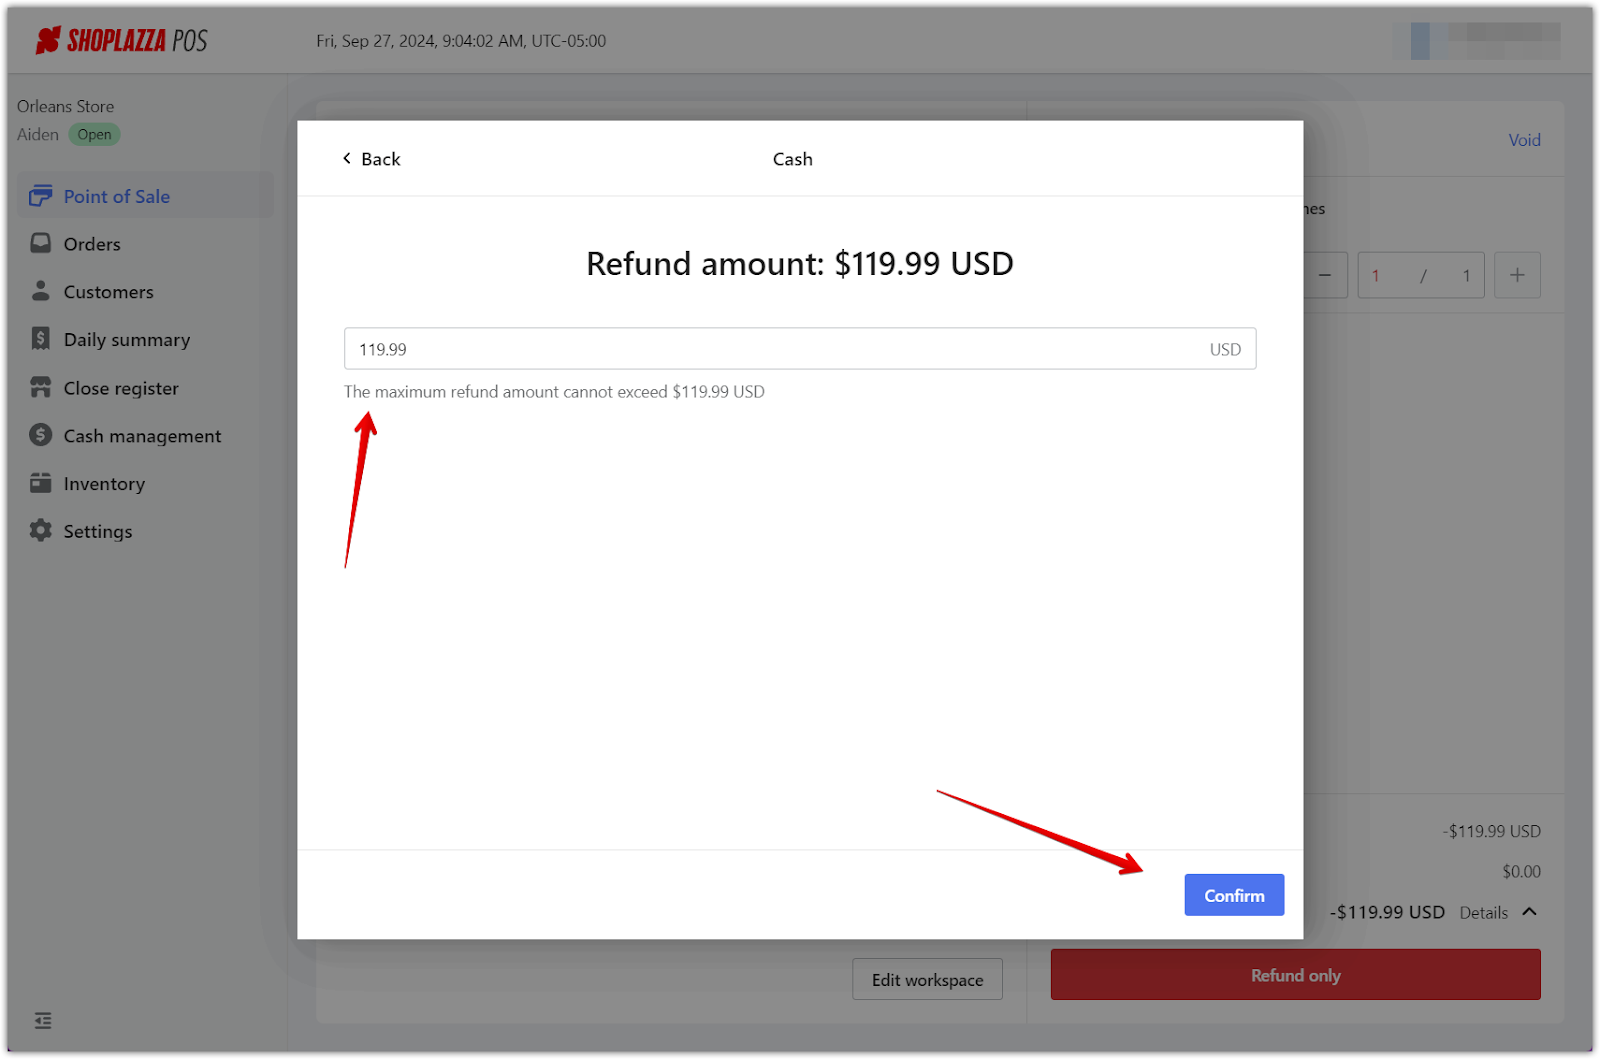
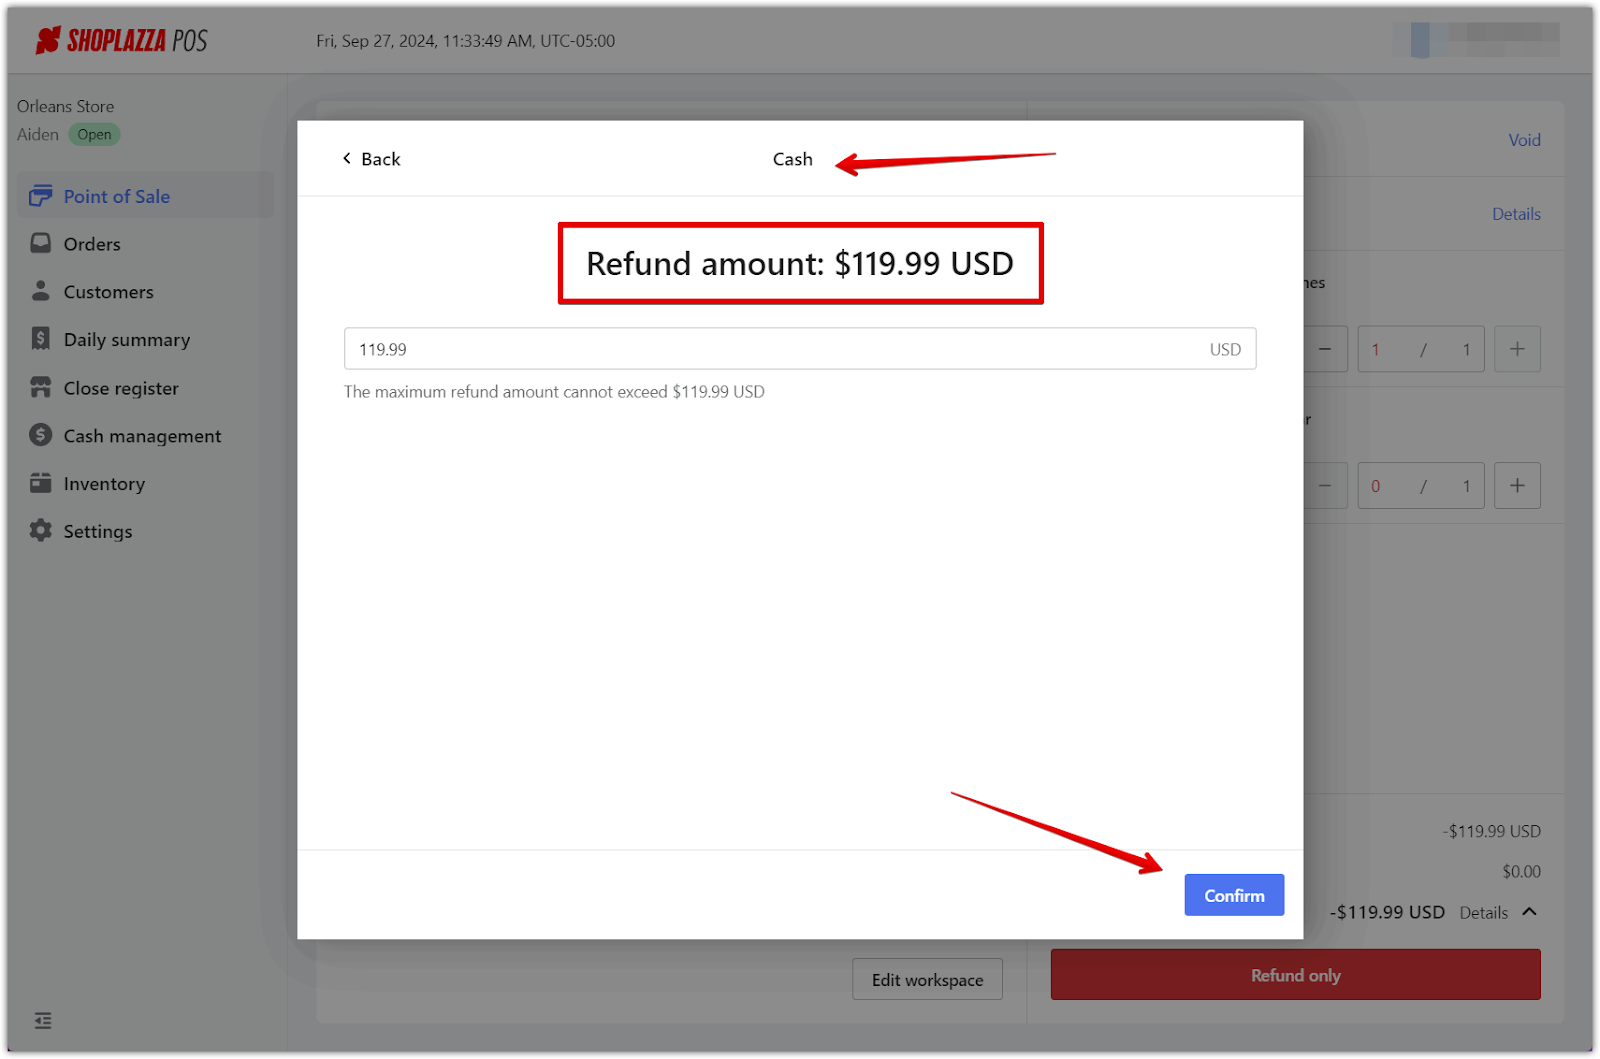
5. Review refund details: The system will show the total refund amount, which cannot exceed the purchase price. Click Confirm to finalize the refund. The amount will be refunded through the original payment method, and a receipt will be printed for your records.
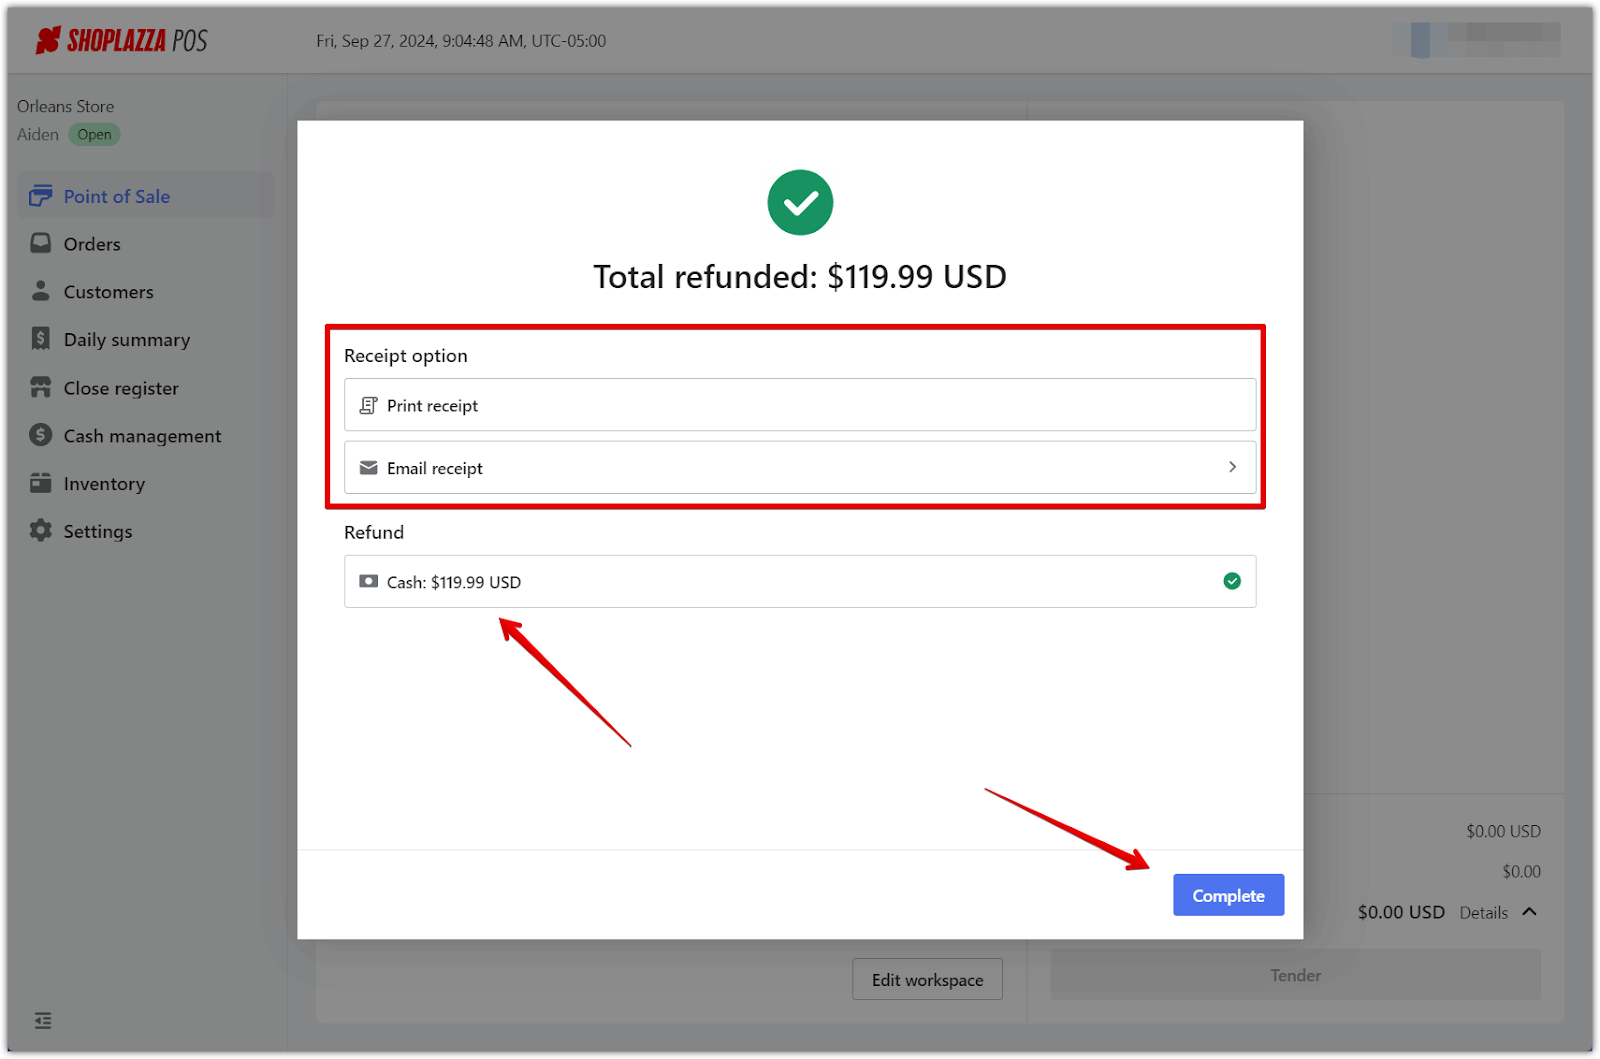
6. Complete refund: Choose whether to Print or Email the receipt to the customer. Once confirmed, the system will refund the original payment method. Click Complete to finish the refund process.
Return and refund (item goes back to inventory)
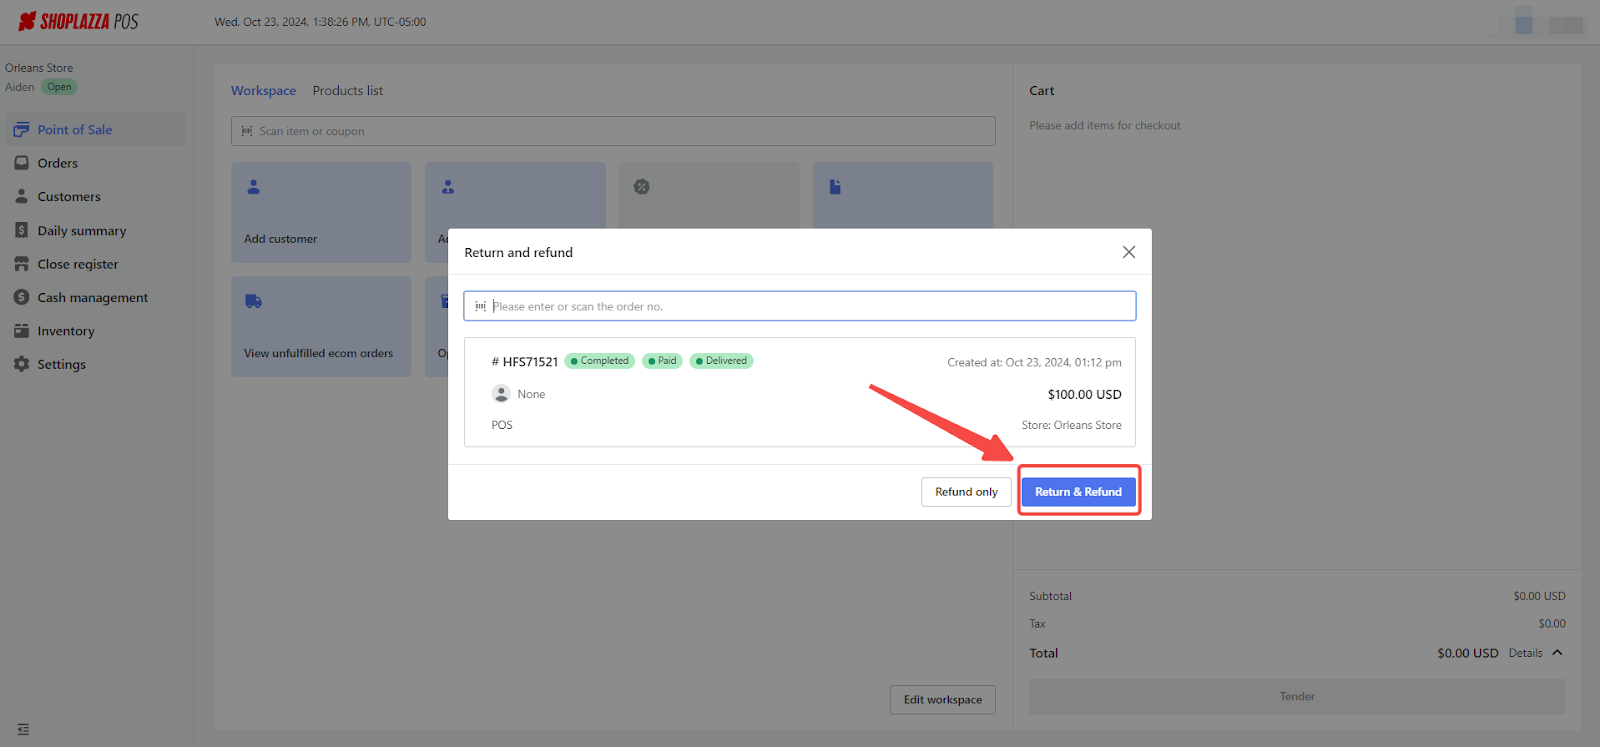
The process for Return & Refund is the same as the steps for Refund only, with one key difference: instead of selecting Refund only, select Return & Refund. This ensures that the item is returned to inventory after the transaction is complete while the refund is processed in the same way.
Refunds and returns from the Orders section
In addition to performing refunds and returns from the Point of Sale screen, you can also process these tasks by loading an order from the Orders section in your Shoplazza POS admin.
Refund without returning the item (Refund only)
1. Navigate to Orders: Go to the Orders section in your Shoplazza POS admin. Search for the relevant order by entering the order number or customer name.
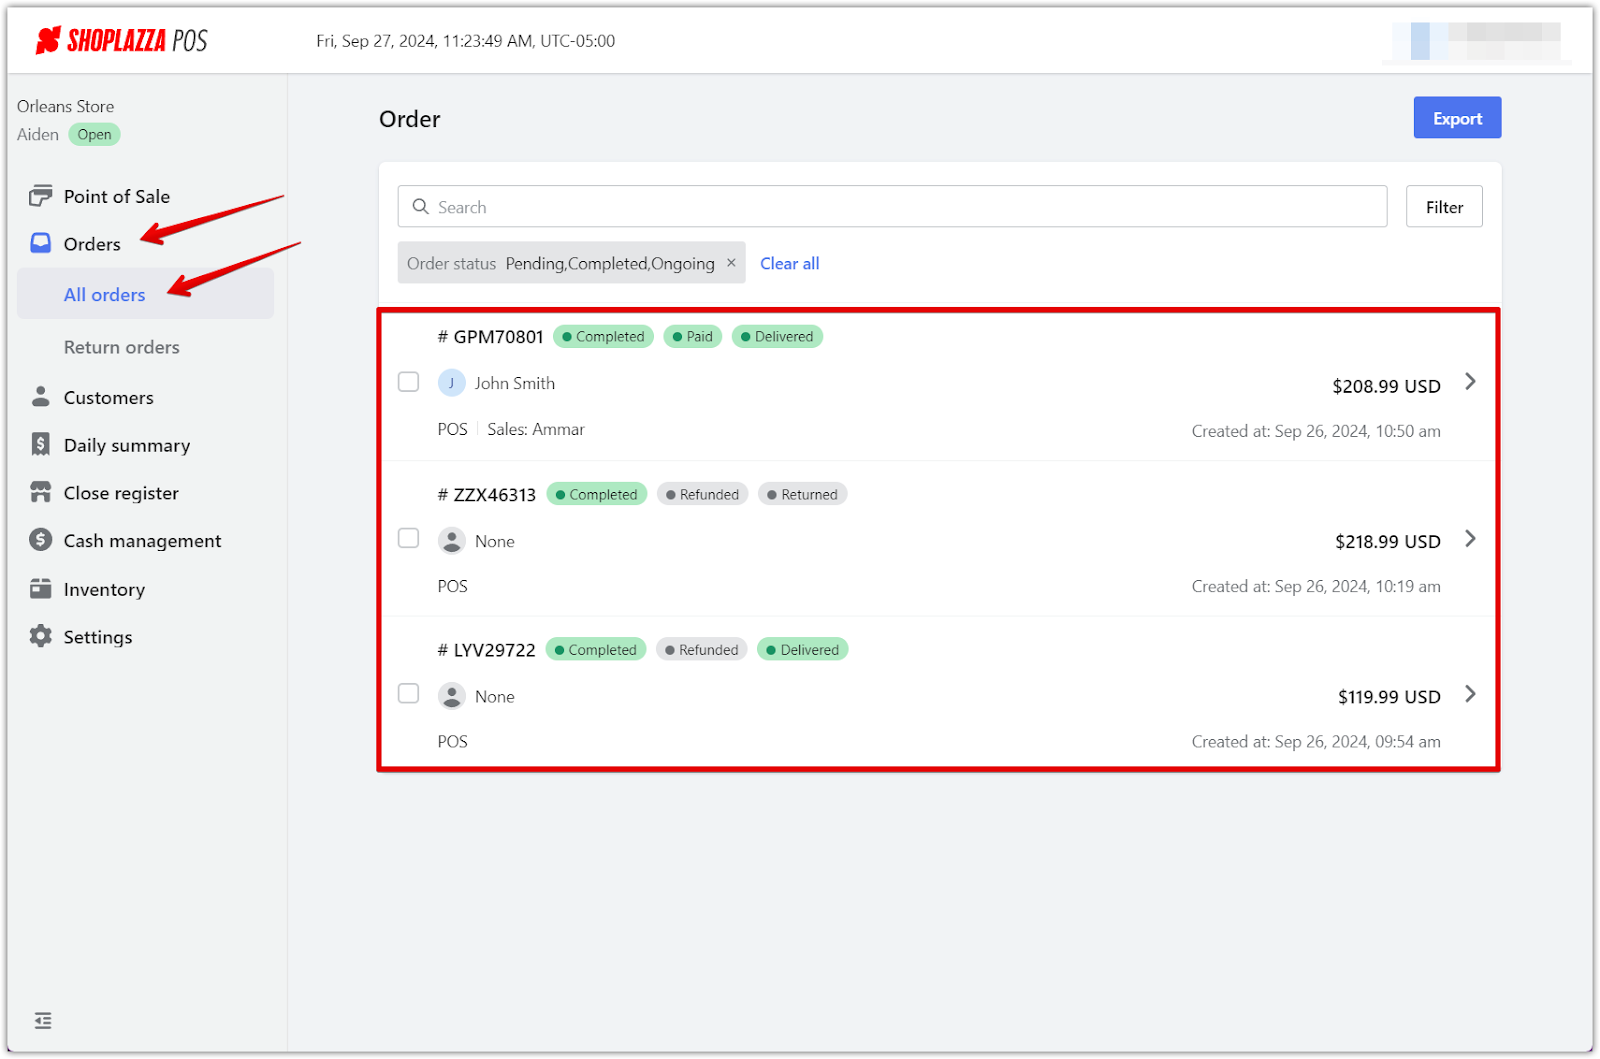
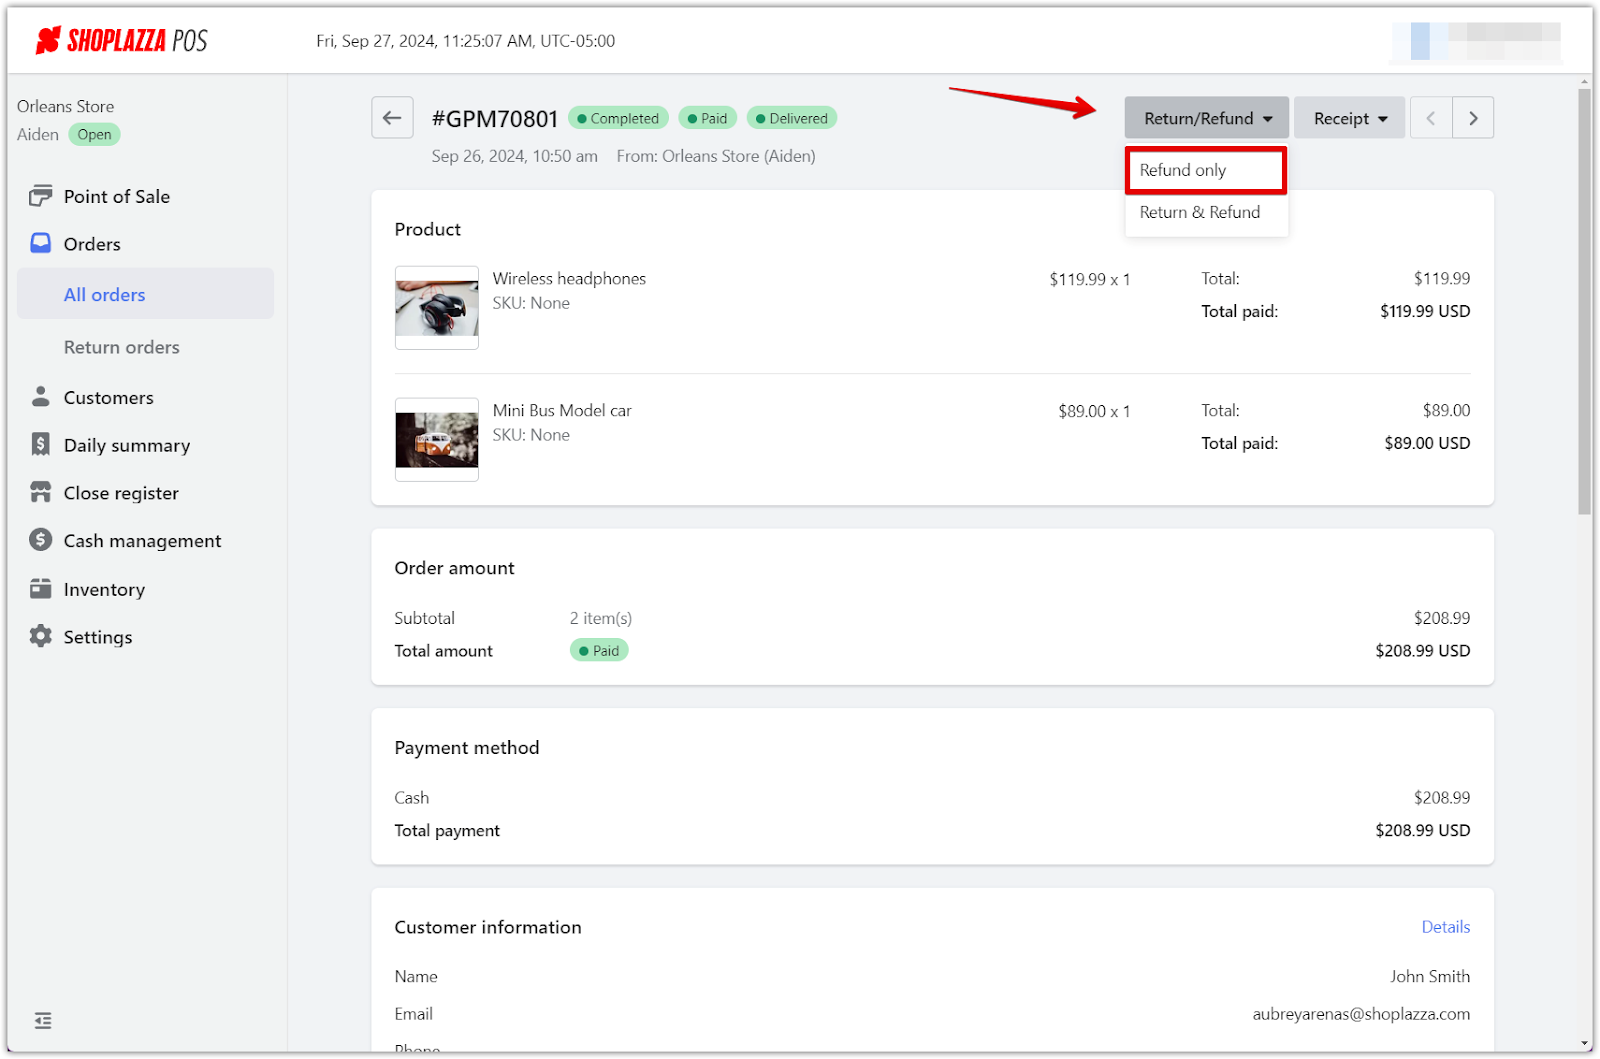
2. Select Return/Refund: Once you’ve located the order, click Return/Refund. From the dropdown menu, select Refund only to refund the purchase without returning the item.
3. Add product to refund: The products will be added to the Cart for refund. Adjust the quantities if needed and click Refund only to continue.
4. Select refund reason: Choose the reason for the refund from the dropdown list and click Next step.

5. Review refund details: Confirm the refund amount and payment method. Click Confirm to process the refund. The refund will be provided in the original form of payment, and a receipt will be automatically printed for your records.
6. Complete refund: Choose whether to Print or Email the receipt to the customer. Click Complete to finalize the process.

Return and refund (item goes back to inventory)
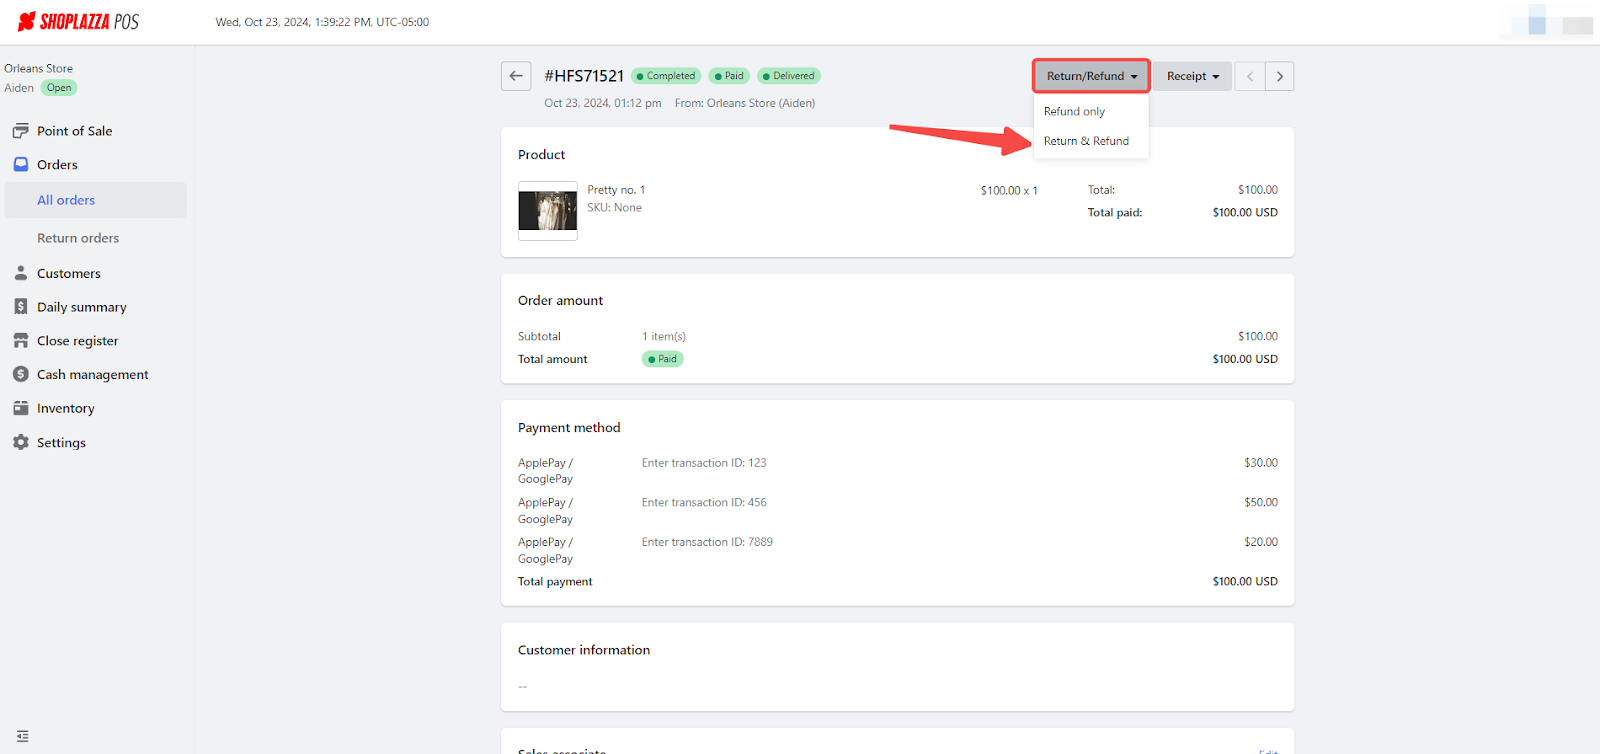
The process for Return & Refund in the Orders section is the same as Refund only, except you will select Return & Refund from the dropdown menu. This ensures the item is returned to inventory while the refund is processed.
In conclusion, by following these straightforward steps, you can efficiently manage after-sales services like returns, refunds, and exchanges. This ensures not only your customers' satisfaction but also your business's smooth operation. Remember to keep your workflow organized and customer-centric to maintain a positive shopping experience.


Comments
Please sign in to leave a comment.