This article will walk you through different methods of adding customer profiles, both during and outside of transactions. We’ll cover how to add profiles directly from the checkout page when processing a sale, as well as how to add profiles without a transaction. Following these steps helps you organize your customer information, supporting a more personalized shopping experience and future sales efforts.
Adding a customer profile during a transaction
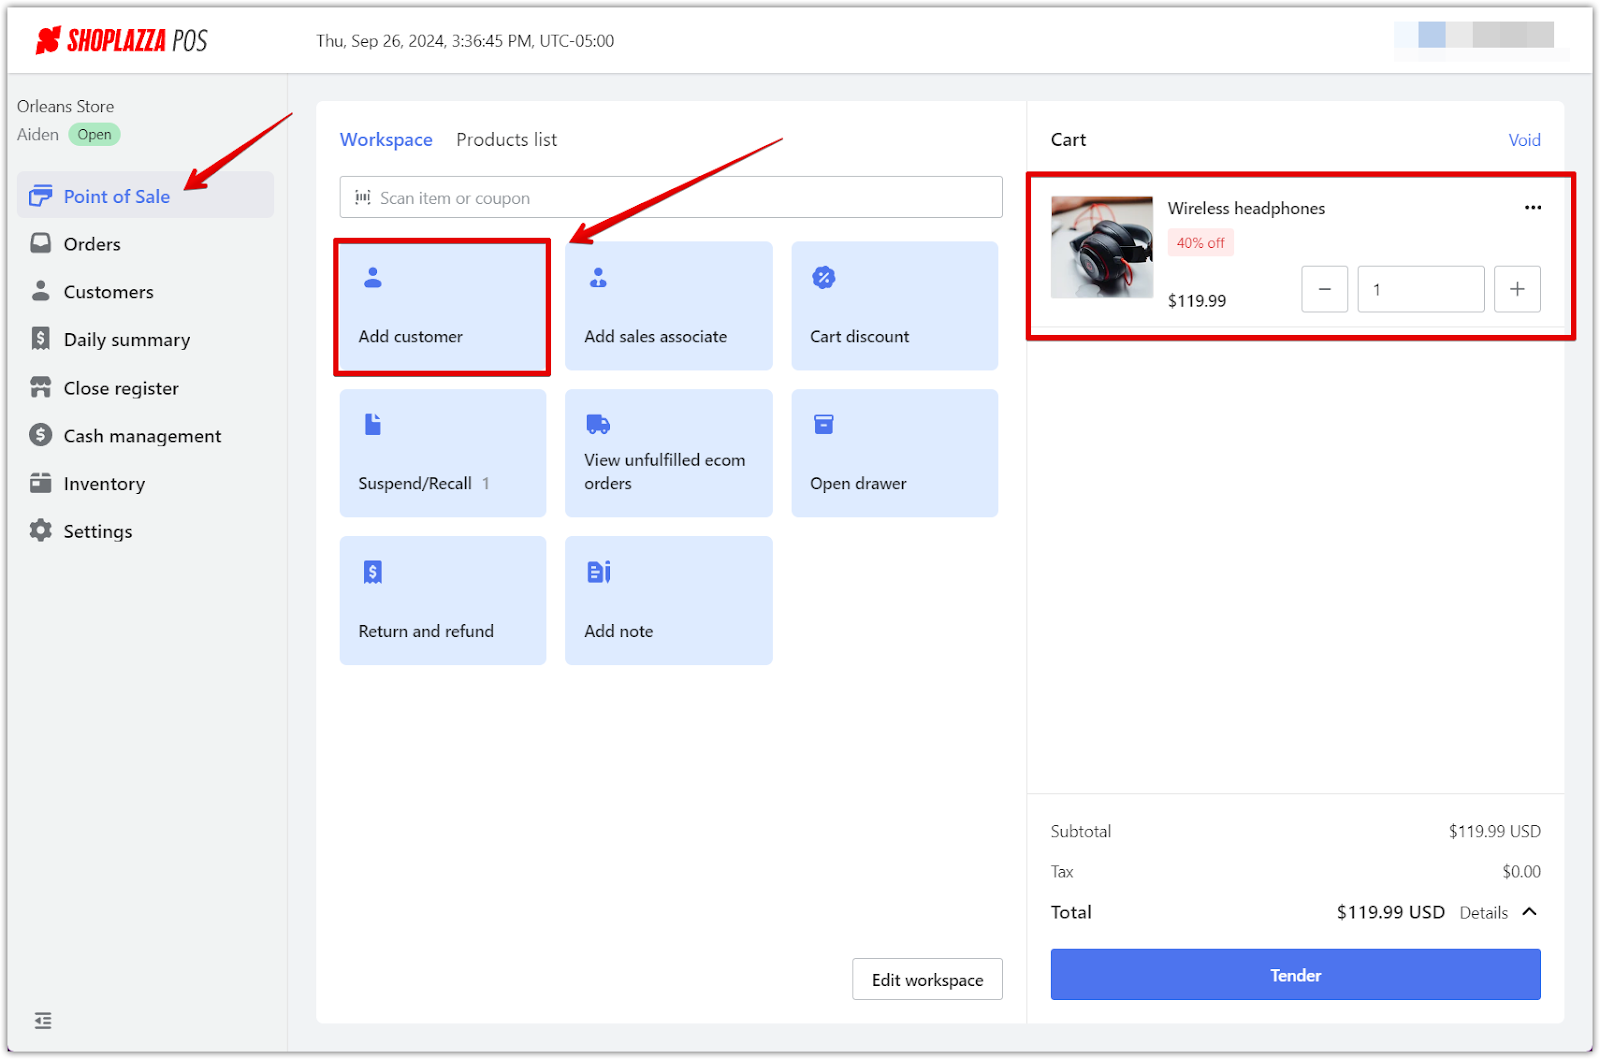
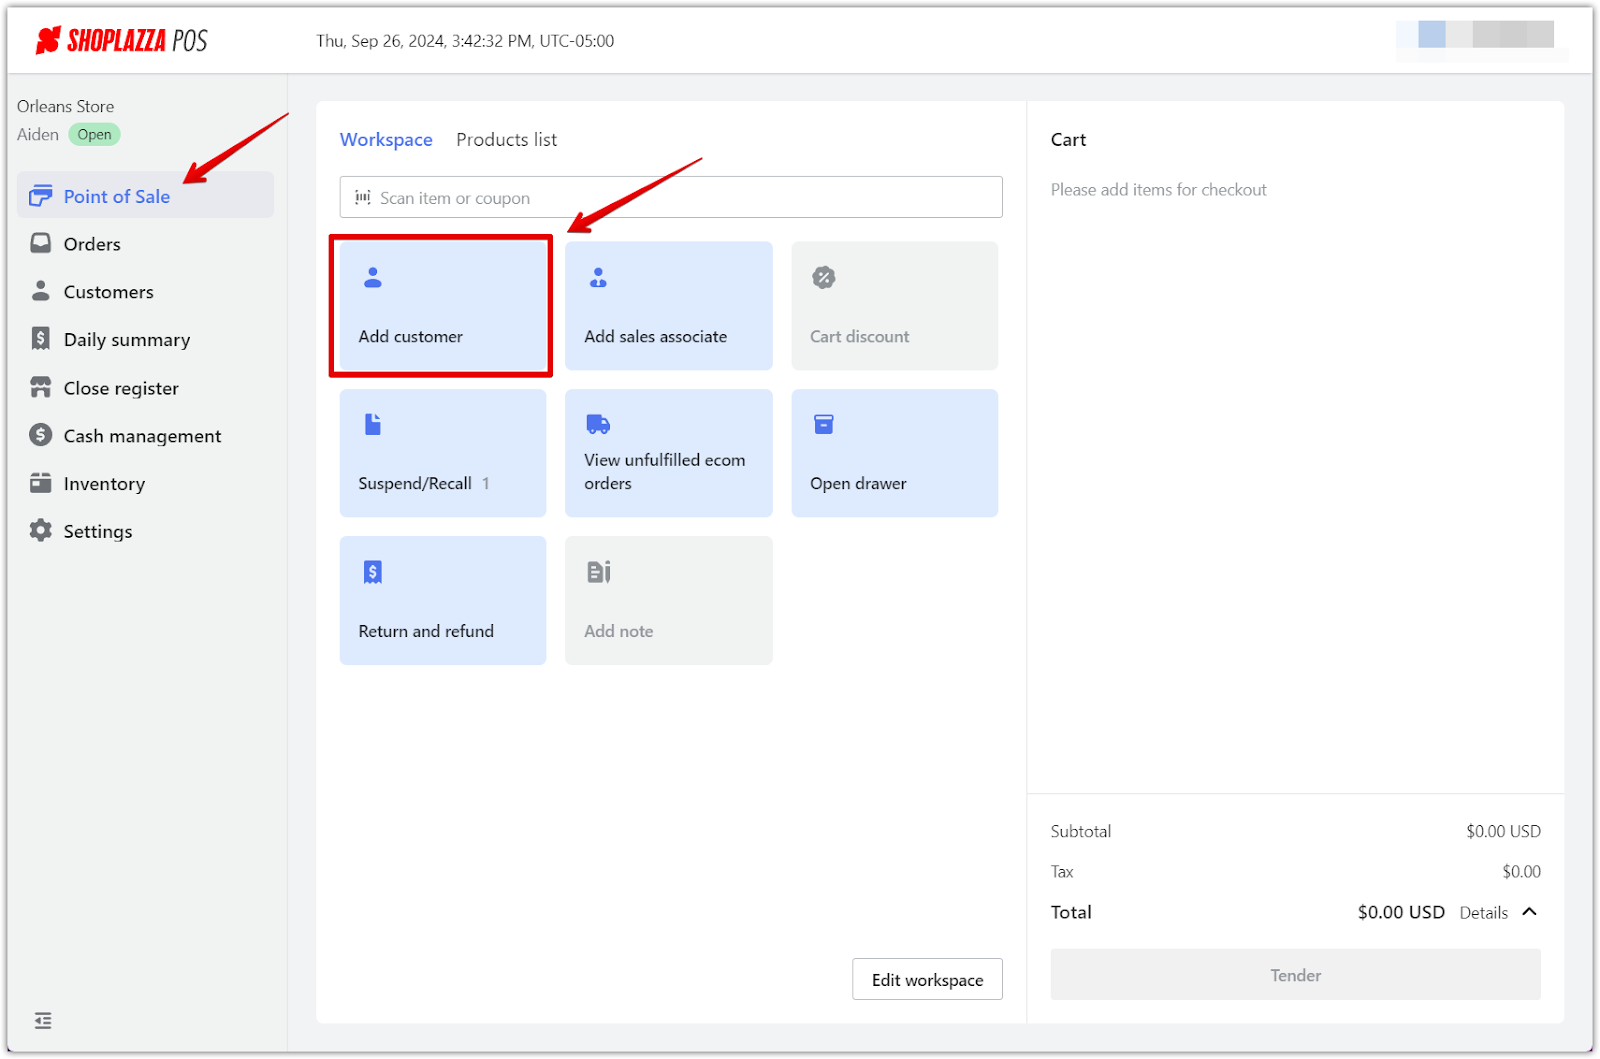
1. Navigate to the checkout page: When you have items ready for a transaction, go back to the Point of Sale and select the Workspace tab. In the Workspace, click on Add customer to begin adding the customer profile.
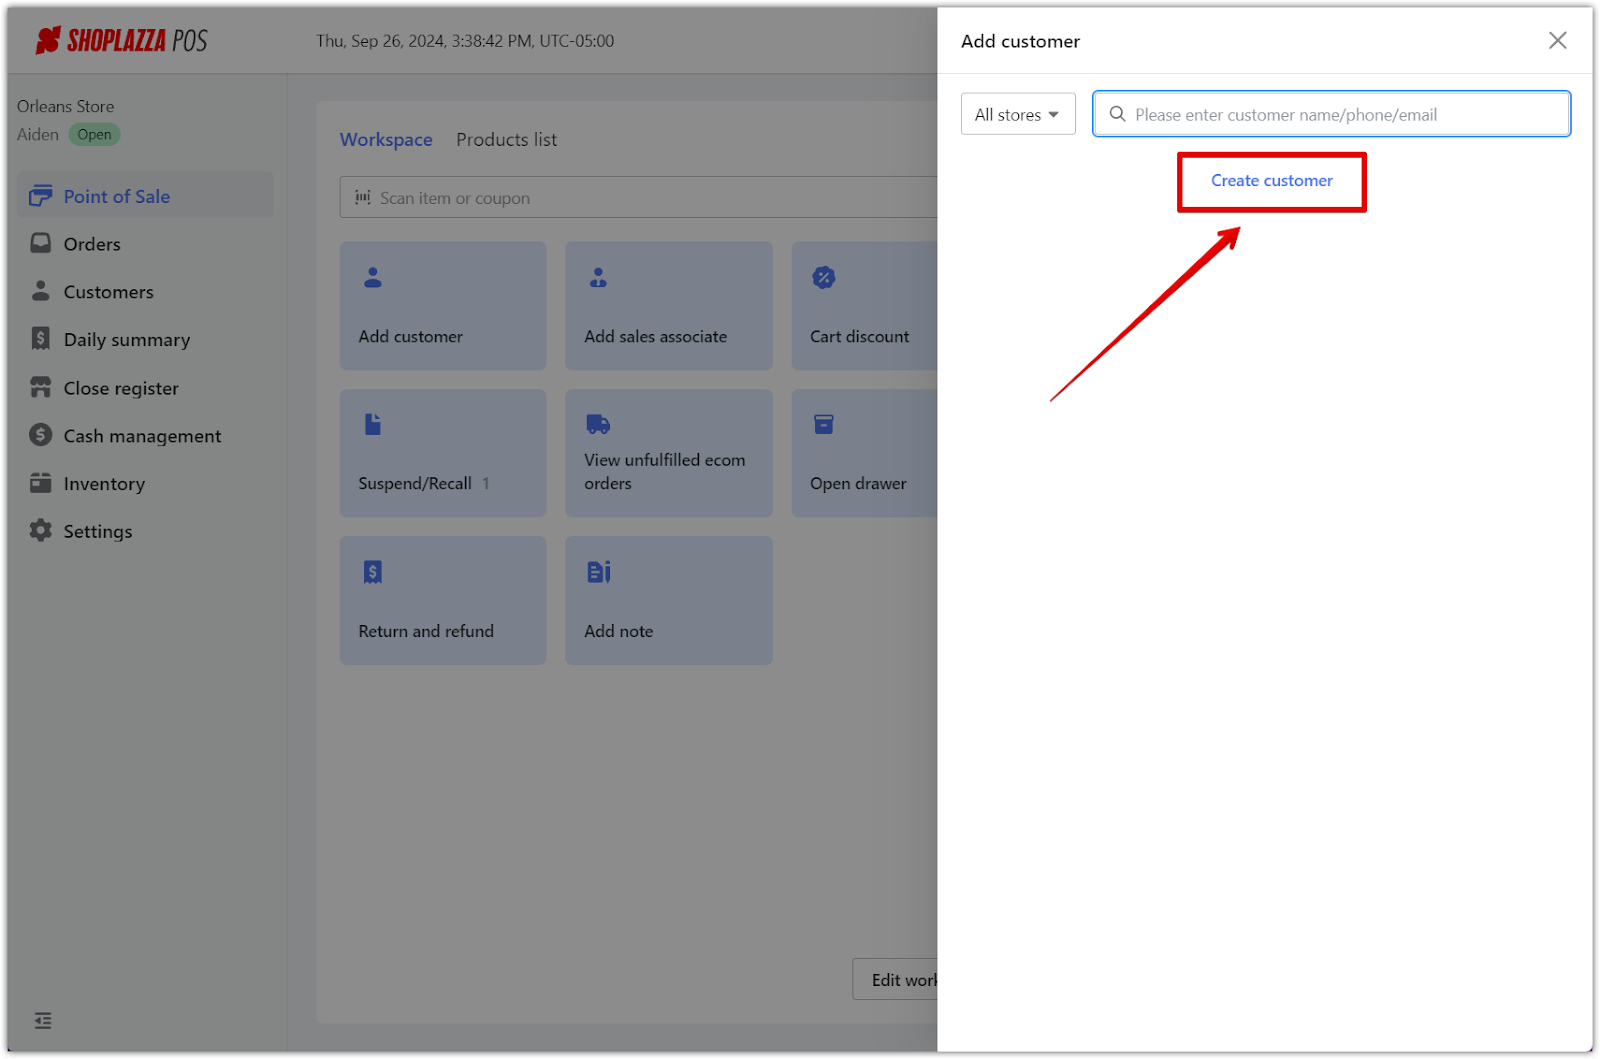
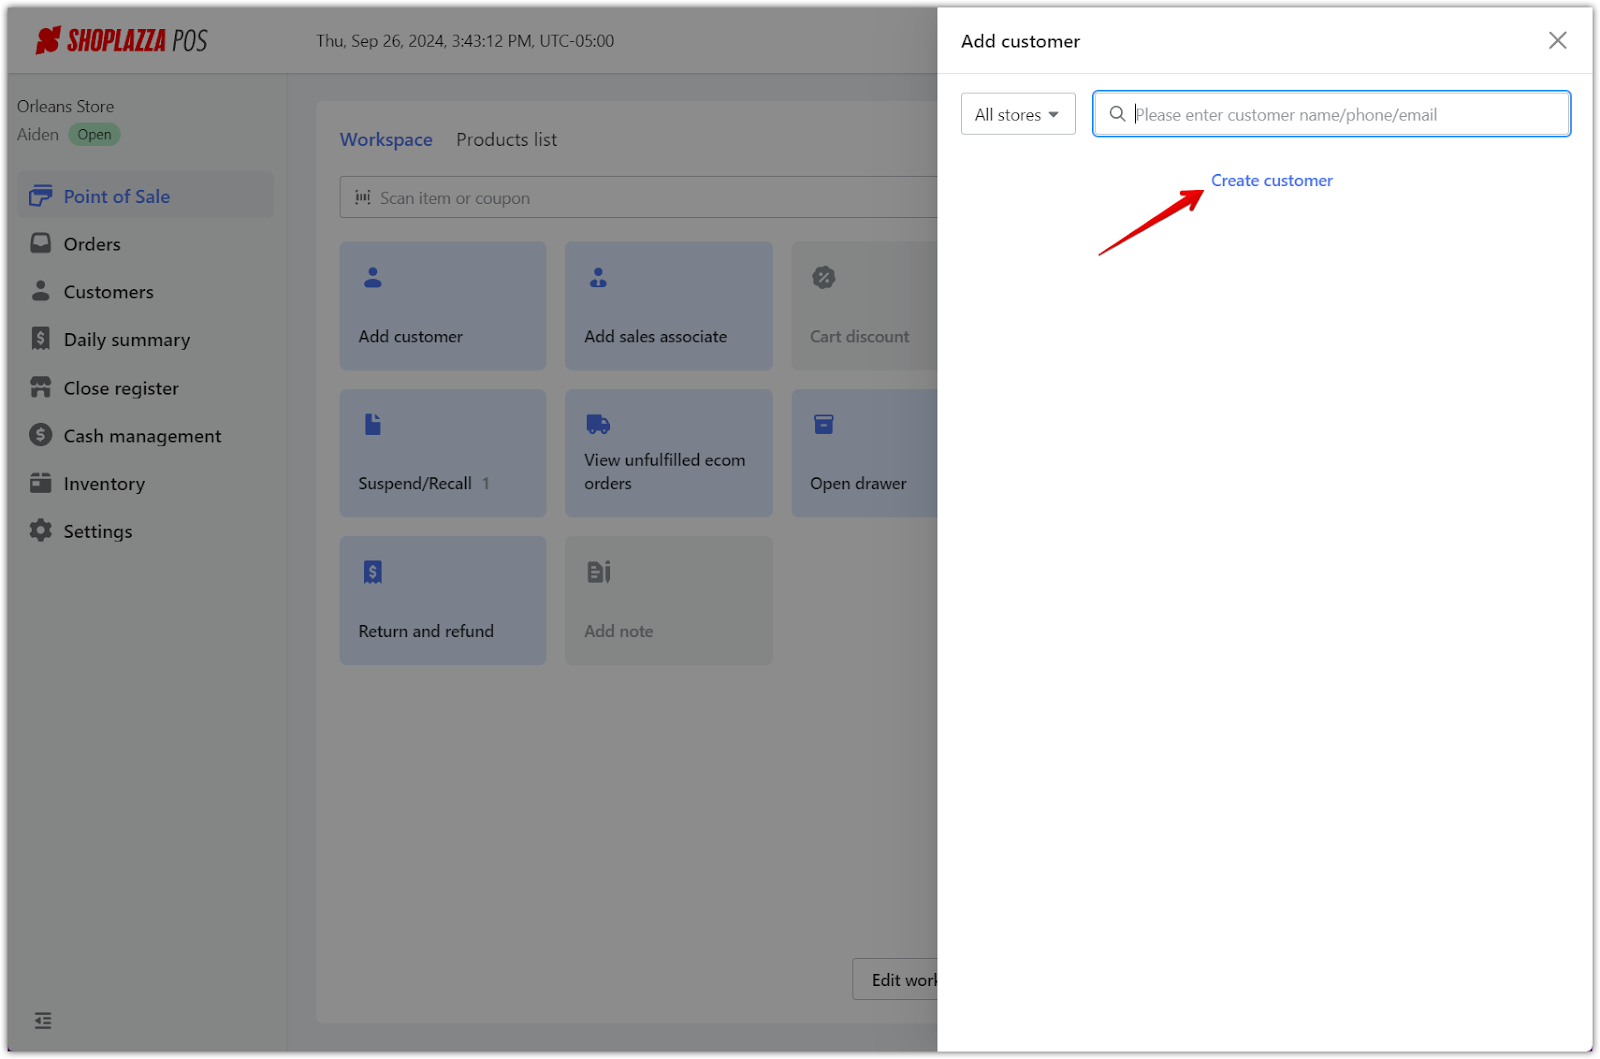
2. Start adding customer details: A window will slide in from the right after selecting Add customer. Click on Create customer to open a pop-up where you can enter the customer’s details.
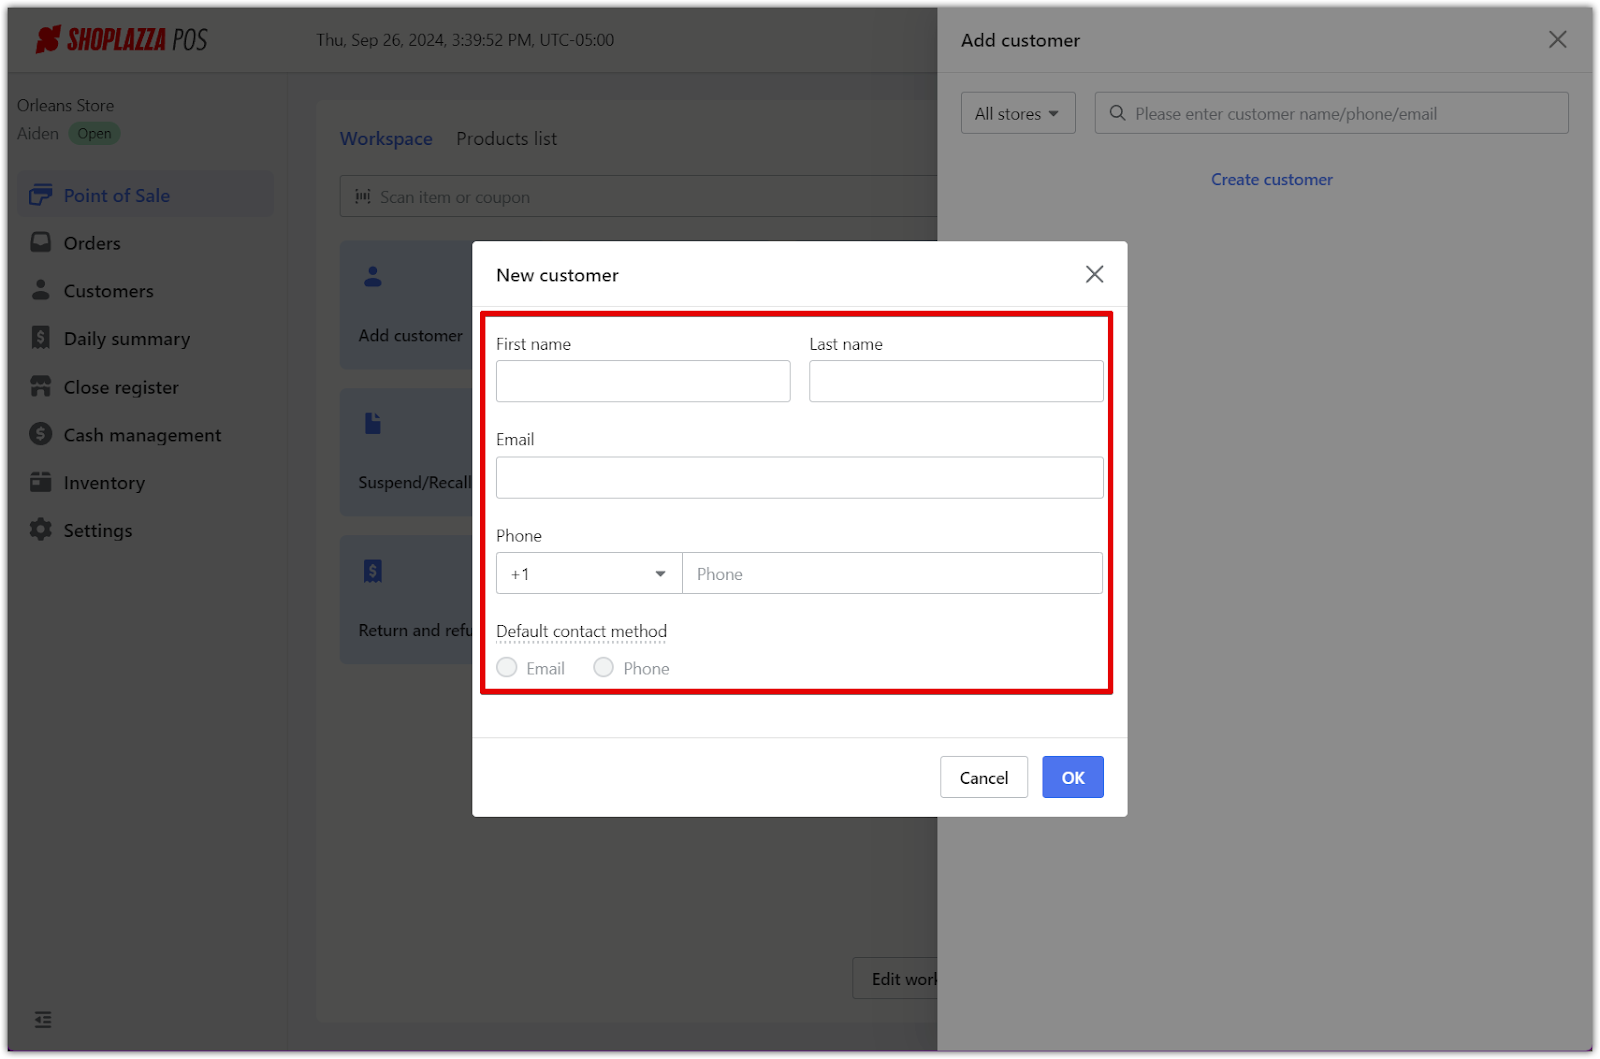
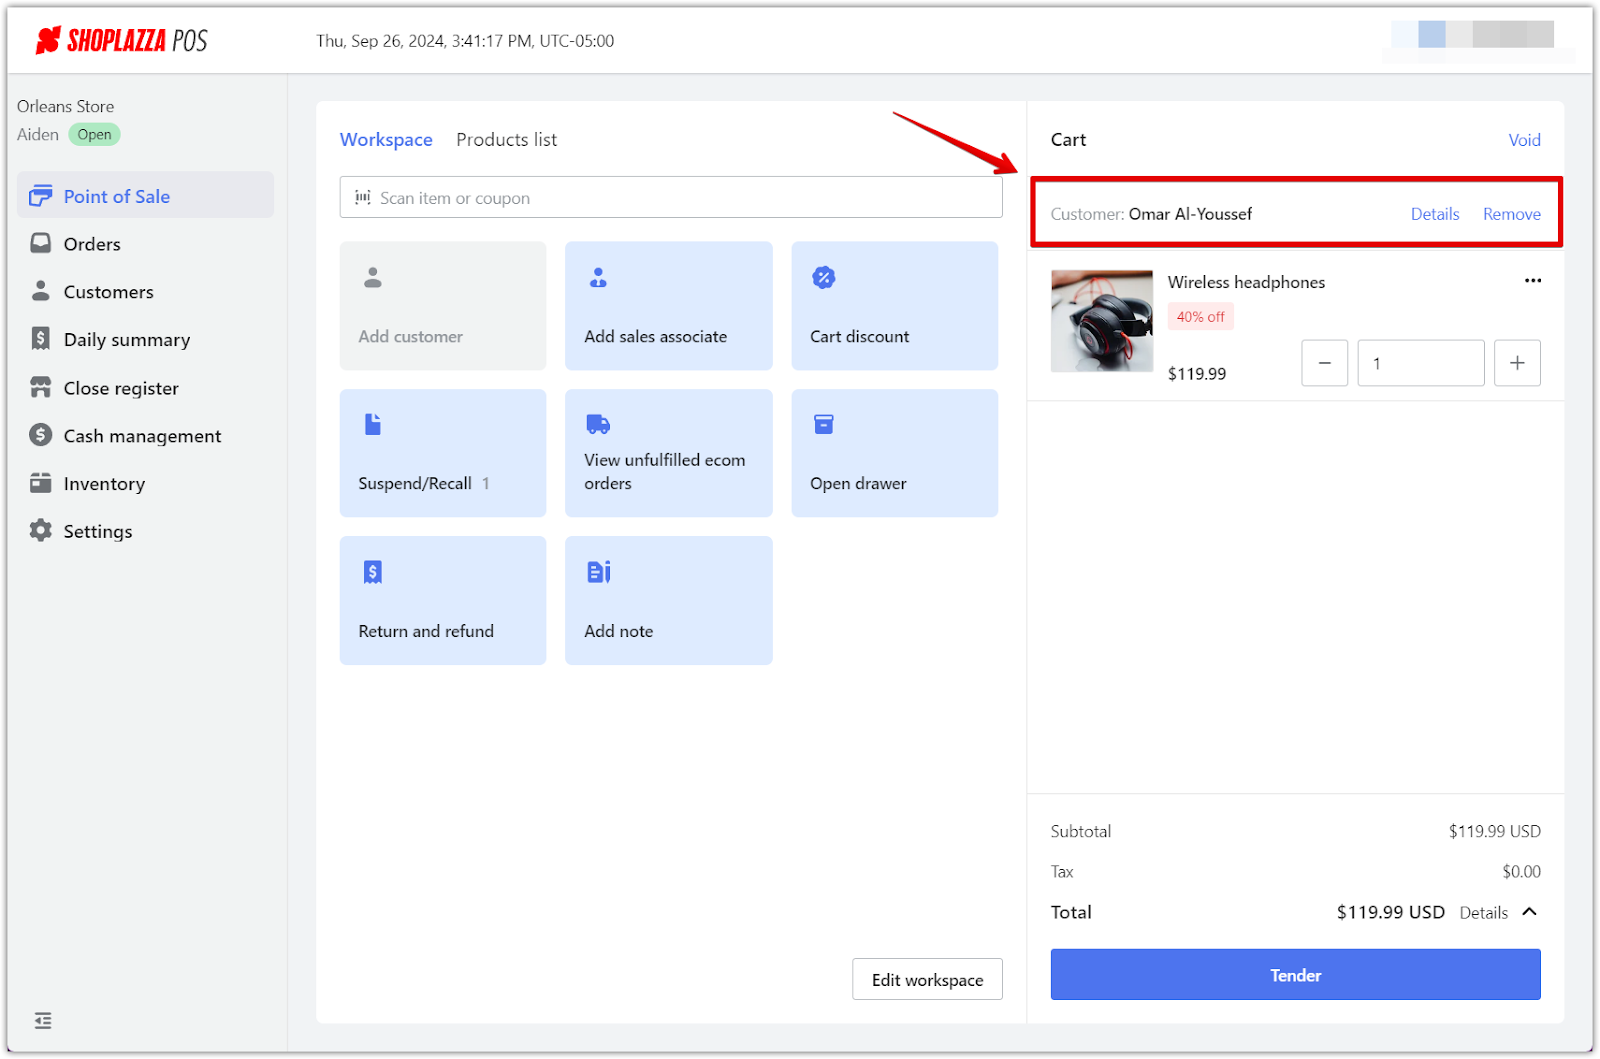
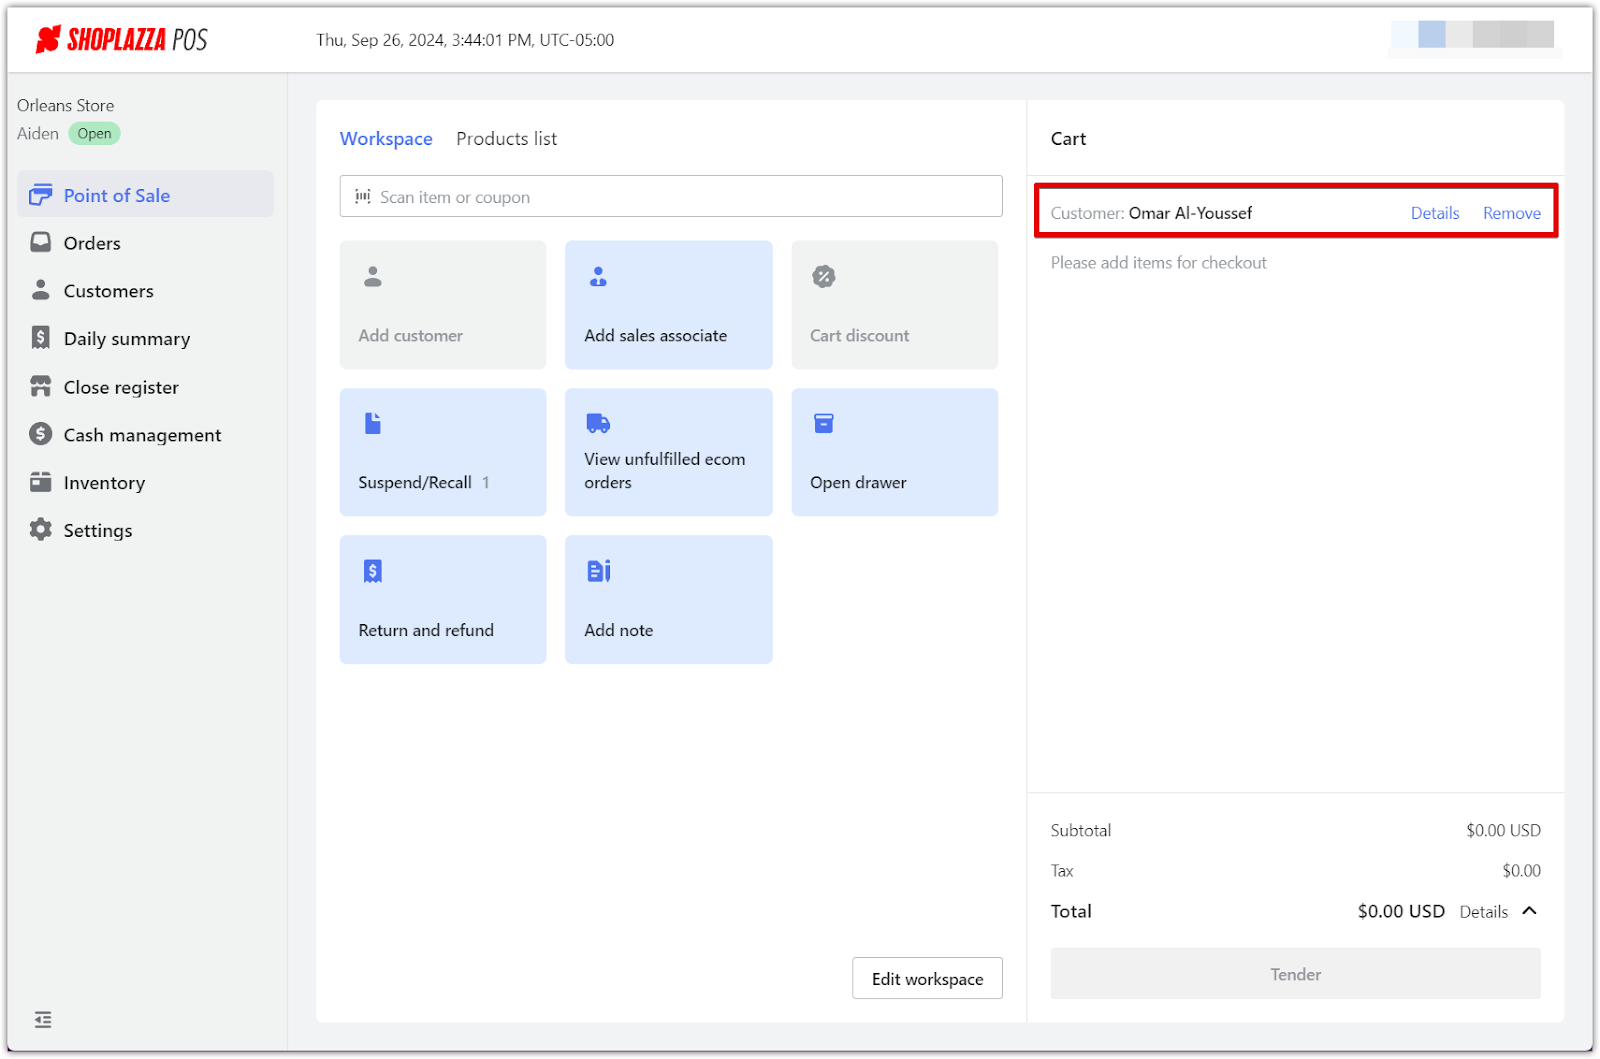
3. Enter customer details and complete the transaction: Fill in the necessary information in the pop-up, starting with the customer's name, email address, or phone number. After entering the details, click OK to save the profile. This action automatically adds the customer to the current transaction, ensuring a seamless integration of sales and customer management.
Creating a customer profile without a transaction
Adding customer profiles without a transaction is a proactive way to manage information, allowing you to build a customer database for future sales or administrative purposes. Here's how to add customer profiles outside of a sale:
1. Access the checkout page without a transaction: If you're not processing a sale but still want to add a customer profile, go to the Point of Sale and select the Workspace tab. In the Workspace, click on Add customer without selecting any items for purchase.
2. Set up a customer profile: As before, a window will slide in from the right. Click on Create customer to open a pop-up where you can enter the customer’s information.
3. Enter customer details: Fill in the necessary information in the pop-up, starting with the customer's name, email address, or phone number. After entering the details, click OK to save the profile. The customer will be automatically added to the system, even without any products in the cart.

By following these guidelines, you can efficiently manage customer information, enhance the overall shopping experience, and streamline your sales process. Always remember that maintaining organized customer profiles is key to fostering positive relationships and driving future sales.


Comments
Please sign in to leave a comment.