Enhancing the checkout experience involves understanding the step-by-step process of selling products and processing payments through your POS system. Whether you're adding products to the cart or receiving payments, these guidelines ensure a smooth transaction for both staff and customers.
Adding products to the cart
This section covers various ways to add products to a customer's cart, whether by scanning SKUs or using the product list. It ensures that products are quickly and accurately added for a seamless checkout process.
1. Add by SKU or UPC: In the Checkout section, enter or scan the SKU or UPC code of the product you wish to add to the cart.

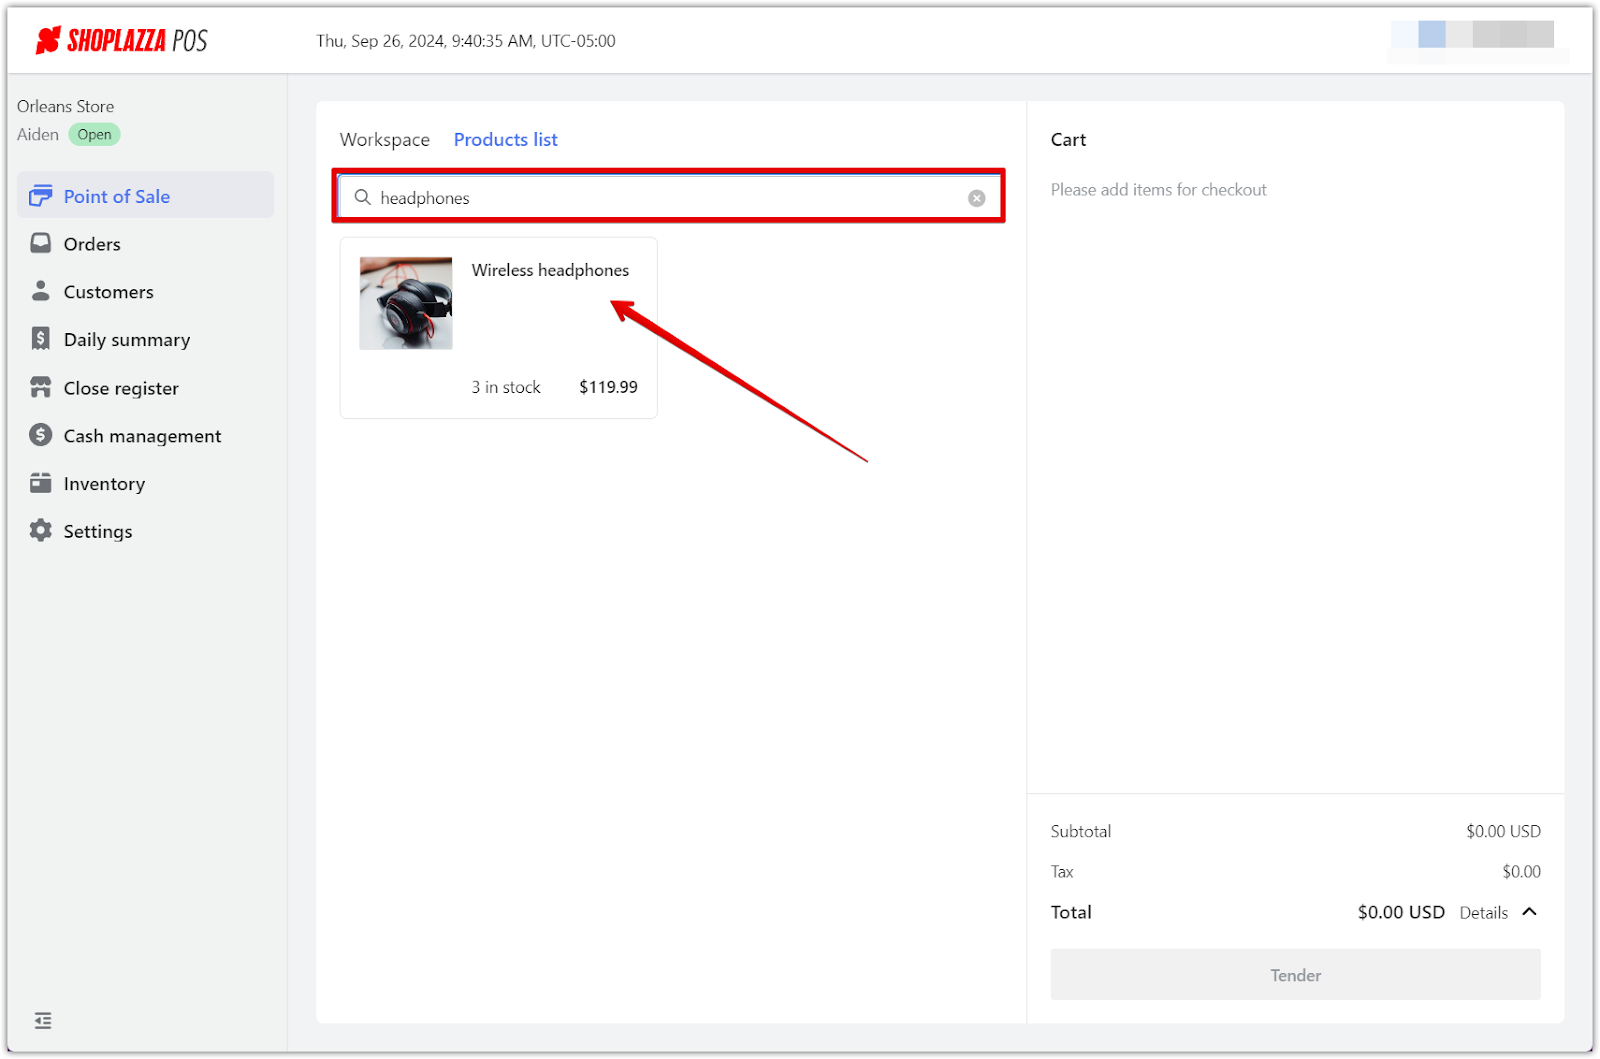
2. Use the Product list tab: To search for a product, select the Products list tab. Enter a search term to find the product.
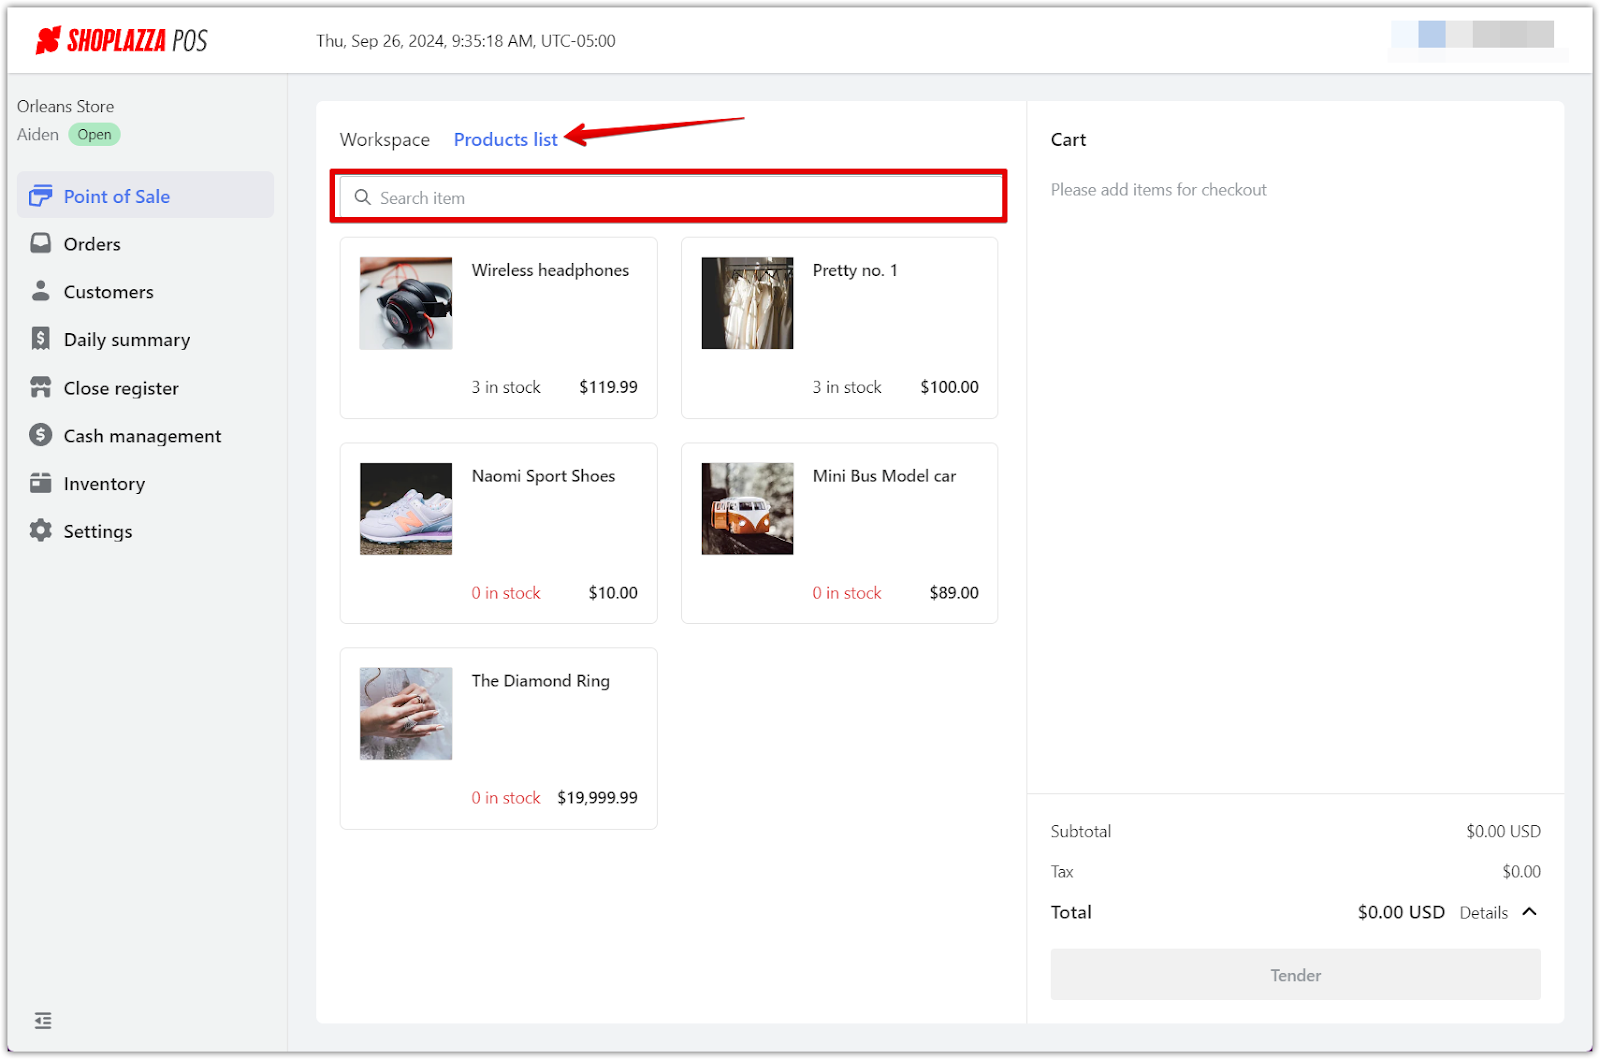
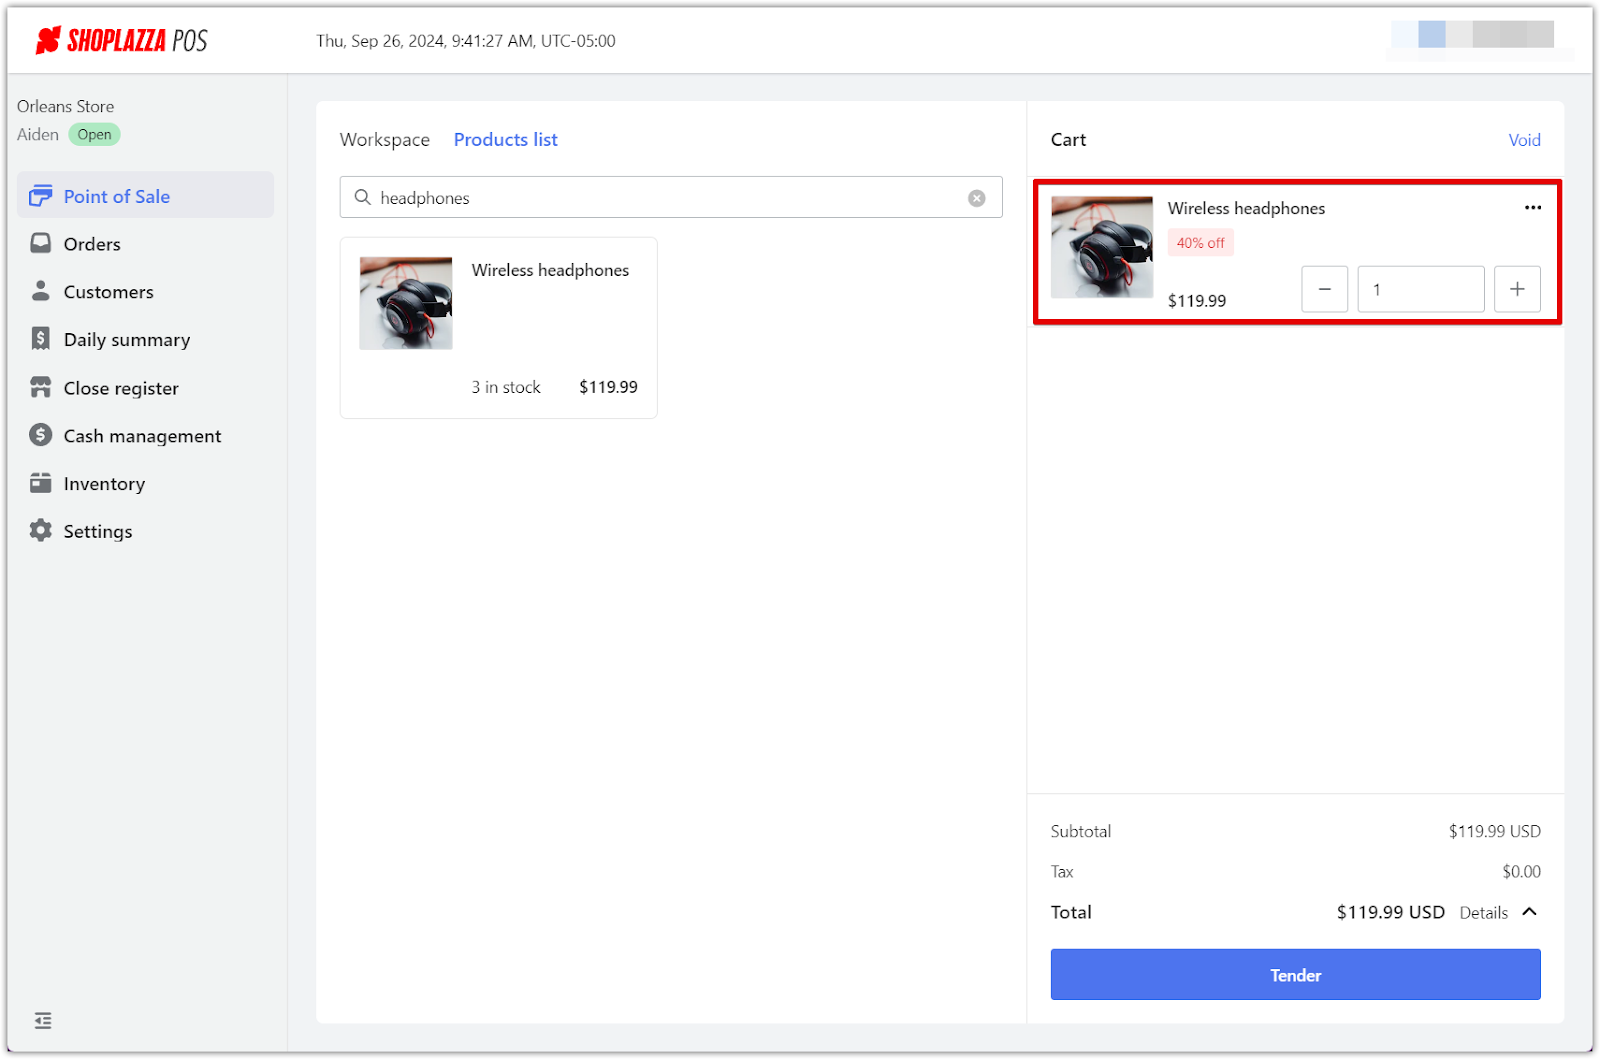
3. Add product to cart: To add a product to the shopping cart, simply click on the product. Add the quantity required. This method provides a visual approach to product selection, enhancing the user experience.
Receiving payments
This section guides you through the steps of receiving payments from customers, detailing how to handle both cash and card transactions. Understanding these options ensures that your checkout process is flexible and meets customer preferences.
For cash payments
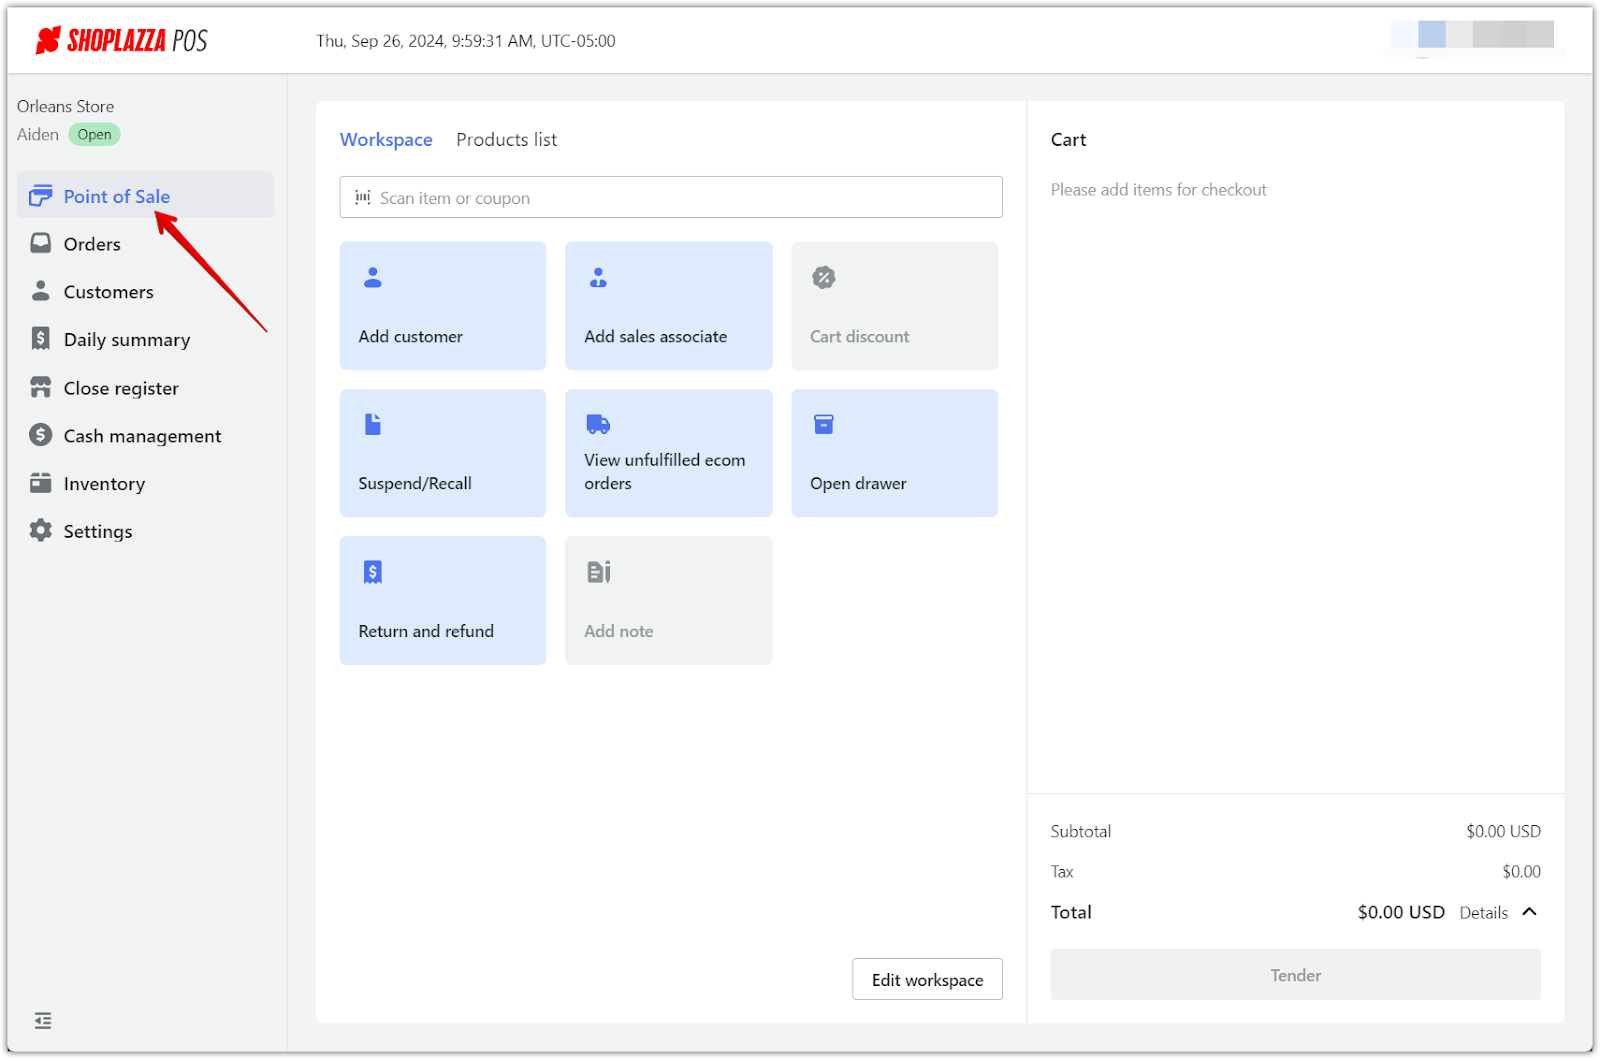
1. Checkout selection: Initiate the transaction by choosing Point of Sale in your POS admin.
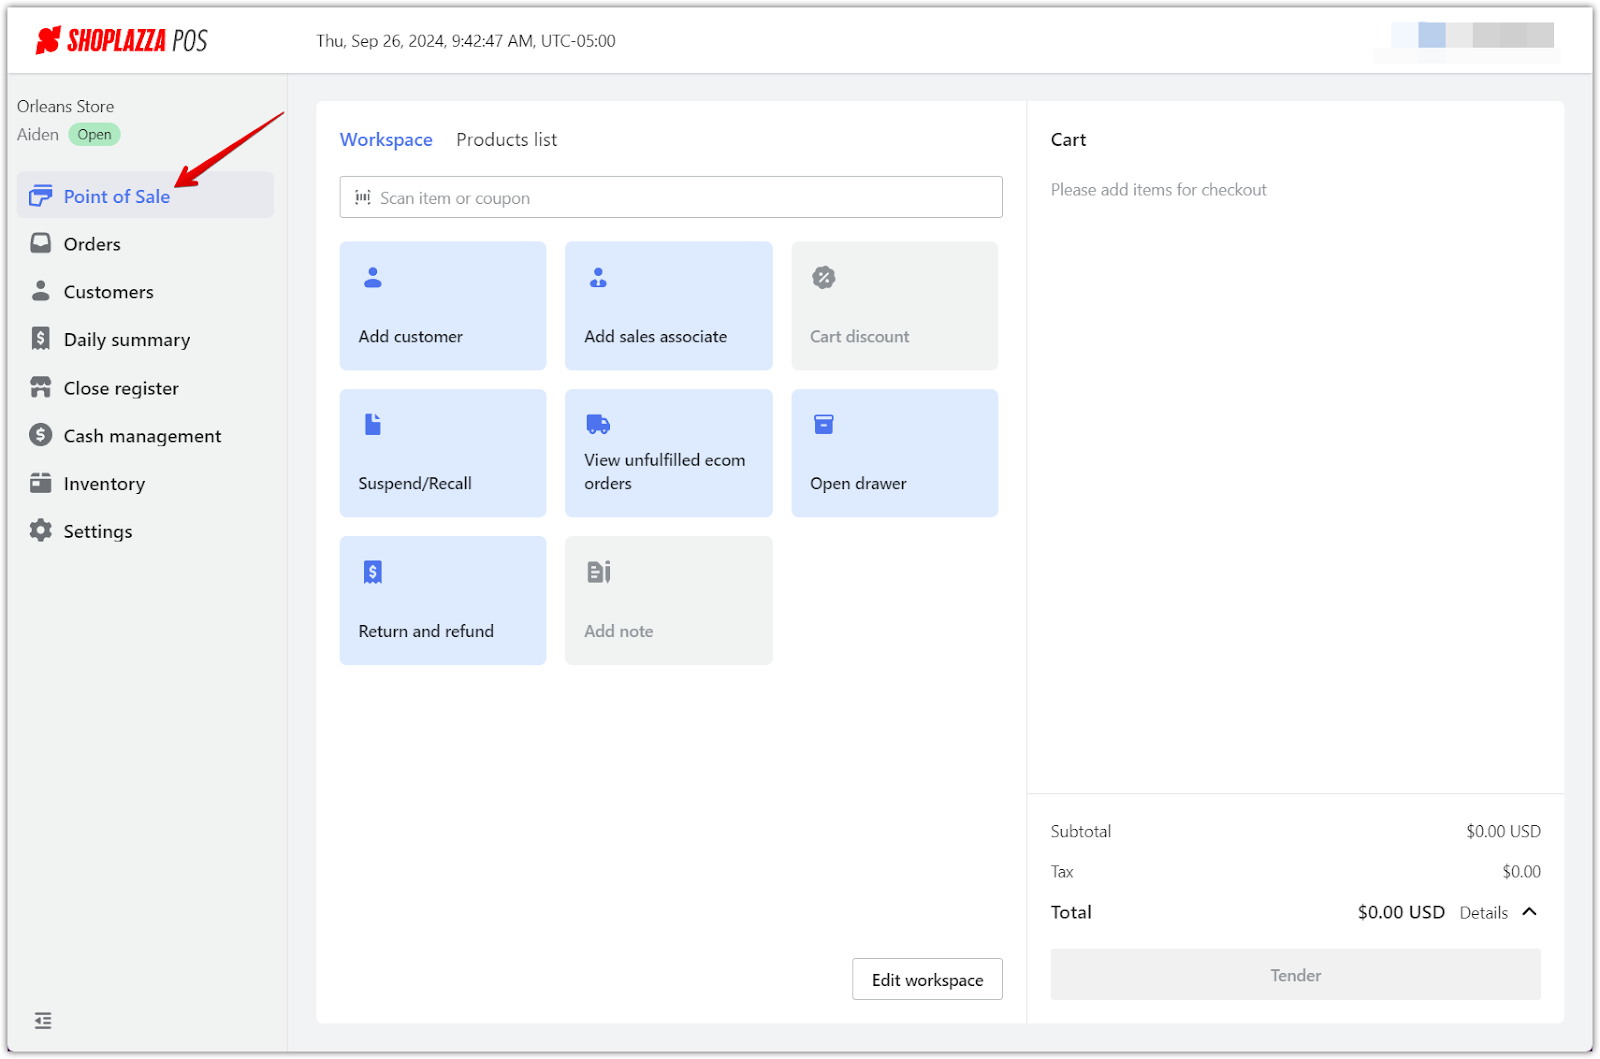
2. Add product and payment tender: Add products to the transaction and select Tender to bring up the payment options.
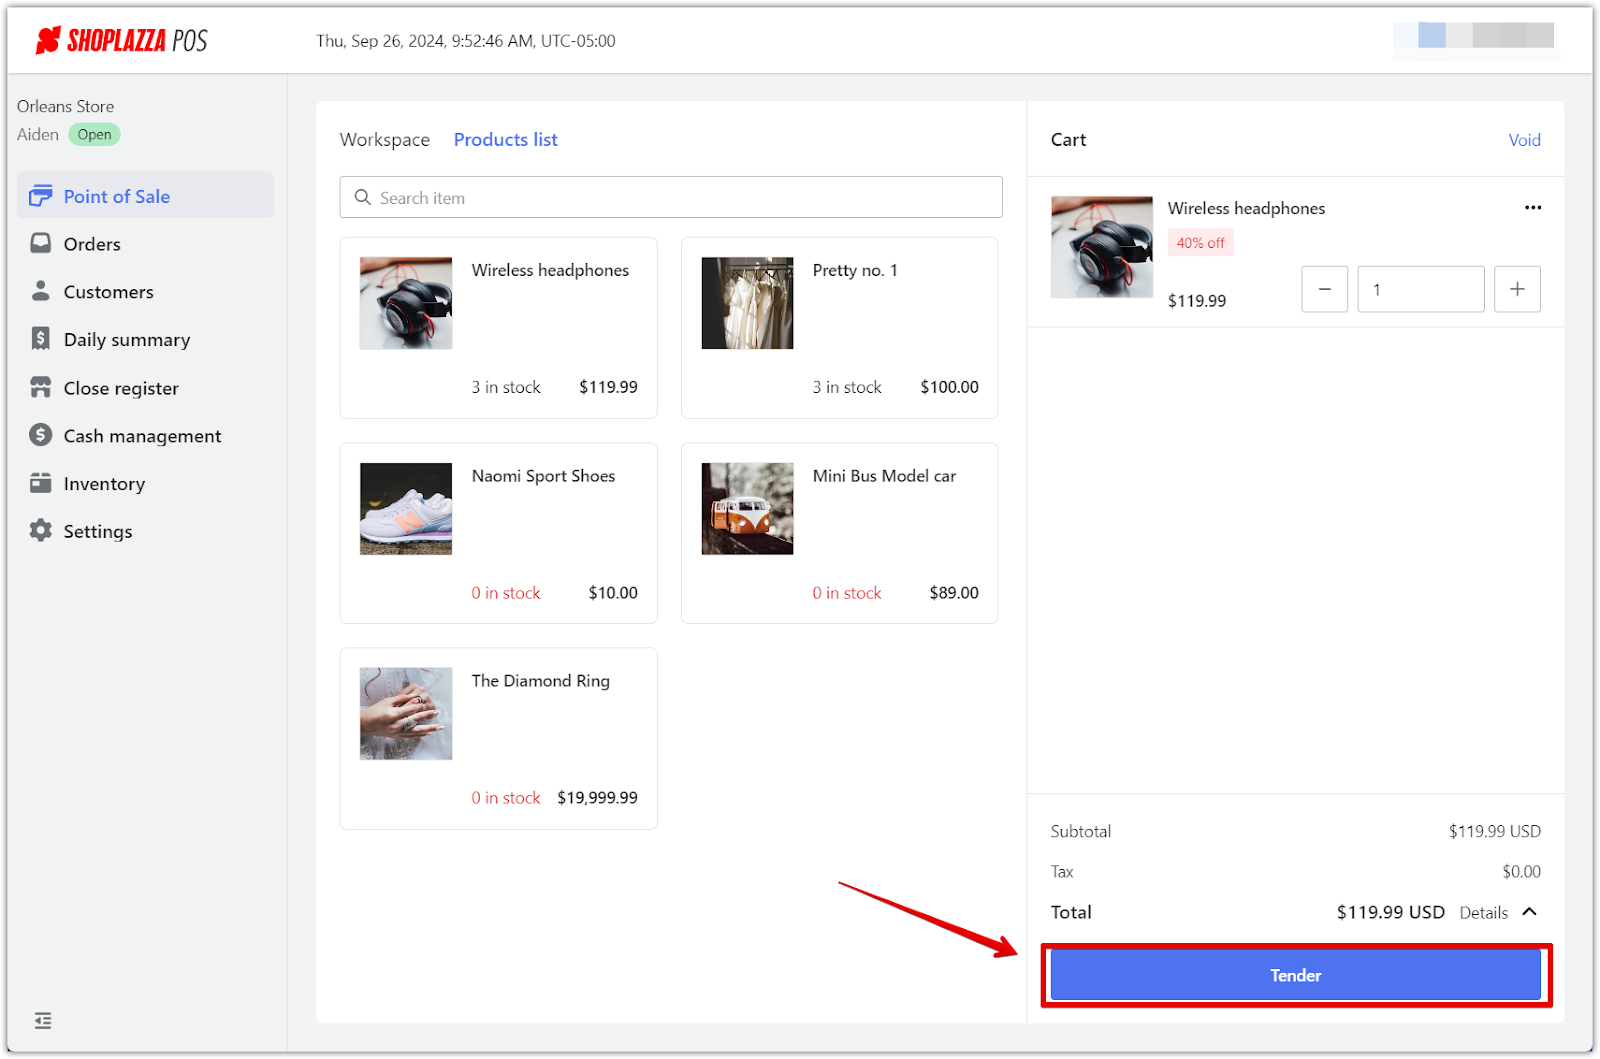
3. Cash payment: When the payment options appear, select Cash.

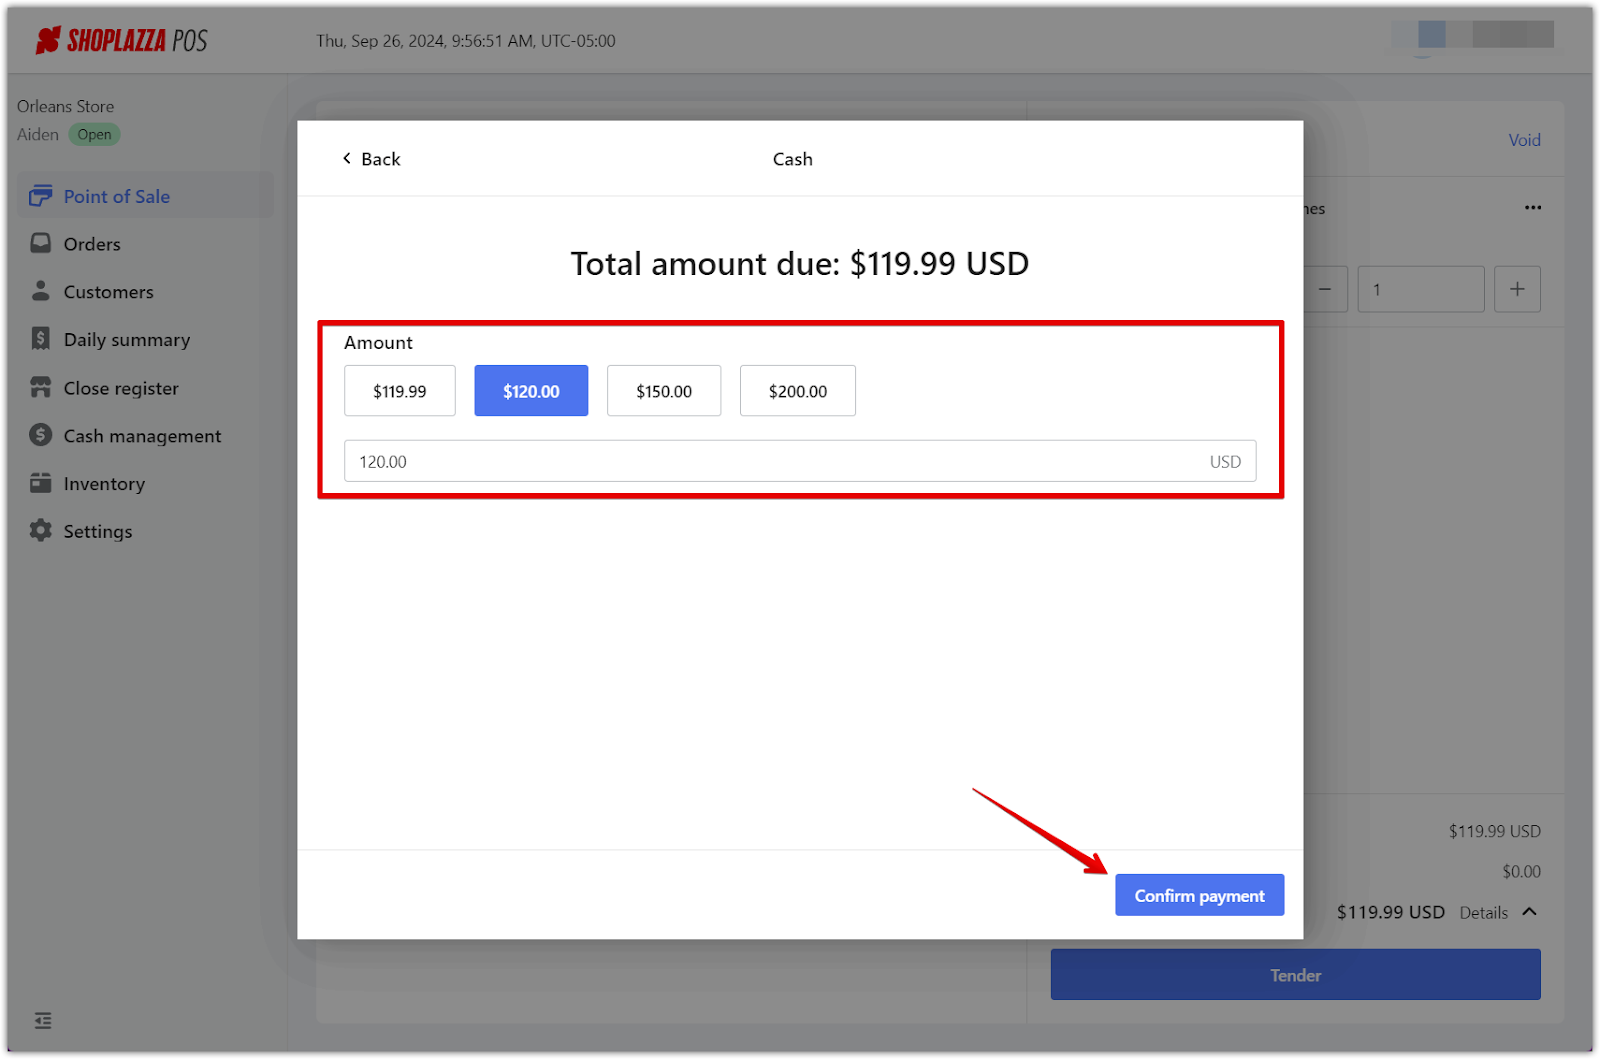
4. Complete transaction: Enter the cash amount received and verify the transaction.
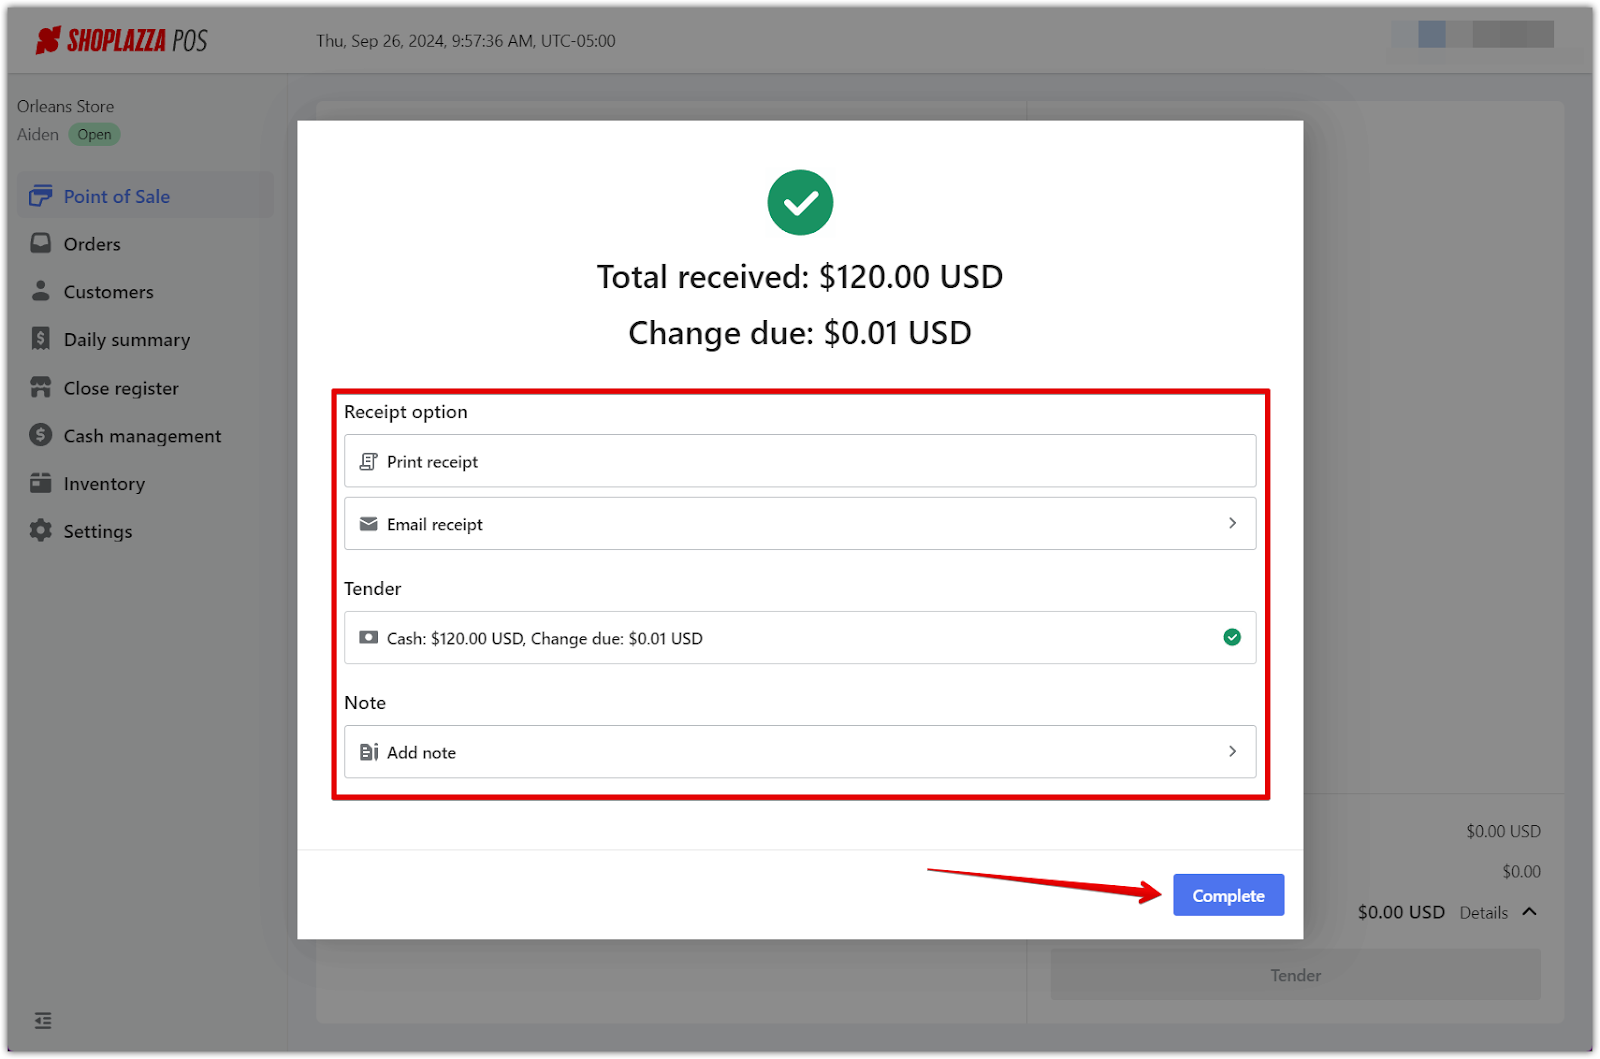
5. Receipt options: Decide whether to email or print the receipt for the customer. Only one method can be used. Add notes if necessary, then select Complete.
For credit card payments
1. Checkout selection: Initiate the transaction by choosing Point of Sale in your POS admin.
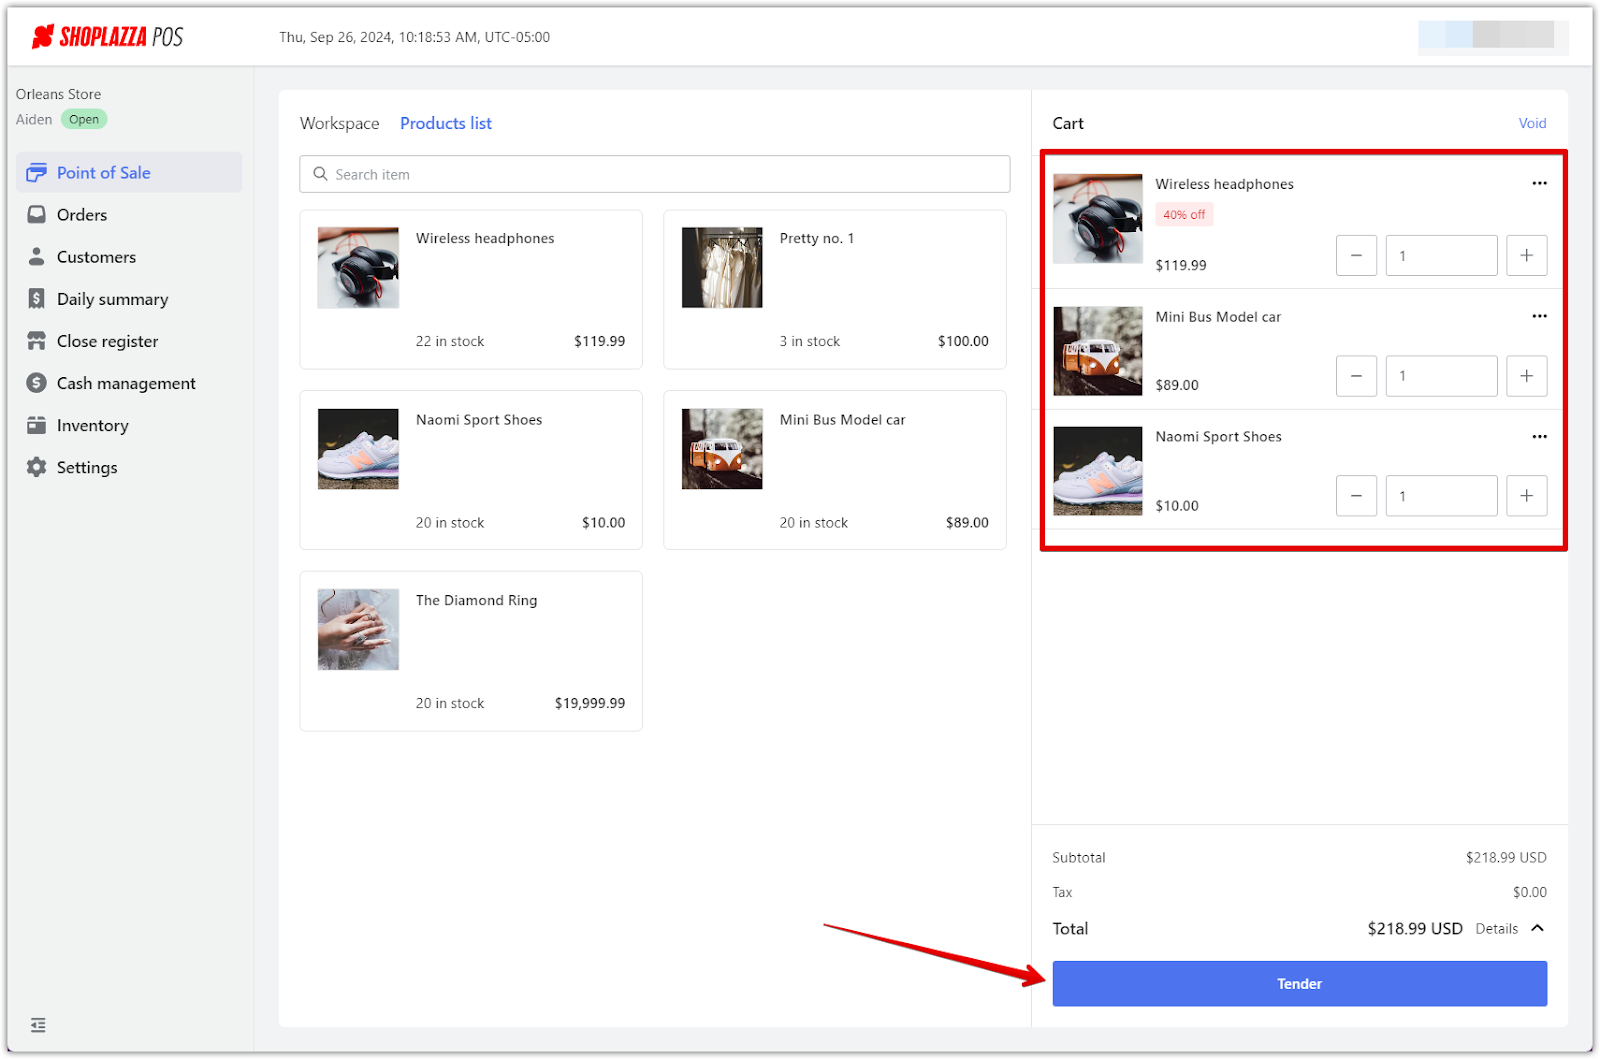
2. Add product and payment tender: Add products to the transaction and select Tender to bring up the payment options.
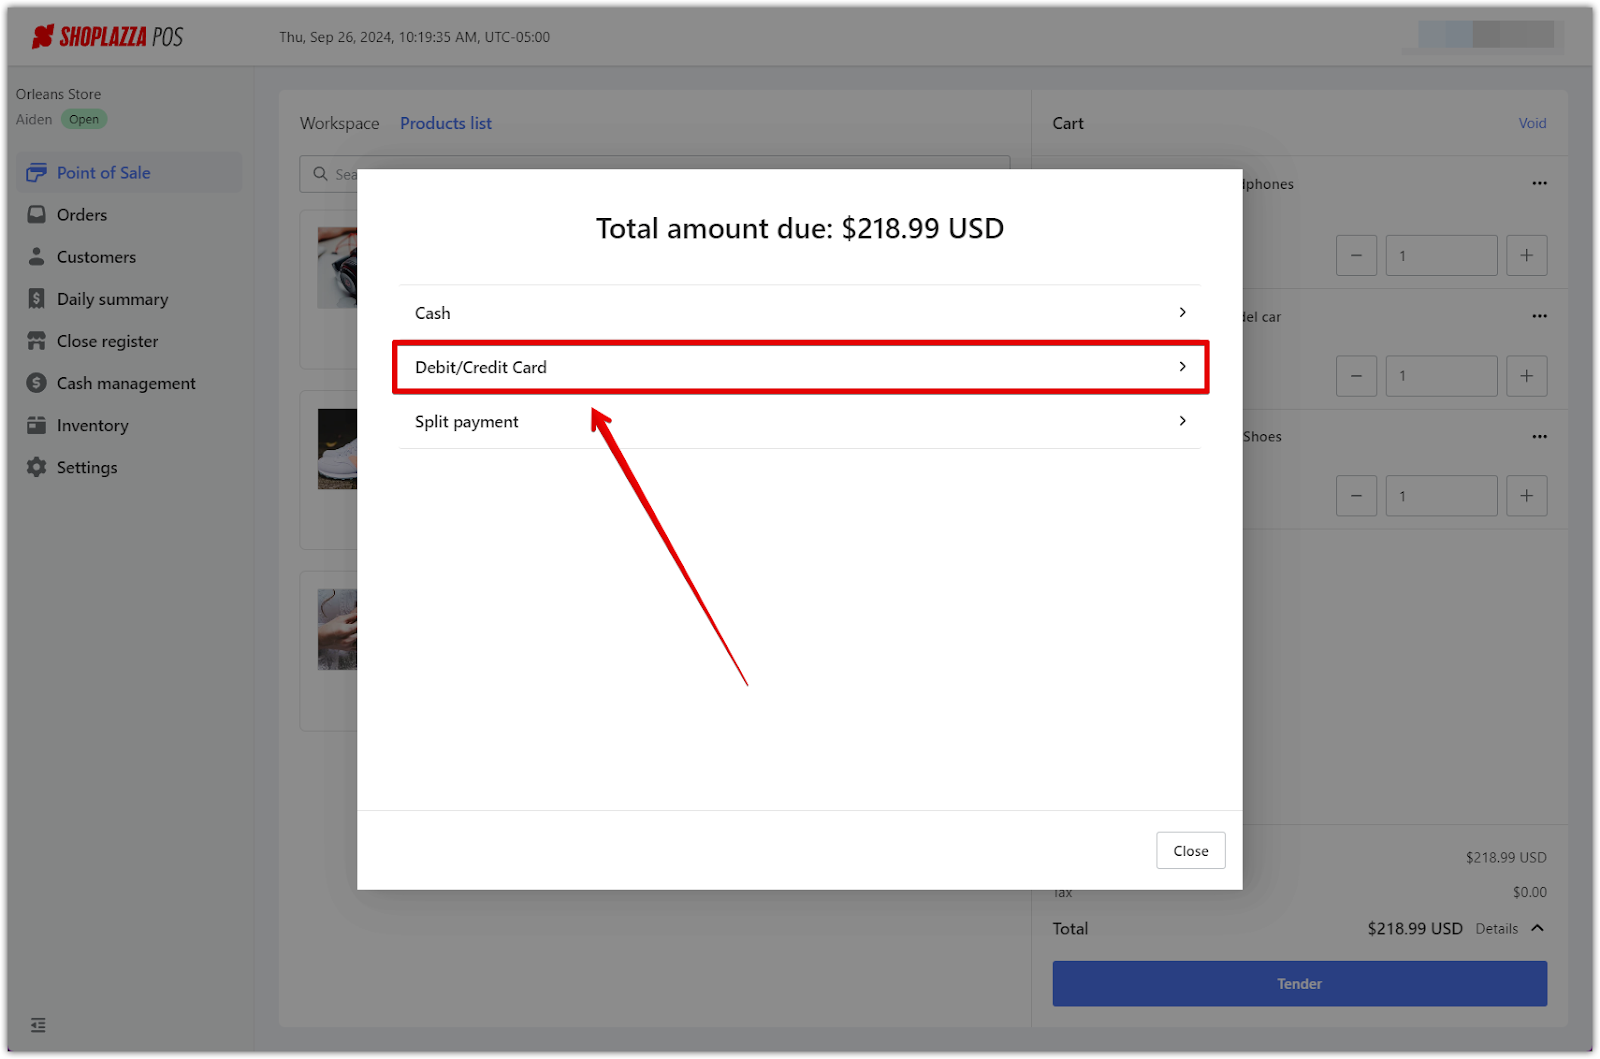
3. Debit/Credit card selection: From the available payment methods, choose Debit/Credit Card and enter the total amount due.
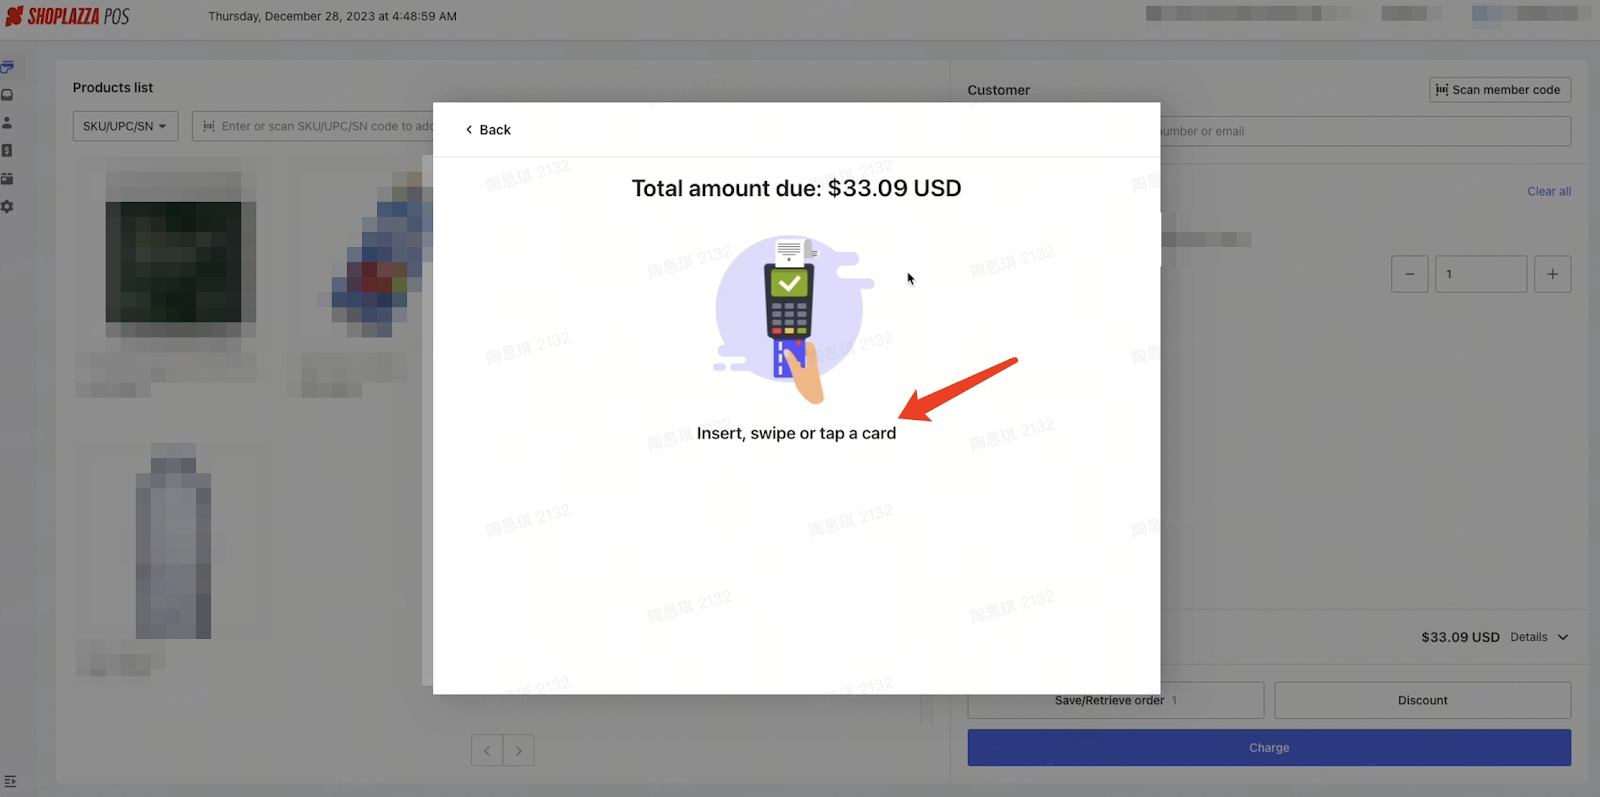
4. Card processing: Process the customer's card by following the on-screen prompts to insert, swipe, or tap their card.
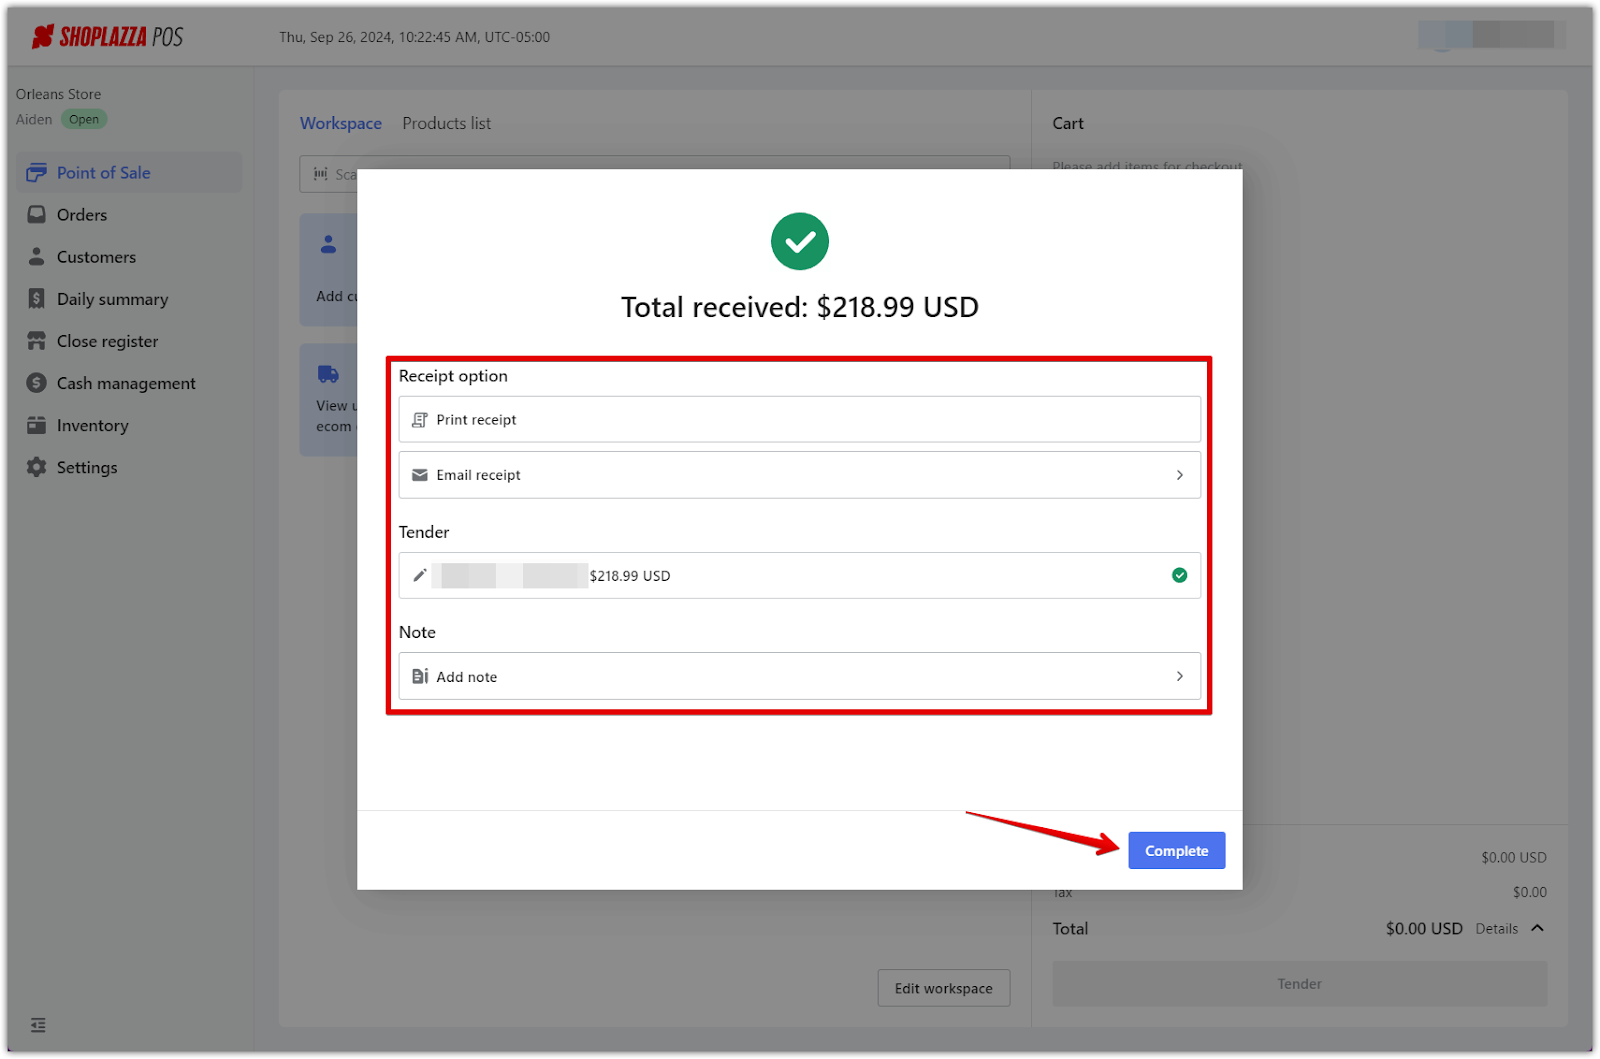
5. Receipt options: Decide whether to email or print the receipt for the customer. Only one method can be used. Add notes if necessary, then select Complete.
For Split payment
1. Checkout selection: Initiate the transaction by choosing Point of Sale in your POS admin.

2. Add product and payment tender: Add products to the transaction and select Tender to bring up the payment options.

3. Choose split payment: Select the option to split payment.
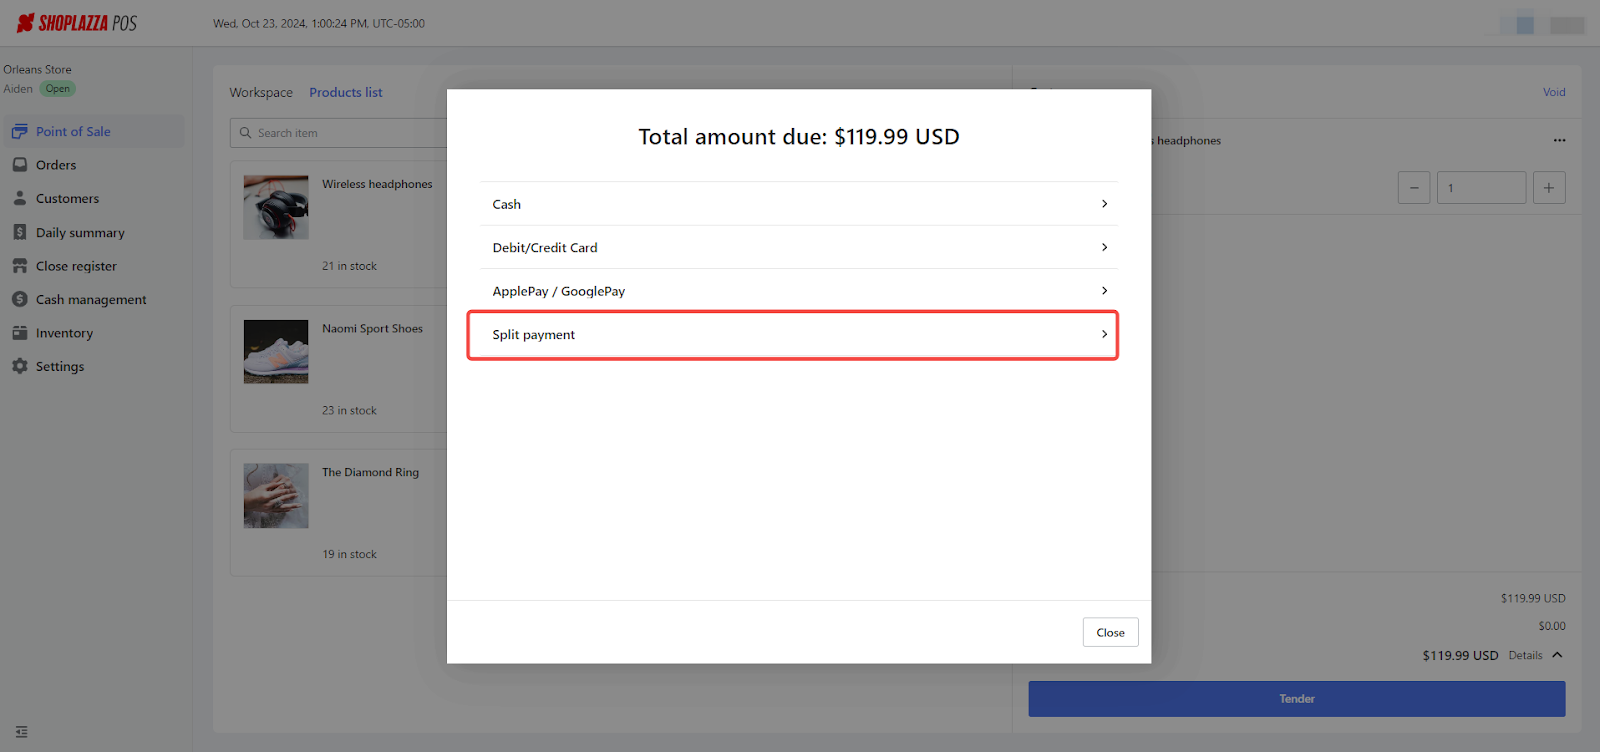
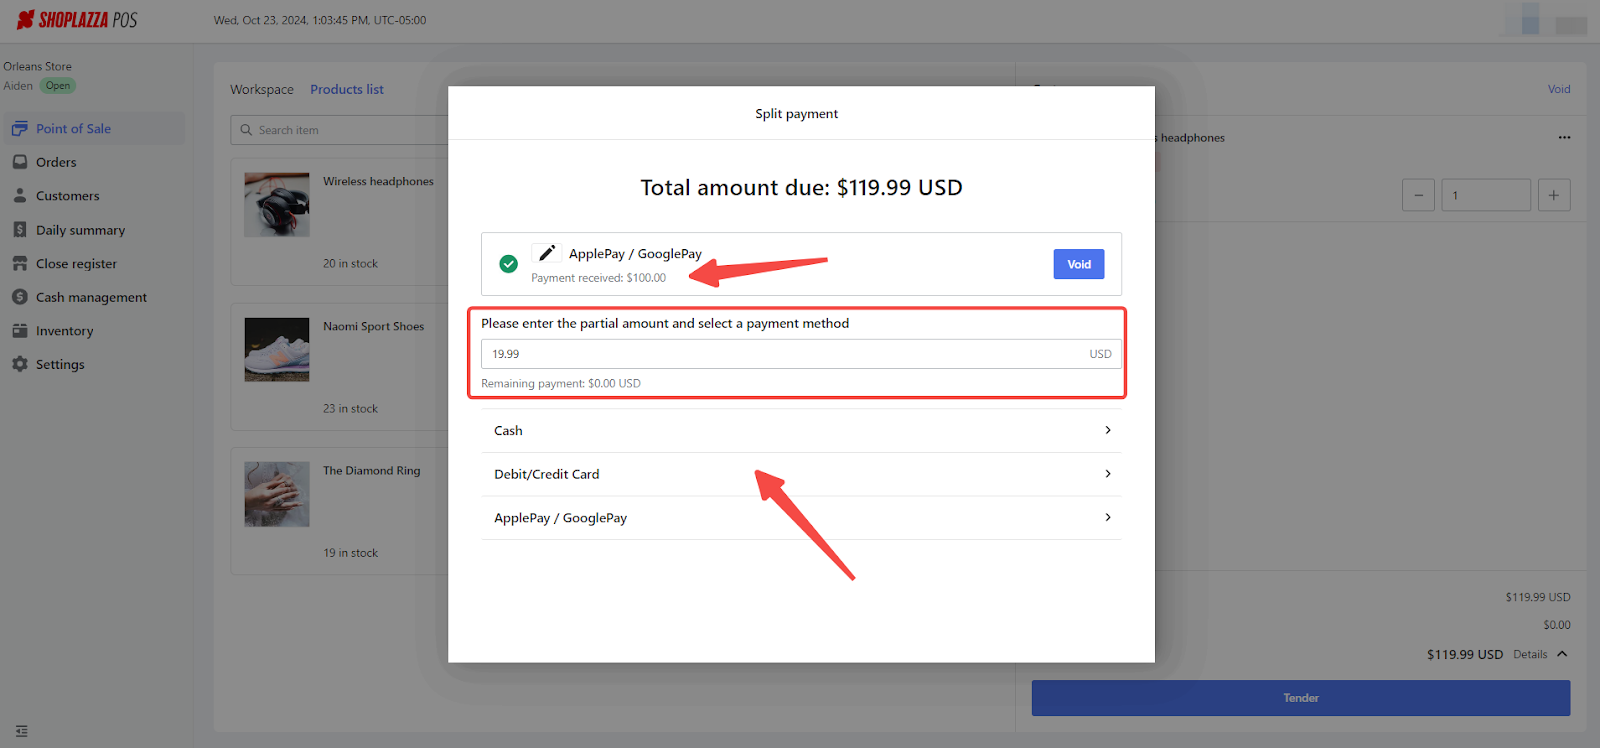
4. Process the first payment: Select the chosen payment method (e.g., cash, debit/credit card), then process the payment for the entered amount.

5. Add remaining payment: For the remaining balance, select the second payment method and process the payment accordingly.
Note
Payments can only be split between a maximum of three methods.

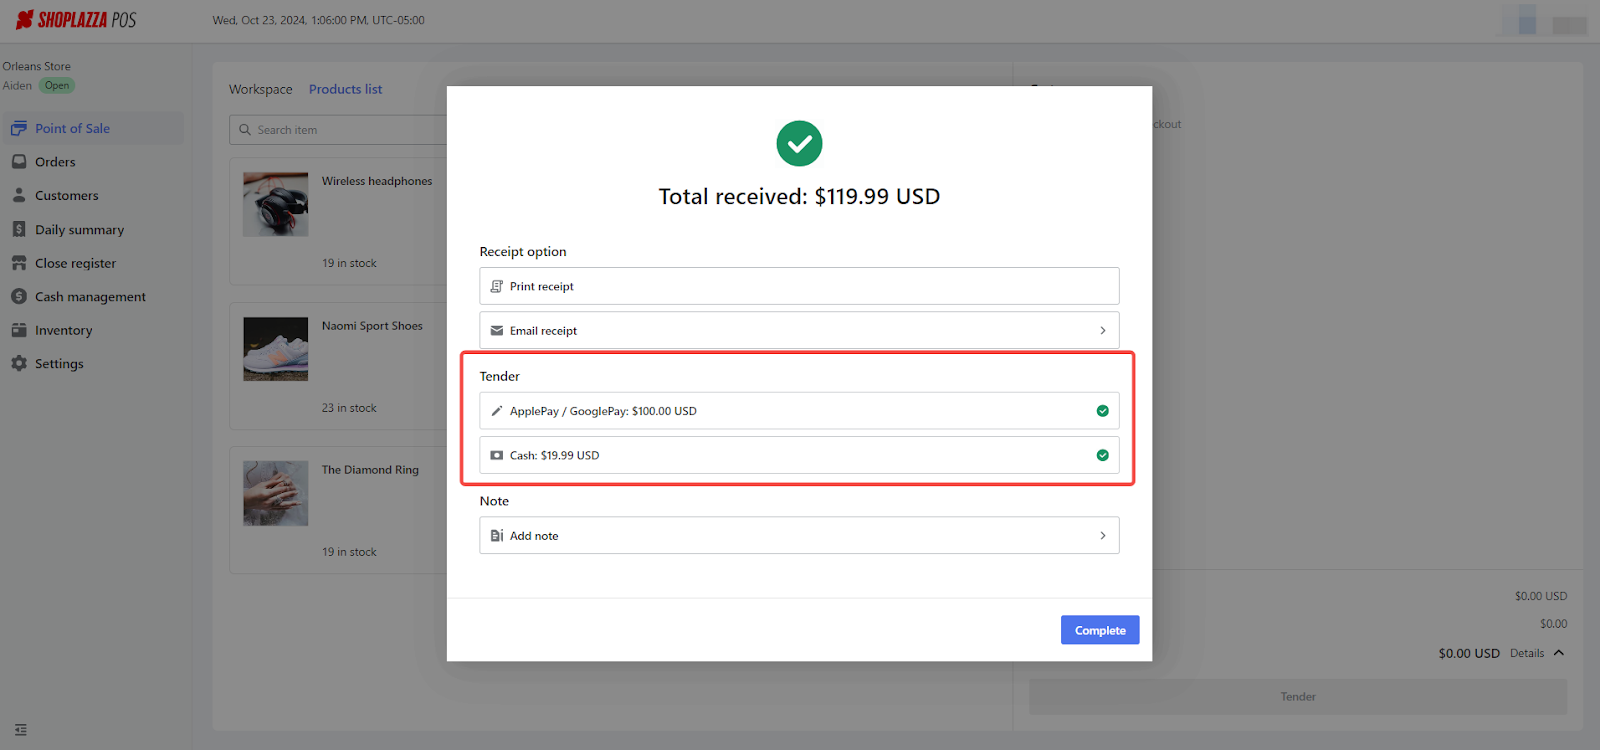
6. Review and complete transaction: After processing the split payment, you'll see a summary showing the payment methods (tenders) used. Confirm that all amounts are correct. Finally, decide whether to email or print the receipt for the customer, then select Complete.
By following the steps outlined for adding products and processing payments, you streamline your POS transactions, enhancing both efficiency and customer satisfaction. This concise approach reduces wait times and errors, fostering a positive shopping experience that encourages repeat business. Mastering these processes is key to the seamless operation of your business, ensuring every transaction is smooth for staff and customers alike.


Comments
Please sign in to leave a comment.