
ShipStation is a powerful platform designed to streamline and optimize your order management processes. By providing a one-stop integrated logistics solution, ShipStation helps you efficiently manage the transportation, tracking, and processing of your orders. Follow this guide to install and configure the ShipStation plugin for seamless integration with your store.
Installing the ShipStation app
To start using ShipStation, the first step is to install the plugin in your Shoplazza store. This section will walk you through the process of adding and activating the ShipStation plugin, ensuring you can quickly integrate it with your existing setup.
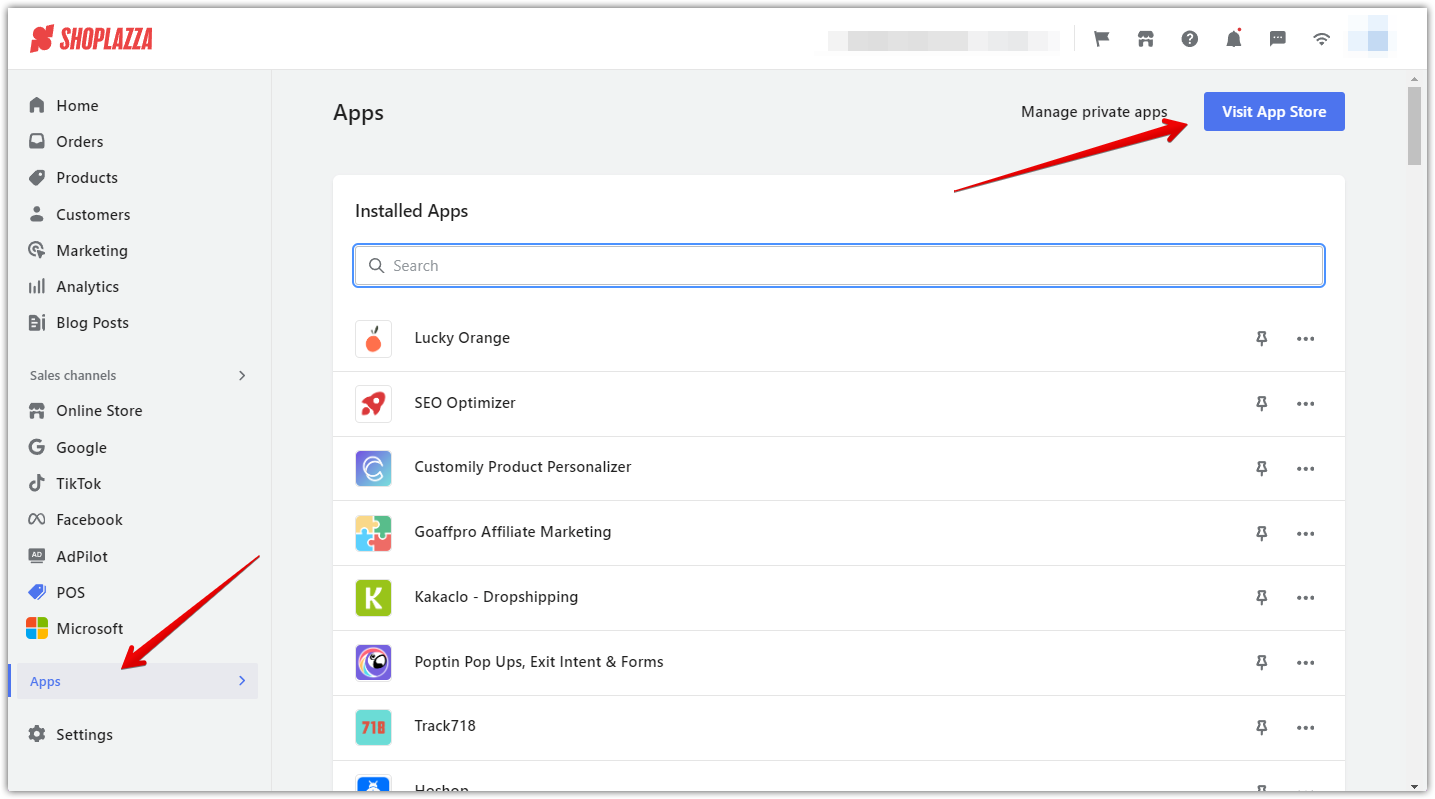
1. Access the app store: Log in to your Shoplazza admin and go to Apps > Visit App Store.
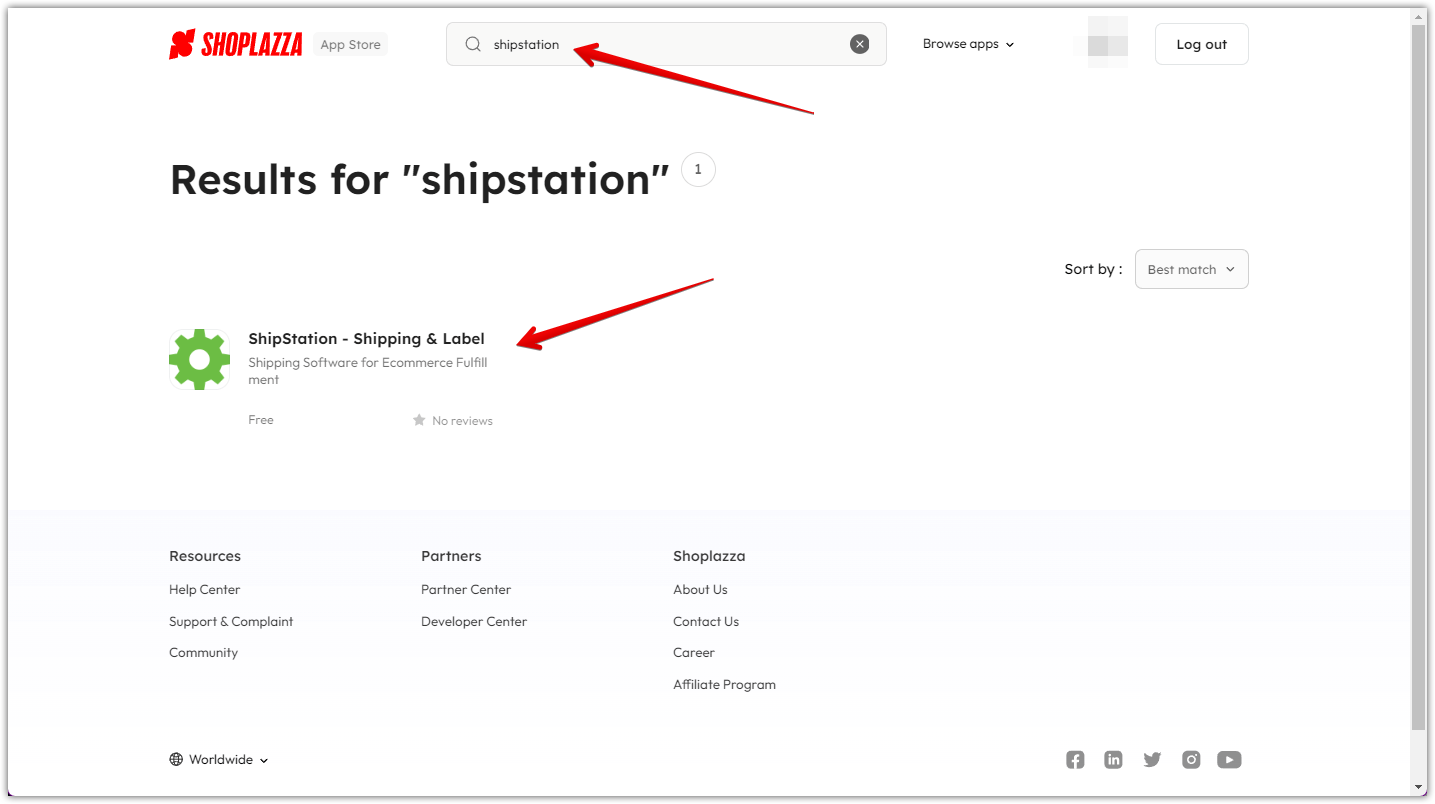
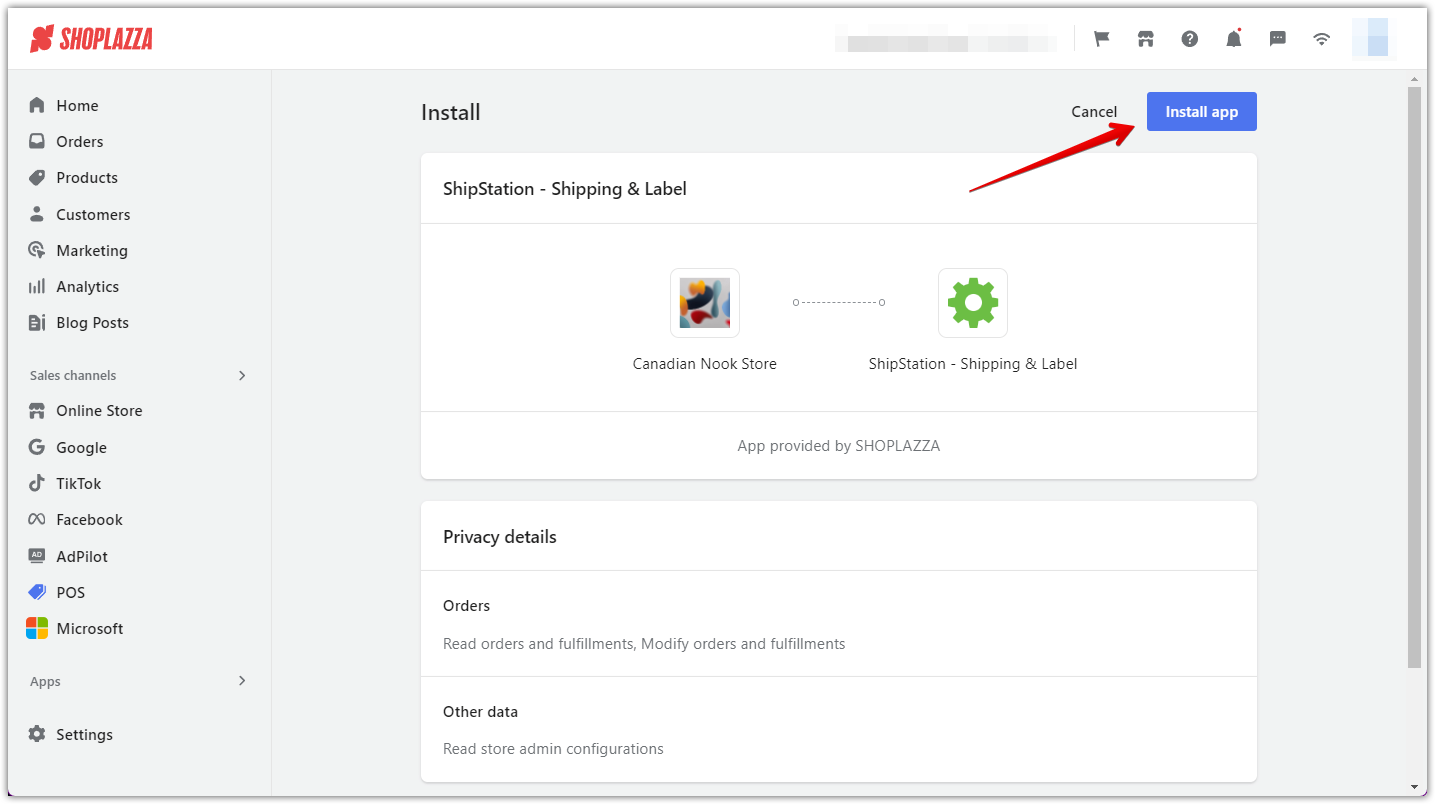
2. Search and install: In the app store, search for the ShipStation app. Once you find it, click Add App > Install App to add it to your store.
Configuring the ShipStation app
After installing the app, the next step is to configure it correctly. Proper configuration is key to ensuring that ShipStation works smoothly with your store. This section provides detailed instructions on how to connect your ShipStation account and enter the necessary API information.
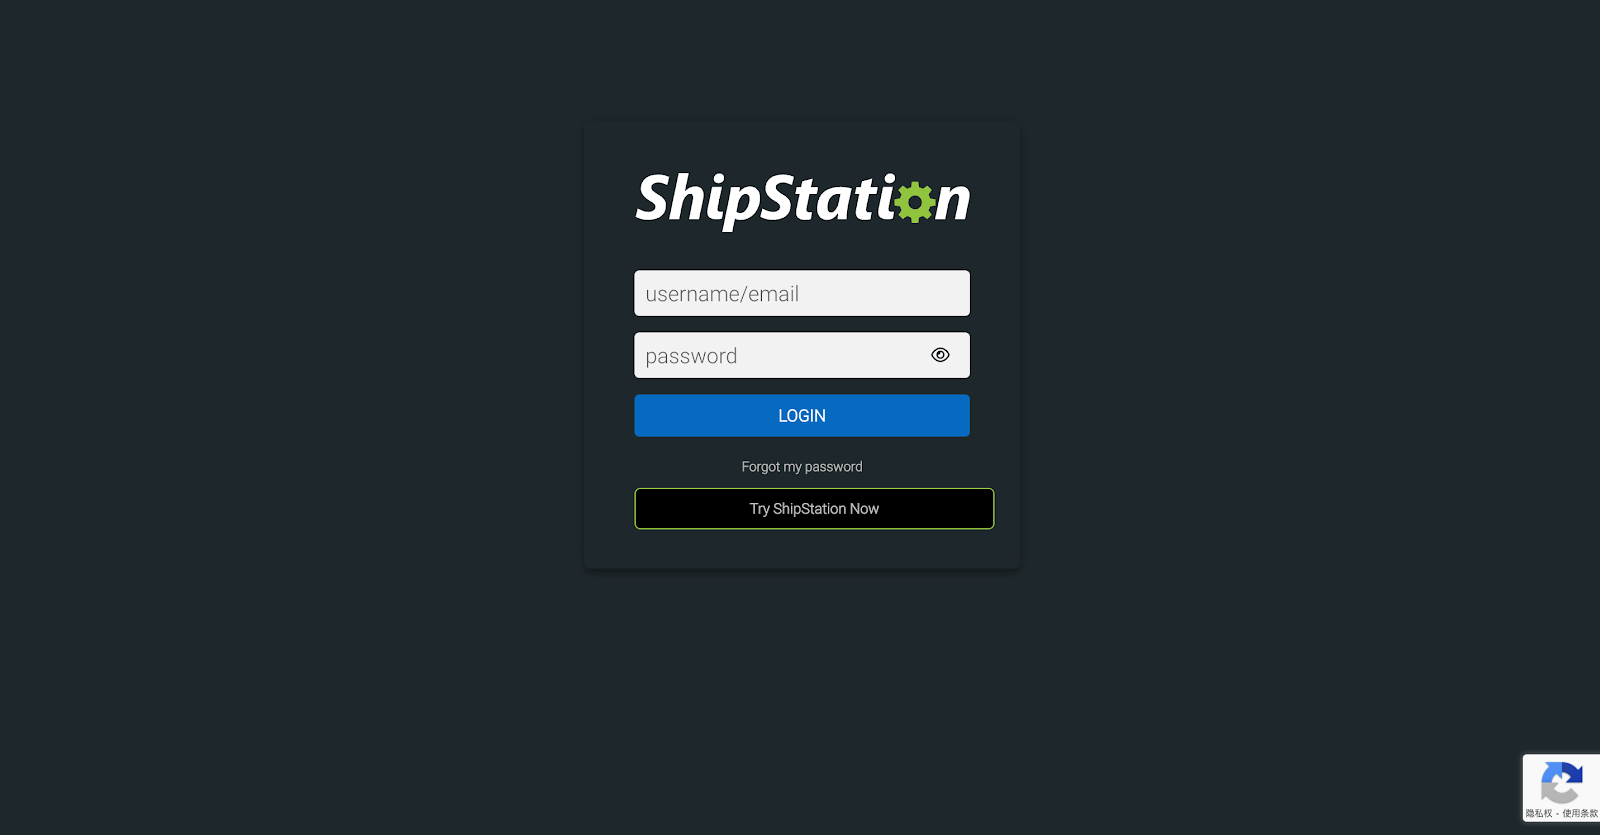
1. Open the configuration page: After installing the app, navigate to the configuration page. If you don't have a ShipStation account, click Register to create one, then log in to your ShipStation account.

Note
If you encounter issues logging in after registration, refer to the ShipStation official guide for troubleshooting steps.
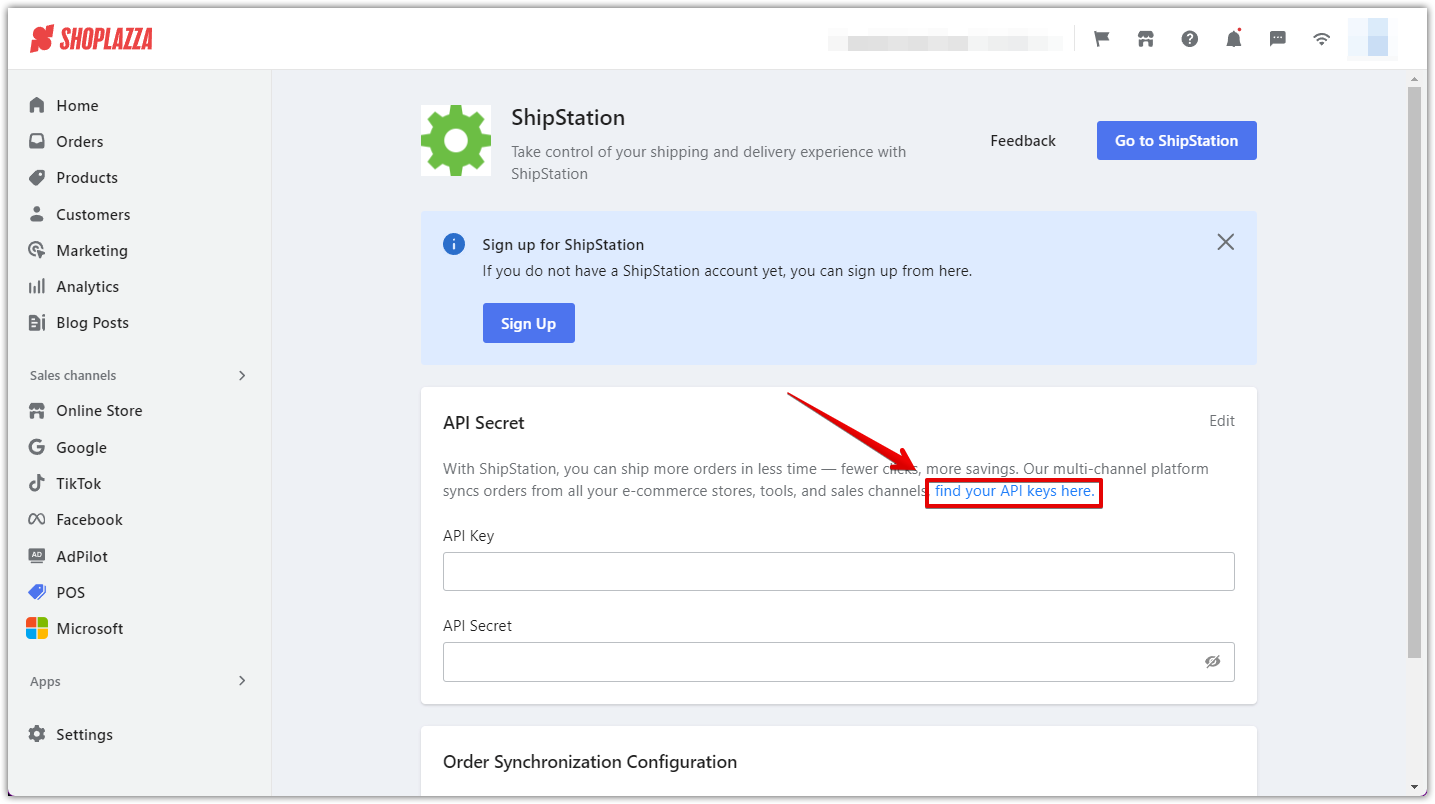
2. Locate API keys: On the ShipStation configuration page, click "find your API keys here" to be directed to the API Settings in your ShipStation account.
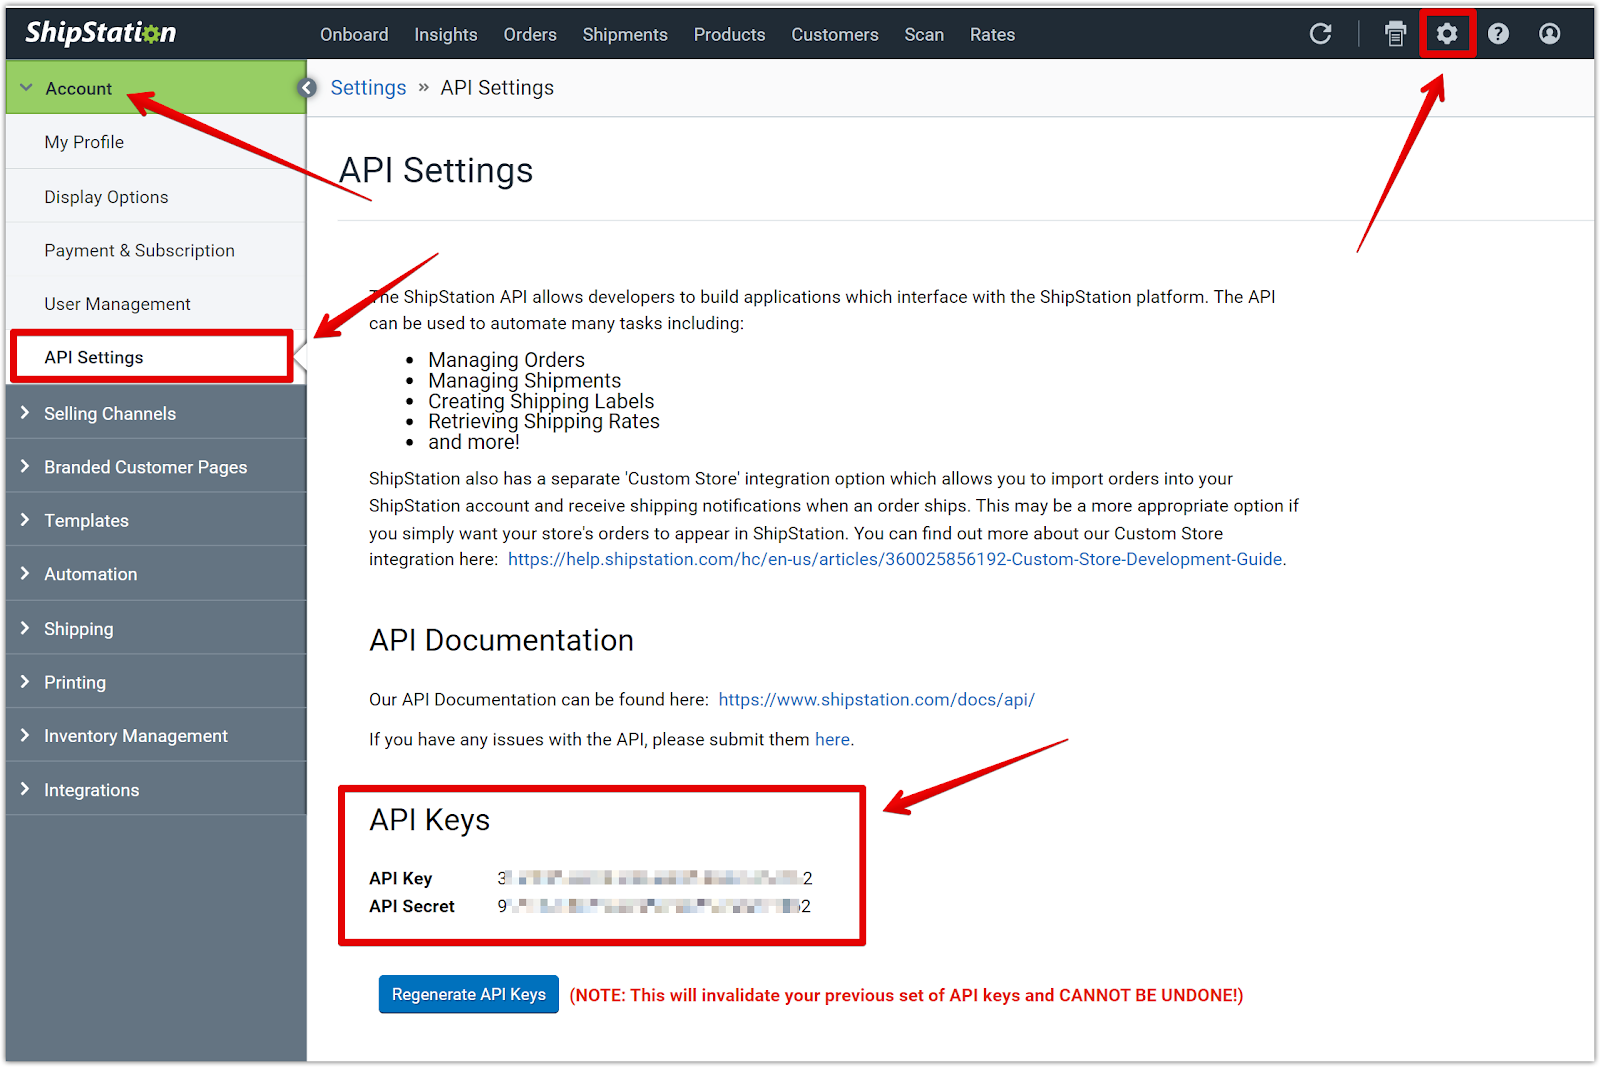
3. Generate and copy API keys: In the ShipStation API Settings, generate your API keys if they aren't already available. Copy both the API Key and API Secret Key.
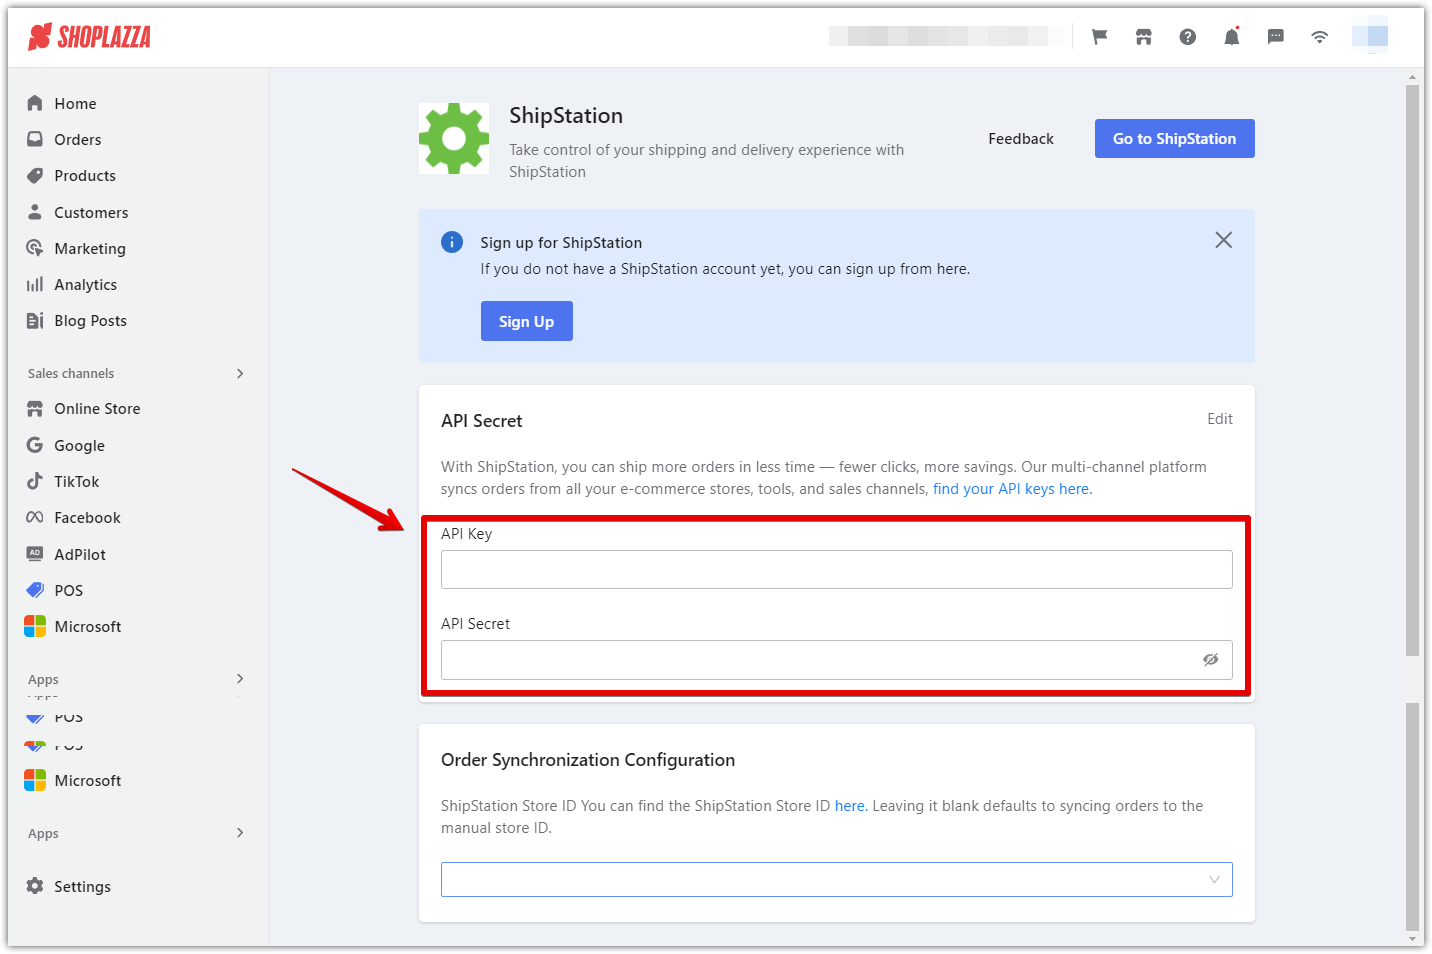
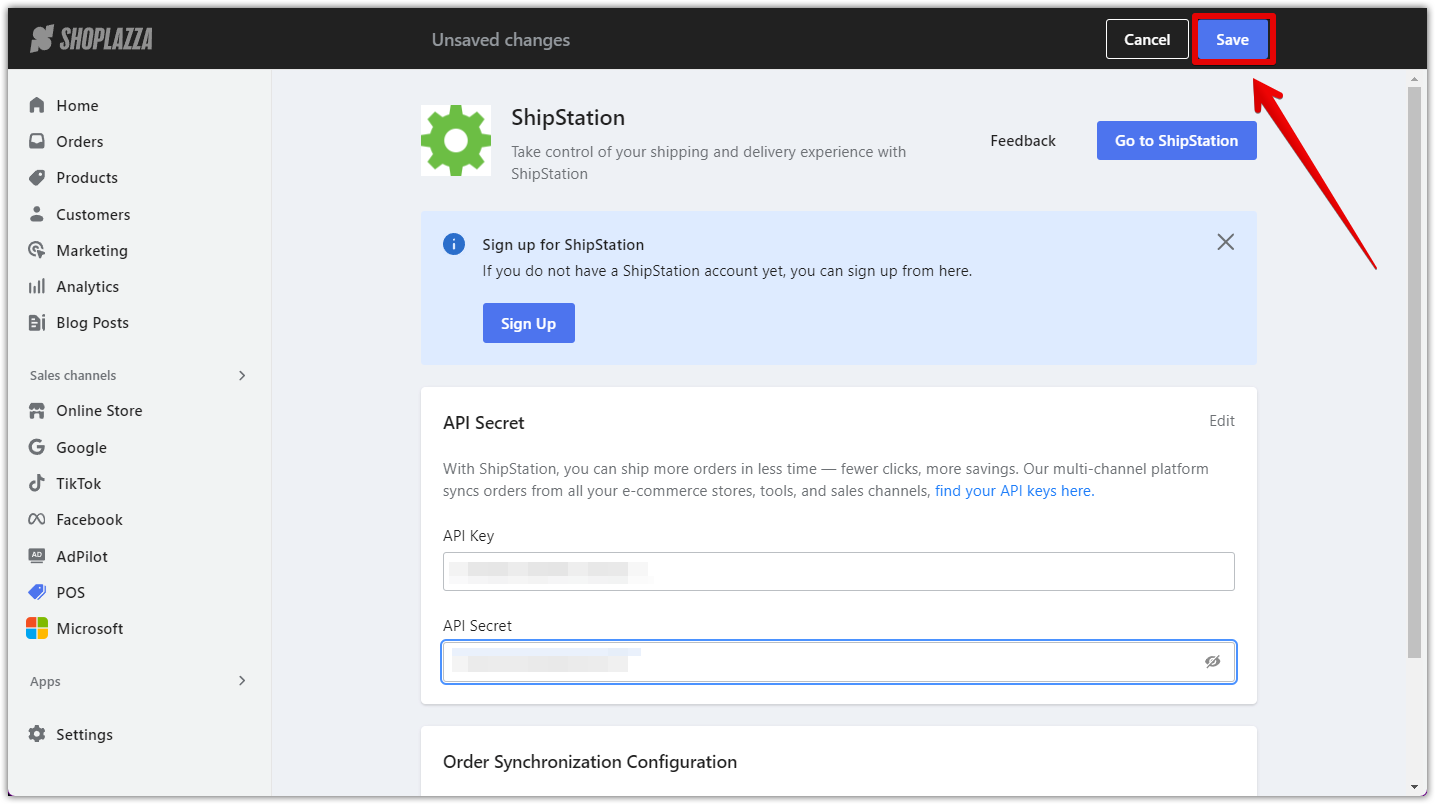
4. Enter API keys in Shoplazza: Return to your Shoplazza admin and enter the copied API Key and API Secret Key into the appropriate fields in the ShipStation app configuration page.
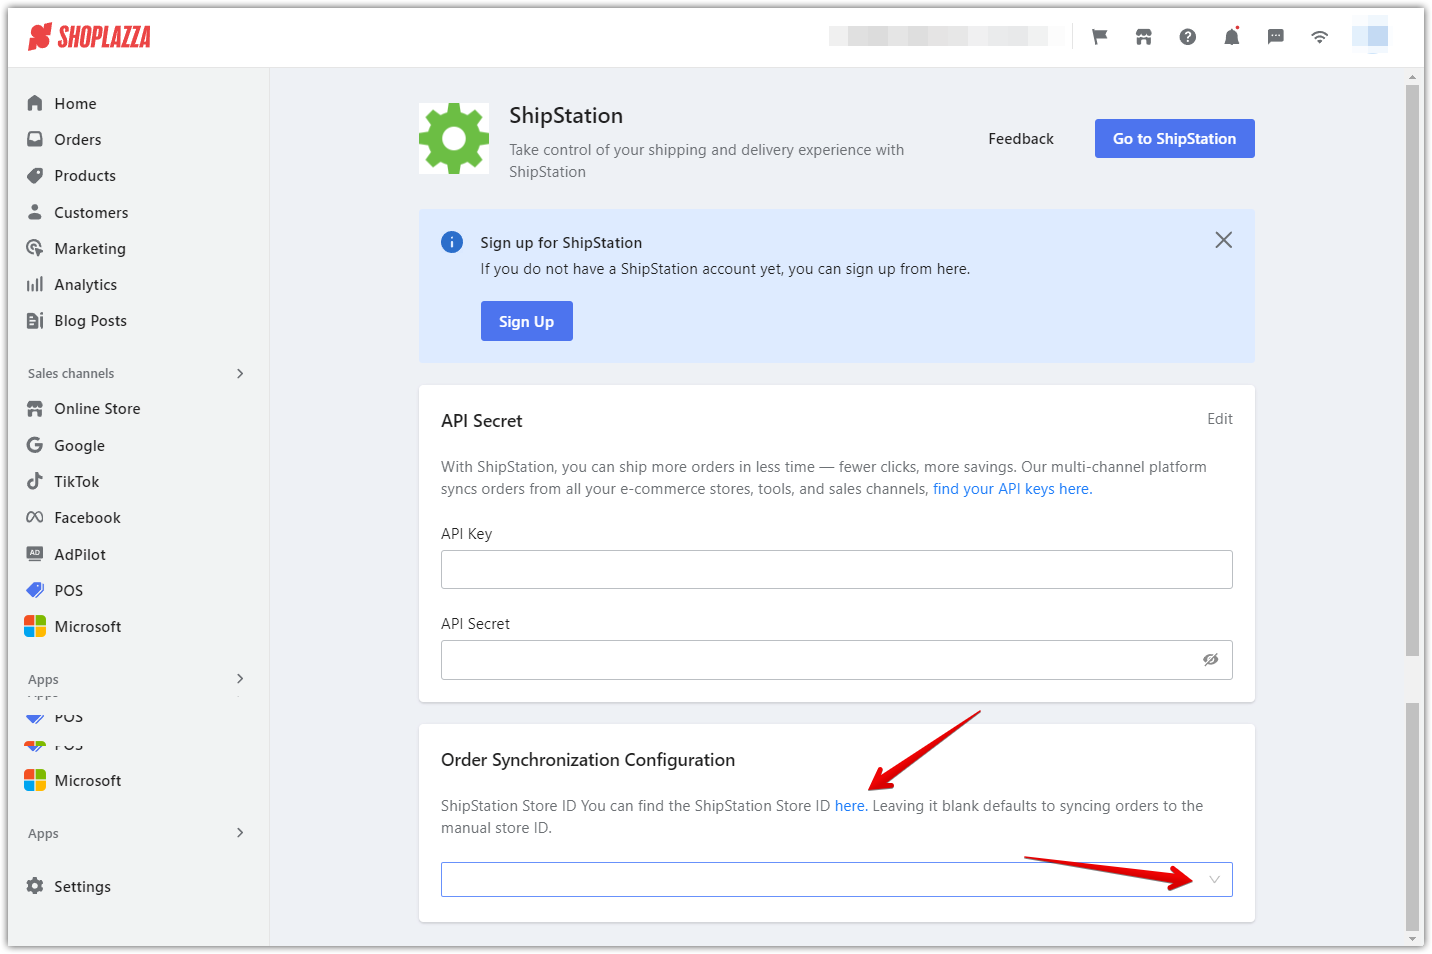
5. Select the Store ID: Once the API keys are entered, click the Store ID drop-down box to select the appropriate ShipStation Store ID. If the Store ID doesn’t appear, double-check the API key and network connection, then try again.
Note
Ensure the API key and Store ID are entered correctly to avoid errors.
6. Save the configuration: Click Save to complete the setup.
Note
Ensure that the ShipStation API public key, key, and Store ID are entered correctly for the save to be successful.
Key features of ShipStation
ShipStation offers a range of powerful features designed to enhance your order management capabilities. This section introduces the key functionalities available through the ShipStation plugin, including order synchronization, refund processing, and logistics status updates.
1. Syncing historical orders: After the ShipStation app is successfully configured, the system will automatically start syncing historical orders, excluding COD orders, outstanding orders, and orders that don’t require logistics (e.g., virtual goods).
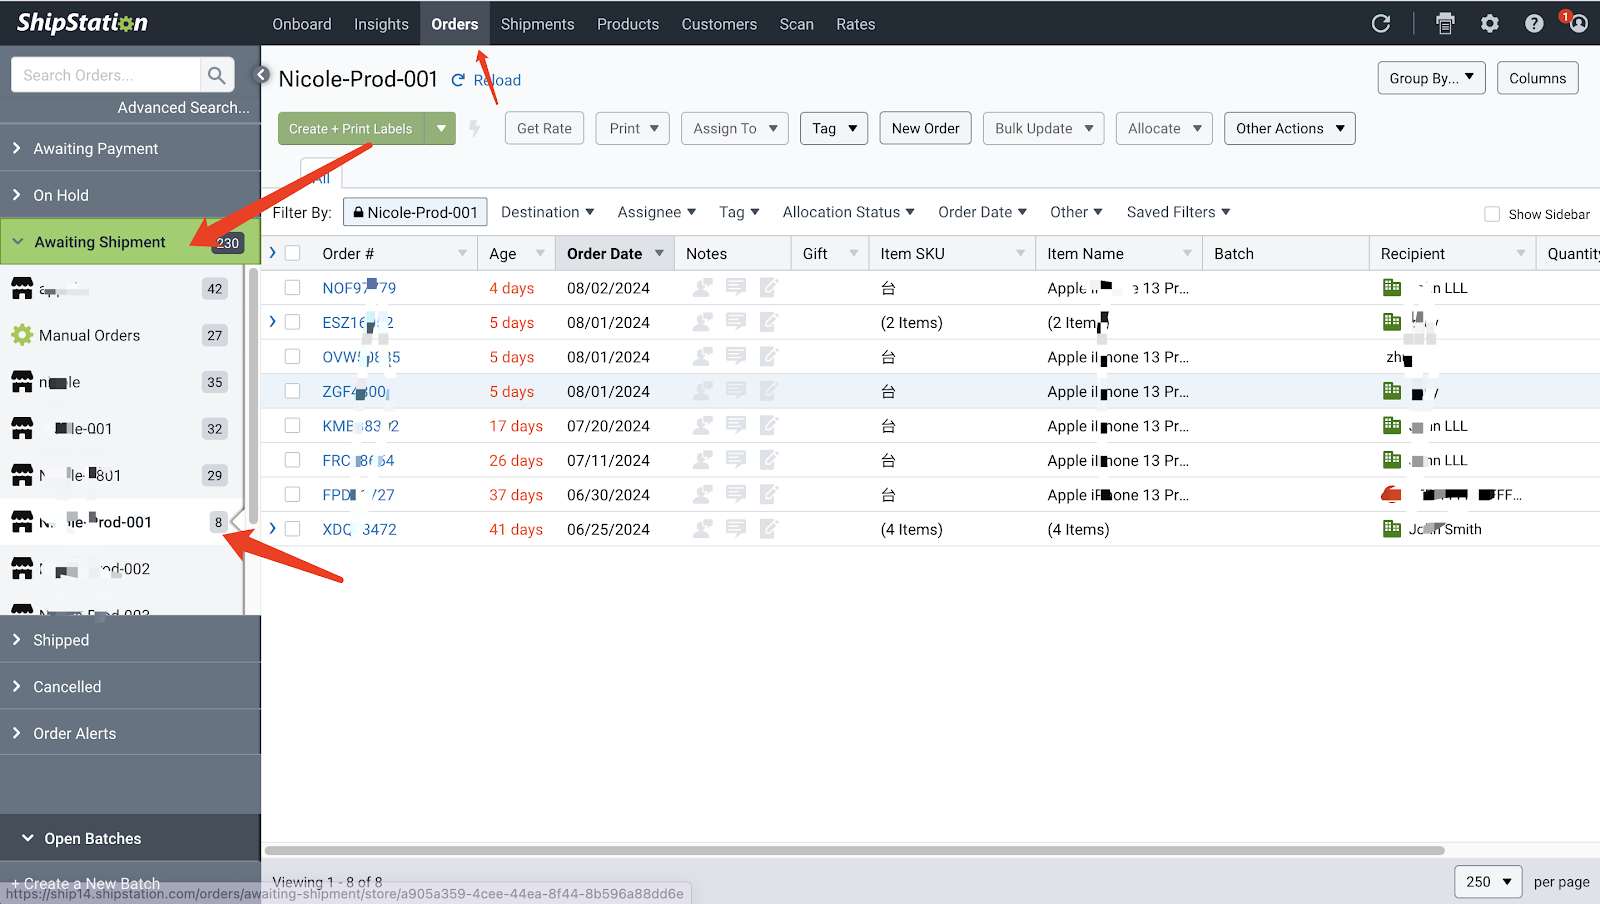
2. Real-time order synchronization: Once set up, non-COD and paid logistics orders will automatically sync with ShipStation. You can view the synced order data in the ShipStation backend under Orders..
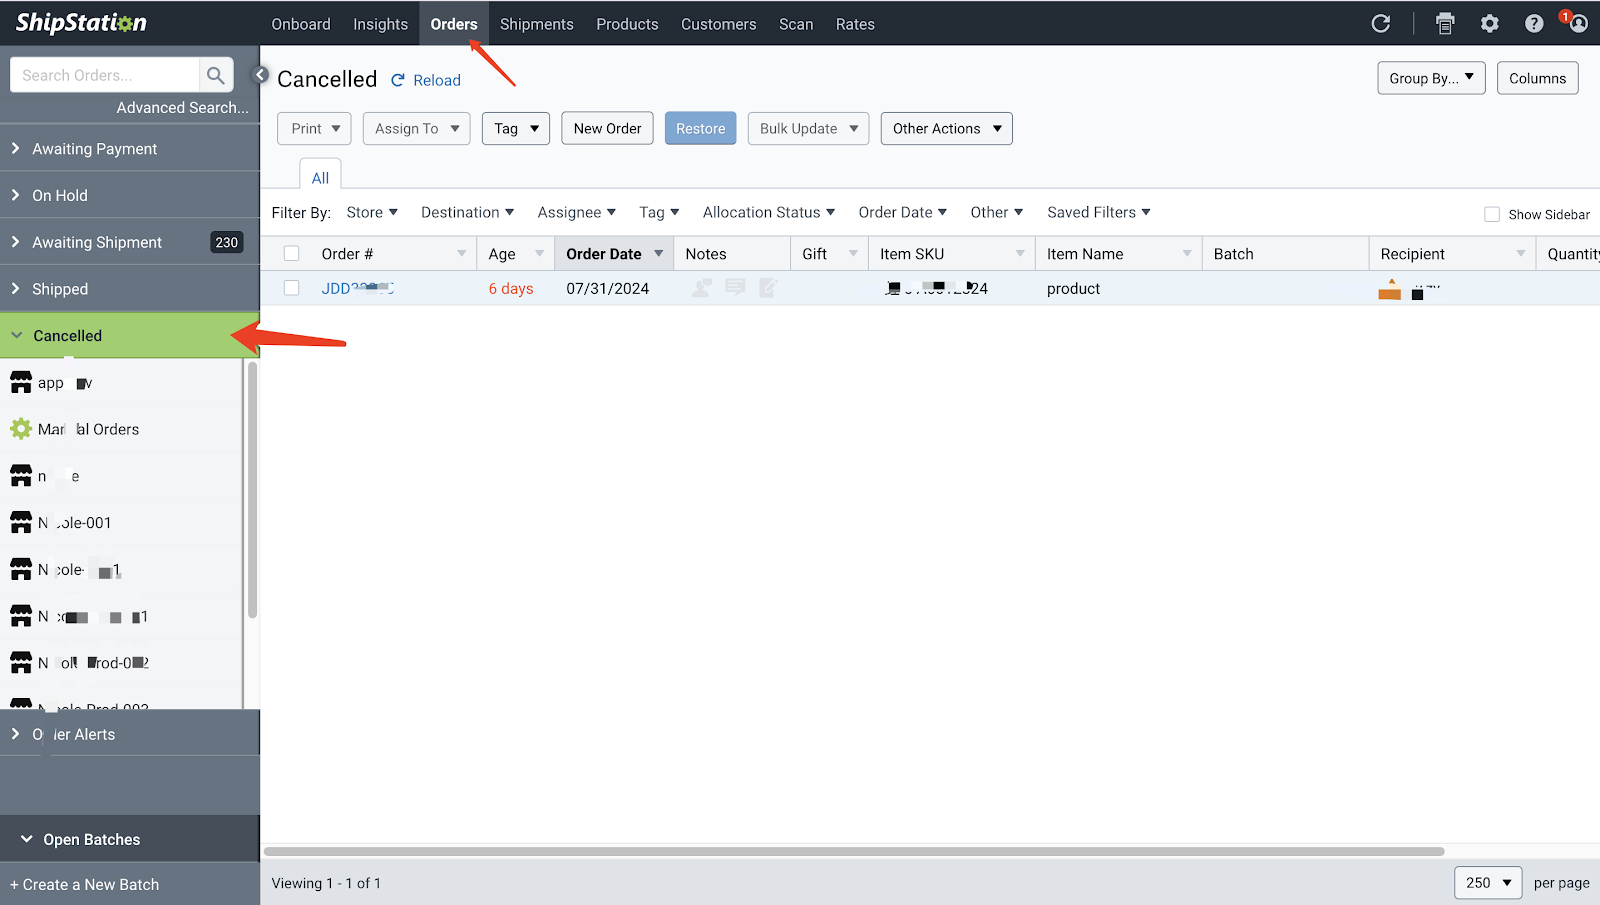
3. Order refund synchronization: When an order is partially or fully refunded in your Shoplazza admin, this information syncs to ShipStation. Fully refunded orders will be marked as Canceled in ShipStation, viewable in the Orders > Canceled section.
4. Synchronized logistics status: When an order is marked as shipped or a print label is created in ShipStation, the status syncs with your Shoplazza admin. Logistics details like tracking information will also sync, updating the order status to shipped or partially shipped accordingly.
Marking an order as shipped or creating a print label
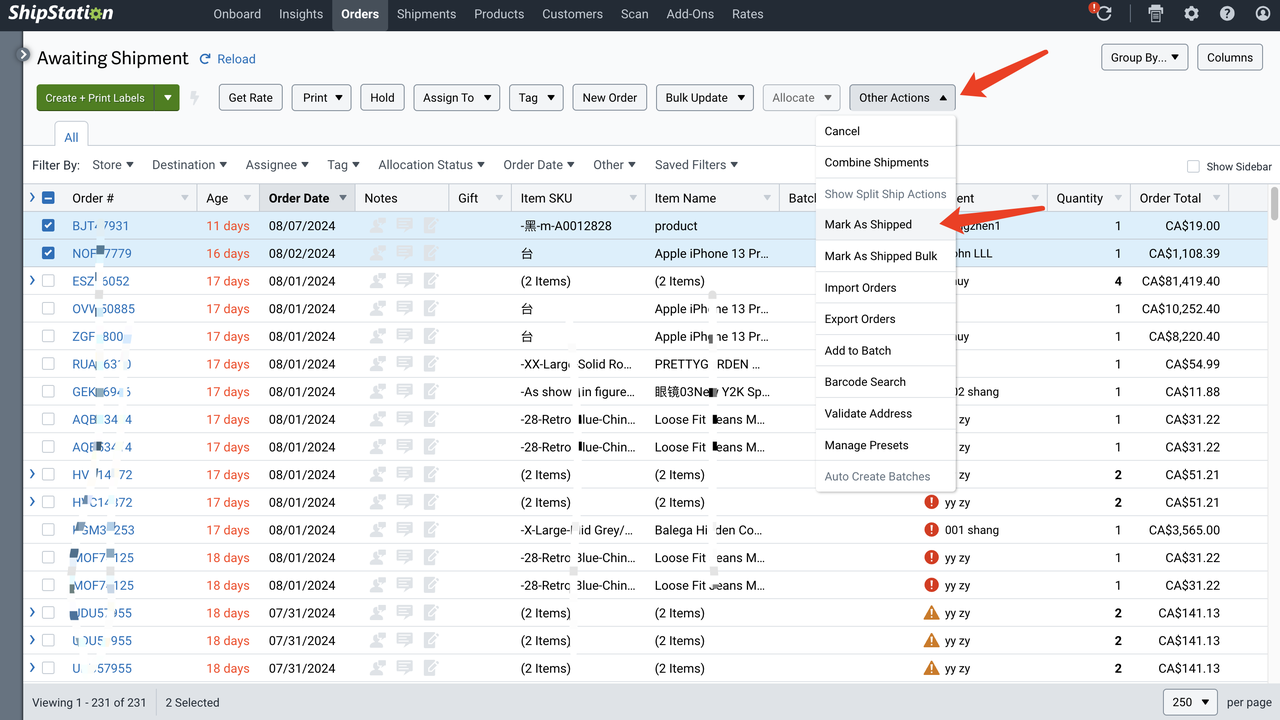
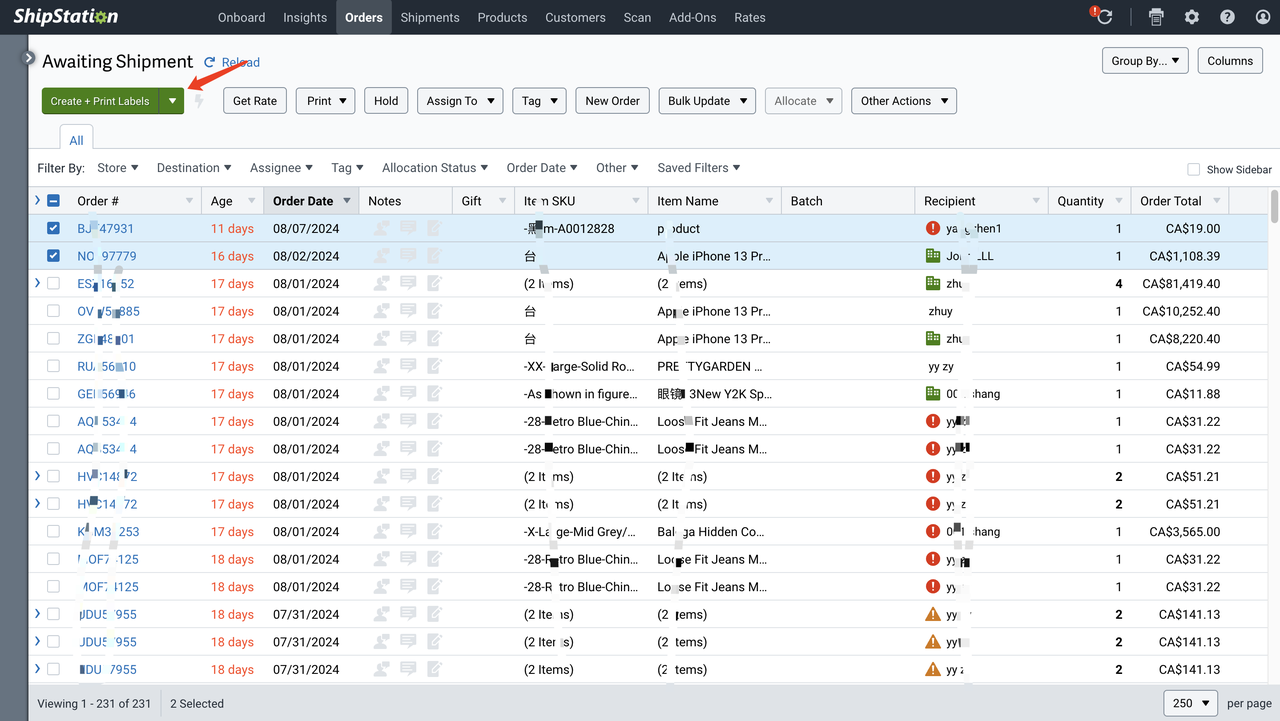
1. Marking an order as shipped: In the Orders tab of your ShipStation account, select the orders you want to mark as shipped. Click on the Other Actions dropdown menu located at the top right, and from the dropdown menu, choose Mark As Shipped.
2. Creating a print label: In the Orders tab, select the orders for which you want to create shipping labels. Click on the Create + Print Labels button located at the top left.
Getting support
If you encounter any issues or need help while using ShipStation, rest assured that support is readily available to assist you. Whether you need technical guidance or have questions about specific features, ShipStation offers multiple support channels to ensure you get the help you need:
- ShipStation Help Center: Access a comprehensive library of articles, tutorials, and FAQs that cover a wide range of topics. The Help Center is your first stop for finding solutions to common issues and learning how to make the most of ShipStation’s features.
- Submit the ShipStation Inquiry Form: If you can’t find the answer you’re looking for, or if you need more personalized assistance, you can submit an inquiry form directly through ShipStation. This allows the support team to review your specific issue and provide a tailored response.
- Email: For more in-depth queries or ongoing issues, you can reach out to ShipStation’s support team via email at support@shipstation.com. This method is ideal for more complex problems that may require detailed explanations or follow-up.
- Other contact information: Depending on your region, ShipStation may offer additional contact methods, including phone support or live chat . Check the ShipStation website or your account’s support section for the most relevant contact details.
By following this guide and taking advantage of the available support resources, you can fully leverage the ShipStation app to improve your store's logistics operations, enhance order management efficiency, and deliver a better experience for your customers. Whether you’re just getting started or looking to optimize your existing setup, ShipStation provides the tools and assistance you need to succeed.


Comments
Please sign in to leave a comment.