Enhancing your online contact lens store involves personalizing various settings to create a seamless and user-friendly shopping experience. This guide covers essential customization options, from adjusting color and style elements to configuring button text and data entry requirements. By leveraging these features, you can provide a tailored experience that meets both customer needs and regulatory requirements. Let's explore how you can optimize these settings to enhance your store's functionality and appeal.
To begin, click on the Contact lenses section in your Shoplazza Admin:
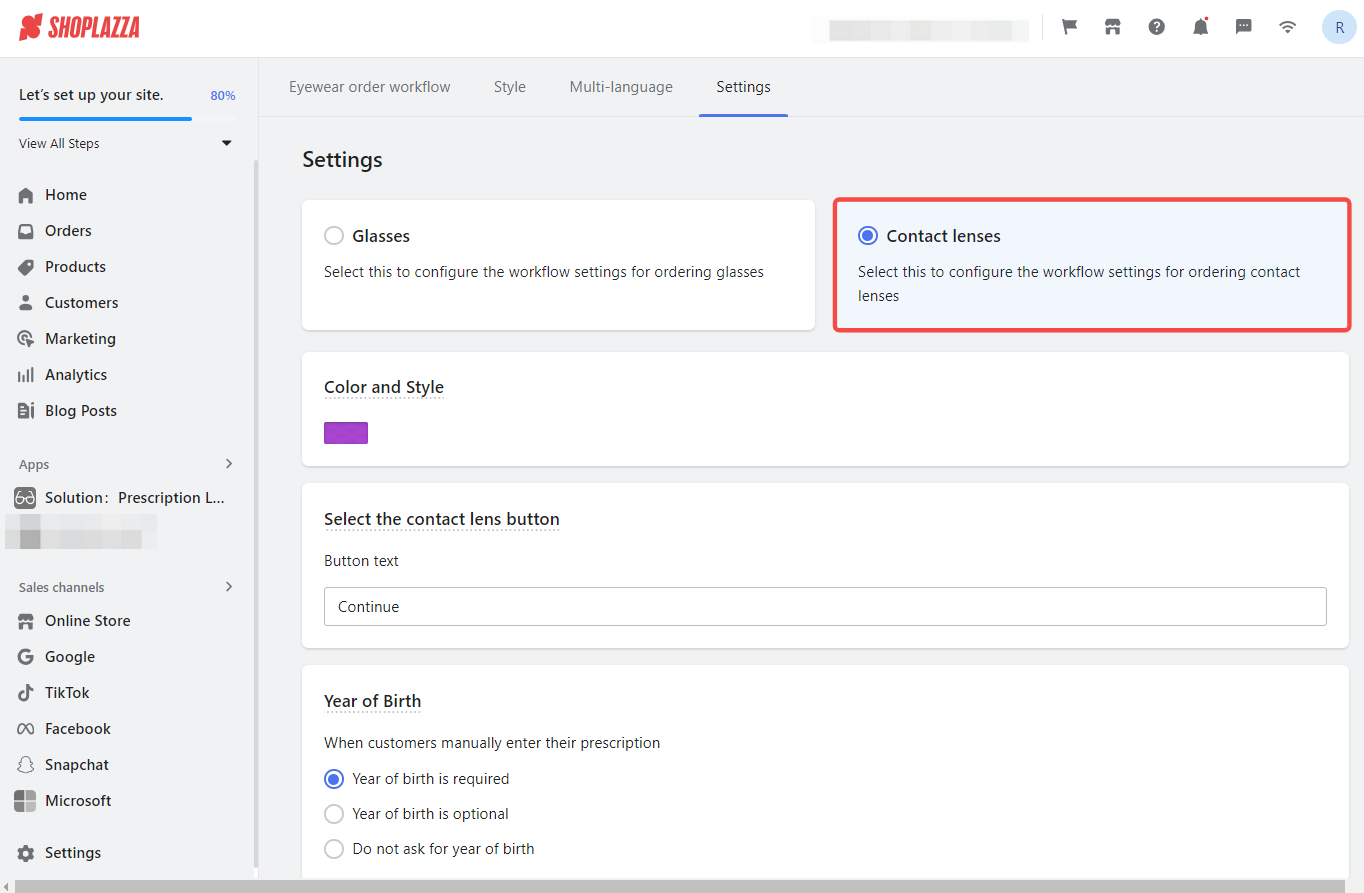
Use your brand colors
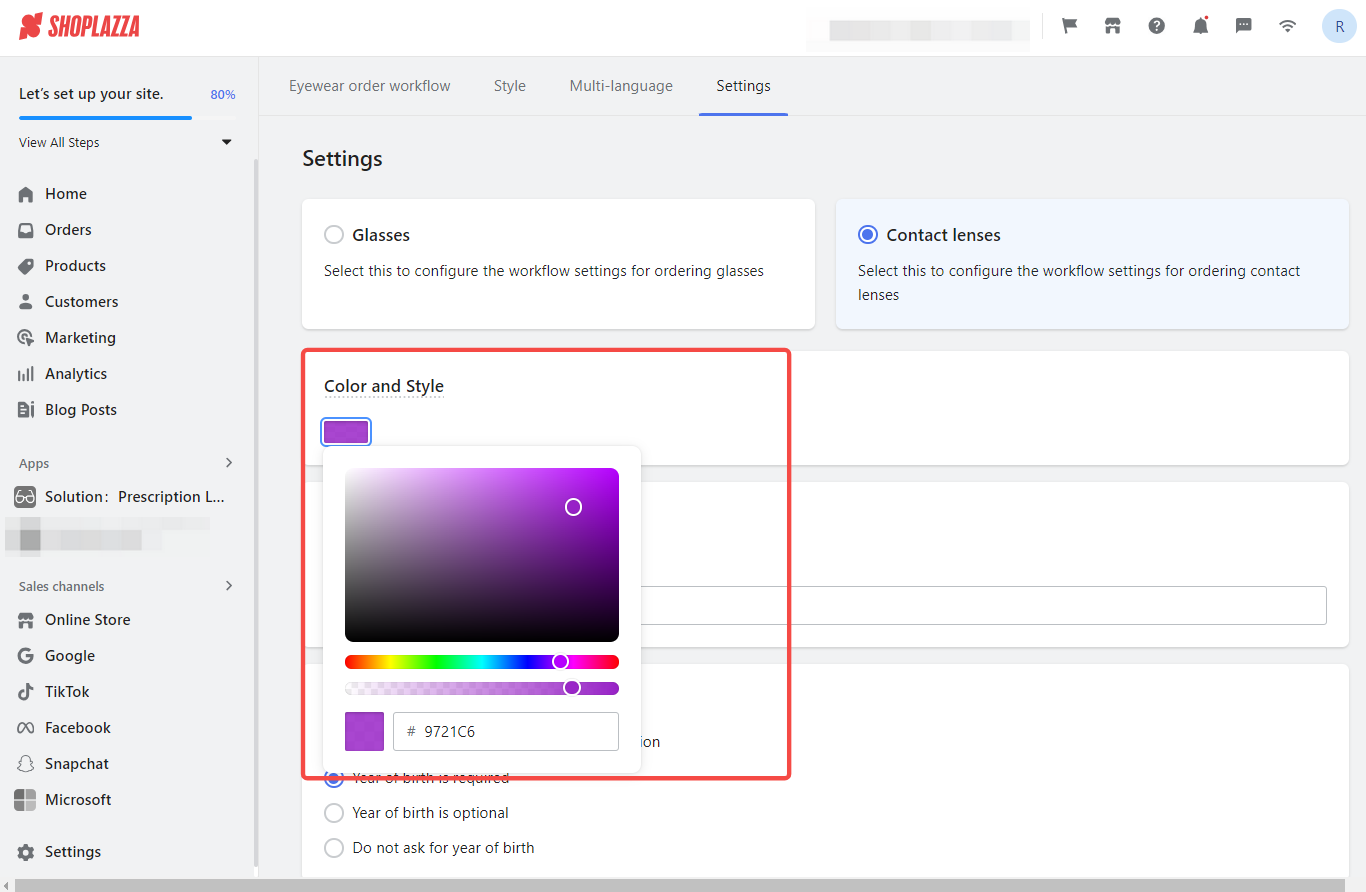
1. Enhancing your store's visual appeal: Change the color scheme, impacting elements like button colors and the background, adding a personalized touch. Select colors using the icon in the Color and Style section. Pick from a range of colors in the palette or enter a specific hex code for the exact color desired. Once preferred colors are selected, use the slider tool to fine-tune the shade and transparency. This enhancement ensures that the chosen colors align seamlessly with your store's overall design aesthetic. After making these adjustments, simply save the changes. Your storefront will then be updated, showcasing the new color scheme across the site, providing a cohesive and visually appealing shopping experience.
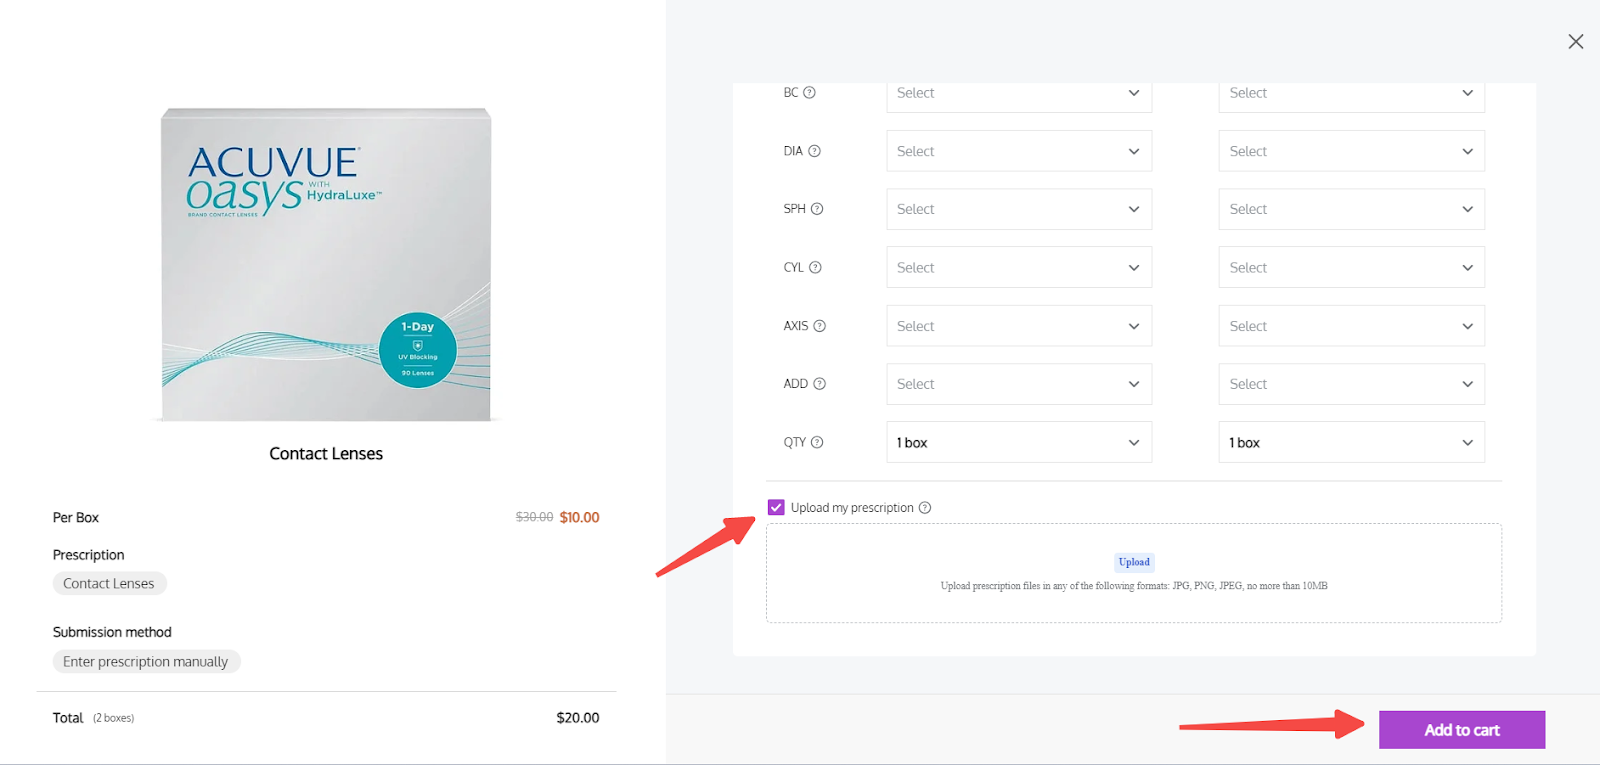
2. Visual example: Here is a visual representation of how this will appear to the consumer with purple configured.
Customizing button text
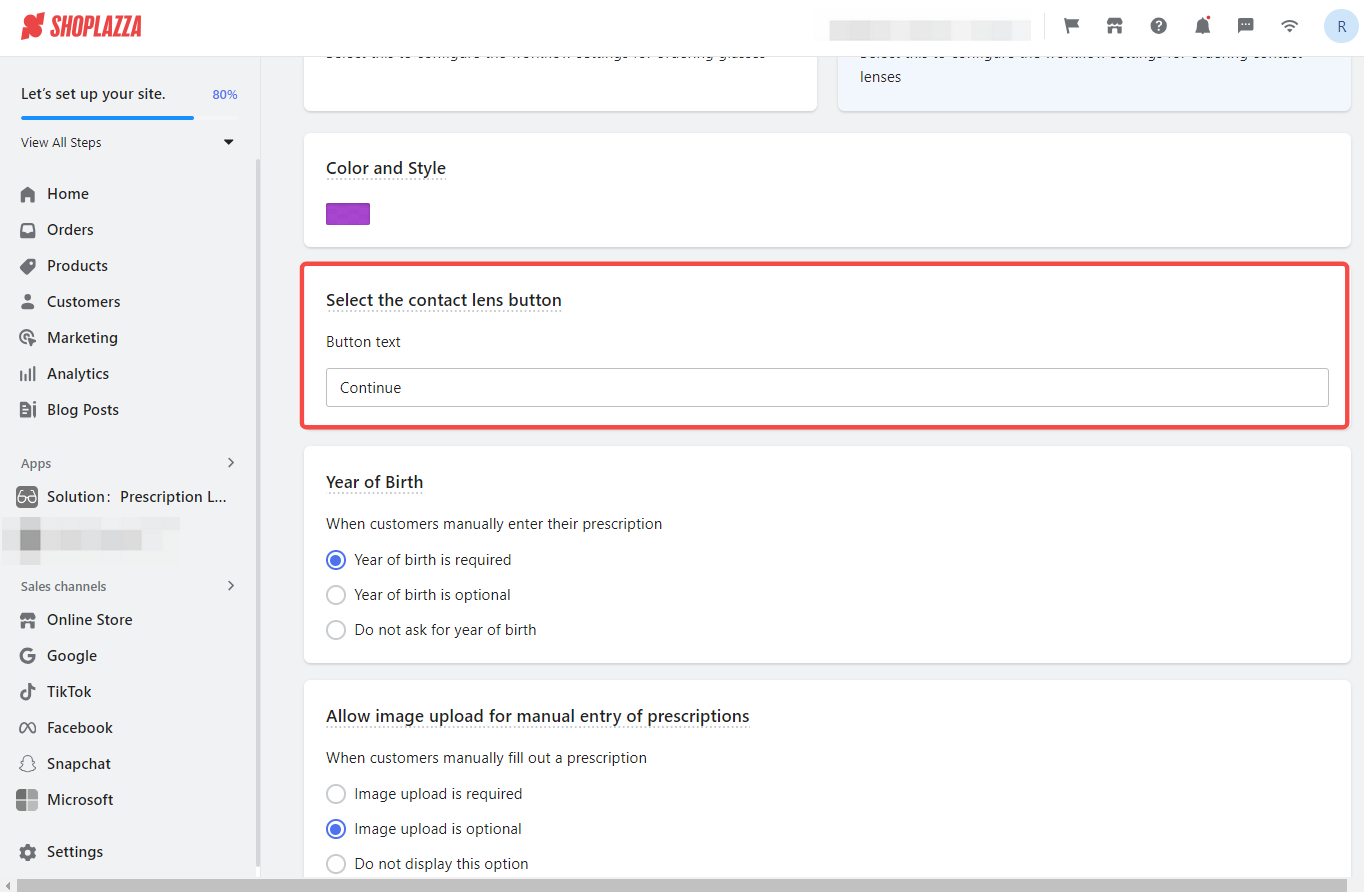
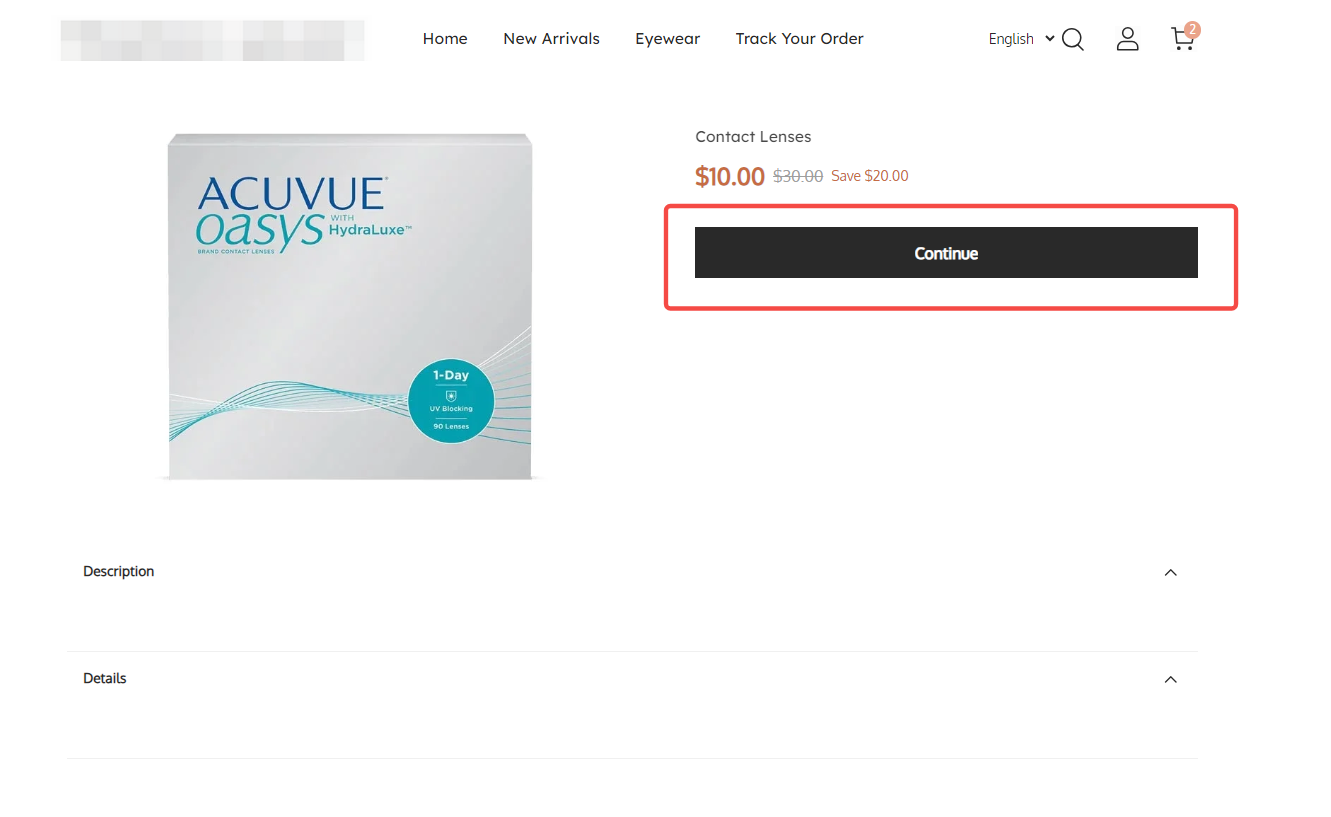
1. Personalize the button text: Customize the button text for contact lens products. This feature replaces the standard Add to Cart button with personalized text, enhancing the shopping experience specific to the lens fitting process. When consumers click the Continue button on the storefront, it opens a popup where they can fill in prescription parameters and select product quantities. Modify the button text, which will be shown on product detail and marketing pages.
2. Visual example: Here is a visual representation of how the interface will appear to the consumer.
Customer birthdate
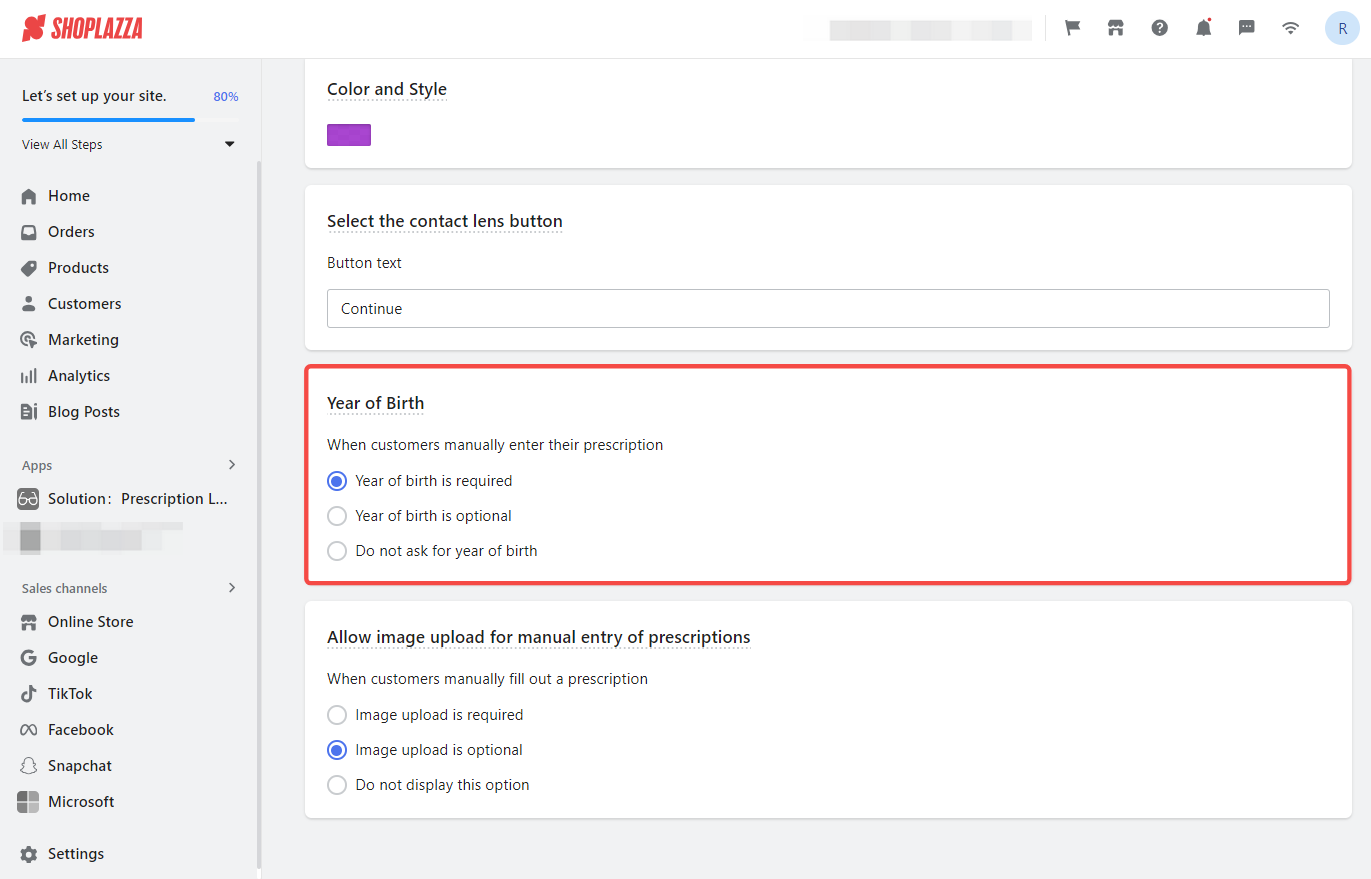
1. Deciding on data entry: Decide if consumers need to input their birth year during the shopping process. The chosen setting is actively implemented in your online store. Choose from the following options: Required, where consumers must enter this information while shopping online; Optional, where consumers have the choice to provide this data; or Do Not Ask, where this information will not be requested from consumers.
2. Visual example: Here is a visual representation of how the interface will appear to the consumer.

Allow image upload for manual entry of prescriptions
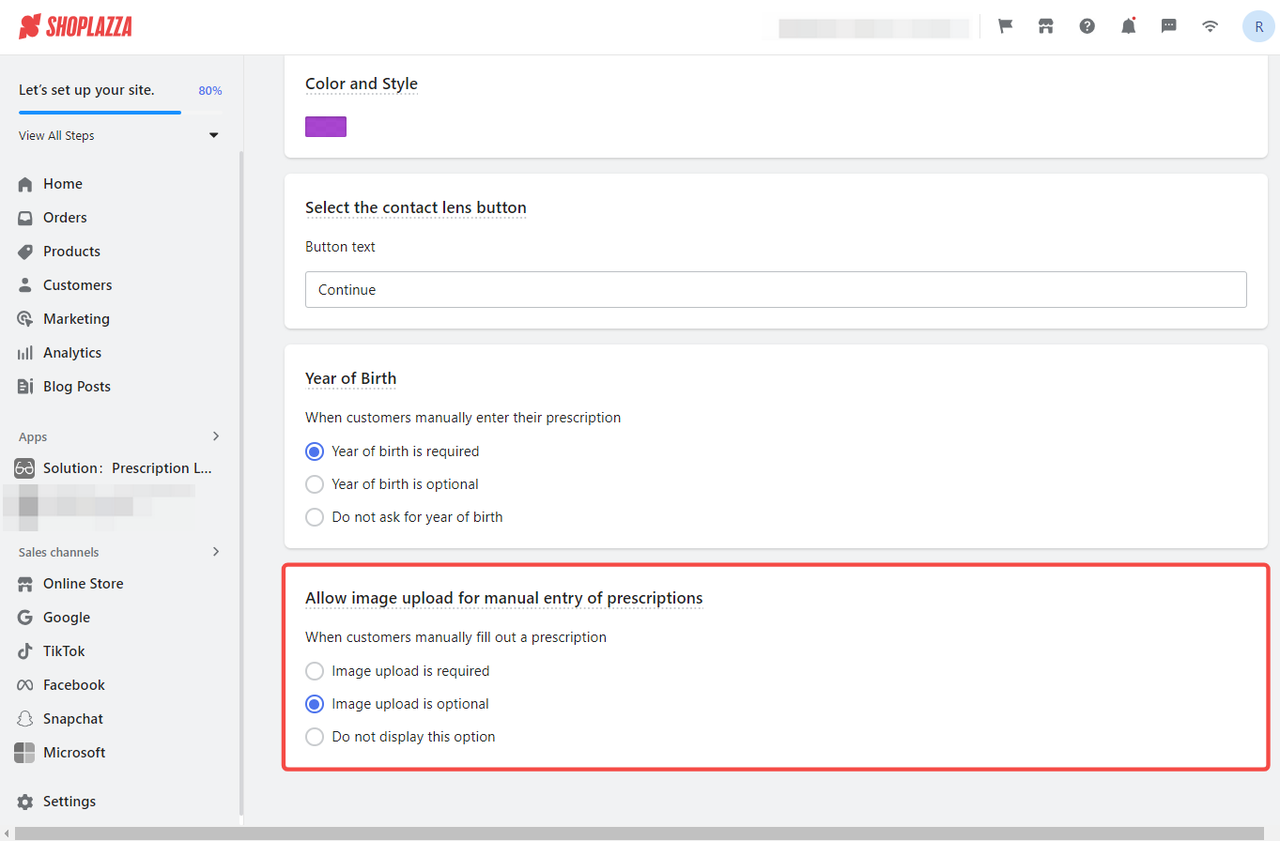
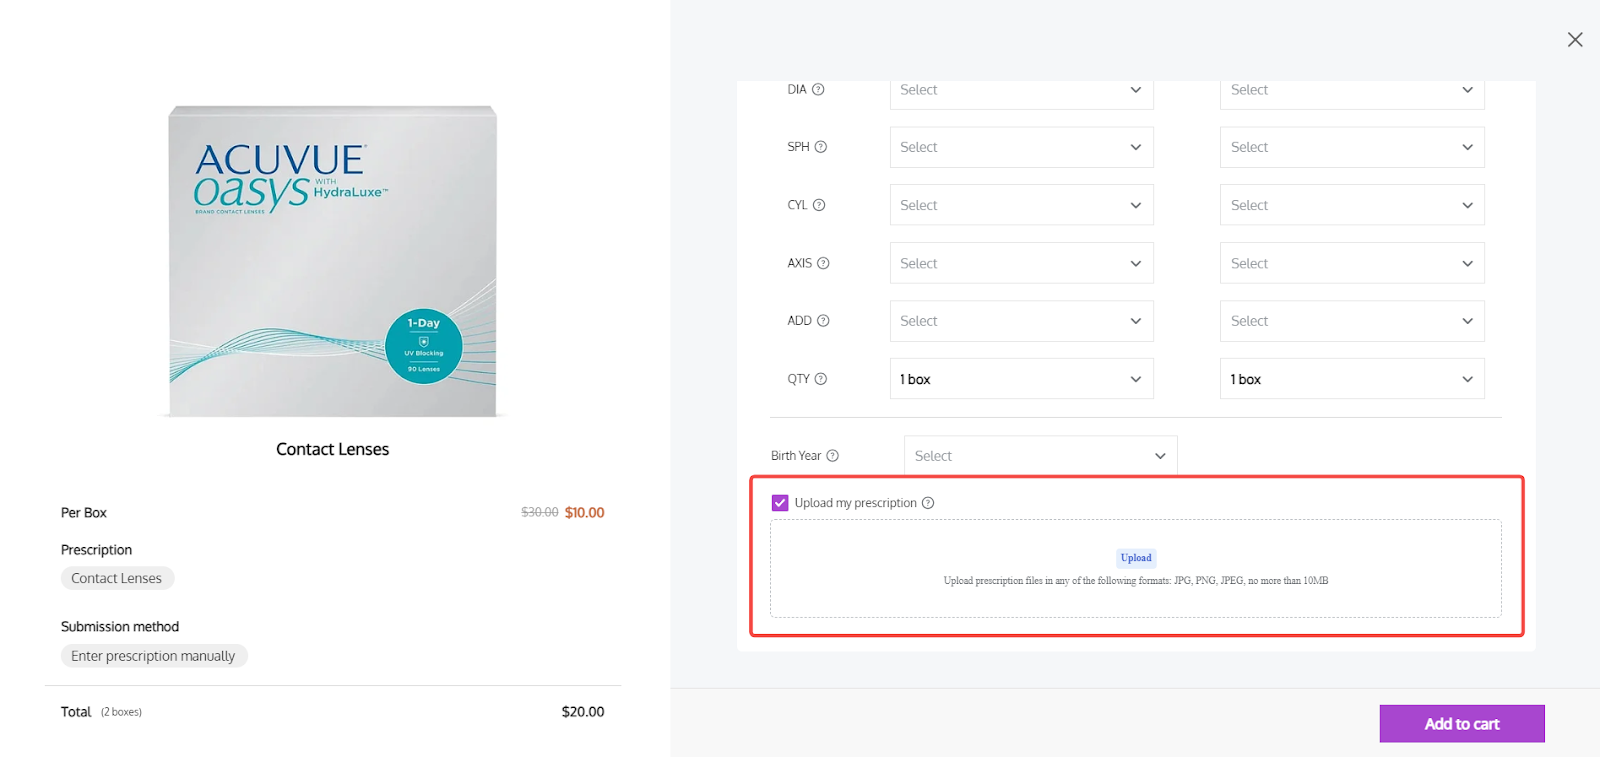
1. Improving prescription entry: Require or allow users to upload a prescription image when they manually fill out a prescription by selecting whether this image upload is required or optional. Once selected, the option to upload an image will appear on the page where the user manually fills the prescription. The options are: Required, where consumers must provide a prescription image to proceed, essential to avoid submission errors; Optional, where consumers have the discretion to upload a prescription image, not mandatory for completing their entry; or Do Not Display, where the upload function is not presented to the consumer.
2. Visual example: The following image showcases what consumers see.
This guide aims to help customize your online contact lens store to better serve your customers. Following these steps provides a smoother and more personalized shopping experience.


Comments
Please sign in to leave a comment.