Enhancing your online glasses store involves personalizing various settings to create a seamless and user-friendly shopping experience. This guide covers essential customization options, from adjusting color and style elements to configuring prescription parameters and tax settings. By leveraging these features, you can provide a tailored experience that meets both customer needs and regulatory requirements. Let's explore how you can optimize these settings to enhance your store's functionality and appeal.
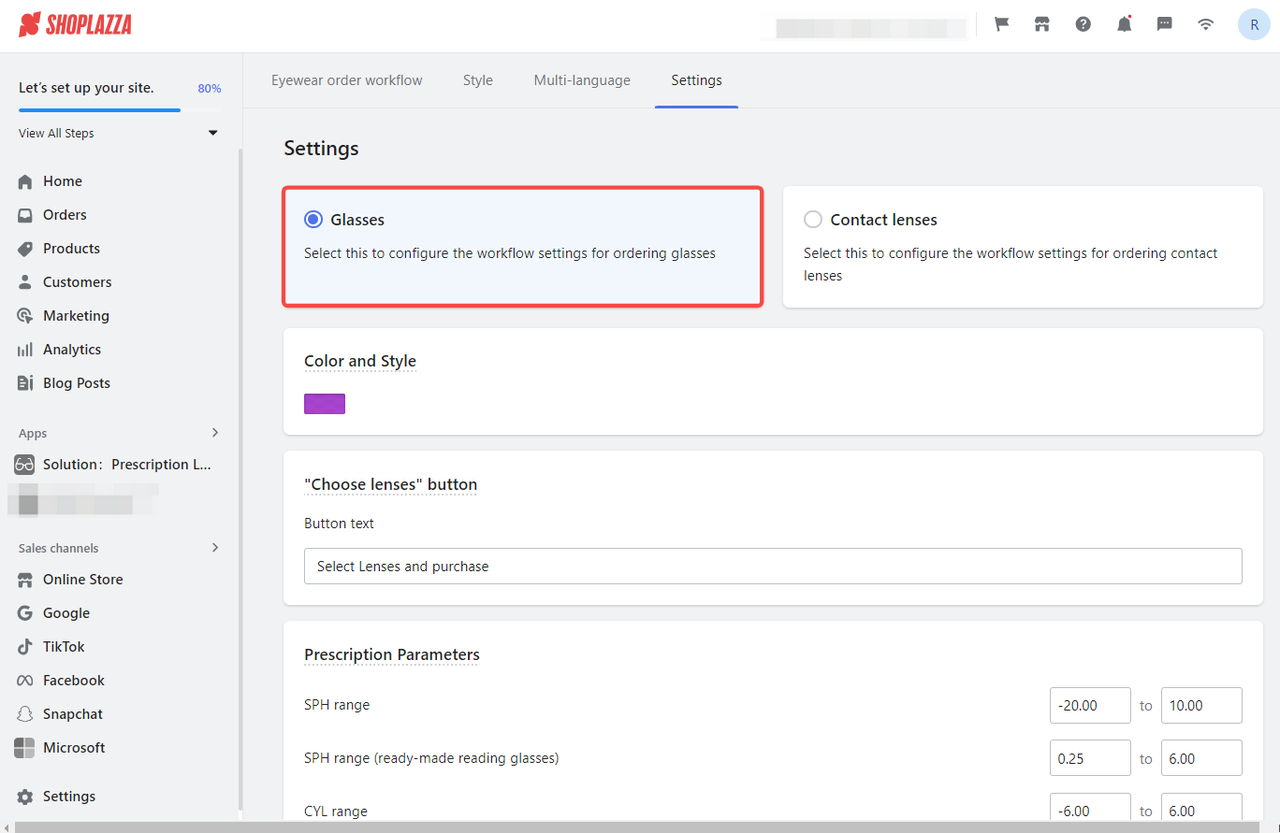
To begin, click on the Glasses section in your Shoplazza Admin panel as shown below:
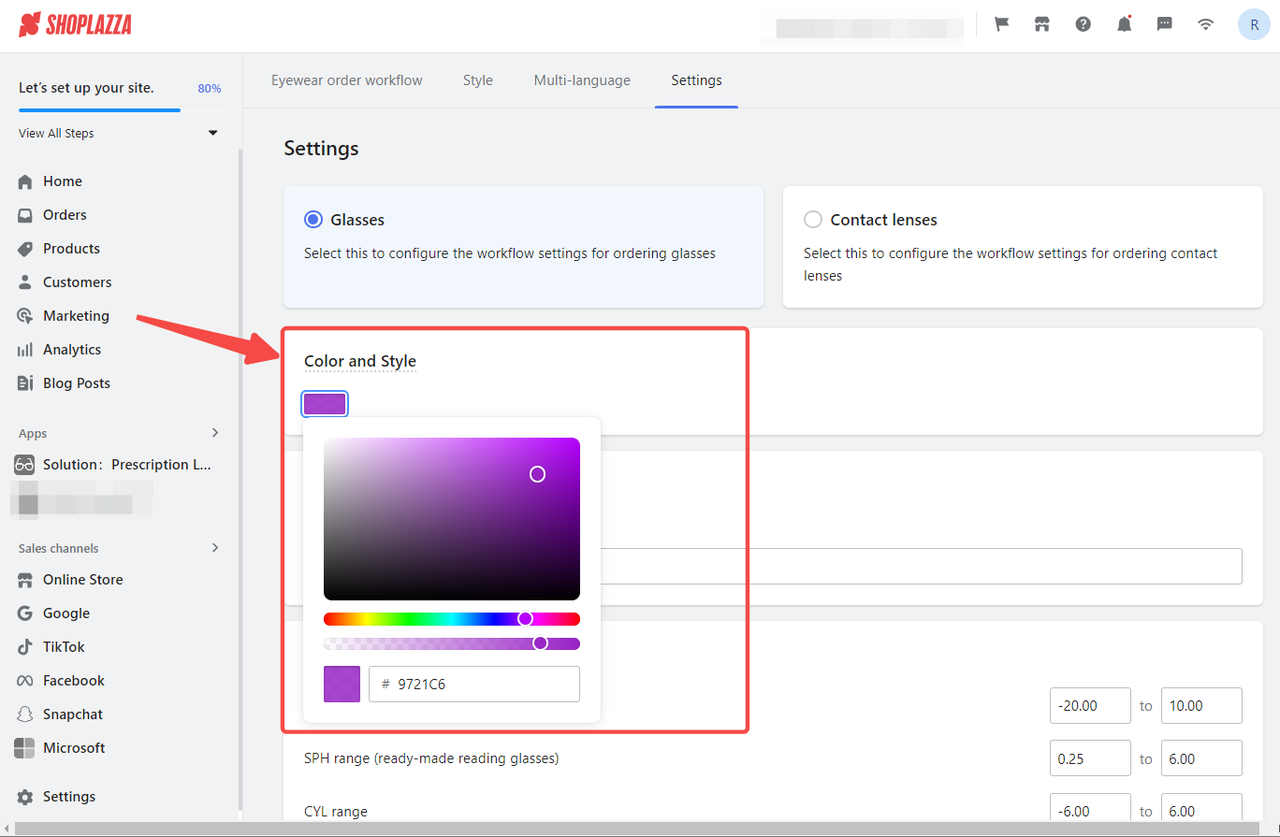
Color and style
1. Personalizing the aesthetics: Customize elements like buttons, scrollbars, and lens selection status to match your store's style.
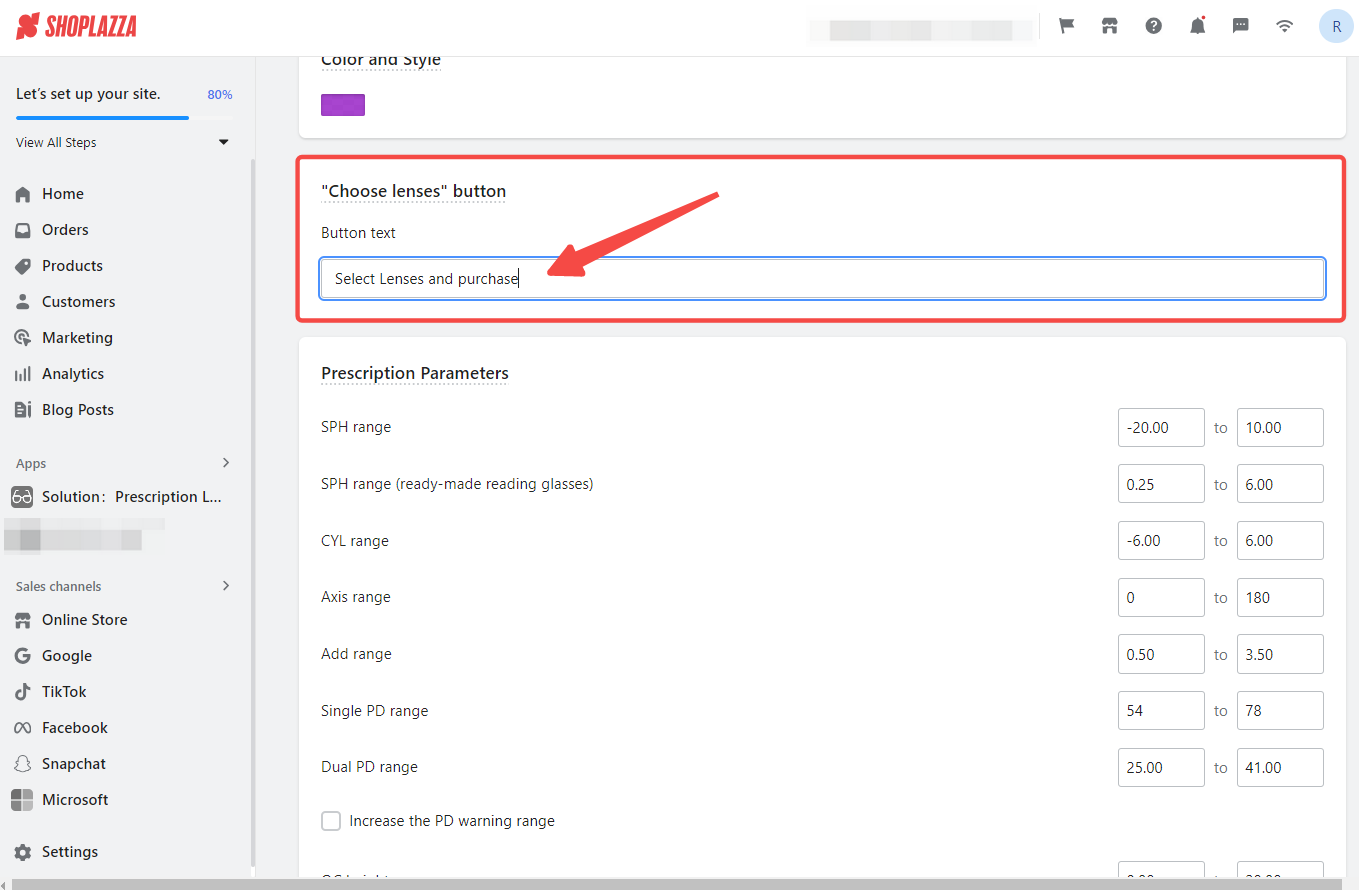
The "Choose lenses" button
1. Customize button text: Replace the default Add to cart button with customized text on the product details page. Personalize the text displayed on this button.
Prescription parameters
1. Customizing prescription range: Define the range of values for various prescription parameters, such as SPH, CYL, Axis, ADD (multifocal), single PD, dual PD, and OC height. This ensures customers can only select values within the specified range. The default SPH range is from 0.25 to +6.00, in 0.25 increments.
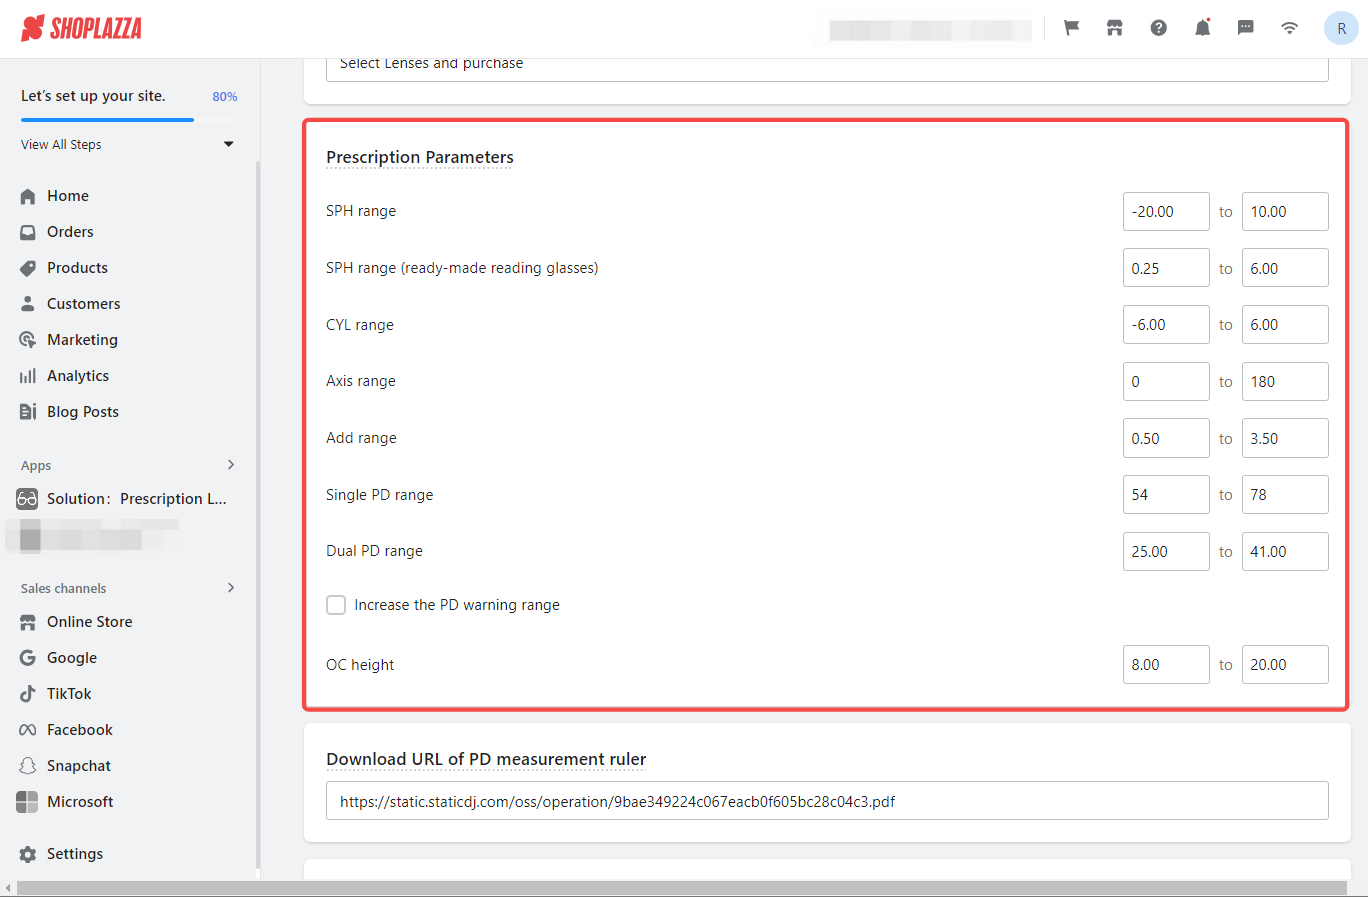
2. Customer-focused preview: Display SPH ranges clearly and user-friendly, showing customers how the products will appear in your store.
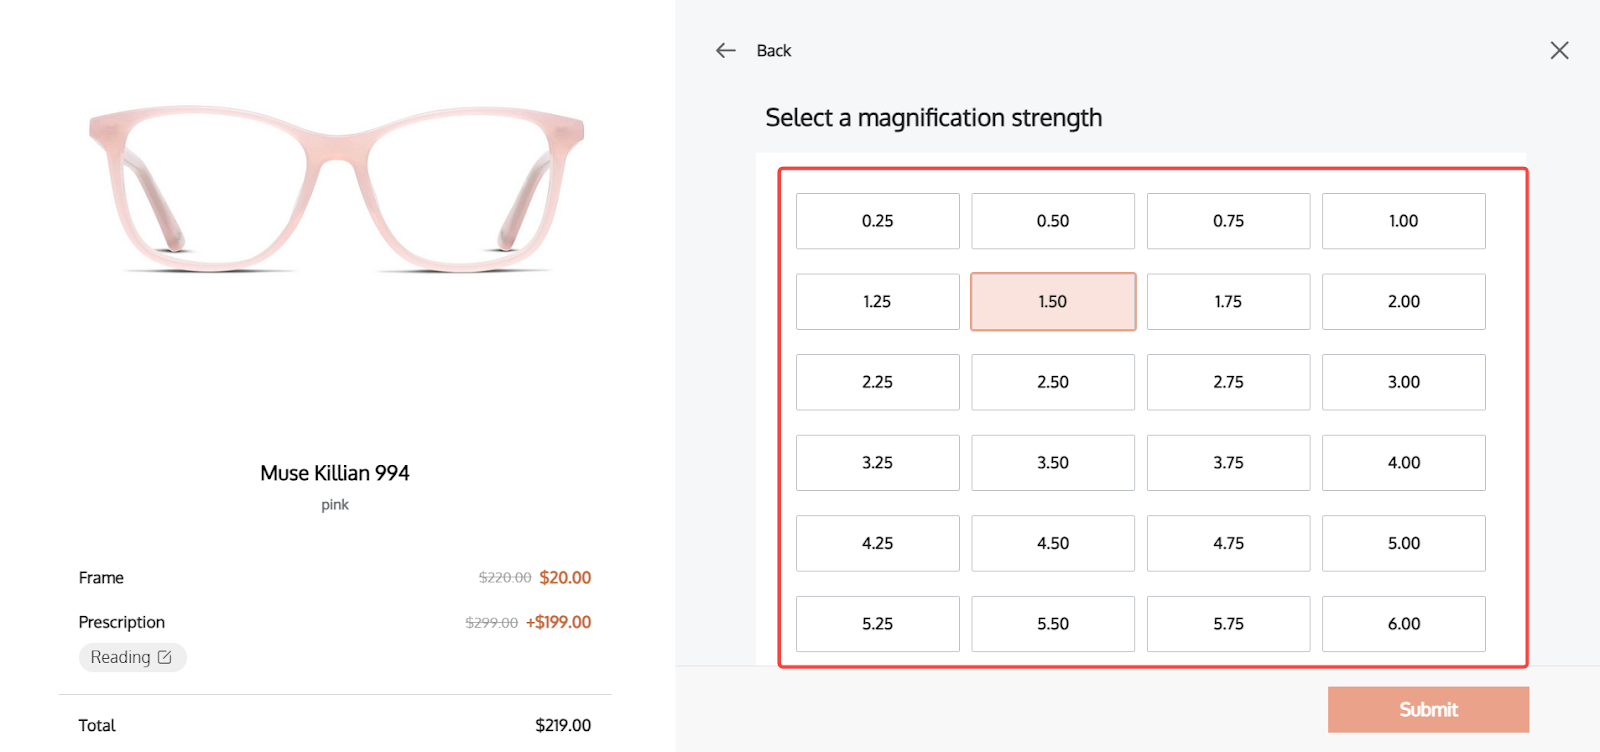
PD measurement ruler
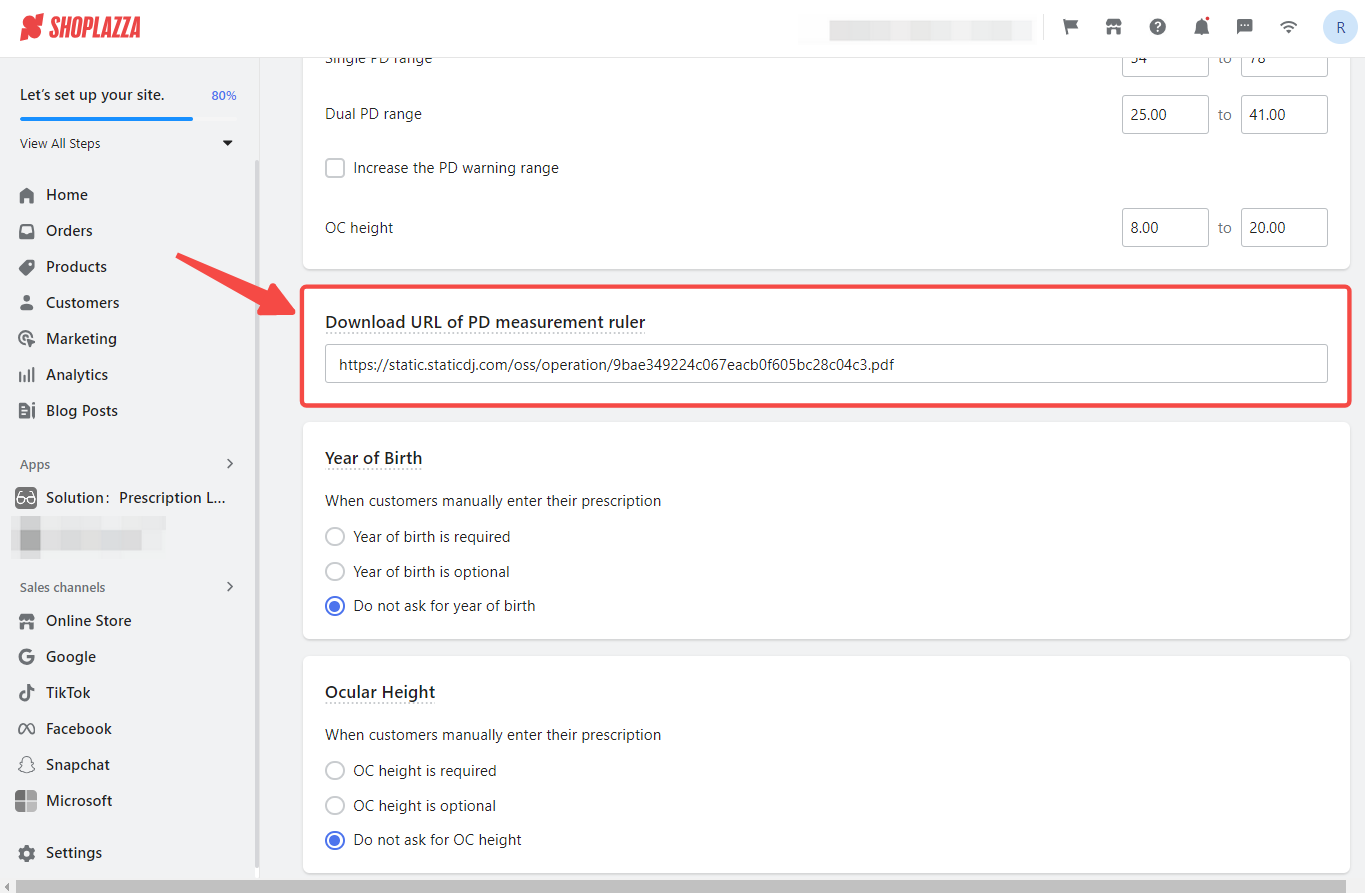
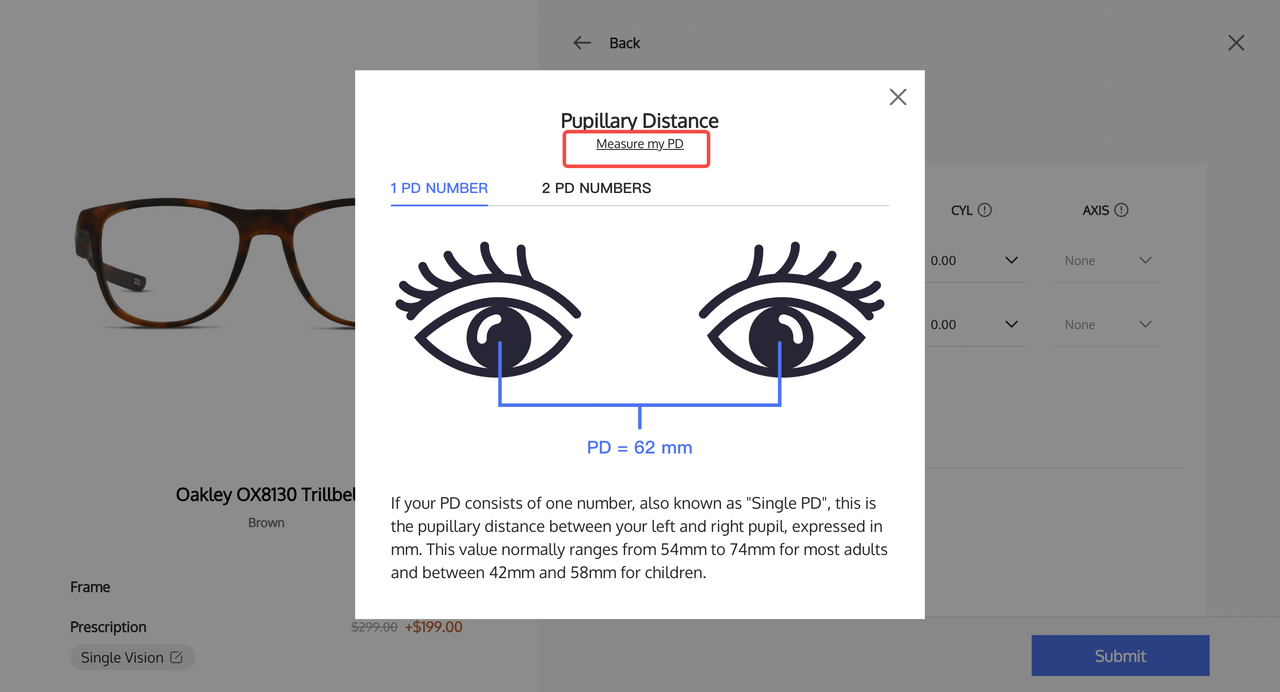
1. Providing a measurement tool: Shoplazza offers a default link to download a PDF of the PD Measurement Ruler. You can use this standard link or provide a customized link for a tailored customer experience. When customers choose Measure my PD during eyewear fitting, they will be directed to download this tool, enhancing their shopping experience.
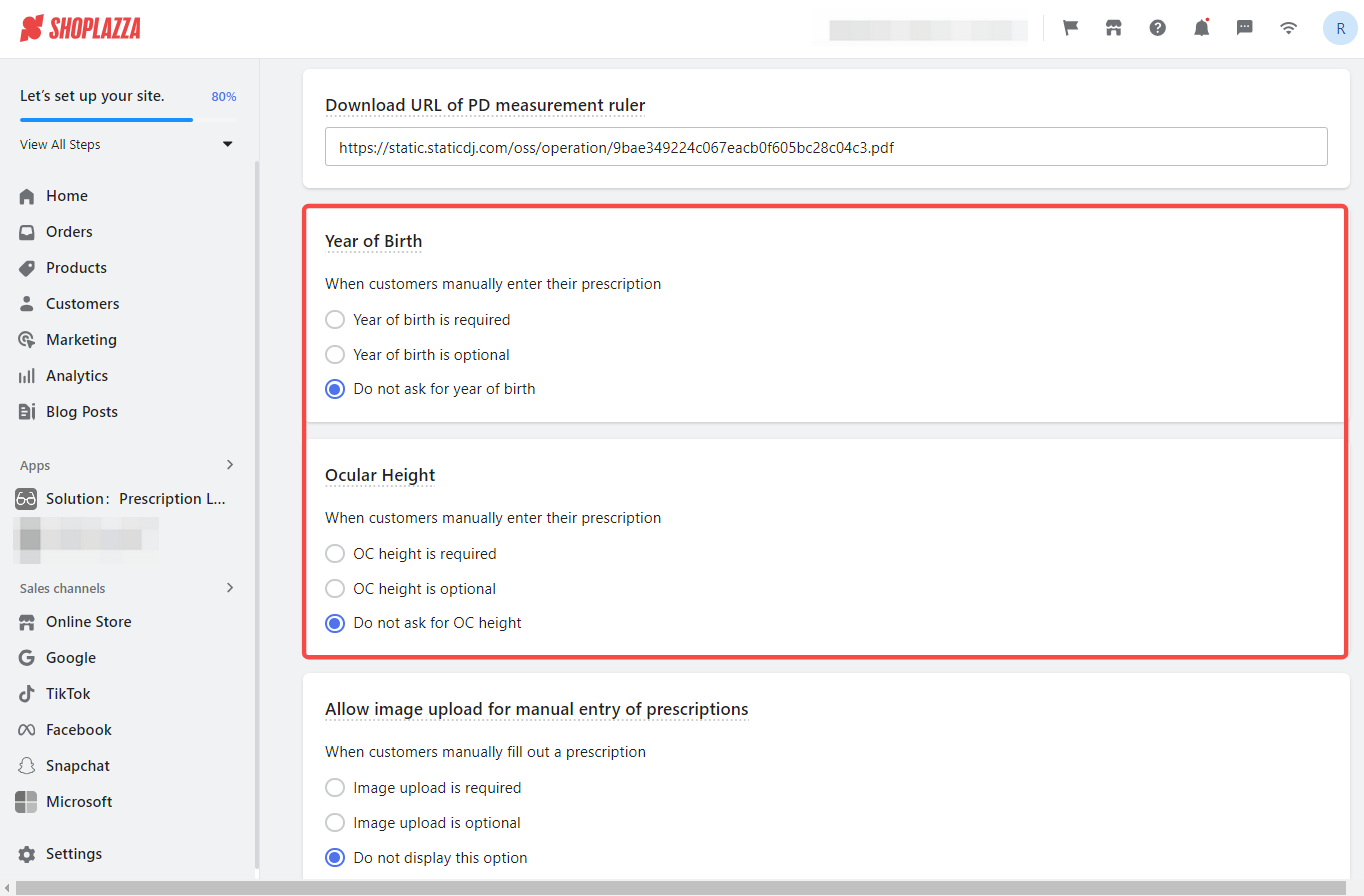
Year of birth/ocular height
1. Setting data entry requirements: Decide if entering the year of birth or ocular height is mandatory, optional, or not displayed during the prescription entry process.
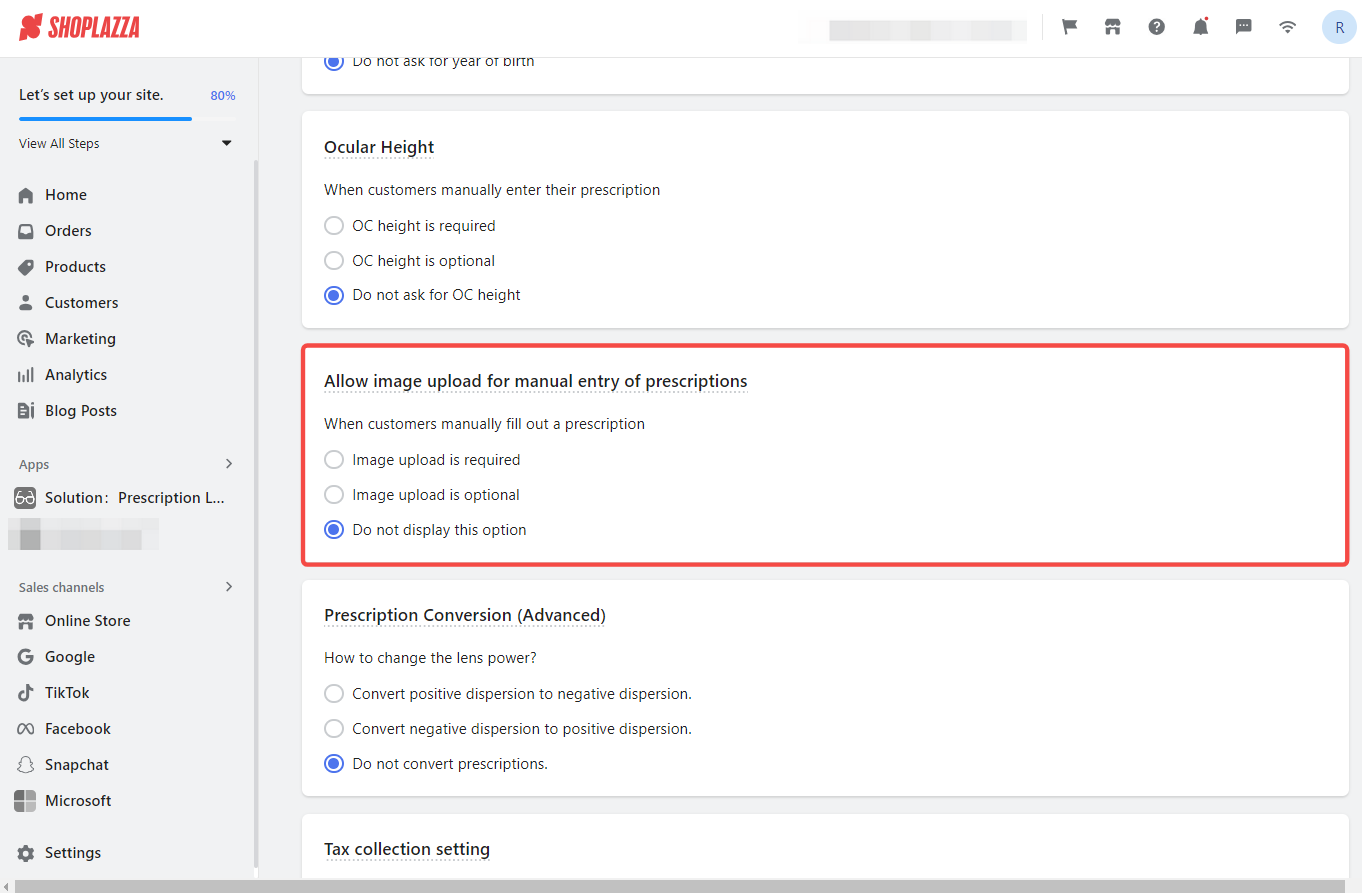
Allow image upload for manual entry of prescriptions
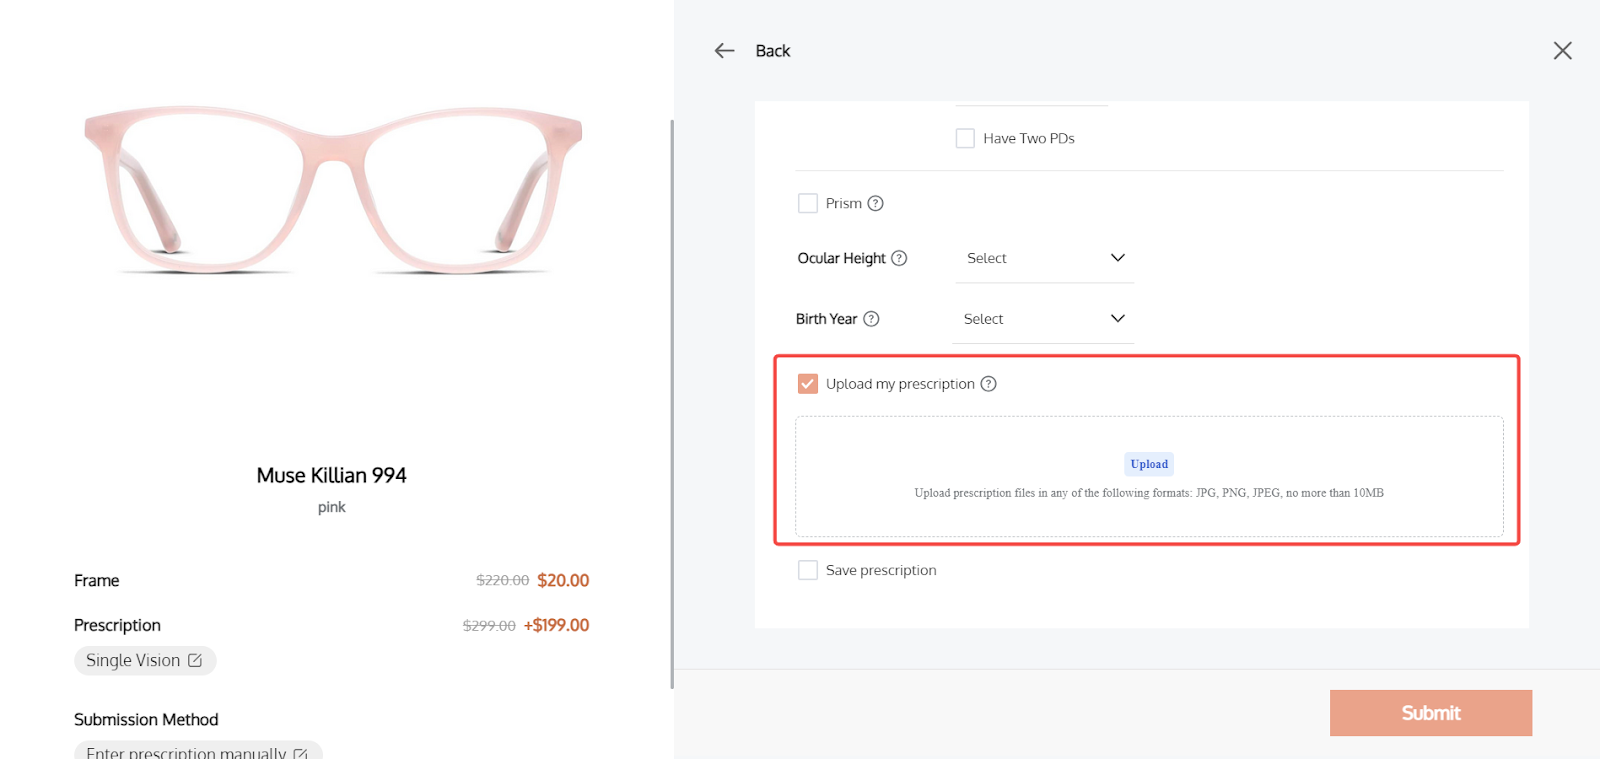
Enable customers to upload images of their prescription glasses, streamlining the verification process and ensuring compliance with local regulations. This feature supports manual entry verification and meets legal requirements in some regions.
- Image upload is required: Customers must upload an image of their prescription. An error occurs if they don't.
- Image upload is optional: Customers can choose to upload a prescription image or not, without encountering errors.
- Do not display this option: Remove the image upload option from the prescription entry process.
- Previewing the feature: See how the image upload option will look to your customers in your store.
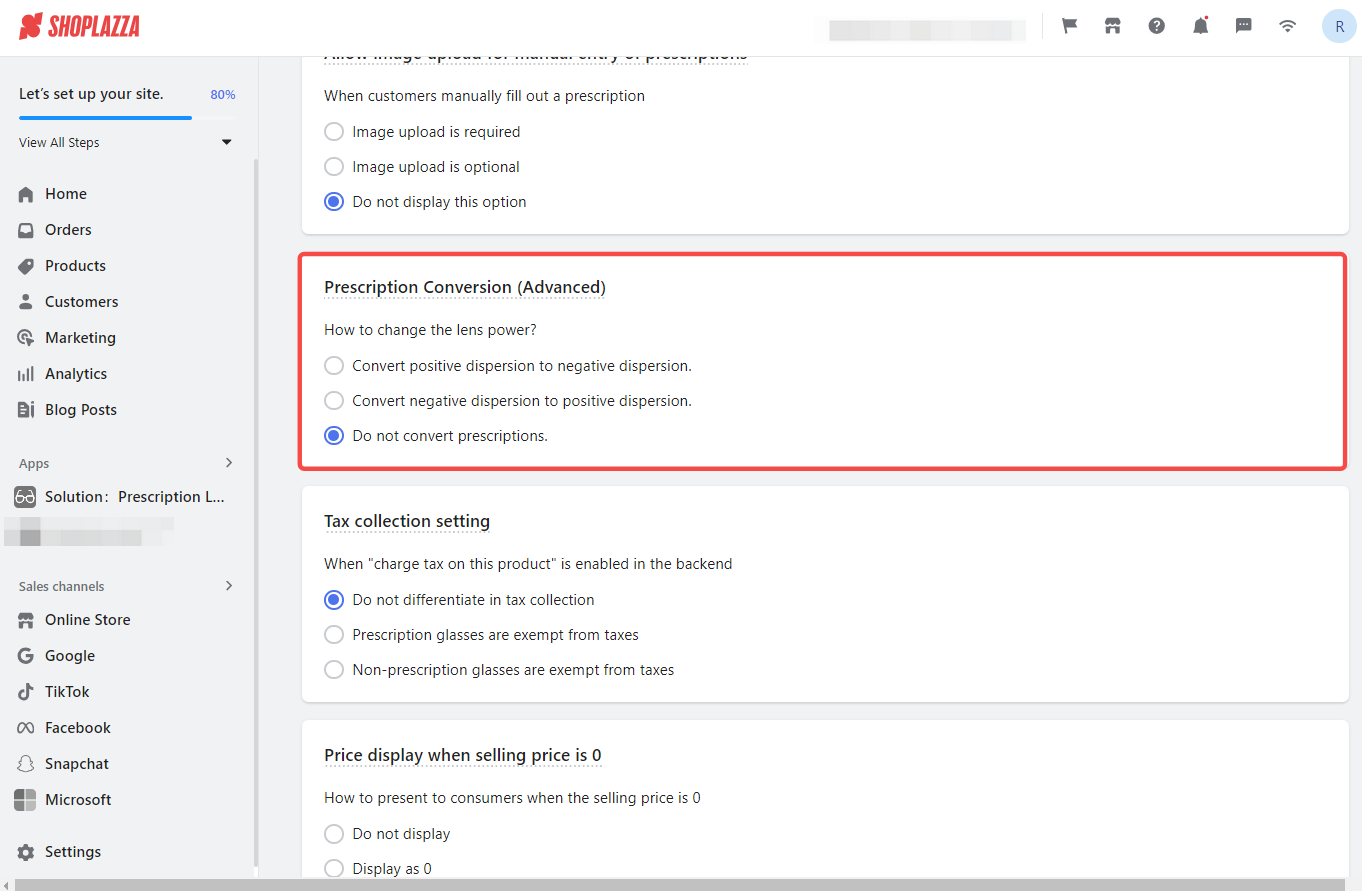
Prescription conversion (advanced)
Adjust lens prescriptions to match the standards in different countries, converting values as needed. Learn more about Optometric Transposition for detailed guidance.
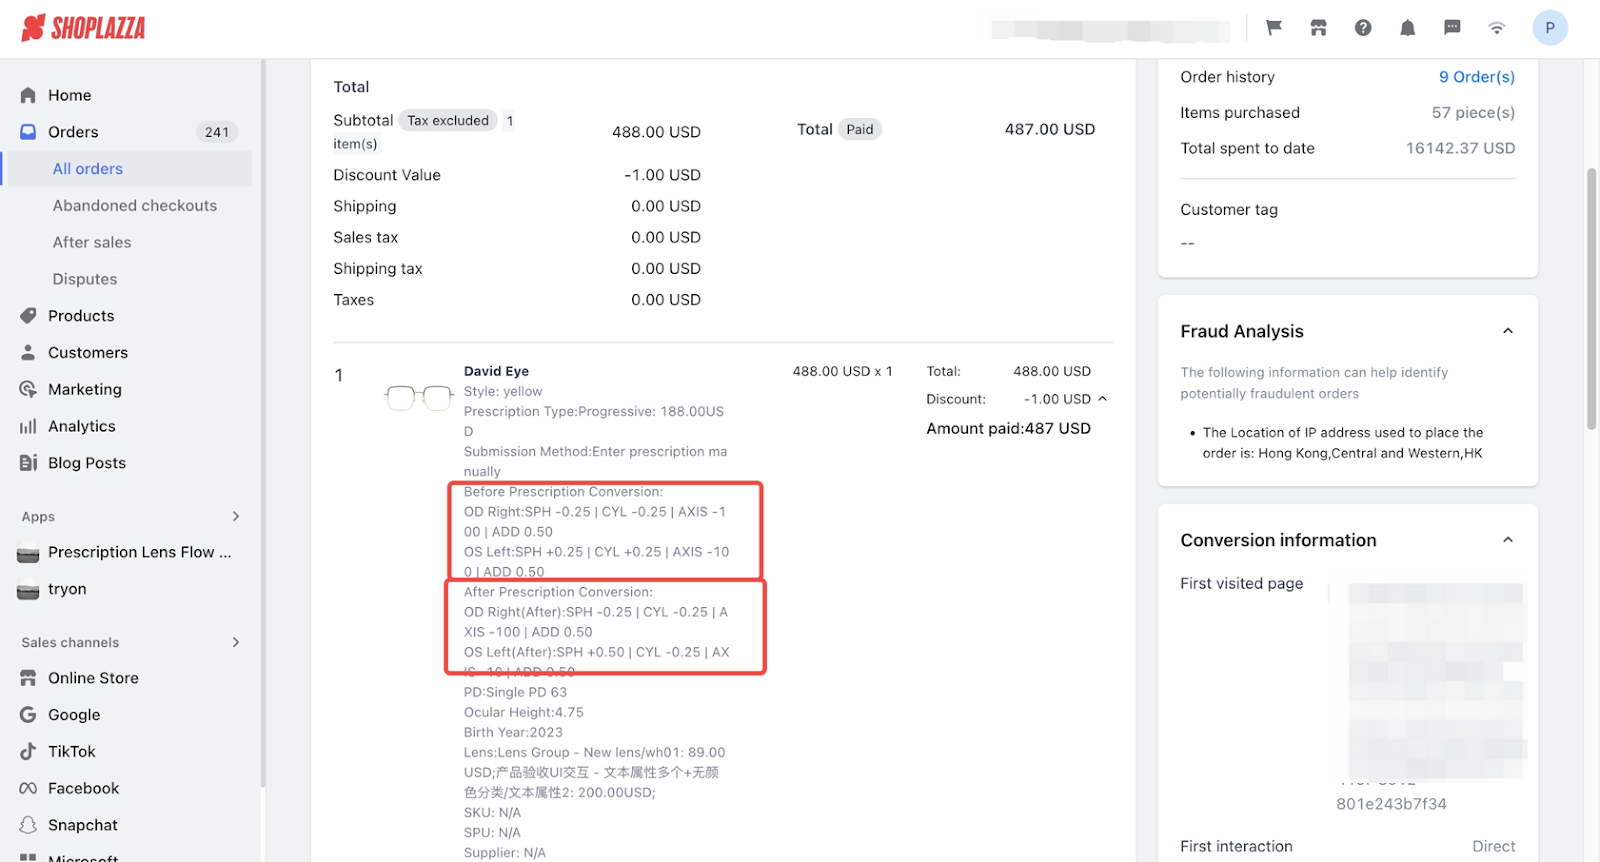
1. Viewing conversion values: Display pre- and post-conversion values clearly in the order details, providing a comprehensive understanding of the adjustments.
2. Detailed prescription overview: Show before and after conversion values, ensuring a clear view of the prescription changes.
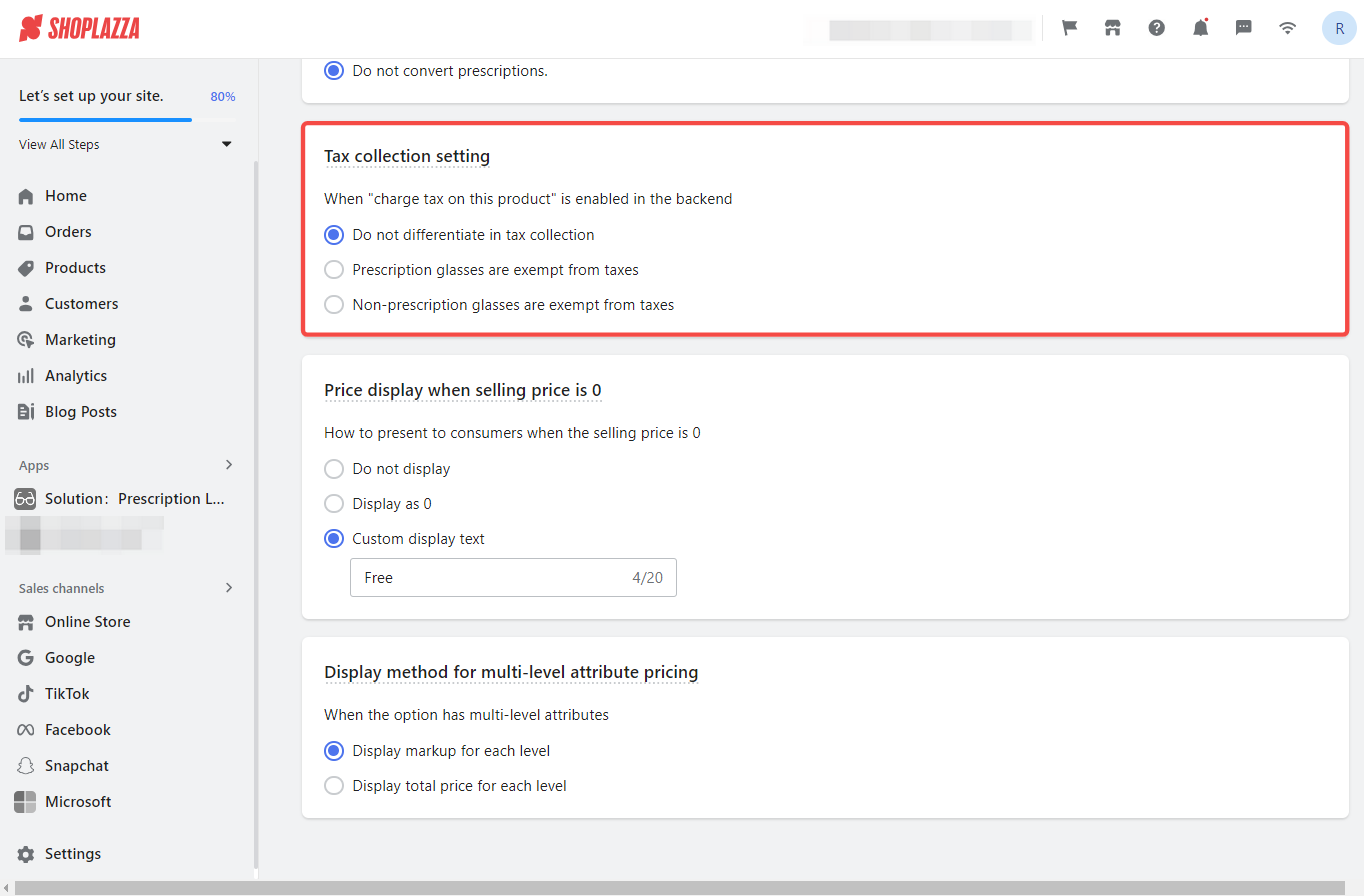
Tax collection settings
Comply with regulatory changes by distinguishing between prescription and non-prescription glasses for tax purposes. Apply for tax exemption automatically for prescription glasses. Frames without prescription lenses are exempt from tax, but adding prescription lenses makes the entire product taxable.
1. Select tax options: Enable Charge taxes for your product in Shoplazza Admin and choose from these options:
- Do not differentiate in tax collection: Default setting applying tax based on your product settings.
- Prescription glasses are exempt from taxes: No tax is applied to prescription glasses, including both lenses and frames.
- Non-prescription glasses are exempt from taxes: Frames without prescription lenses are not taxed, but adding lenses makes the entire product taxable.
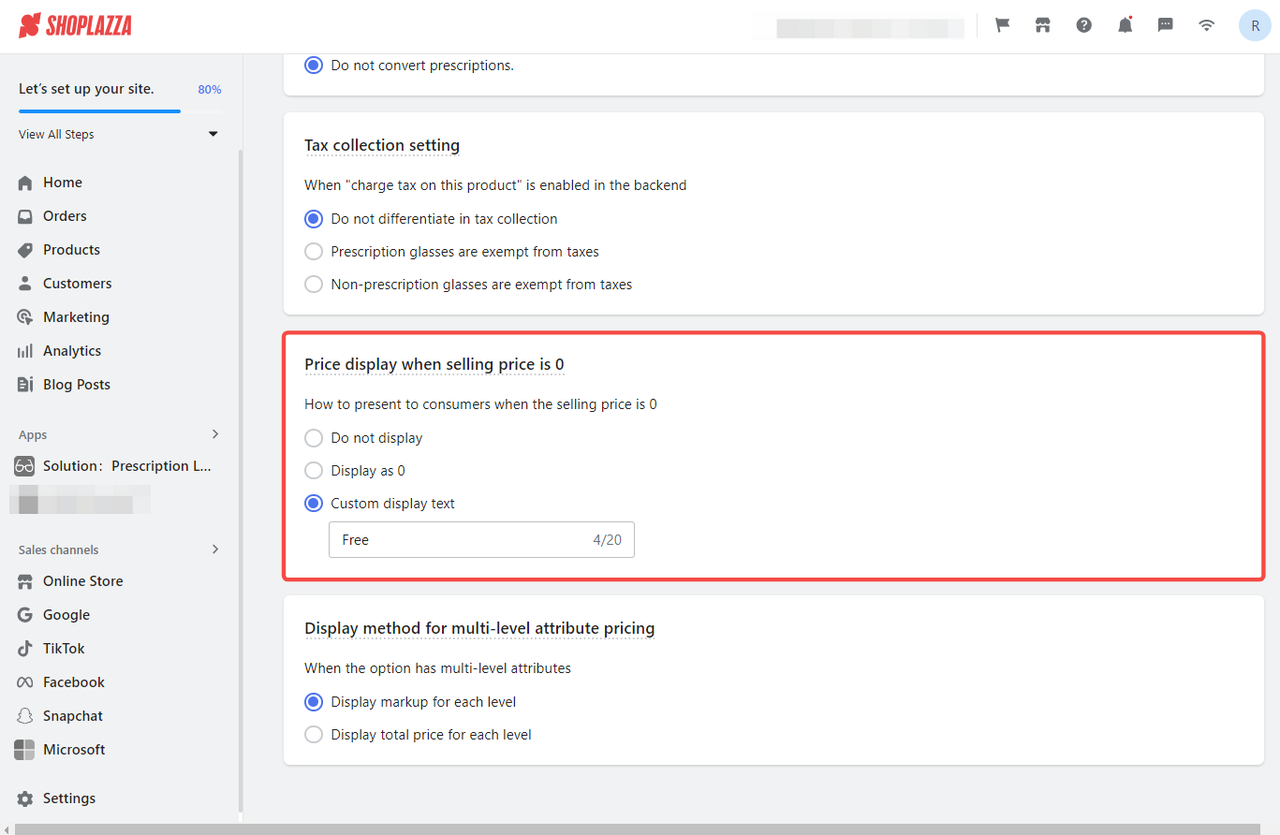
Price display when selling price is 0
1. Customizing zero price display: Manage how zero-priced options are shown to consumers, ensuring clarity.
- Customizing zero price display: Choose to hide zero-priced options, show them as zero, or use custom text.
- Flexible display options: Options include Do not display, Display as 0, or Custom display text.
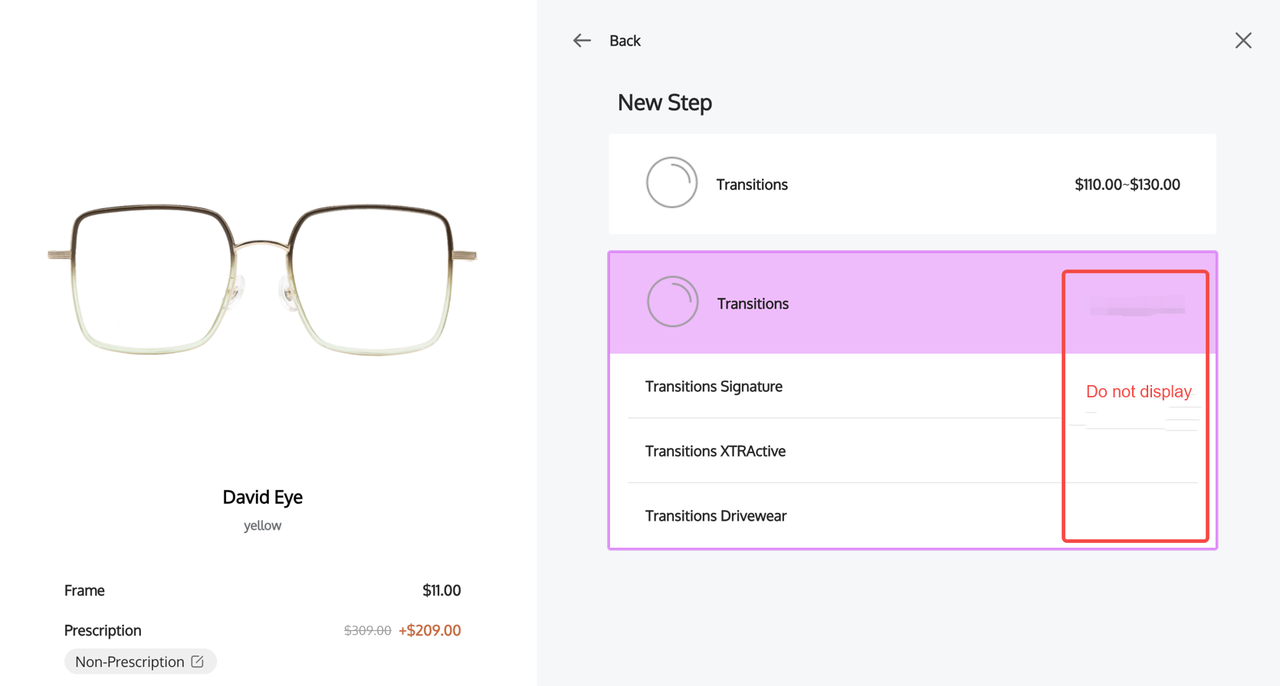
- Visibility of zero price: If Do not display is selected, the price area for those options remains blank.
2. Do not display option: When set to Do not display, prices are not displayed (blank).
3. Display as 0 Option: When set to Display as 0, zero-priced options are shown as such.
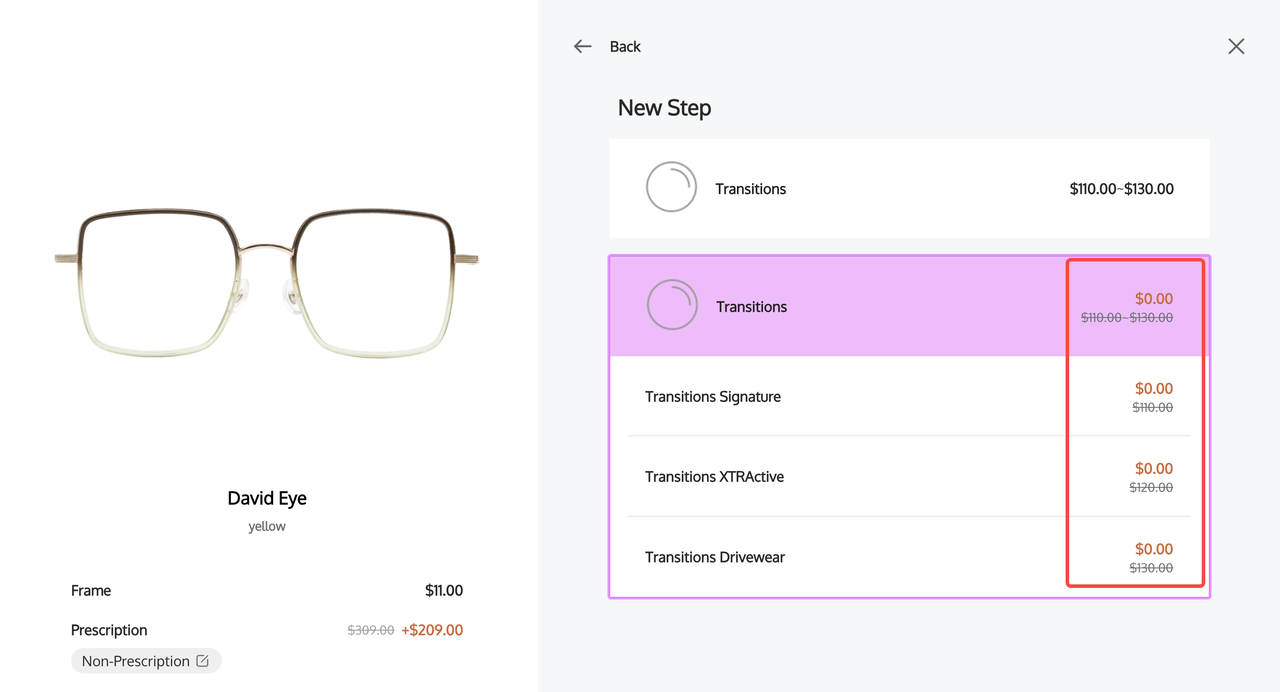
4. Custom text display: Select Custom display text for personalized text display for zero-priced options.

Display method for multi-level attribute pricing
1. Showcasing different pricing tiers: Manage how pricing tiers for products with various attributes are displayed.
- Handling multiple pricing structures: Set individual pricing for subtypes like Transitions Signature, XTRActive, and Drivewear.
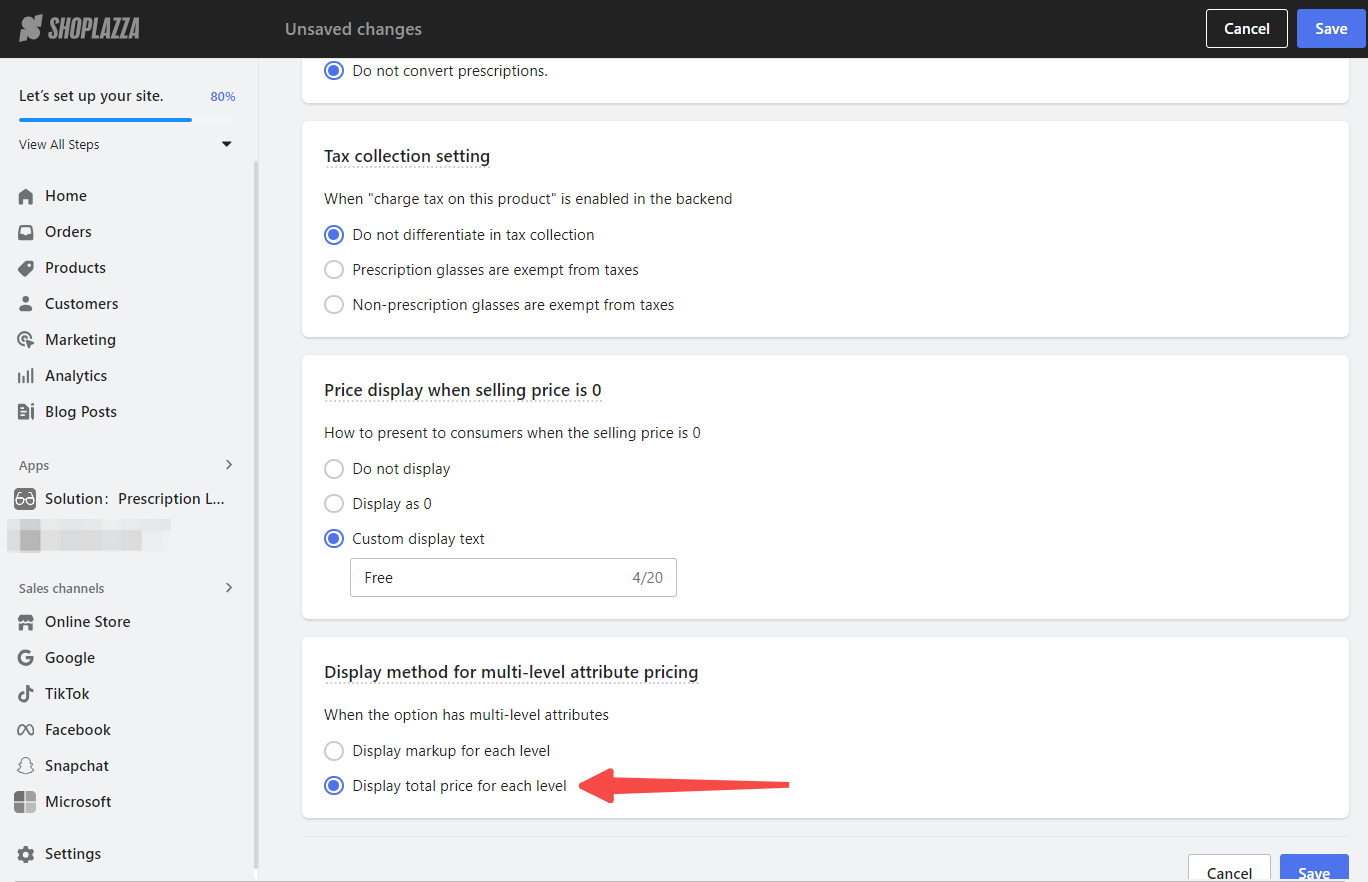
- Tailoring the pricing display: Decide whether to show prices as a markup for each level or as a total combined price for all attributes.
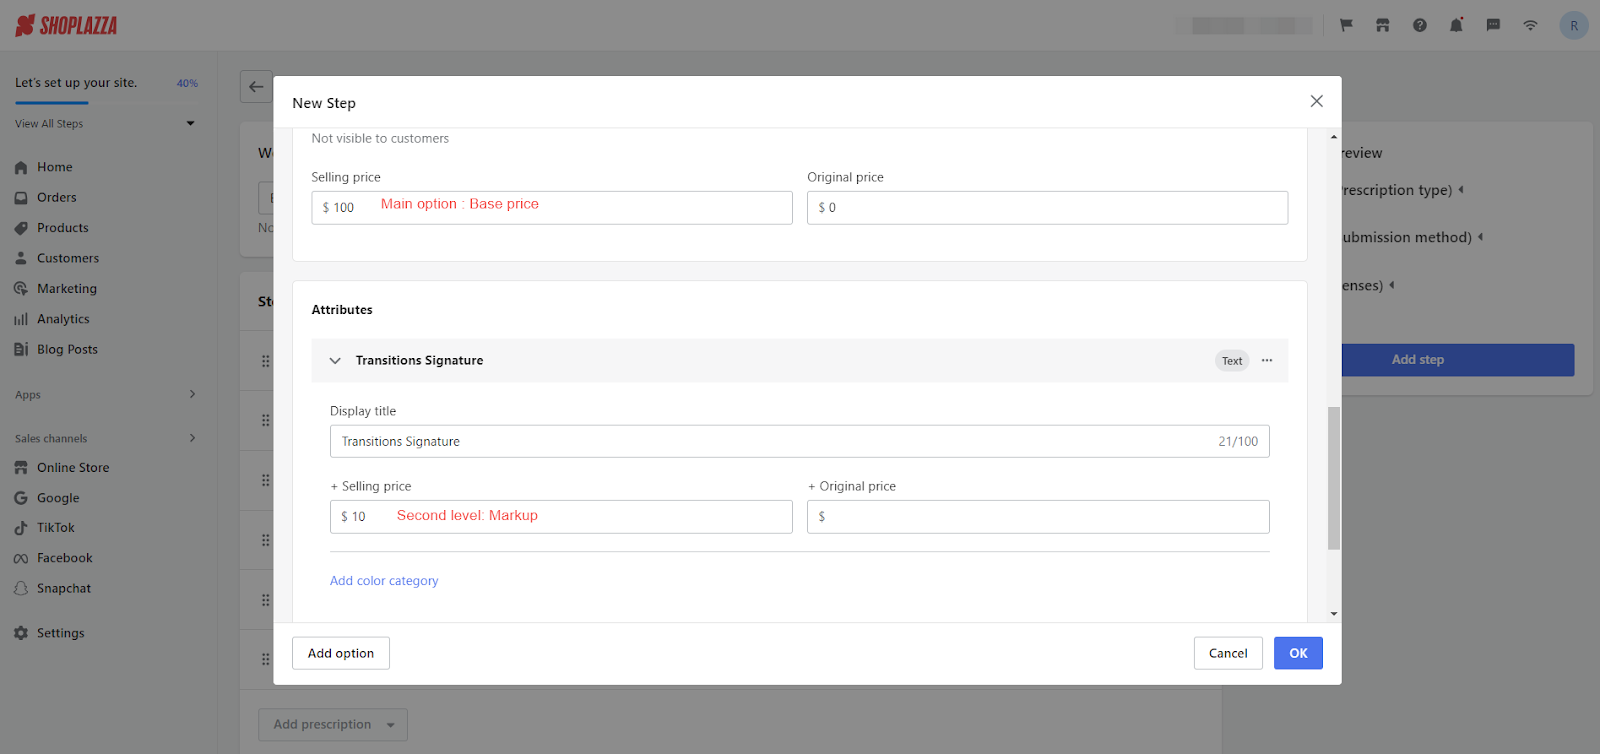
2. Markup display per level: Show base prices with additional charges for each level separately.

3. Display total price for each level: Combine base price and additional charges into a single figure for each level, offering a unified price view with potential price ranges.
This guide aims to help you customize your online glasses store to better serve your customers. By following these steps, you'll provide a smoother and more personalized shopping experience.


Comments
Please sign in to leave a comment.