Setting up the eyewear order process in your Shoplazza store involves a few simple steps. This guide will walk you through configuring the workflow for ordering glasses, ensuring a smooth experience for your customers.
To start, navigate to the Eyewear order workflow section in your Shoplazza admin and click on New workflow.
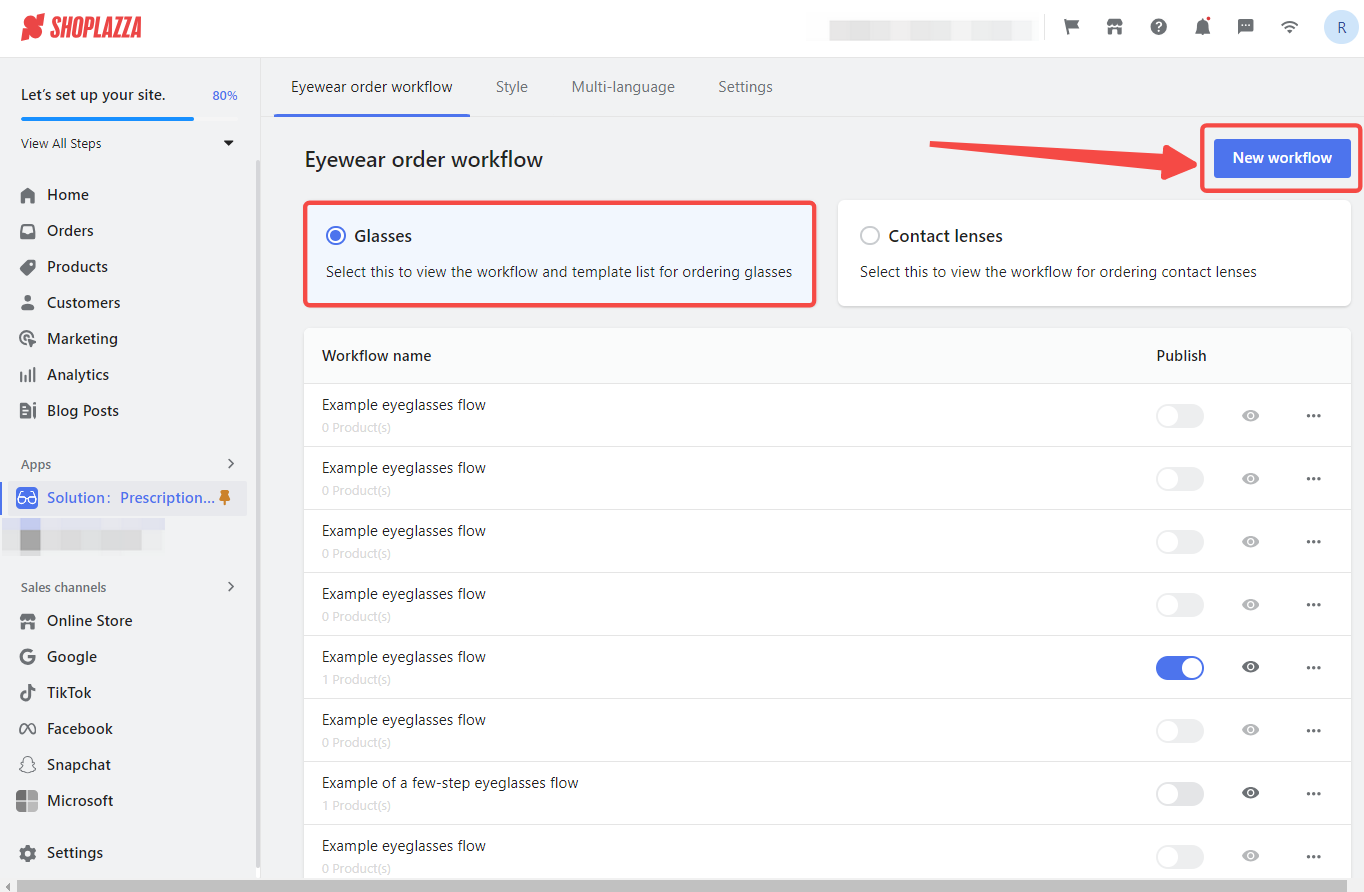
Introduction to the three main steps
Your lens fitting workflow is made up of three main steps:
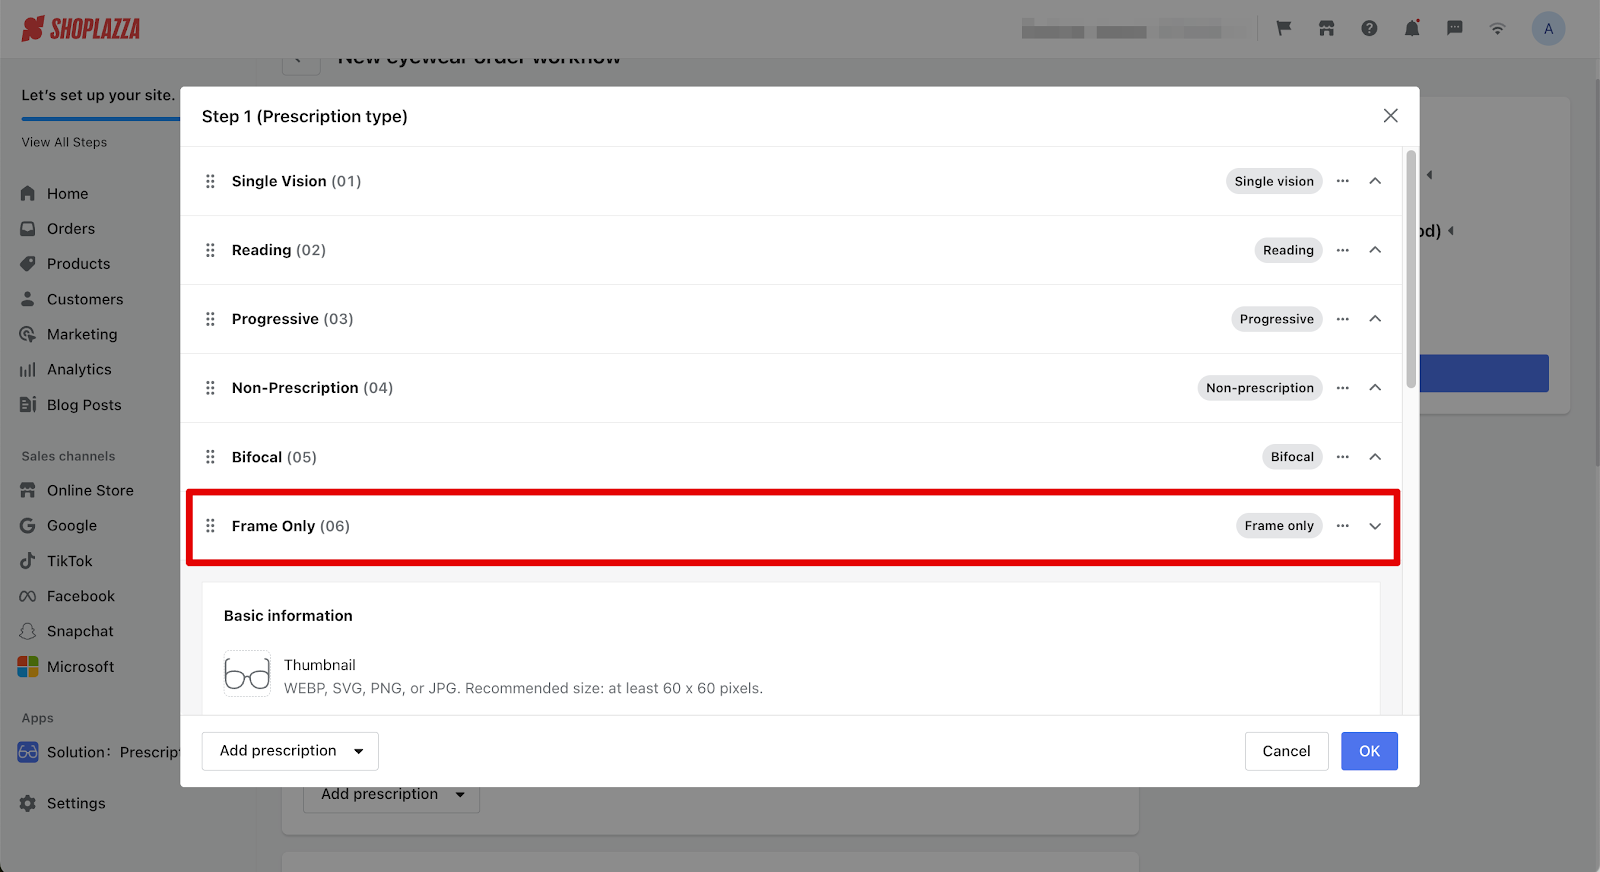
1. Step 1 - Prescription type: Decide what types of prescriptions your store will cater to. You can choose from six preset types—Single Vision, Reading, Progressive, Non-Prescription, Bifocal, and Frame Only.
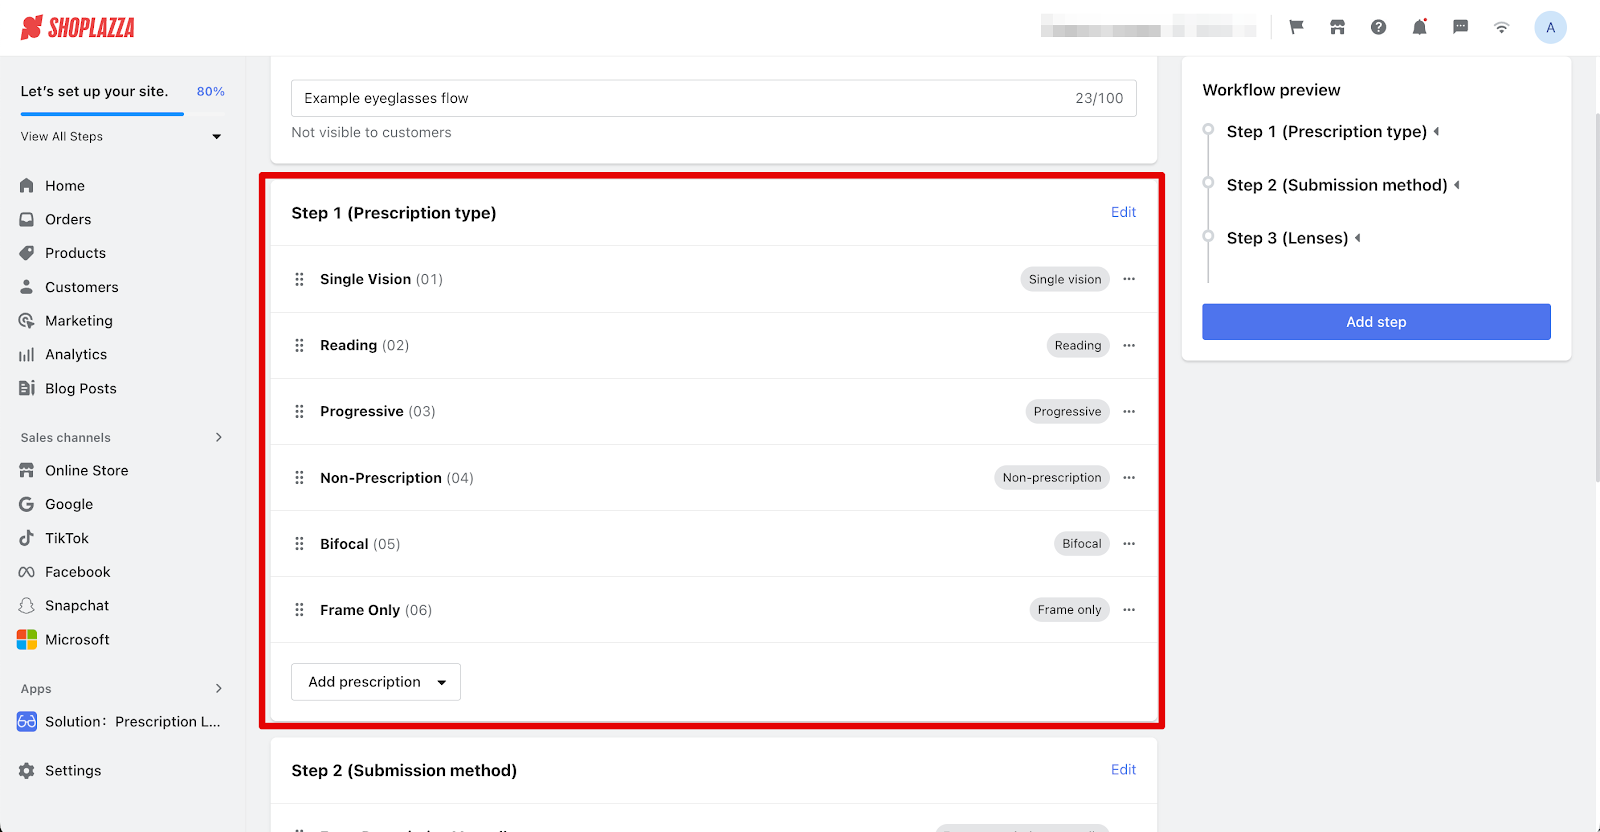
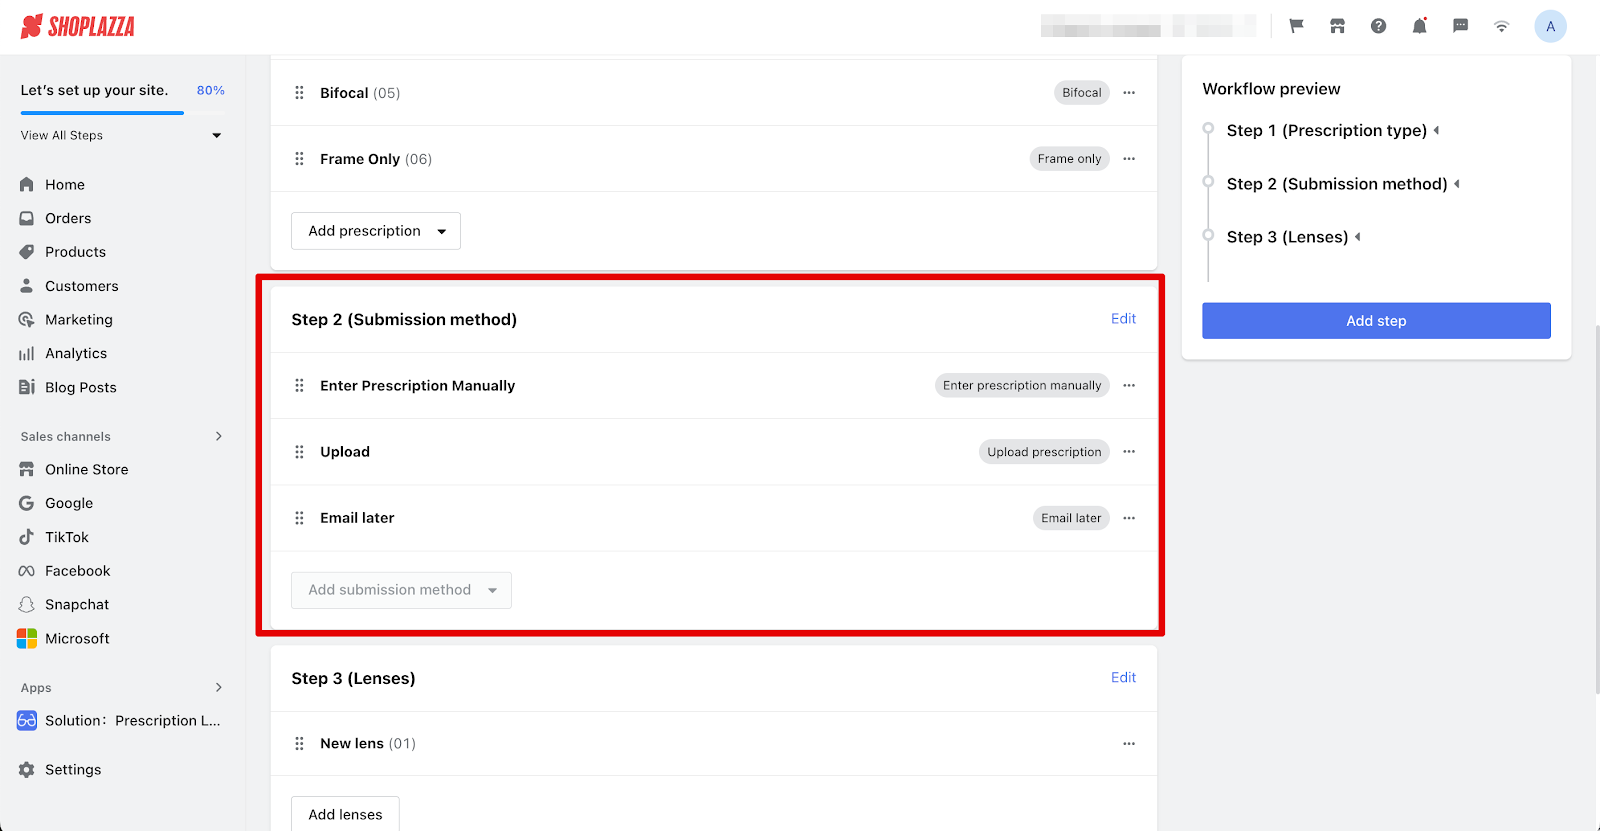
2. Step 2 - Submission method: You can either allow customers to enter their prescriptions manually, upload their documents, or email them later.
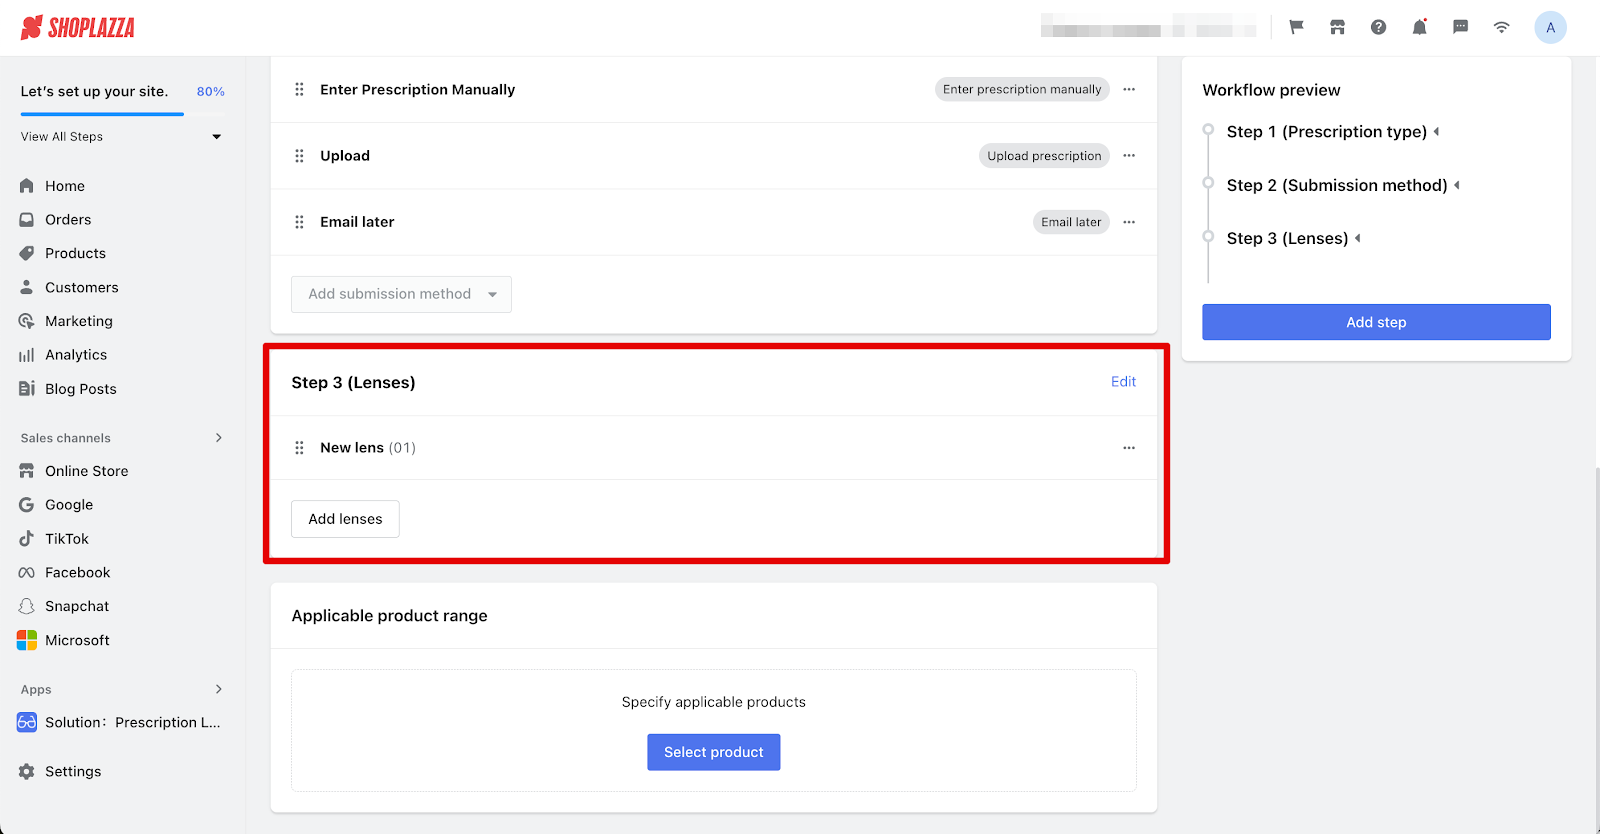
3. Step 3 - Lenses: Here's where you customize what types of lenses you offer, from the material and color to more specific attributes like the refractive index.
Step 1: Prescription type
Basic Infomation
In this step, you'll define the types of prescriptions your store offers. You can choose from six categories. Each type can be customized to fit your store's offerings.
1. Setup prescription types: To configure the prescription types, click on Edit.

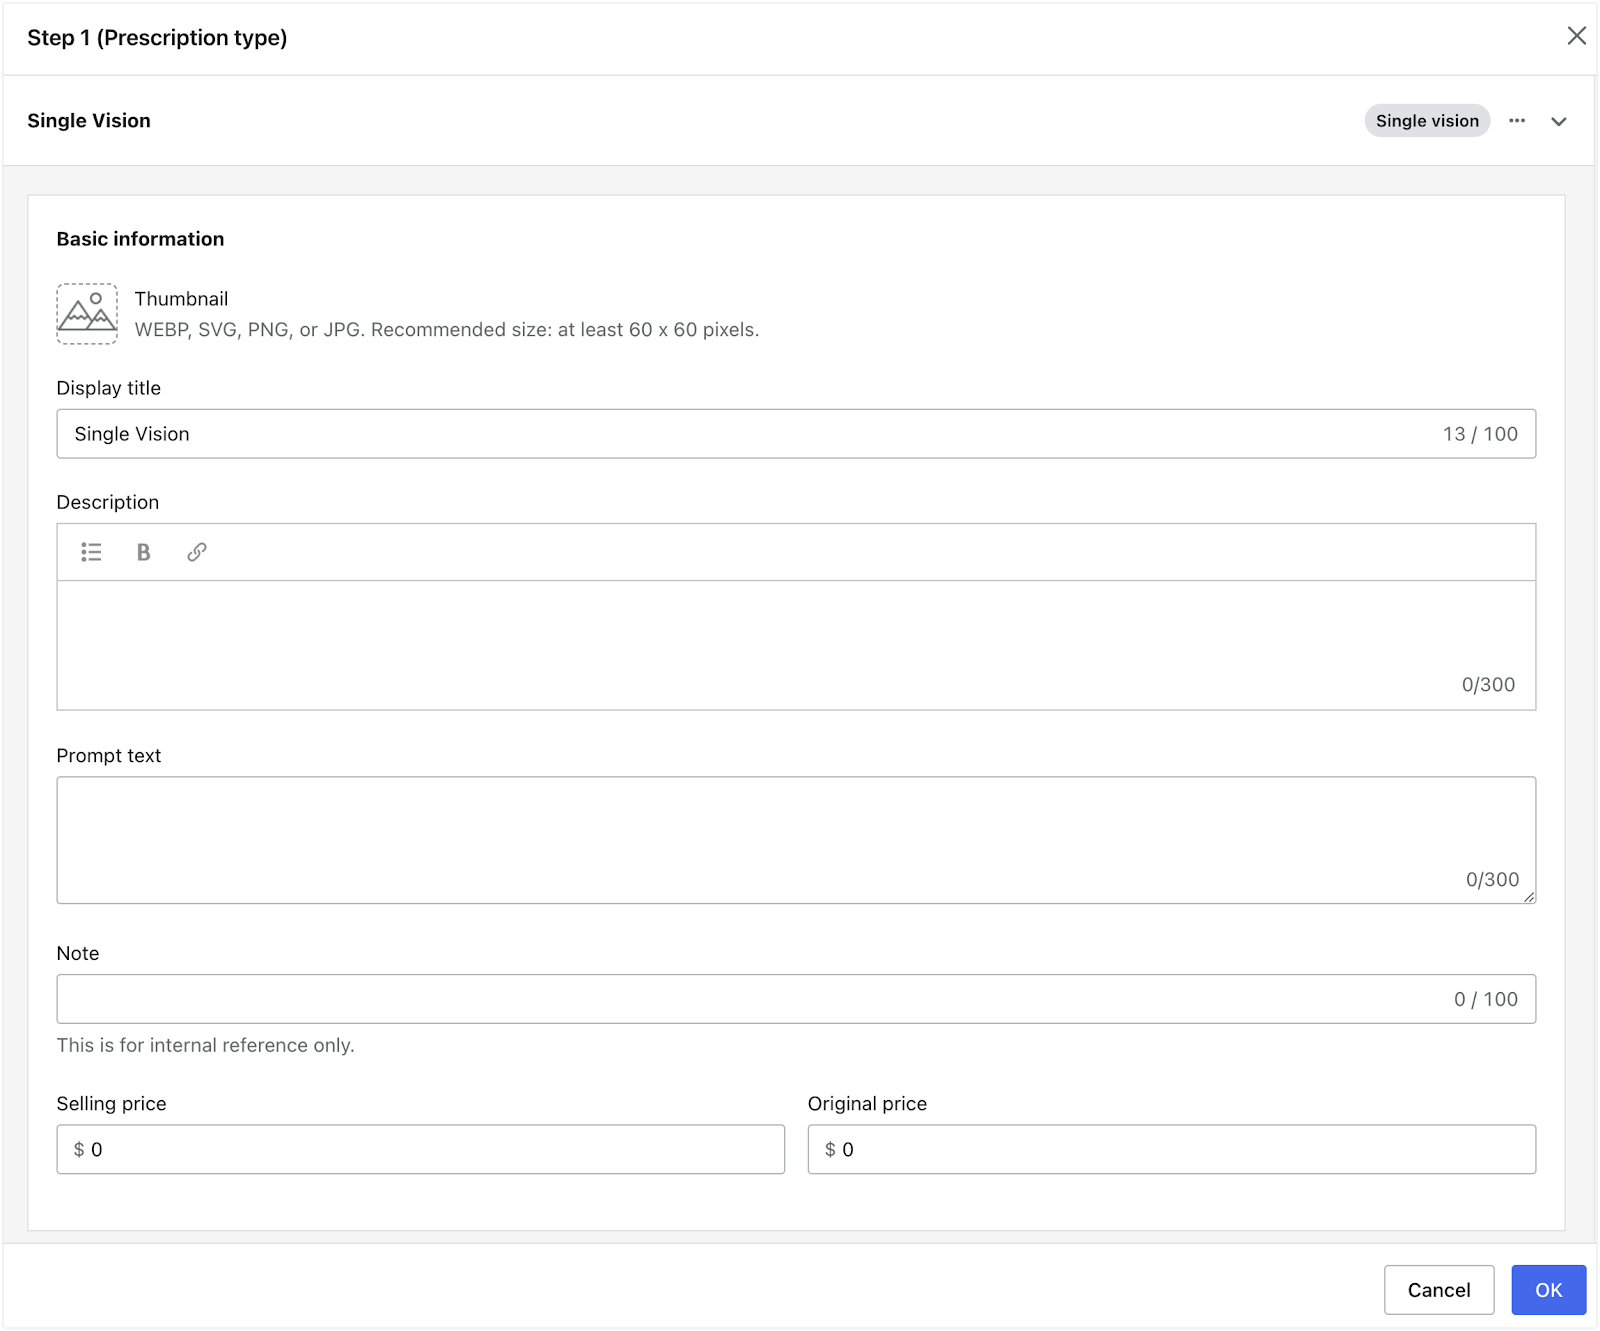
2. Configure categories: Here's what you can adjust for each of the six categories: Single Vision, Reading, Progressive, Non-Prescription, Bifocal, and Frame Only.
- Thumbnail: A small image representing the prescription type.
- Display title: The name you want to appear for each prescription type.
- Description: Additional details about each prescription type.
- Prompt text: Helpful hints for the customer.
- Selling price & Original price: The cost details.
Note
The display title is required, while the other fields are optional. The information you input (excluding the Note) will be displayed in your store for your customers' reference. The Note field is for internal reference only and can include personalized content.
Customizing descriptions
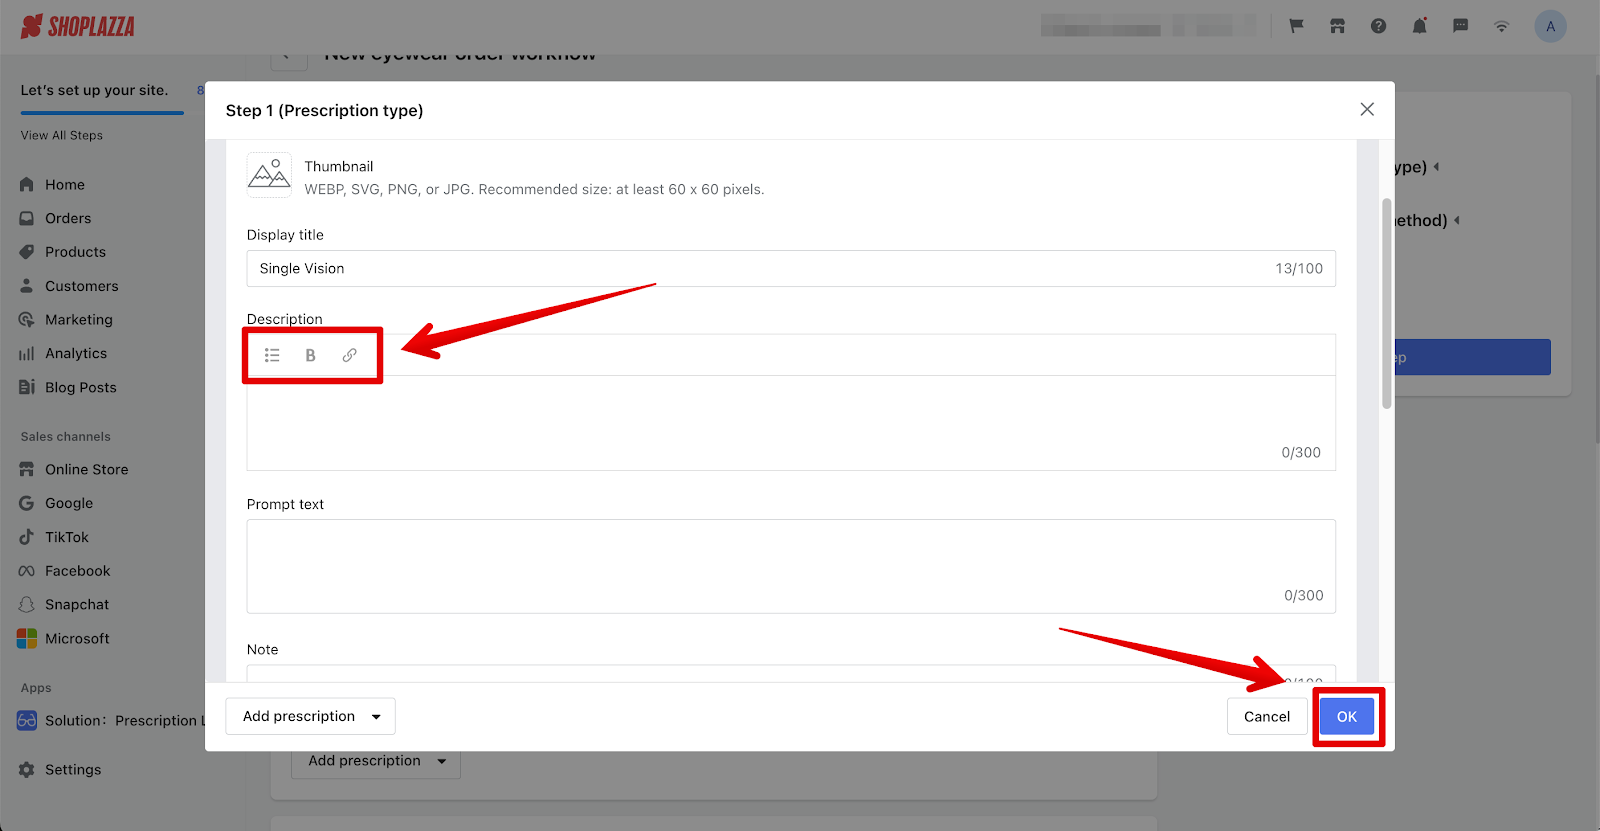
Use the Unordered list and Bold icons for better formatting. Insert links into your descriptions by using the Insert link icon, entering the link and text, and clicking OK.
Using the formatting toolbar
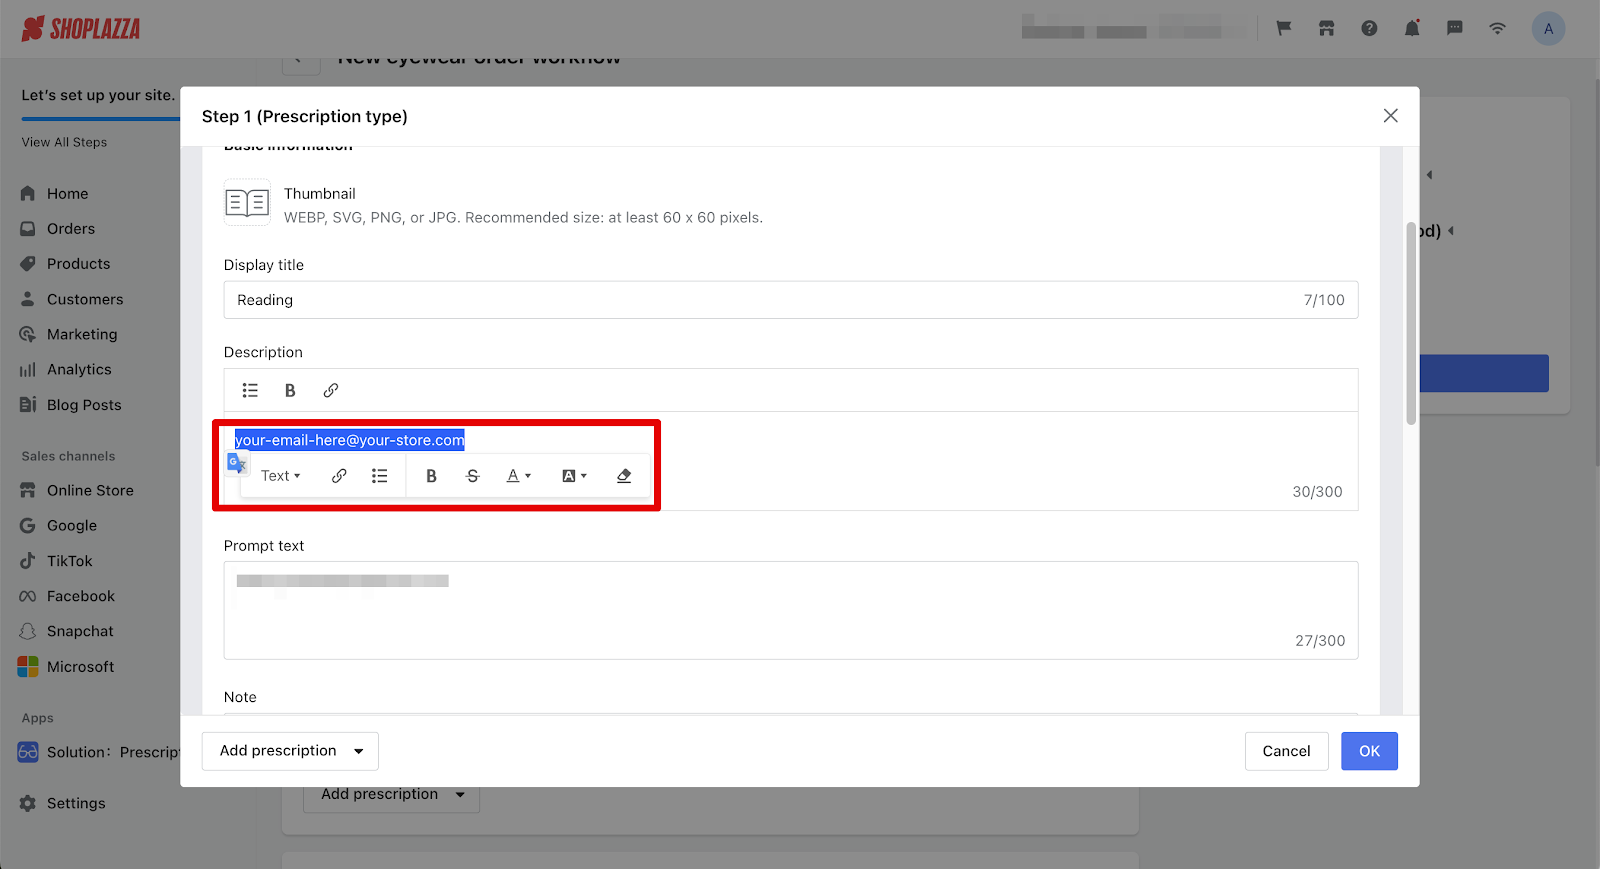
To edit text, highlight it and use the formatting toolbar to apply bold, insert links, and adjust other formatting options.
Deleting a prescription type
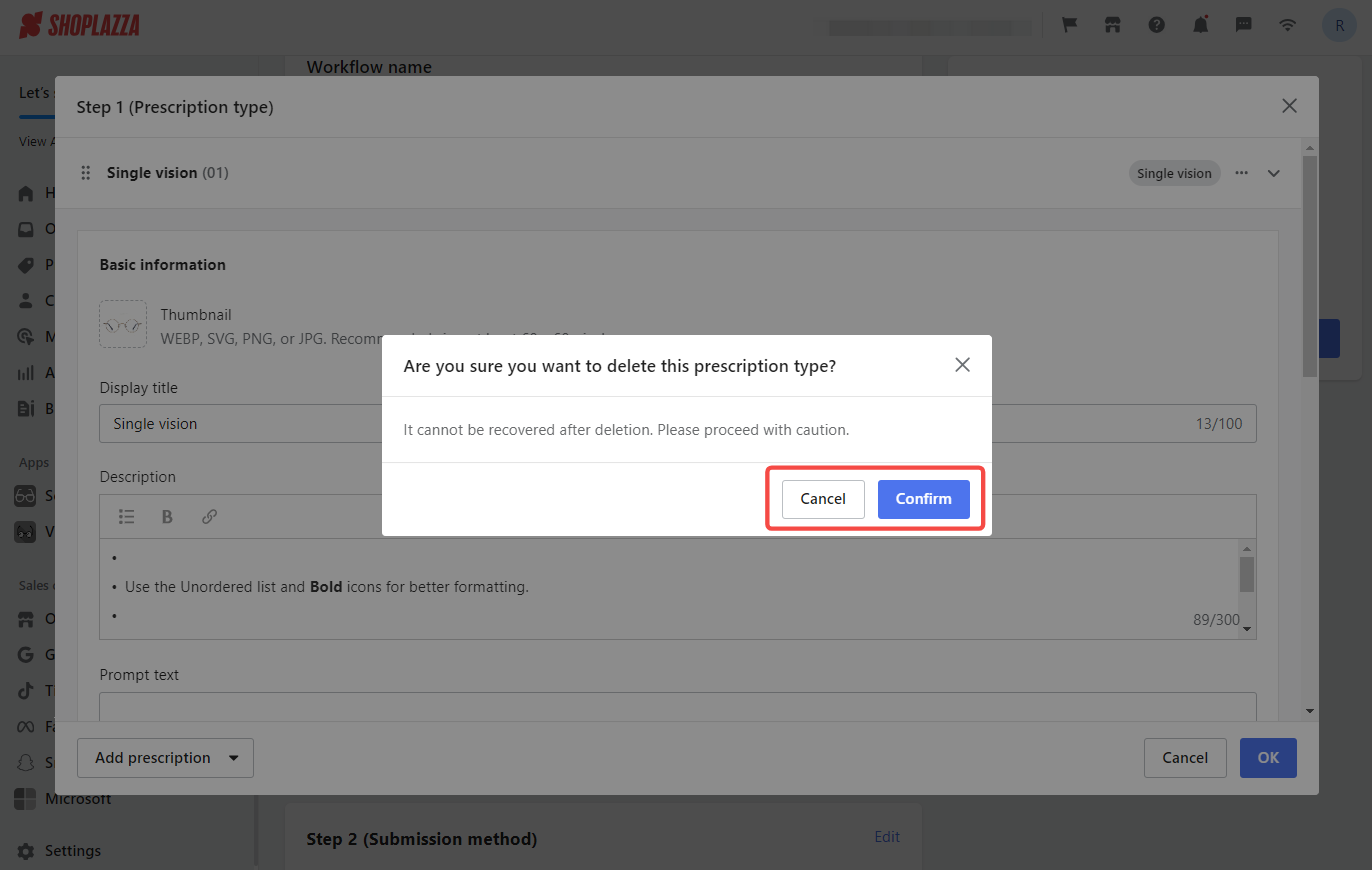
Hover over the more options icon next to a type and click Delete. Choose Copy to duplicate the type or Delete to remove.

Reading prescription type: Ready-made vs Prescription reading glasses
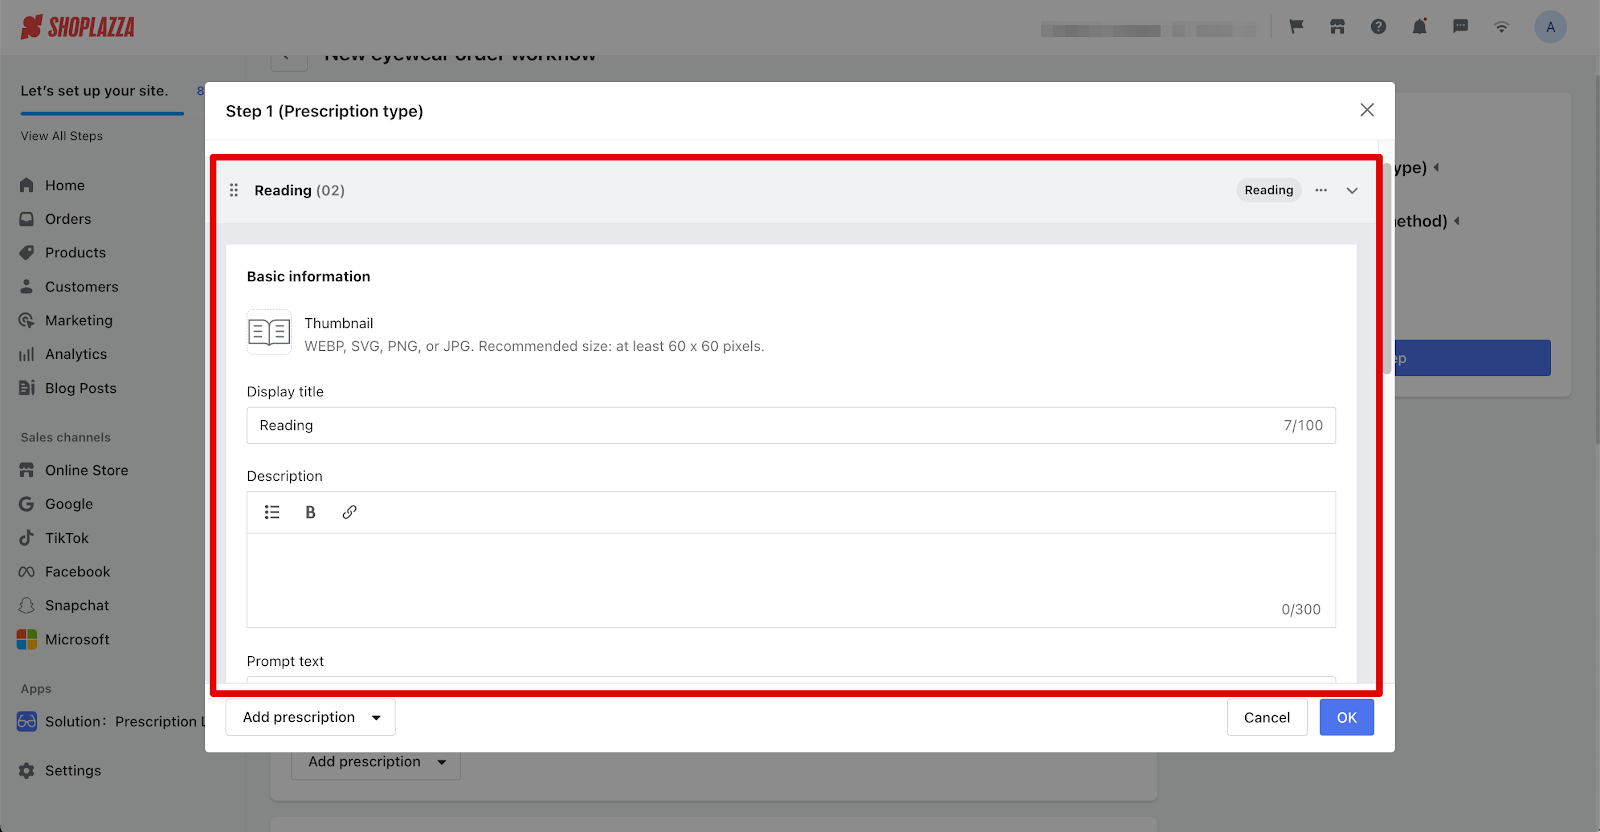
Fill in the basic information for reading glasses:
- Product thumbnail: Upload a thumbnail in WEBP, SVG, PNG, or JPG format (at least 60 x 60 pixels).
- Display title: Keep the title under 100 characters.
- Description: Limit your description to 300 characters.
- Prompt text: This should be within 300 characters for customers to see in your store.
- Note: Keep this under 100 characters; it won't be visible to customers.
- Price: Set the selling price and original price for the product.
- Product type: Select whether to sell only prescription reading glasses, only ready-made reading glasses, or both. Provide display titles for each if selling both types.
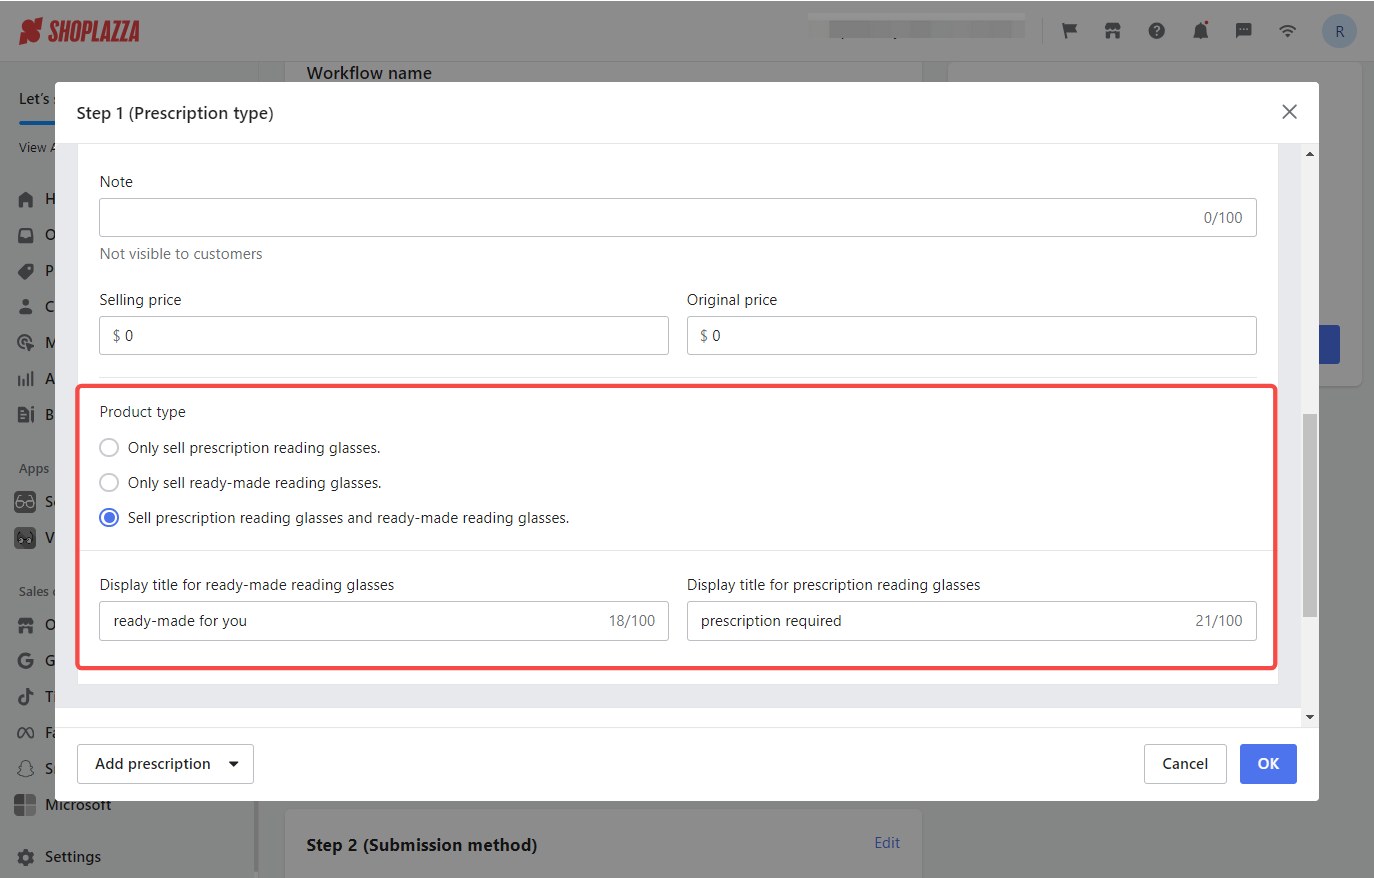
Specify the product type
Specify whether the reading glasses are ready-made or prescription, and display this information prominently for your customers. This helps them quickly identify the type of reading glasses you offer, reducing search time in your store.

Note
When editing the Reading type, you can offer only sell prescription reading glasses, only sell ready-made reading glasses, or both ready-made and prescription options. Name these accordingly for display.
Customer-focused preview
Provide a preview of how the products will be displayed to your customers in your store, enhancing their shopping experience.

Frame Only prescription type
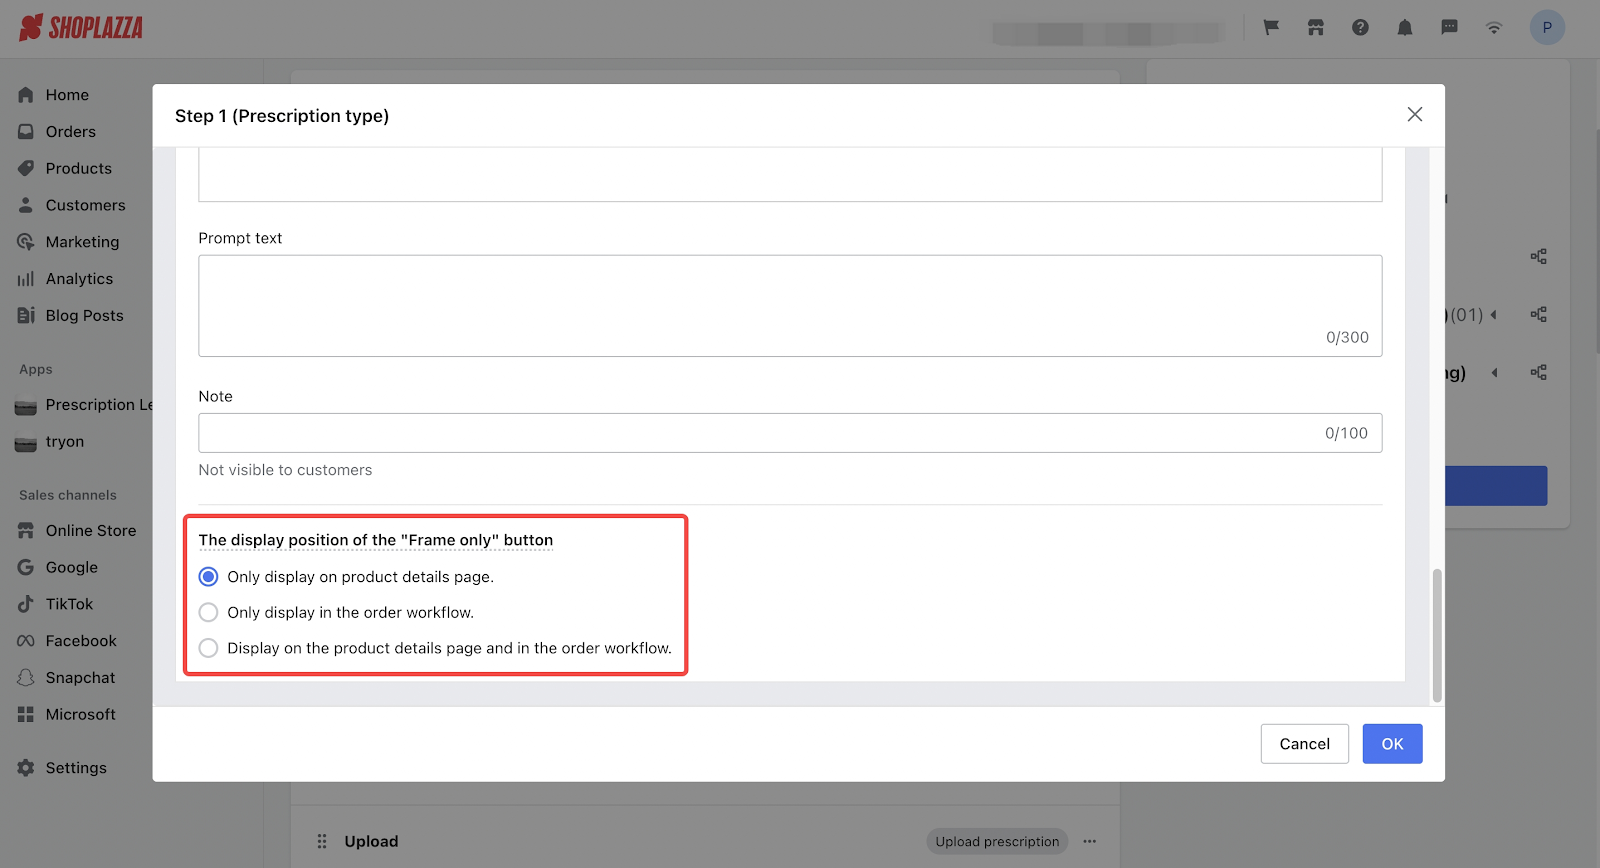
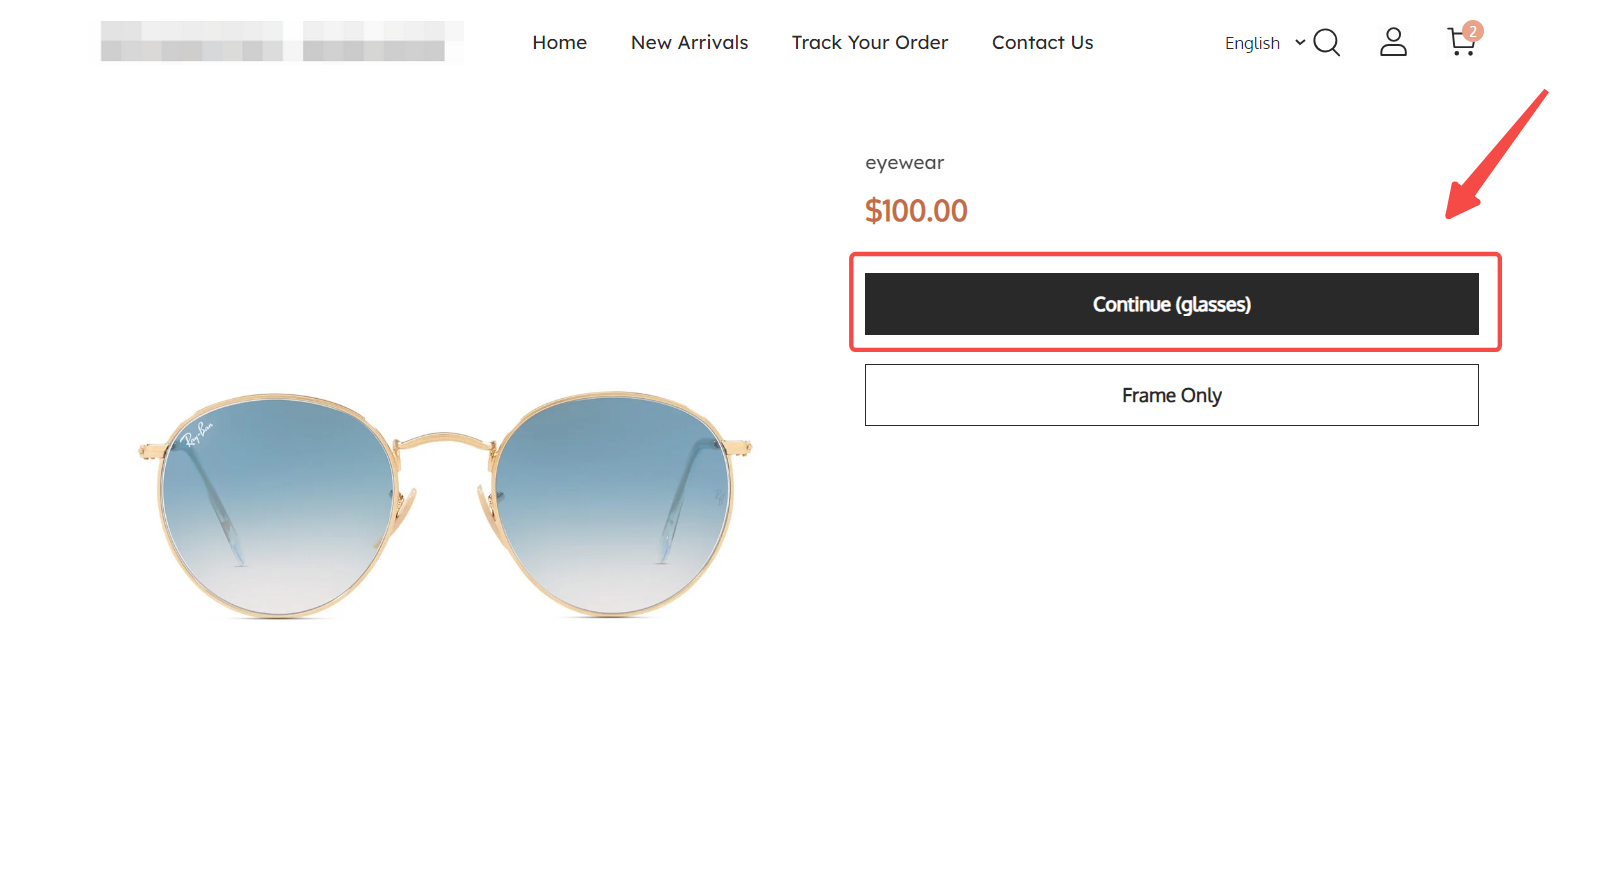
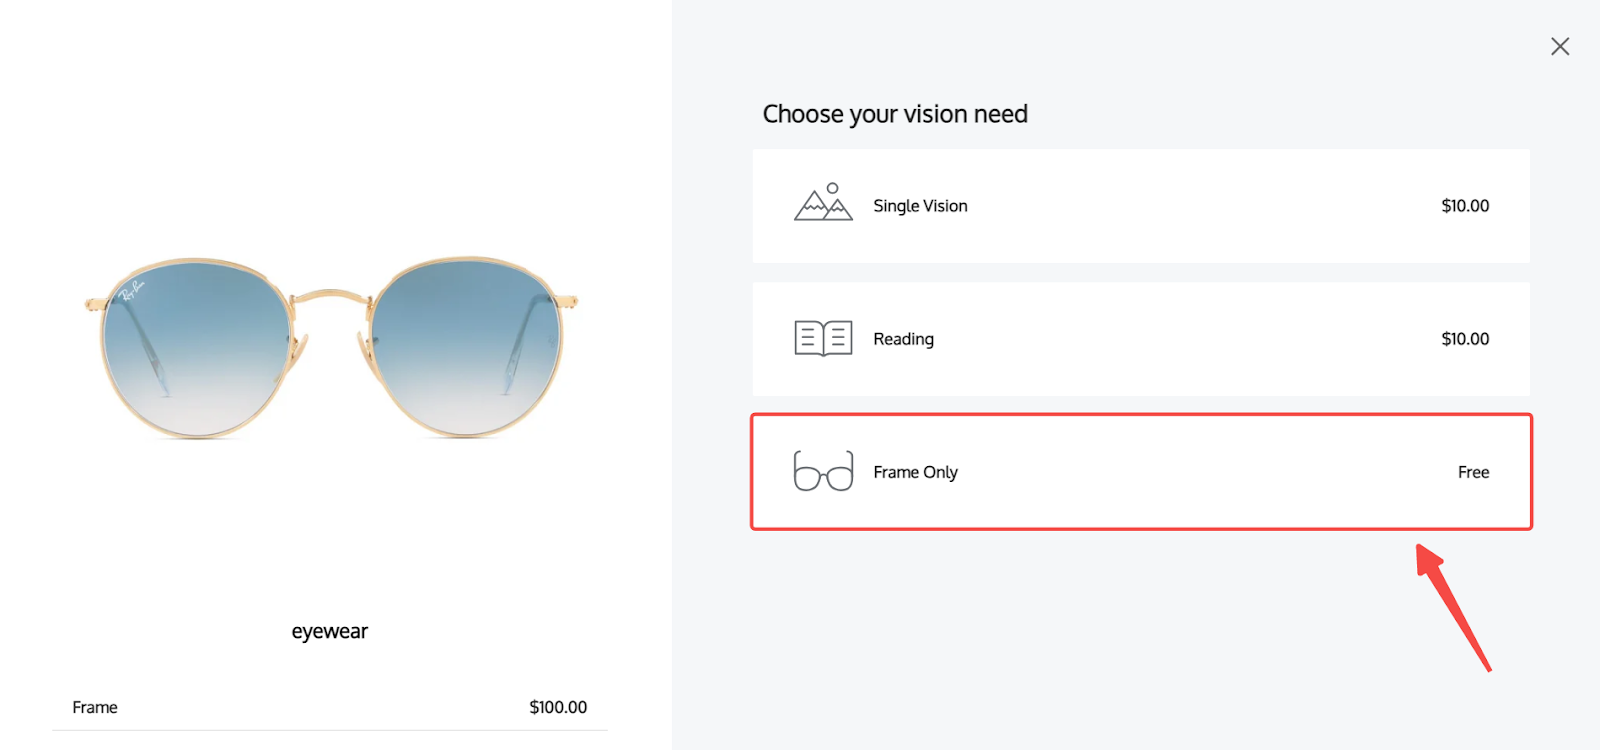
1. Set display location for the 'Frame Only' button: Choose from the following options:
- Display on the product details page.
- Display in the order workflow.
- Display on both the product details page and in the order workflow.
2. Review appearance on the product details page:

3. Review appearance within the eyewear order workflow:
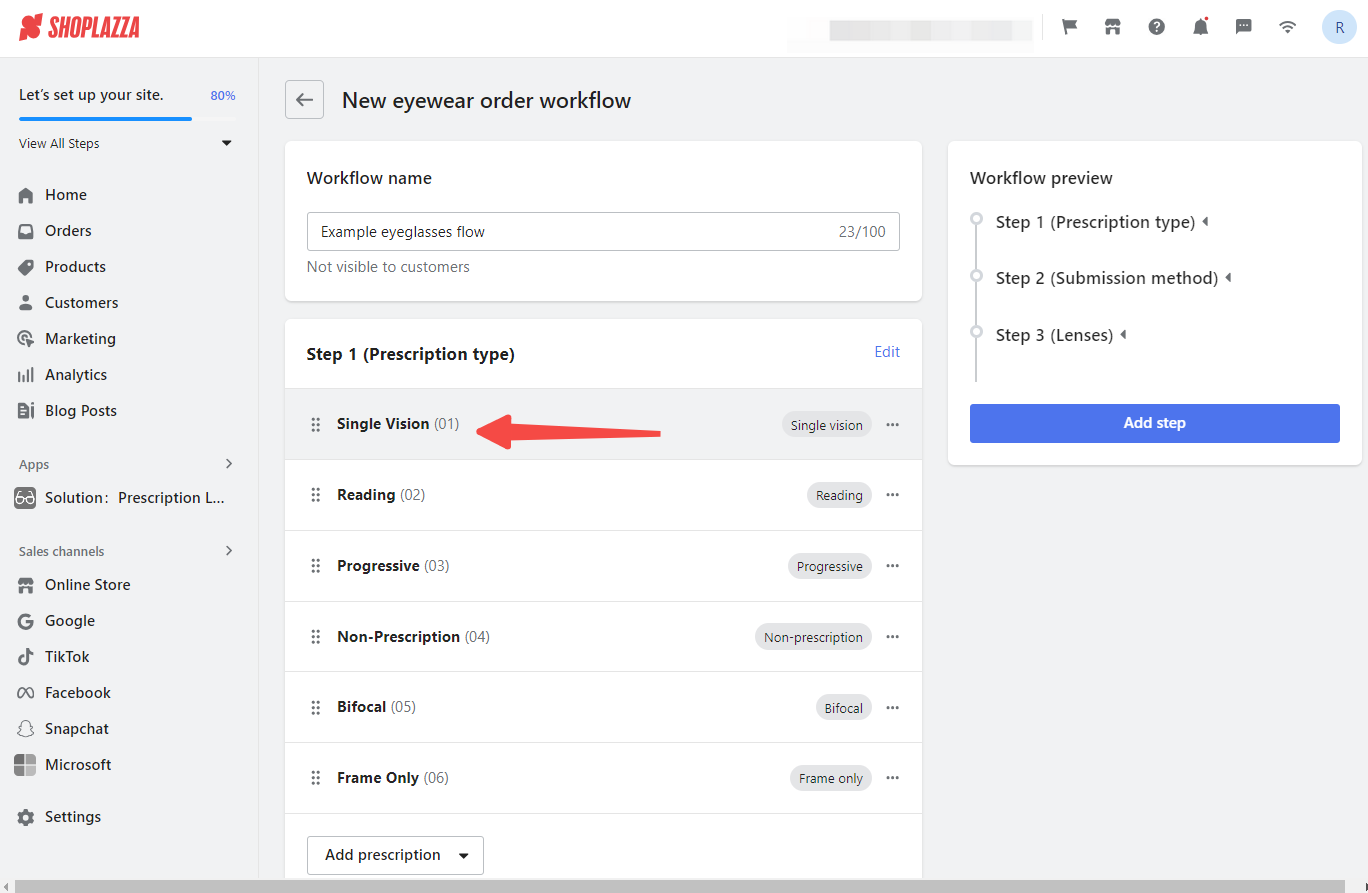
Quick access to editing options
Click on step option titles to quickly access the editing pop-up, streamlining the editing process.
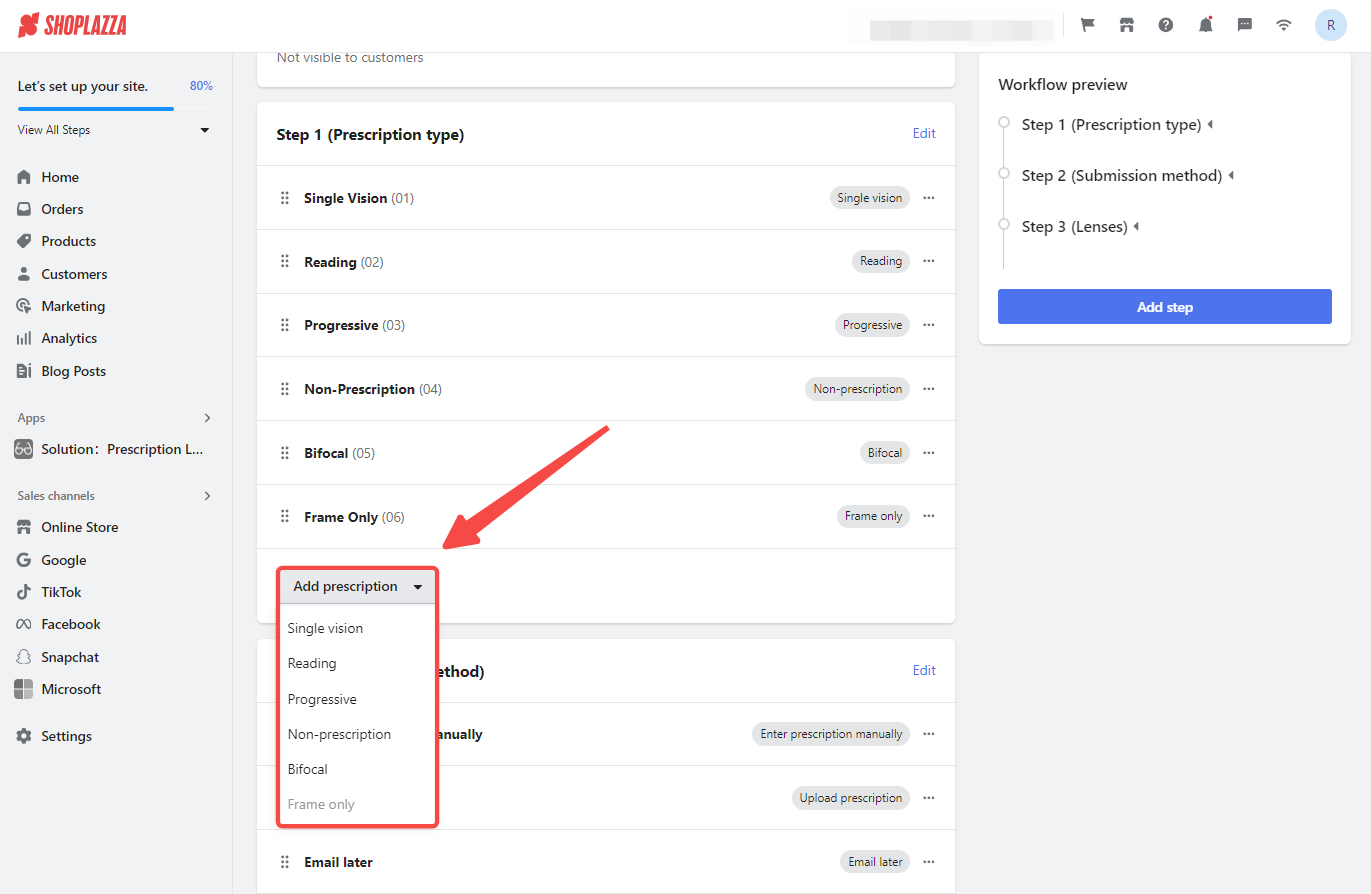
Adding new prescriptions
Add additional prescription types by clicking Add prescription.
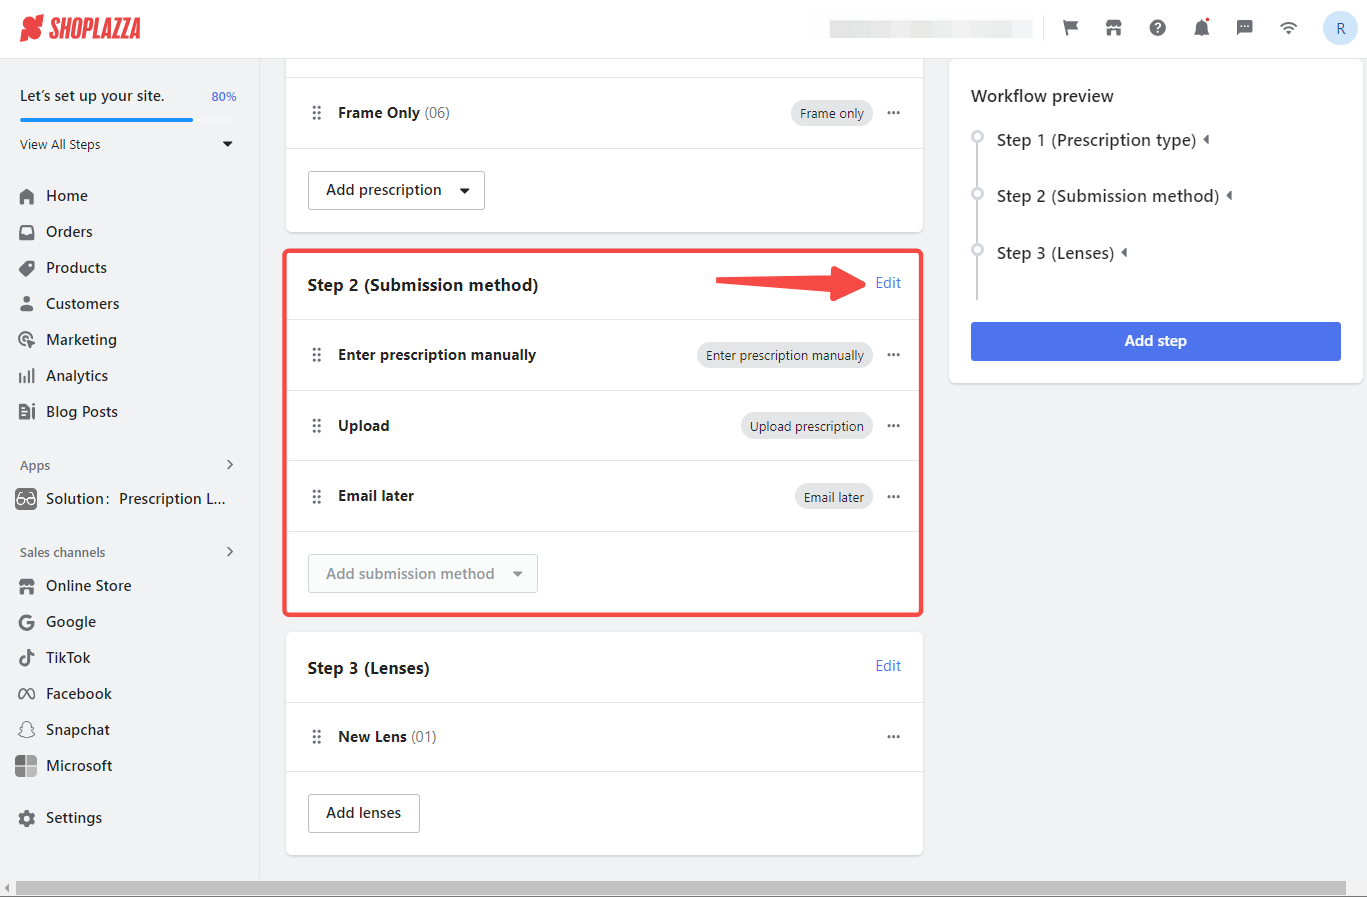
Step 2: Submission methods
Basic settings
Adjust how customers can submit their prescription details:
- Enter manually: Type in the prescription.
- Upload: Attach relevant documents.
- Email later: Opt to email the prescription at a later time.
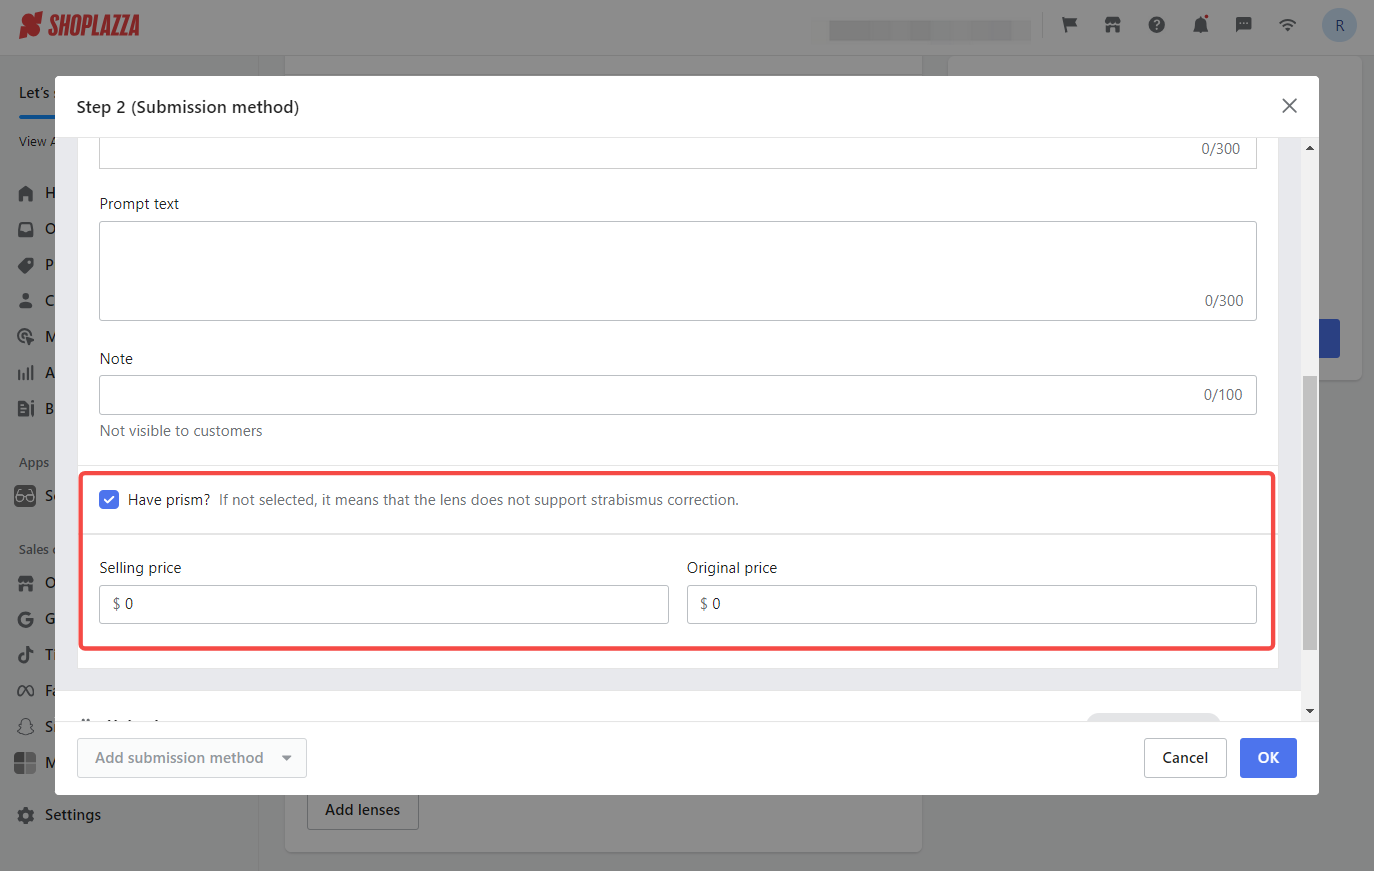
Offering prism lenses
If you offer prism lenses, enable the Have a prism option and set your pricing for these specialized lenses.
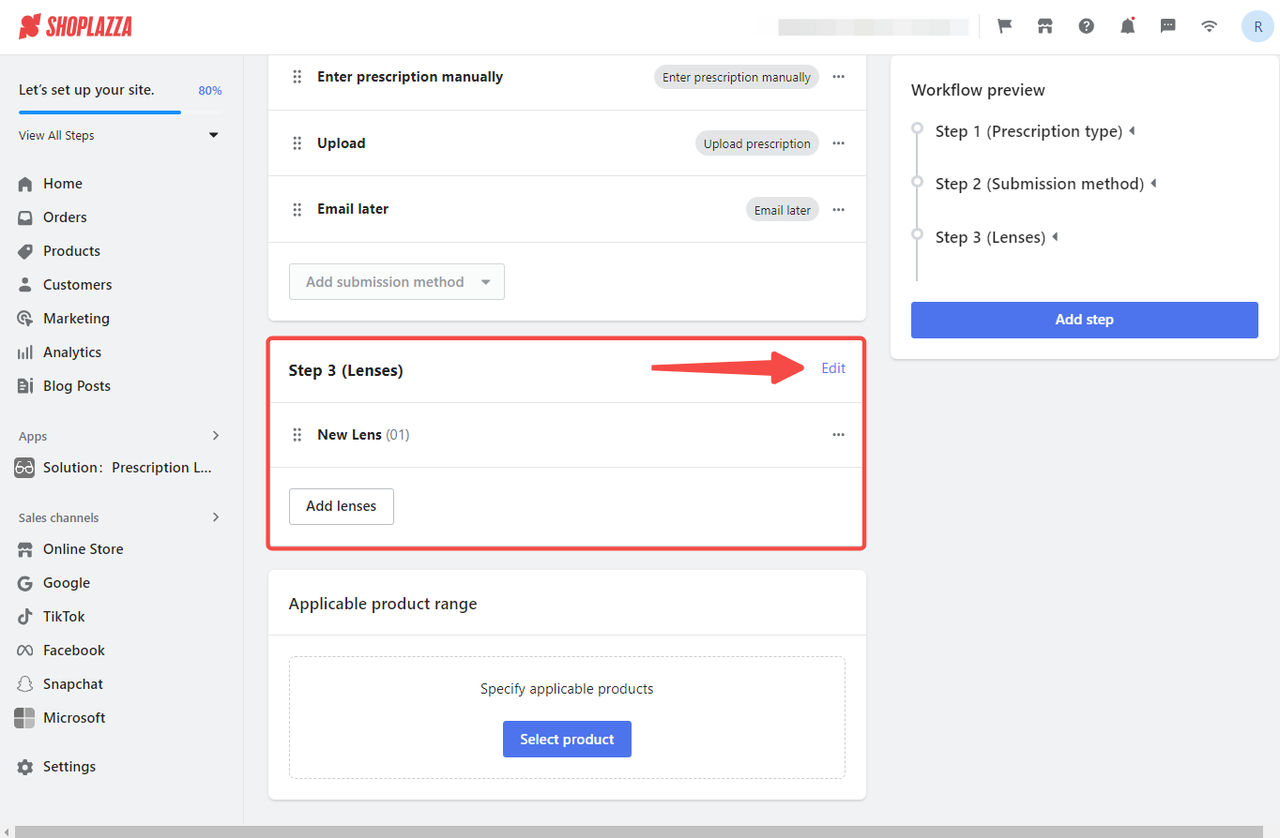
Step 3: Customizing lenses
This is where you personalize your lens offerings. From material to color, make each selection unique. Additionally, set requirements for specific lenses based on prescription details.
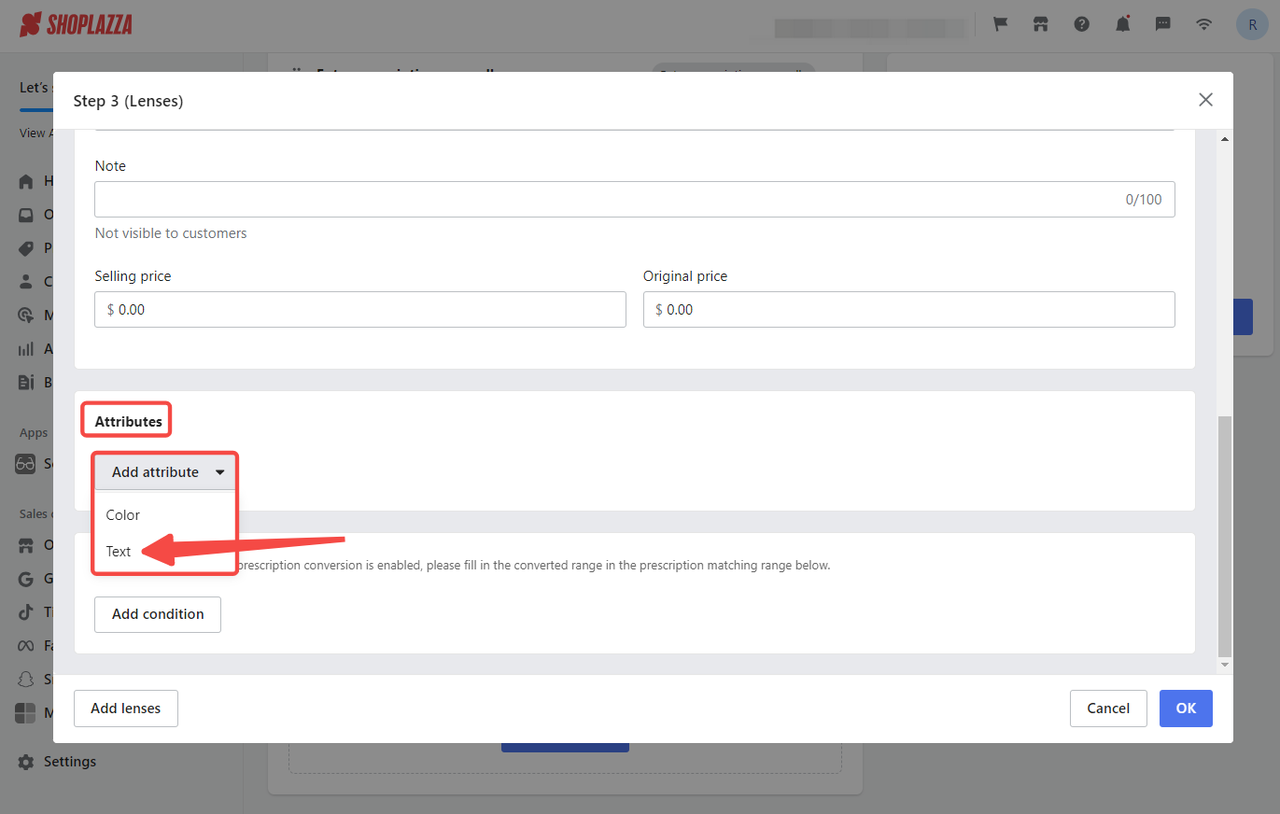
Adding lens attributes
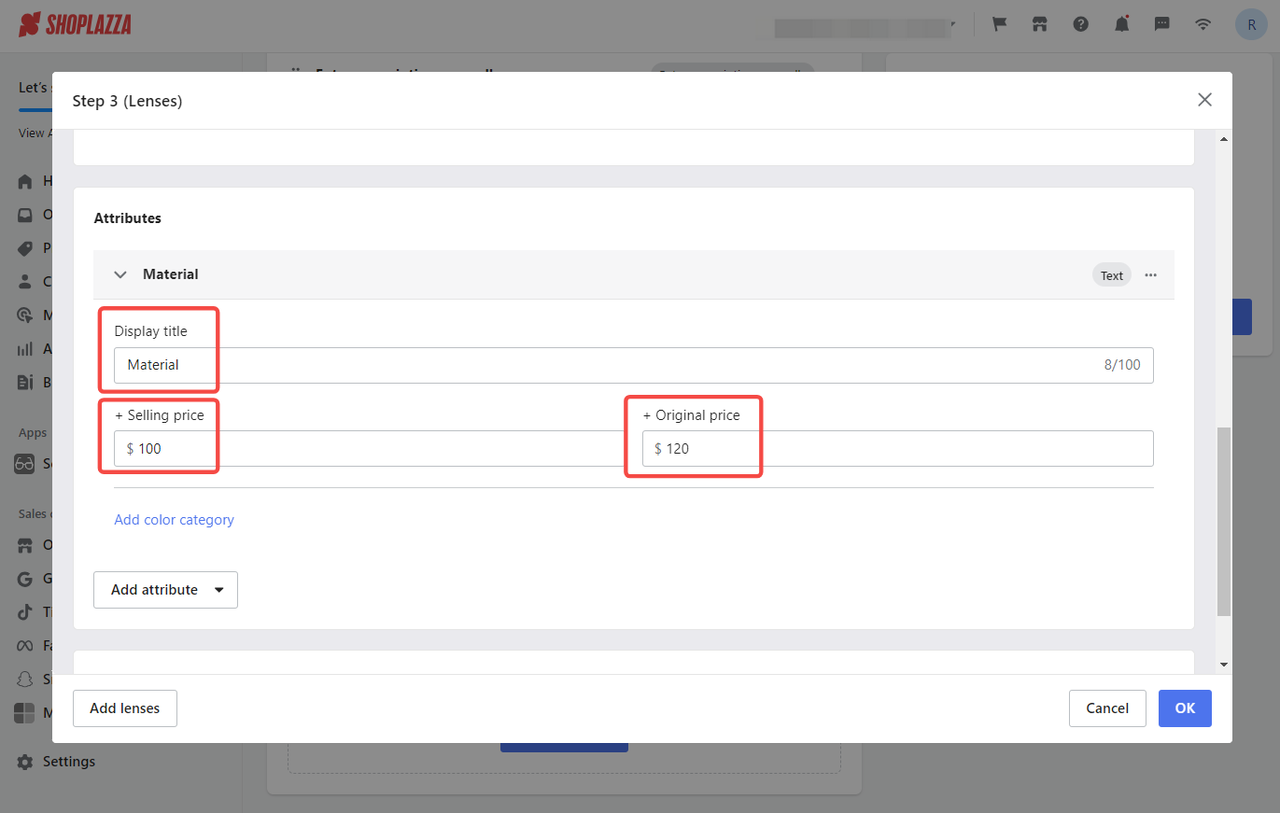
Describe lens properties like refractive index and material. Scroll down to the Attributes section, click on the Add attribute dropdown, and select Text. Enter the Display title and, if different pricing applies, the Selling price and Original price.
Adding color within text attributes
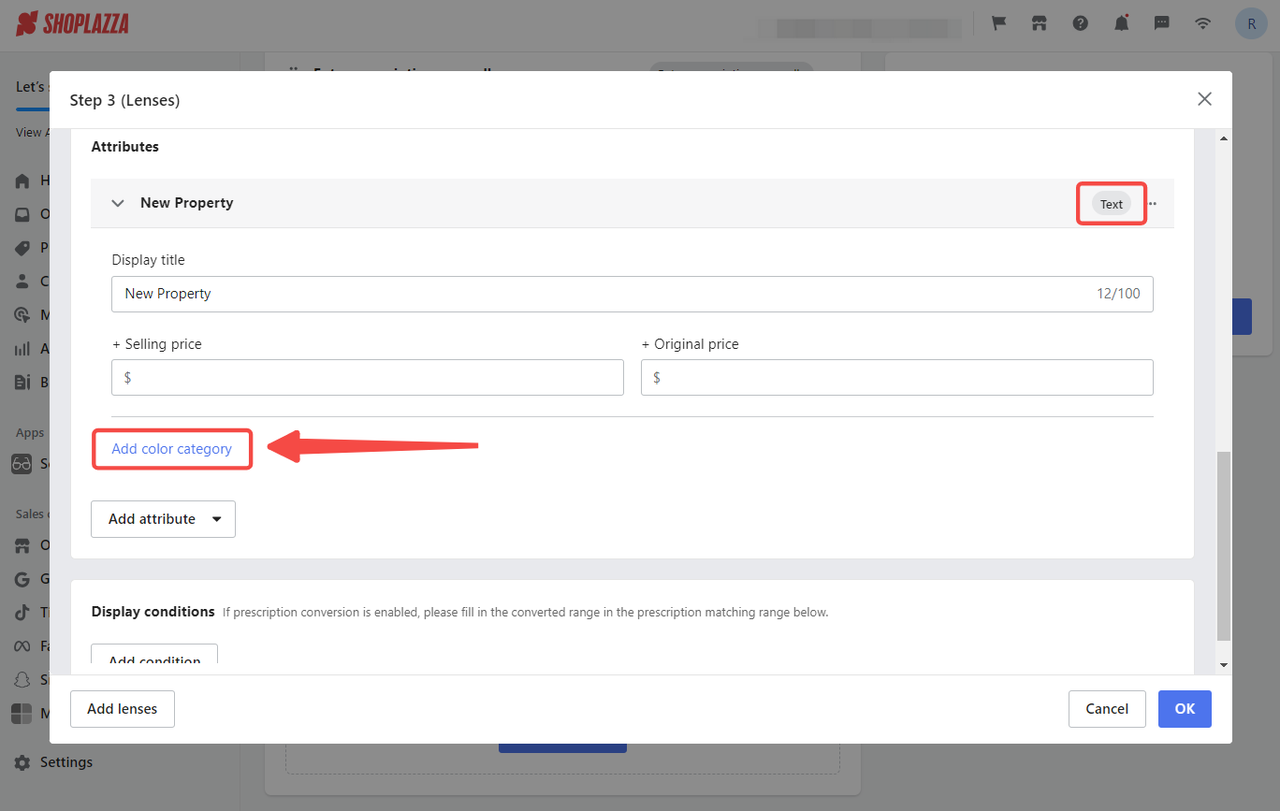
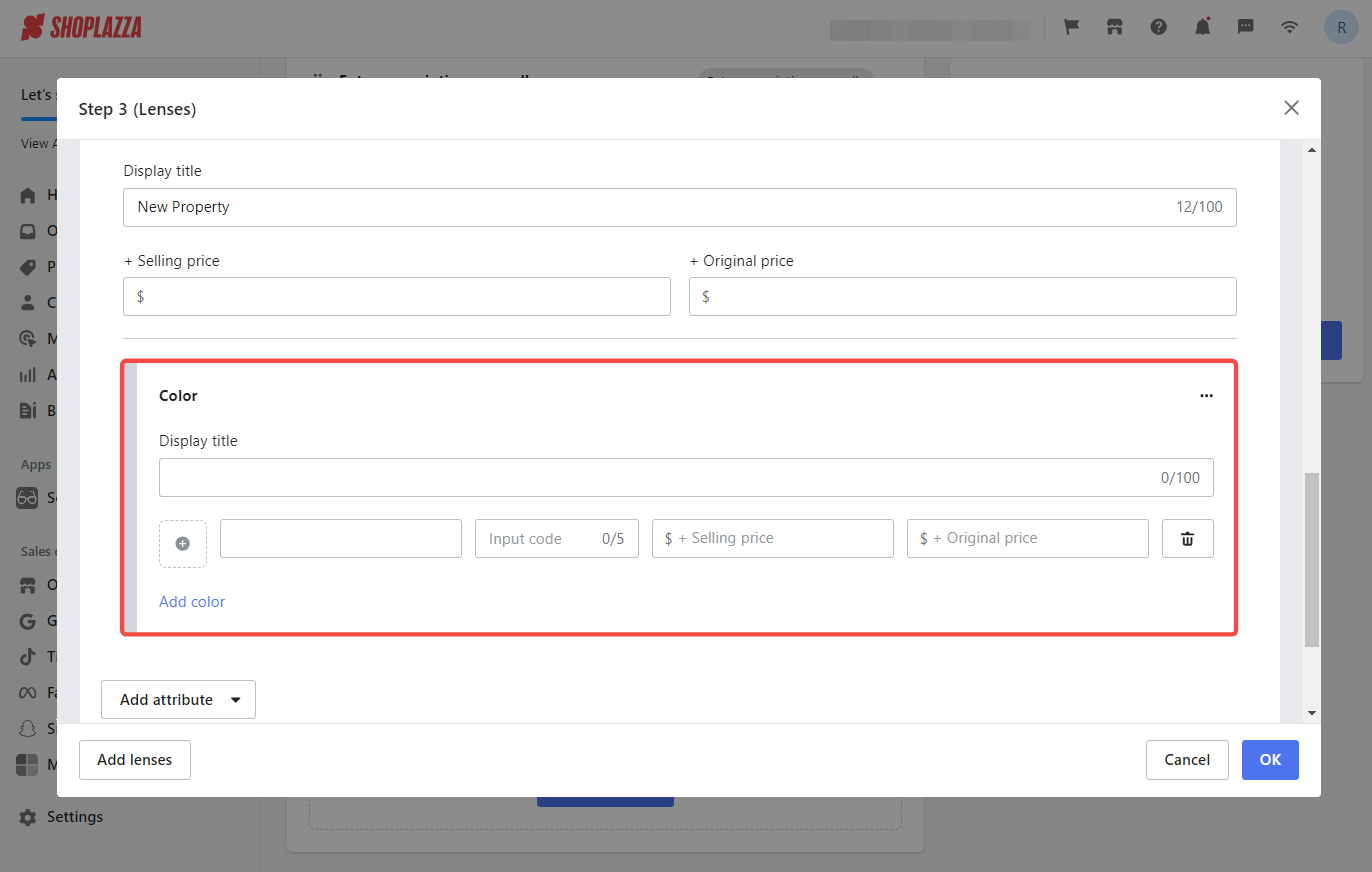
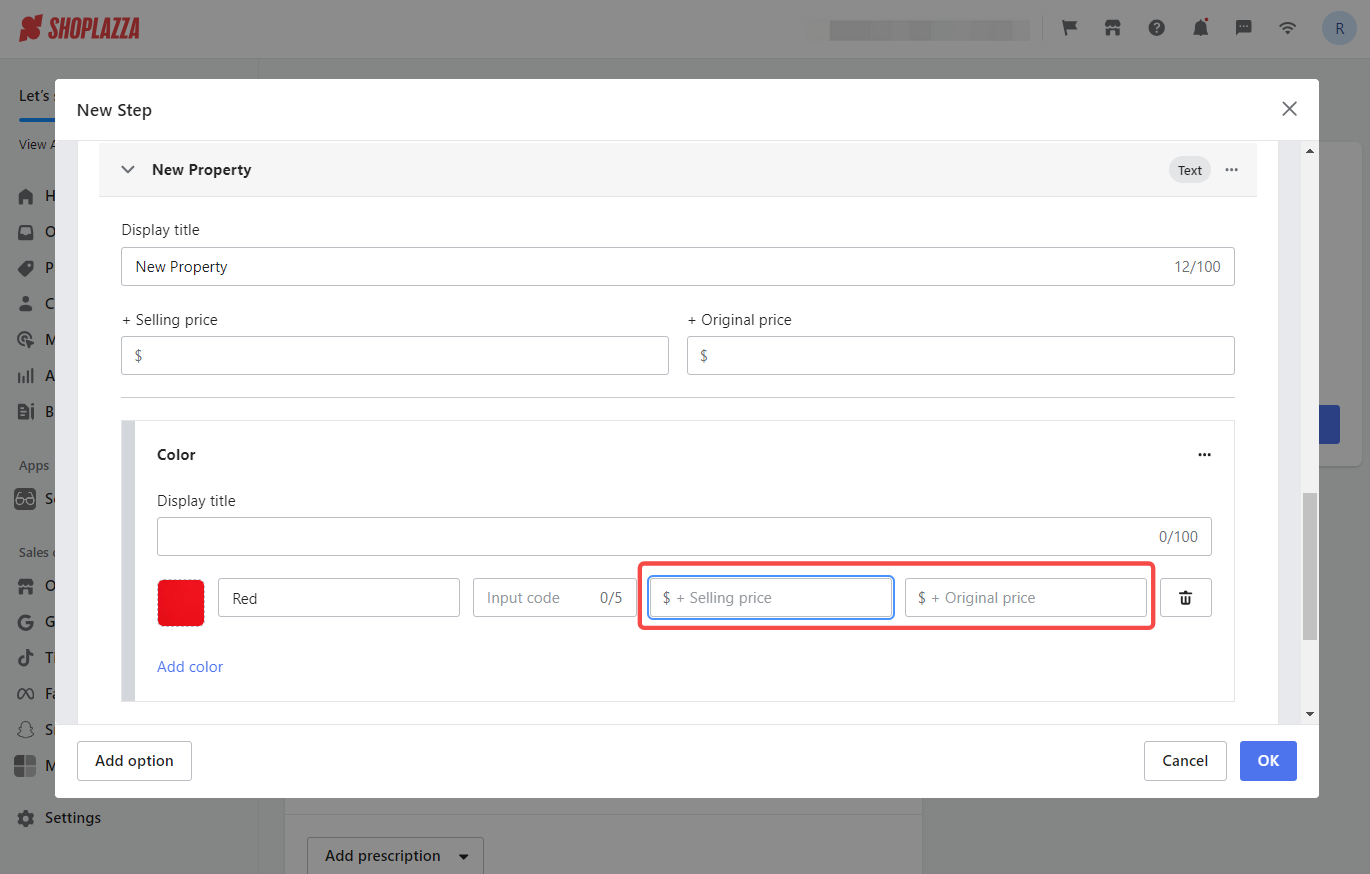
Click Add color category and specify the color information.
Adding color attributes
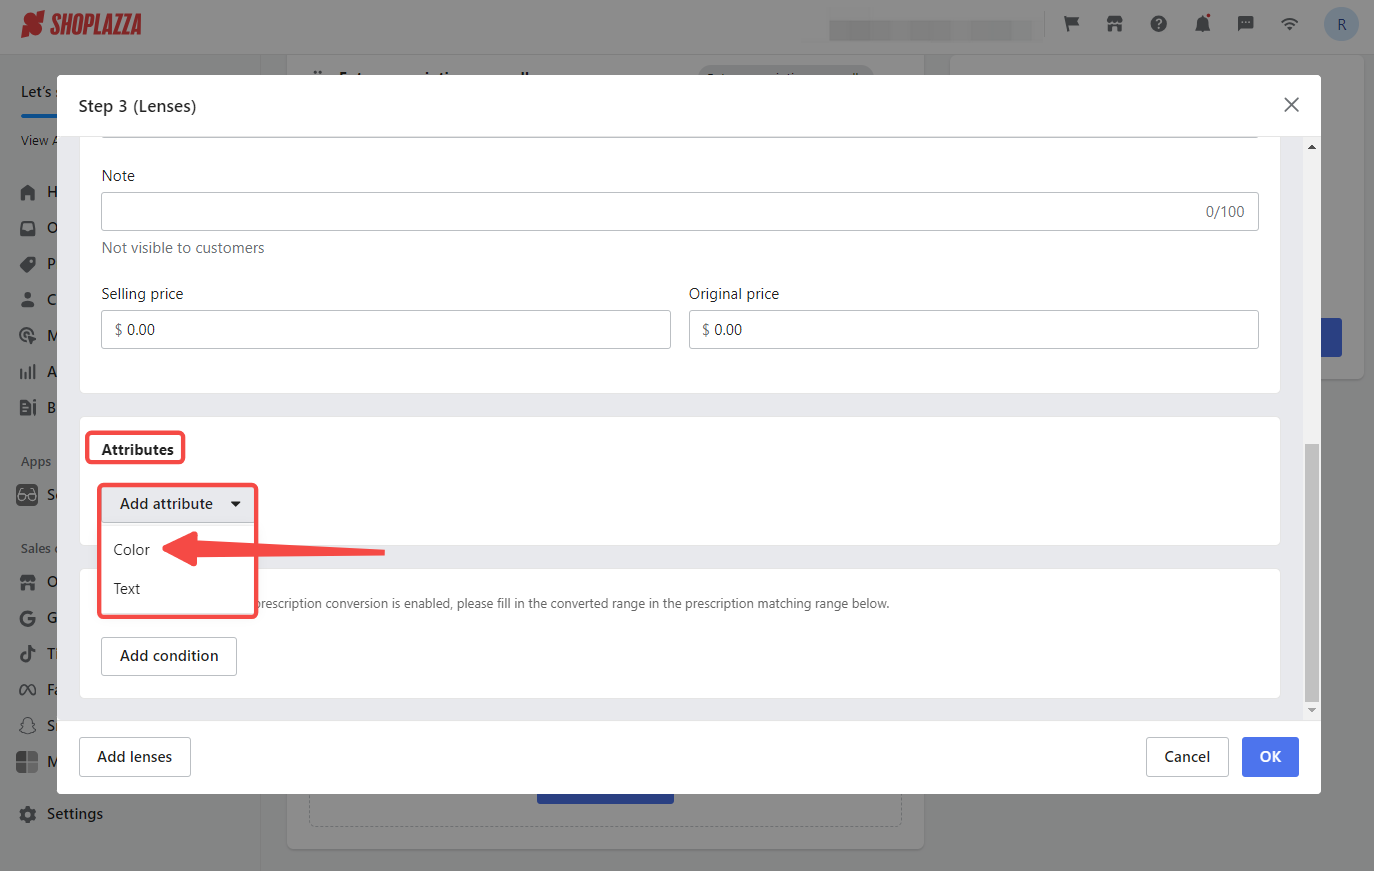
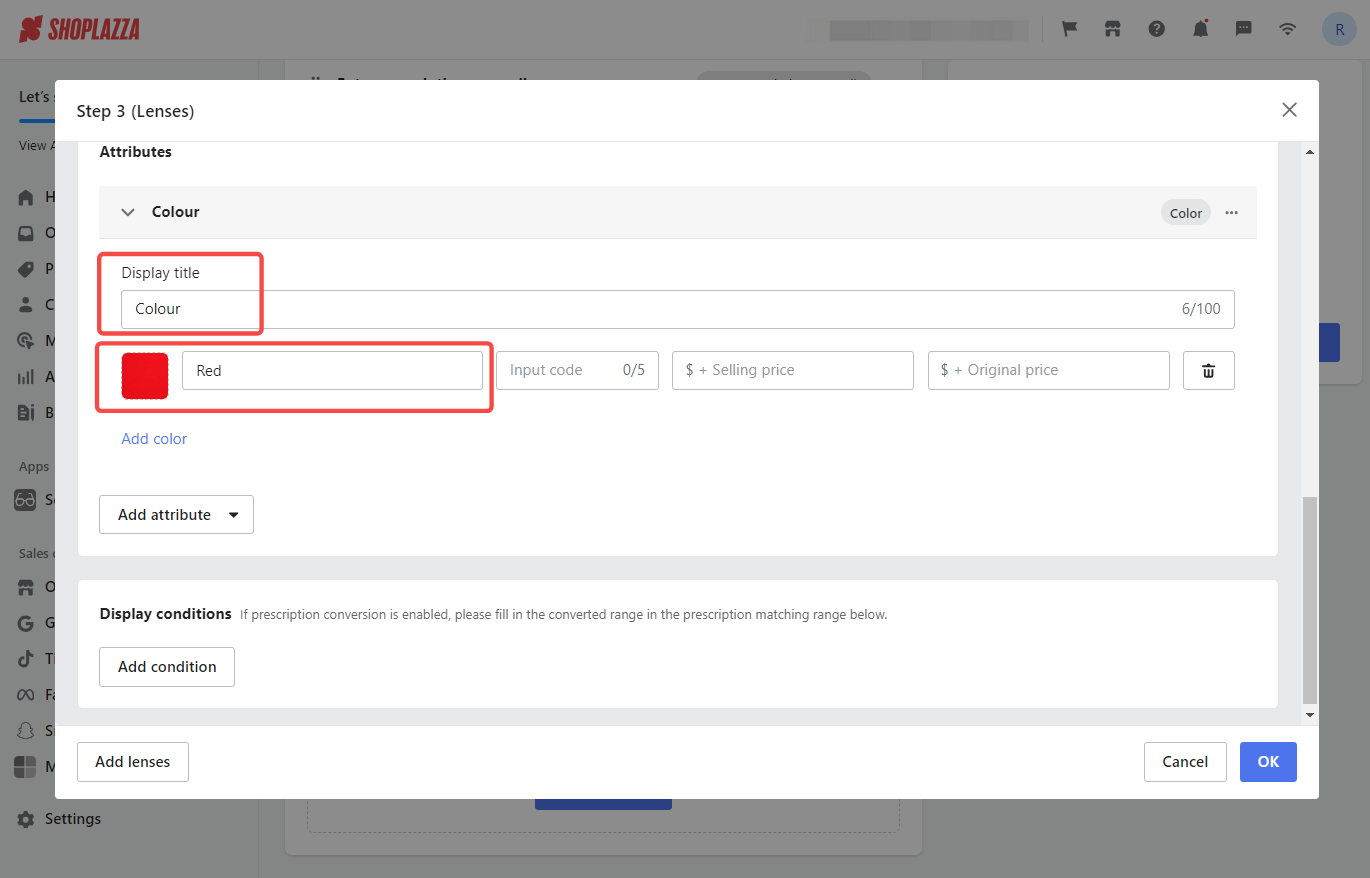
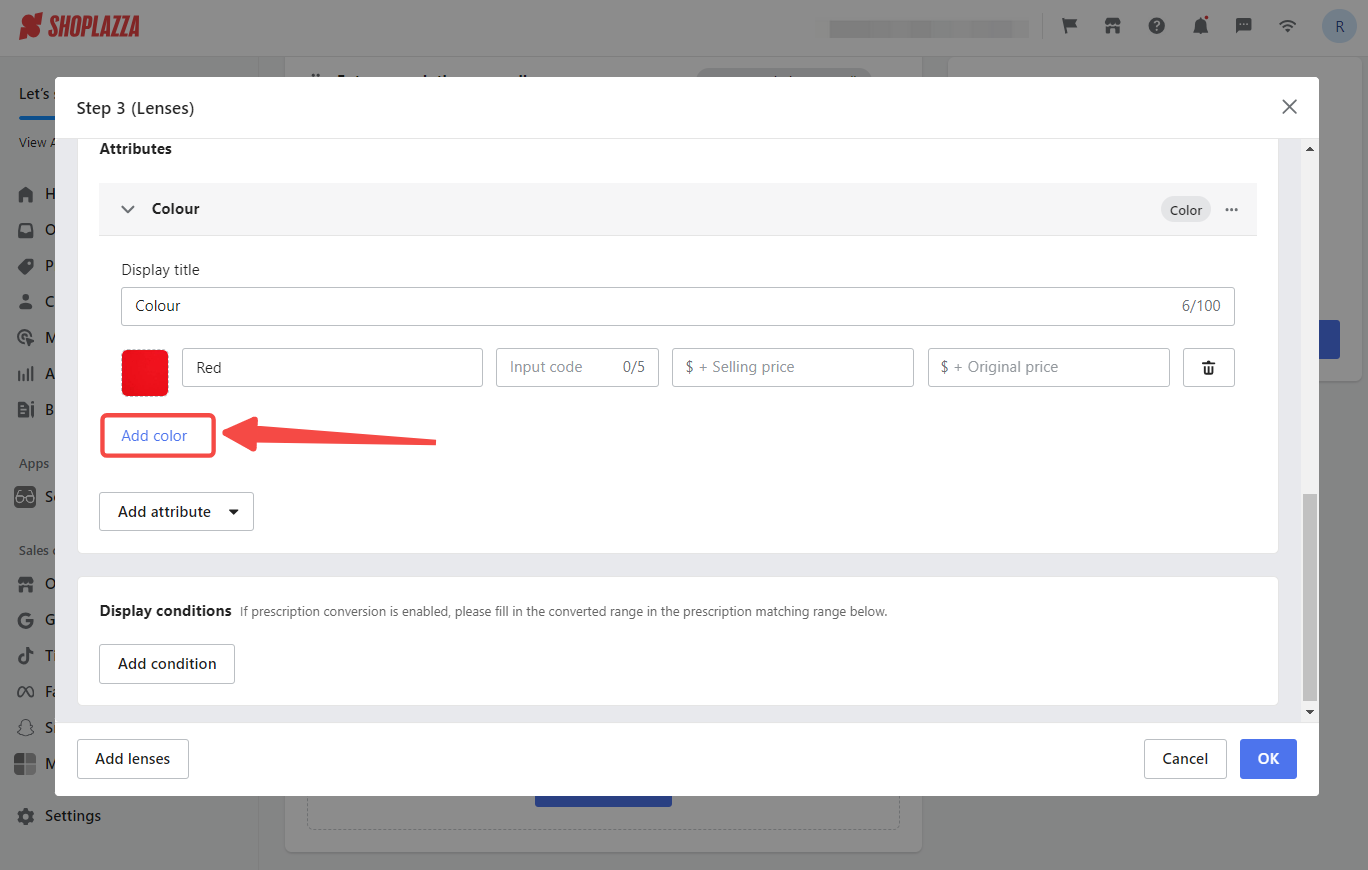
Directly add color as a separate attribute by clicking Add attribute under the Attributes section and selecting Color in the dropdown. Input the Display title, upload the corresponding image, and name the color. More colors can be added by clicking Add color.
Pricing structure
After adding color attributes or color categories, input additional prices for each color variant to create a customized pricing structure that reflects the unique value of each color option. For instance, anti-fog lenses in red, yellow, and blue are priced at an additional $10, $20, and $30 respectively, on top of the base price of $100. The final prices will be $110 for red, $120 for yellow, and $130 for blue. If no additional pricing is required for certain colors, the color price can be set to 0 or left blank.
Deleting attributes
- Delete attributes: Click on the more options icon next to the attribute and select Delete for removal.
- Delete single color options: Click the trash bin icon.

Attribute codes
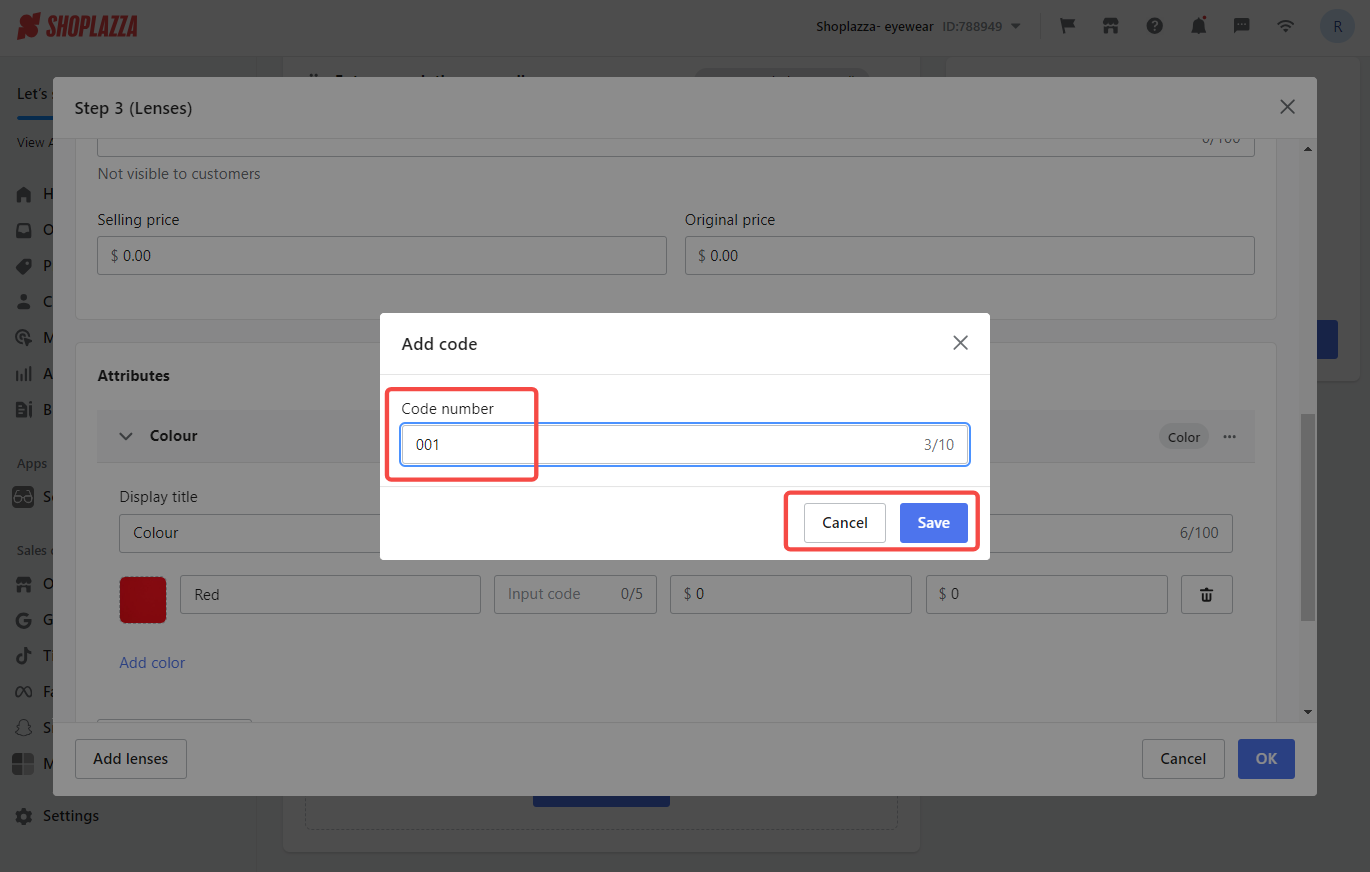
Adding unique codes to each lens attribute aids in tracking inventory and simplifying the order fulfillment process. These codes act as shorthand identifiers for quickly determining the specifications of a lens type.
For example, assigning the code "001" to the attribute "Red" and "002" to "1.57 refractive index" means a lens with both attributes would be identified as "001 002".
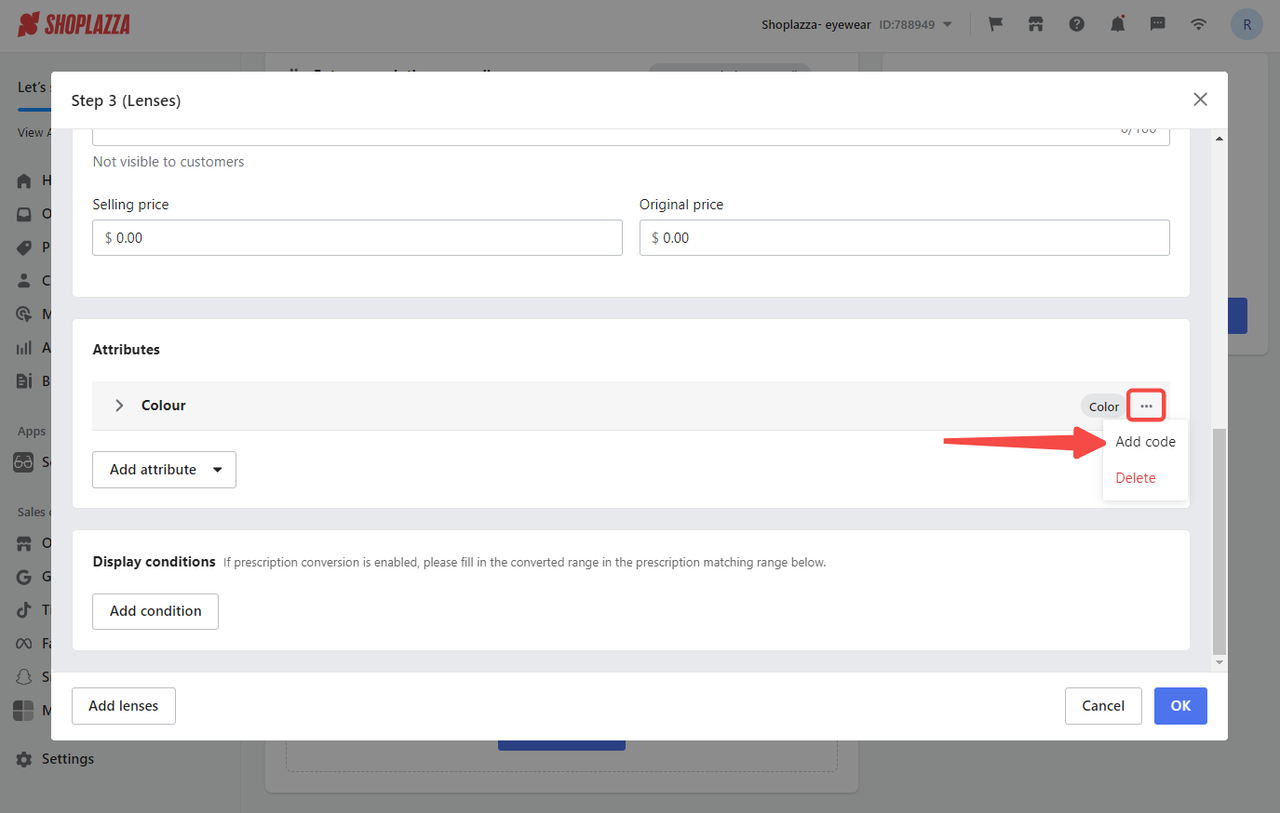
- Add code: Hover over the drop icon next to the attribute name and select Add code.
- Save code: Enter the code and confirm by clicking Save.
Displaying Conditions
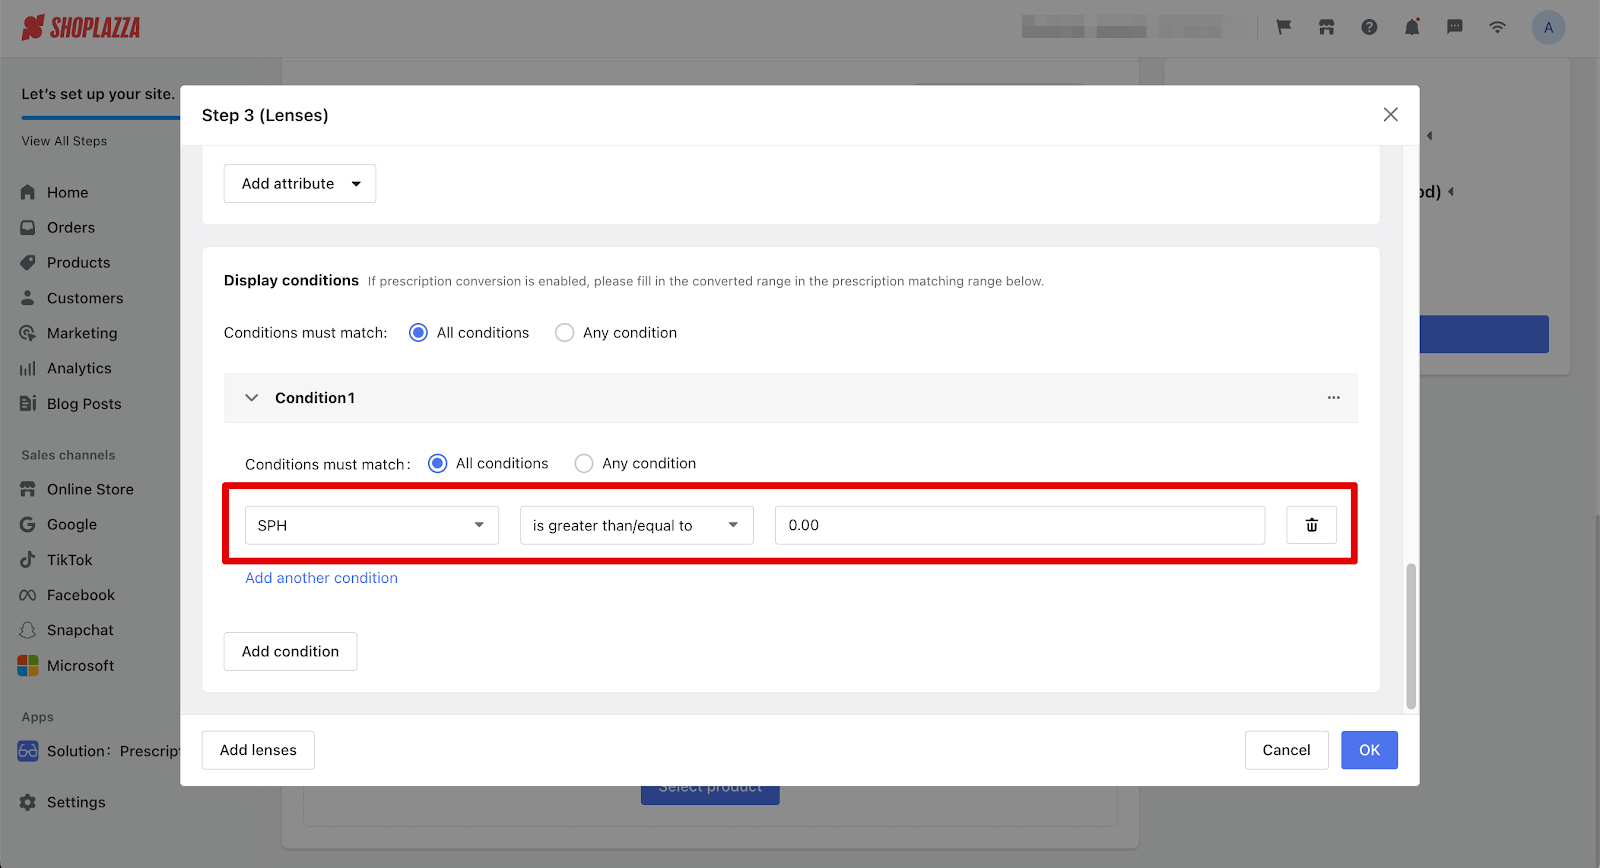
Set conditions under which certain lens types are available to customers, ensuring they meet specific criteria before purchase, which helps prevent incorrect orders and ensures satisfaction.
For instance, a lens suitable only for prescriptions with a Sphere (SPH) value of 5 or higher would only appear for customers meeting these criteria.
- Add condition: Click Add condition and use the dropdown to specify criteria.
- Set multiple conditions: Click Add another condition or Add condition again to set multiple conditions.
- Remove condition: Hover over the drop-down icon next to it and click Delete, or click the trash bin icon.
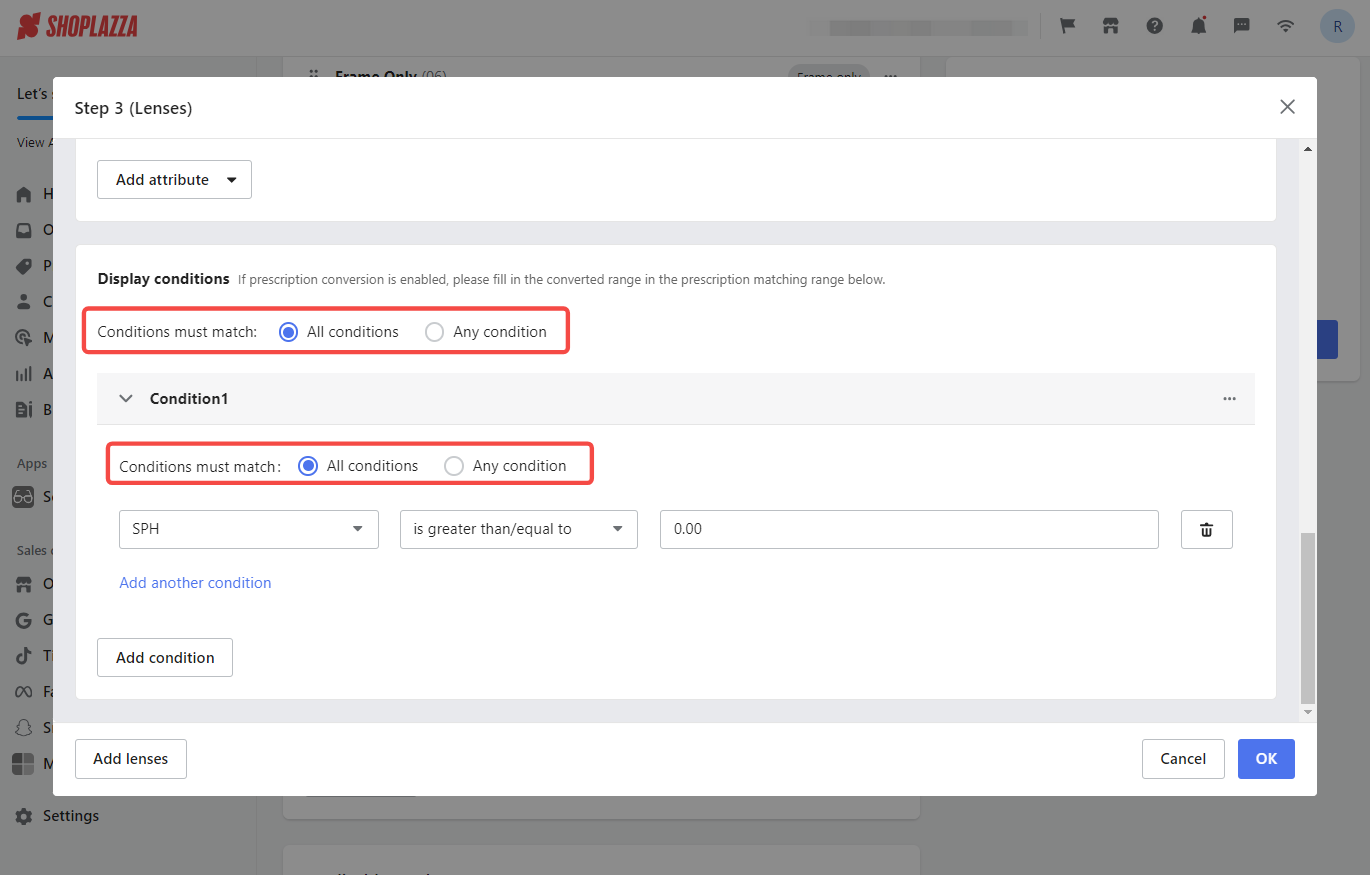
You have two options for how these conditions apply:
- All conditions: The lens is available only if all specified conditions are met.
- Any condition: The lens is available if any one of the specified conditions is met.
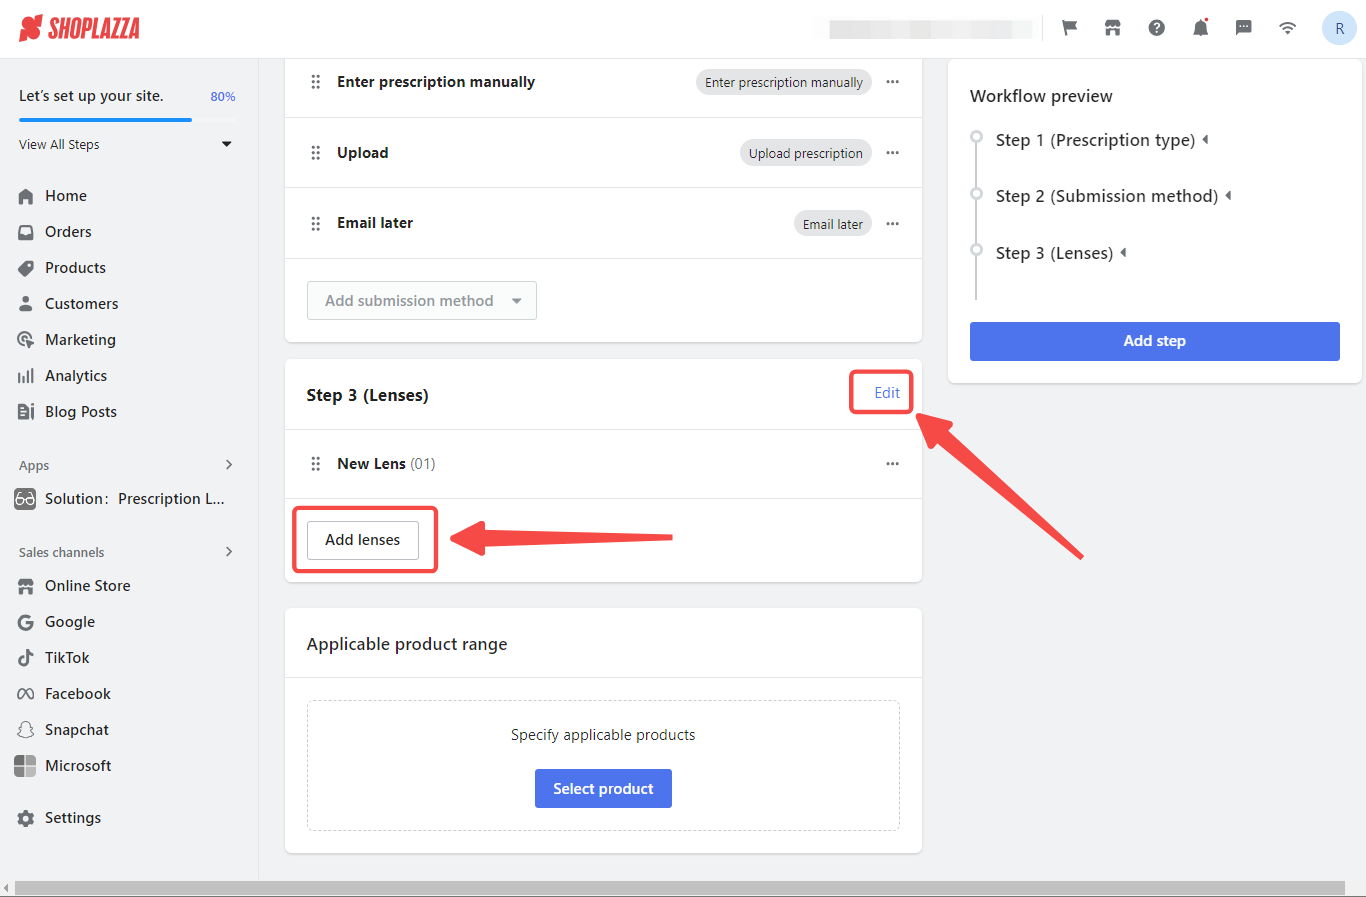
Adding new lenses
- Add lenses: Click Add lenses to offer more choices.
- Customize new lenses: Click Edit beside Step 3 to customize information for the newly added lenses.
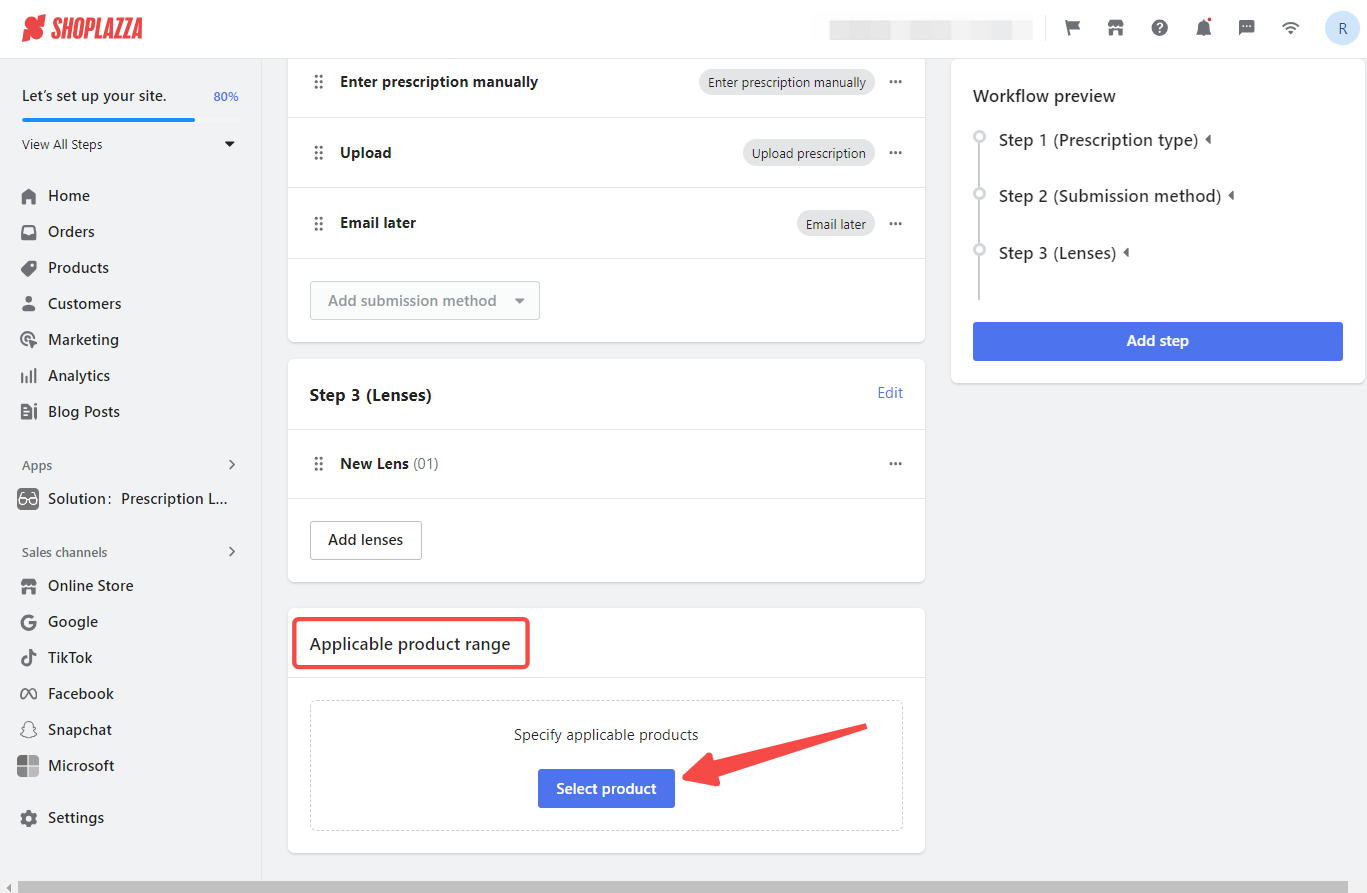
Applicable product range
Define which products within your online store the fitting workflow applies to, choosing specific products for this customized fitting experience.
1. Select products: Scroll to the Applicable product range section, click Select product, choose products in the pop-up window, and click Confirm. Select specific products, all products, or search by name, collection, or status.

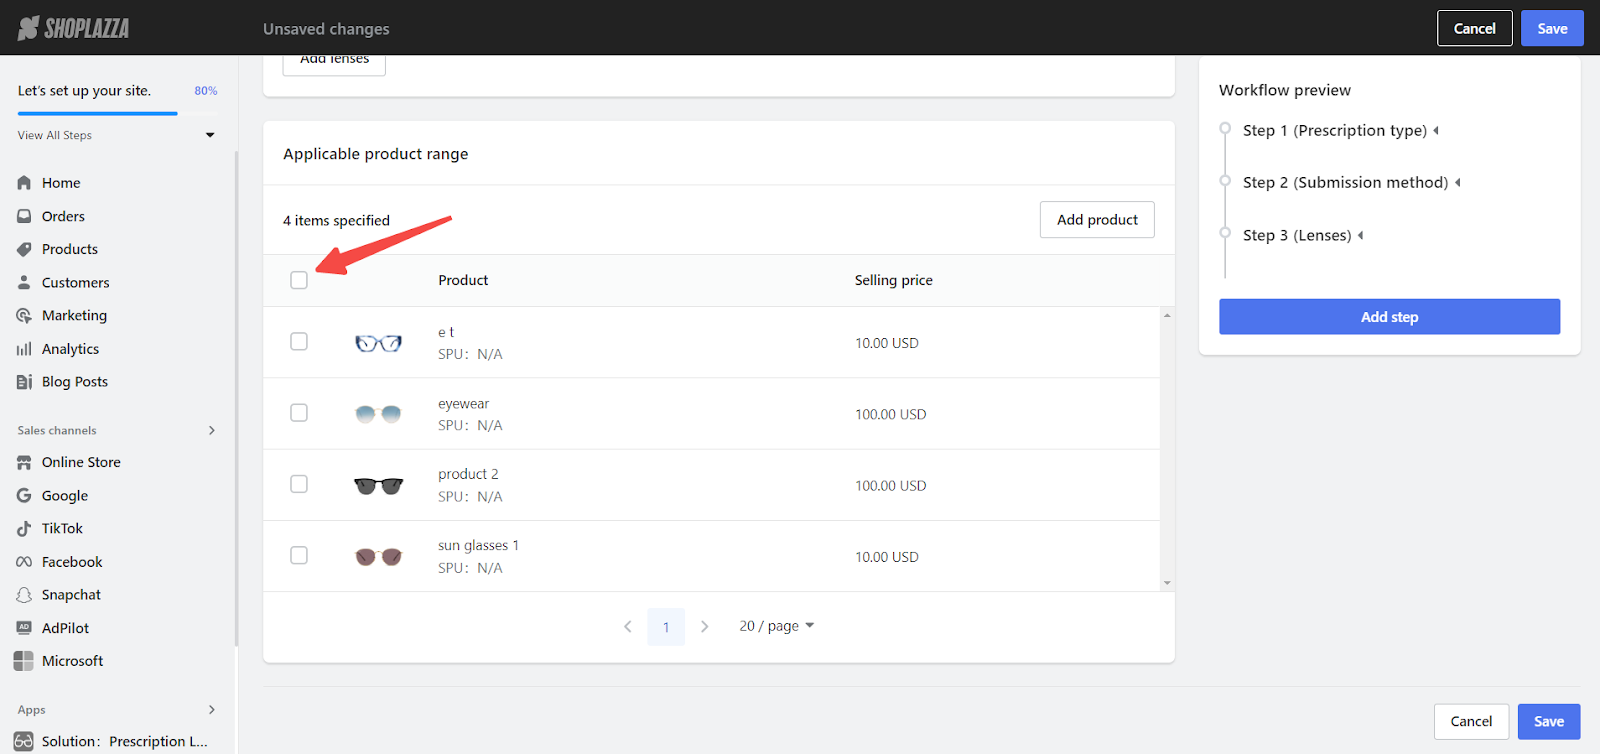
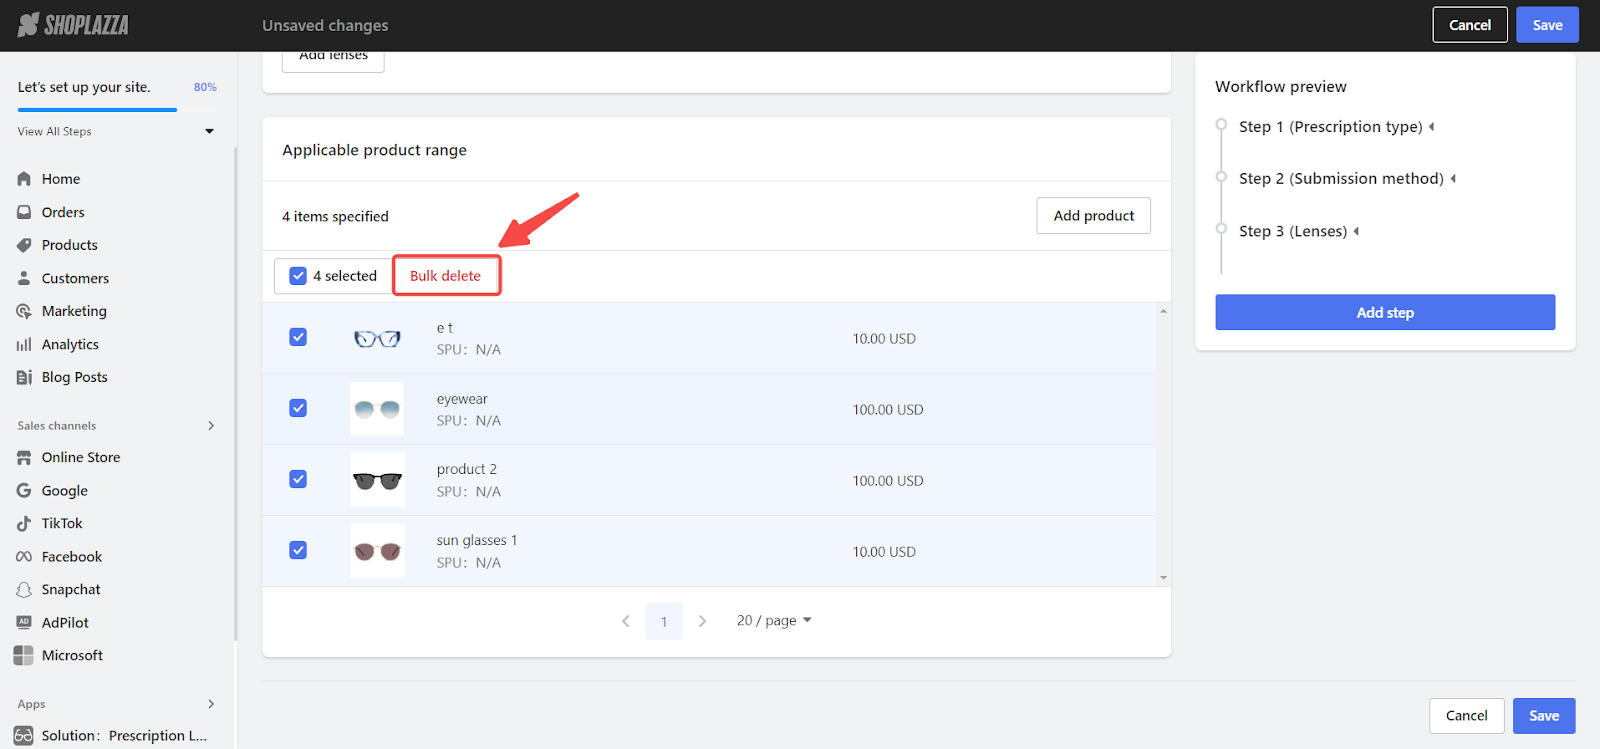
2. Bulk deletion of applicable products: Manage your product listings more efficiently by bulk deleting products applicable to certain workflow steps.


Comments
Please sign in to leave a comment.