
To effectively track and manage your ad performance, setting up your X pixel is essential. Follow these steps to install the OnePixel app and create your X pixel.
Installing the OnePixel app
To start using OnePixel, you’ll first need to install the app in your Shoplazza store. Here’s how you can do it:
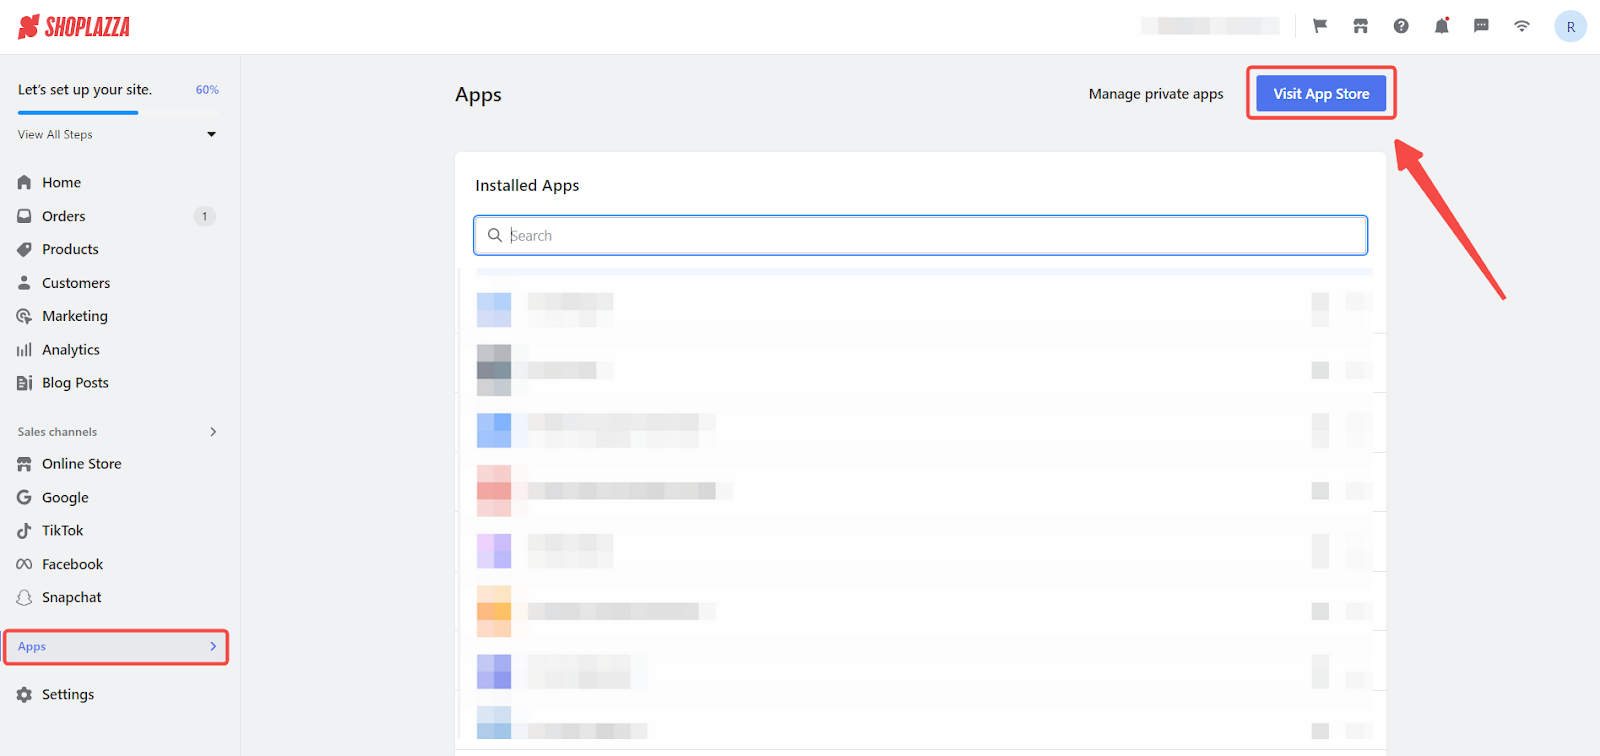
1. Access the App Store: Access the App Store by navigating from your Shoplazza Admin > Apps, and clicking Visit App Store.
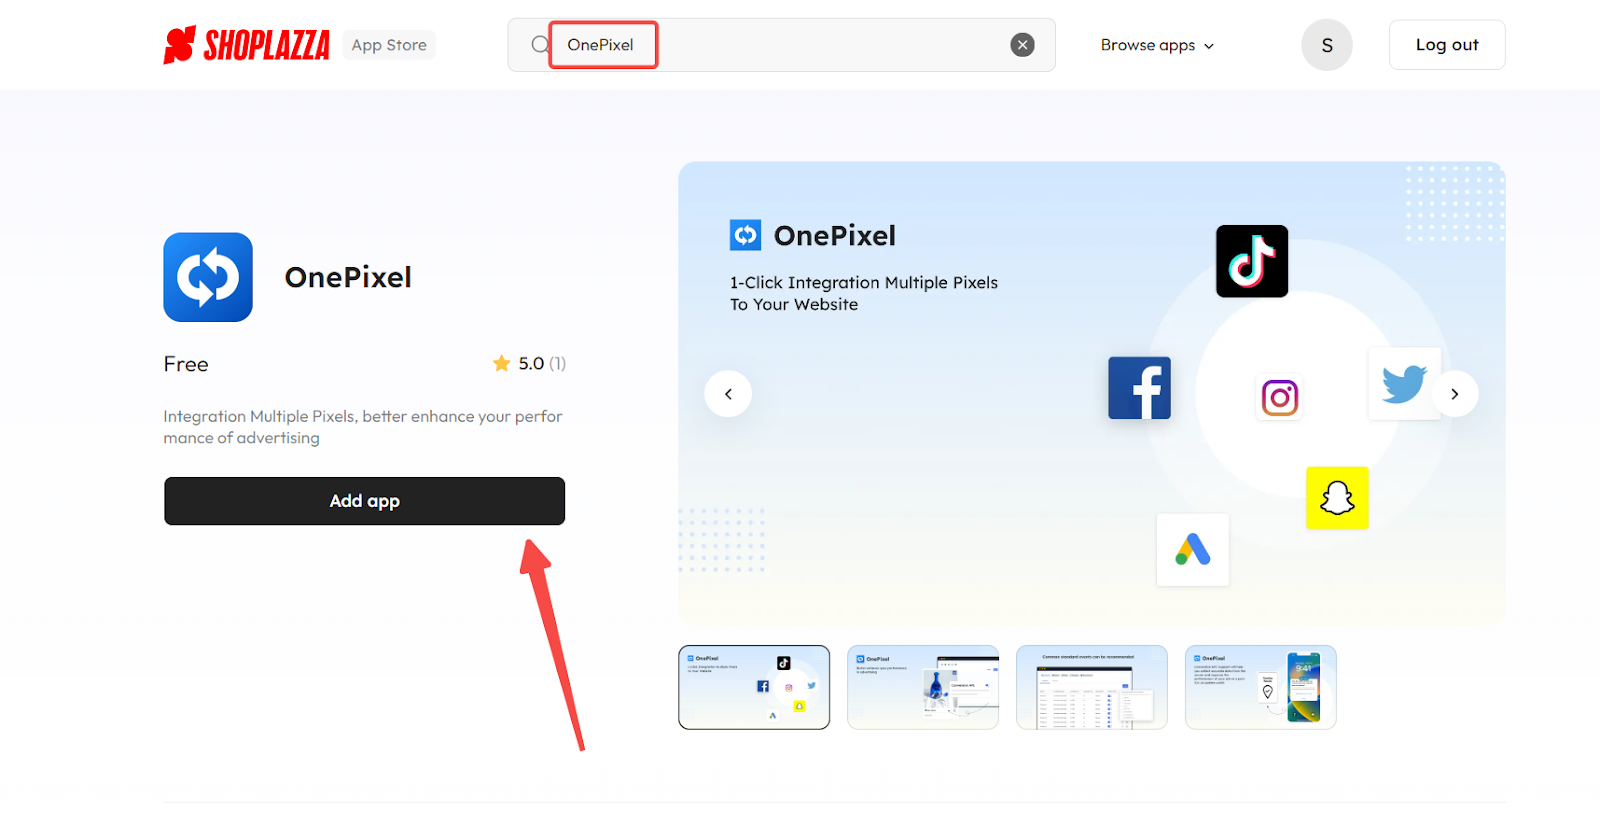
2. Find the app: Find the One Pixel app by entering the app name “One Pixel” in the search box and clicking on Add app.
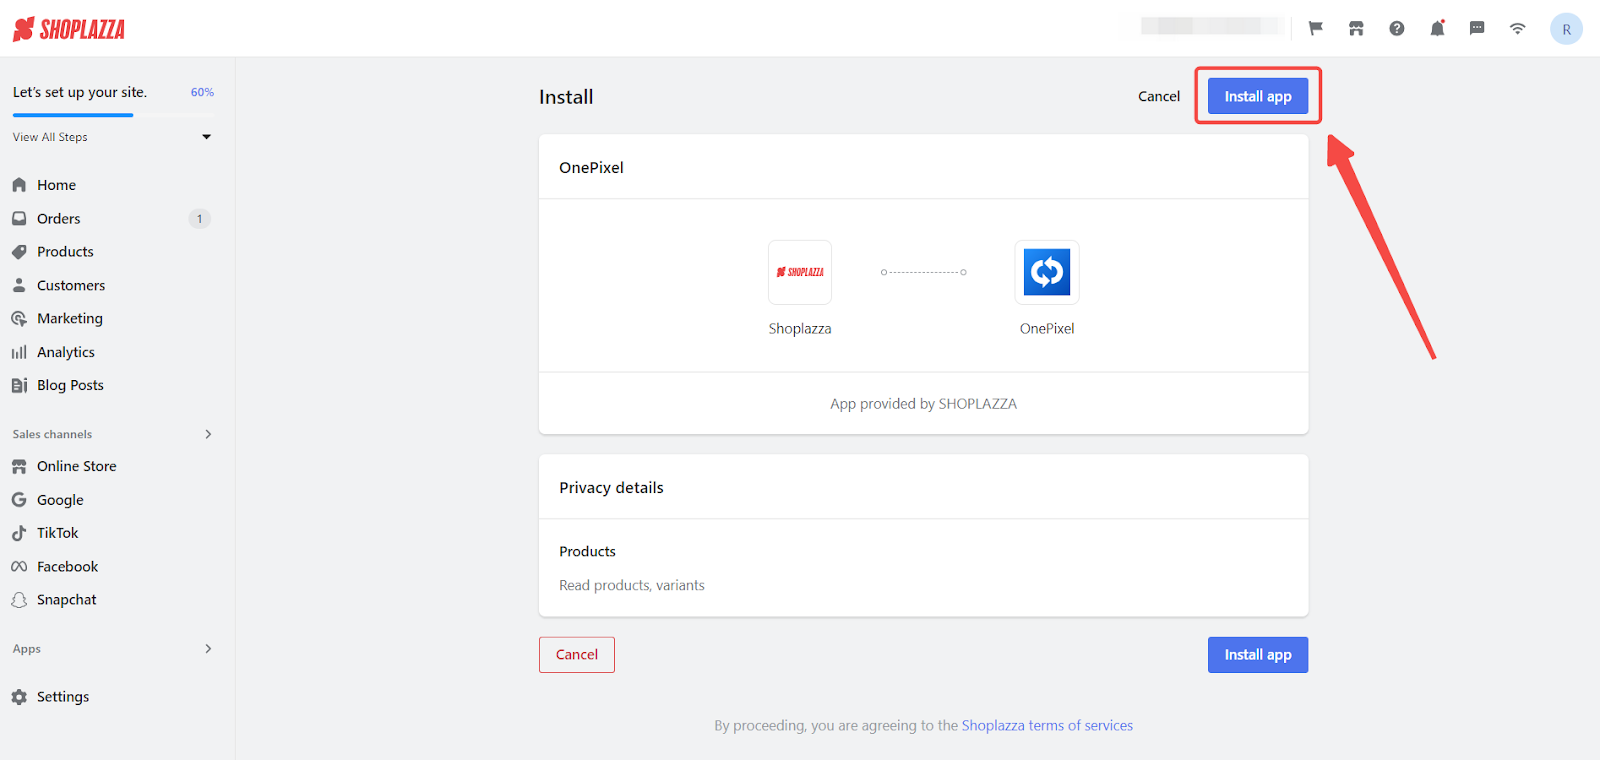
3. Install the app: Install the One Pixel app by clicking Install app to complete the app installation.
Creating your X pixel
Once the app is installed, the next step is to create your X pixel. This section will walk you through the process of logging into your X ads account and setting up your pixel to track events accurately.
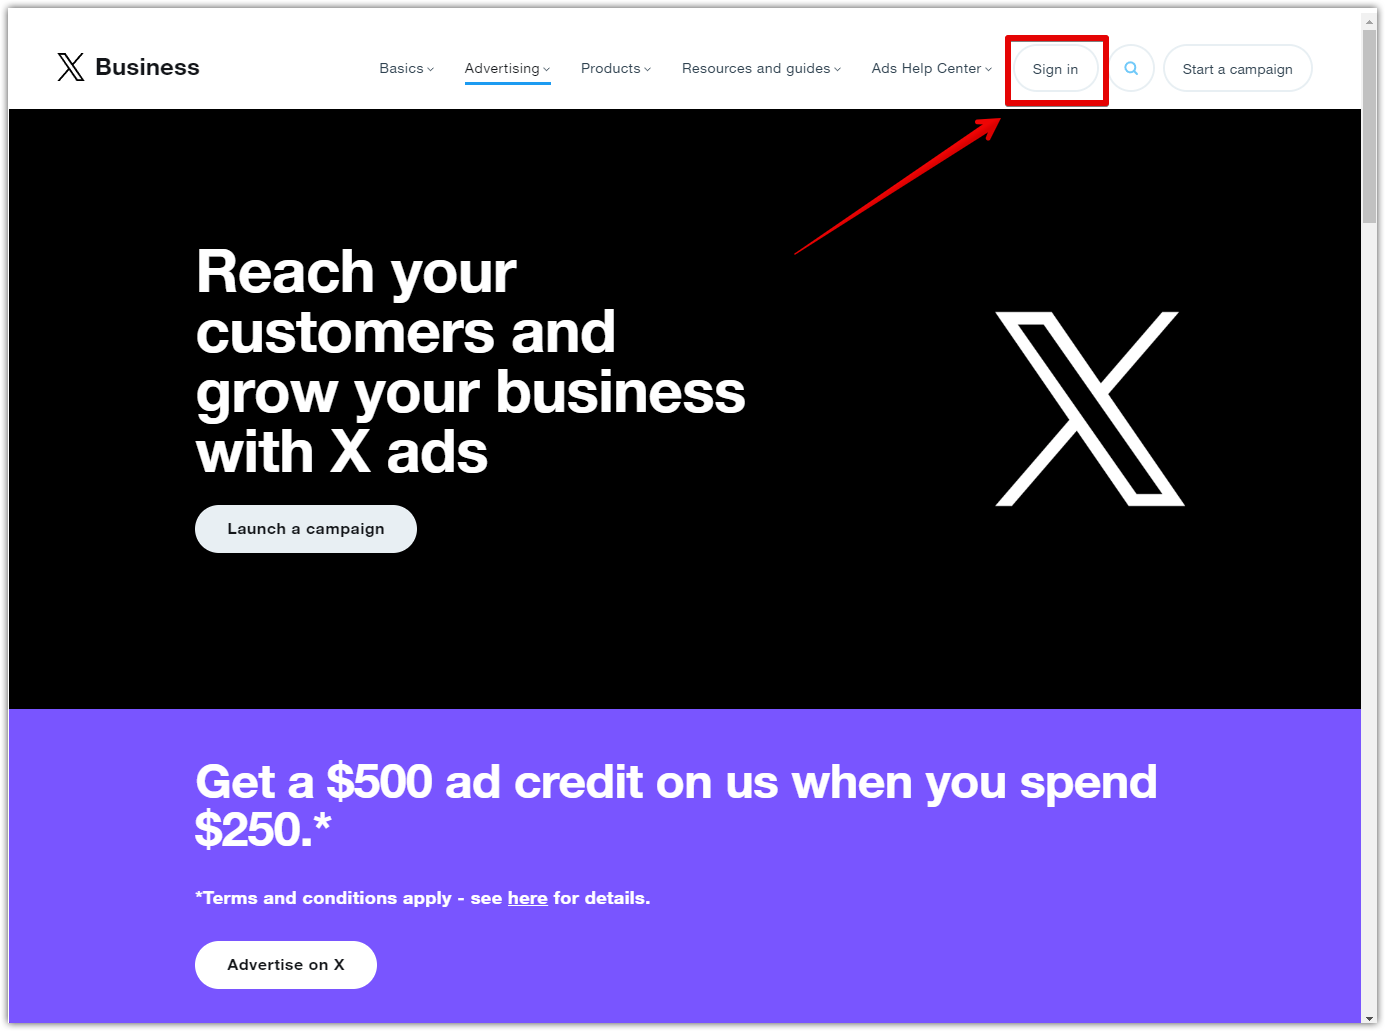
1. Log in to Your X Ads Account: Start by logging in to your X Ads account to access your campaign management tools.
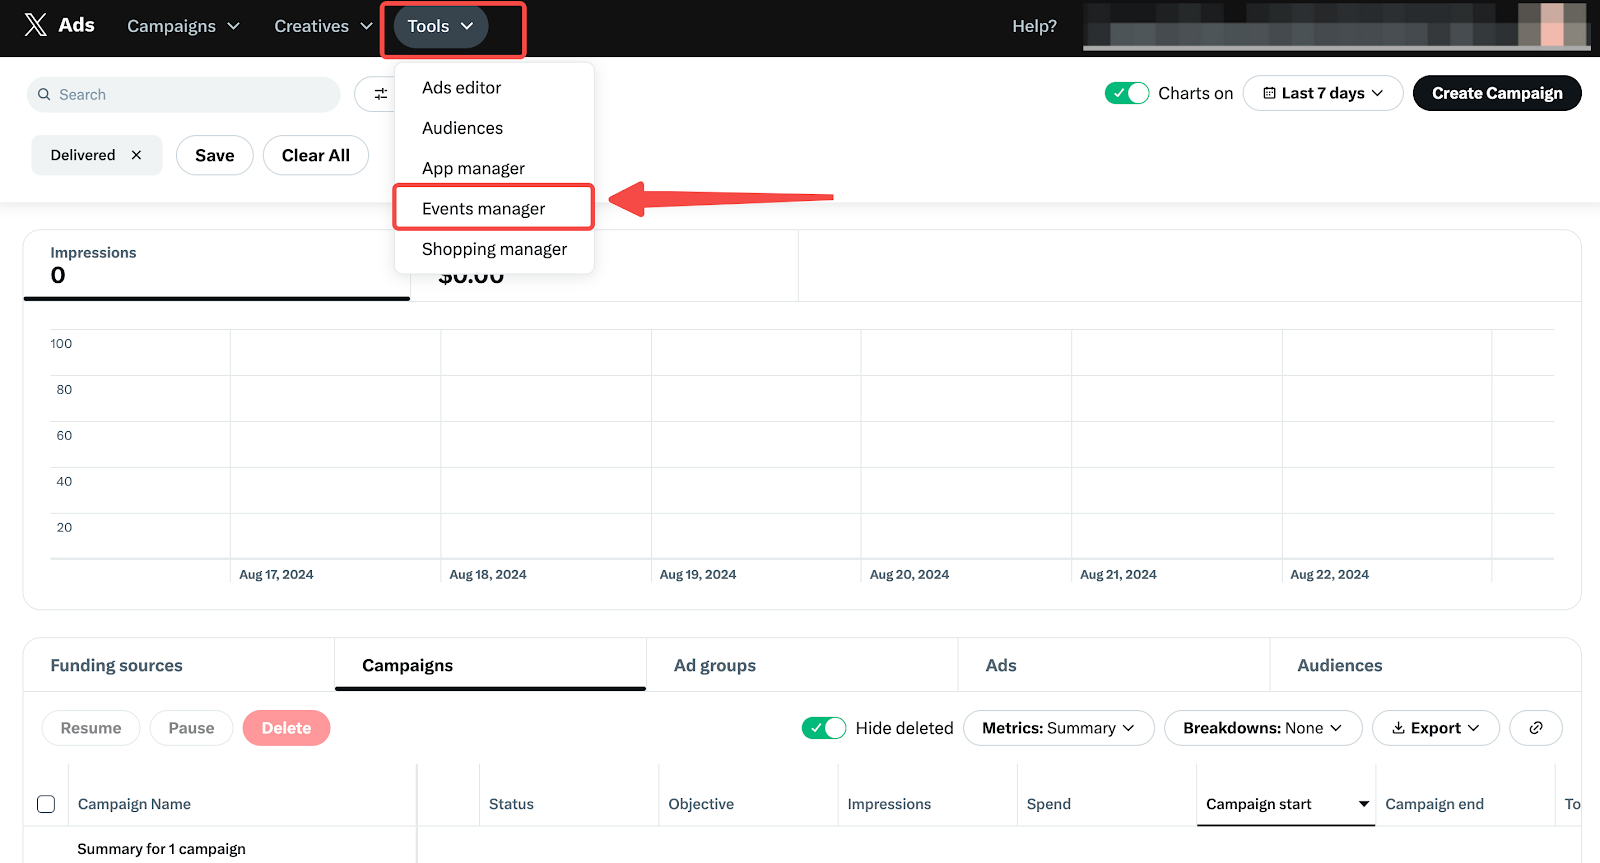
2. Access the Event Manager: In your X Ads dashboard, navigate to Tools > Event Manager to find your Pixel and Event IDs.
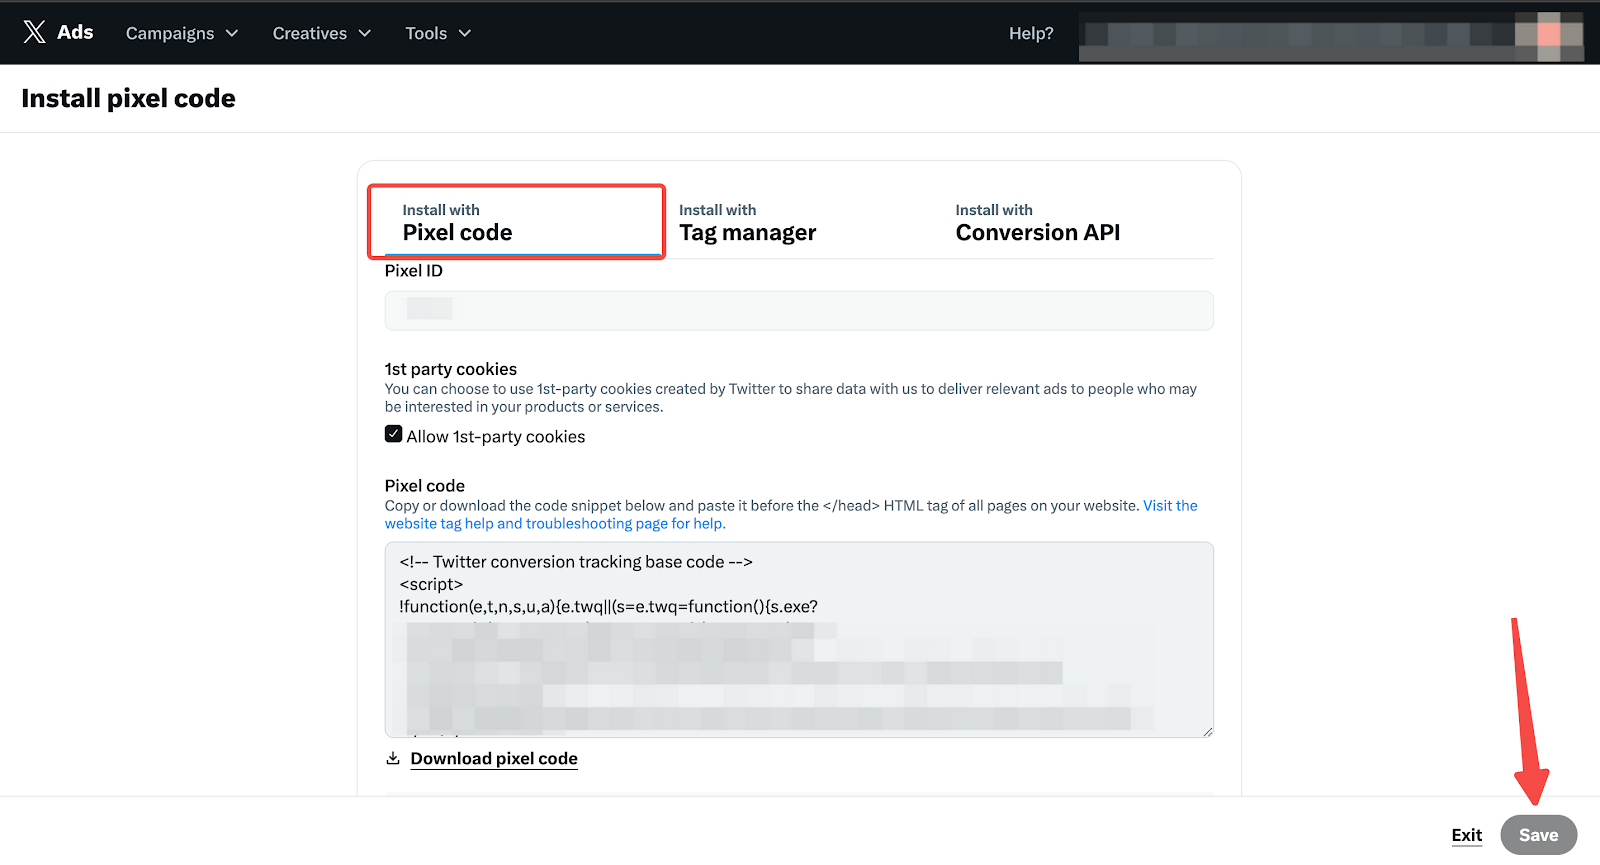
3. Create and save your pixel. After entering the Event Manager, select Pixel Code and click Save.
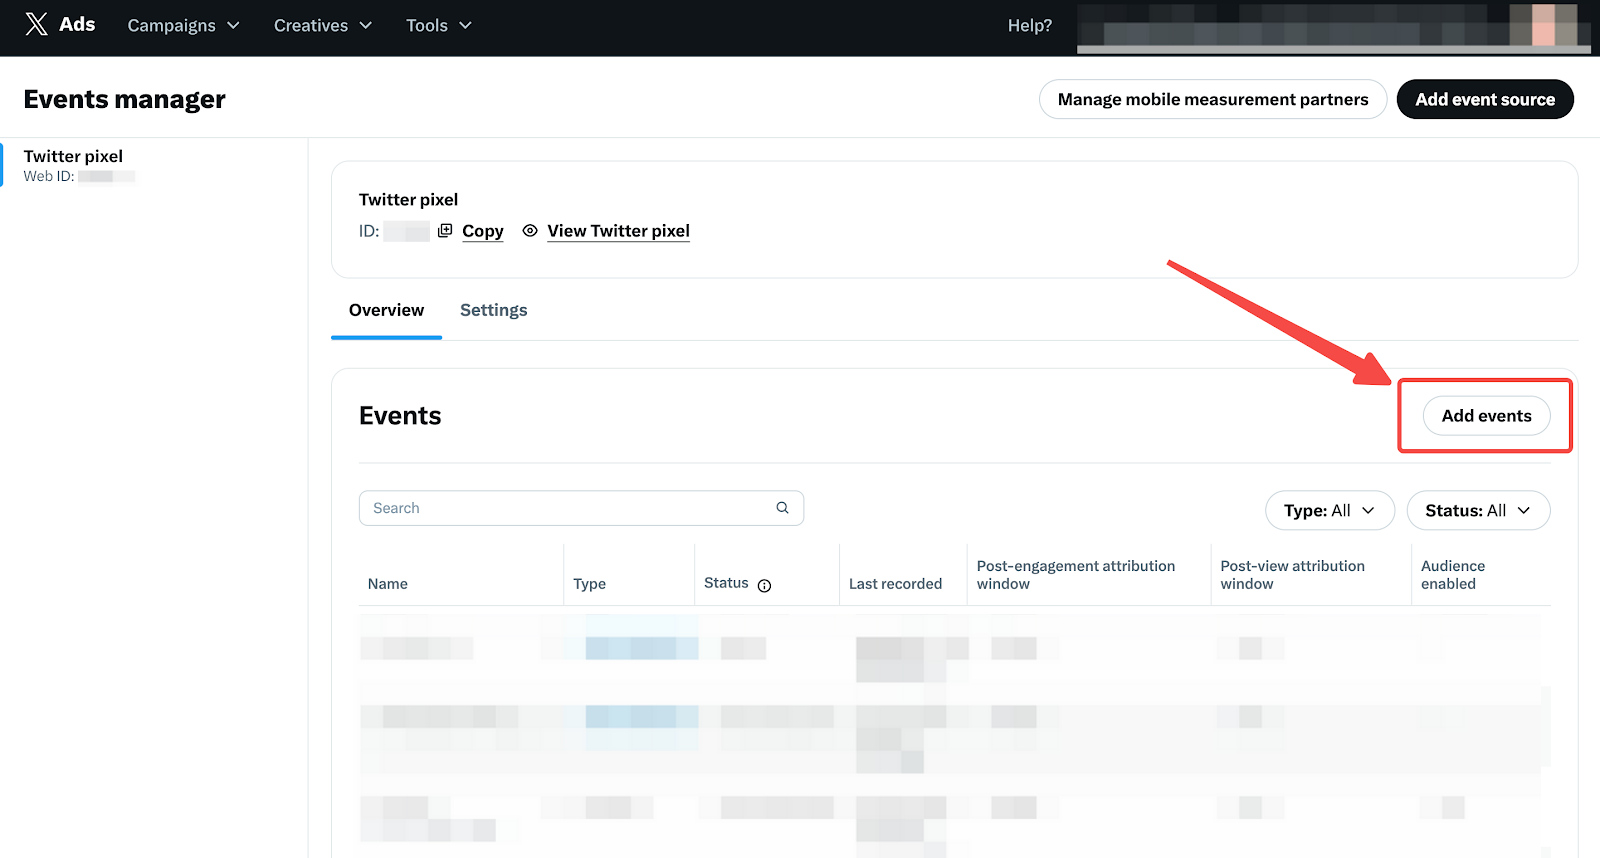
4. Create a new event: Click Add events.
5. Enter event details: Provide an event name, choose the event type you want to track, and click Next.

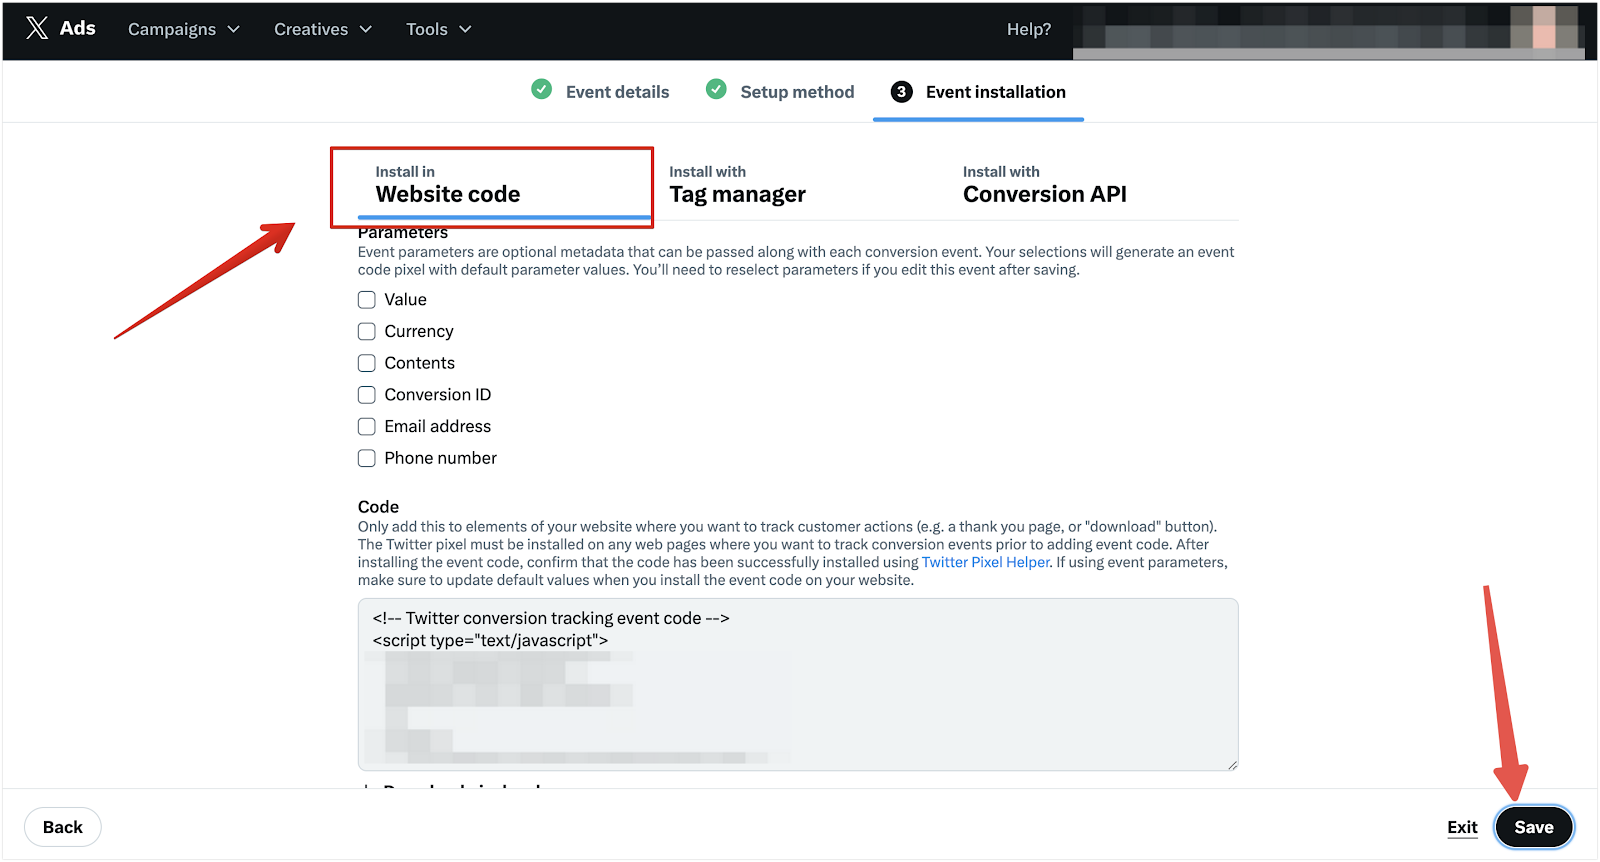
6. Set up the event: Select Define events using code as the setup method, then click Save to finish creating the event.
Note
When creating an event, please select parameters based on the merchant’s specific needs.
With your X pixel set up in X ads and the OnePixel app installed, you’re now equipped to effectively track ad performance and optimize your campaigns. Make sure to regularly monitor your events and adjust your strategies as needed to maximize your ad success.
Related articles
OnePixel | Getting your X (formerly Twitter) Pixel ID and Event ID


Comments
Please sign in to leave a comment.