
Boost your business and delight your customers by implementing the Subscription app for products like contact lenses, medications, or consumables. This feature allows customers to set up recurring orders, ensuring they always have their essential items without the hassle of reordering. By offering subscription purchases, you can improve customer loyalty, increase sales, and streamline your inventory management.
Note
The subscription feature does not support the OnePage theme.
Installing the Subscription app
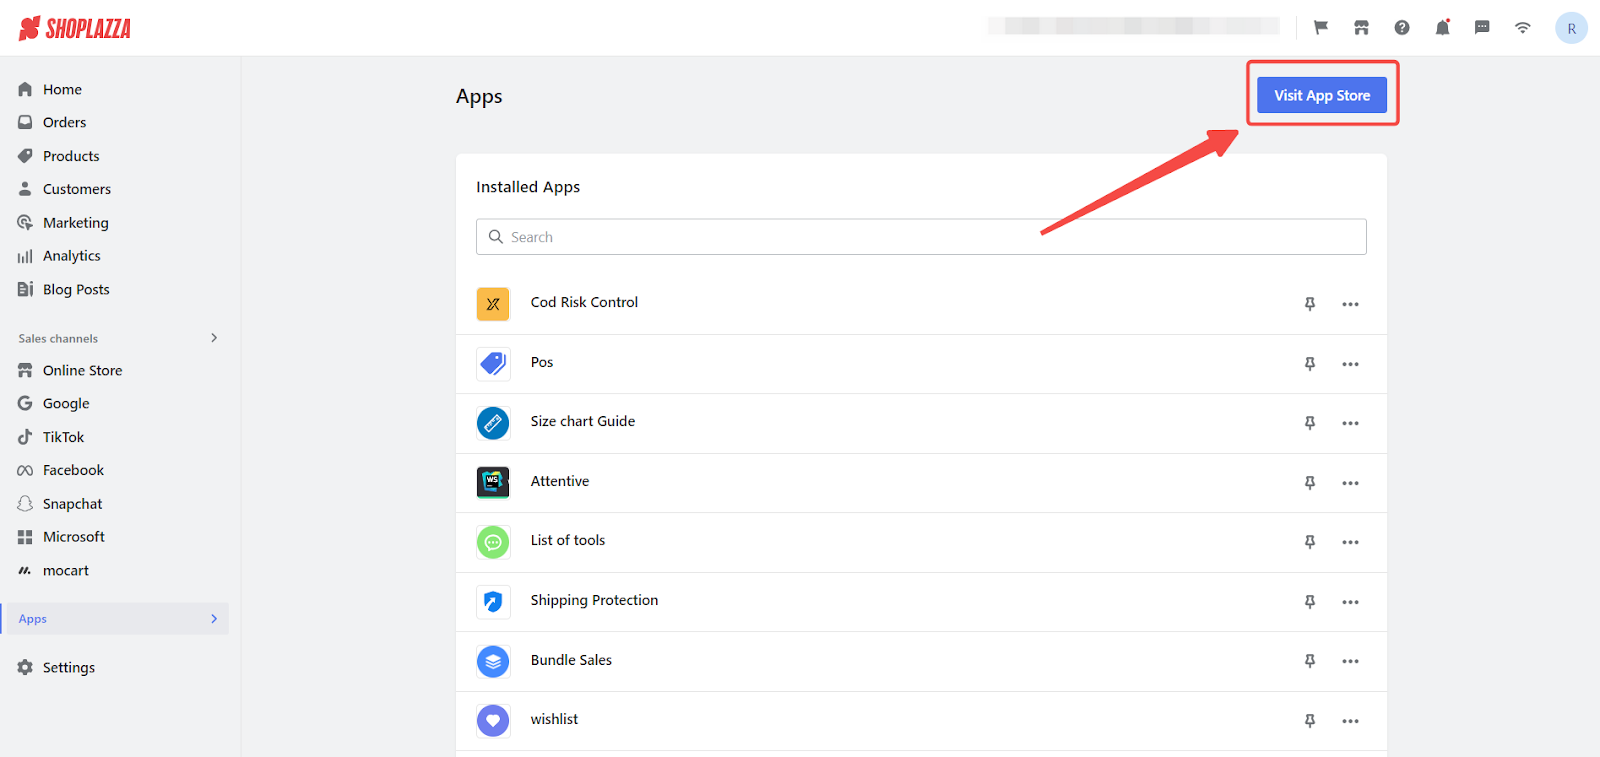
1. Access the app store: From your Shoplazza admin > Apps, click Visit App Store. This will take you to the Shoplazza App Store where you can find various apps to enhance your store's functionality.
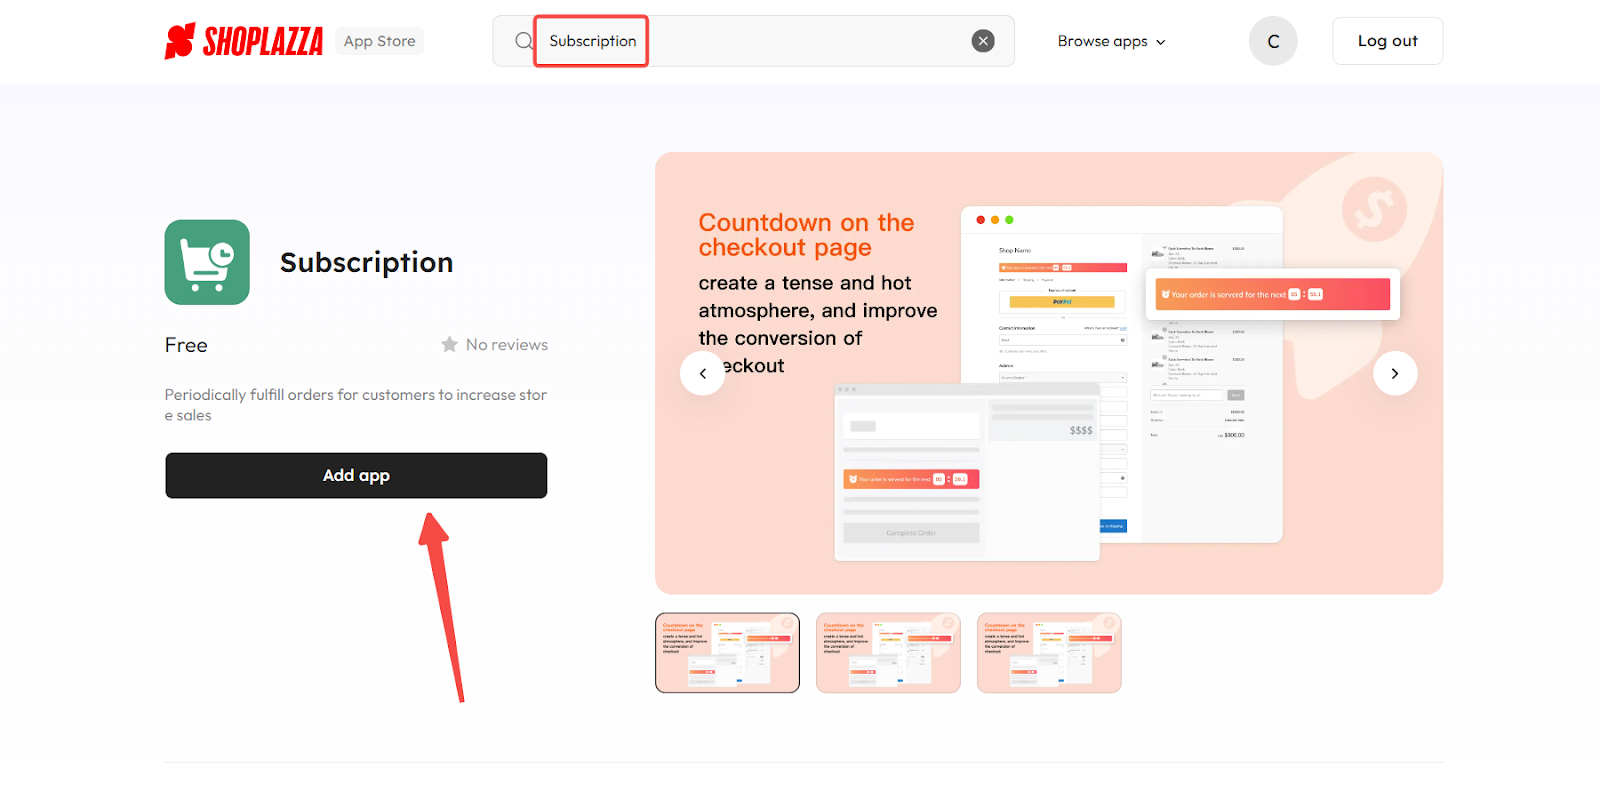
2. Find the app: In the search box, type Subscription and press enter. When you find the Subscription app in the results, click Add app to add it to your store.
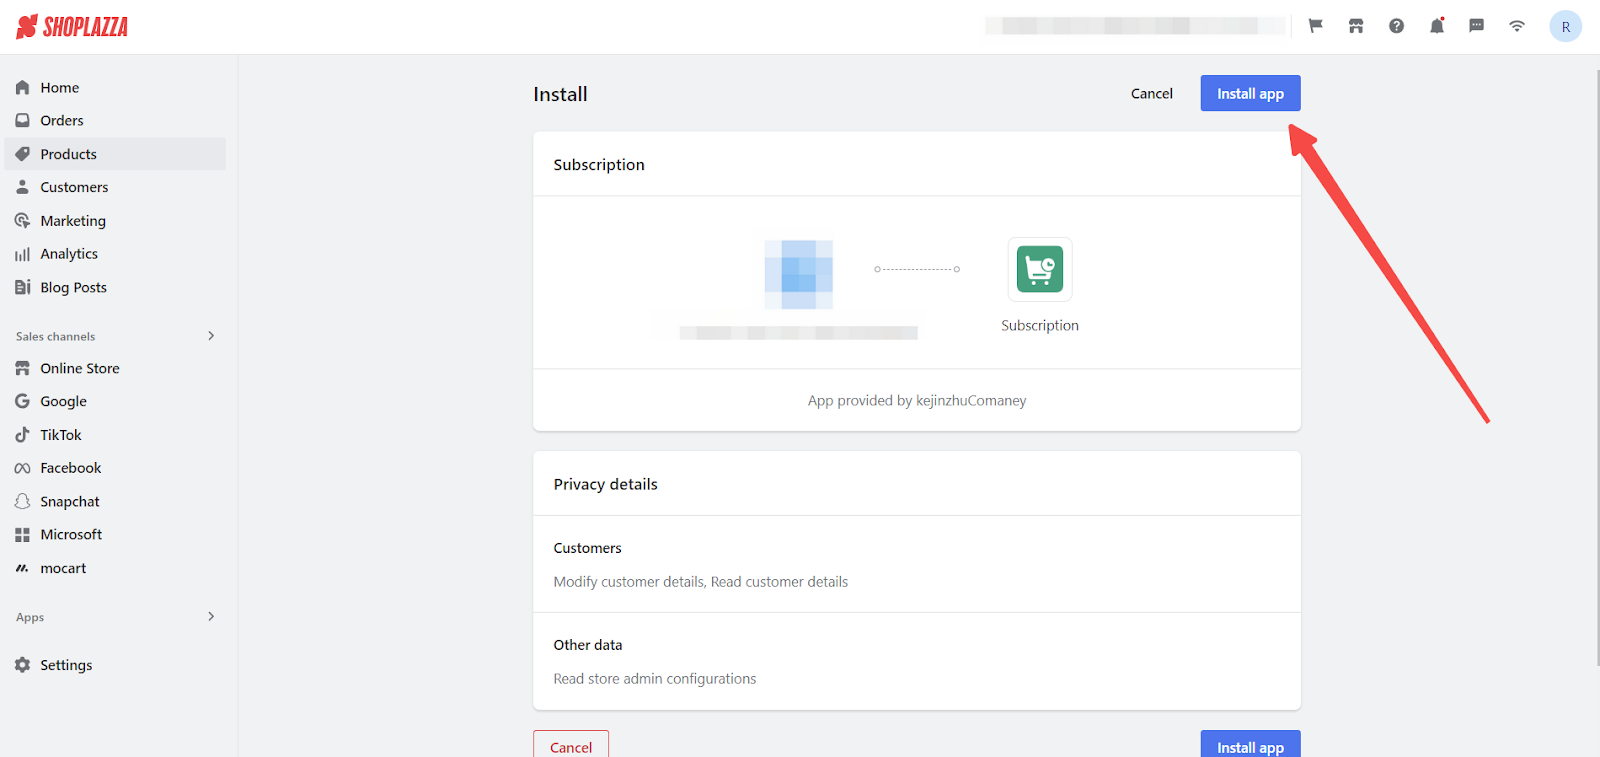
3. App installation: Once you've added the app, click Install app to complete the installation process.
Setting up the Subscription feature
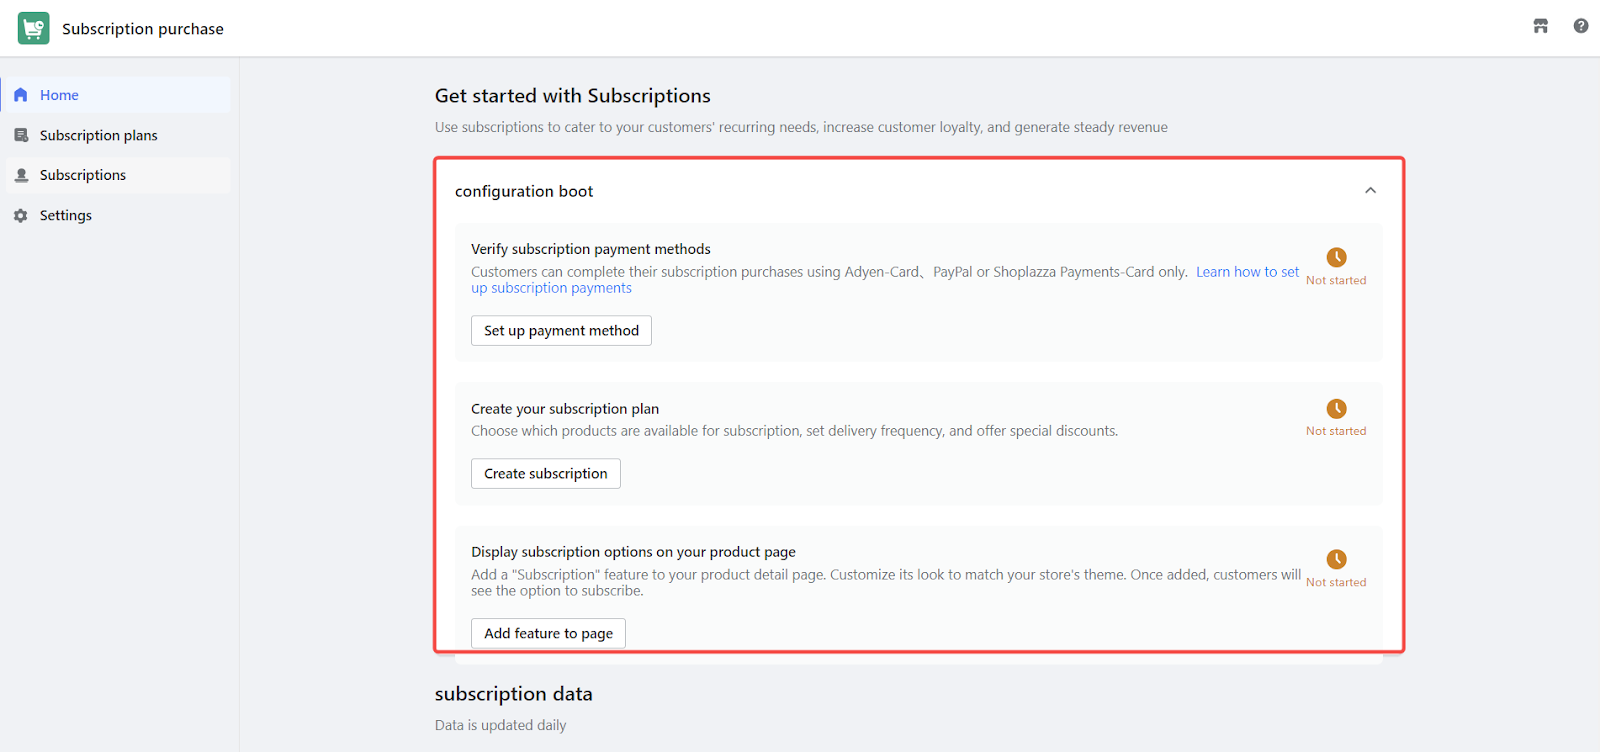
After installation, you will be redirected to the app homepage. Here, you will see three main steps that need to be configured. Follow the home page configuration guide to proceed.
Step 1: Configure payment methods
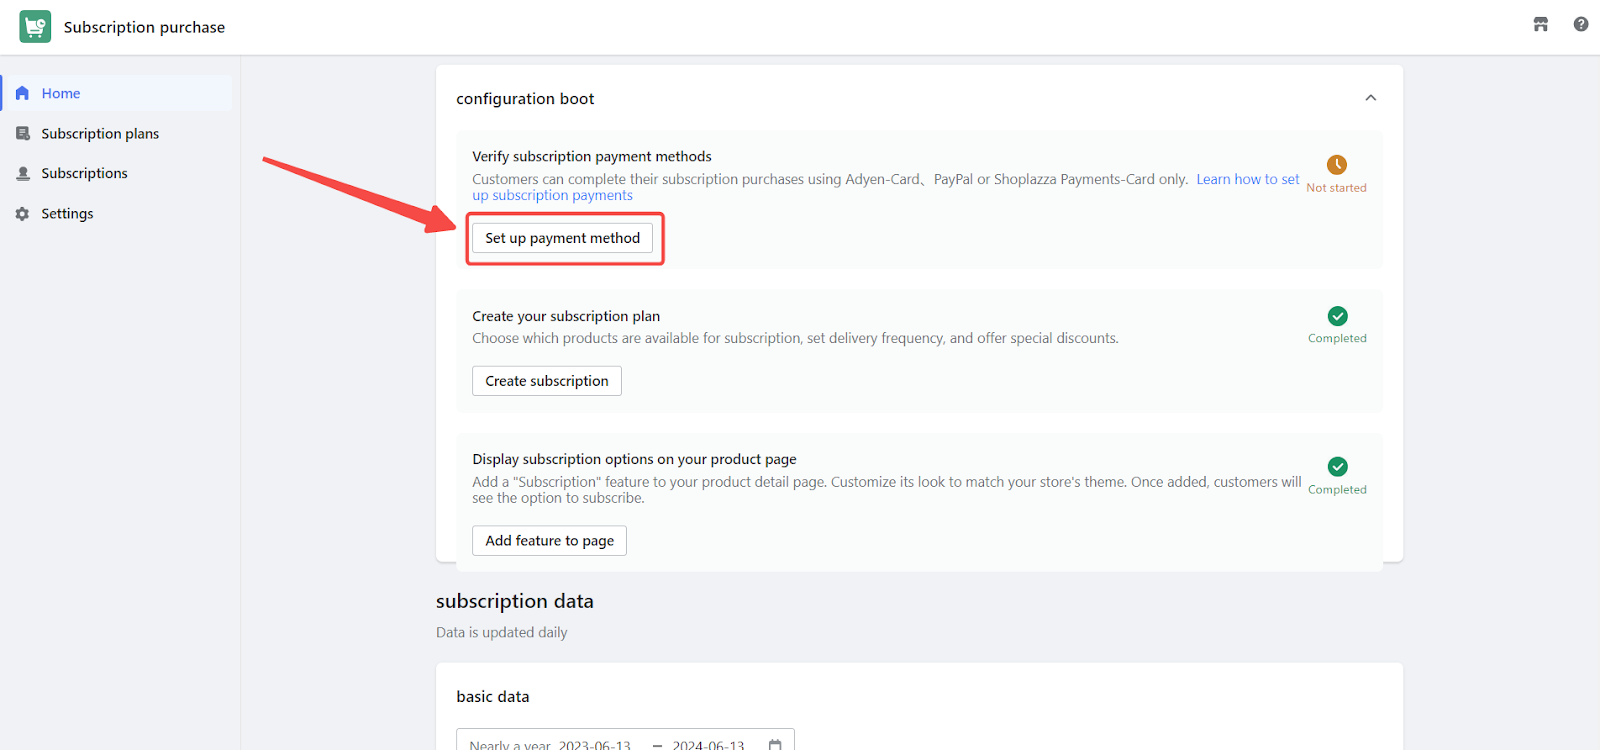
1. Set up payment methods: From the subscription app’s homepage, click Set up payment method to be redirected to the payment settings section. Here, you will configure the necessary payment methods to support subscription billing.
Note
Avoid frequent changes to payment methods as this may disrupt automatic billing for existing subscriptions.
2. Supported payment methods: Currently, Shoplazza supports Adyen-Card, PayPal, and Shoplazza Payments-Card for subscription payments.
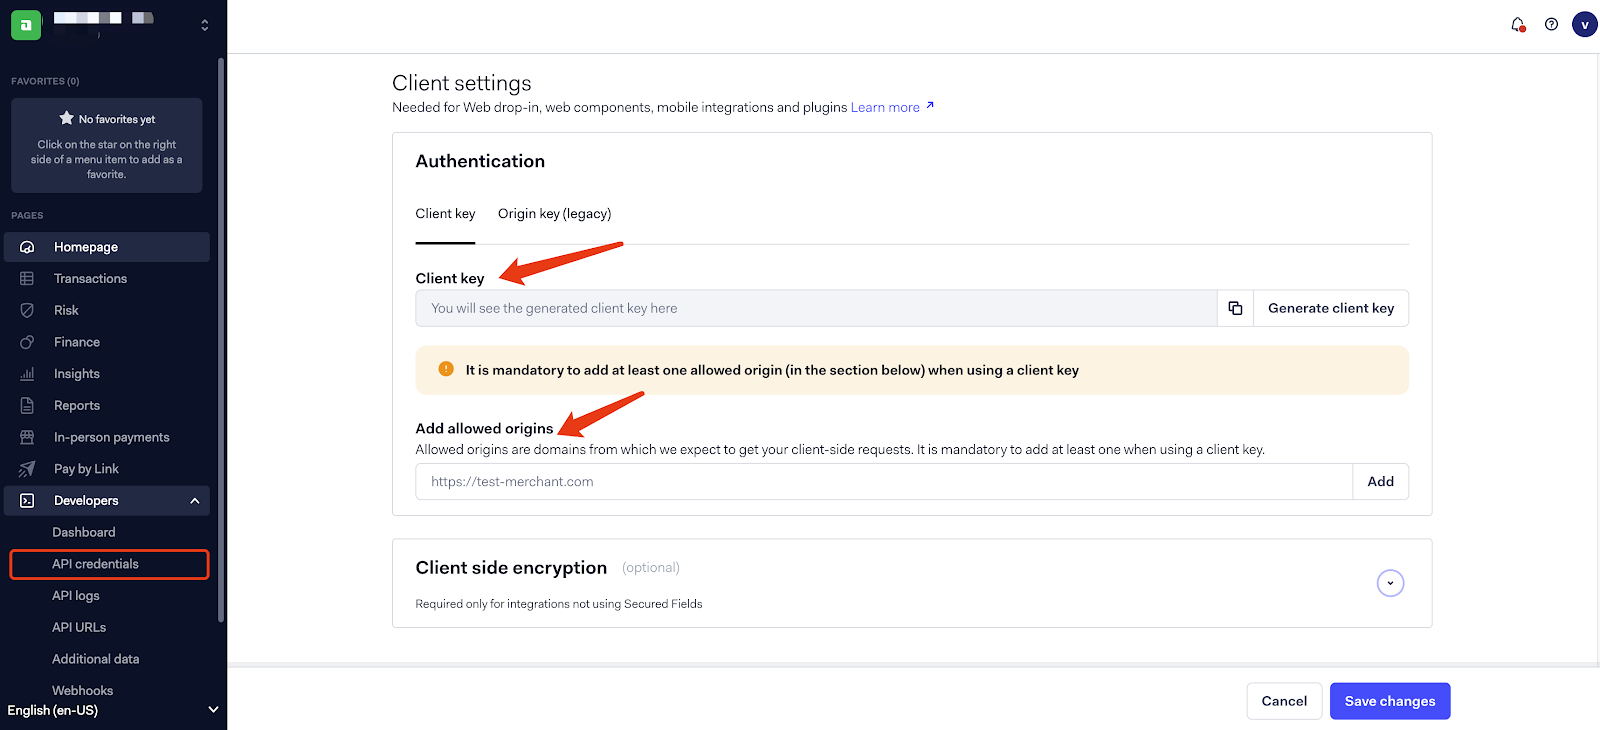
- Adyen: To use Adyen for subscription payments, go to Shoplazza admin > Settings > Payments > Adyen. Enter the Client Key obtained from the Adyen Customer Area in the Shoplazza Payments settings. In the Adyen Customer Area, add your Shoplazza domain to the allowed origins. Make sure to Save your settings.
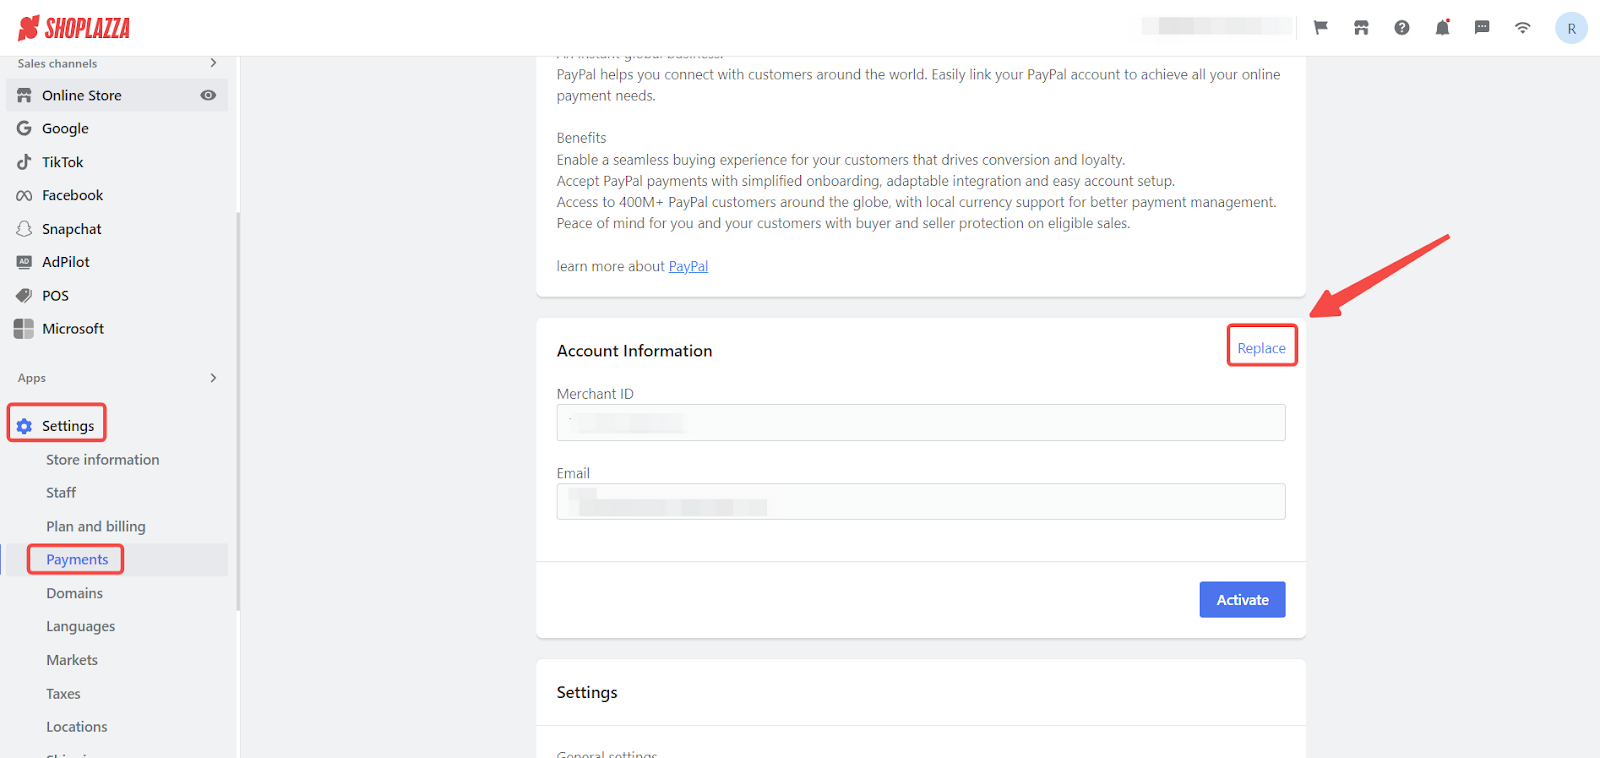
- PayPal: For PayPal, navigate to Shoplazza admin > Settings > Payments > PayPal and click Replace to reauthorize your PayPal account. After reauthorizing, verify the completion on the subscription homepage.
Note
If PayPal still shows incomplete, it may be due to account permissions or regional restrictions. Contact Shoplazza for further assistance.
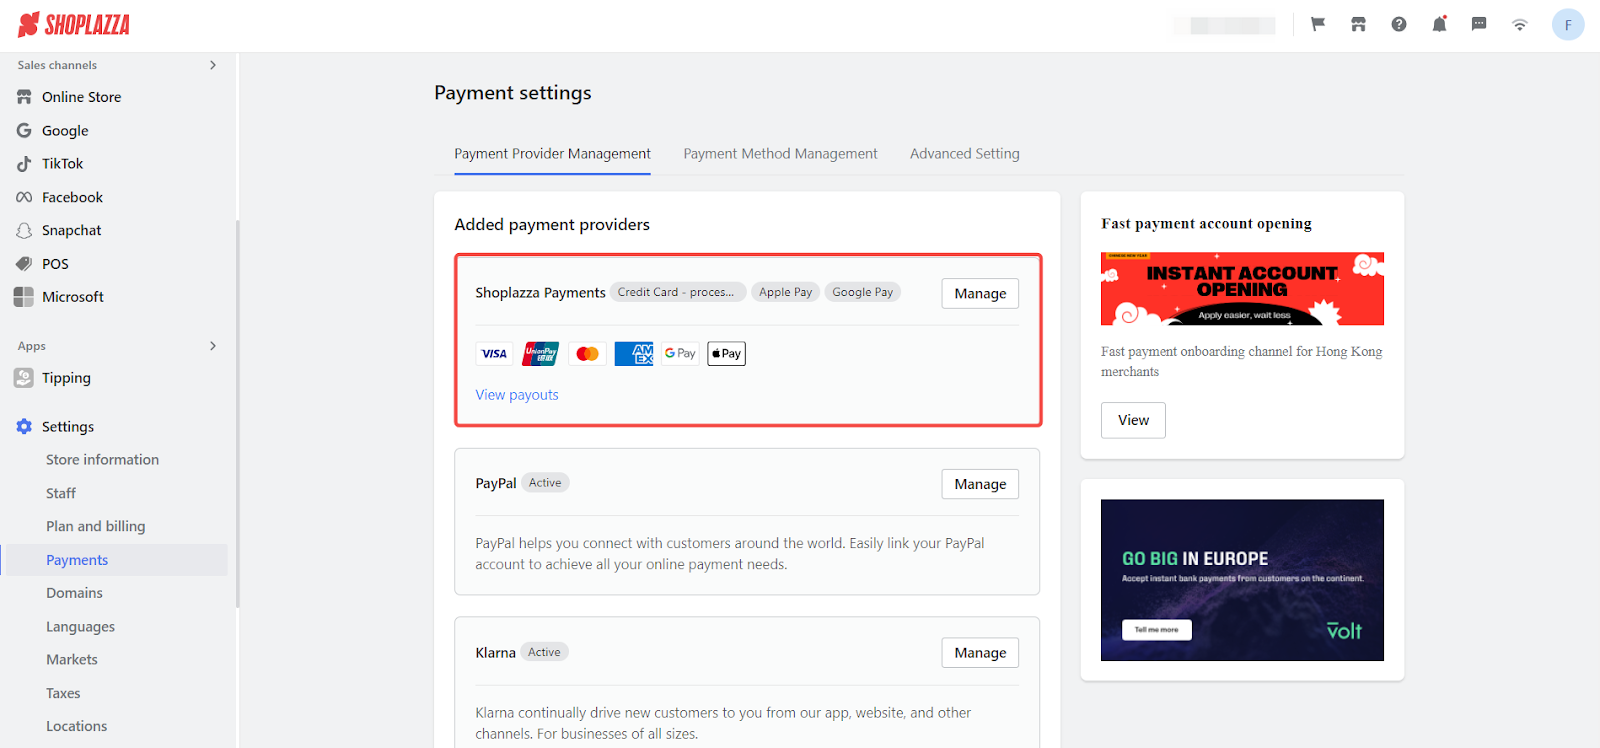
- Shoplazza Payments: Ensure Shoplazza Payments is active. If this payment method is already enabled, no further setup is needed.
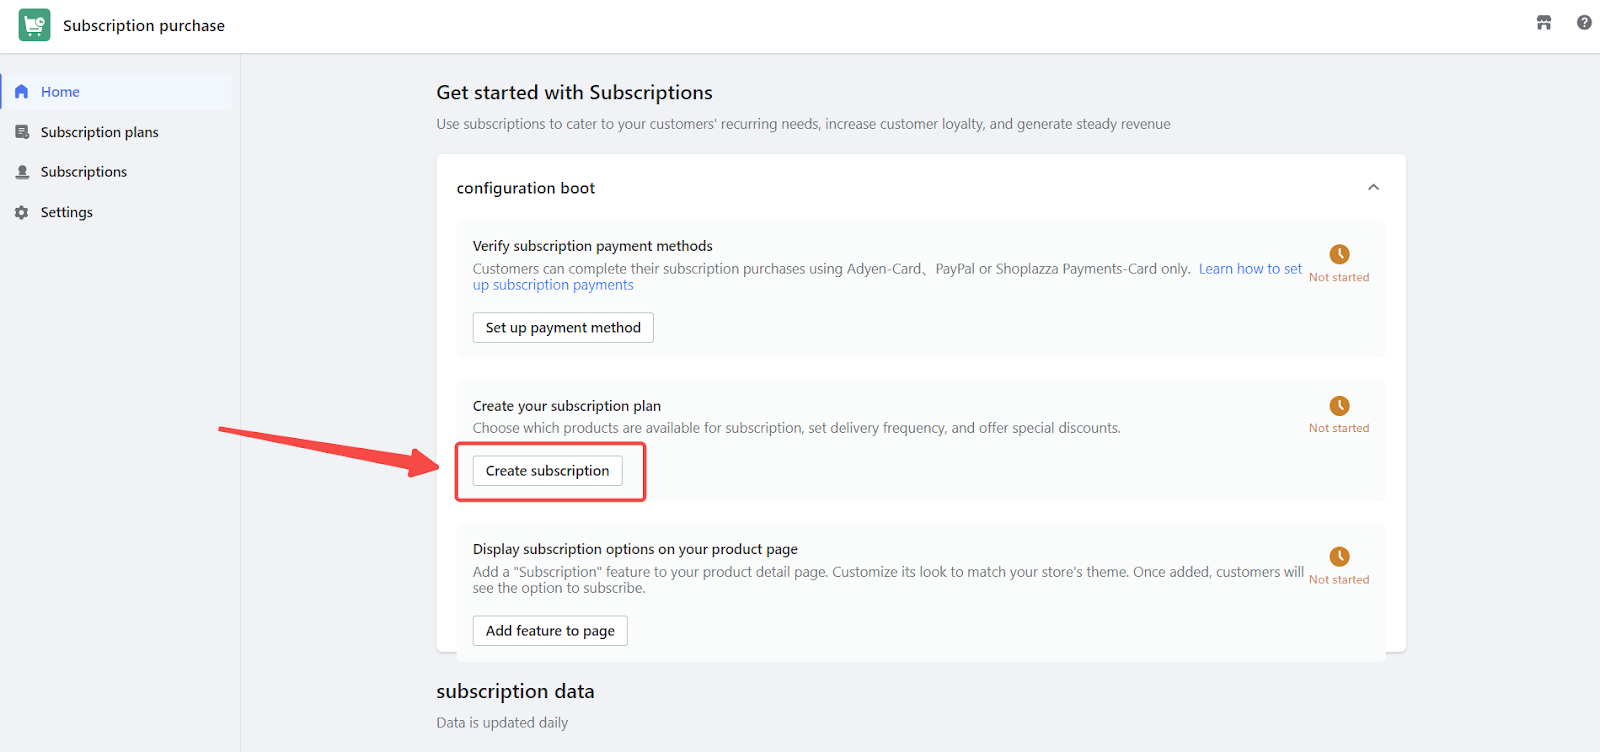
Step 2: Create a Subscription Plan
1. Create a subscription plan: Click Create subscription to start setting up a new subscription plan.
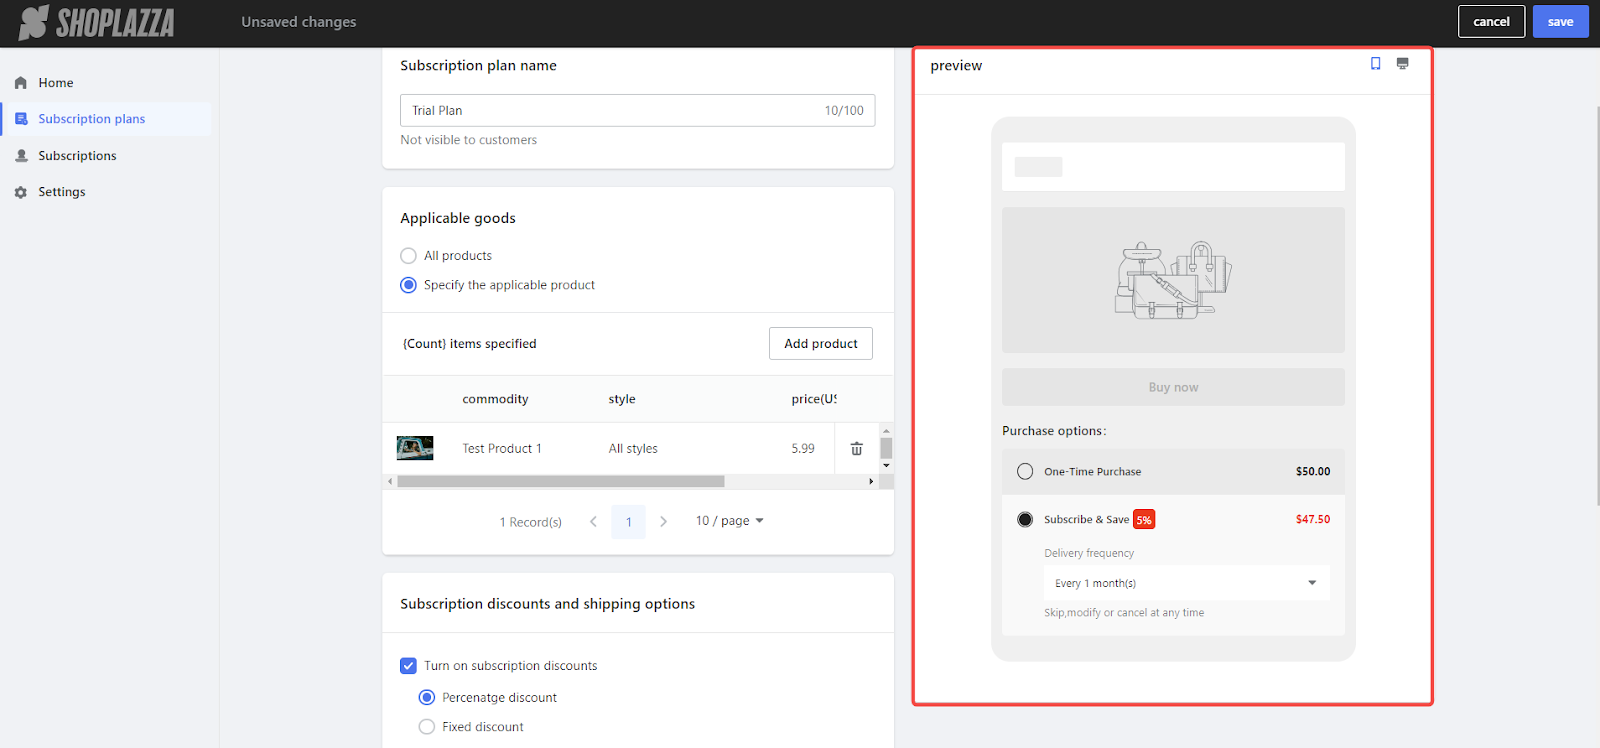
2. Configure the Plan: You will need to set several parameters:
- Plan name: This is for internal use only and will not be visible to customers.
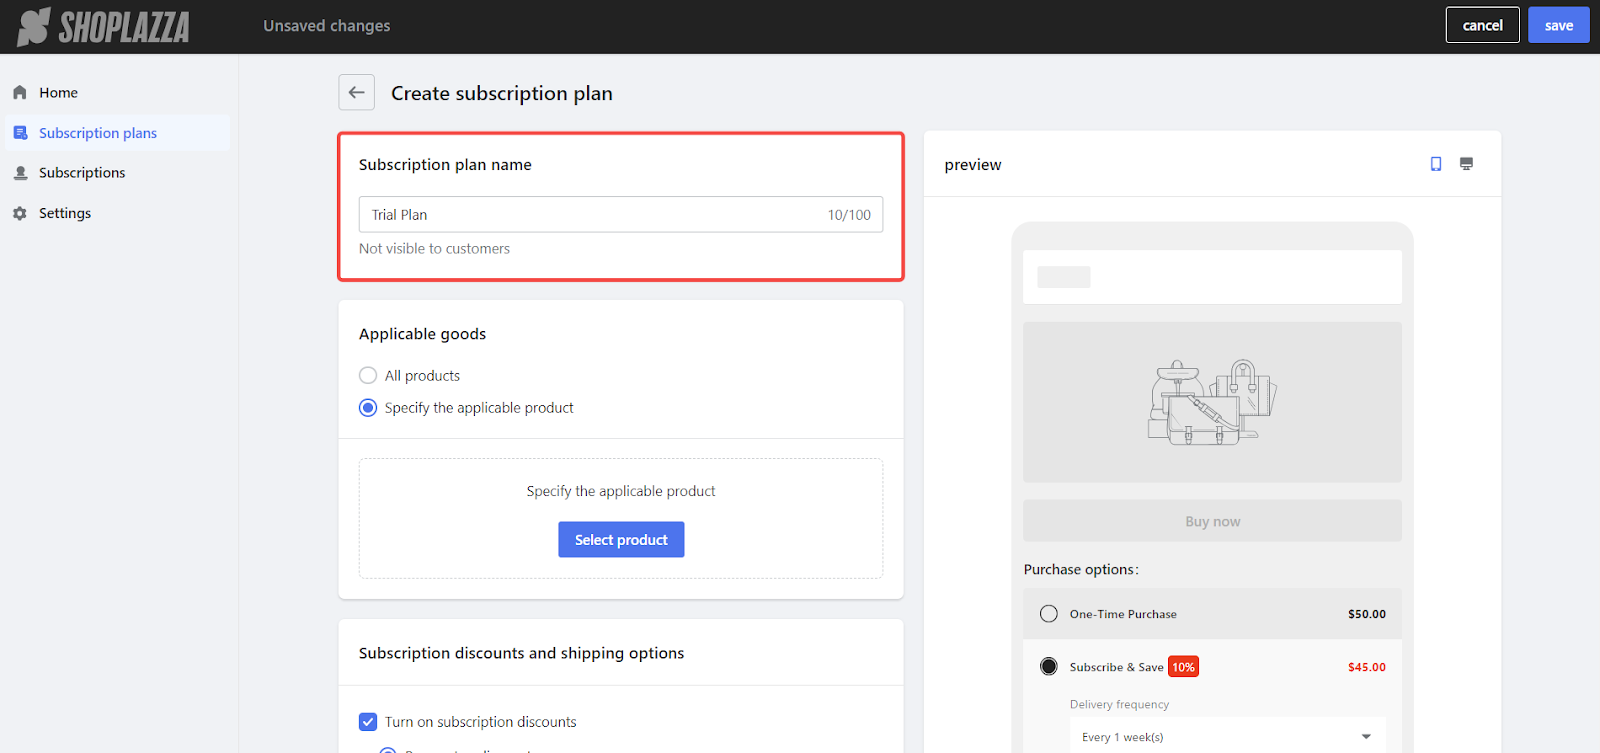
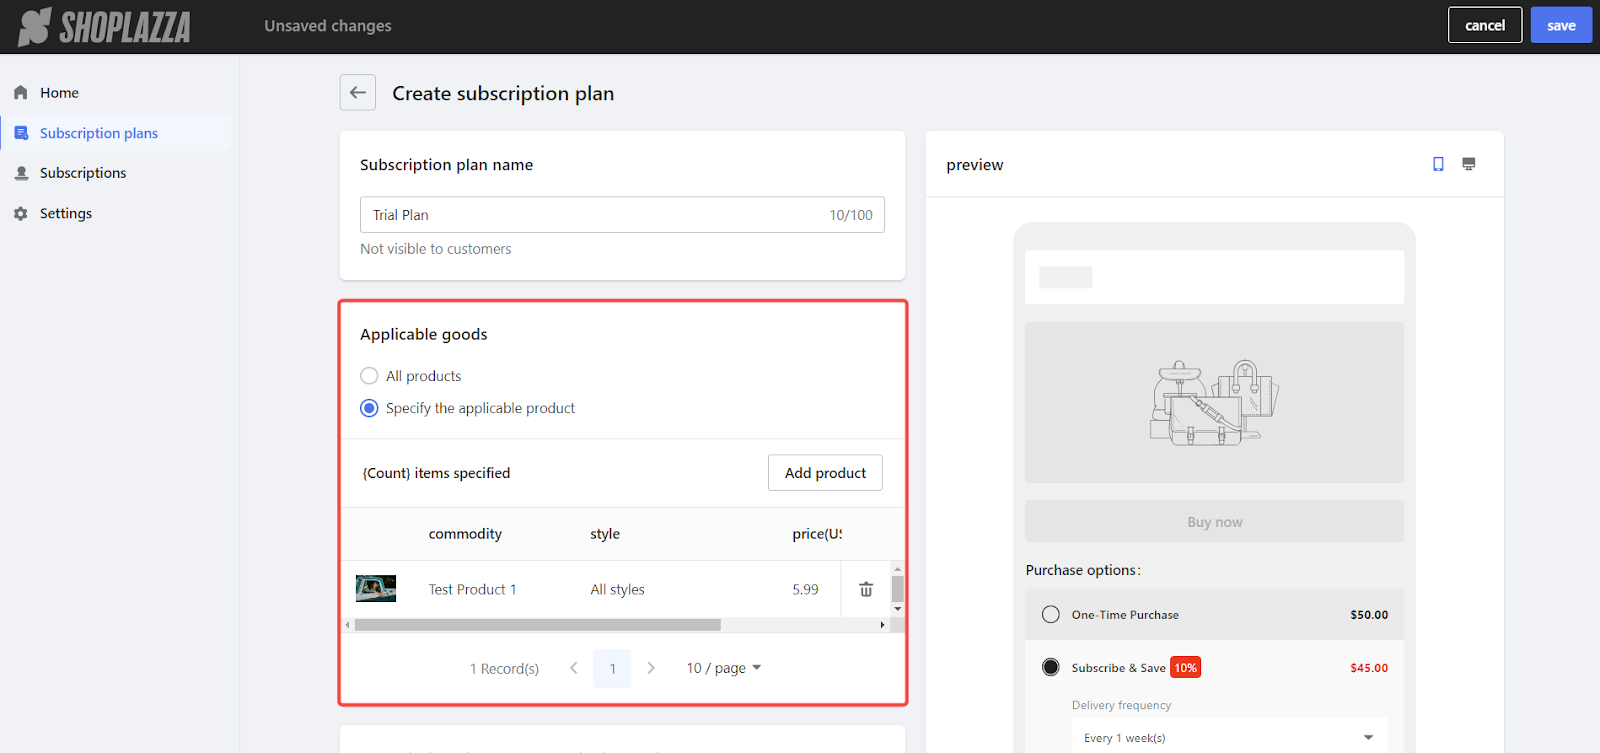
- Applicable products: Select whether the subscription applies to all products or specific items.
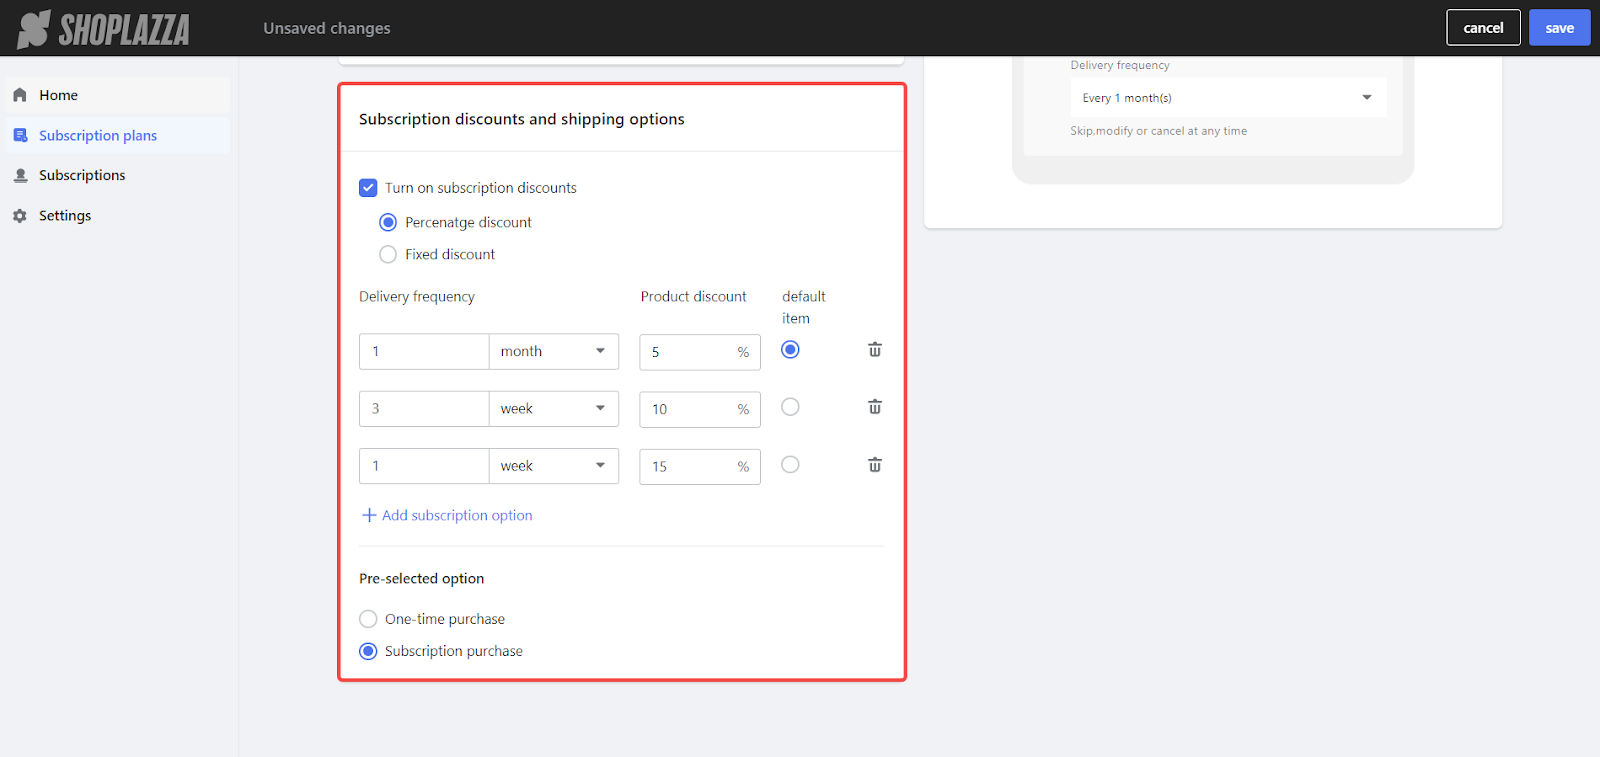
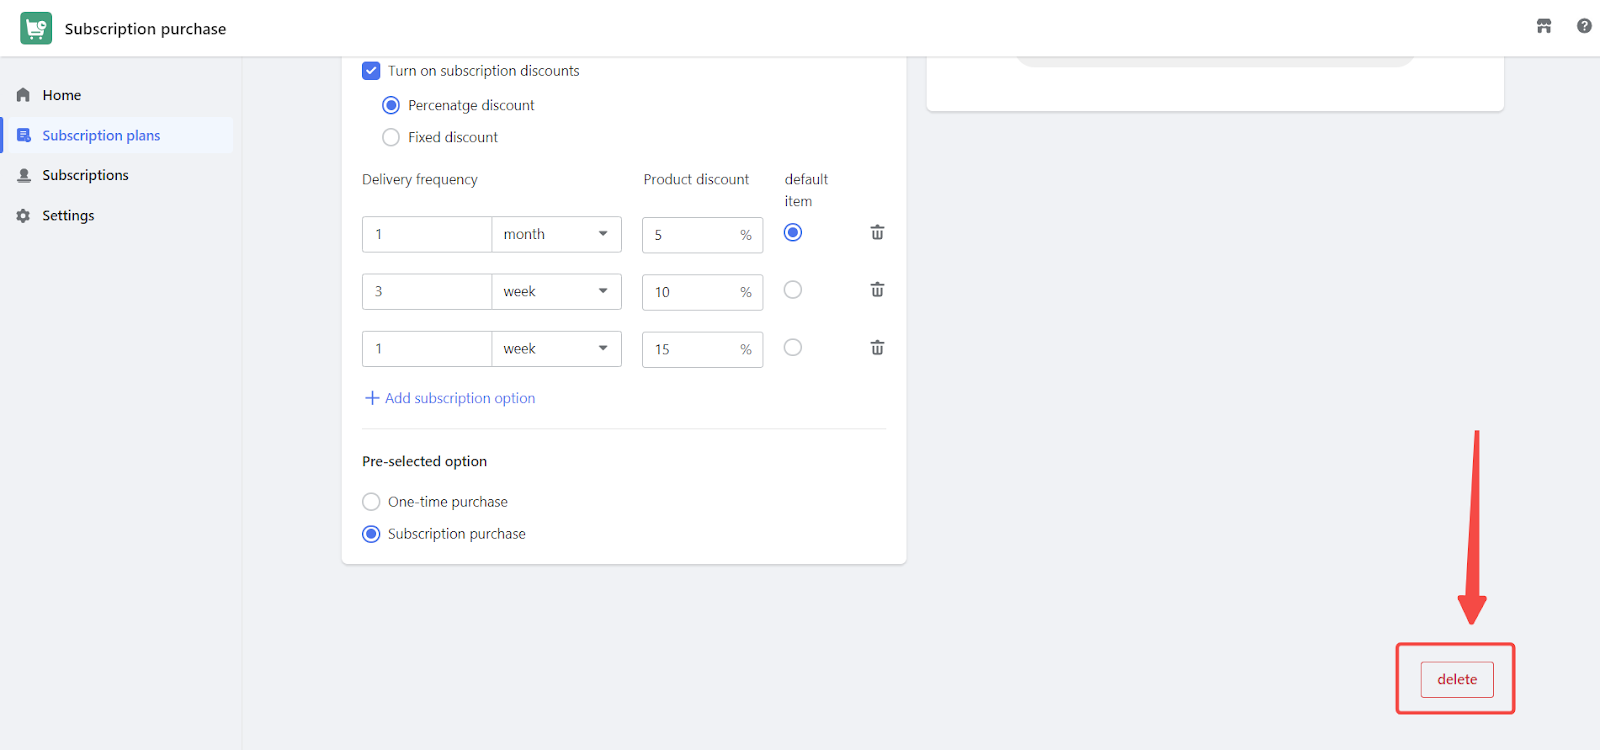
- Order discounts: Set either percentage or fixed amount discounts for the subscription.
- Delivery frequency: Choose how often the subscription will be fulfilled (daily, weekly, monthly, or yearly).
- Subscription options: Offer different subscription tiers or options with various discounts.
- Default purchase type: Determine if the default purchase type is one-time or subscription-based.
3. Preview and save: Before finalizing, preview how the subscription plan will appear on both mobile and PC. Make sure everything looks good, then click Save to complete the setup.
4. Edit or delete a subscription plan
- Edit: To make changes to an existing plan, click on the subscription plan you want to edit. Update any settings as needed.
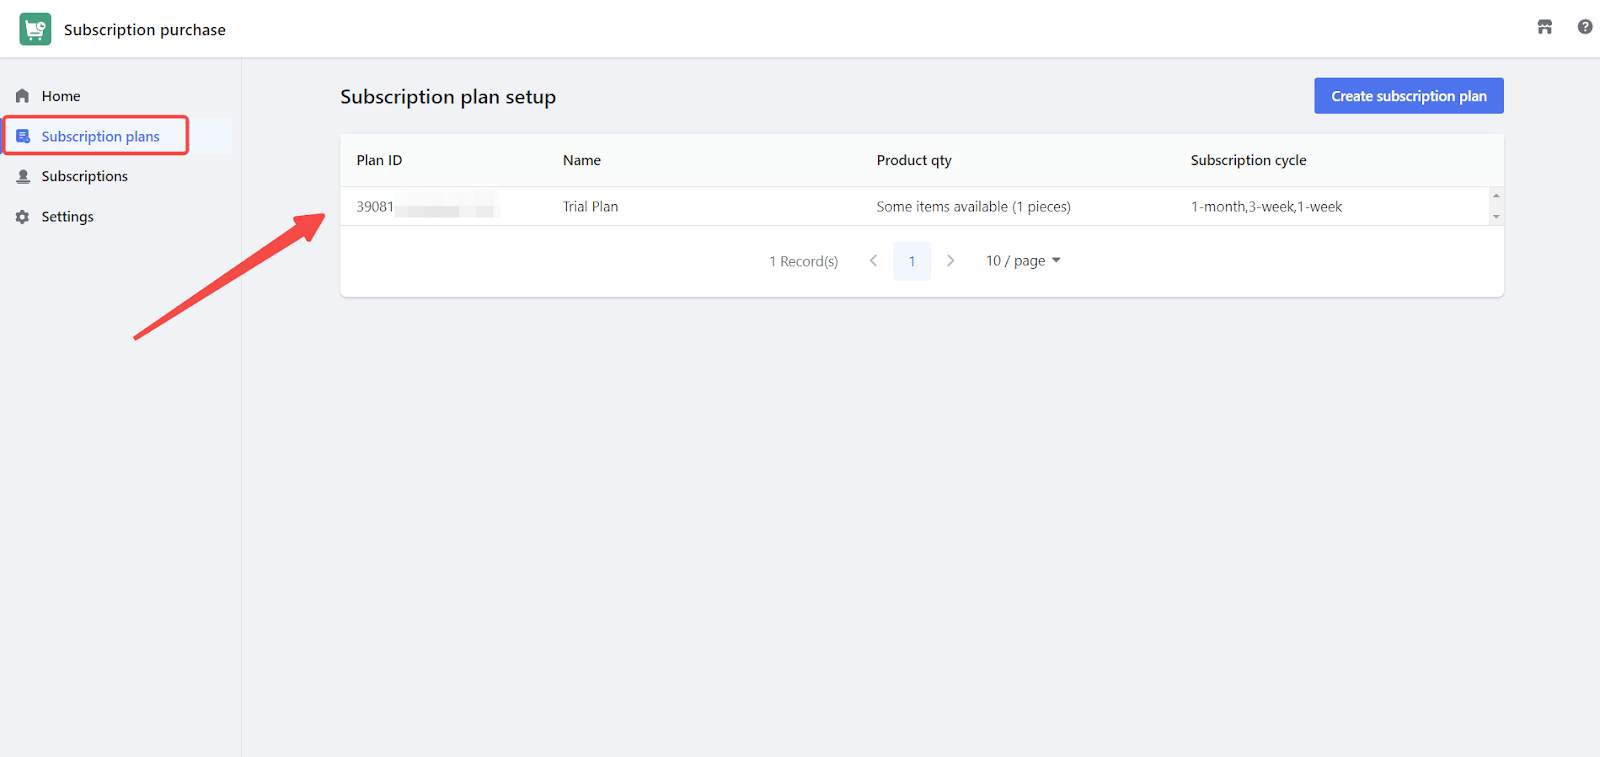
- Delete: If you need to remove a subscription plan, go to the Edit Subscription Plan page, scroll to the bottom left, and click delete.
Step 3: Add Subscription to Product Page
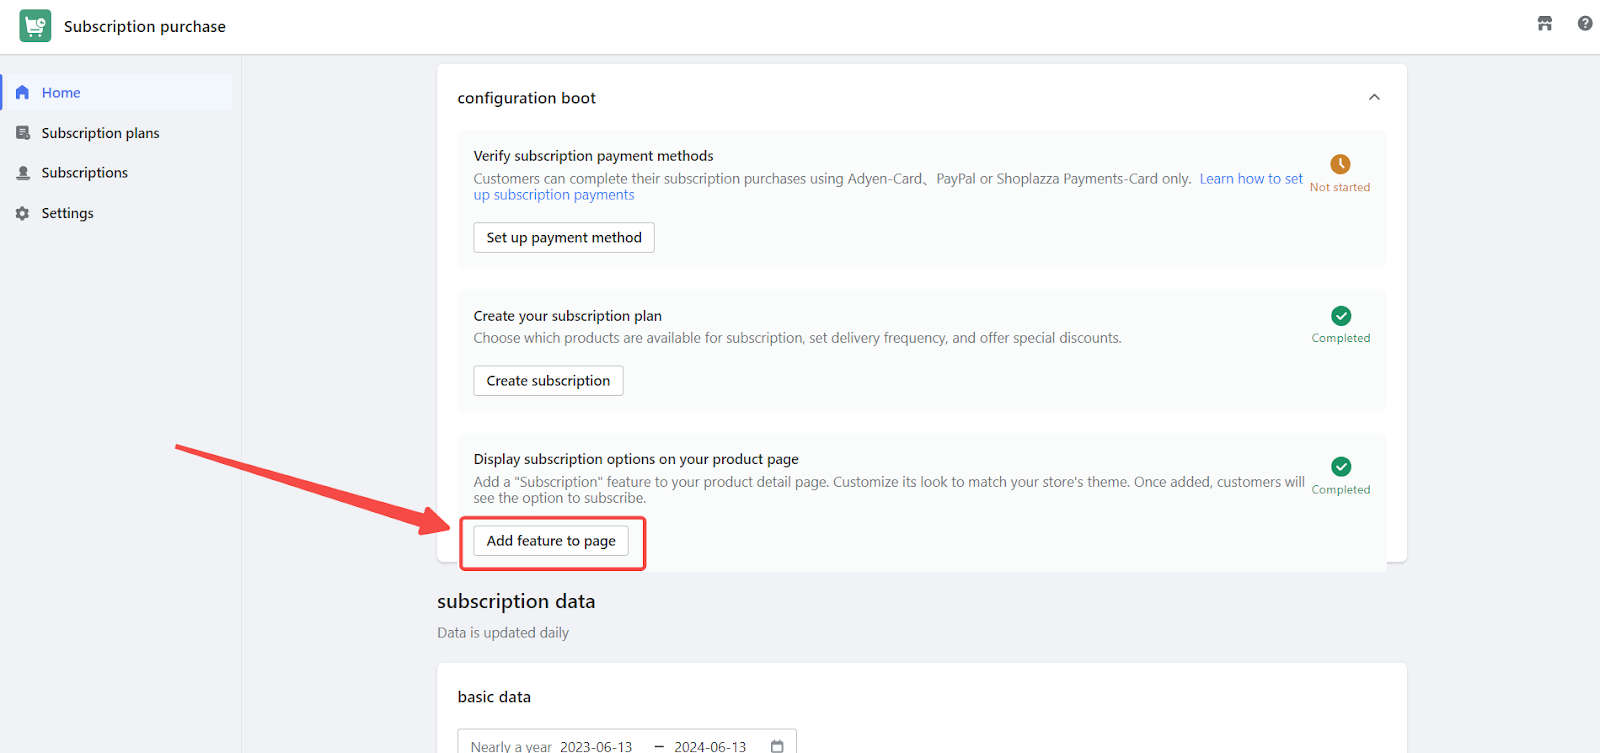
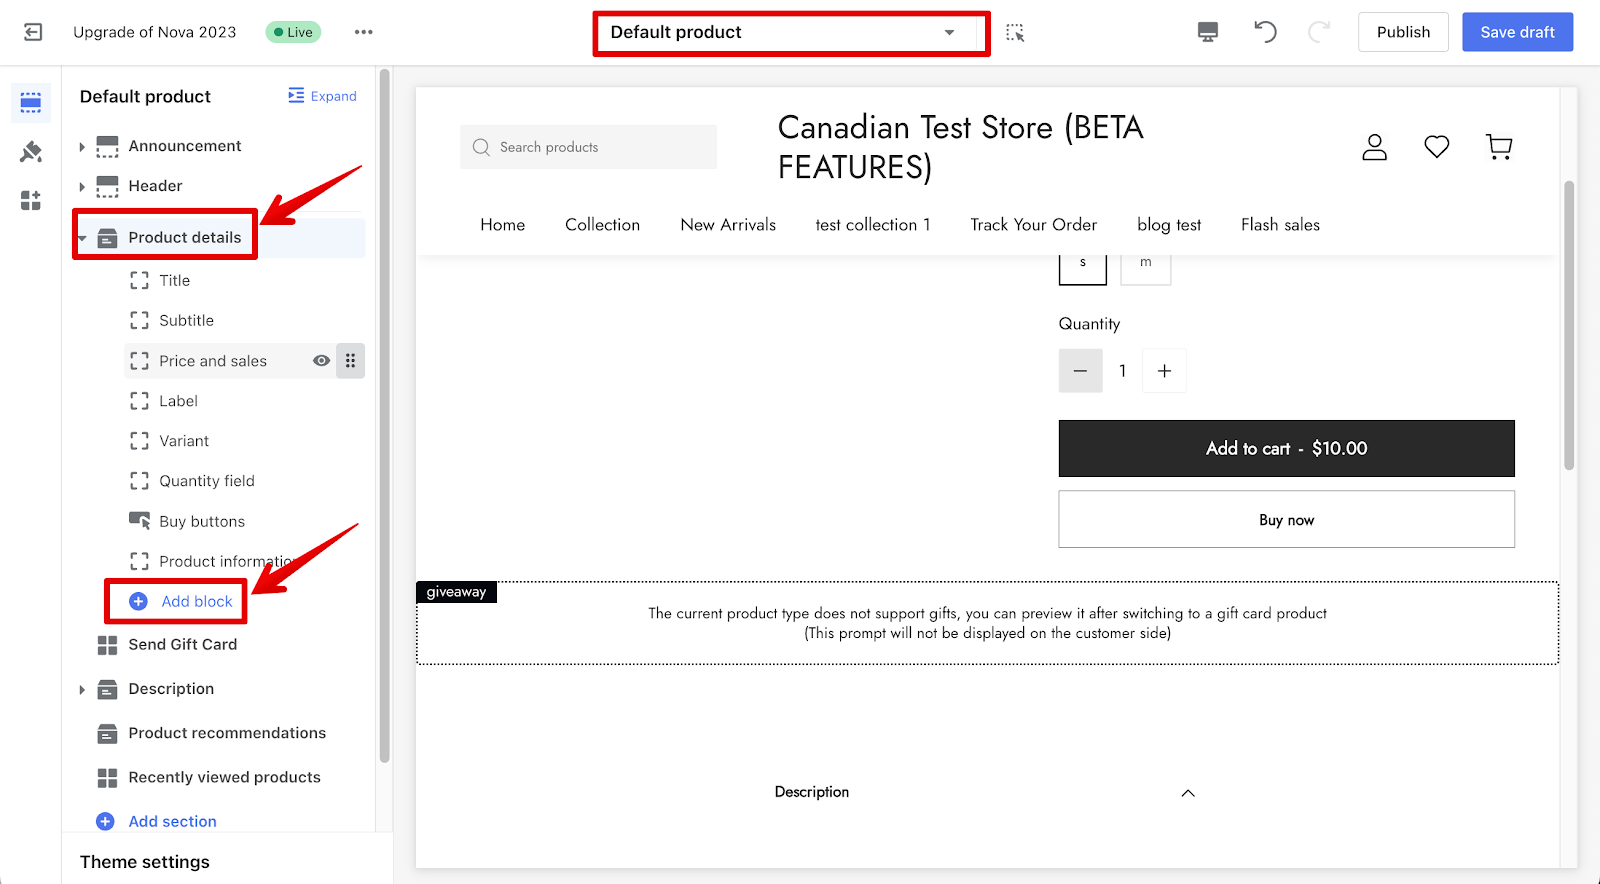
1. Via Subscription app: From the subscription app’s homepage, click Add feature to page to go directly to the Theme editor.
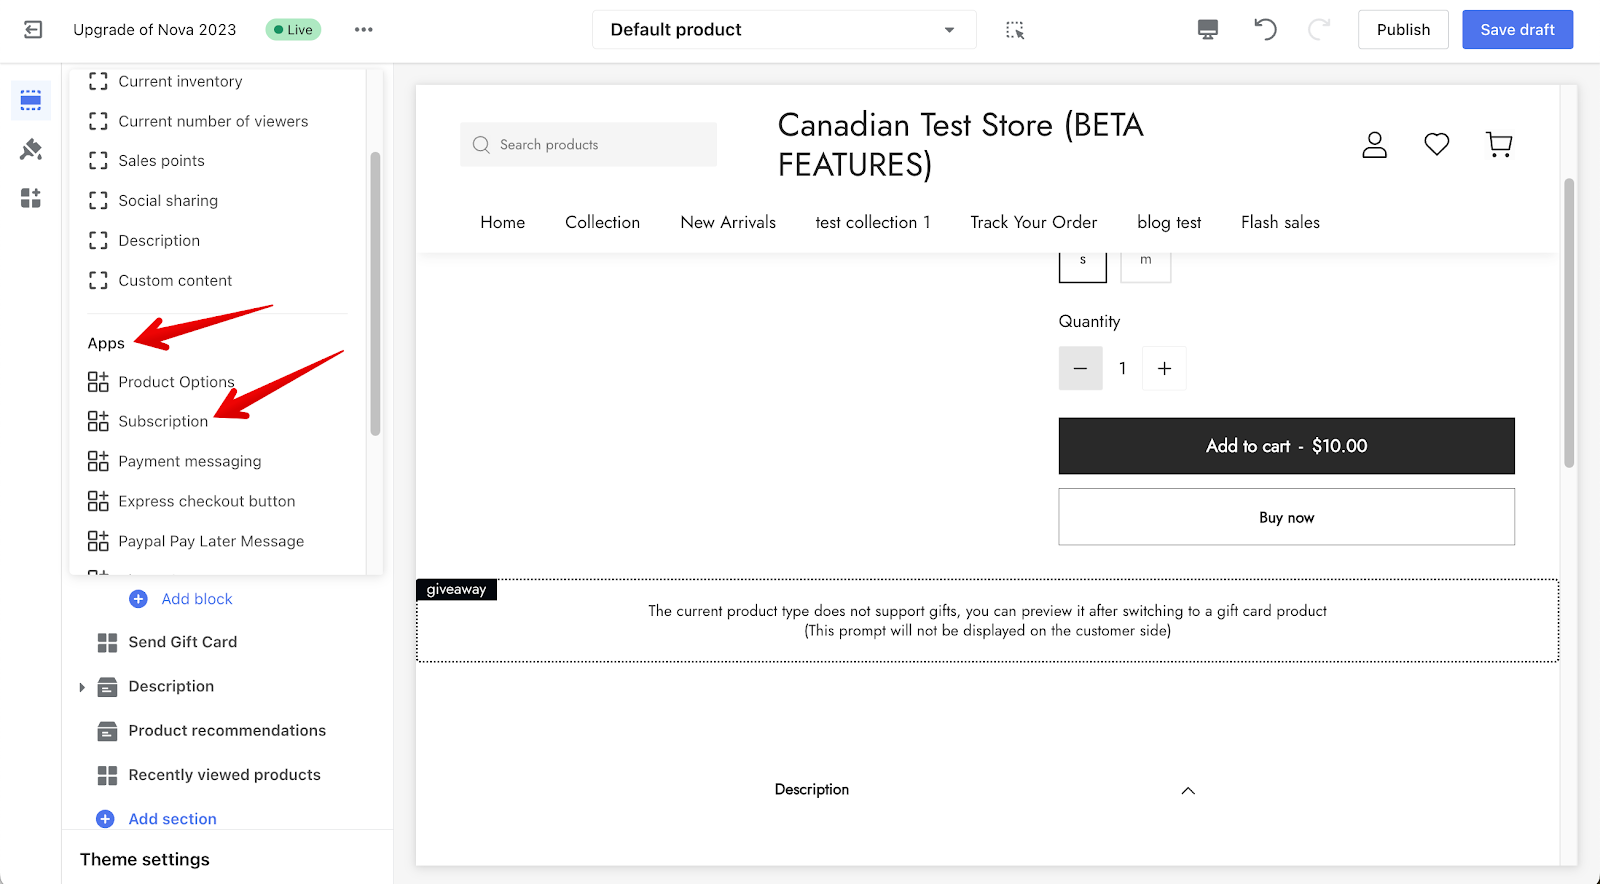
2. Add a subscription block: From the dropdown, select Product > Default product page. Under the Product Details section, click Add block and select Subscription from the list of Apps.
Confirming Subscription setup
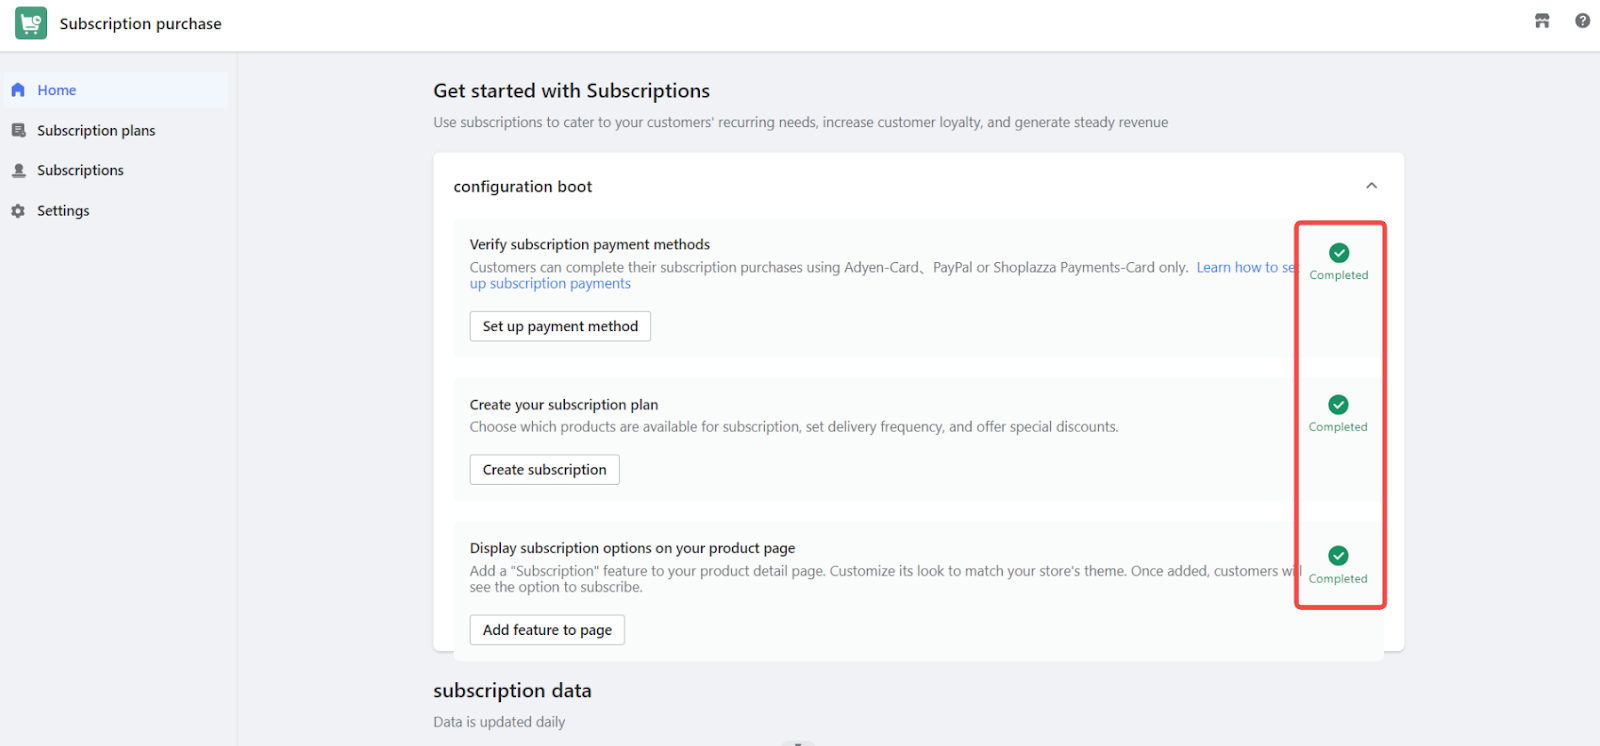
1. App homepage appearance: Once you have completed these three steps, your app homepage should appear as follows:
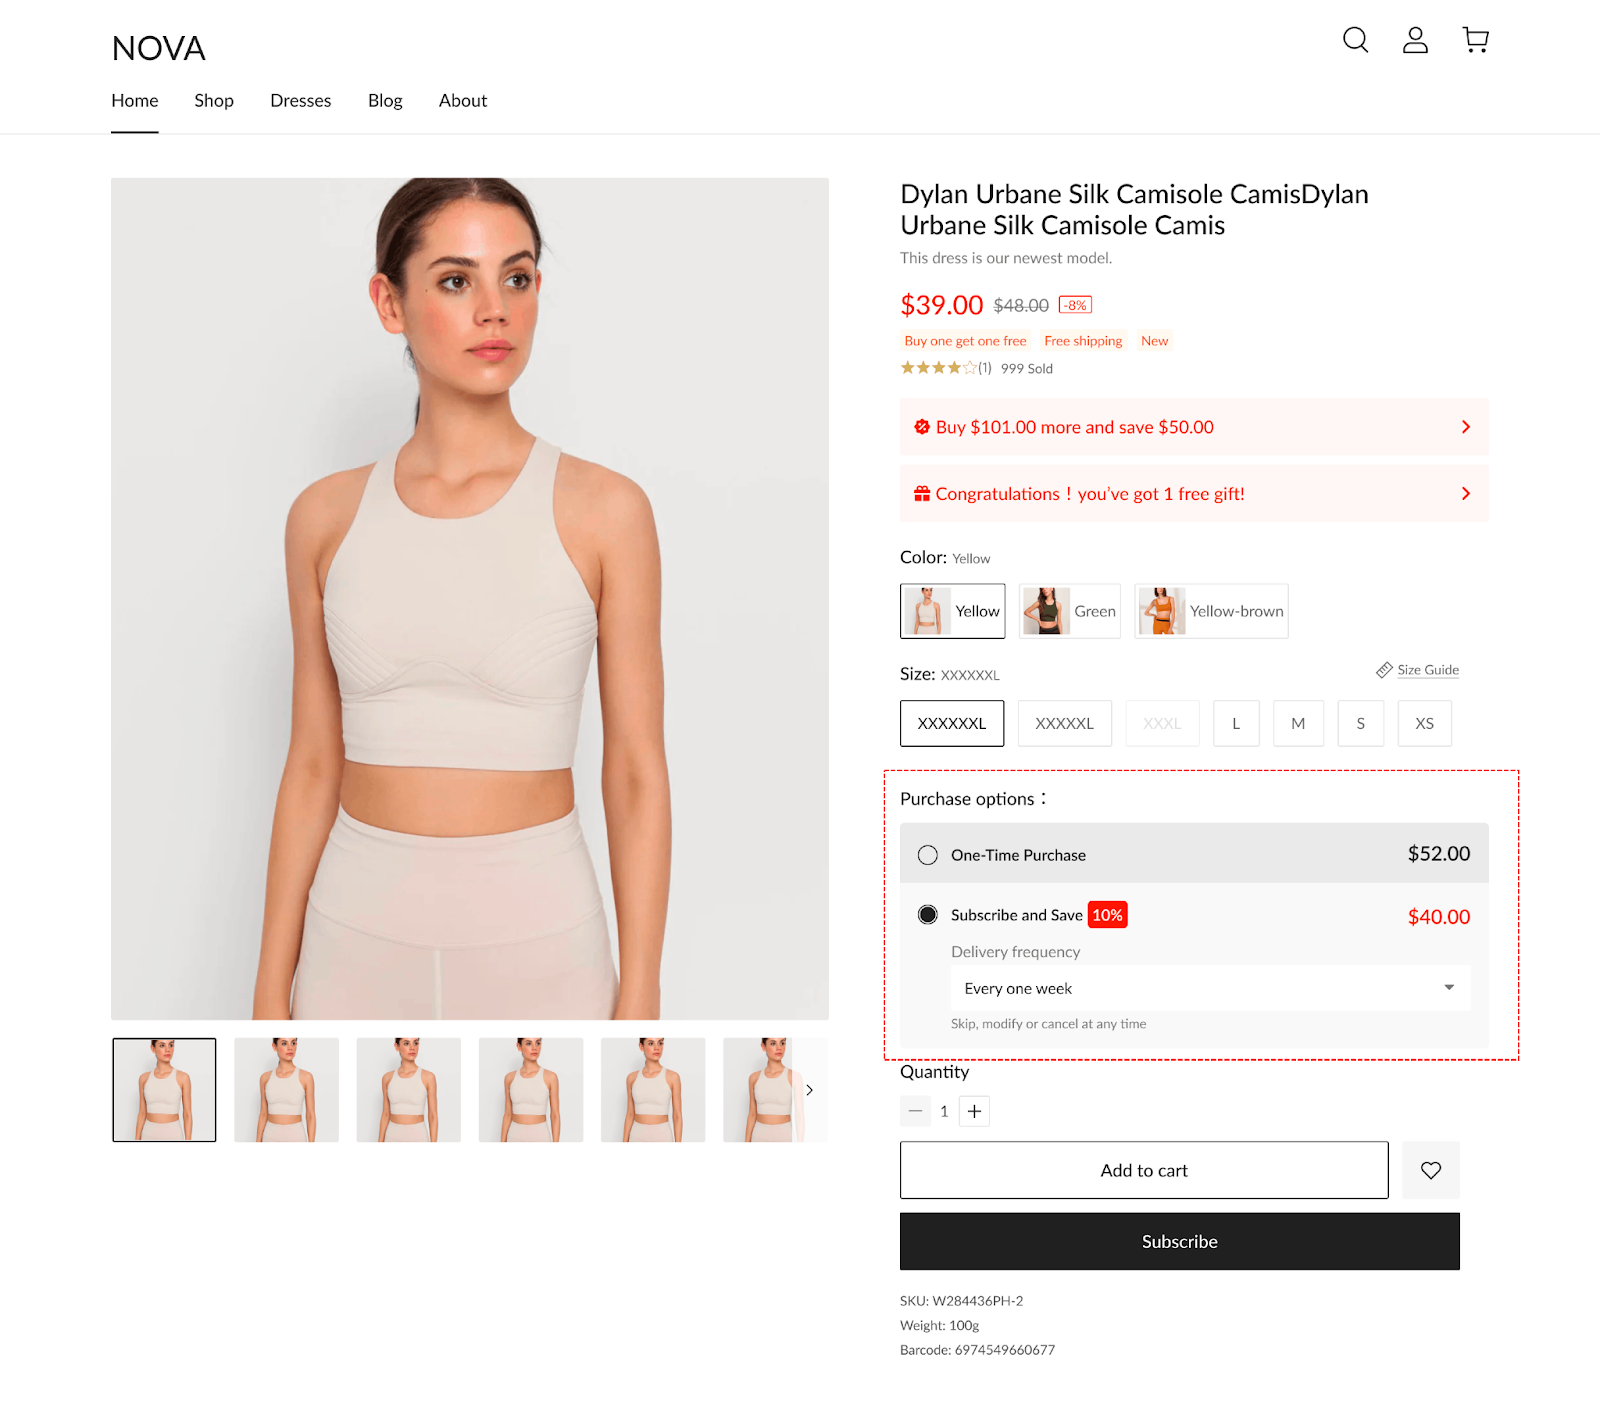
2. Store setup completion: When you enter your store, you will see that the setup is complete:
Managing automatic billing and notifications
- Customer notifications: Customers are notified via email one day before the subscription fulfillment date.
- Automatic orders: On the fulfillment date, orders are automatically created and billed. If there are any issues, the system will retry up to four times and notify the merchant and customer.
- Impact of failures: Failed orders do not affect subsequent ones.
Note
- Consistency of subscription discounts: The subscription-specific discount will remain as initially described when the customer subscribed. However, product prices, shipping fees, taxes, and other promotions may change. Each subscription fulfillment order will reflect the prices and fees at the time of order generation, which may result in different amounts for each billing cycle.
- Store status and subscription contracts: If your store is deactivated, closed, or frozen, the system will automatically cancel subscription contracts to protect customer rights. No further subscription fees will be automatically deducted.
Subscription management for customers
Accessing management
Customers can access the subscription management page through:
- Their personal account: Log in to their account to manage subscriptions.
- Subscription emails: Click the link provided in subscription-related emails.
- The subscription thank you page: Use the link on the thank you page after subscribing.
Note
Subscription notifications currently support email only. If your store does not collect email addresses during checkout or customers do not provide an email address, they will not receive subscription-related notifications.
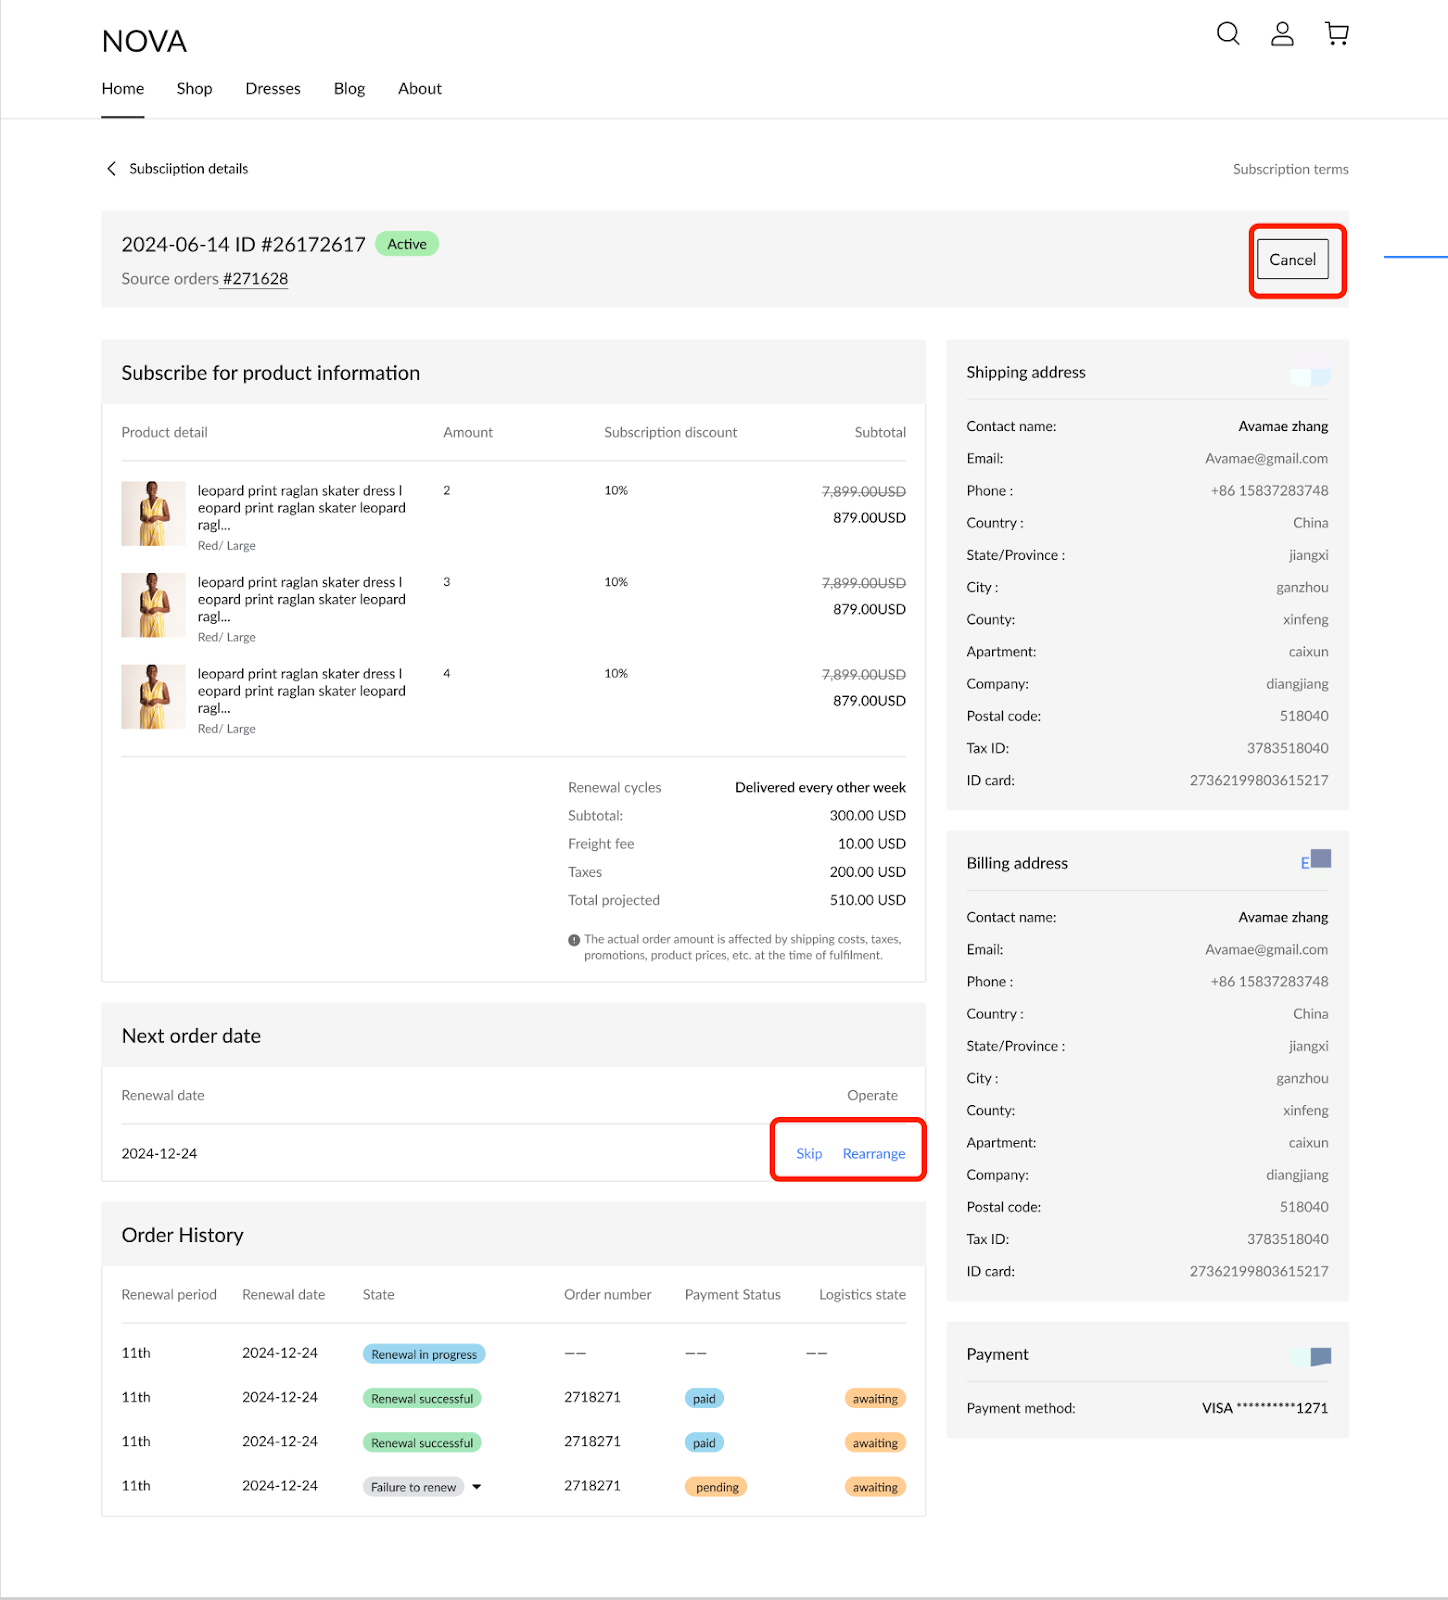
Managing subscriptions
From the subscription management page, customers can:
- Skip orders: Skip the next unfulfilled order.
- Change dates: Change the delivery date of the next unfulfilled order.
- Cancel subscriptions: Cancel the subscription contract.
Frequently asked questions
1. Will the automatic billing amount remain the same?
The amount may vary due to changes in product prices, shipping fees, taxes, and other discounts. Customers receive an email with the expected amount one day before billing.
2. Can other discounts be applied with subscription discounts?
Yes, subscription discounts do not affect the application of other discounts.
3. Will additional content like coupons or insurance be added automatically?
No, the auto-fulfillment orders only include subscribed products, subscription discounts, automatic discounts, shipping fees, and taxes.
4. What happens if the subscription app is deleted?
Deleting the app stops new subscriptions but does not affect existing contracts. Reinstalling the app will restore access to these contracts.


Comments
Please sign in to leave a comment.