After following the customization steps outlined above, you should have a good idea of how to use the theme editor. Take this opportunity to further refine and adjust additional pages to align with your store’s brand. Once you’re satisfied with your customizations, the next step is to publish your theme and preview it to ensure everything looks good.
Publishing the theme
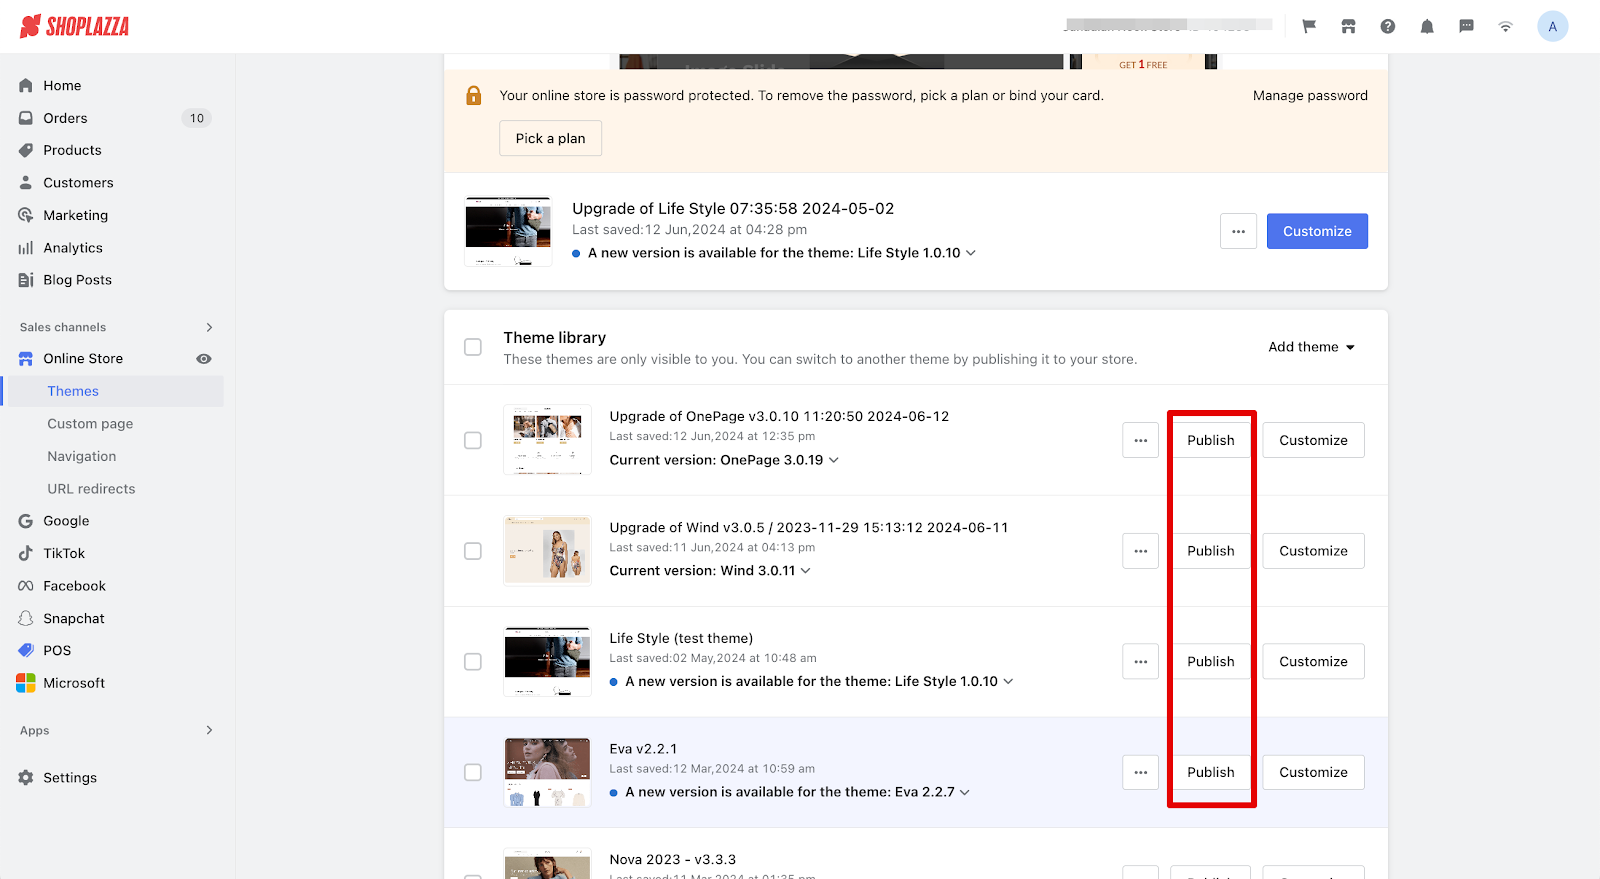
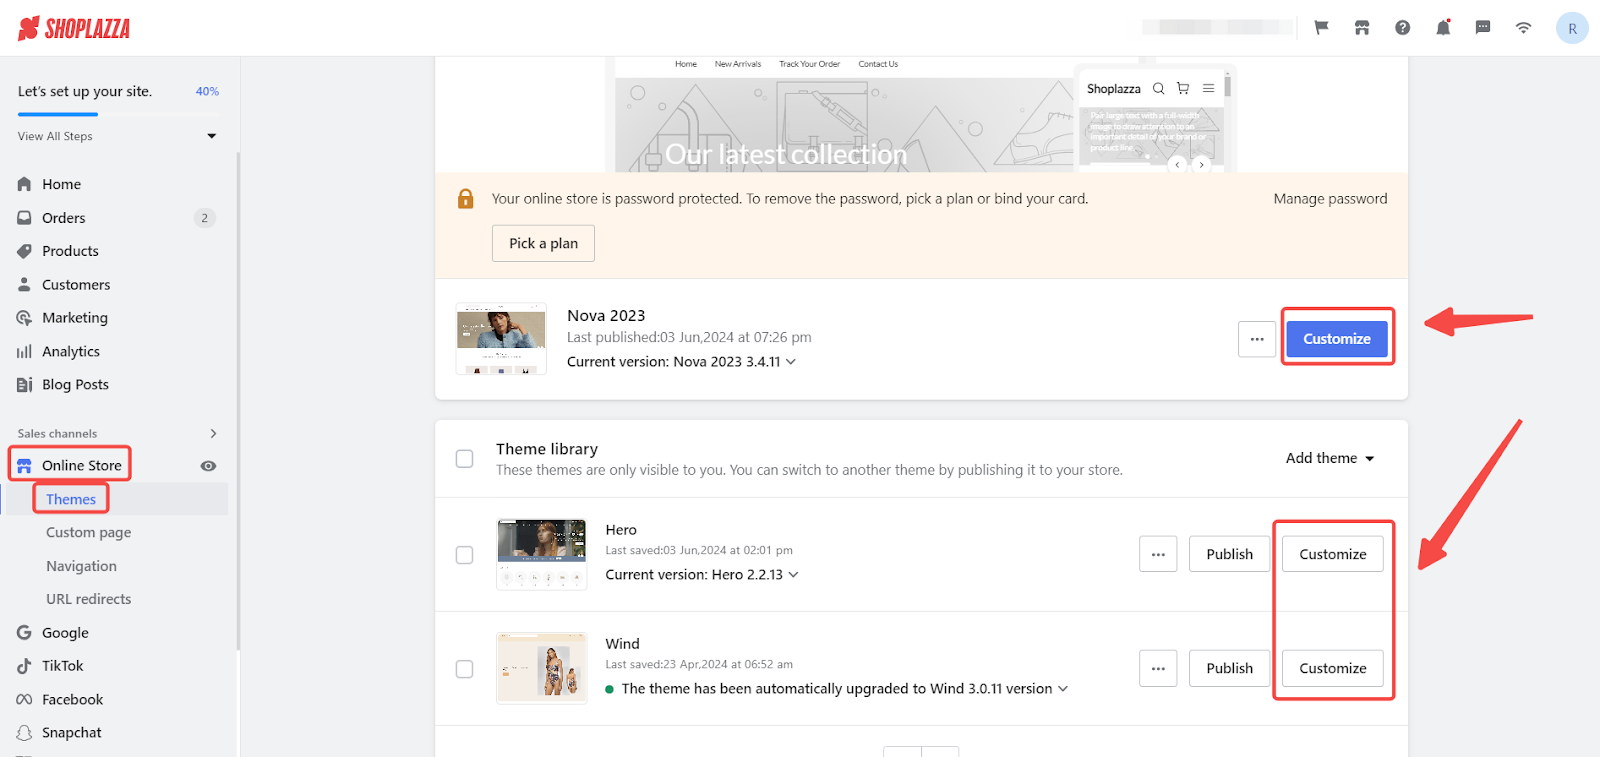
1. Login to your admin: Navigate to Online Store > Themes. On the theme list page, find the theme you want to publish. You have two options:
- Direct publish: Click the Publish button next to the theme you want to activate.

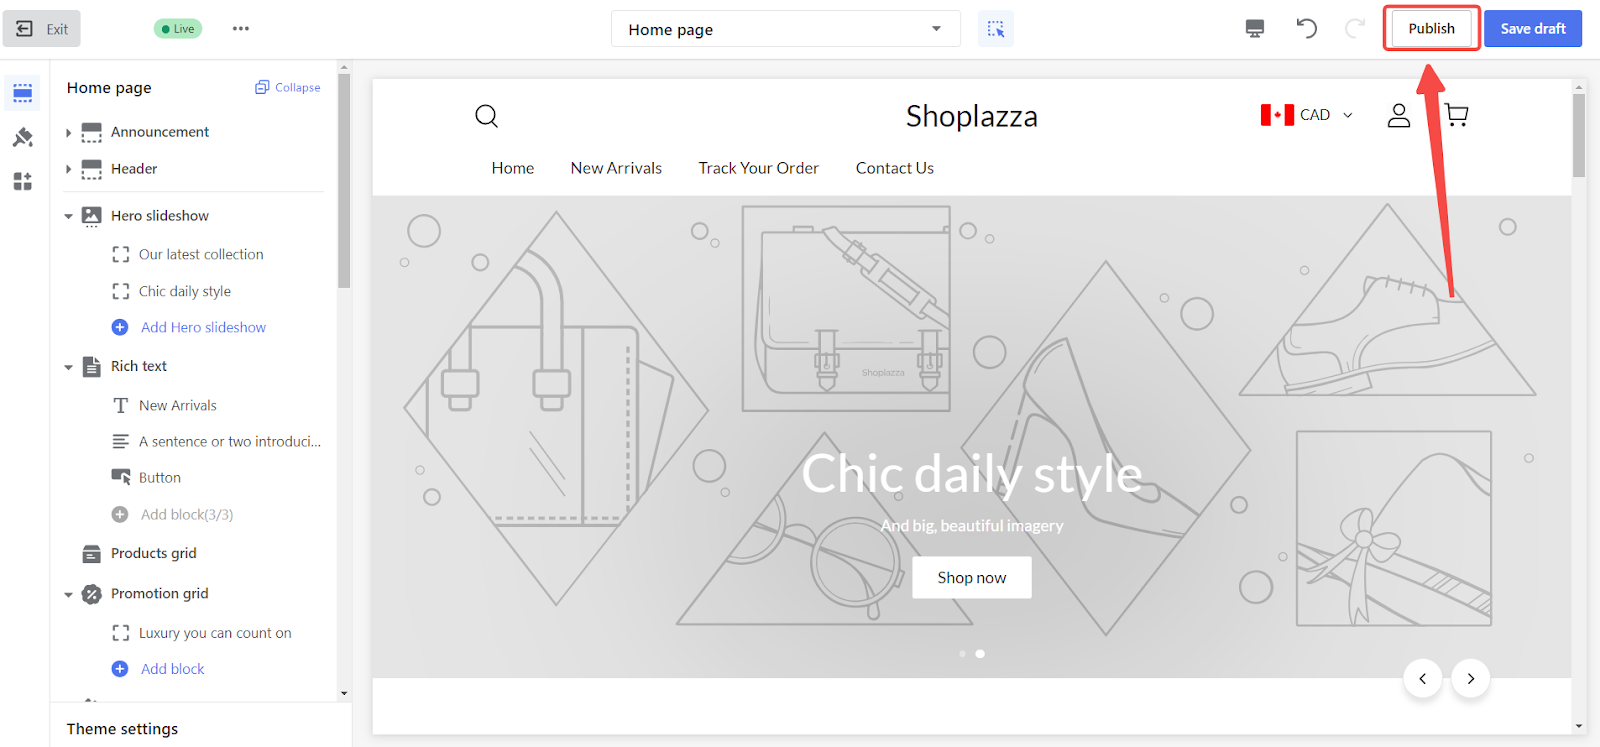
- Customize and publish: If you want to double-check your theme before publishing, click the Customize button to enter the theme editor. After reviewing, click Publish from within the theme editor.


Accessing the storefront
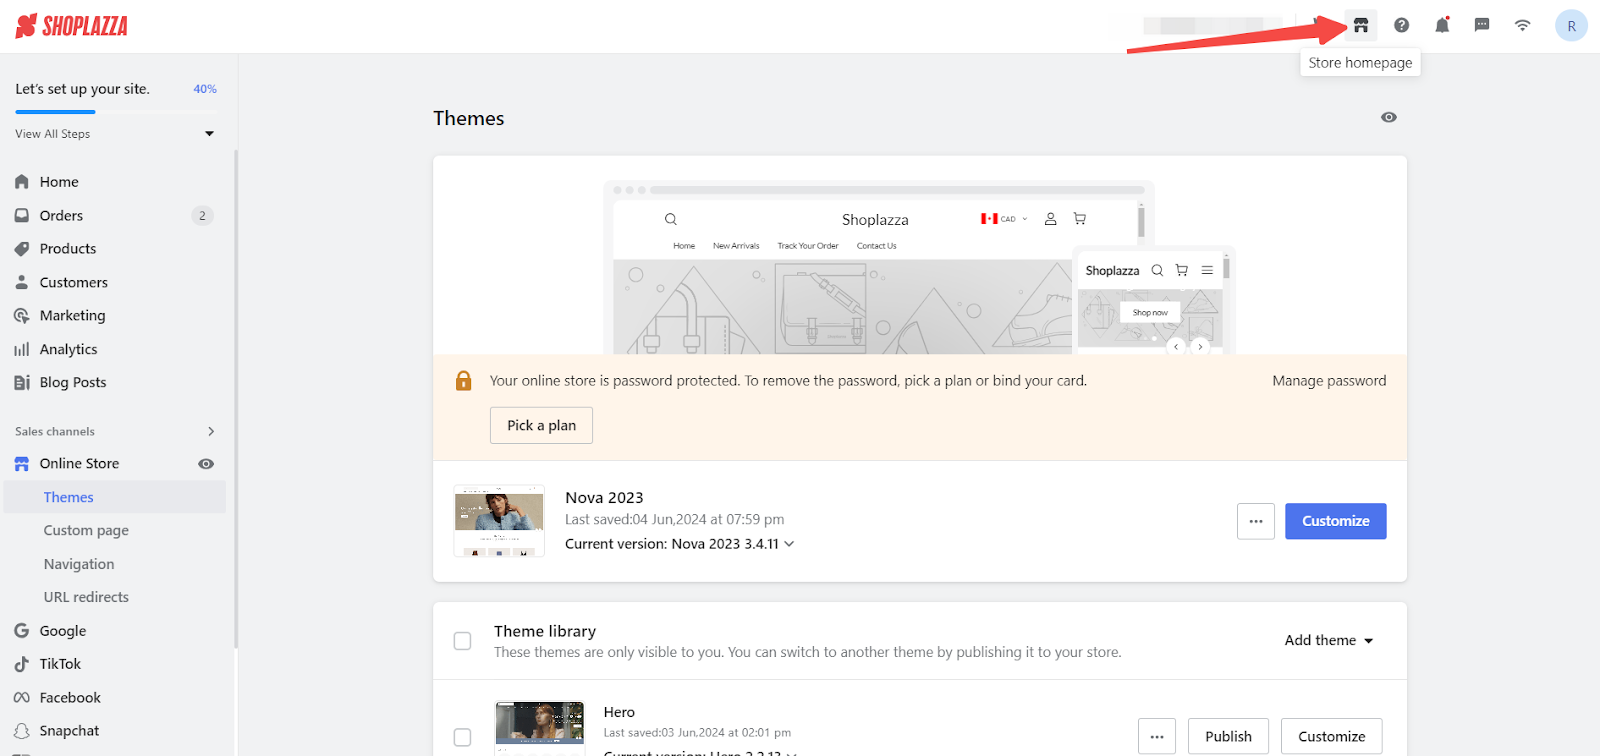
1. Navigate to your storefront: In your store's admin, click on the icon shown in the screenshot at the top right corner of the page. This allows you to quickly navigate to your storefront to preview the customization effects.

By following these steps, you can ensure that your customizations are properly applied and look great on your storefront. This helps to provide an excellent user experience and reinforces your brand's identity.


Comments
Please sign in to leave a comment.