
Bundling products or services together can lead to larger purchases and increased sales. Our Bundle pricing feature in the Bundle sales app offers tiered discount rules, various styles, and customizable pop-ups to help you sell more effectively. This guide will walk you through the process of setting up bundle pricing campaigns.
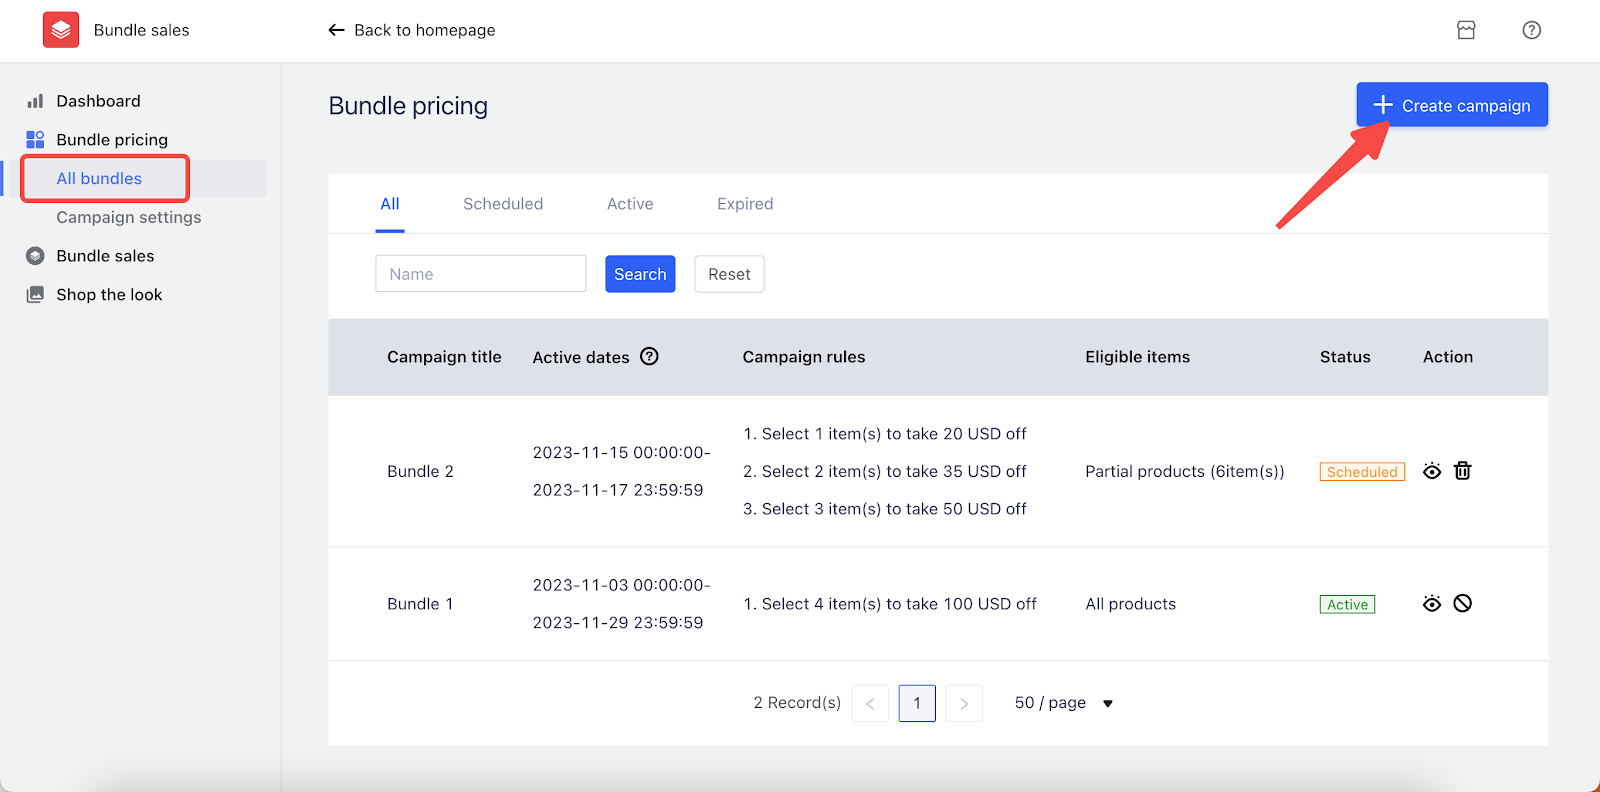
Begin the process of creating your bundle pricing campaigns. This section covers the initial steps required to get your campaigns up and running.
1. Start the campaign: Click + Create campaign to initiate your new bundle pricing effort.
Setting up promotion rules
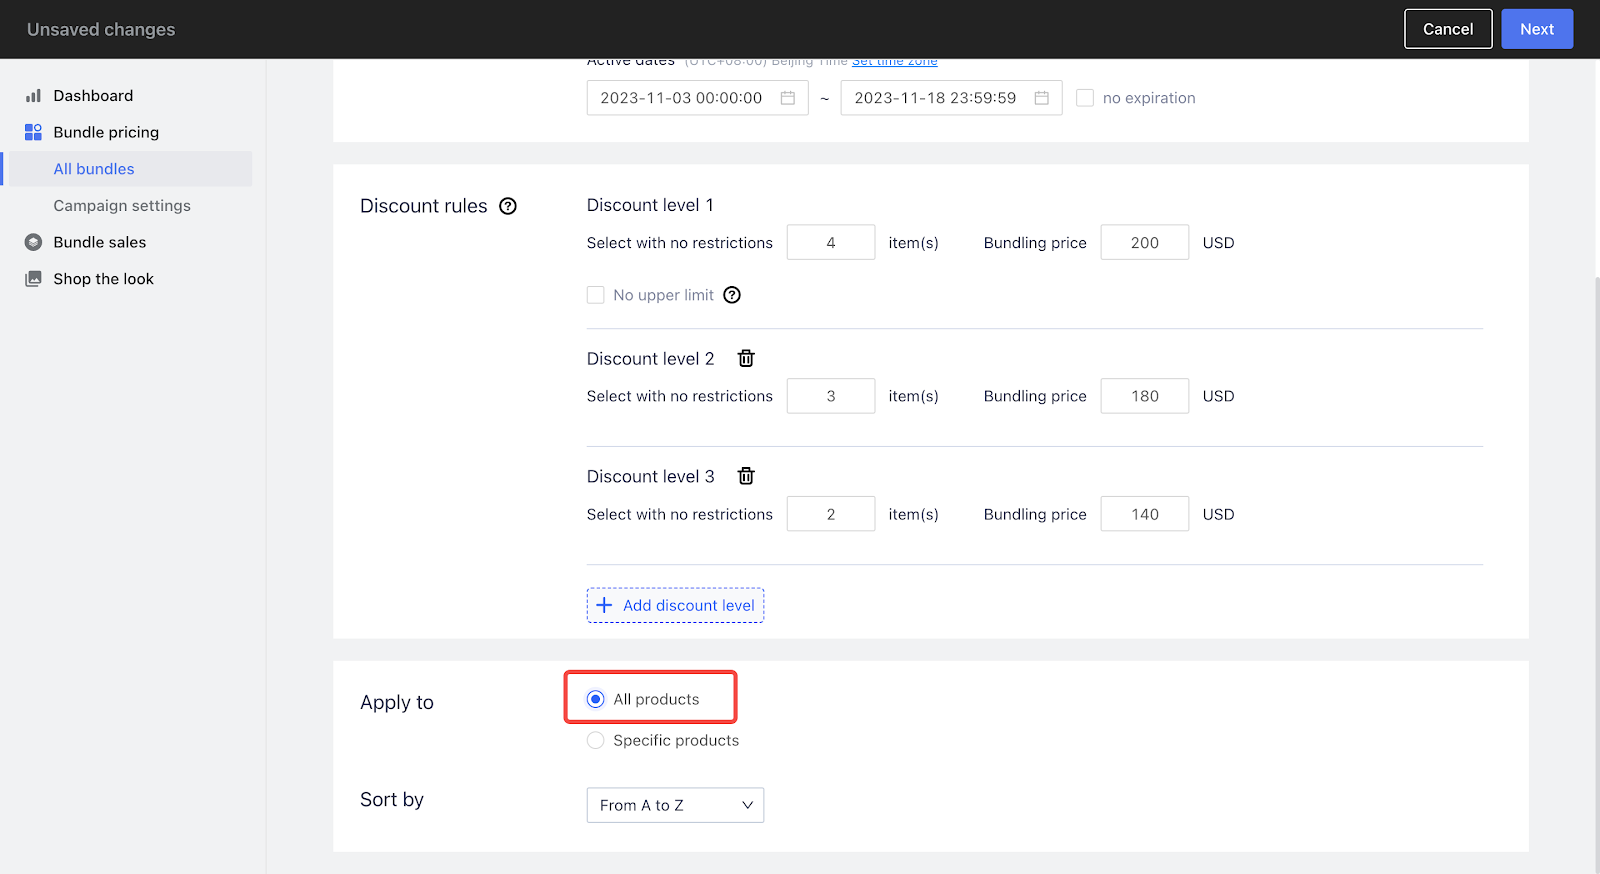
The promotion rules are important as they define the structure of discounts and determine the products involved. Set these up carefully to match your sales strategy.
1. Name your campaign and set the period: Enter a name for your campaign and specify the effective period to ensure clarity and timing for your promotions.
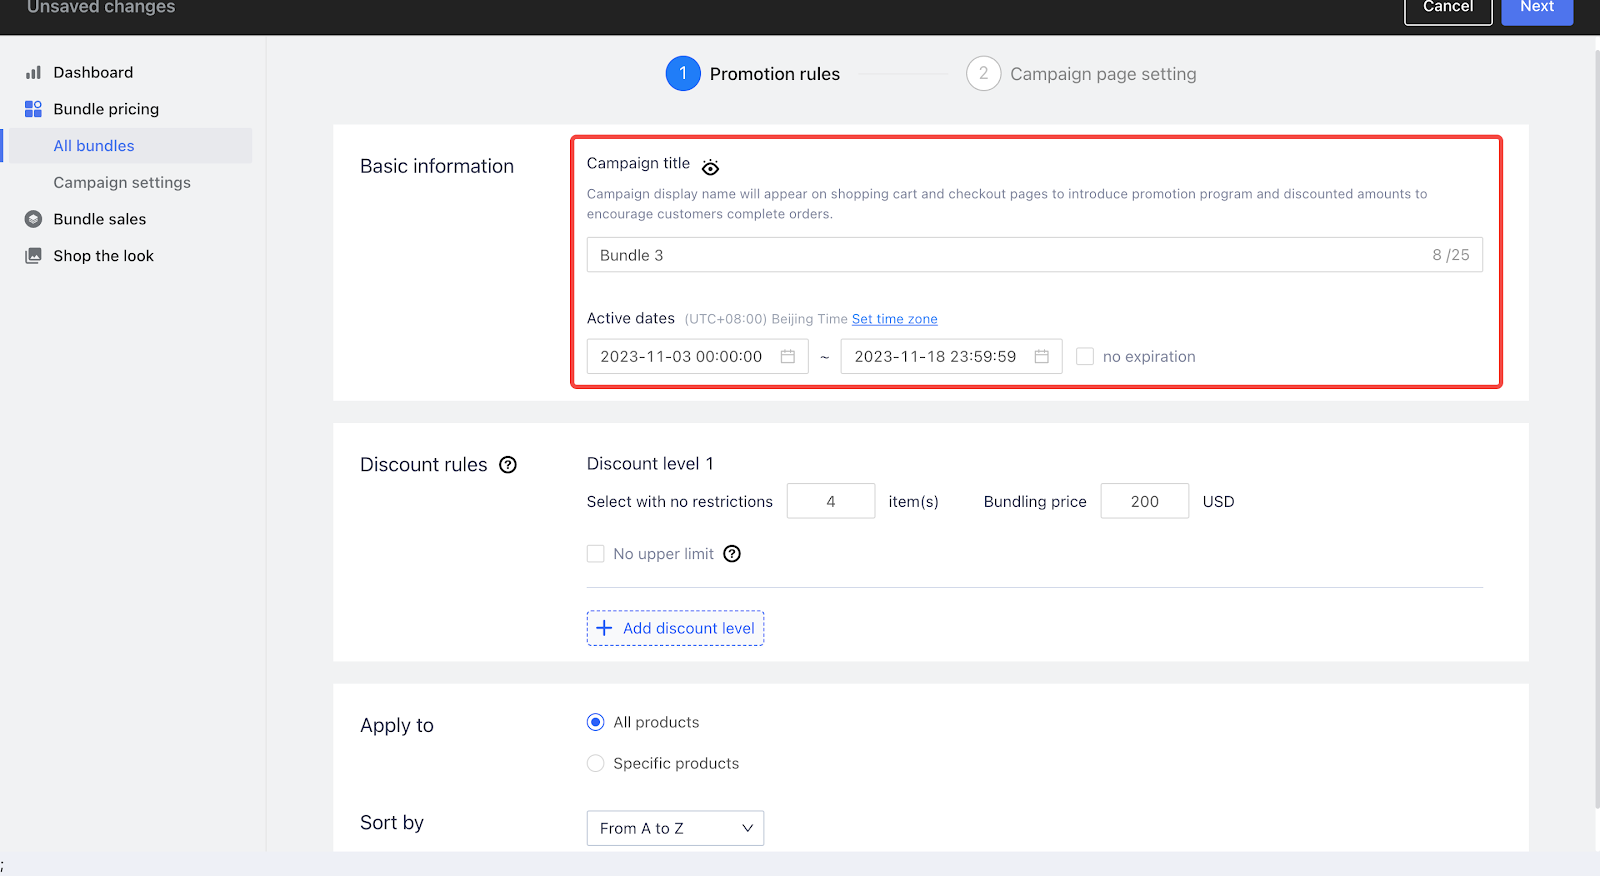
2. Add discount levels: Establish different discount tiers within your campaign by clicking + Add discount level, allowing you to cater to various customer spending thresholds.

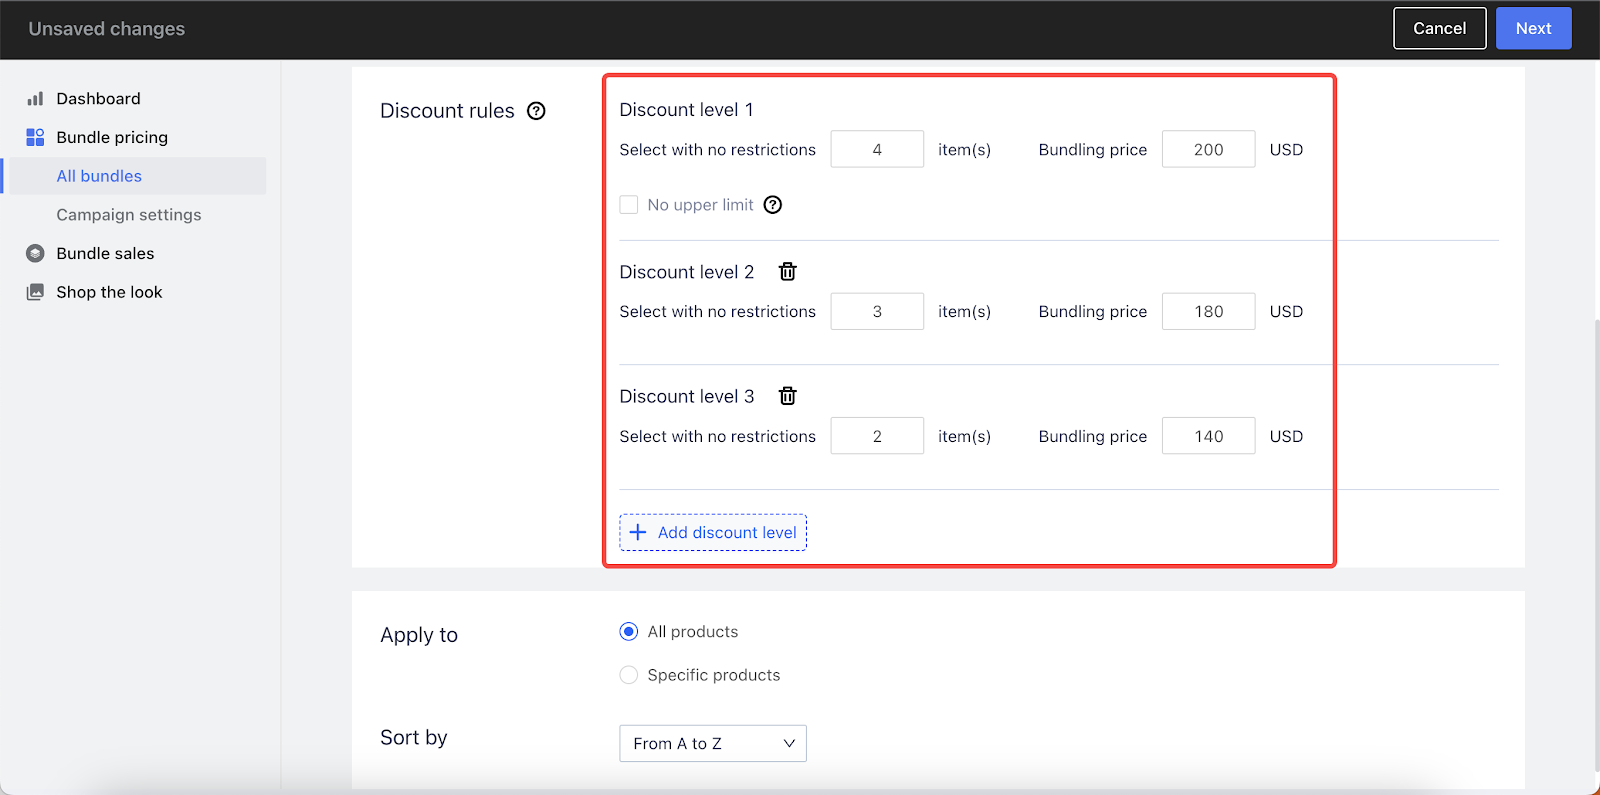
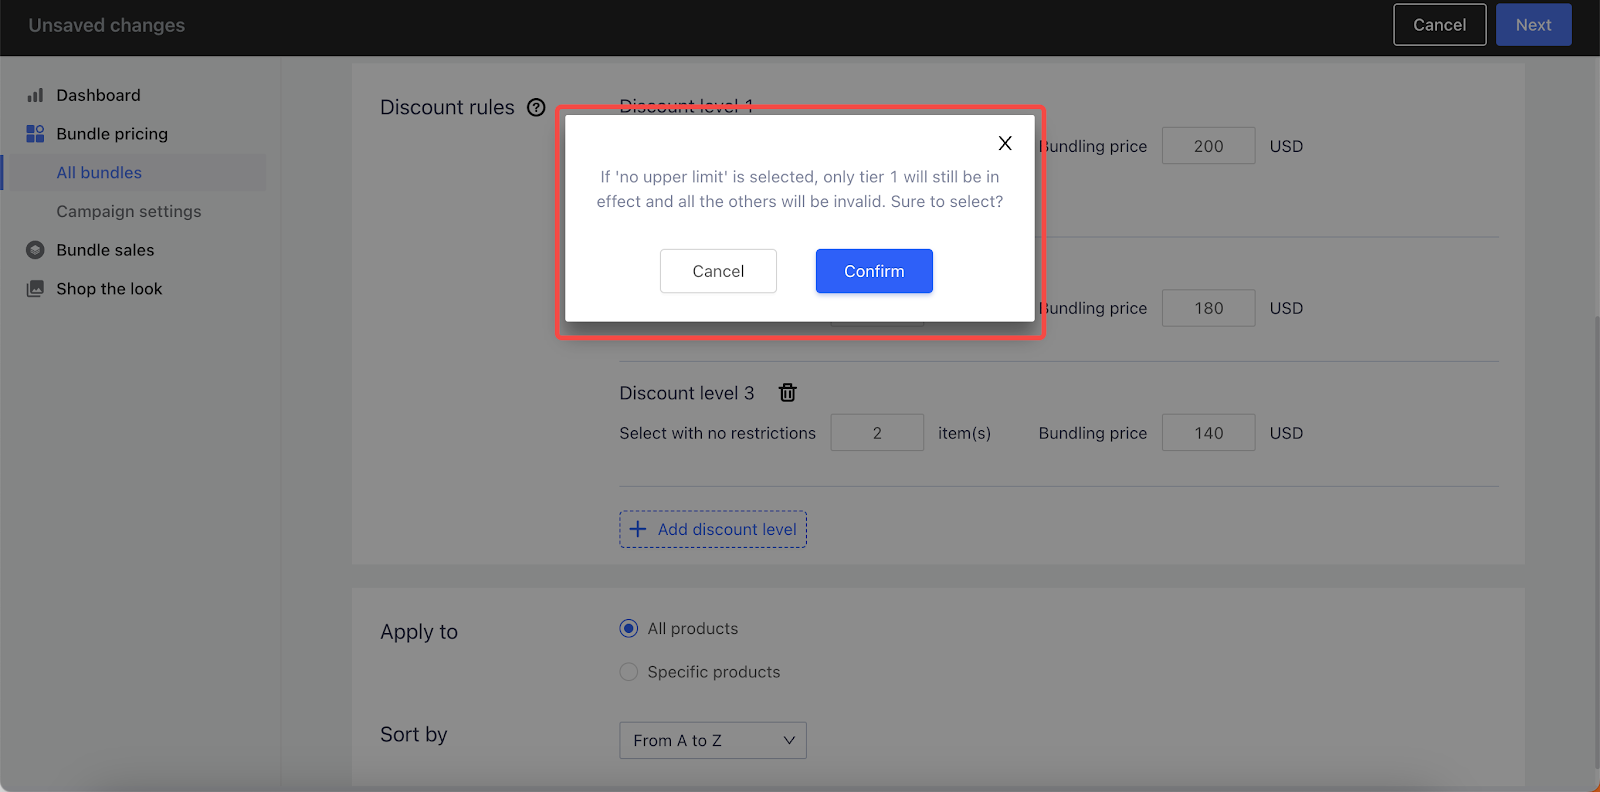
3. Configure no upper limit options: Enable this option to apply discount levels sequentially, such as buy 3 for $10, 6 for $20; disable it to revert any additional items to original price after the set discount level.
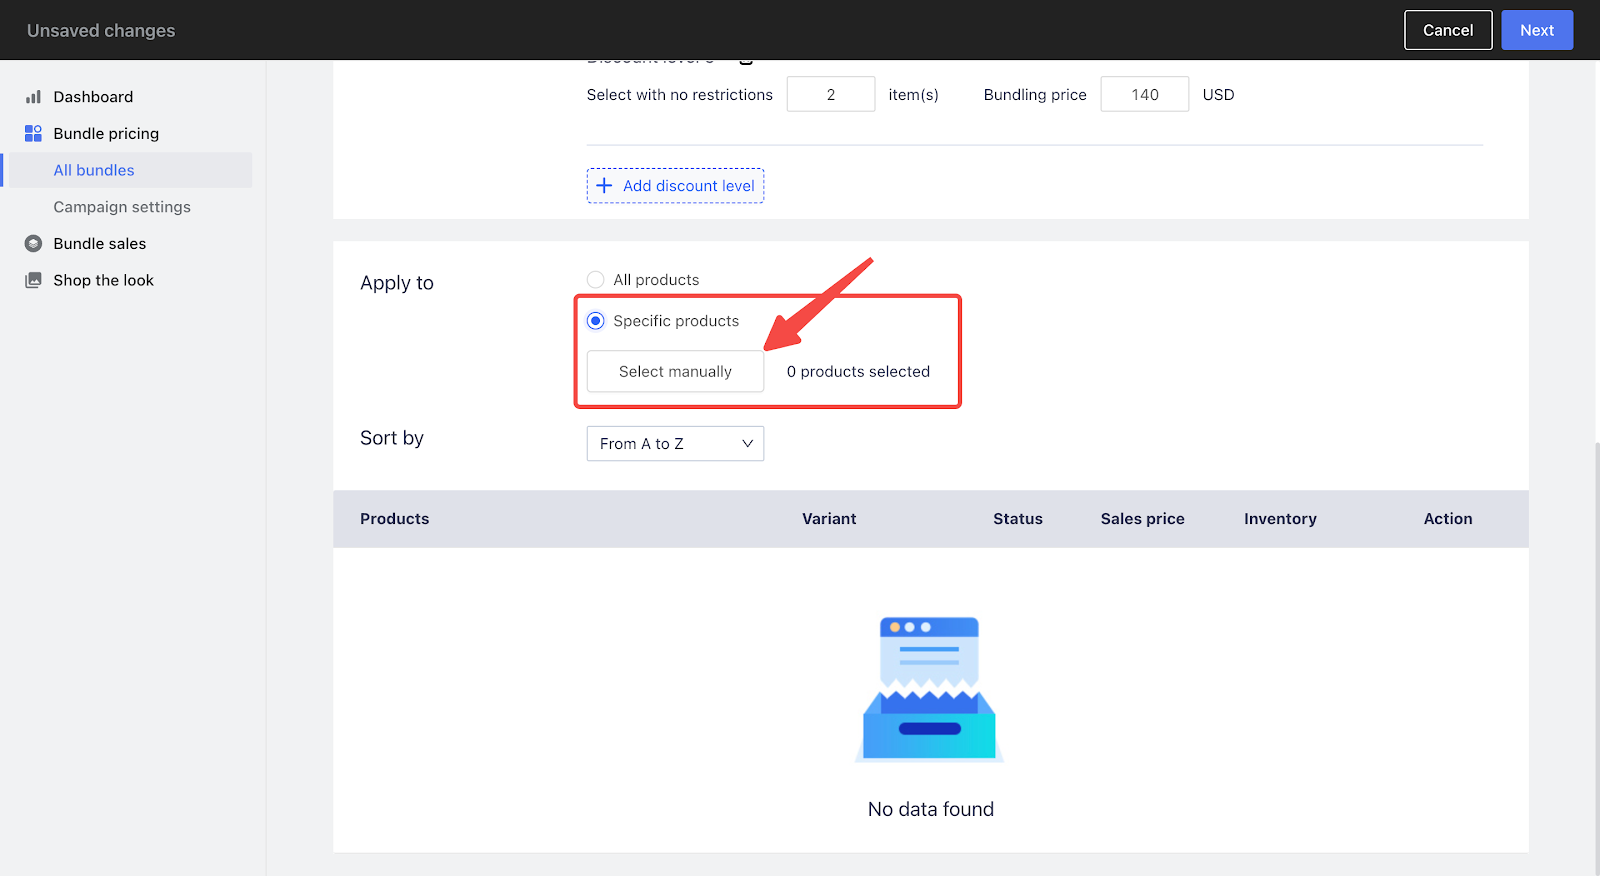
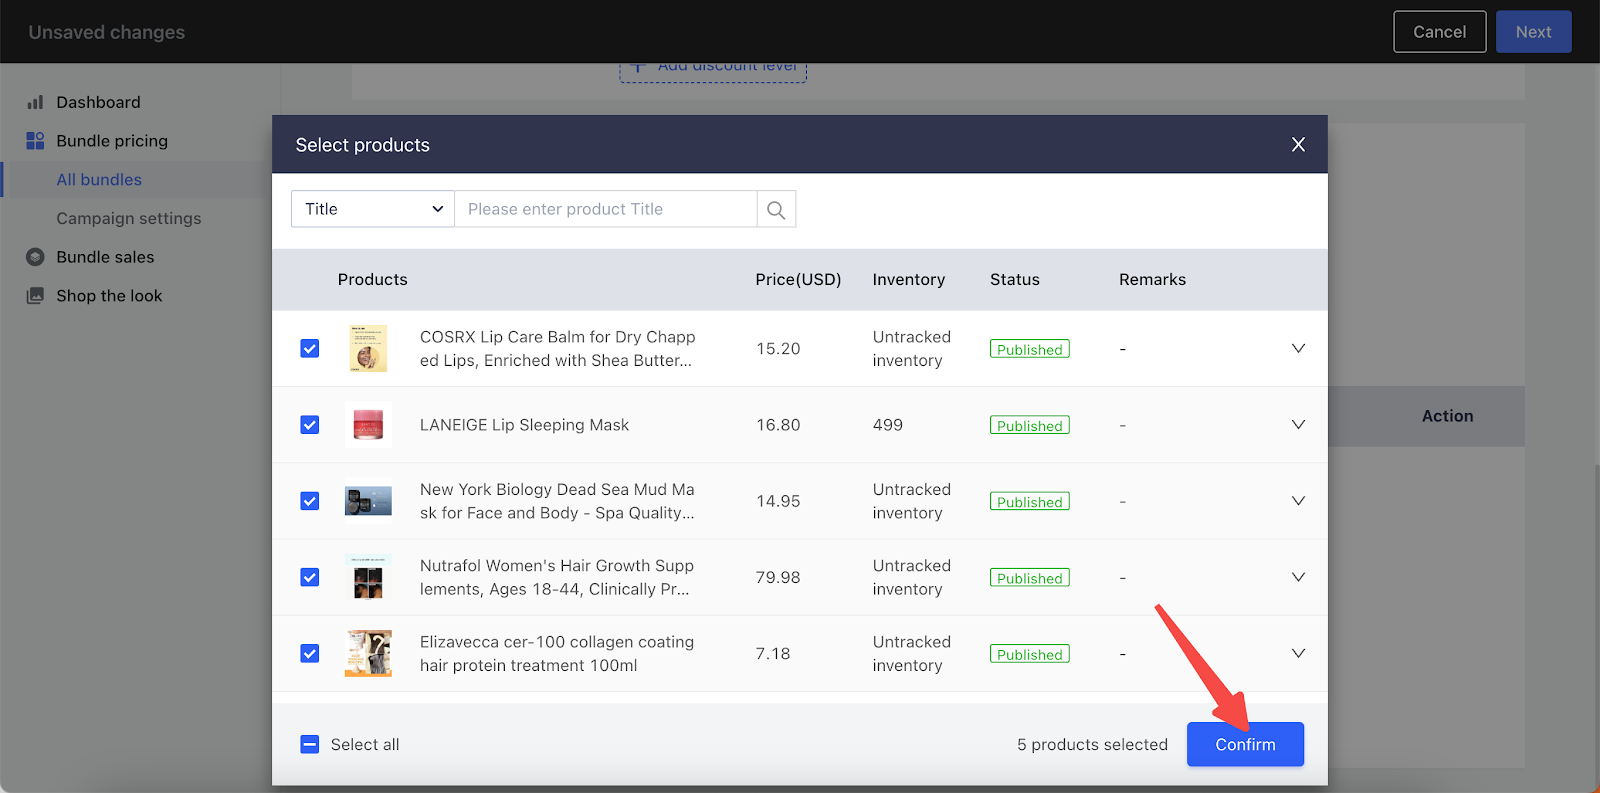
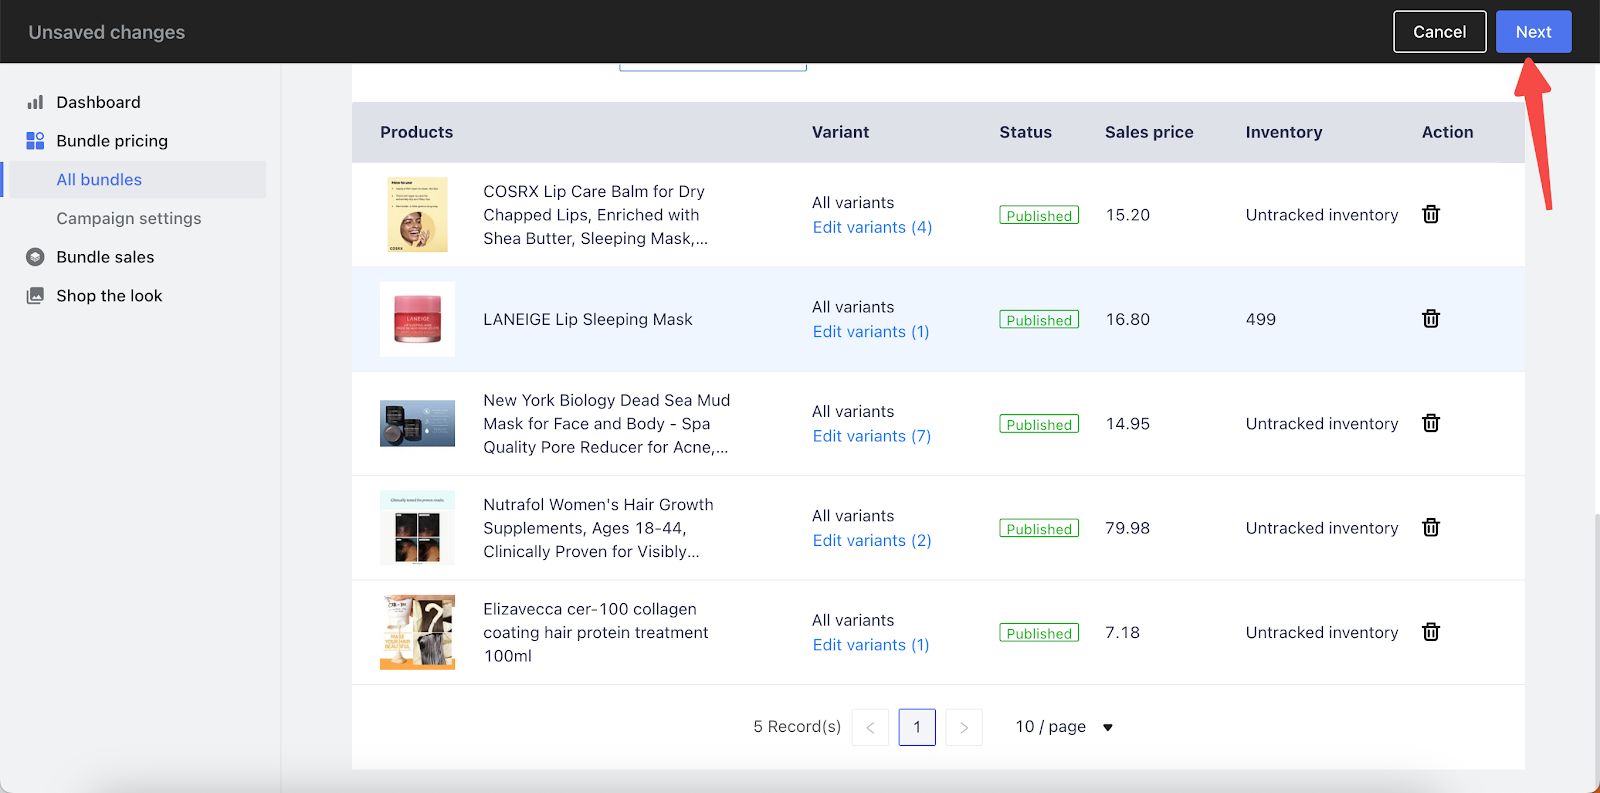
4. Select products for the campaign: Choose to include all products or only specific products by clicking Select manually and then Confirm, aligning the campaign with your inventory strategy.
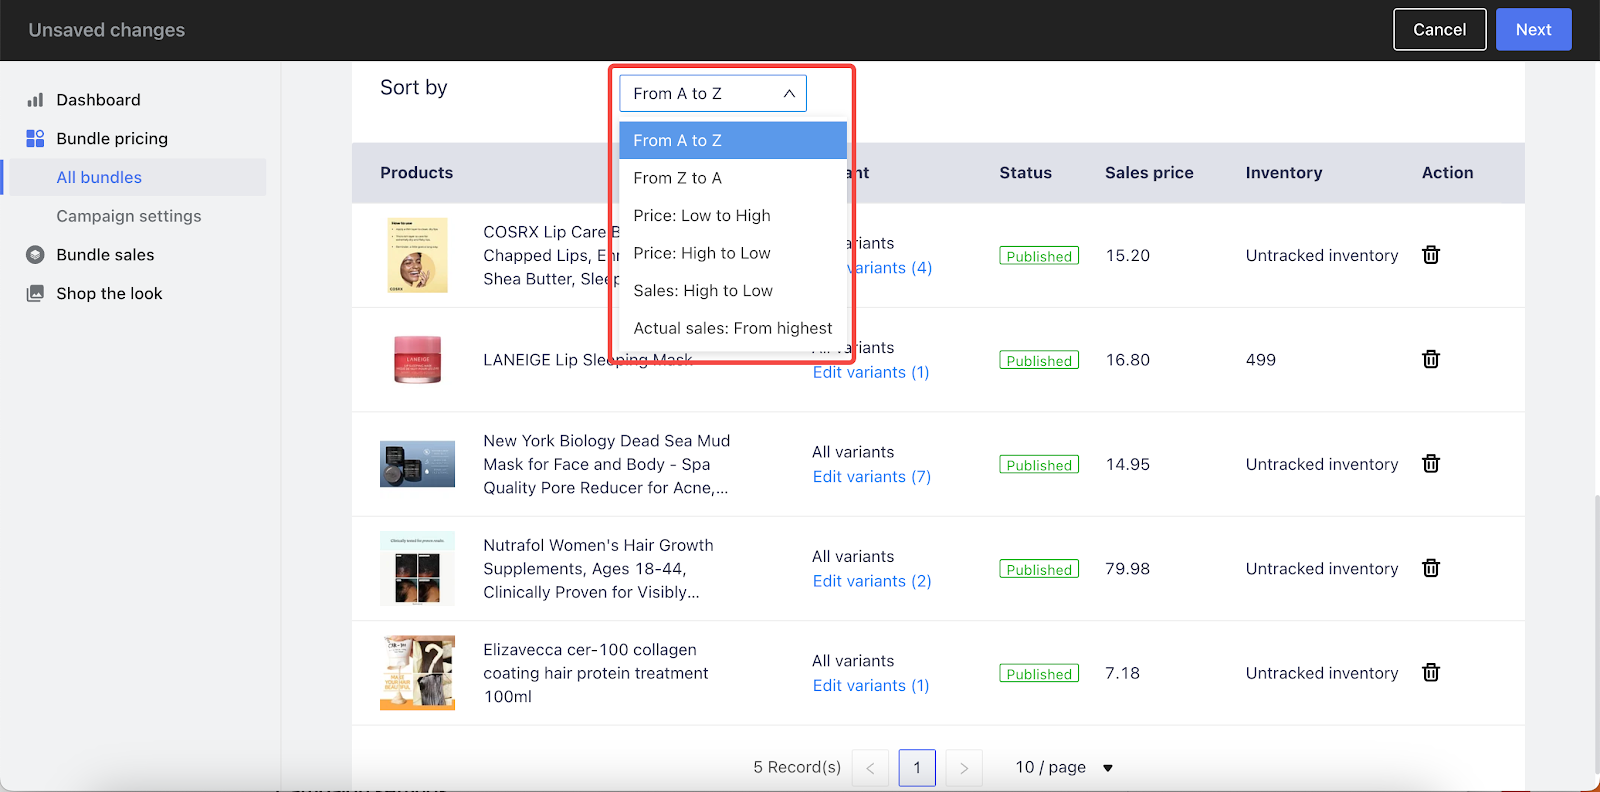
5. Set product sort order: Organize the appearance of products within the campaign by setting a specific sort order. Click Next to set up the display page.
Configure campaign display page
This part focuses on the visual aspects that make your campaigns attractive to customers. Set up banners, pop-ups, and other visual elements that are key to catching the eye of potential buyers.
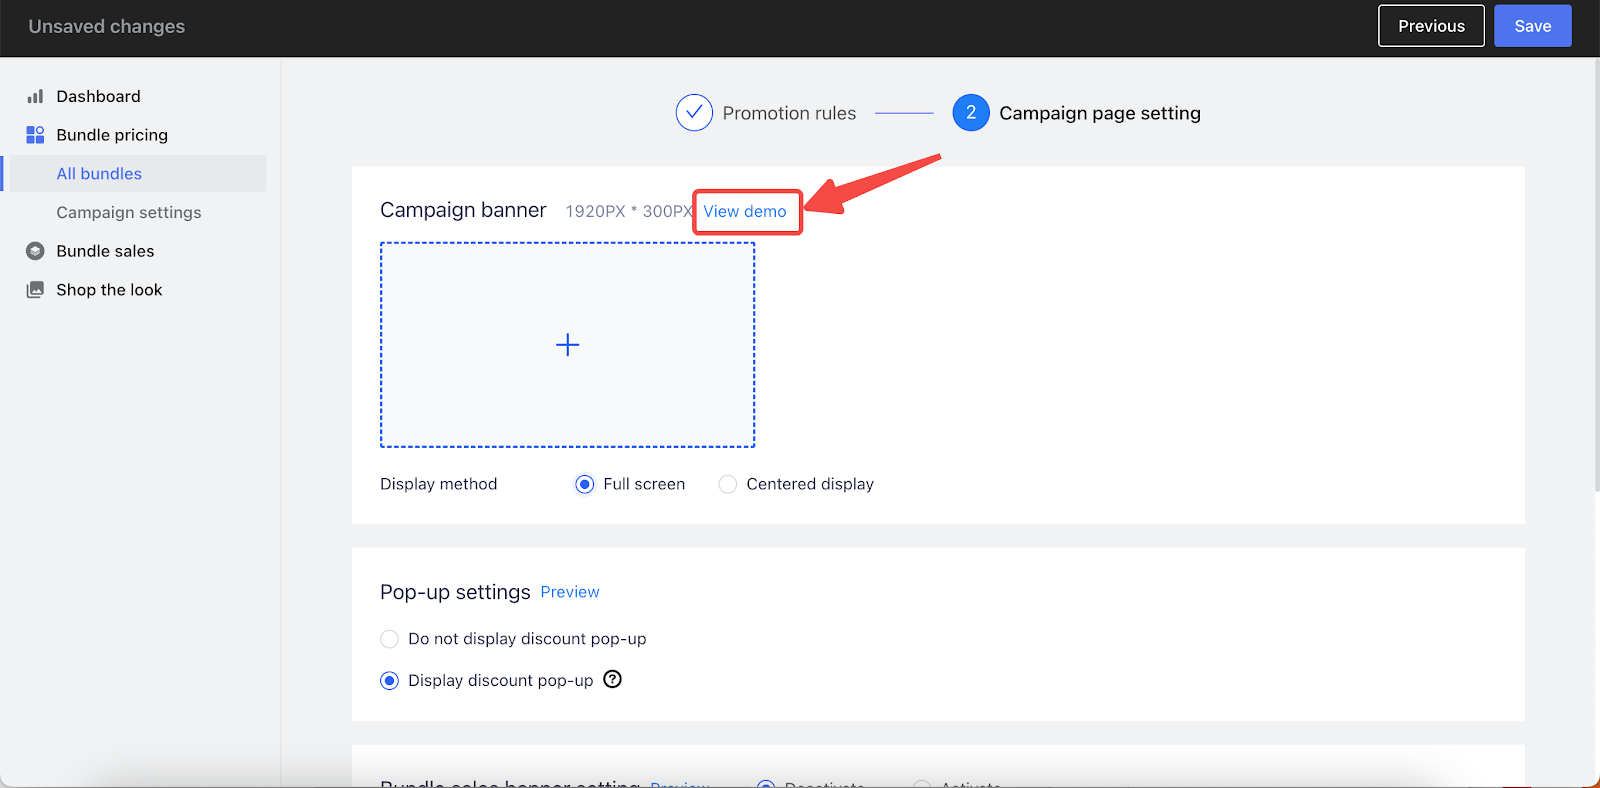
1. Upload campaign banner and set display options: Add a banner image by clicking the + icon choose between full screen or center screen display, and preview the banner with the View demo button to ensure it meets your visual standards.

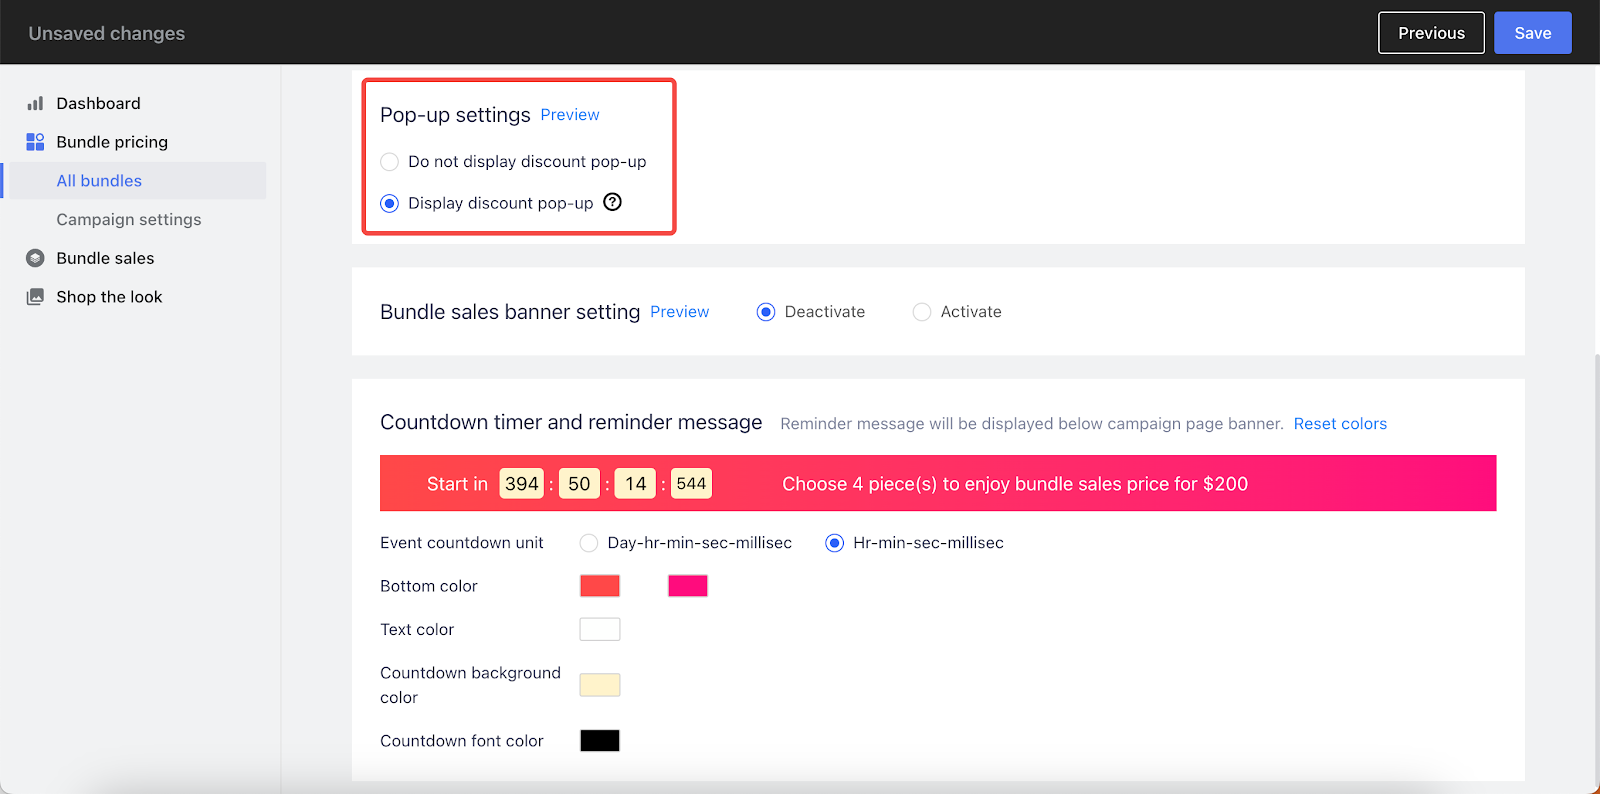
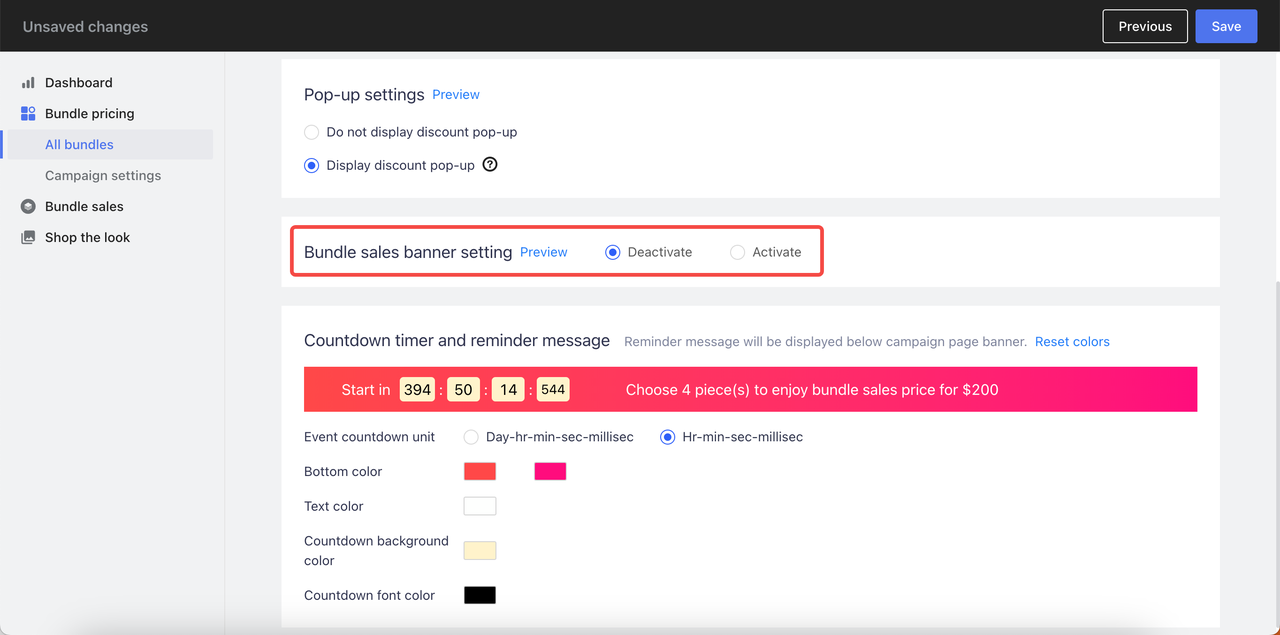
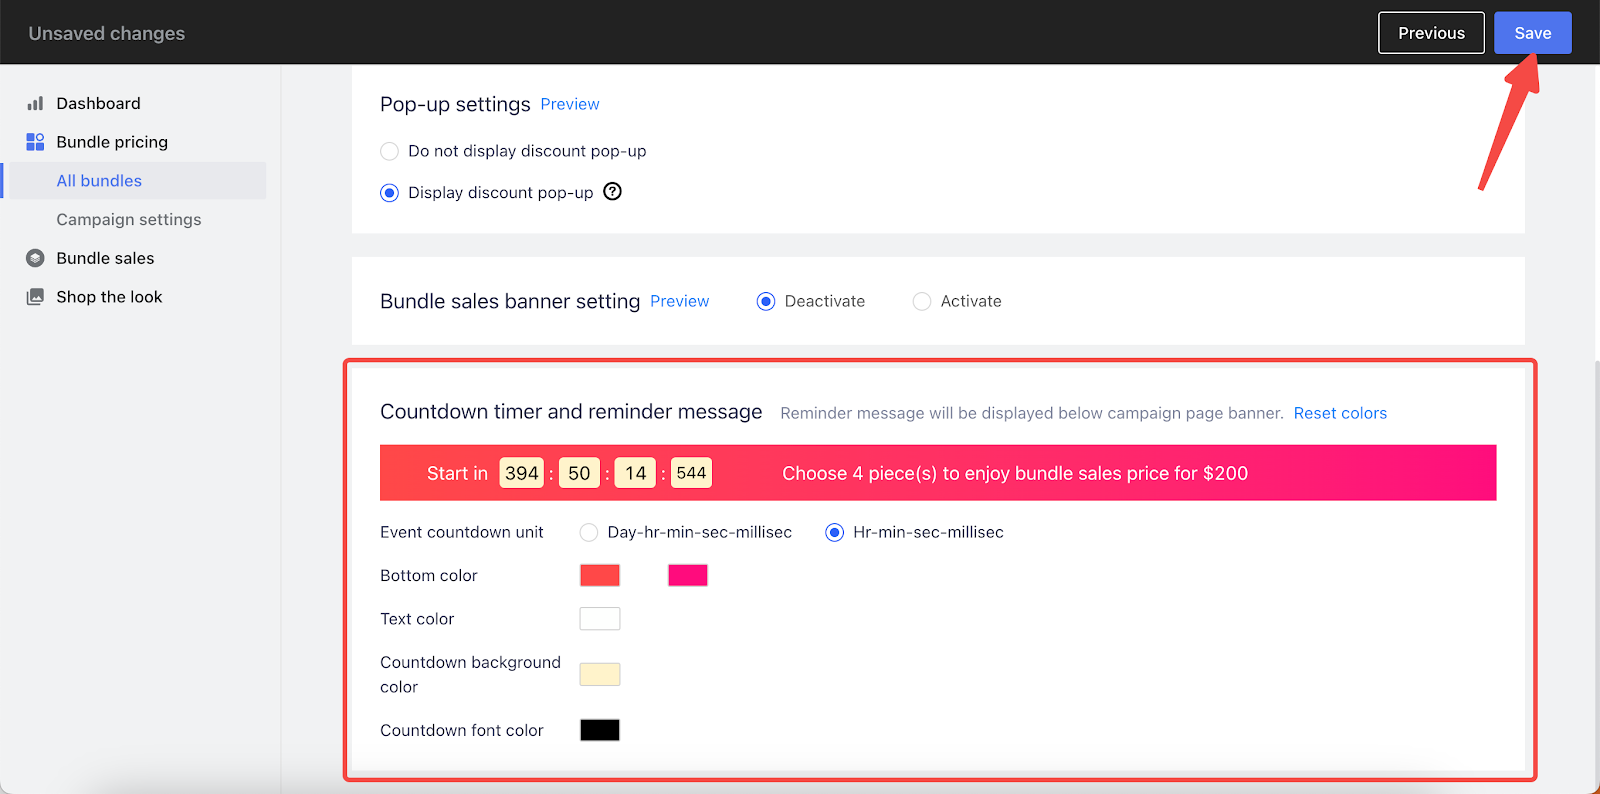
2. Set pop-up and banner display options: Decide whether to display a campaign pop-up, and preview it along with the decision on displaying a sales banner, ensuring all visuals align with the campaign's theme and objectives.
Note
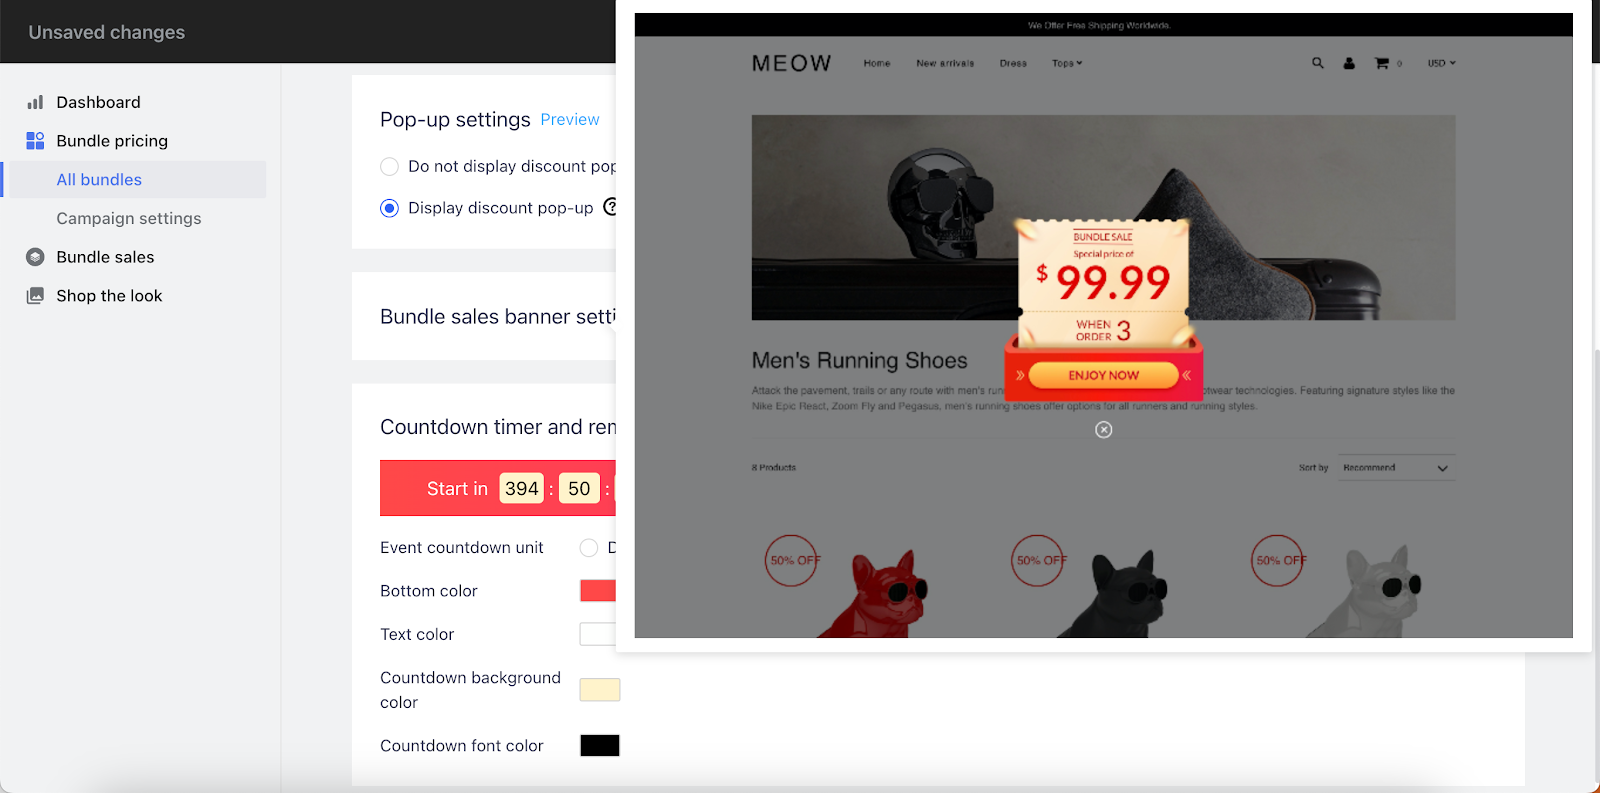
The pop-up window will appear on all pages except the checkout and sign-up pages. It will be displayed only once per visit. For additional configuration options, please refer to the Pop-up notification settings or navigate to Campaign settings > Pop up.
3. Customize reminder message and countdown timer: Adjust the style of your reminder messages and countdown time and Save the settings to keep your campaign timely and engaging.
Managing your bundle pricing campaigns
Once your campaigns are active, this section provides tools and tips for managing them effectively. You can preview, adjust, or discontinue campaigns based on performance and strategic goals.
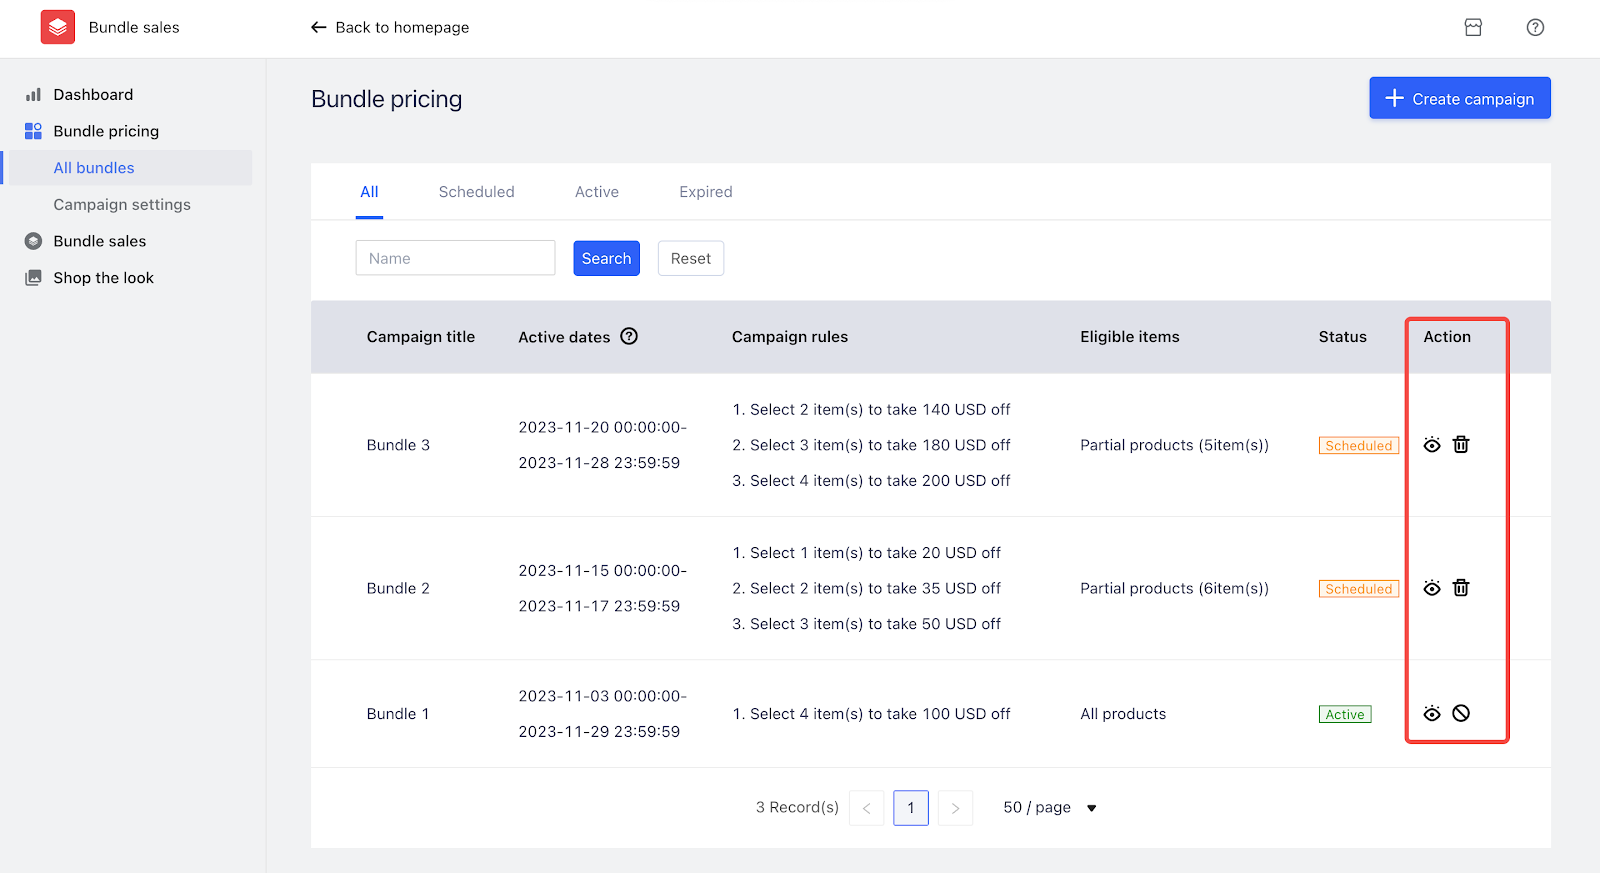
1. Preview, delete, or end campaigns: Utilize the eye icon to preview a campaign, the trash can icon to delete it, or the forbidden icon to end an active campaign prematurely, allowing for effective campaign management.
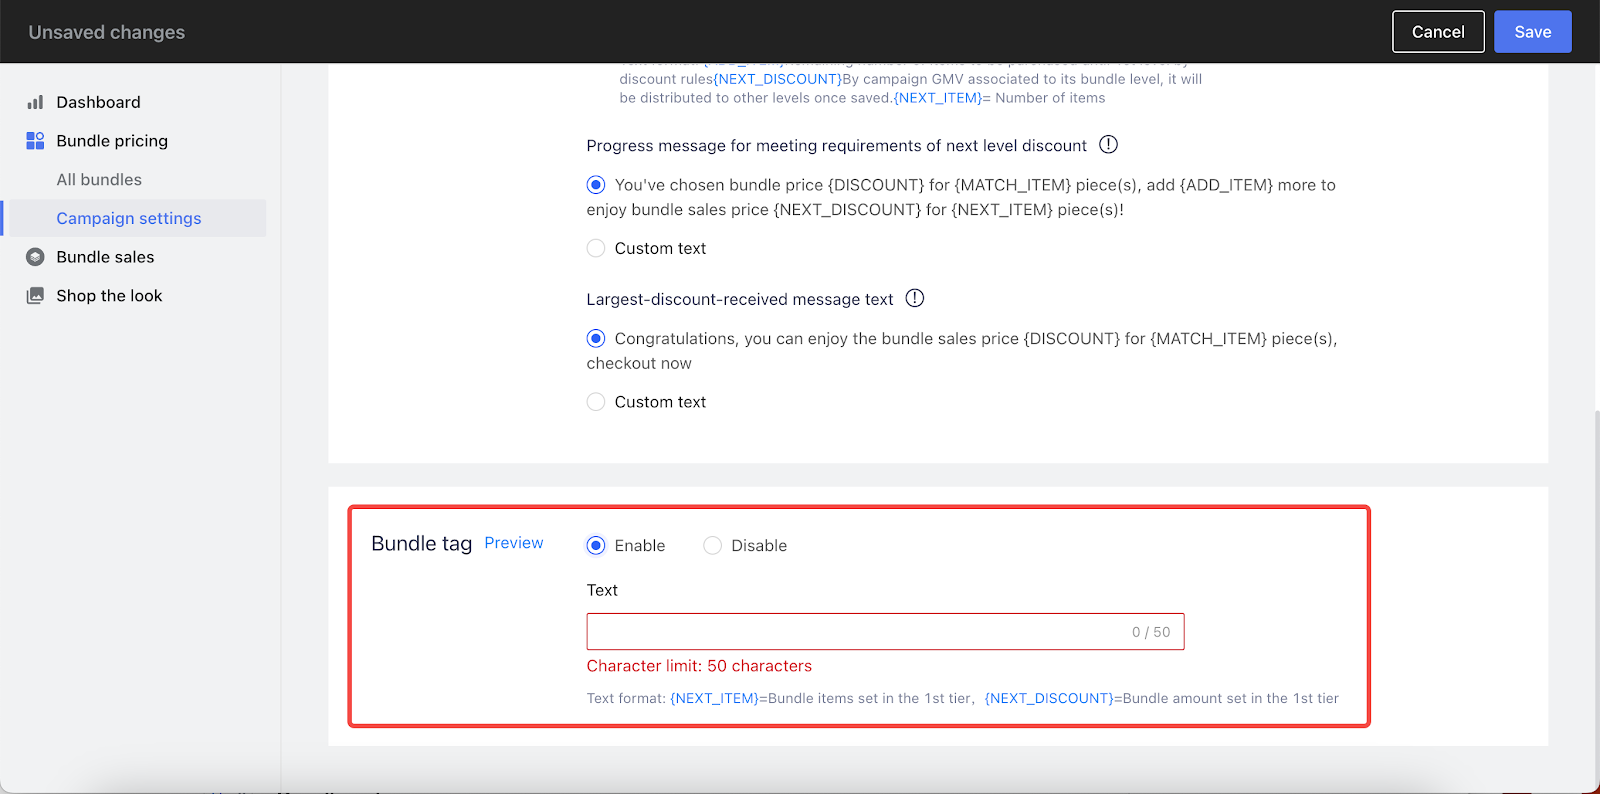
Campaign settings
Enhance the effectiveness of your campaigns by fine-tuning settings and customizing details that interact directly with customers. This section allows you to adjust text, tags, and pop-up features to better suit your store’s needs.
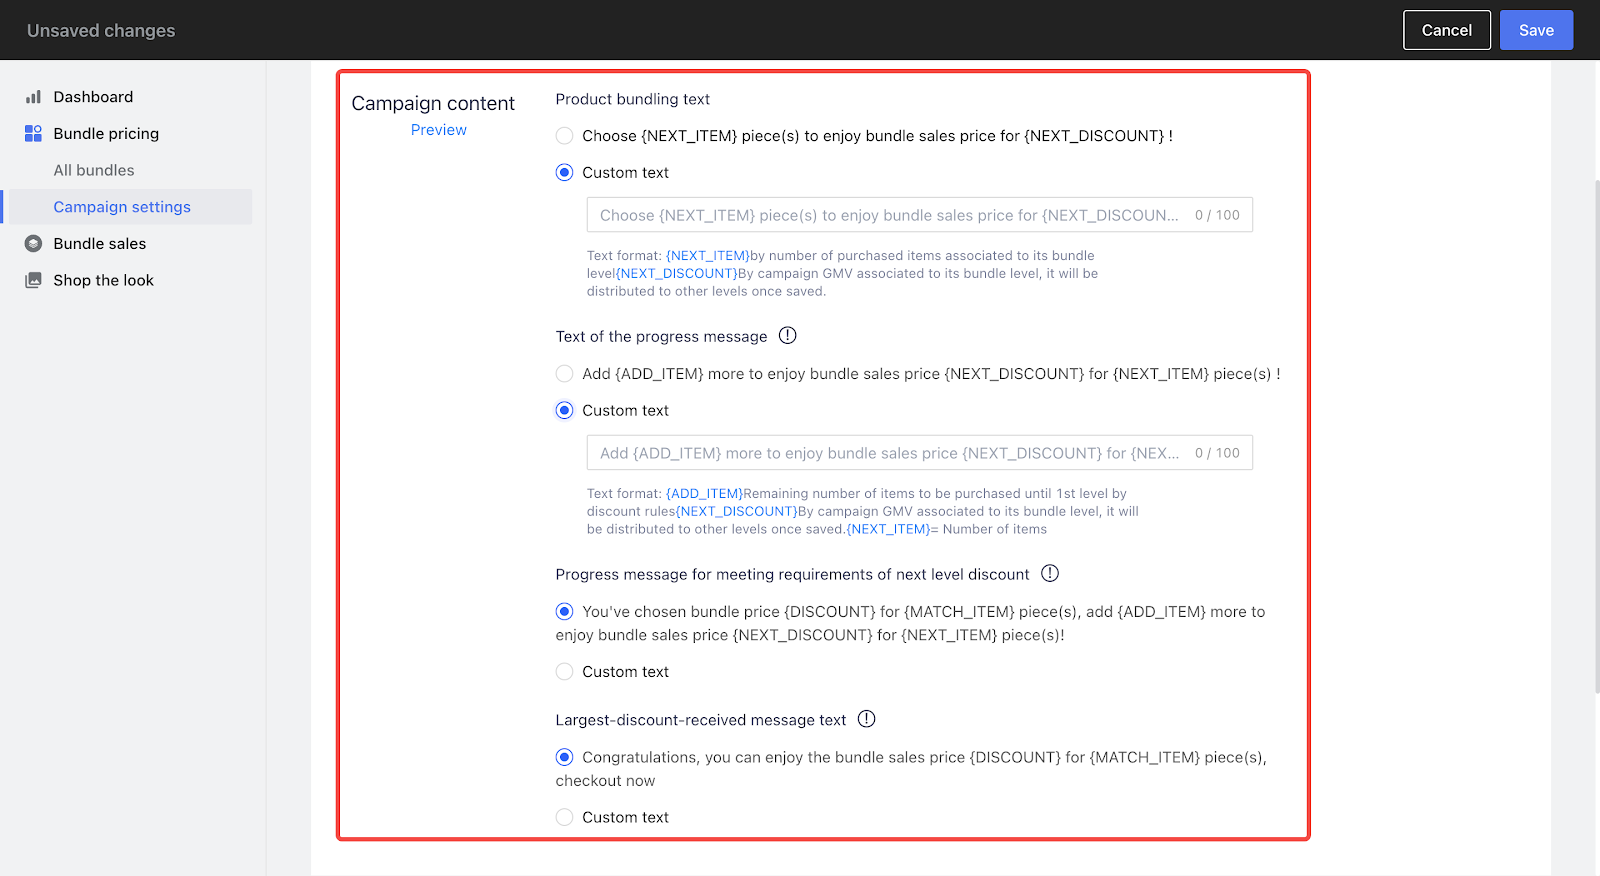
1. Edit campaign content: Customize the text for different store pages to better communicate the campaign details and engage your audience.
2. Customize bundle tags: Adjust the text presented to customers with the Bundle tag feature, enabling more personalized messaging.
Setting up your pop-up
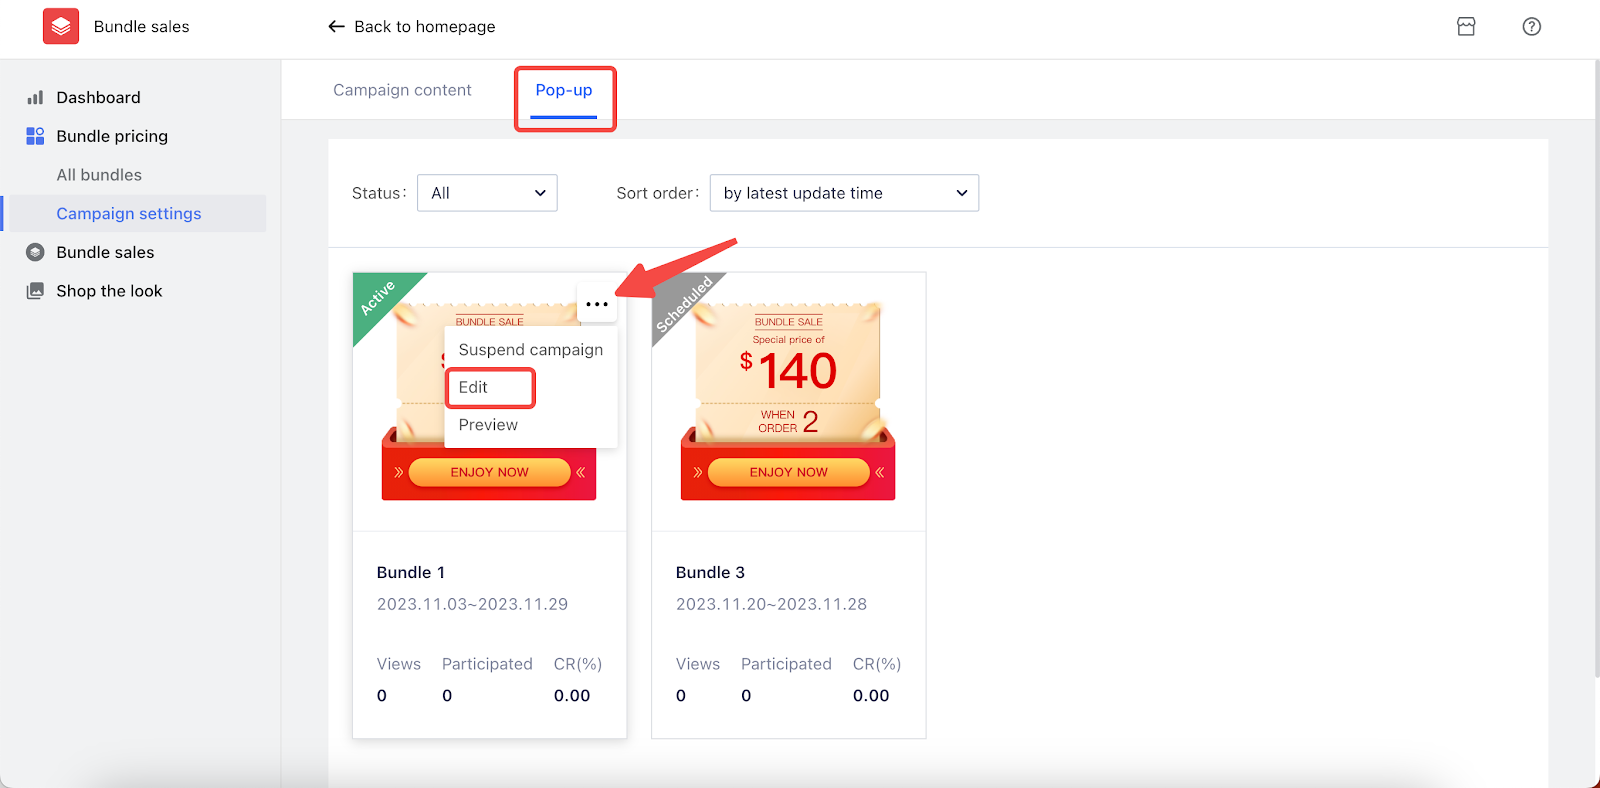
1. Access pop-up settings: If you've selected to display a discount pop-up when creating a campaign, start customizing it here. Hover over the target campaign and click on the more options icon, then select Edit.
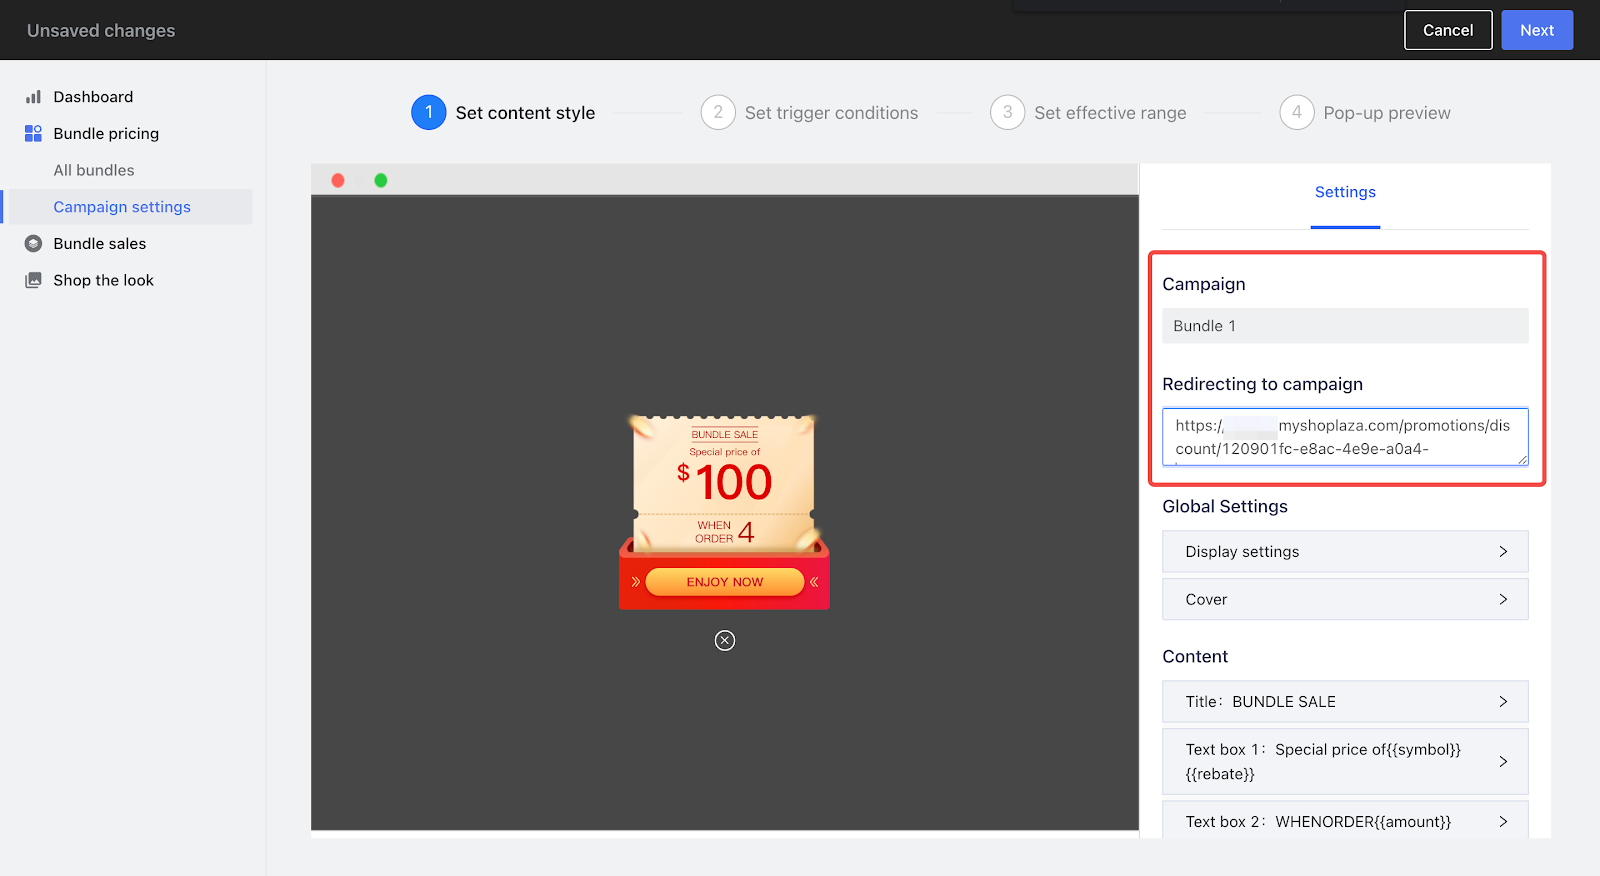
2. Define pop-up identity: Name the pop-up window, then copy and paste the link of the corresponding campaign into the Redirecting to campaign text box to ensure it connects properly when customers click on the pop-up.
Note
To obtain the URL for your campaign, click on the eye icon next to the campaign on the app's overview page.
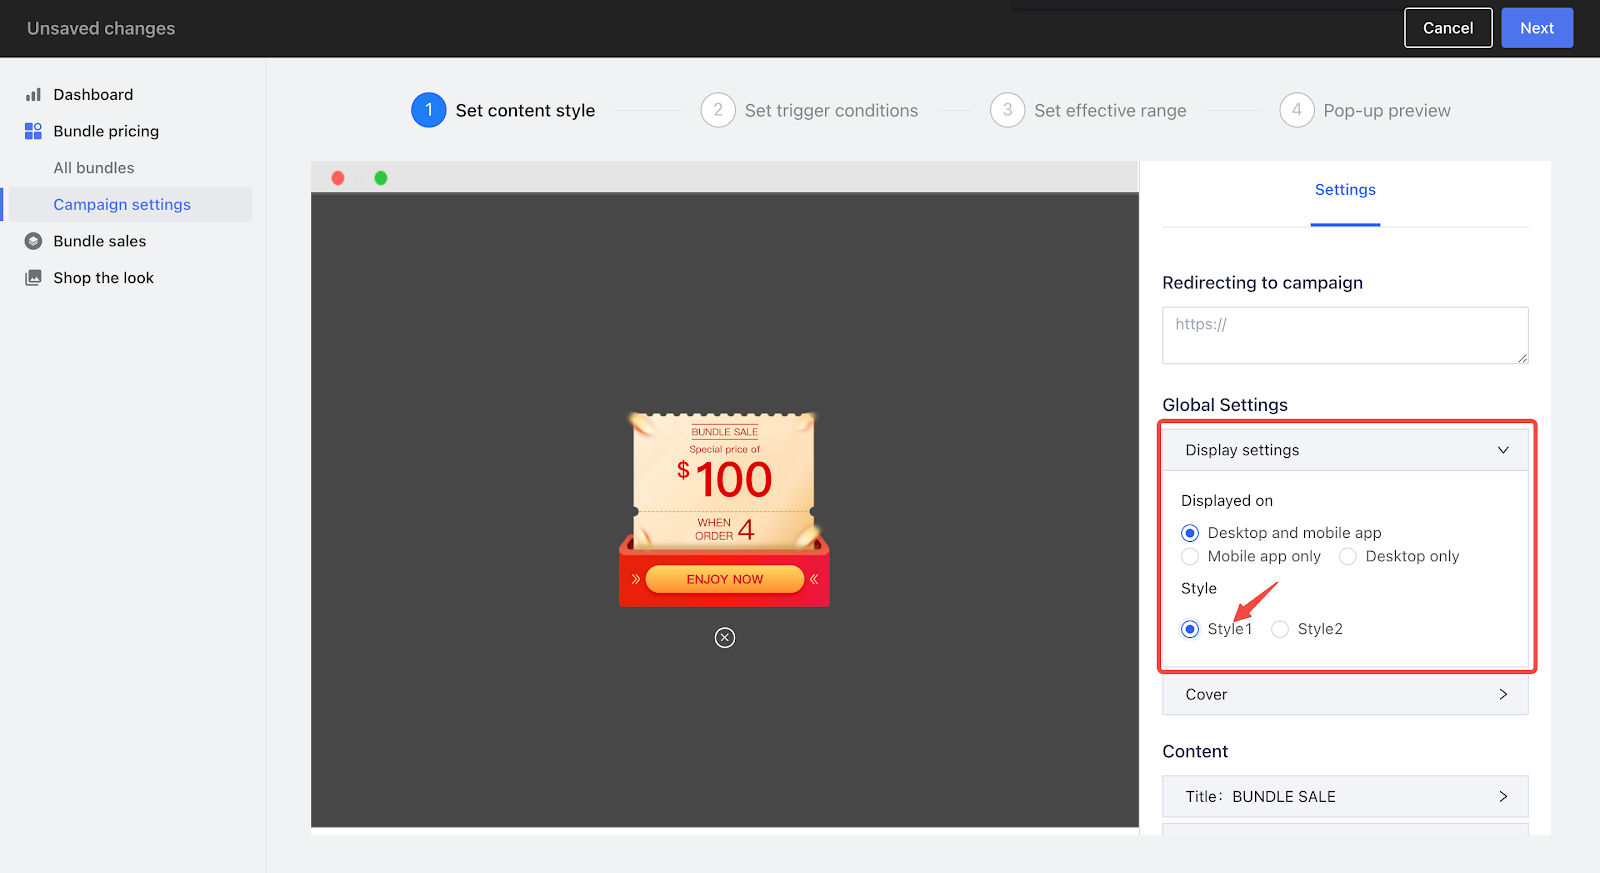
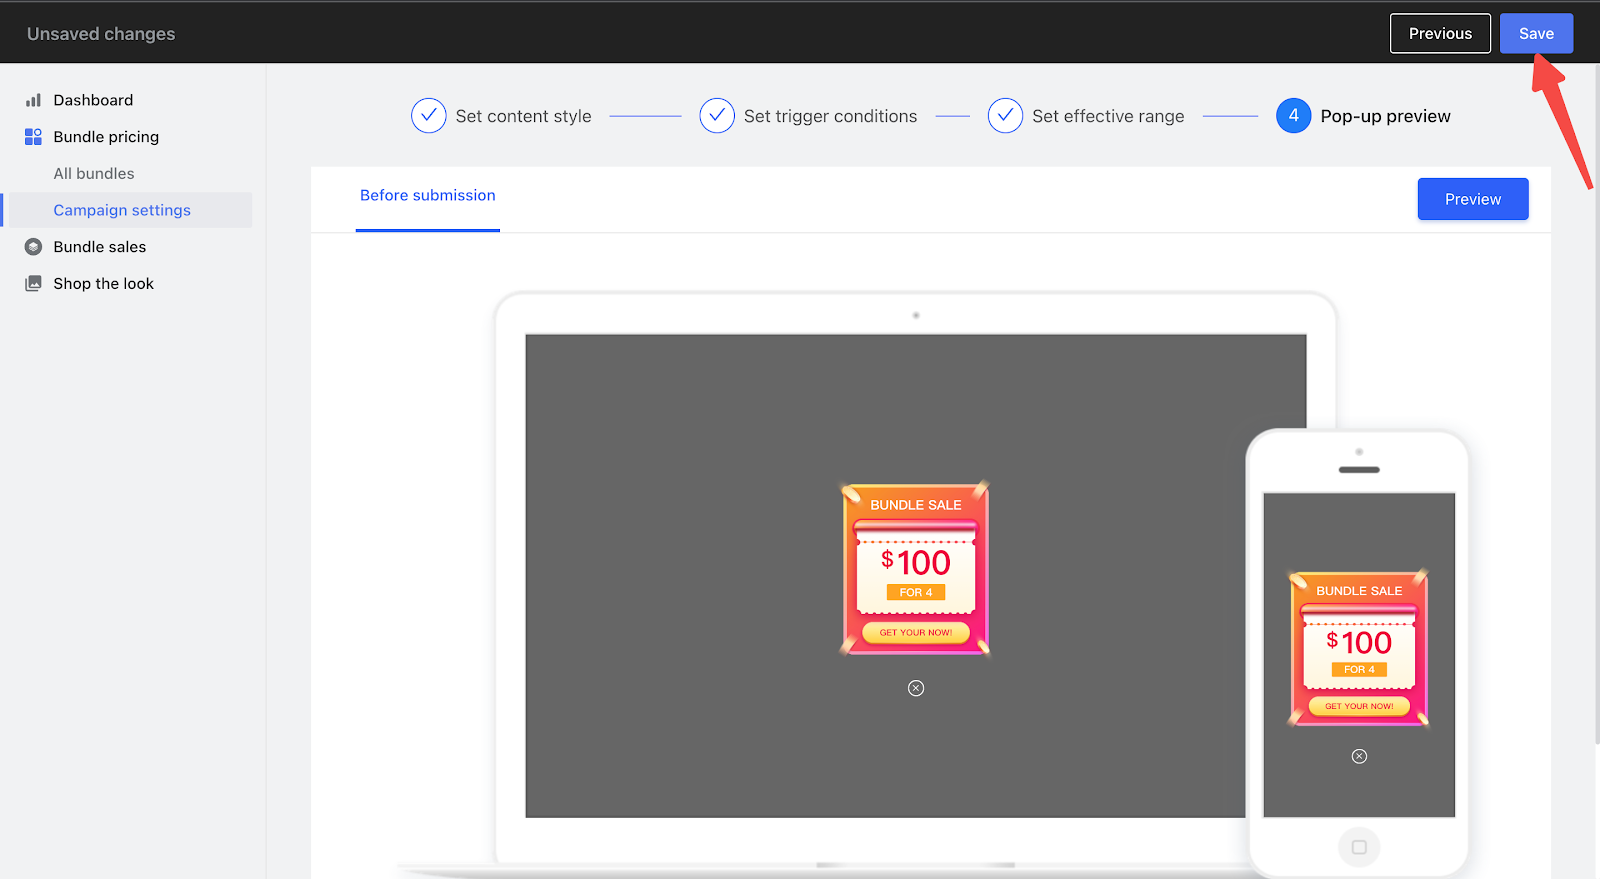
3. Choose display settings: Select the device where the pop-up will be displayed, and choose from one of the two available styles.
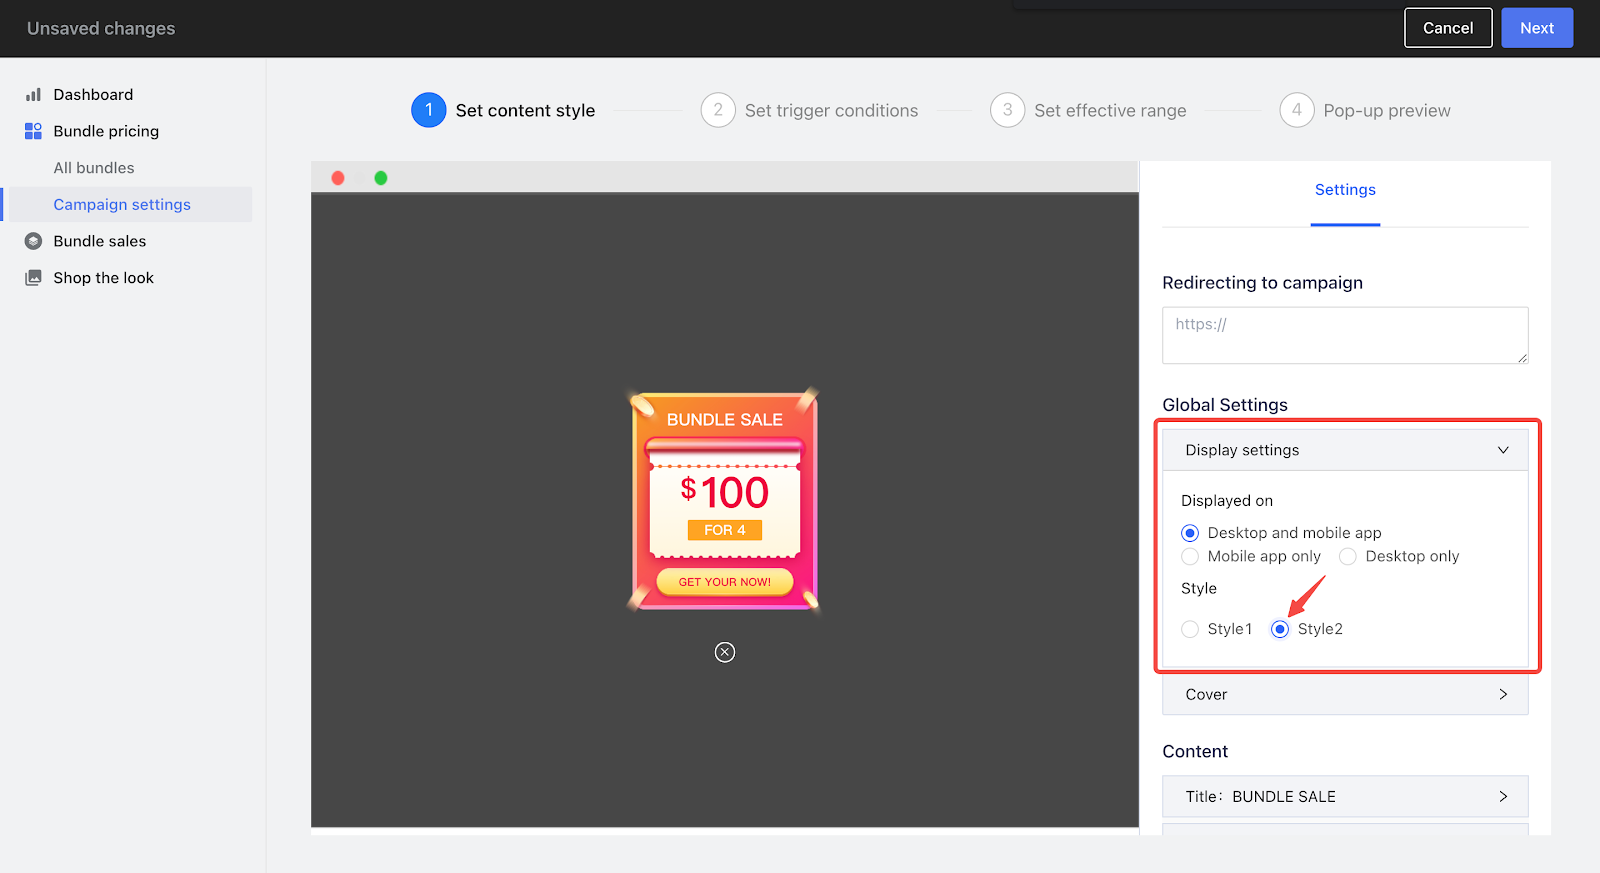
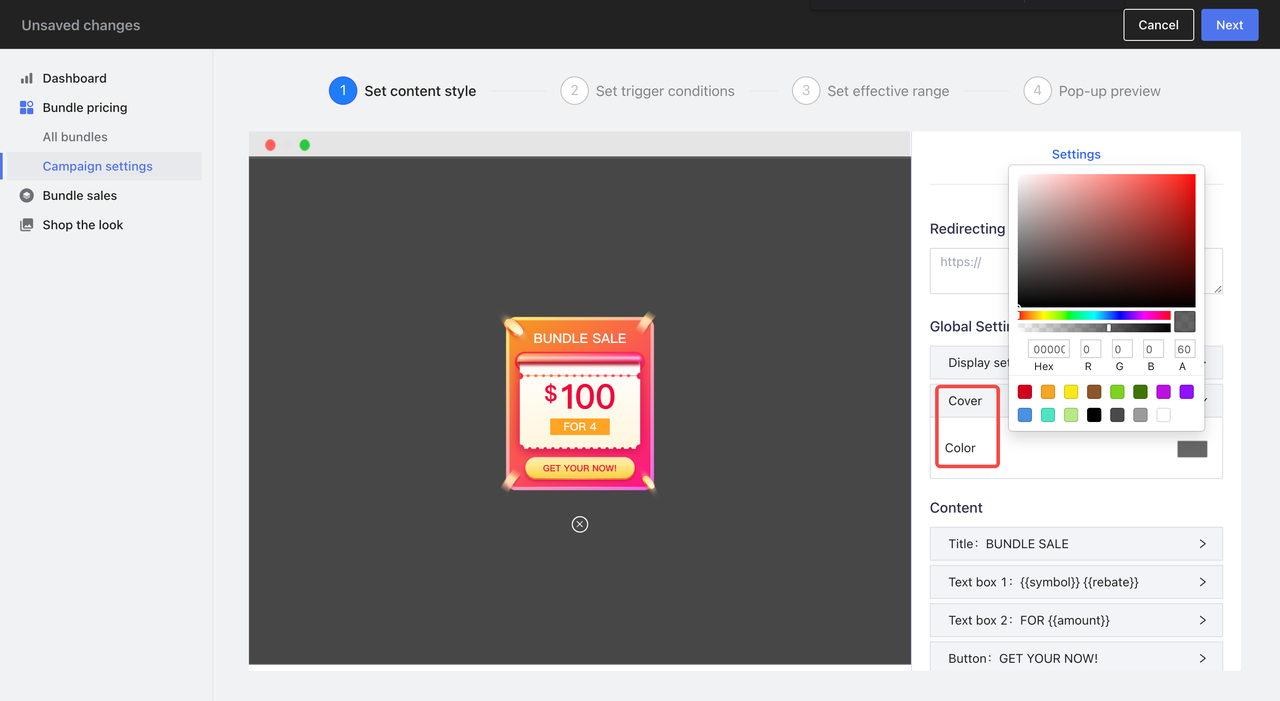
4. Customize appearance: Select a color for the background to align with your branding or campaign theme.
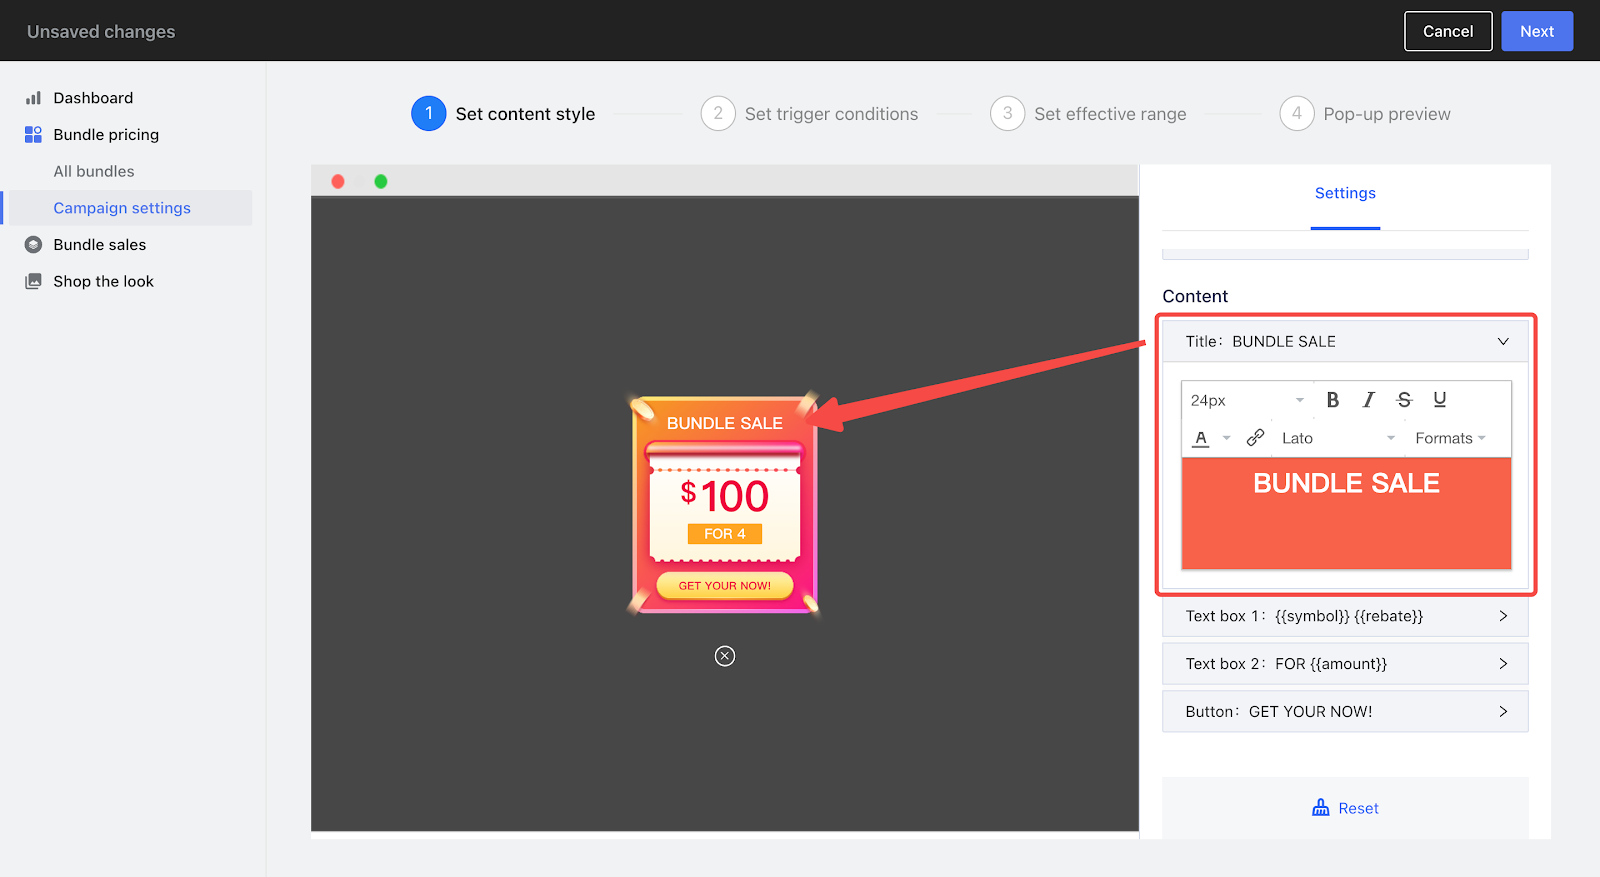
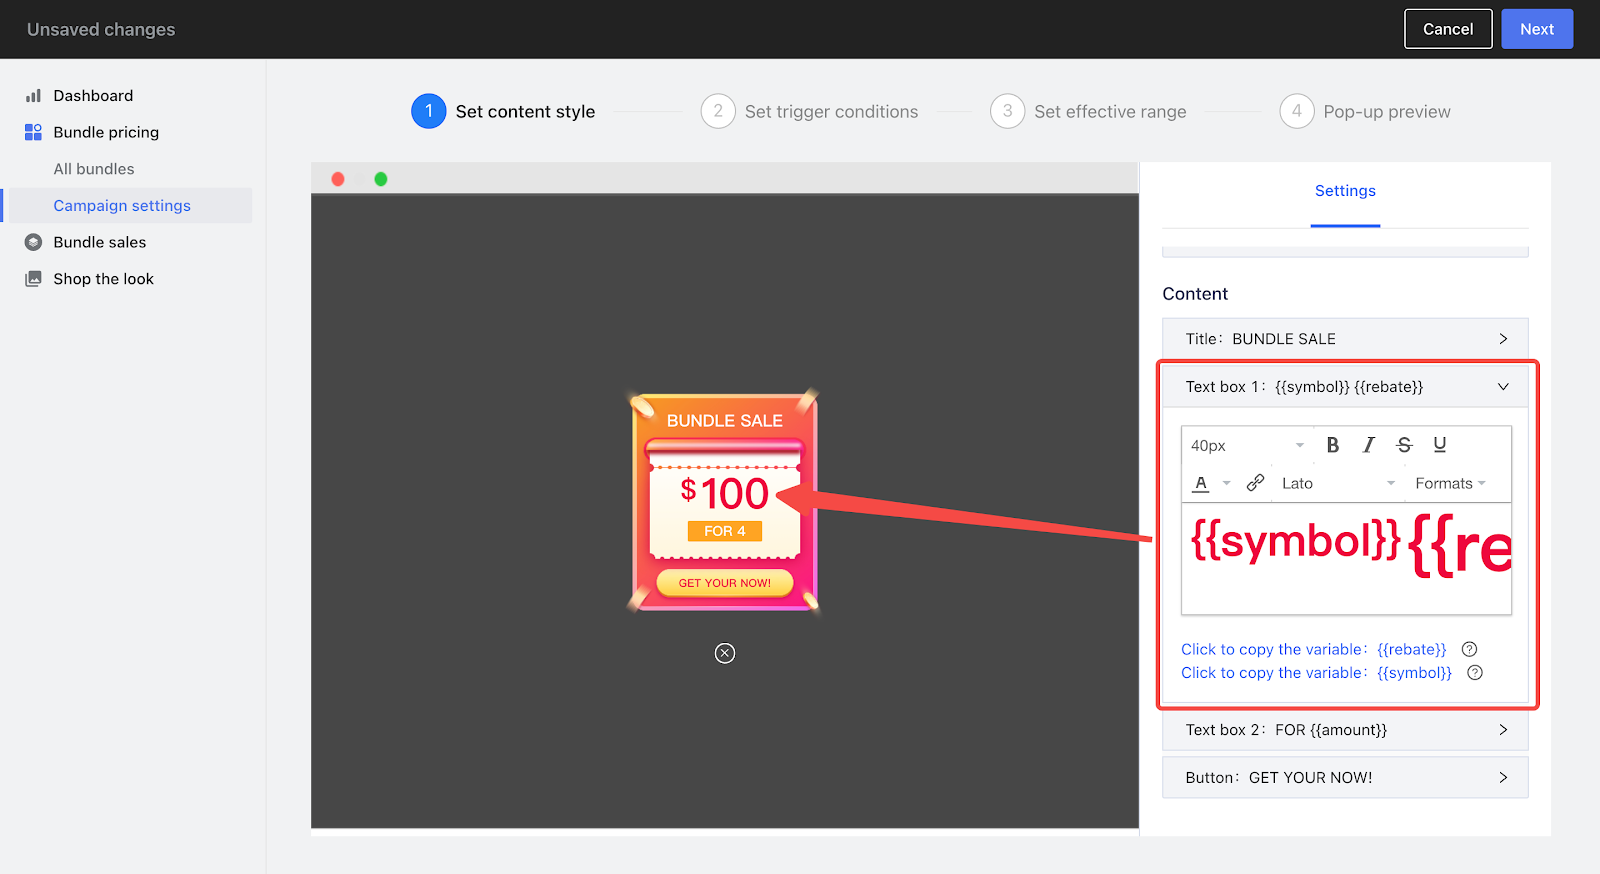
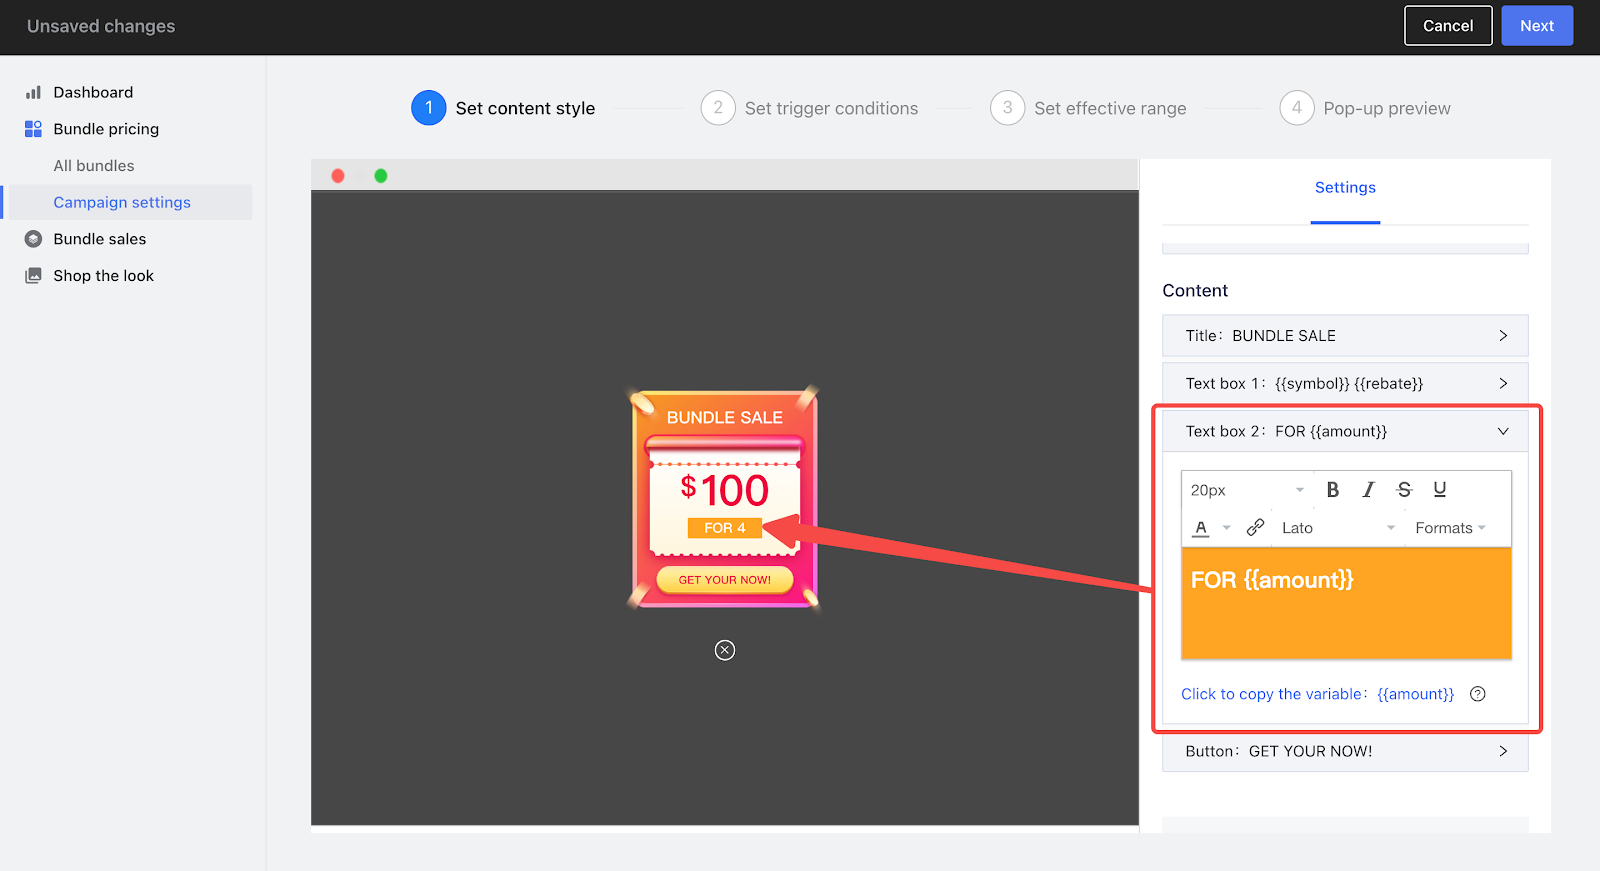
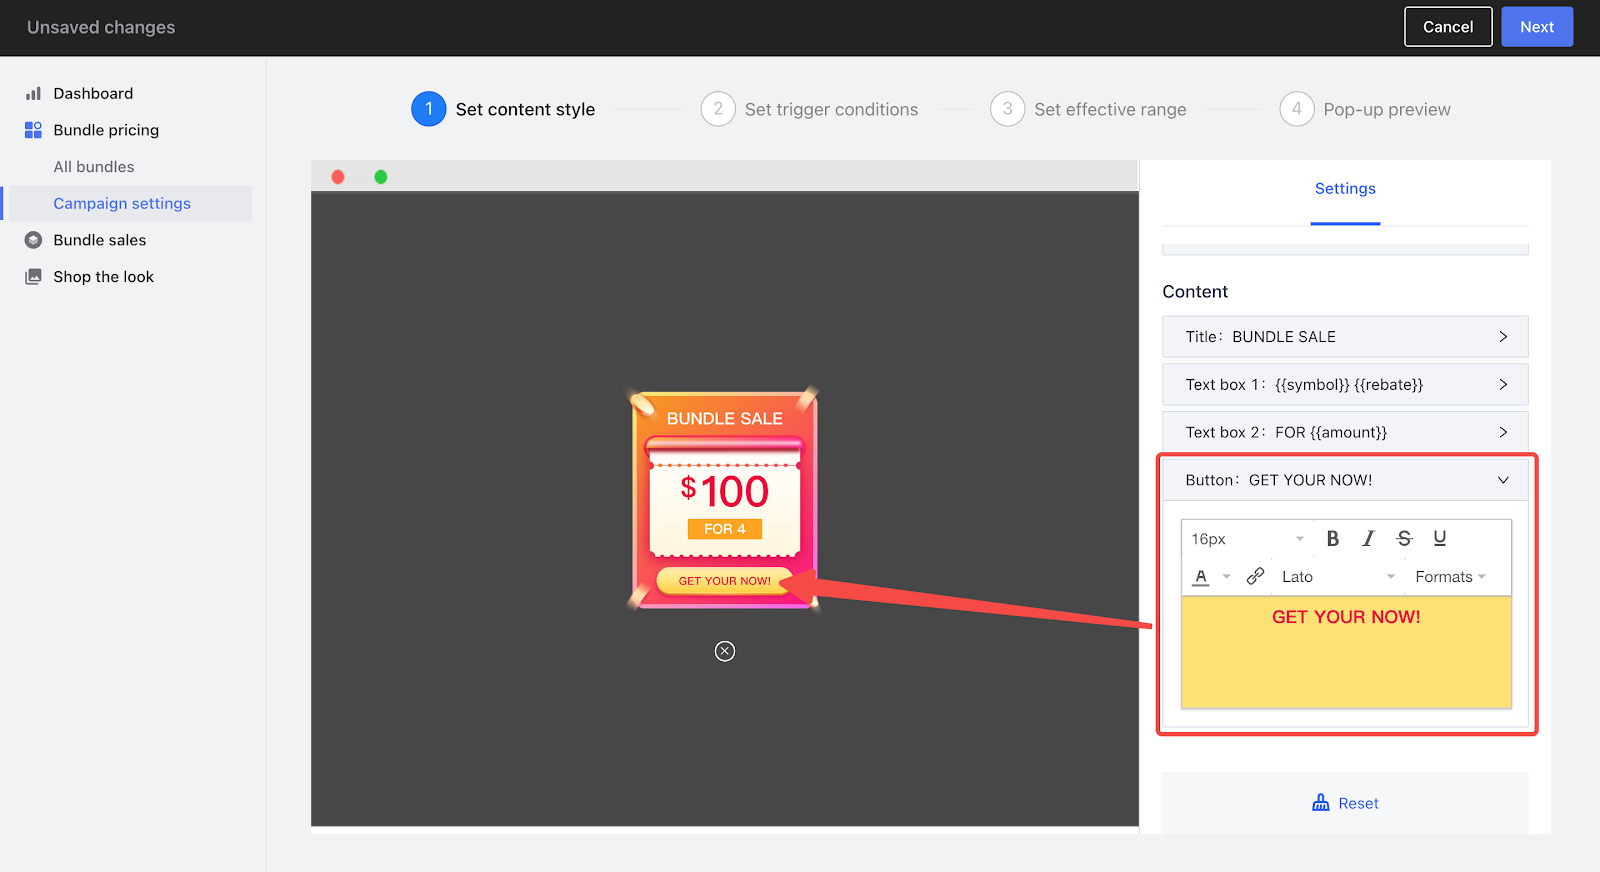
5. Edit content: Customize the title, text, and button of the pop-up. Once you finish editing these elements, click Next to proceed.
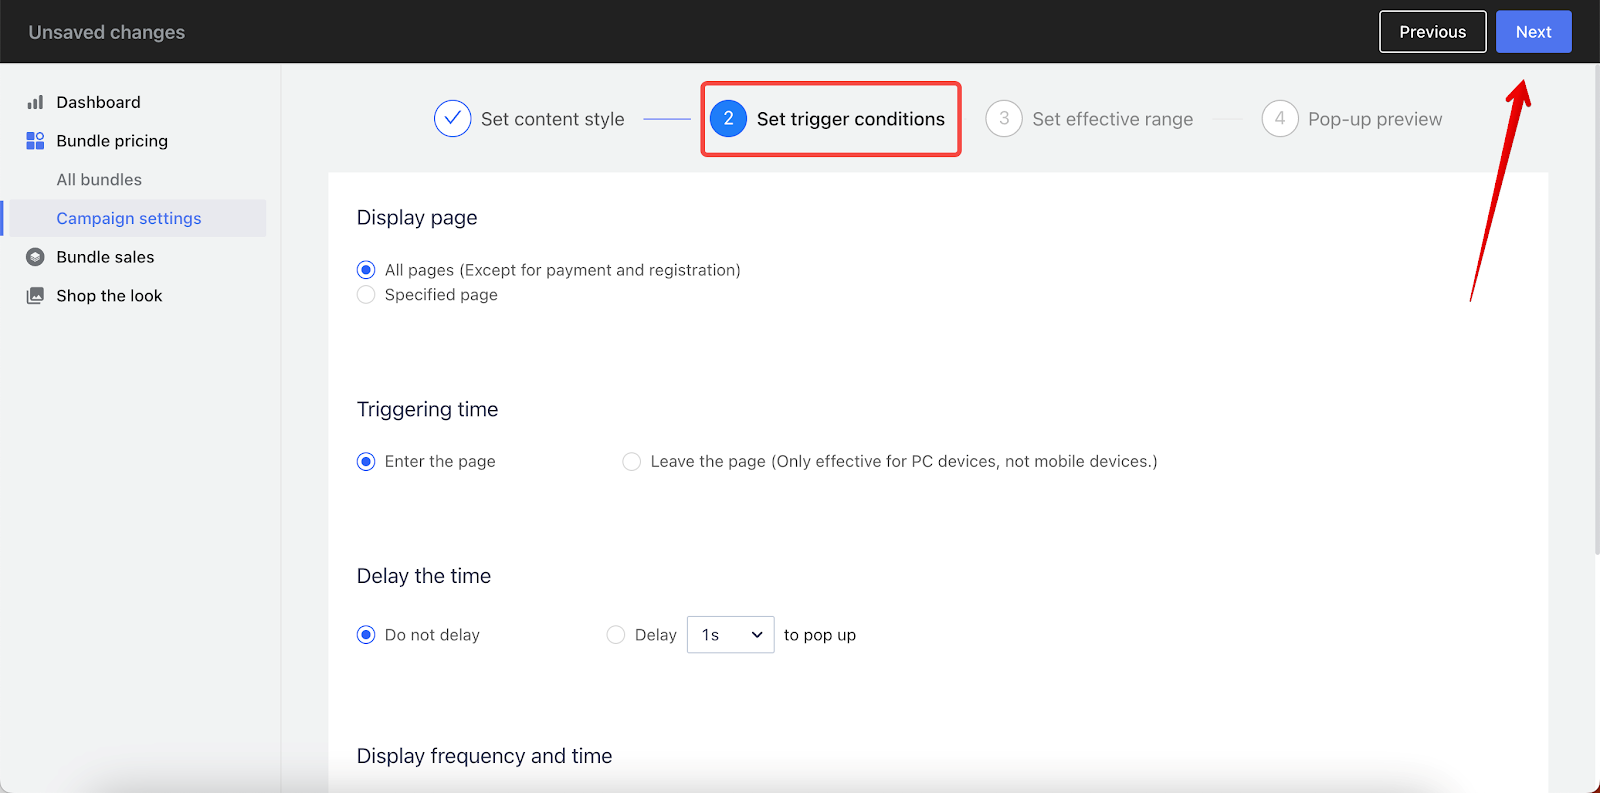
6. Set trigger conditions: Establish the conditions under which the pop-up will trigger. After setting these parameters, click Next to continue.
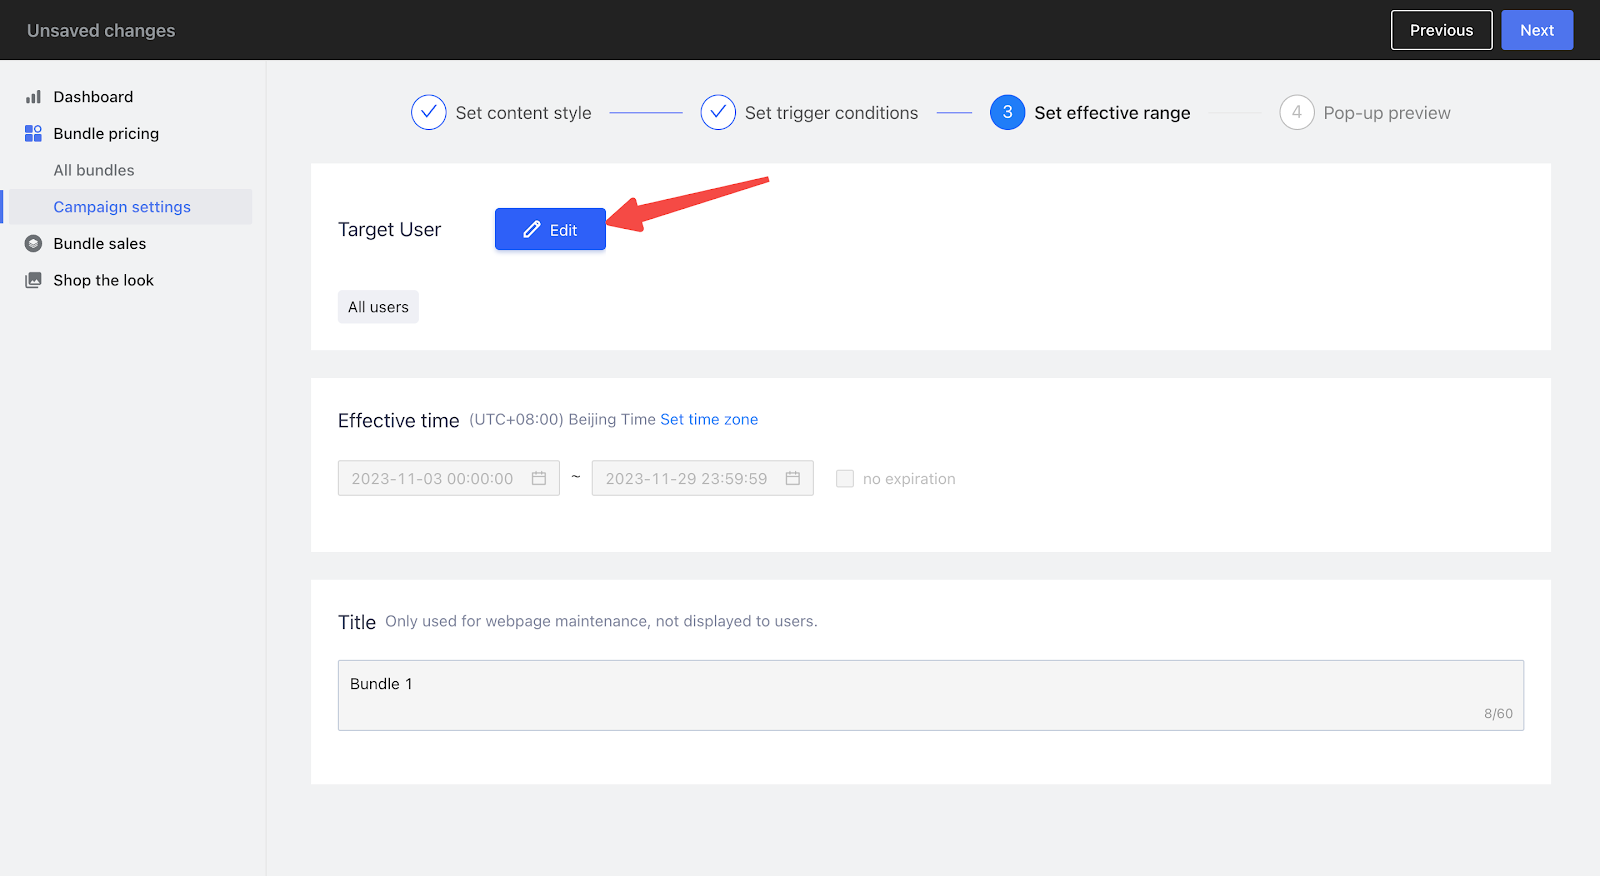
7. Target specific customers: Click Edit to filter the target customers for this pop-up. Once the targeting is set, click Confirm and then Next to finalize the targeting settings.
8. Preview and save: Preview the pop-up on both mobile and PC to ensure it displays correctly across devices. Then, click Save to complete your settings.
Note
The pop-up window will appear on all pages except the checkout and sign-up pages. It will be displayed only once per visit. For additional configuration options, please refer to the Pop-up notification settings or navigate to Campaign settings > Pop up.
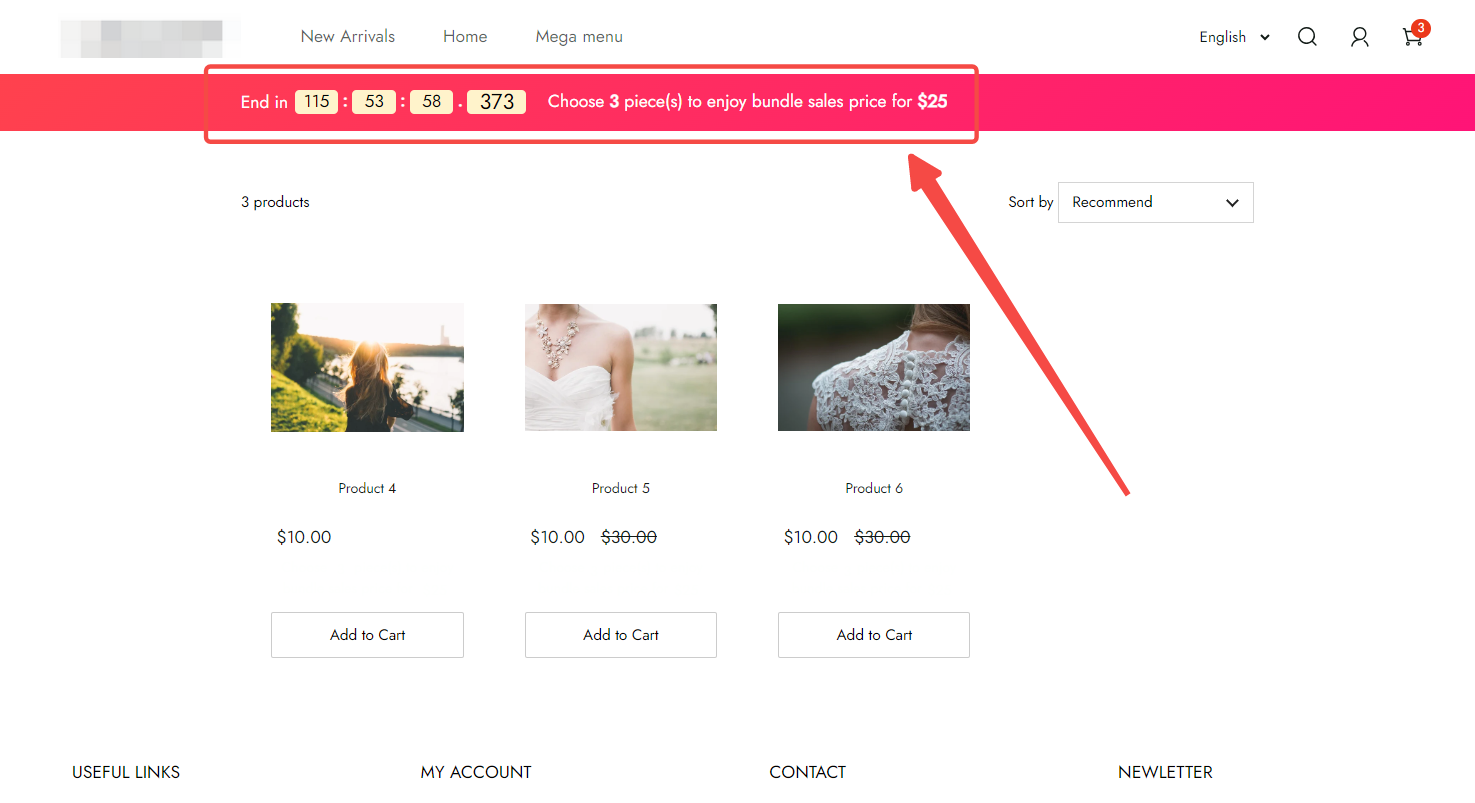
After Setup: Bundle pricing Display
Using the Bundle pricing feature simplifies the decision-making process, making it easier for both you and your customers. Below is an example of how it should look:
With these steps, you are well-equipped to set up and manage your bundle pricing campaigns effectively using the Bundle sales app. By customizing each element to fit your business needs and optimizing the customer experience through strategic pop-up placements and tailored content, you can enhance engagement and drive better sales results. Always remember to review and adjust your campaigns based on performance data and customer feedback to continue improving and achieving your sales objectives.


Comments
Please sign in to leave a comment.