
The Geek theme series includes Geek, Christmas, Impress, Petonly and Venue. These Shoplazza themes support a built-in mega menu that replaces the standard dropdown with a collection-based layout in your store’s header. Customers can view product images, prices and sale tags when they hover over the trigger menu item, making it easier to browse featured collections without leaving the page.
Requirements
Make sure you meet these conditions before setting up the mega menu:
- Menu structure: The trigger menu must include second- or third-tier items.
- Menu level: The trigger must be a first- or second-tier item.
- Collections: You need to create collections in your Shoplazza admin first.
- Theme support: This feature is available in the Geek, Christmas, Impress, Petonly, and Venue themes.
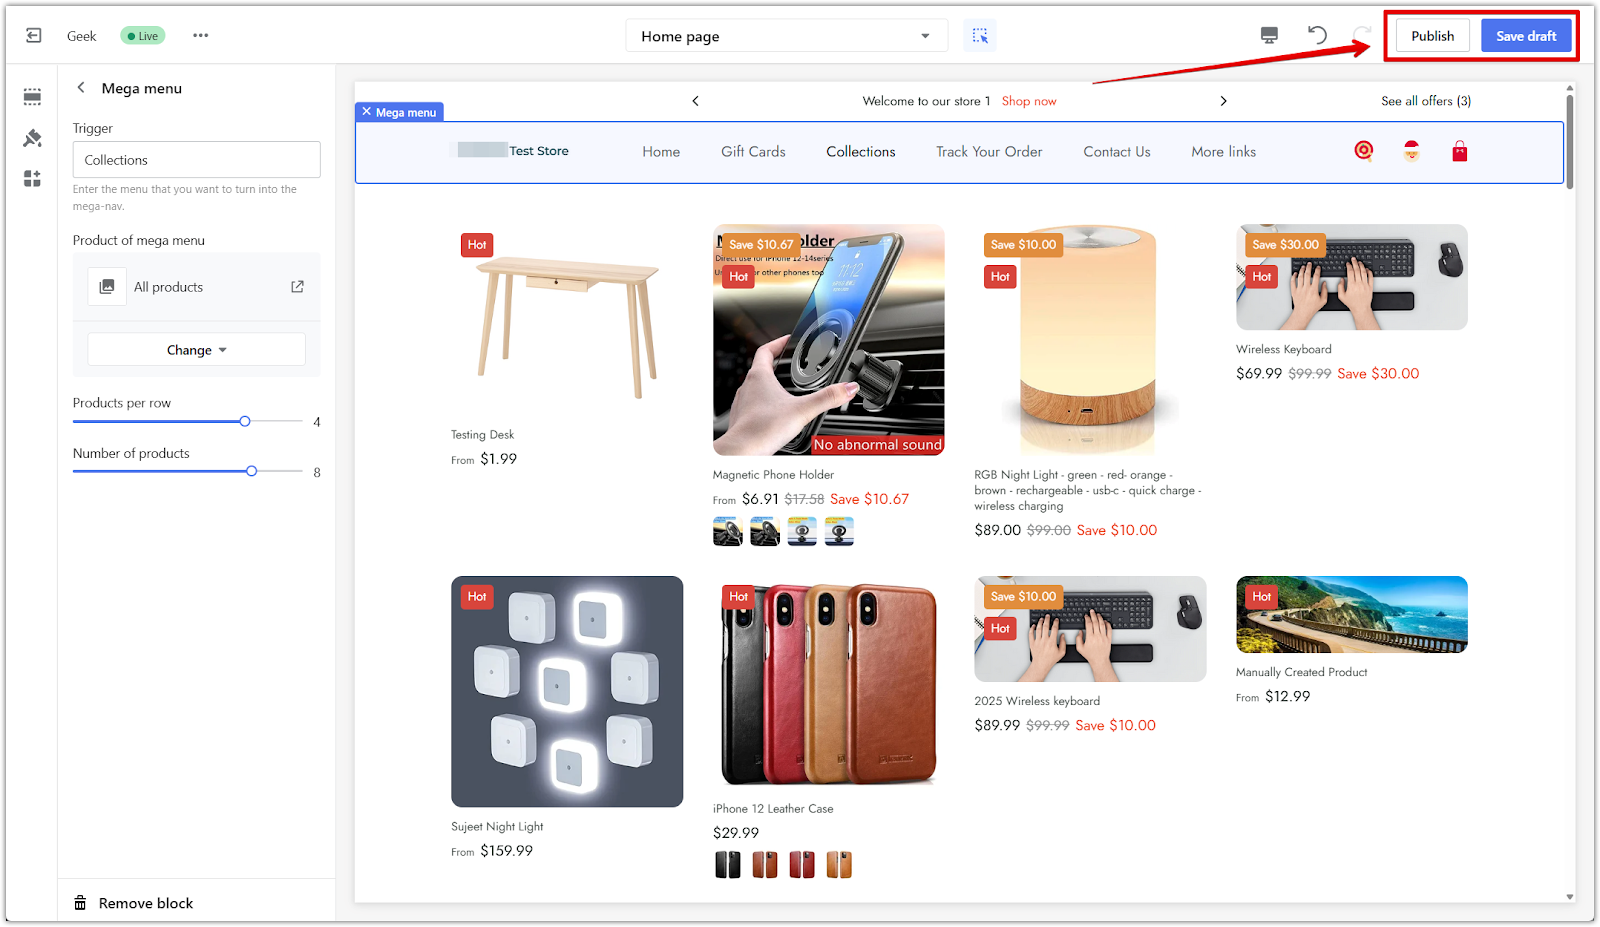
Configuring the mega menu
Once your collections and menus are ready, follow these steps:
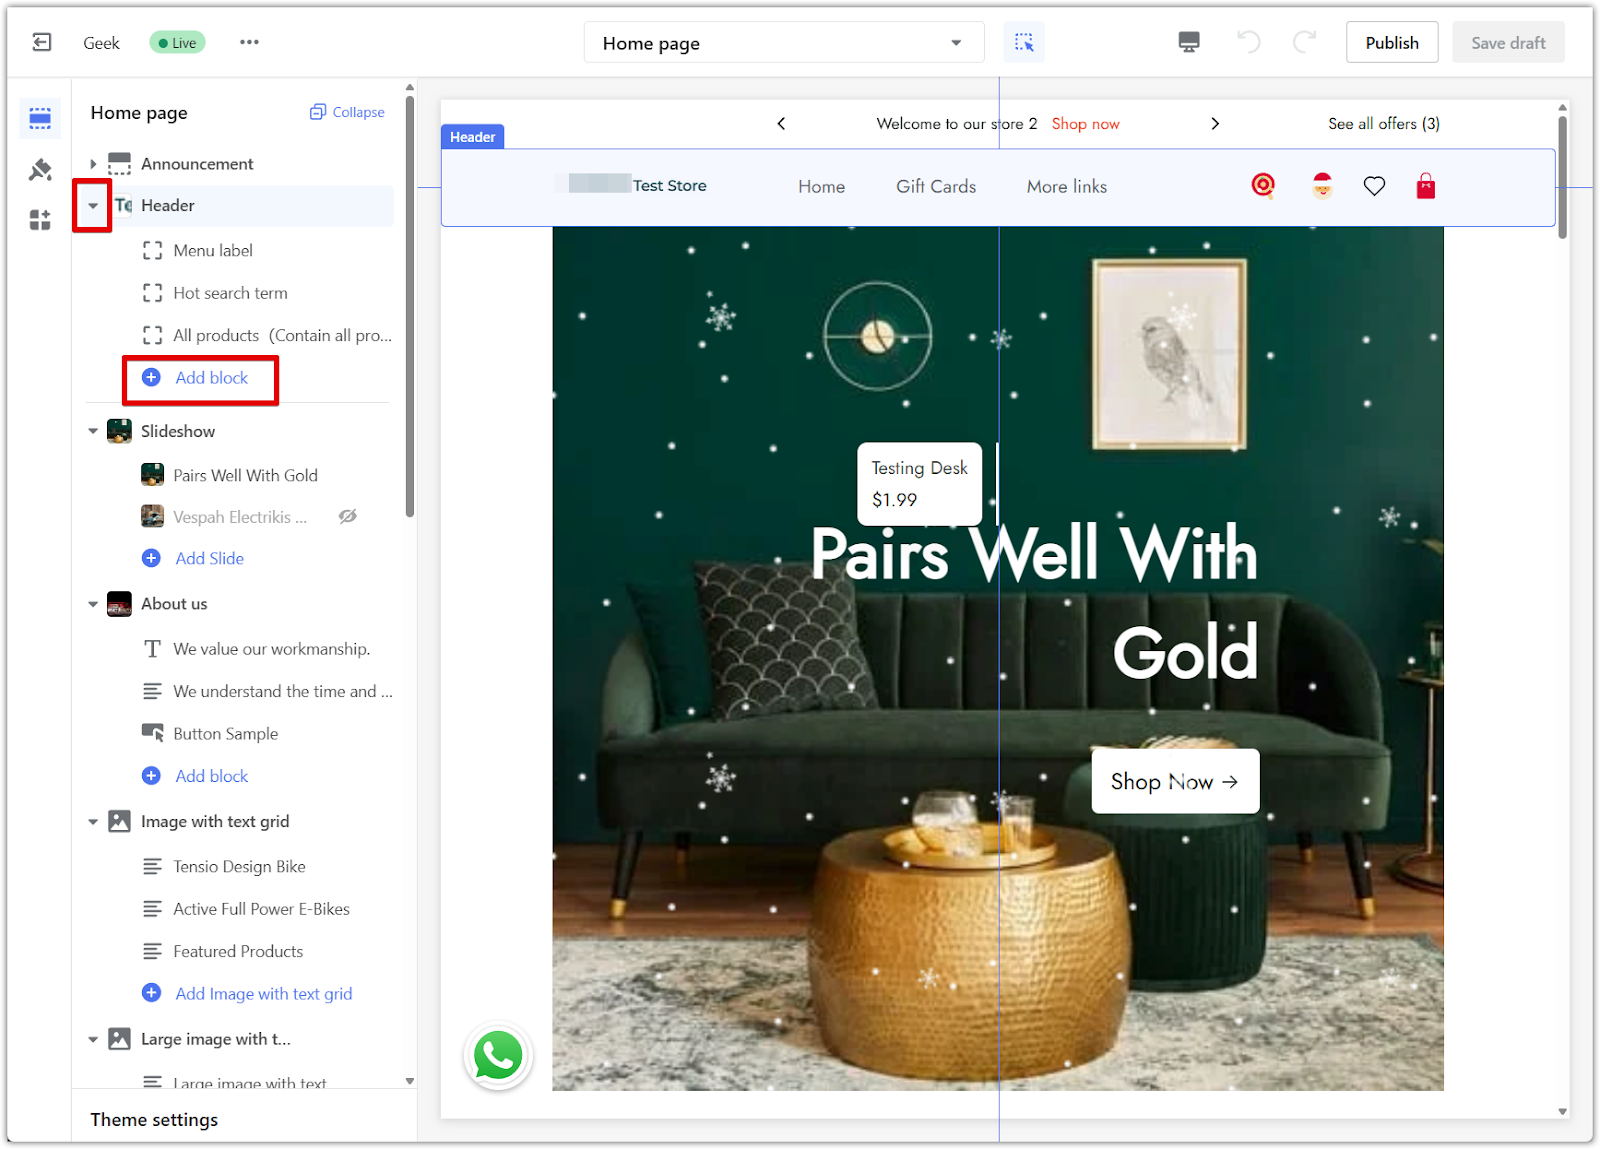
1. Go to your Shoplazza admin: Click Online store > Themes and select Customize next to the theme you want to edit.

2. Add the mega menu block: In the theme editor sidebar, open the Header section, click the dropdown arrow, select Add block, then choose Mega menu.
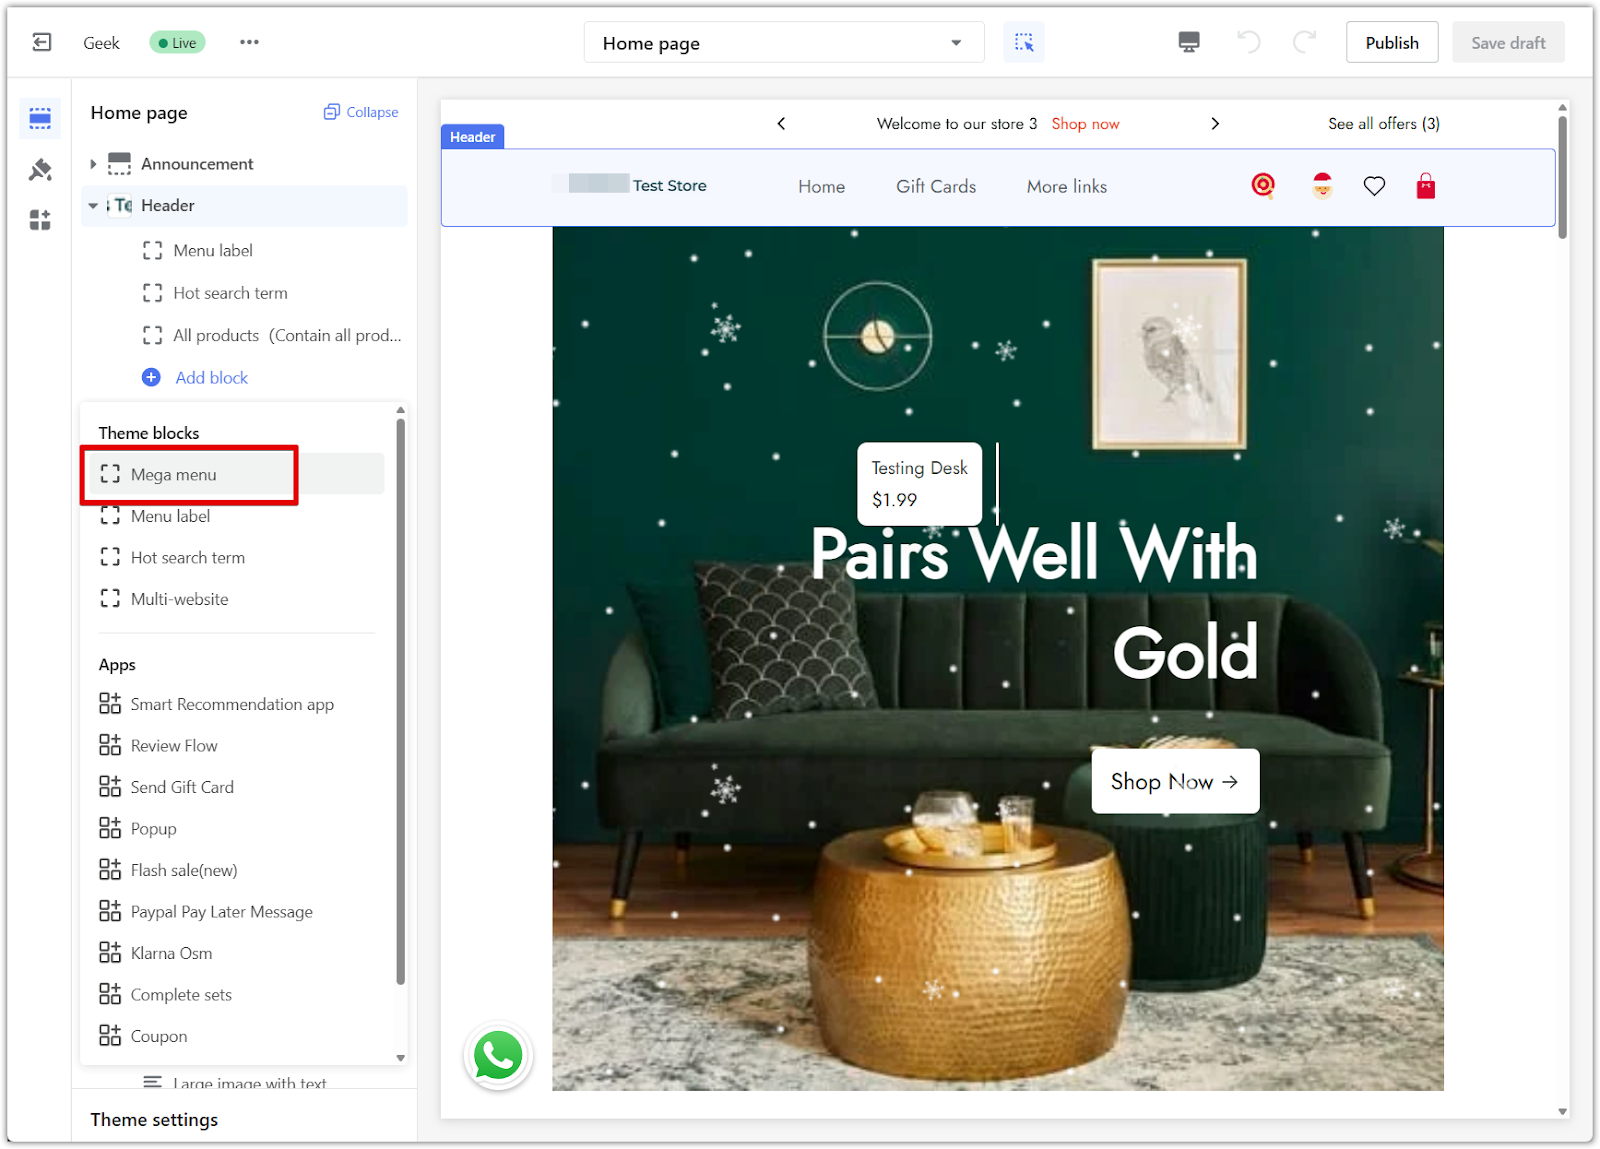
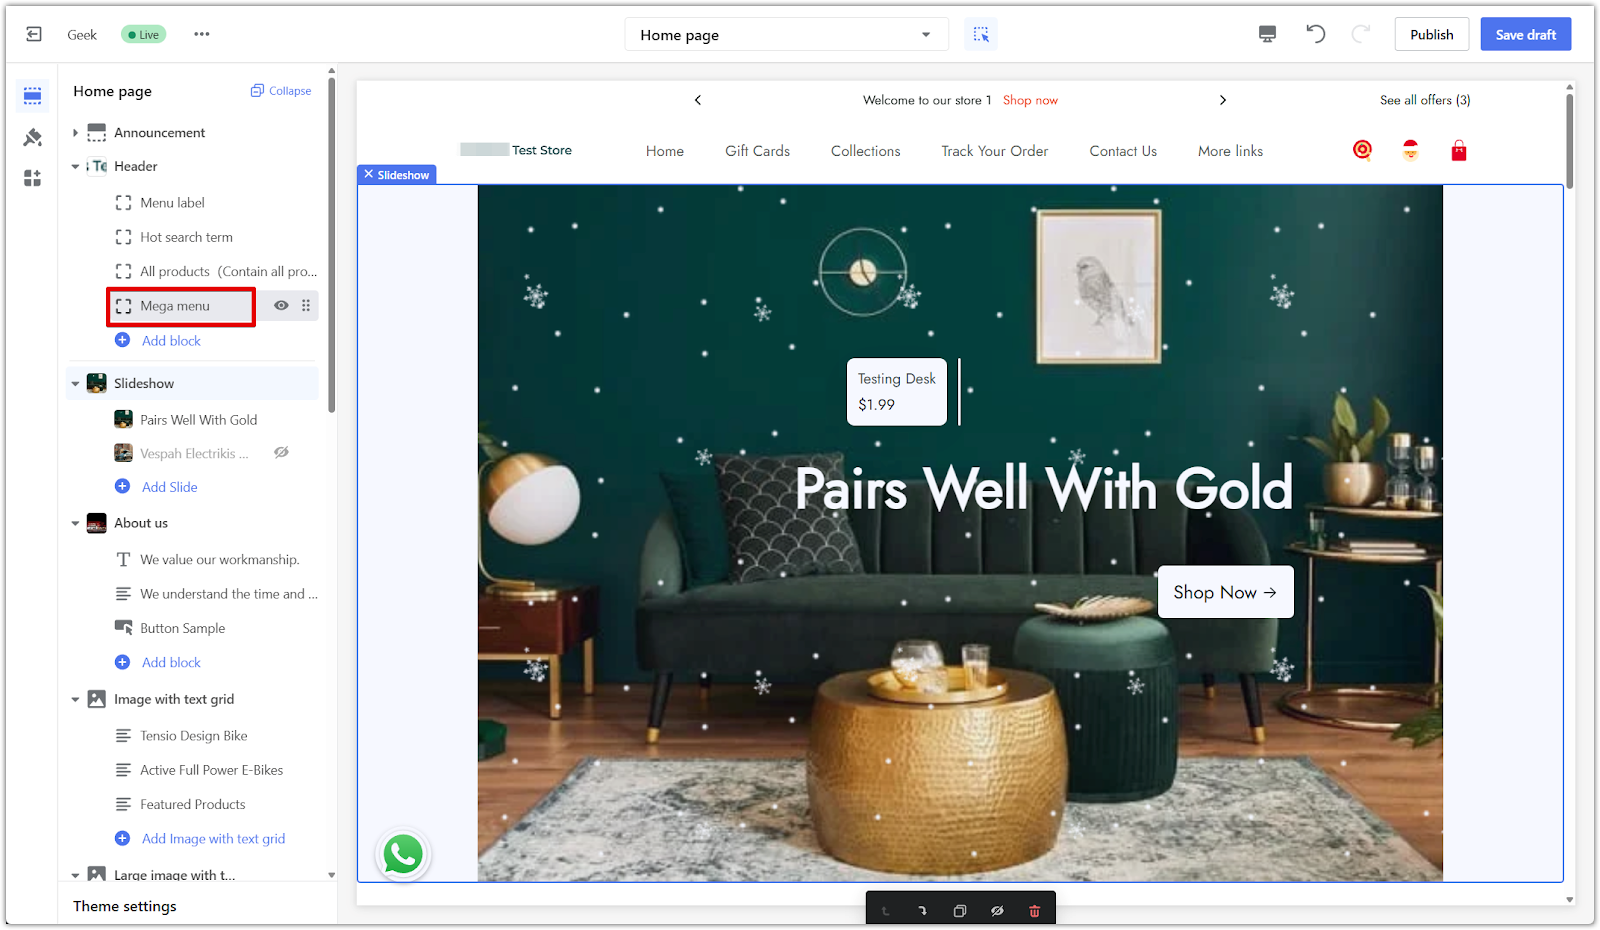
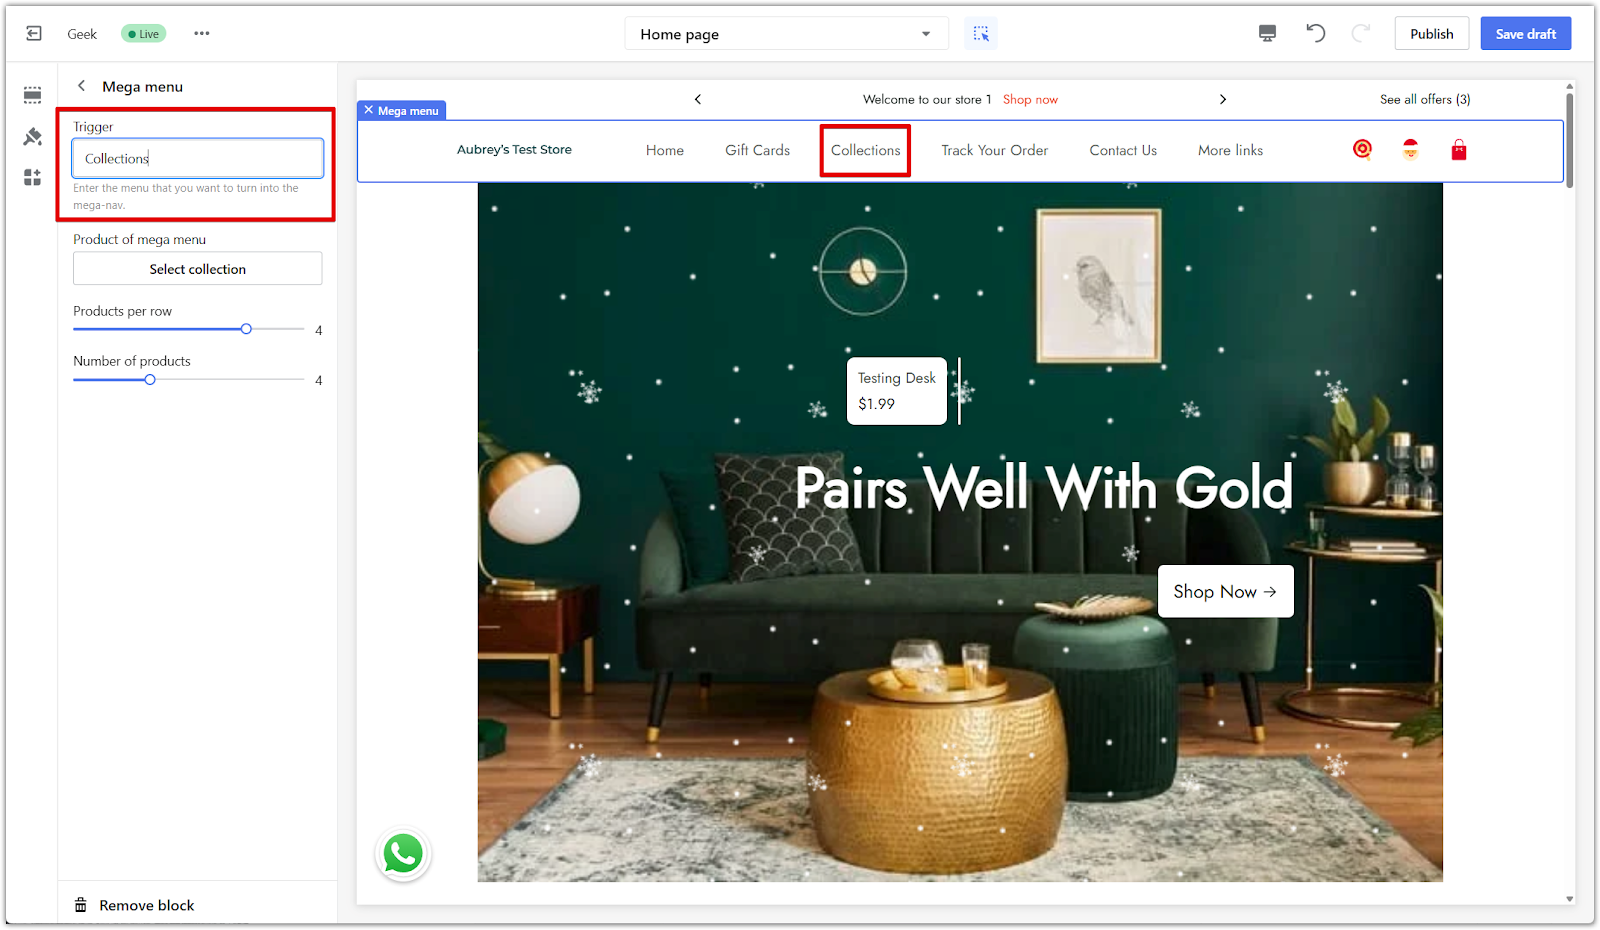
3. Access the settings: Click on the Mega menu section title to open the block settings.
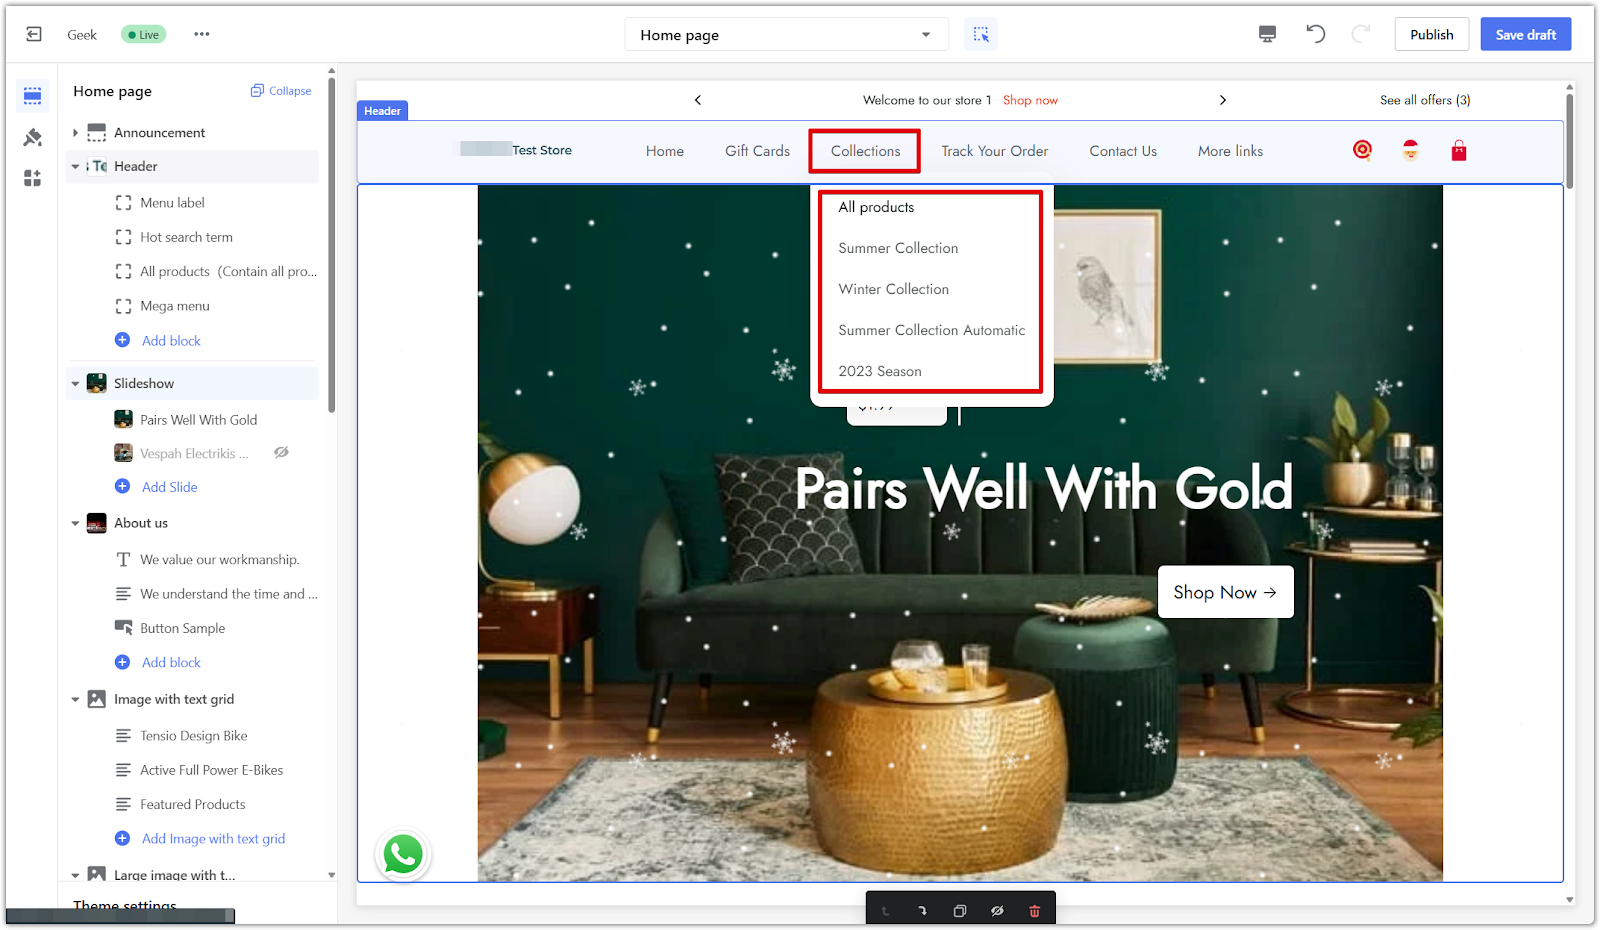
4. Check your menu structure: Make sure the trigger menu item has submenus listed beneath it in your navigation. In your storefront, these will appear as standard dropdown options. For example, in the image below, Collections is the trigger, and menu items like Summer Collection and Winter Collection are second-tier submenus. The mega menu will only appear if the trigger item has at least one nested submenu. For more details, see Building an effective navigation menu.
5. Set the trigger name: In the mega menu block settings, find the trigger field and enter the exact name of the menu item you want to use. This must match the label used in your navigation menu.
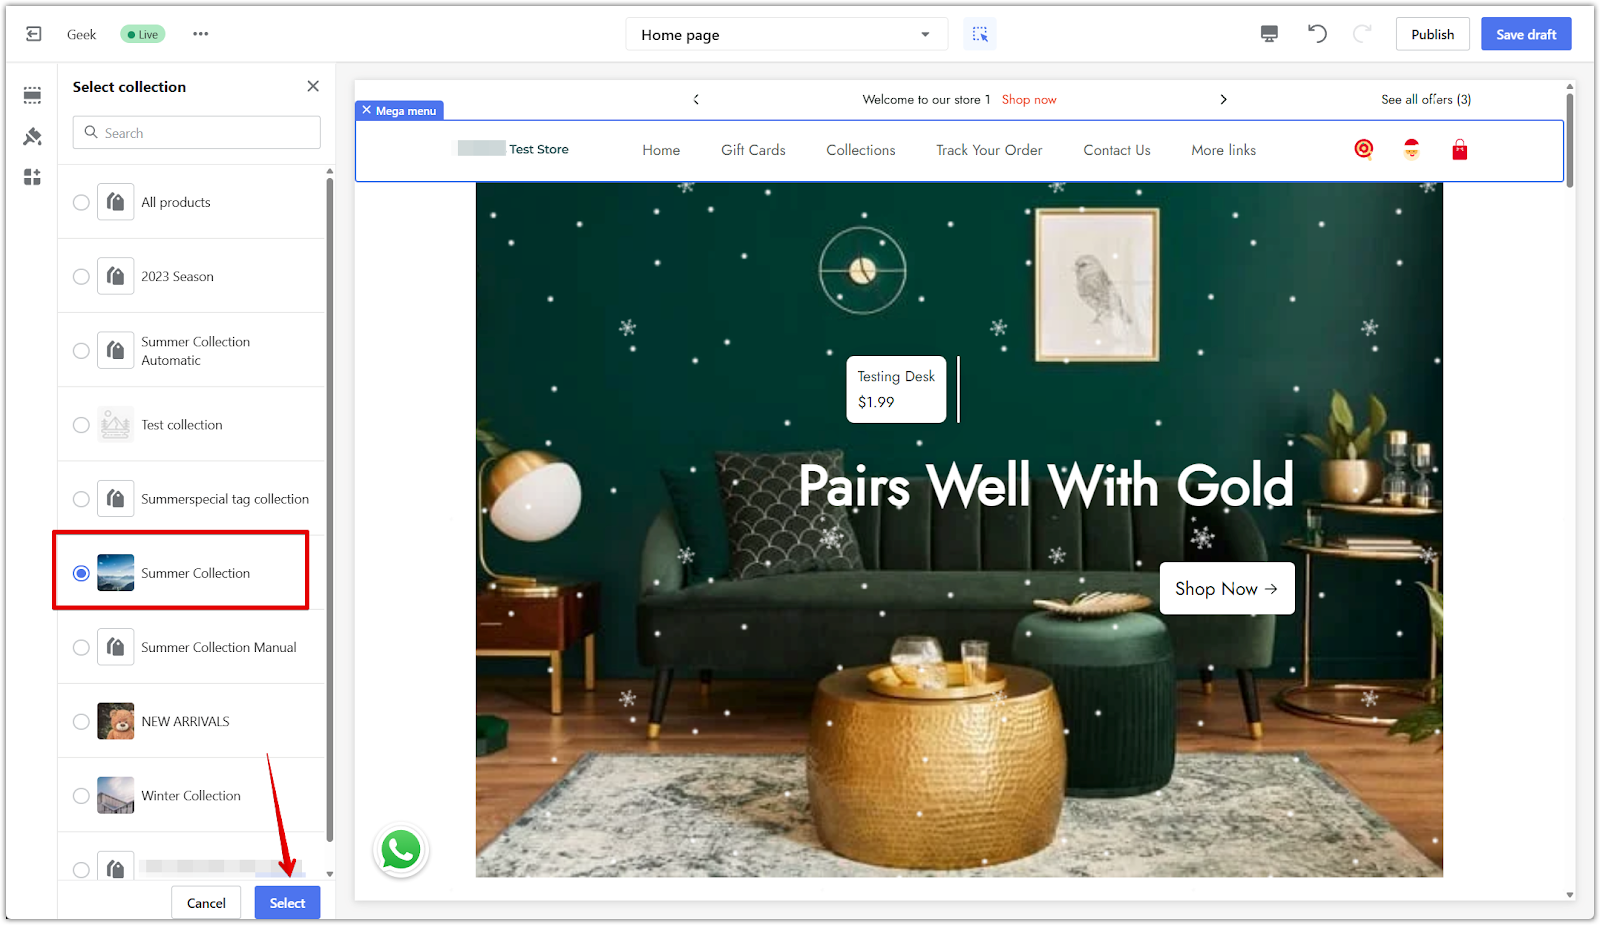
6. Select a collection: Click Select collection and choose the collection you want to display in the mega menu.

7. Review submenu behavior: When you activate the mega menu:
- Submenus under the mega menu are automatically hidden.
- If the trigger is a second-tier item, other second-tier items under the same first-tier menu are hidden.
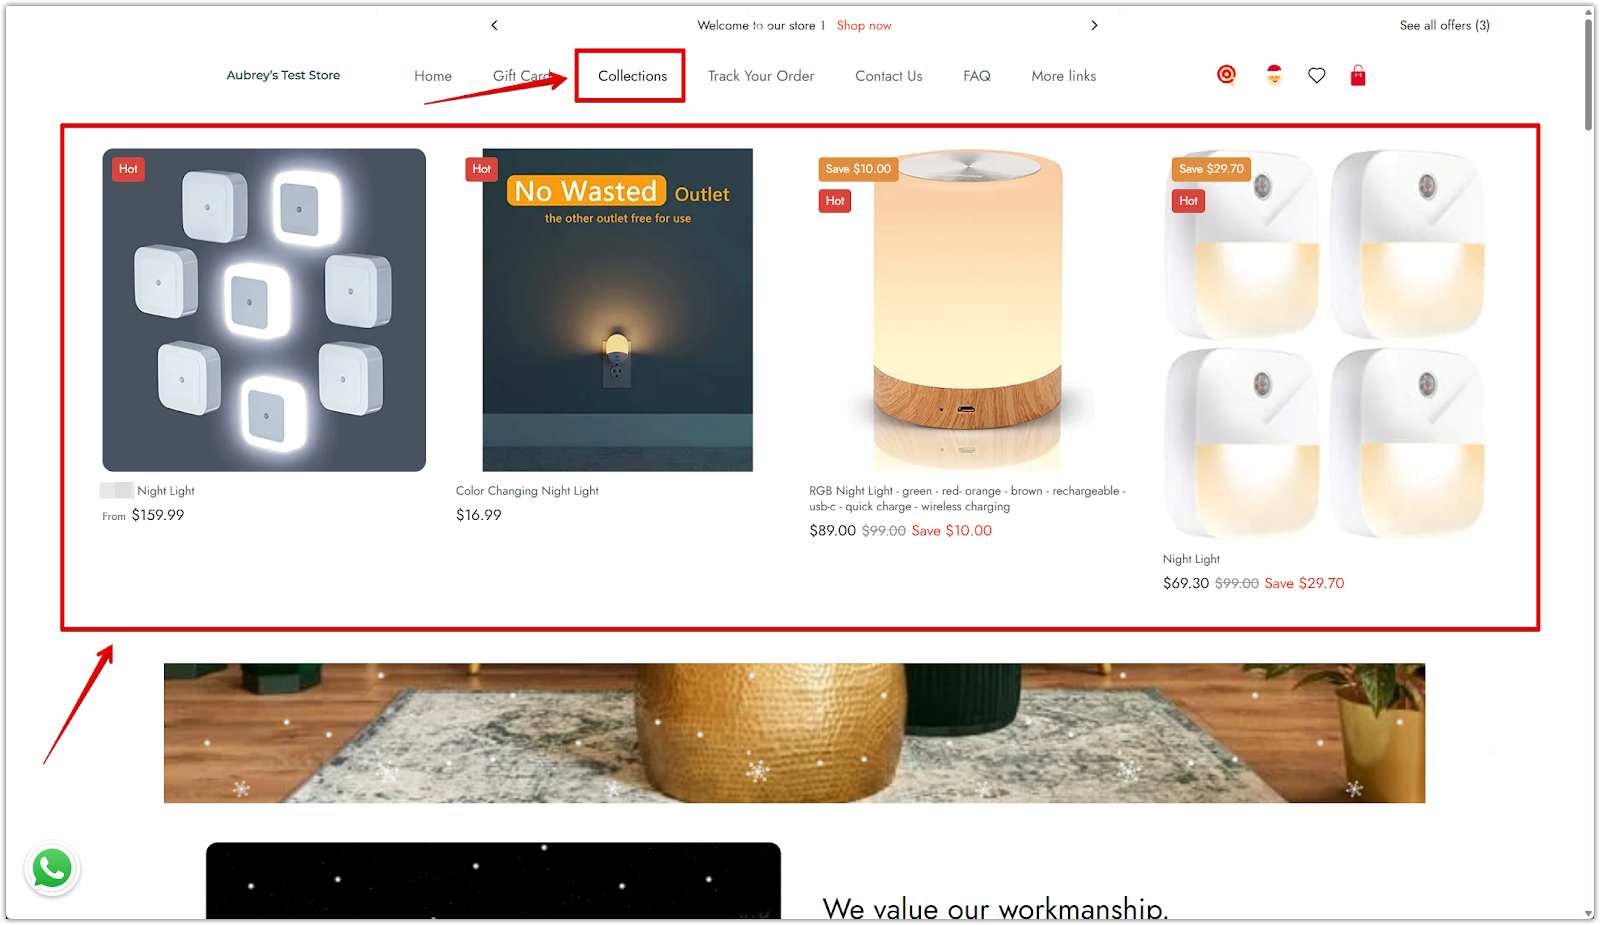
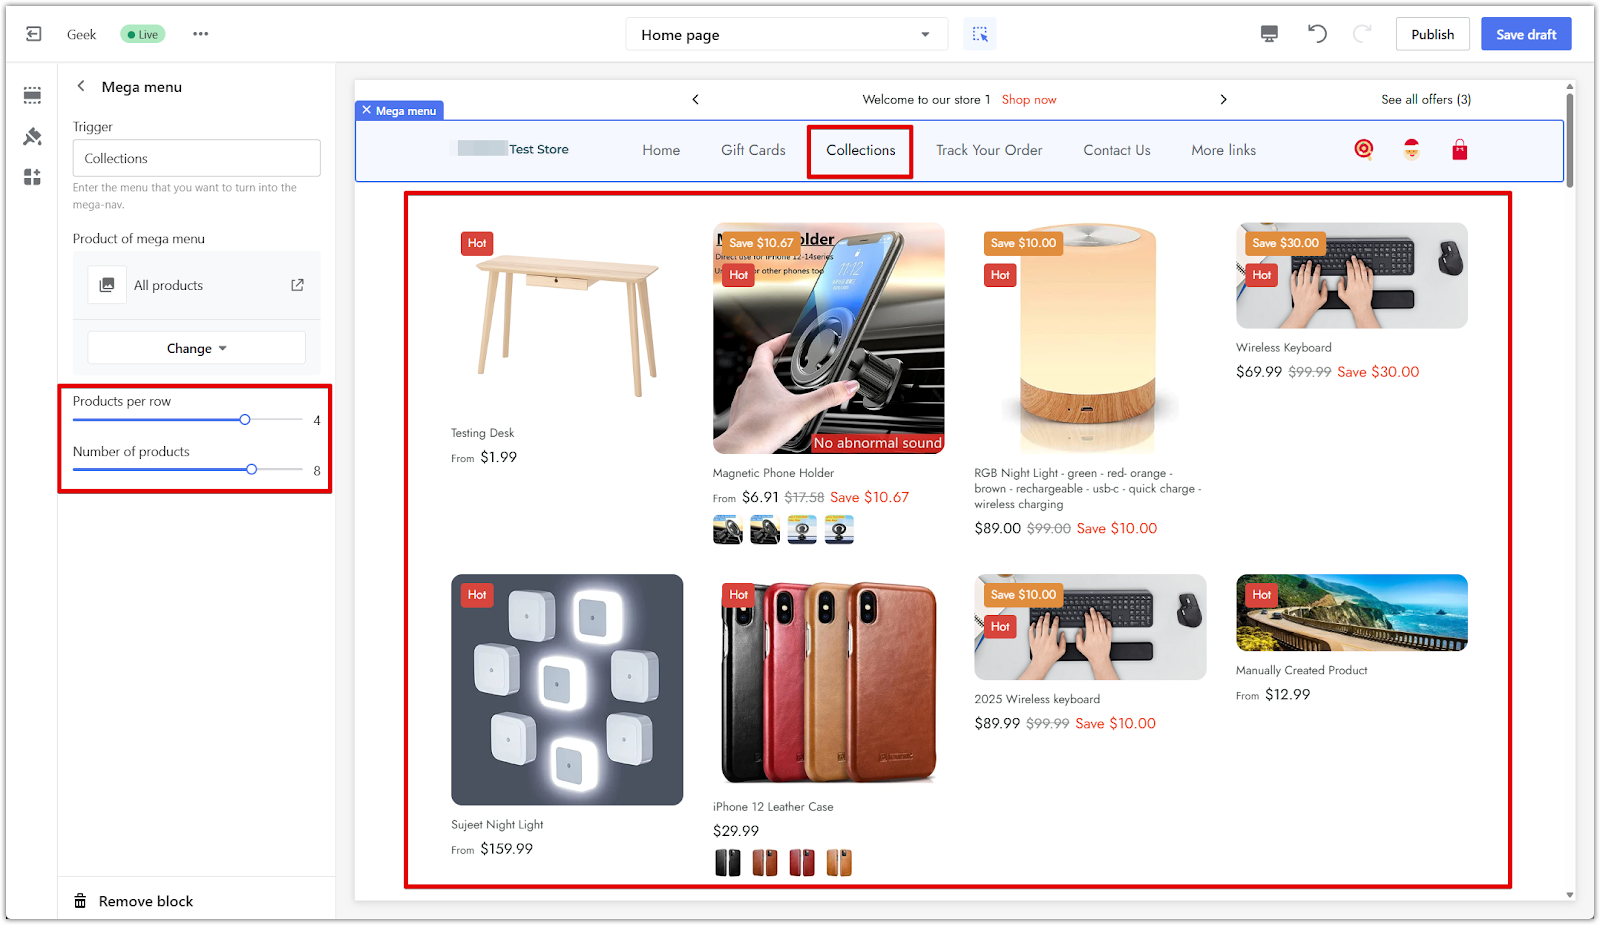
8. Preview and adjust: After connecting a collection, preview how it looks in your store’s header. You can also set how many products appear in the menu.
9. Save your changes: When you're done, click Save draft or Publish to make it live.
The mega menu makes it easier for customers to browse featured collections and shop directly from your main navigation. Showing products in a visual layout helps guide attention to specific items, promote seasonal collections, and highlight bestsellers. This setup improves store navigation, increases product visibility, and helps drive sales directly from your header menu.


Comments
Please sign in to leave a comment.