
Sub-collections group your Shoplazza collections into a single page, making product discovery faster and easier, and are supported by themes like Geek, Christmas, Impress, Petonly, and Venue. Follow this guide to set up and customize your sub-collections.
Creating a new menu item to link collections
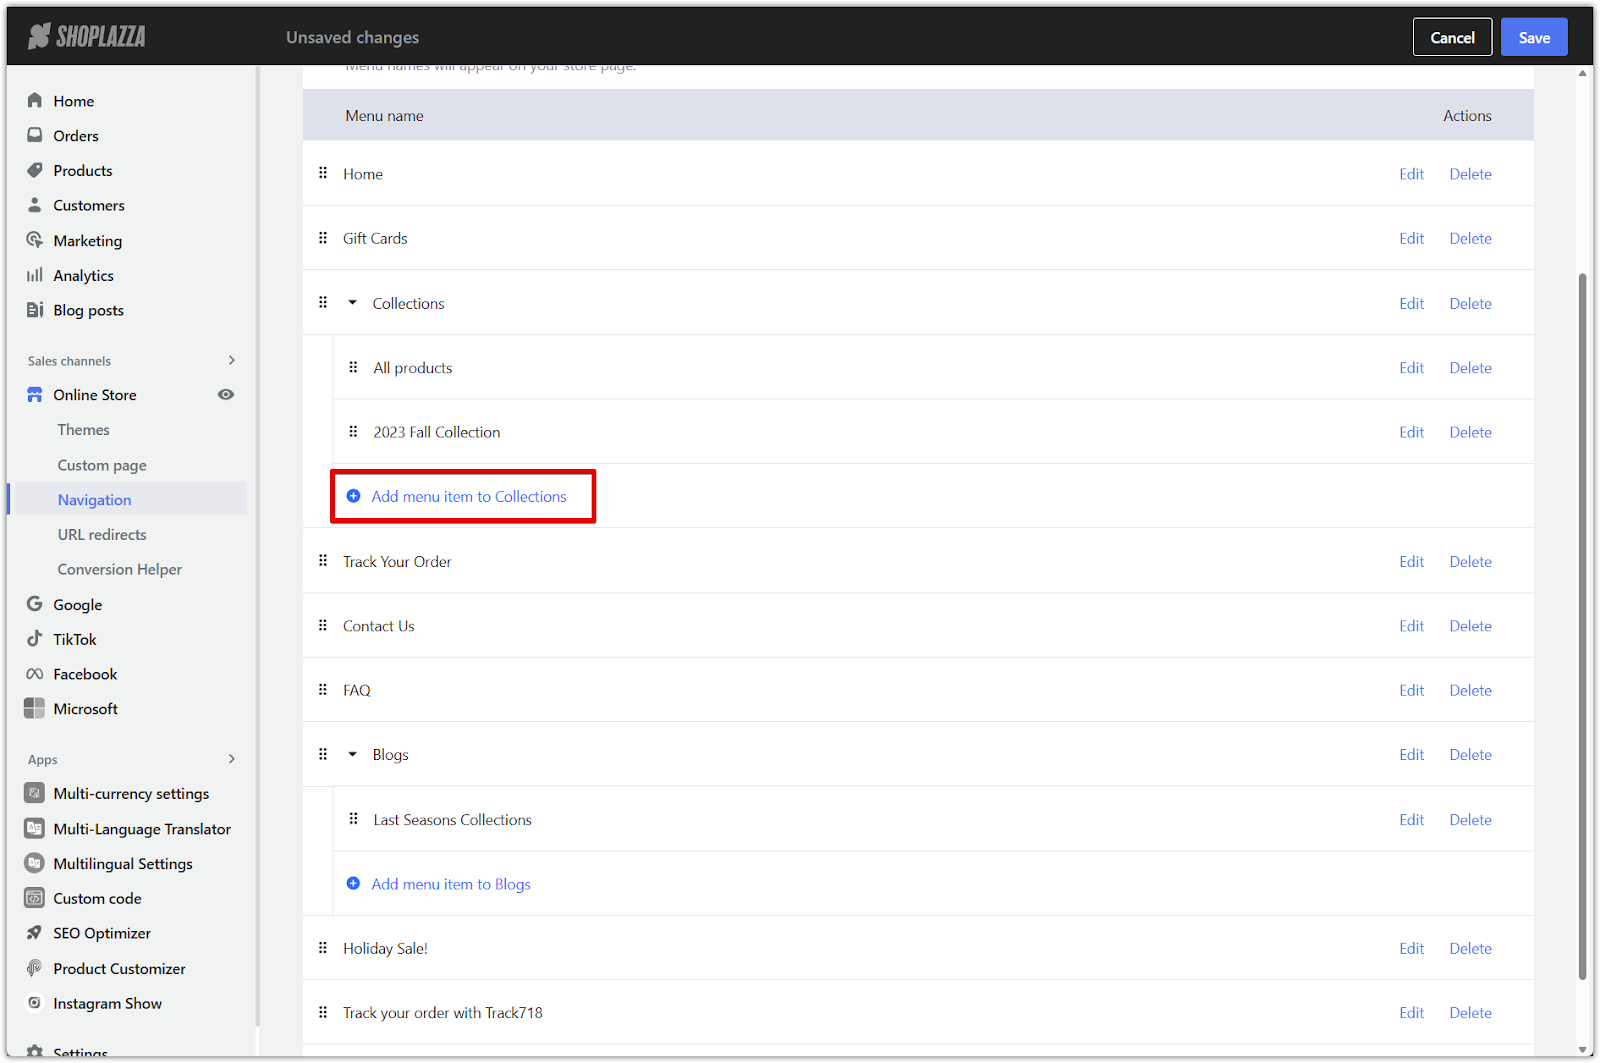
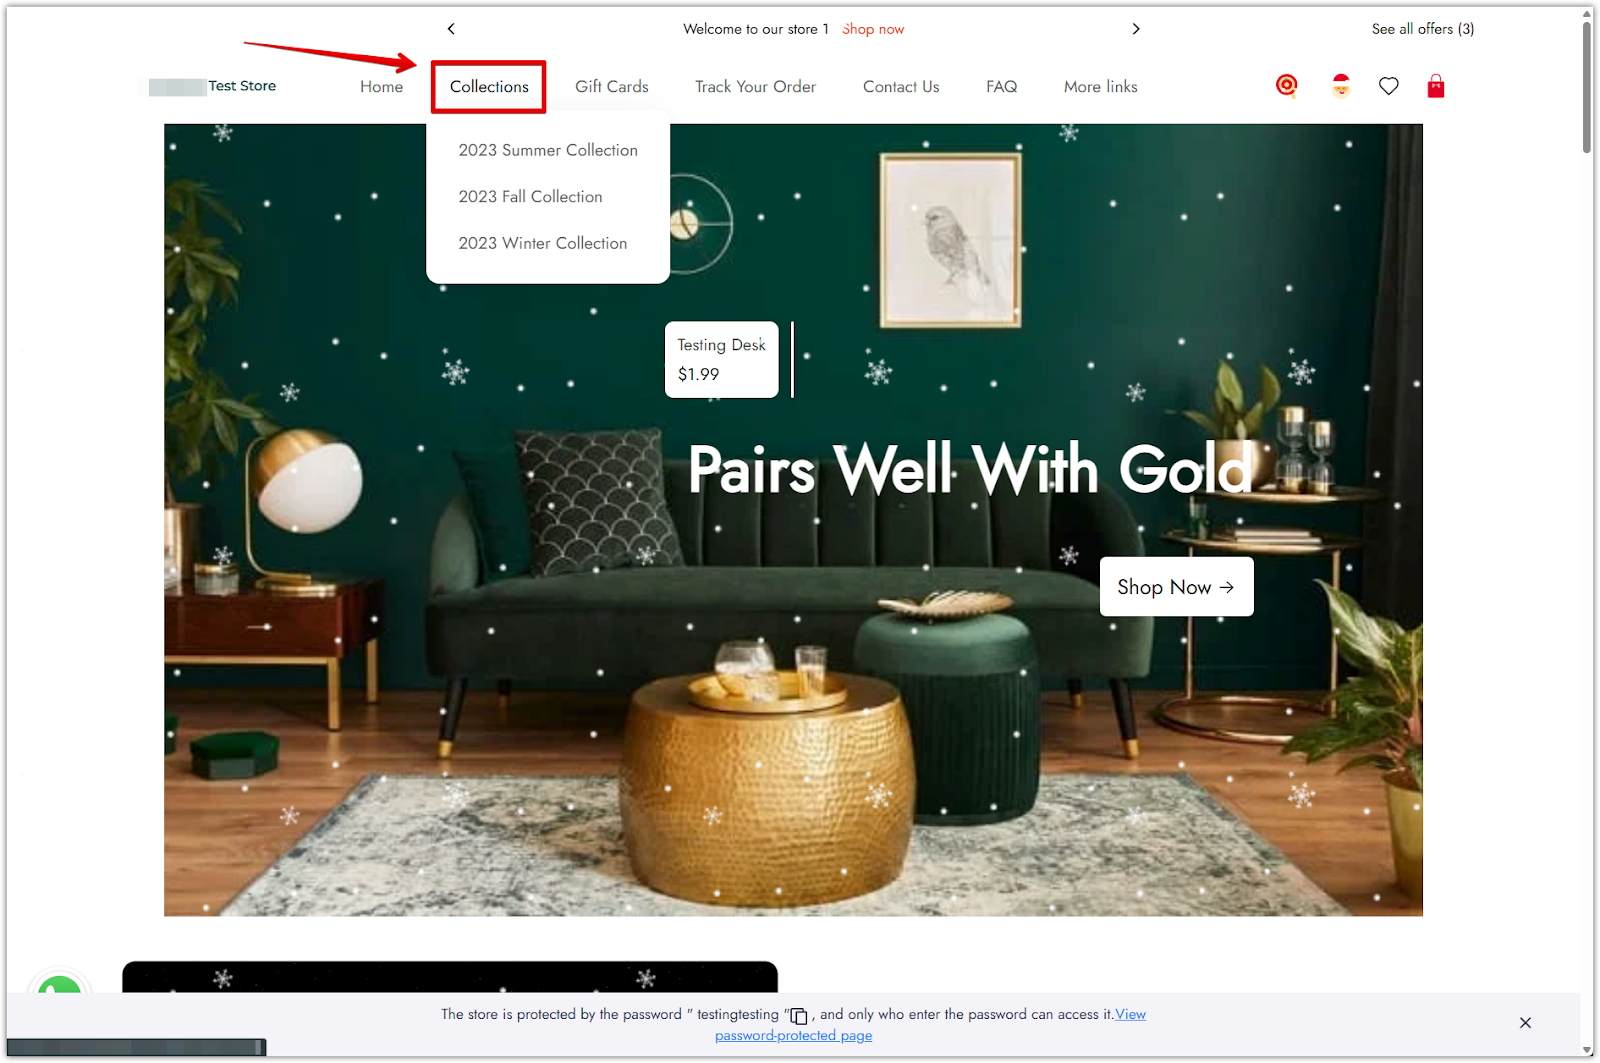
To set up sub-collections, start by creating menu items that link to your collections. These individual items will later be grouped under a main category to form a sub-collection layout on your collection page. Repeat this process for each collection you want to include.
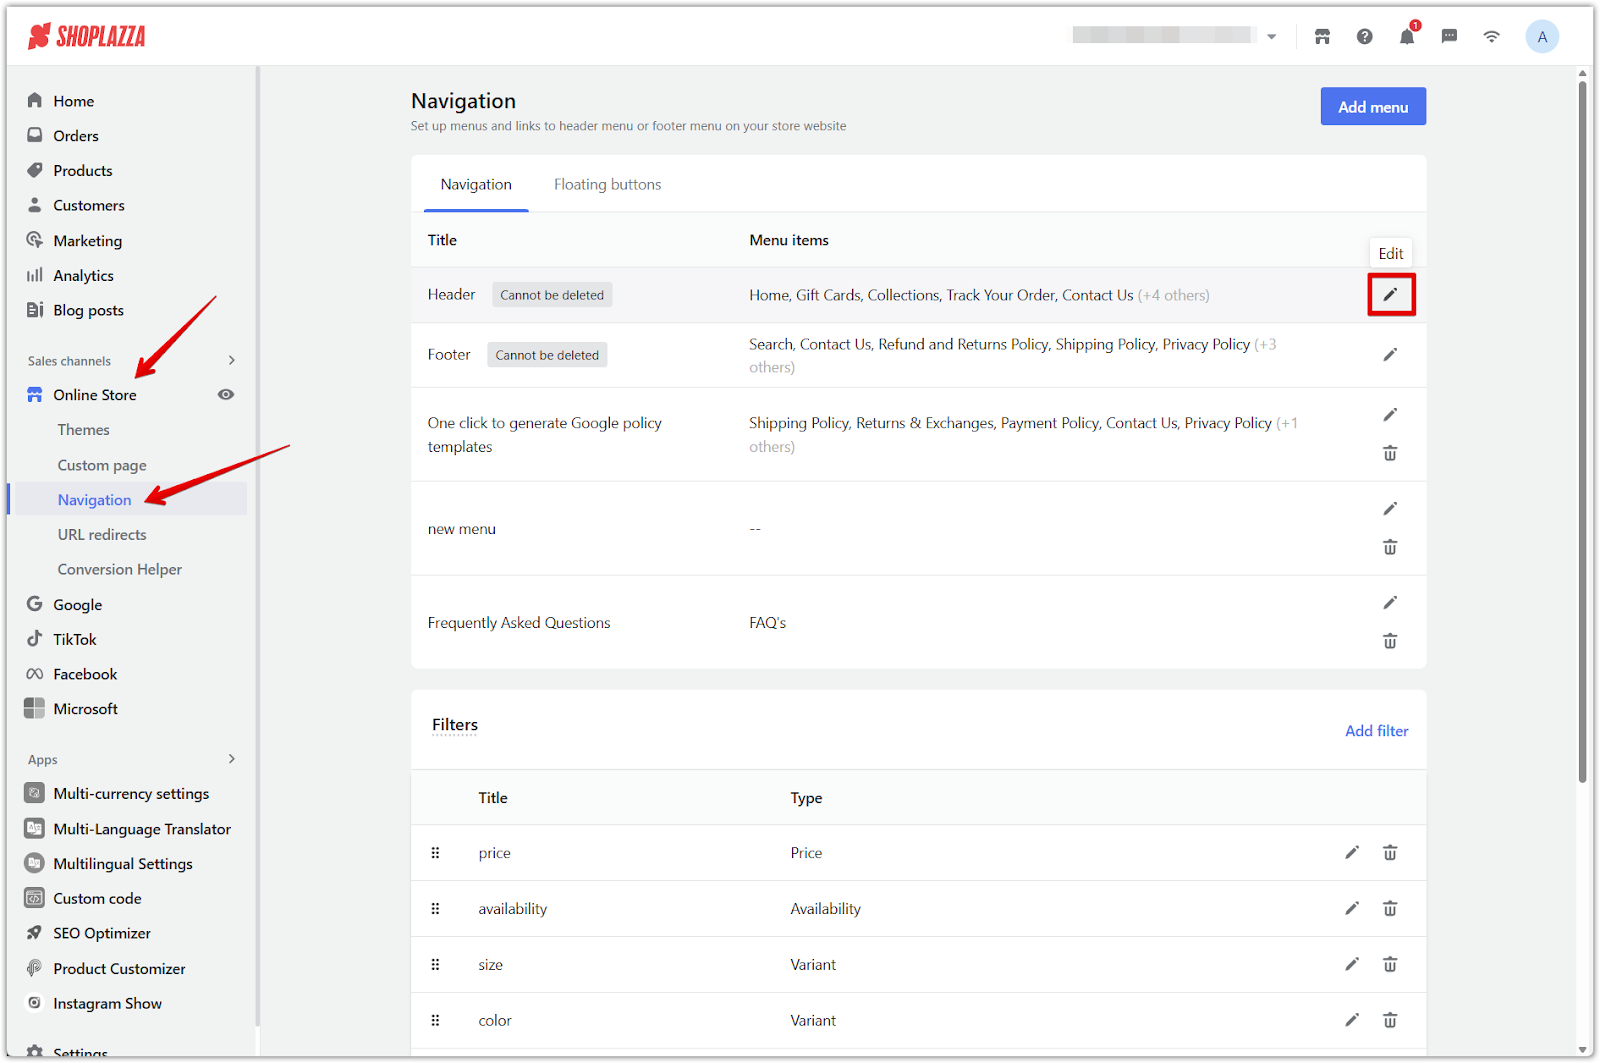
1. Go to your navigation settings: From your Shoplazza admin, go to Online Store > Navigation and click Edit next to the Header menu.
2. Click Add menu item: At the bottom of the menu structure, click Add menu item.
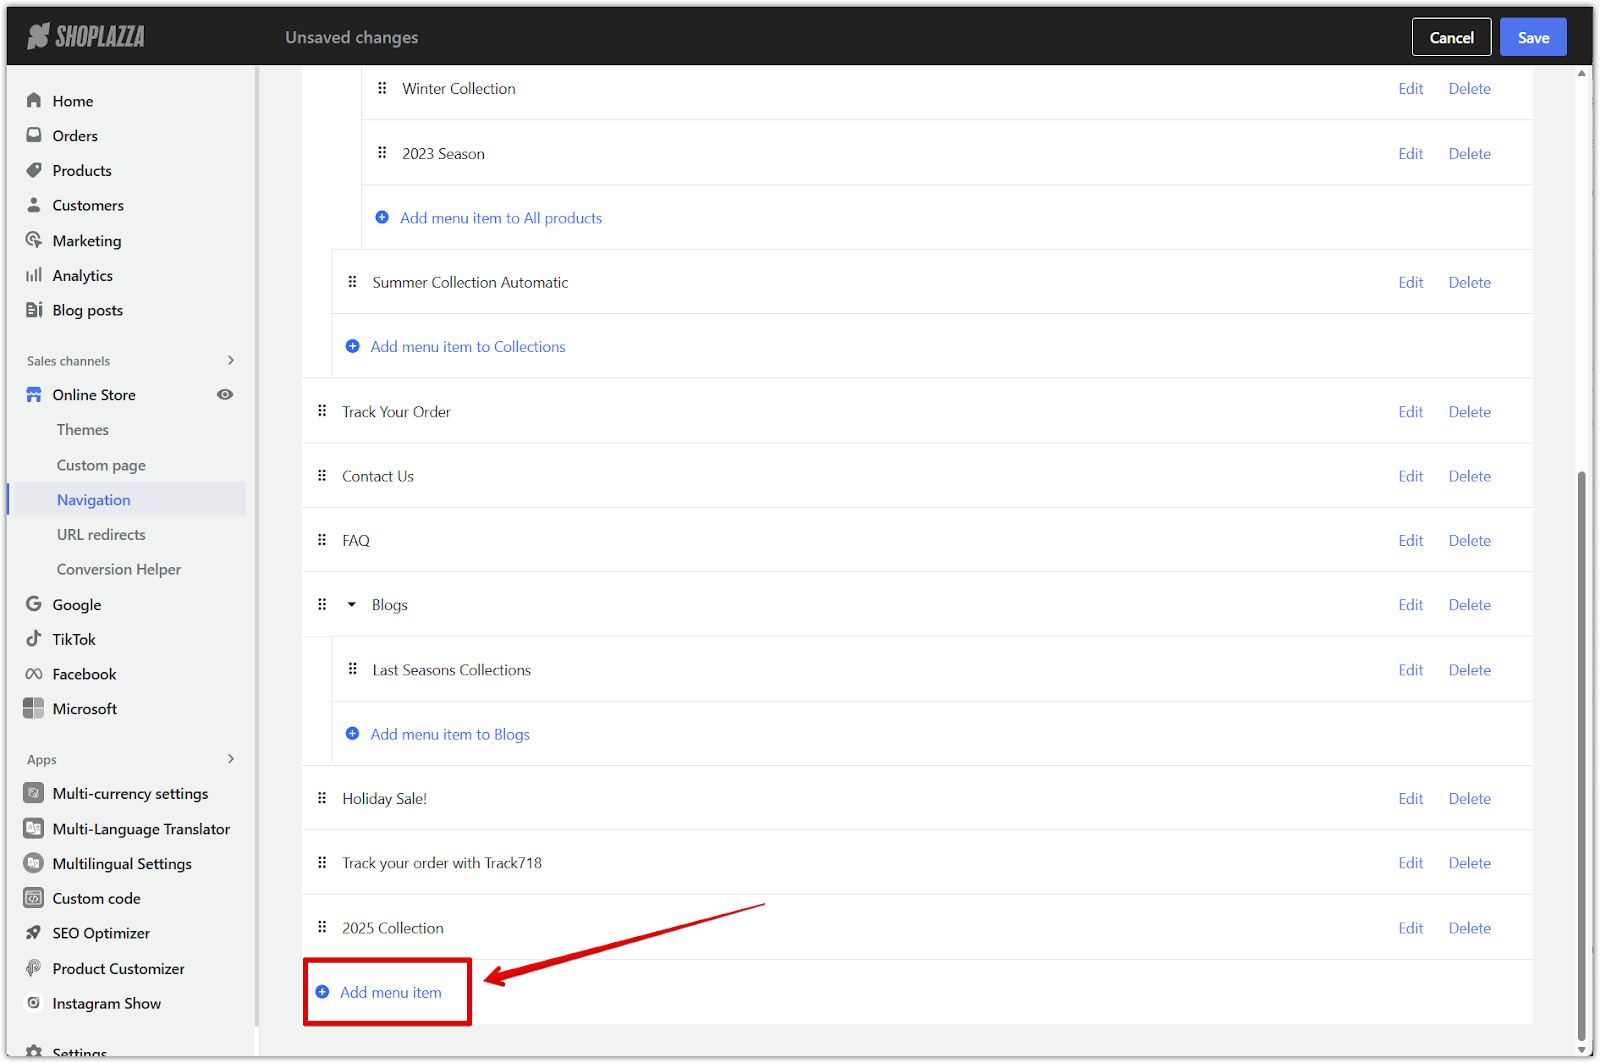
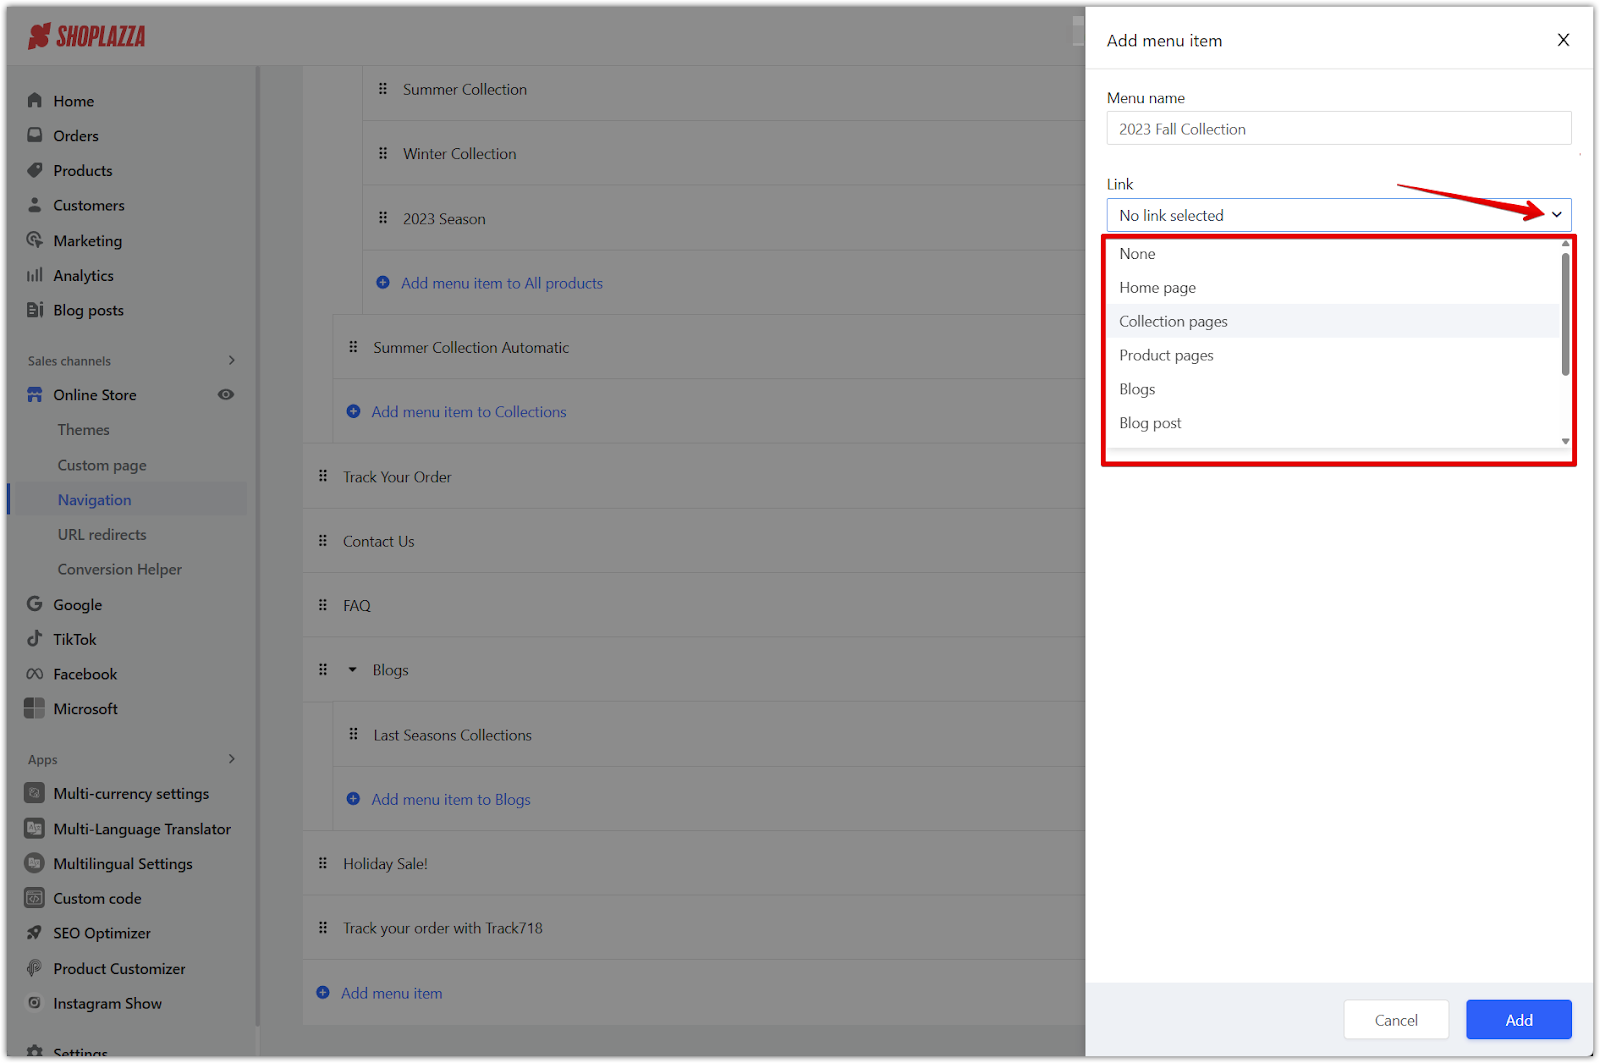
3. Enter the name: In the pop-up, type in a name for the new item. This name will appear in your store’s navigation.

4. Link the item to a collection and confirm: Open the Link dropdown, select Collection pages, and choose the collection you want to link to. Once your collection is selected, click Confirm to apply the link.
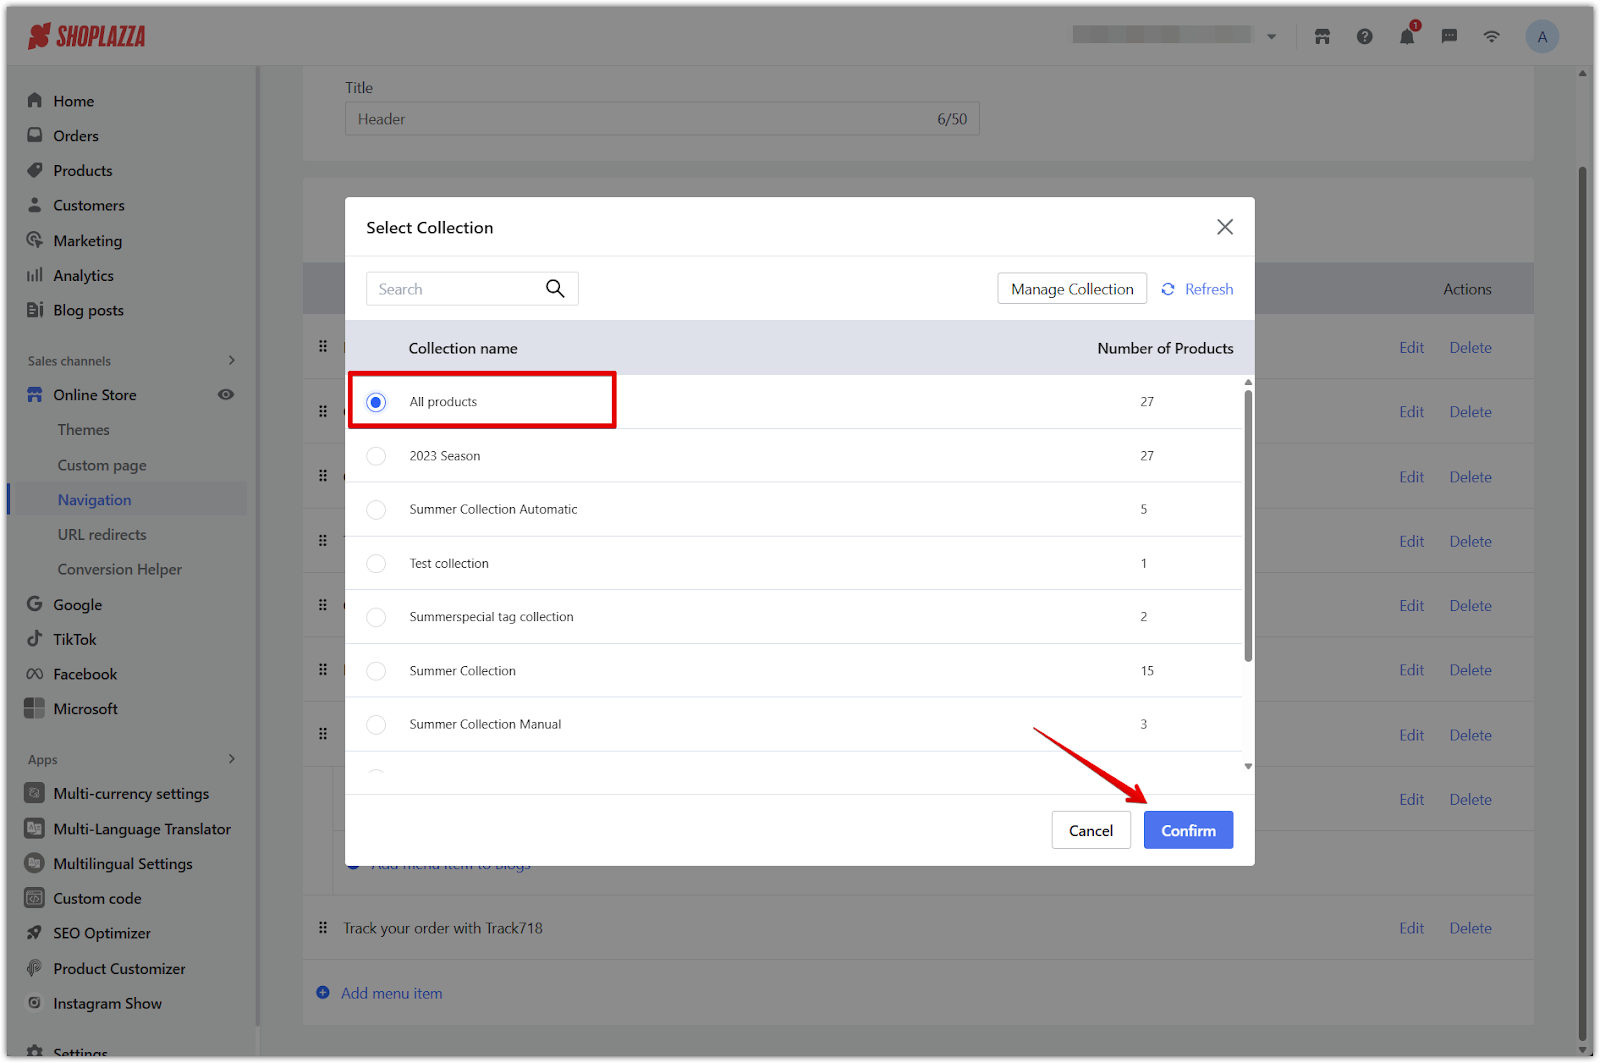
5. Add menu: Click the Add button to finish setup.
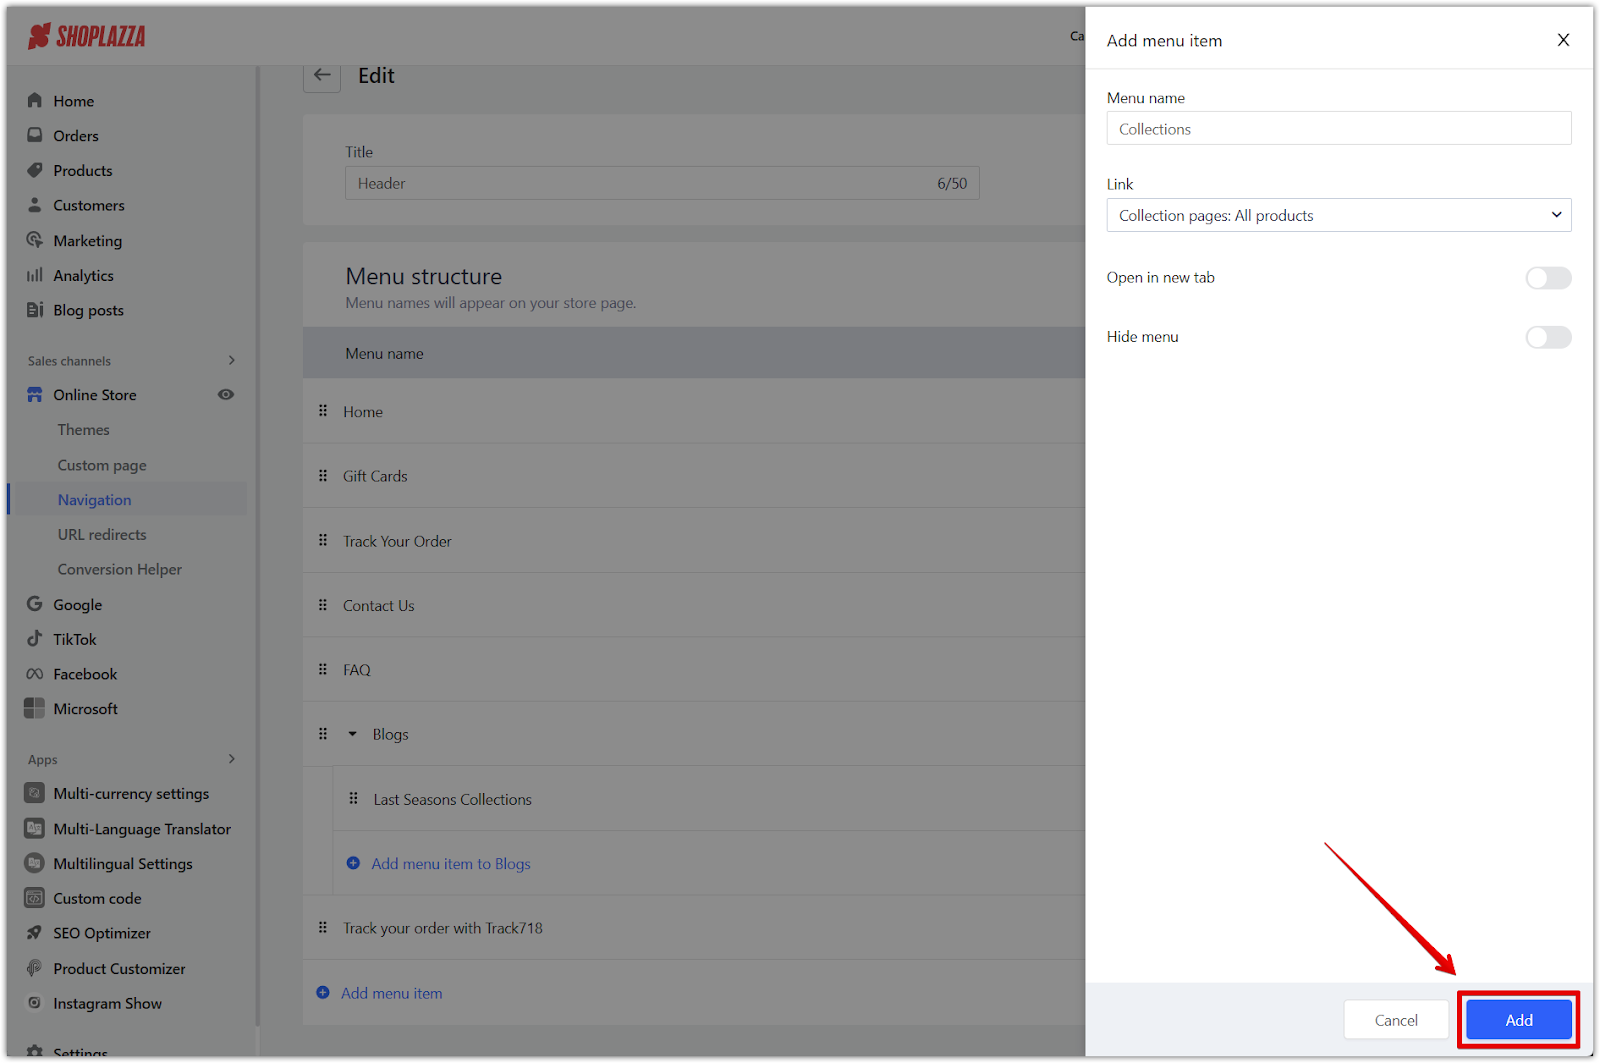
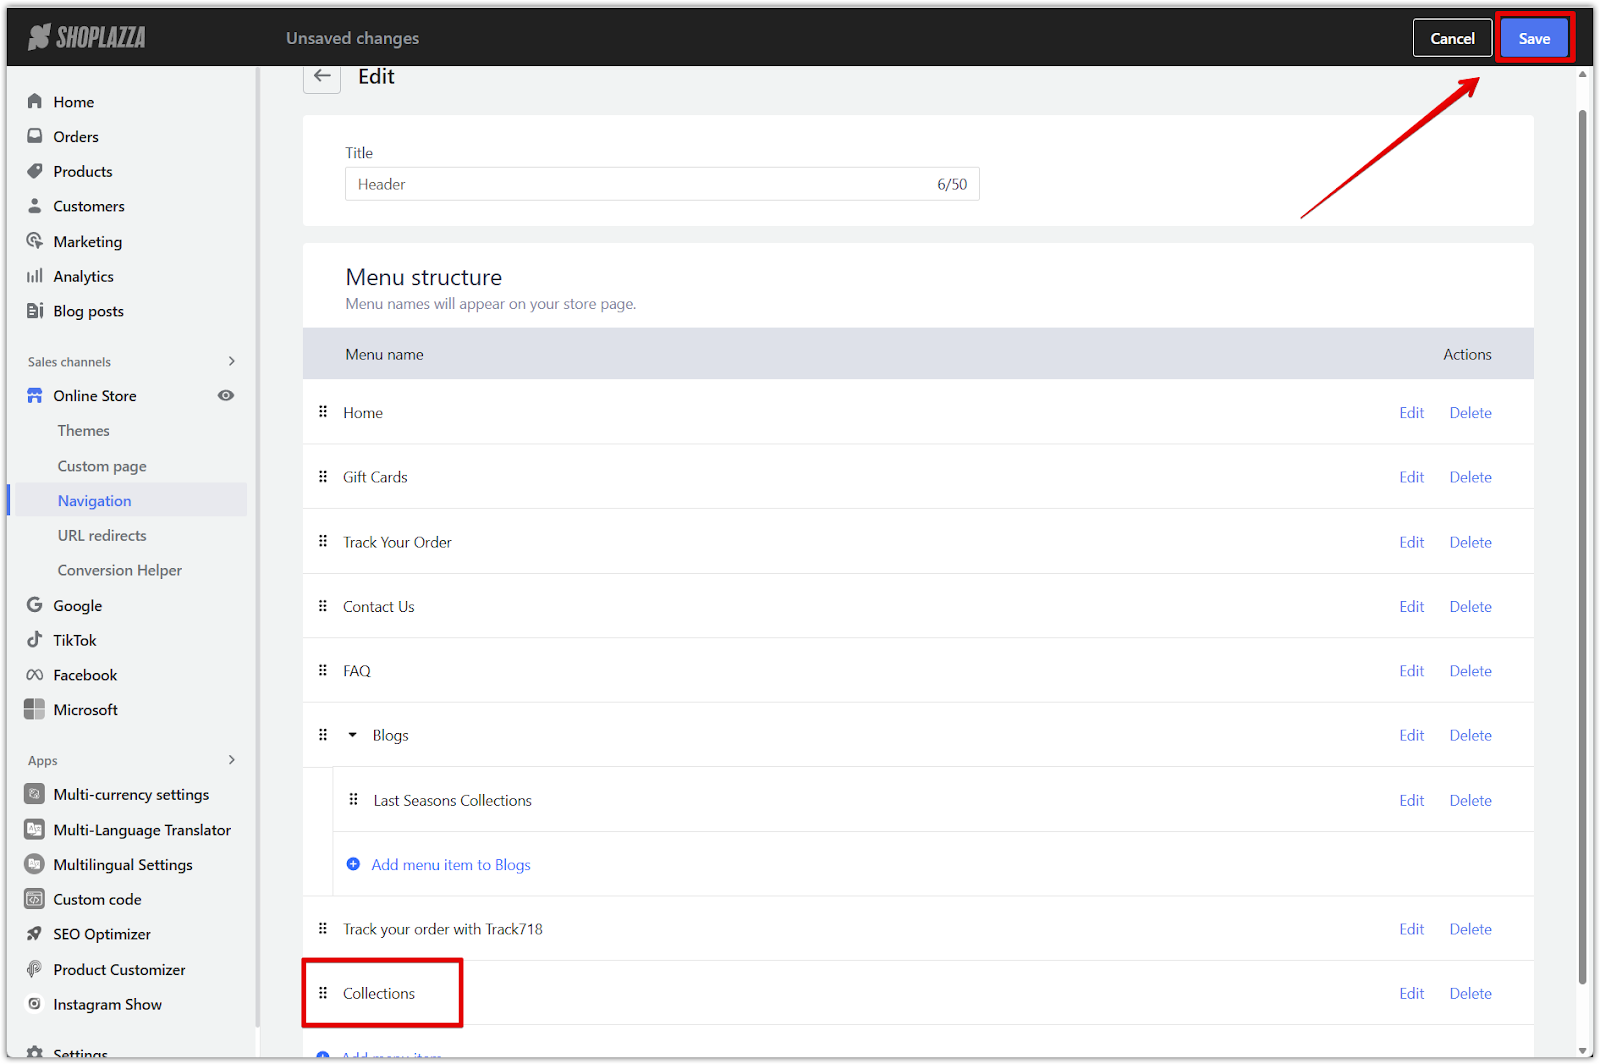
6. Click Save: When you're done, save the updated menu.
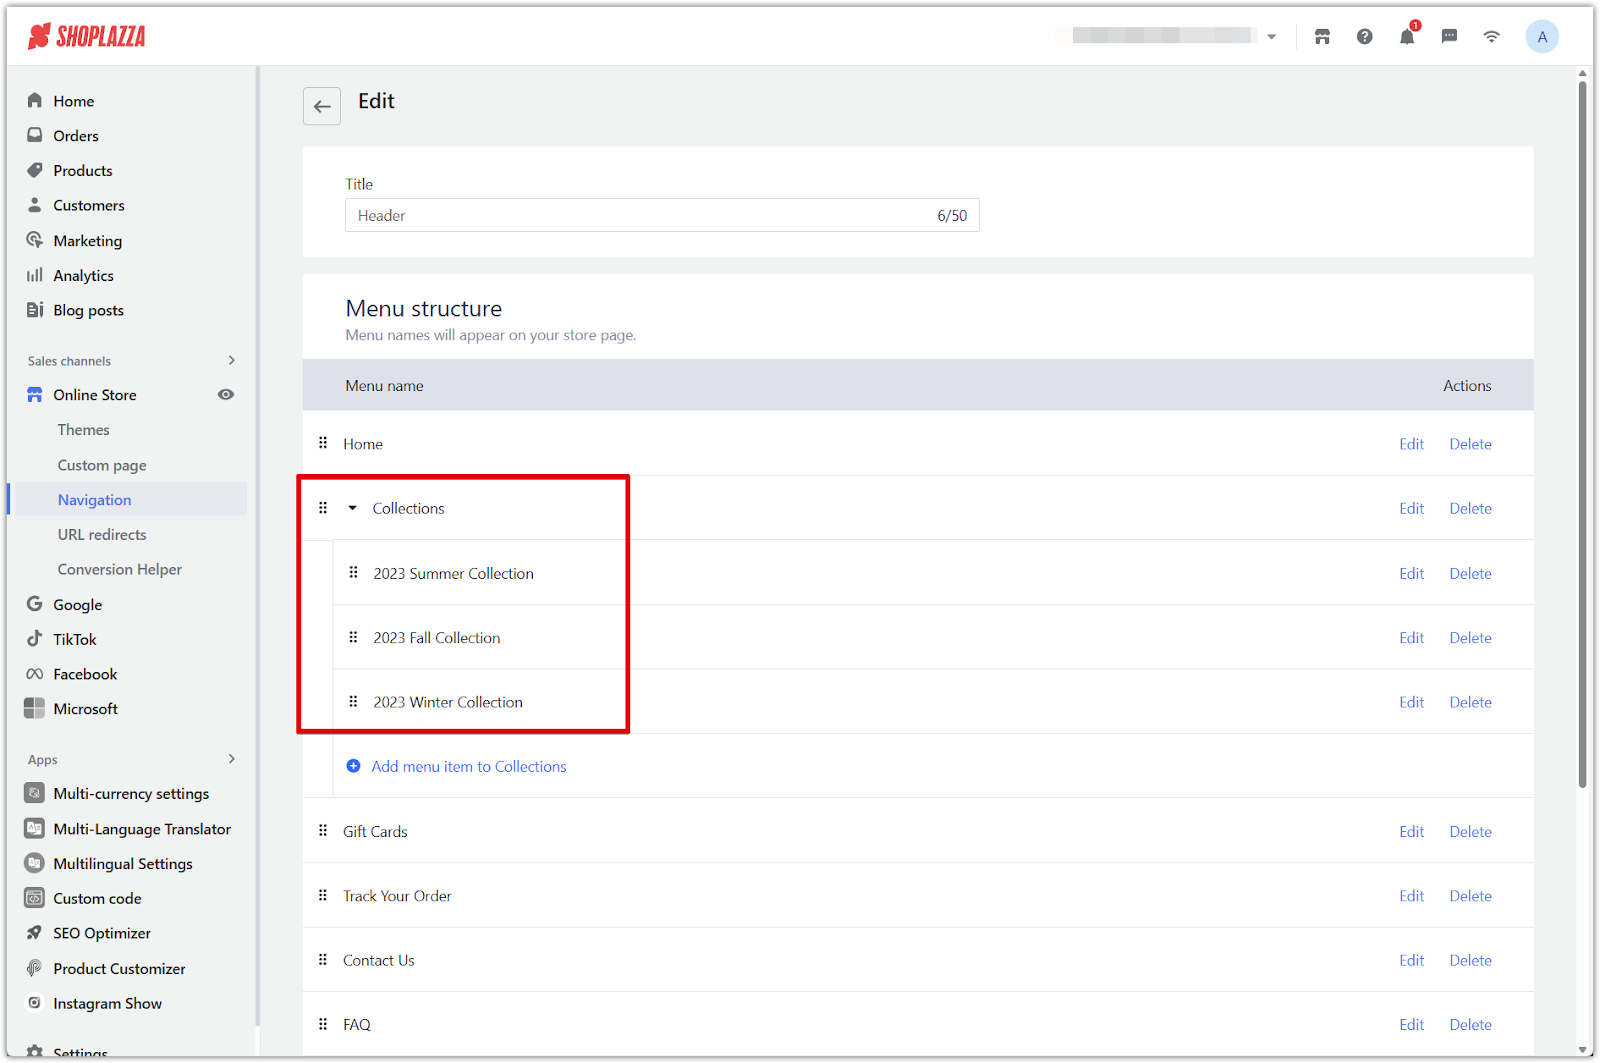
Organizing menu items into sub-collections
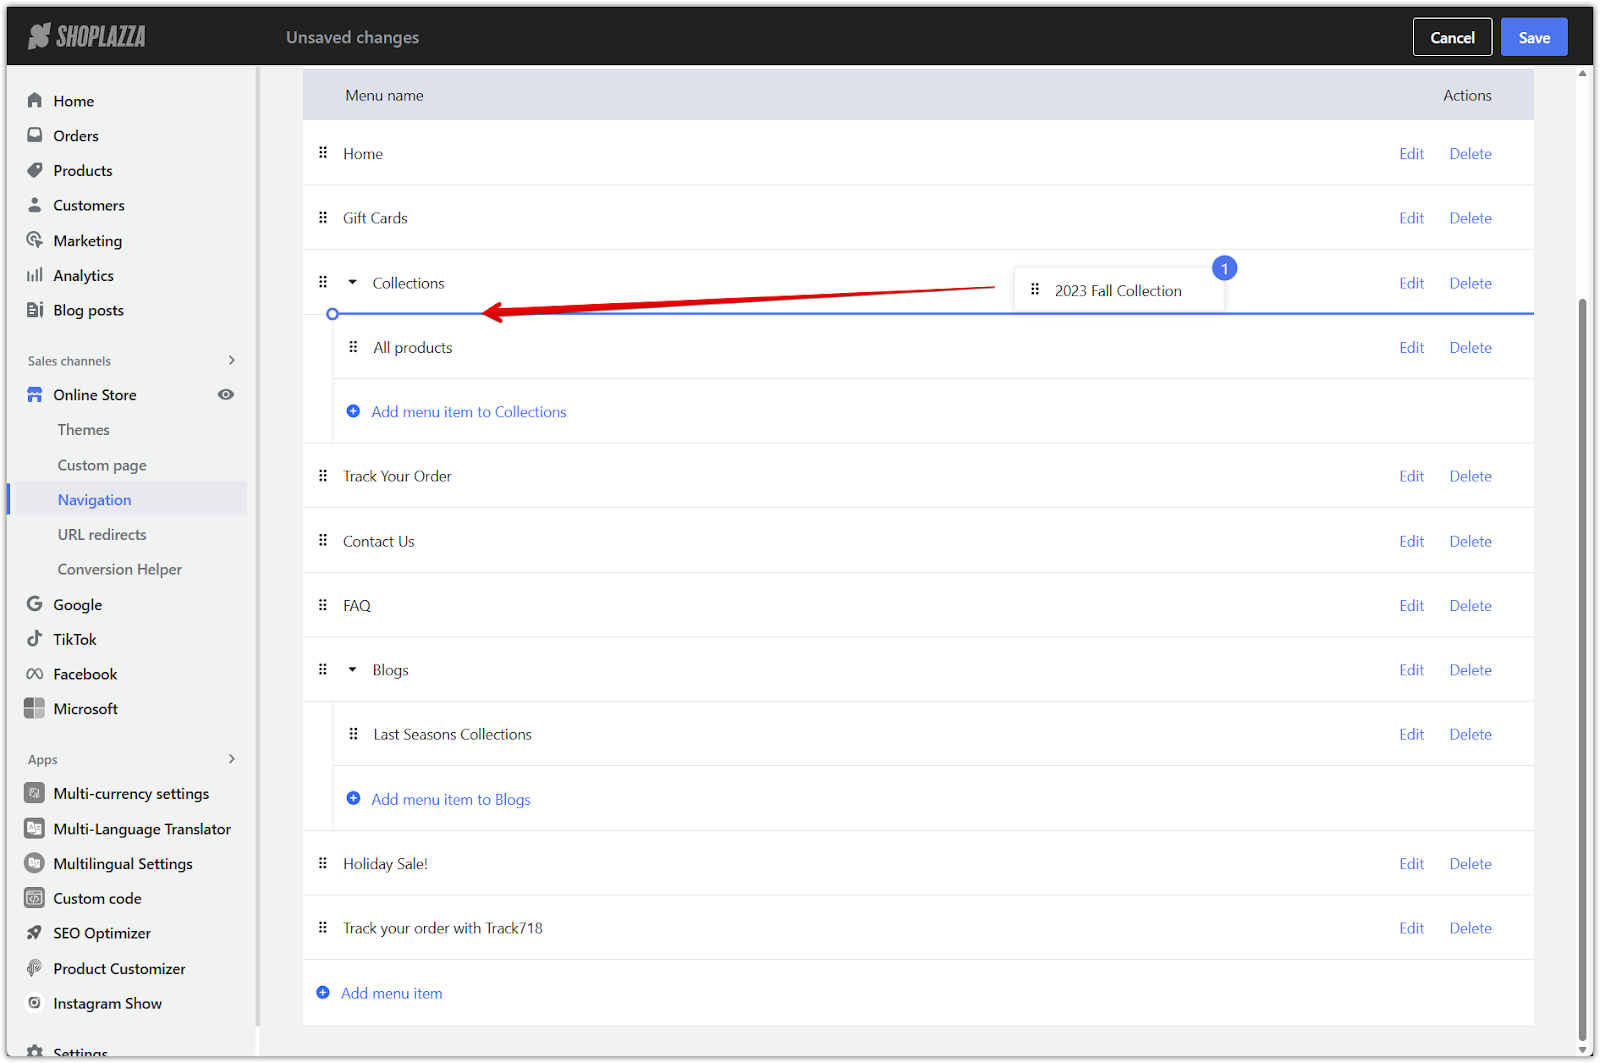
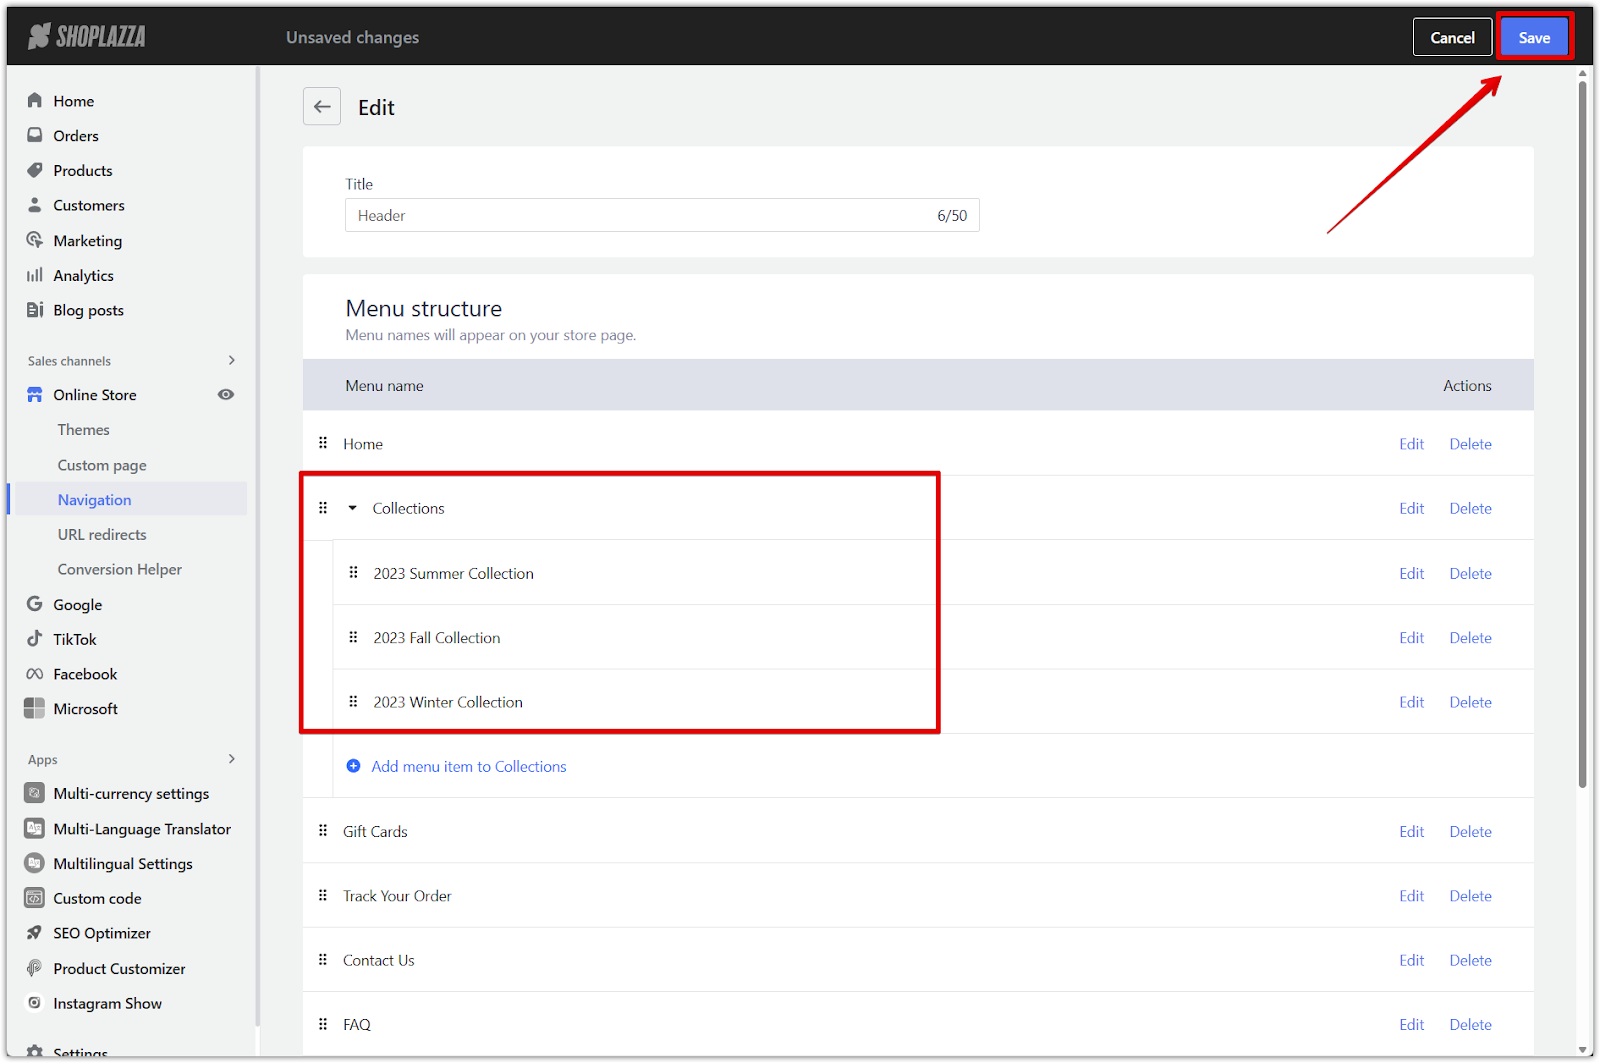
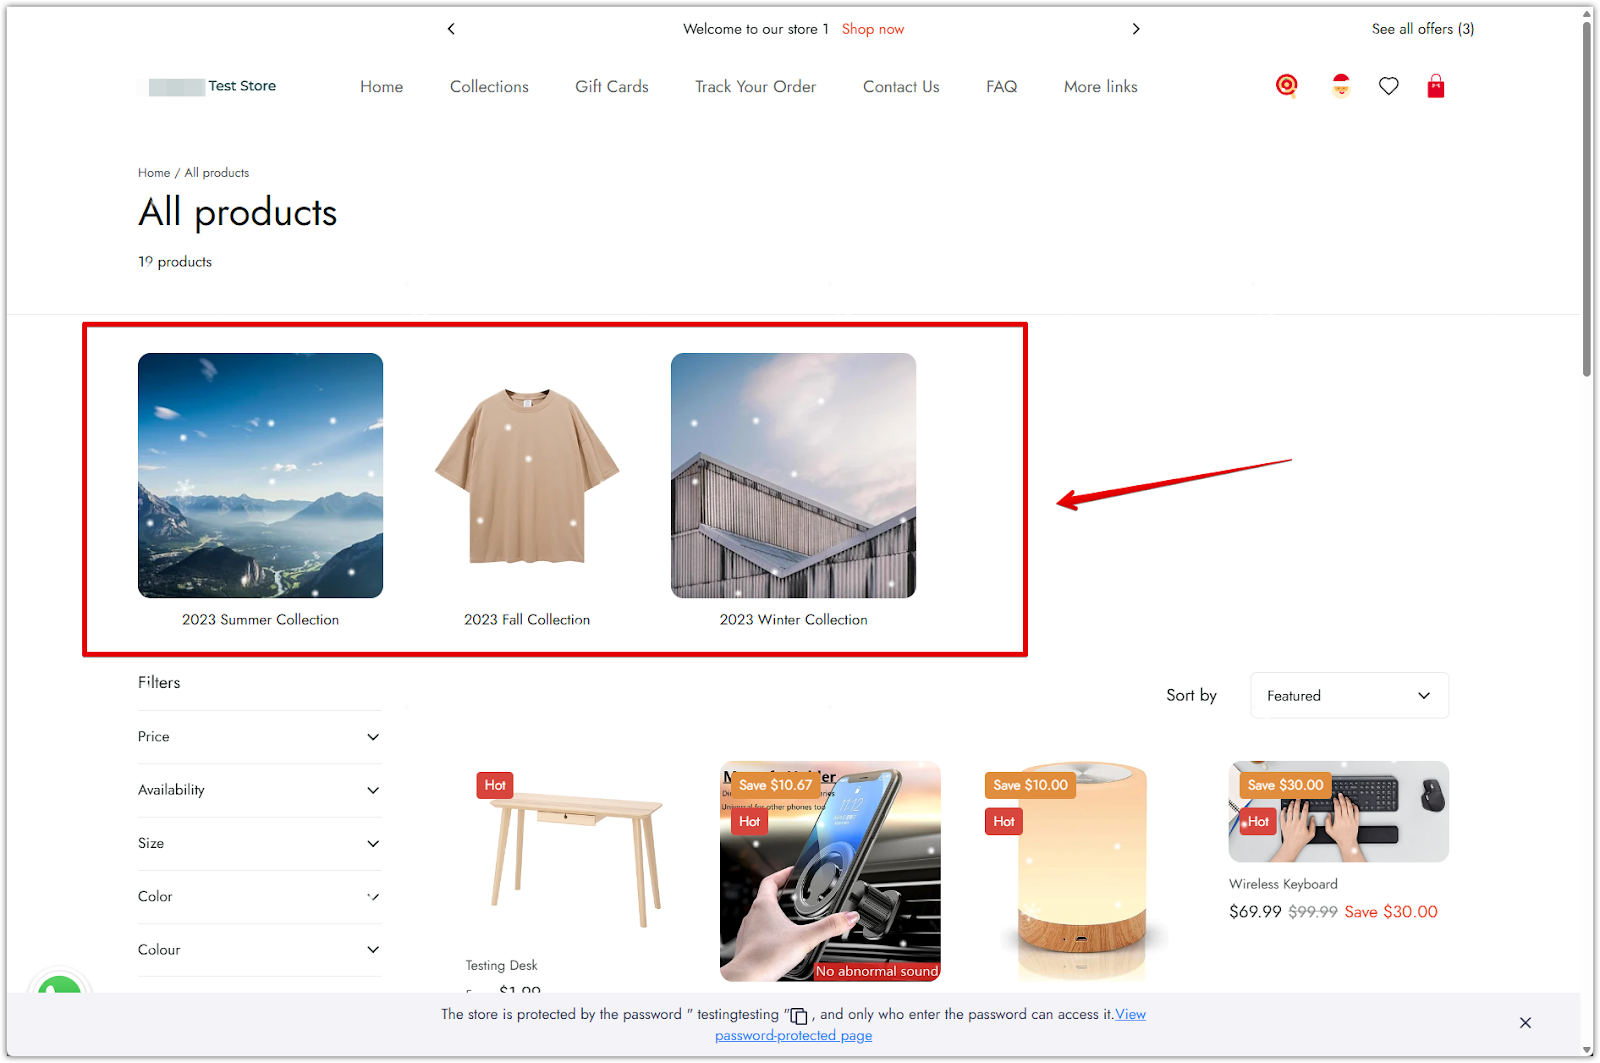
Once your collection menu items are created, you can arrange them into a structure where one acts as the main category and the others appear as sub-collections beneath it. When a customer clicks on the main category (like Collections), they’ll land on that collection page and see a visual layout of all the sub-collections you grouped underneath it. Each item shown on the page is pulled directly from the second-tier links you added in your navigation menu.
1. Drag items into place: Move your collection menu items directly under the main menu item to nest them as second-tier items.
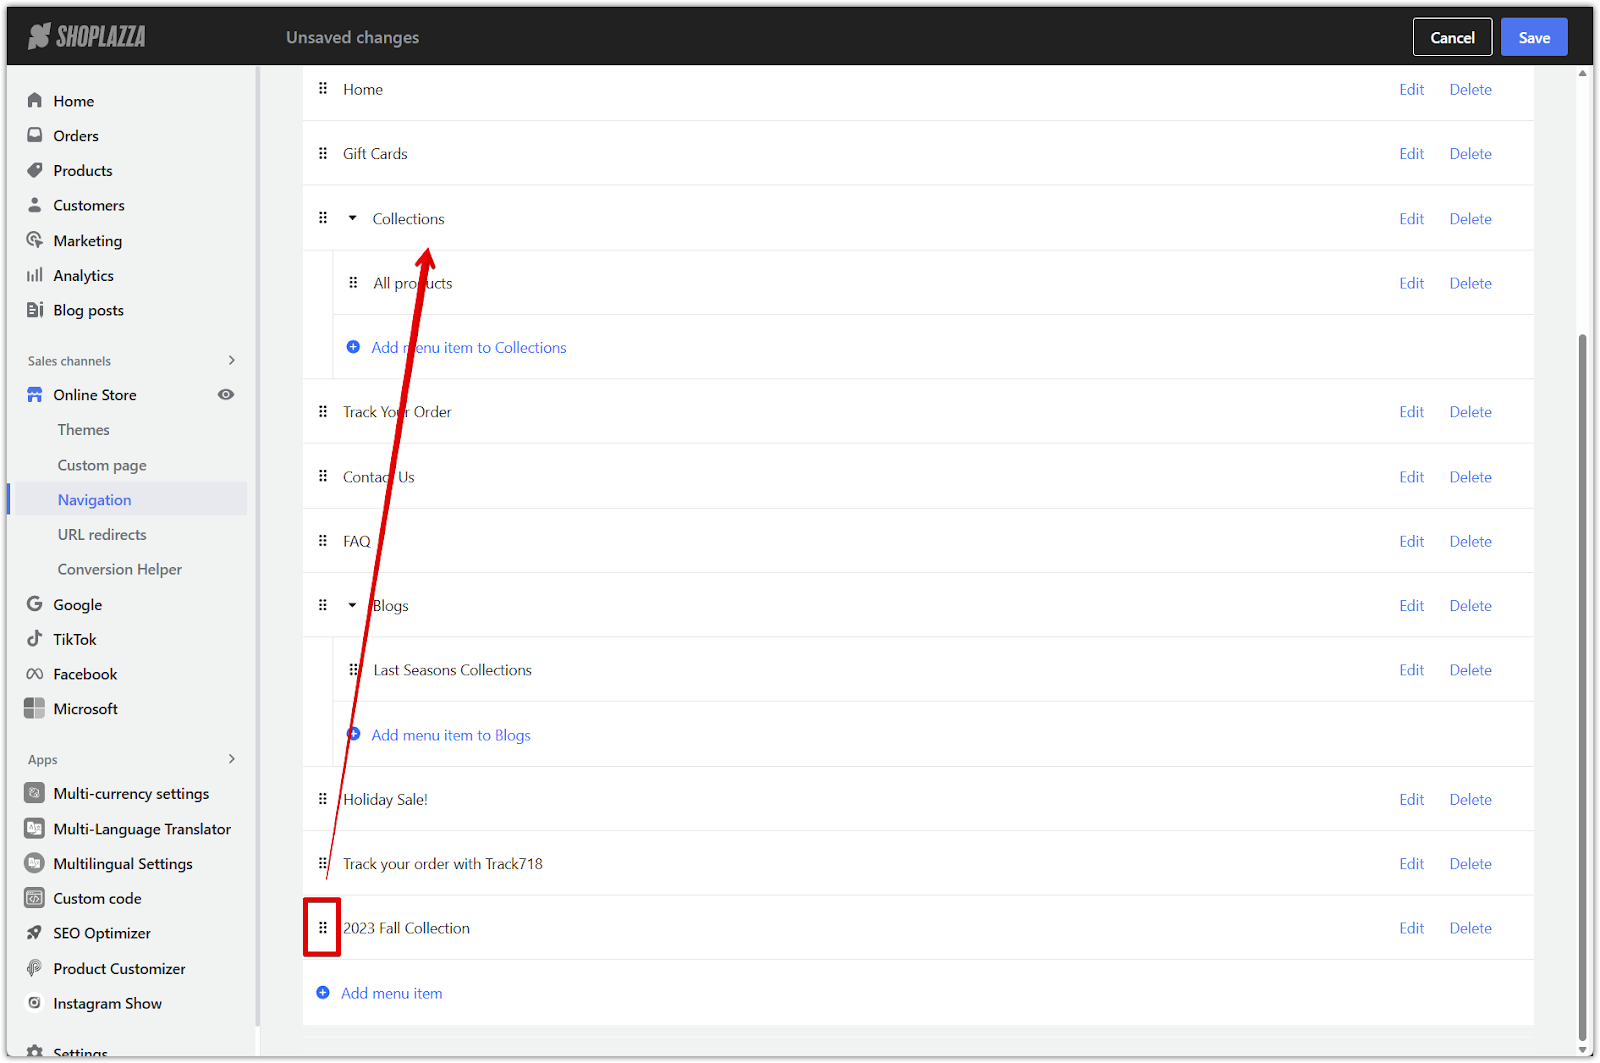
2. Nest additional sub-collections: If a menu item already has sub-collections, you can click Add menu item directly under that group to add more without dragging.
3. Adjust as needed: You can always rearrange or update items using the Edit and Delete options beside each one.

4. Click Save: After finishing your layout, be sure to click Save to apply the changes.
Enabling and customizing the sub-collection section
After organizing your navigation, go to your theme editor to enable and customize how your sub-collections appear on the collection page.
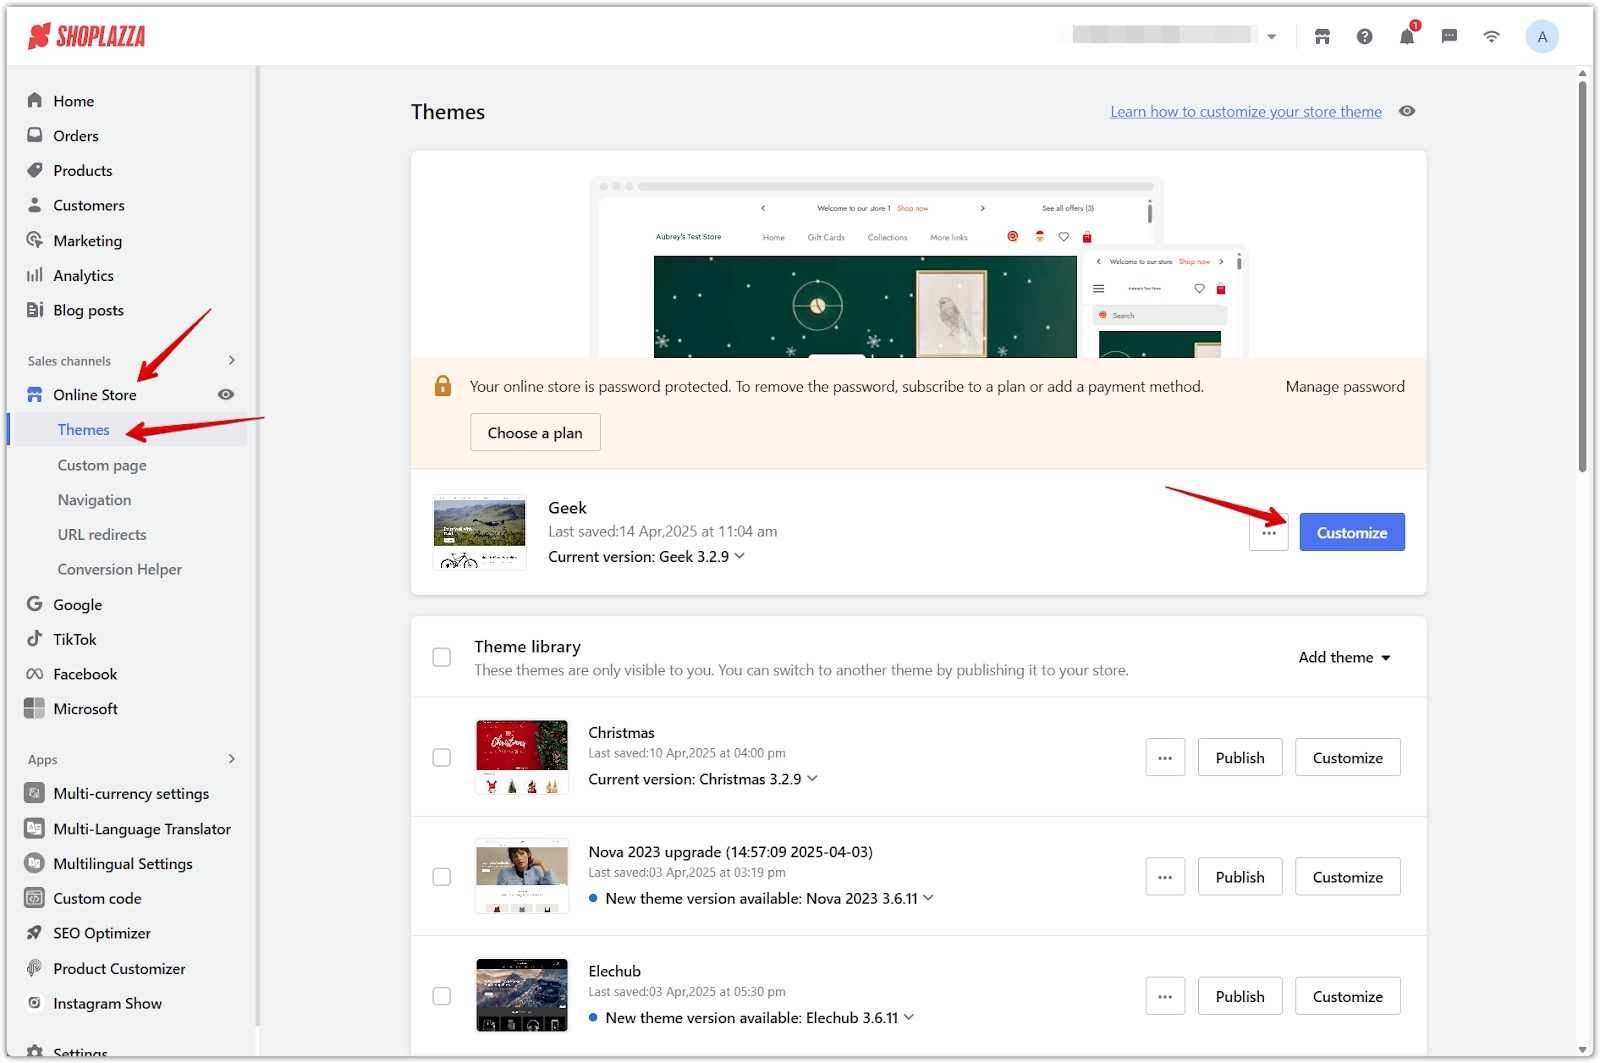
1. Go to the theme editor: From your Shoplazza admin, go to Online Store > Themes and click Customize.
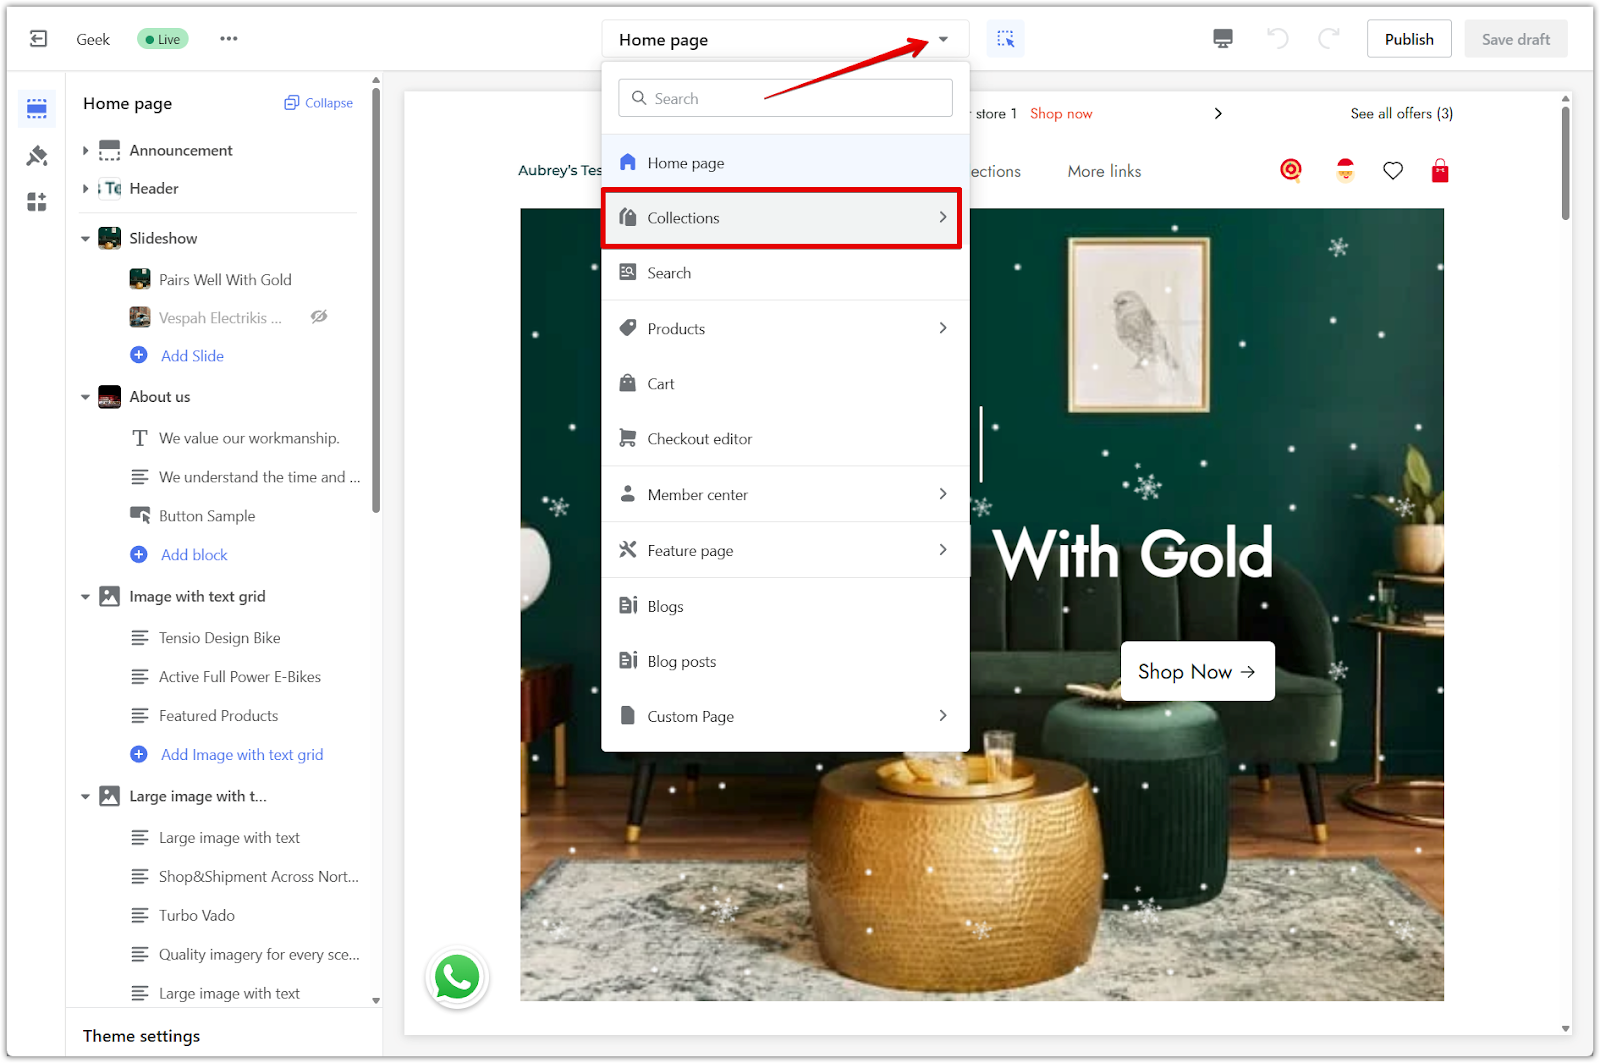
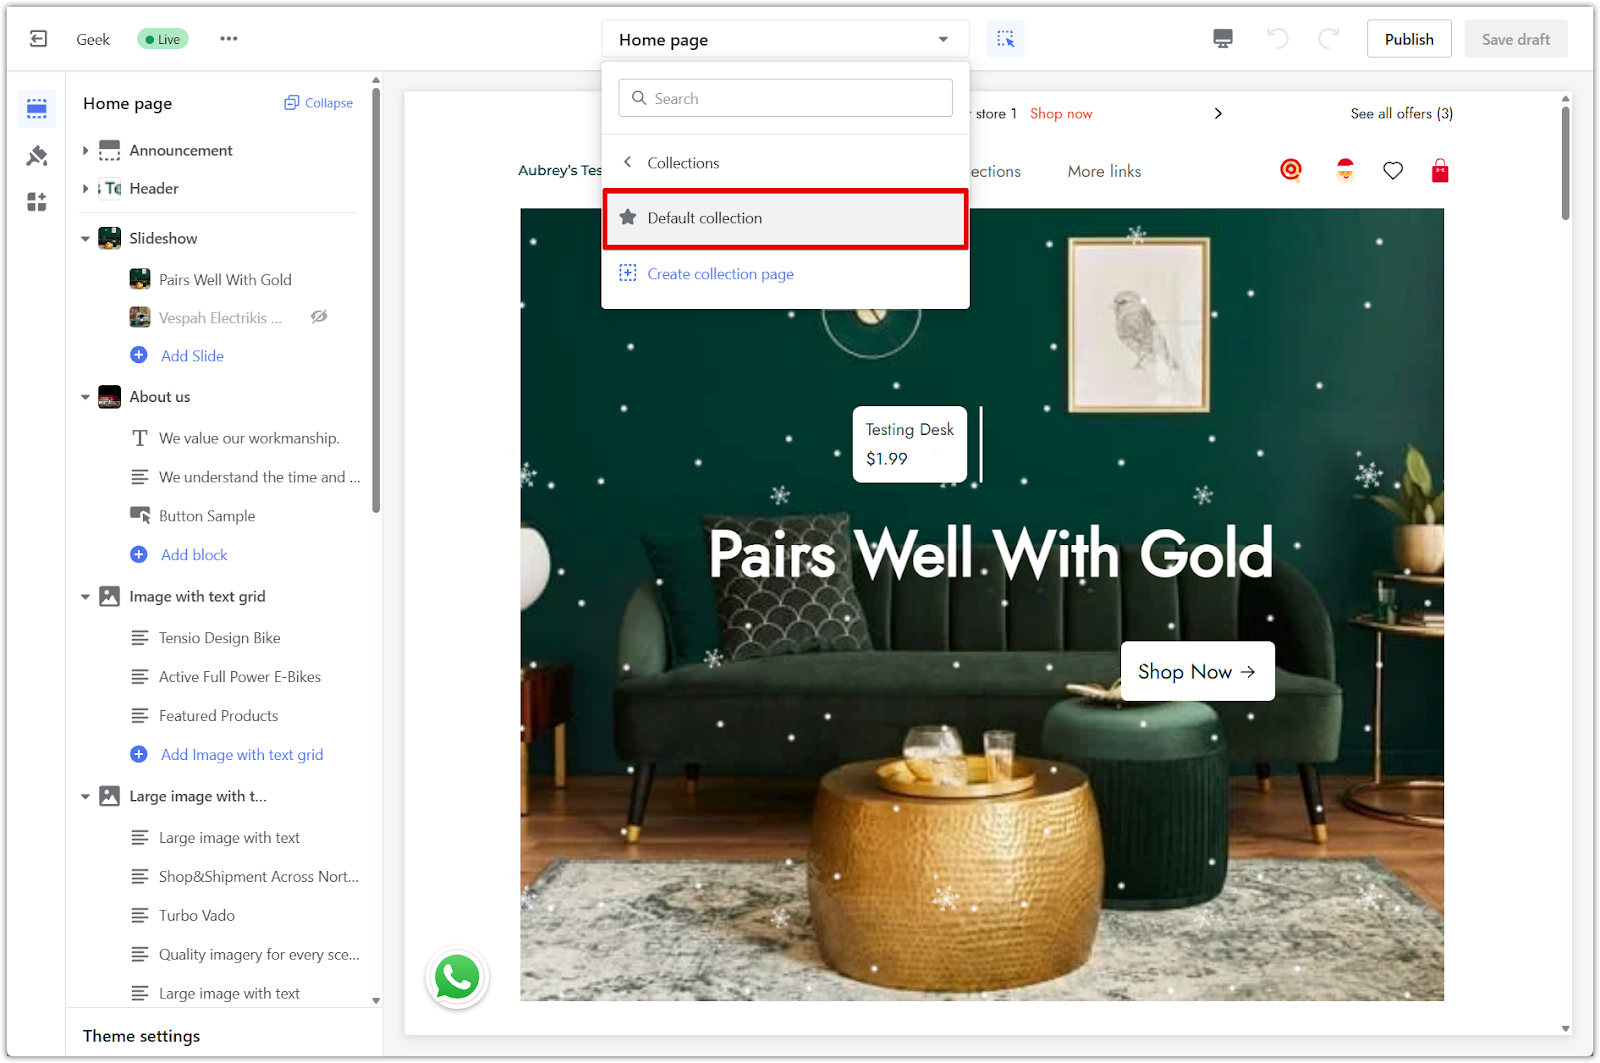
2. Switch the page view: Use the dropdown at the top of the editor to switch to Collections – Default collection.
Note
For a unique layout that only applies to one collection, see Customizing collection page for a specific collection.
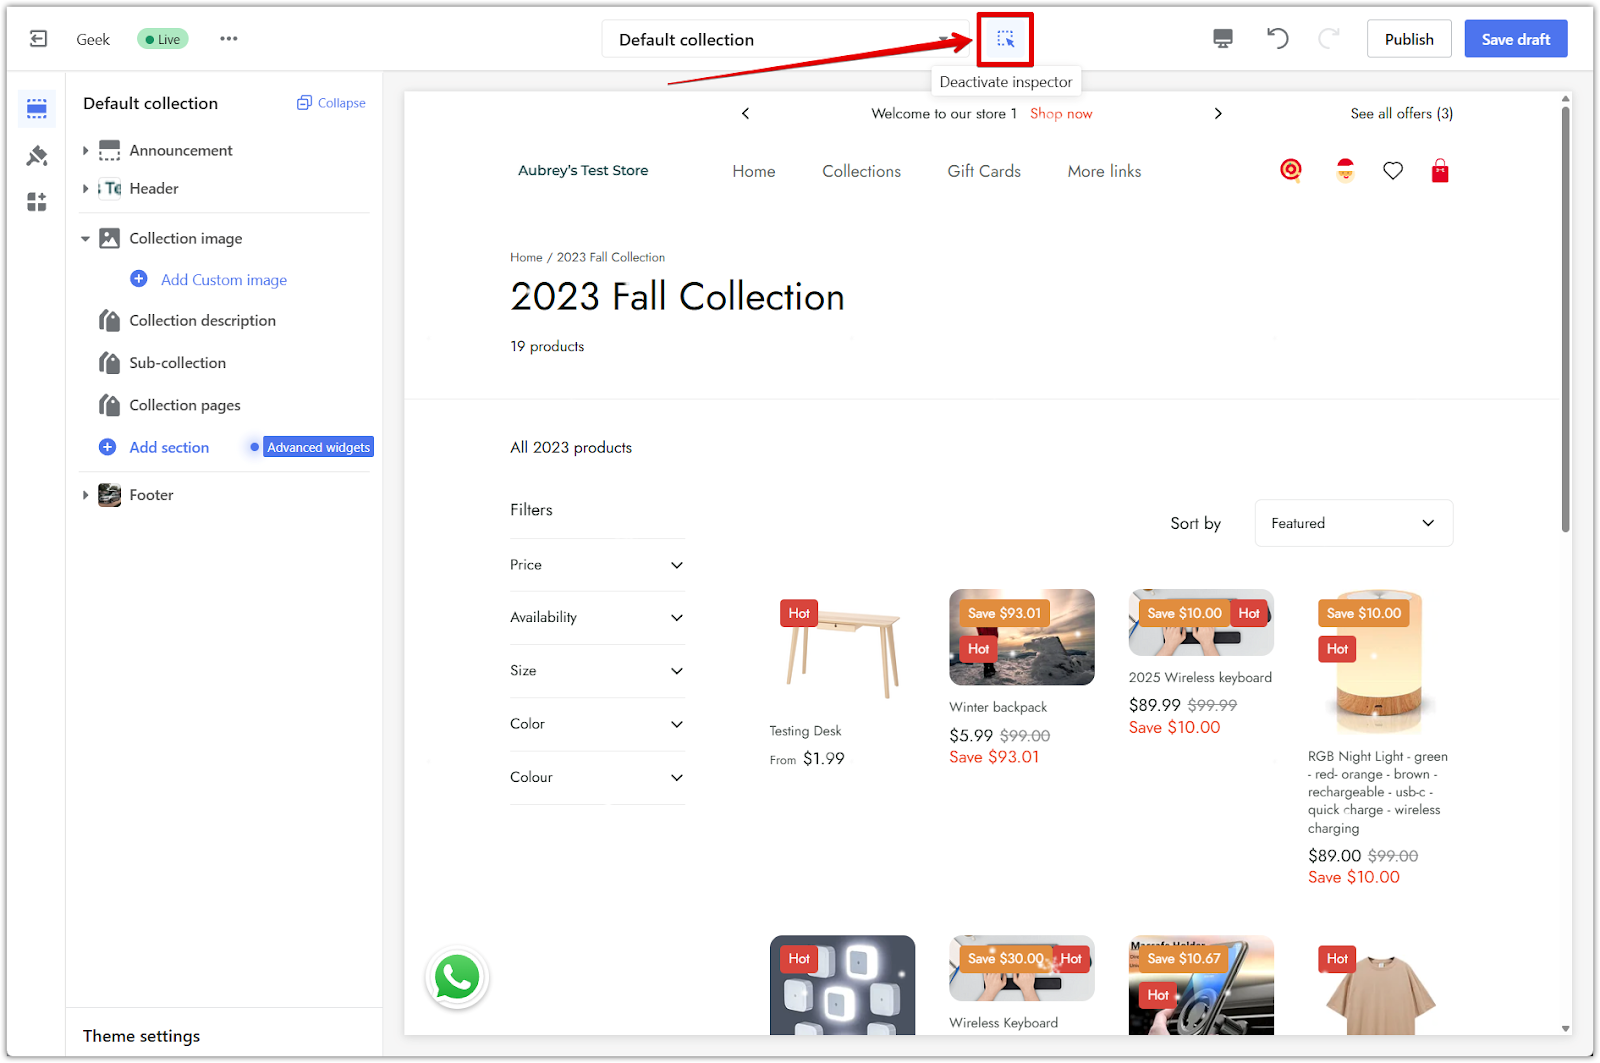
- Click the main menu item title: While viewing the Default collection page, make sure the inspector is deactivated (icon at the top right). Then click the main menu item (e.g. Collections) in your store preview to load the correct collection page with sub-collections.
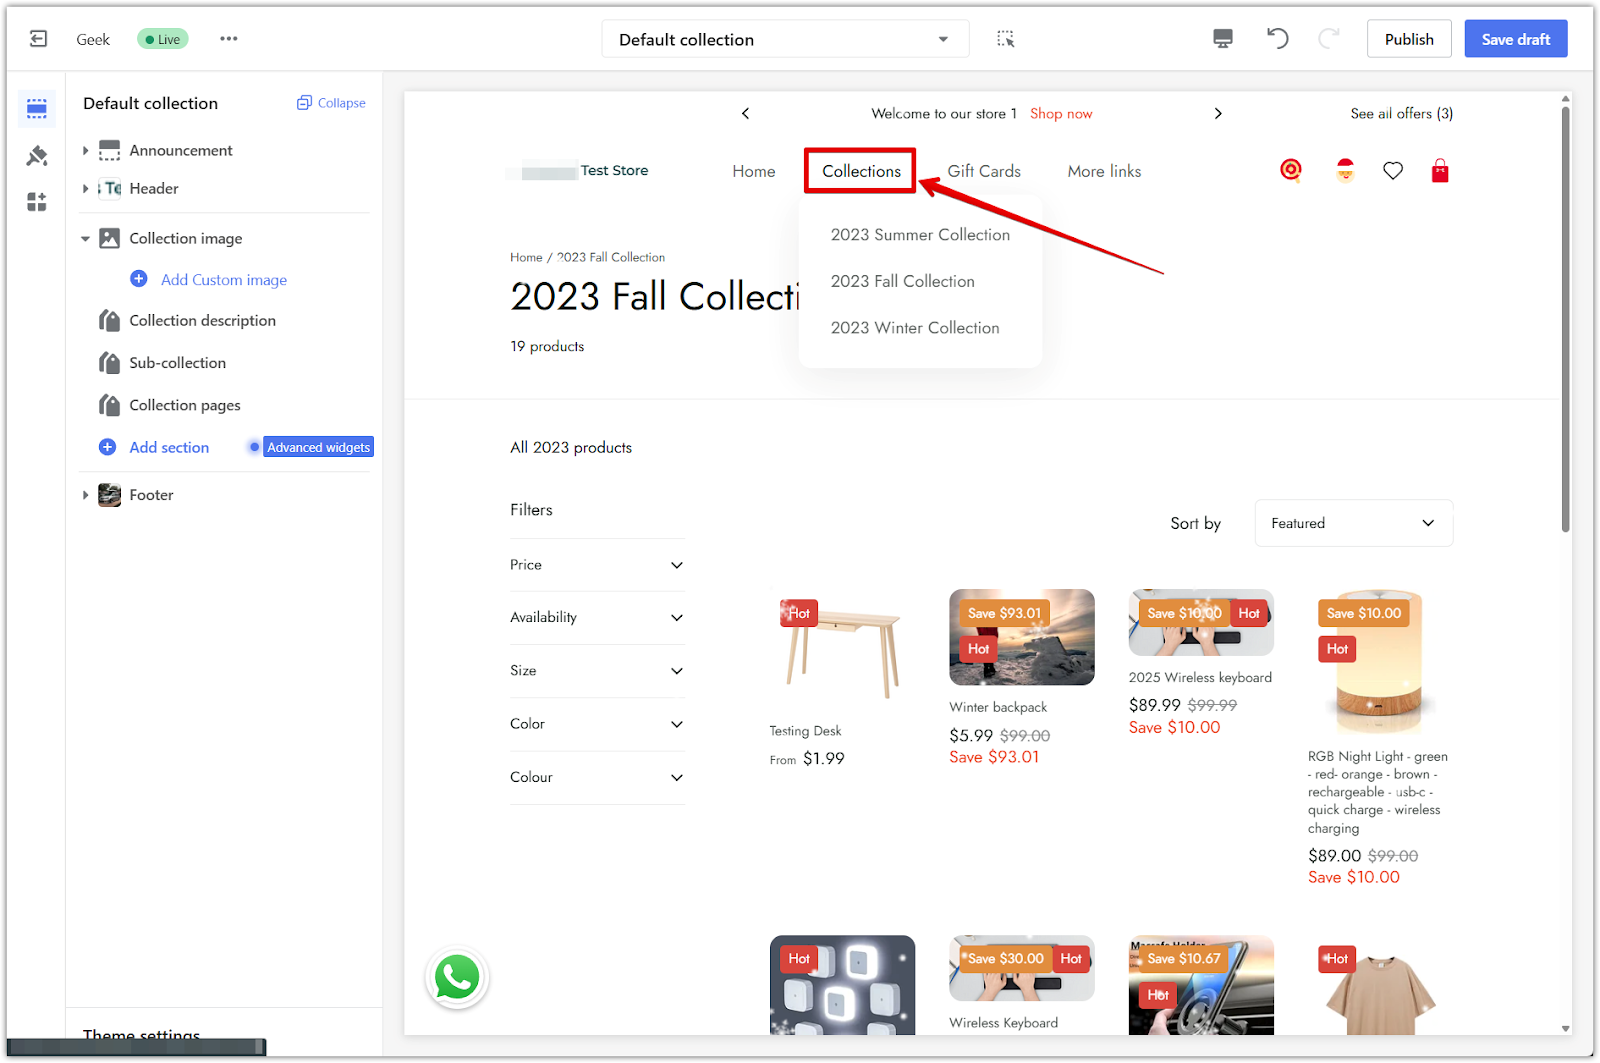
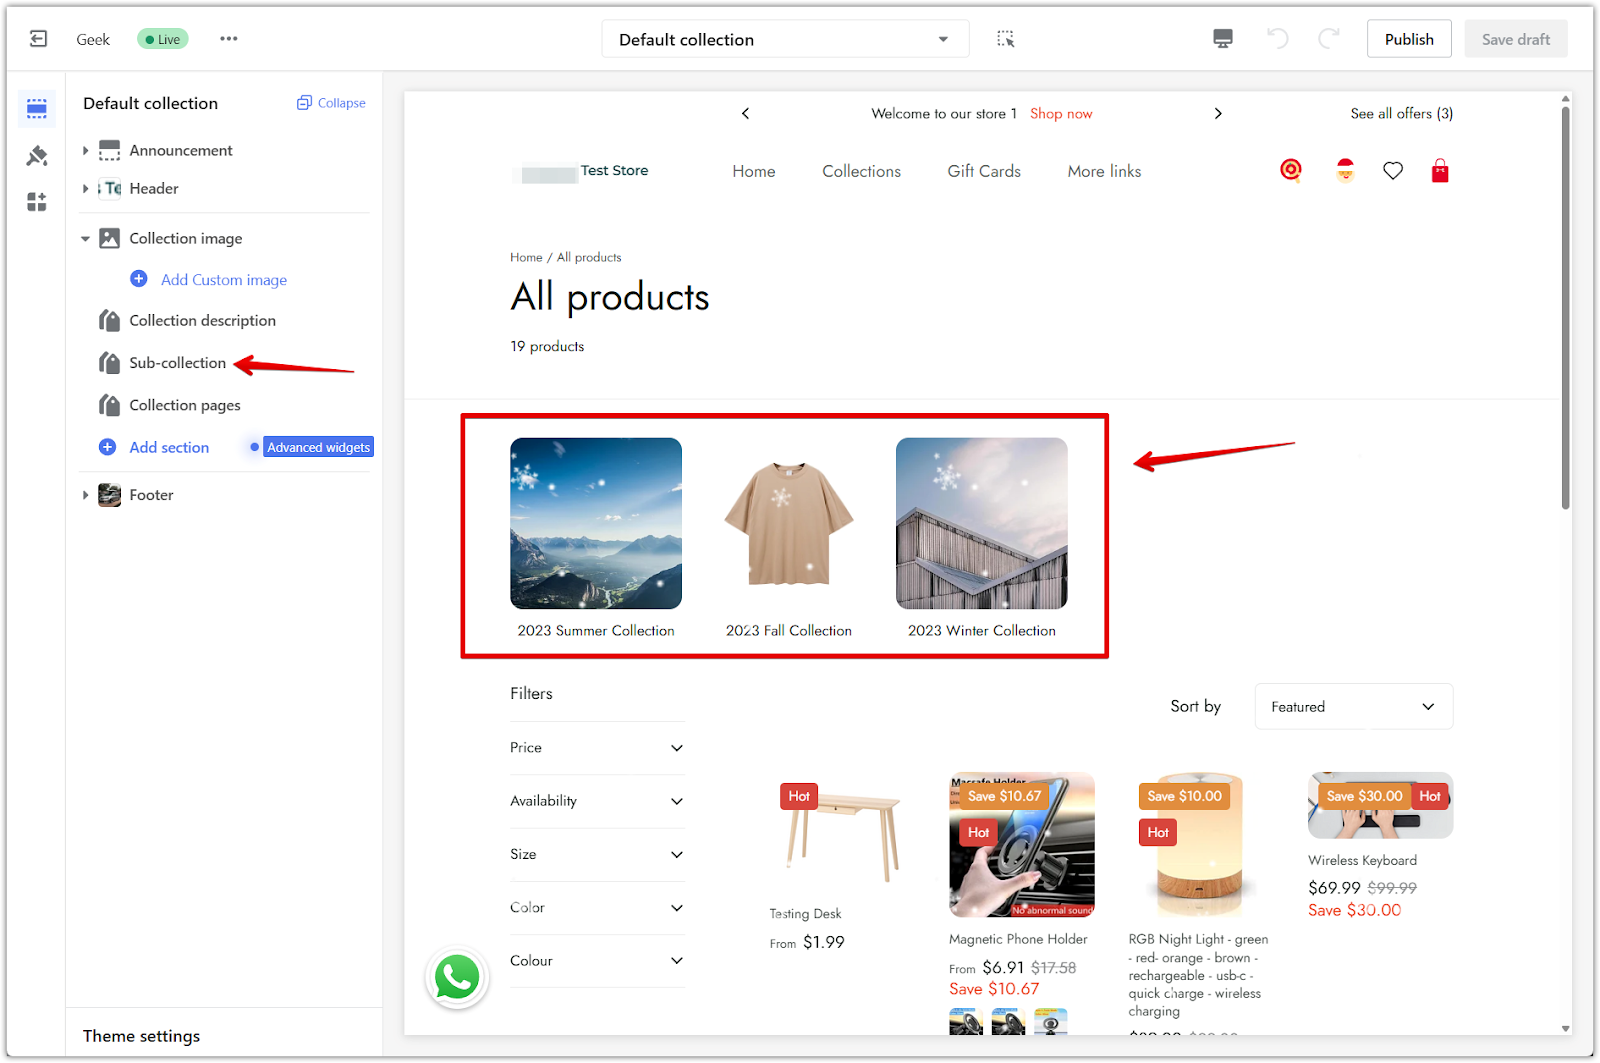
- Check that sub-collections are showing: If your navigation is set up properly, the sub-collections will appear on the page.
Note
Make sure your main menu item is correctly linked to a collection page. Otherwise, the sub-collection section will not display in the theme editor or on your storefront.
- Reposition the section: If needed, drag the section to a new position on the page layout.
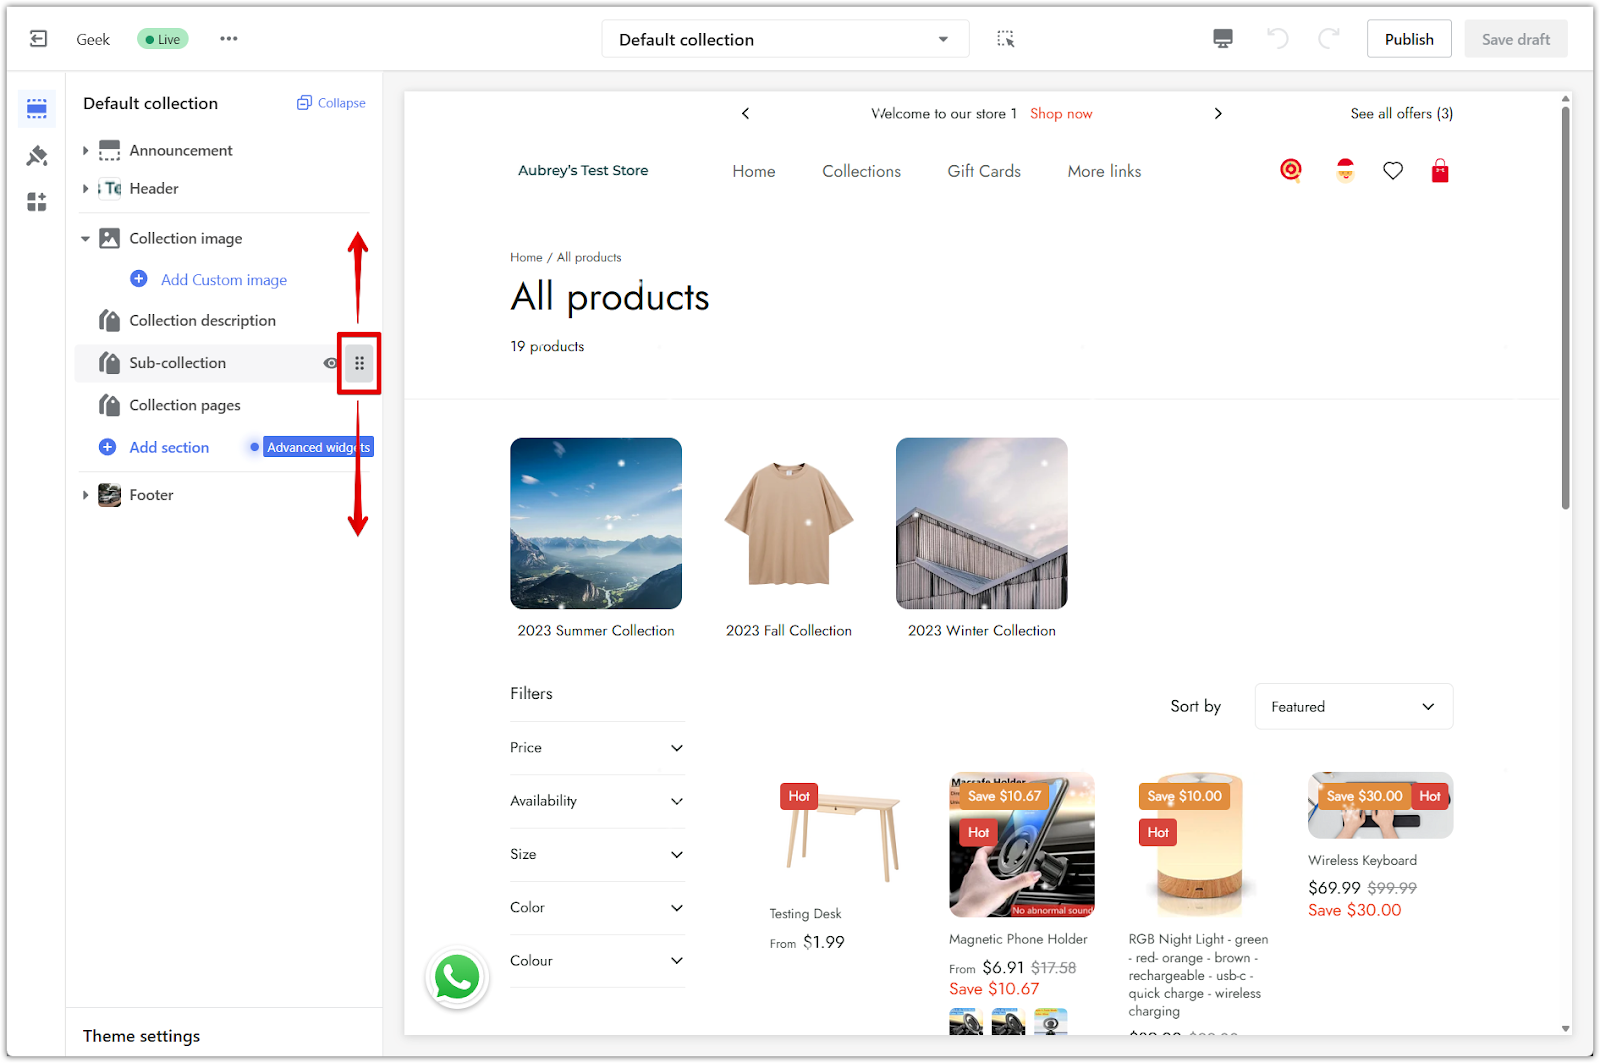
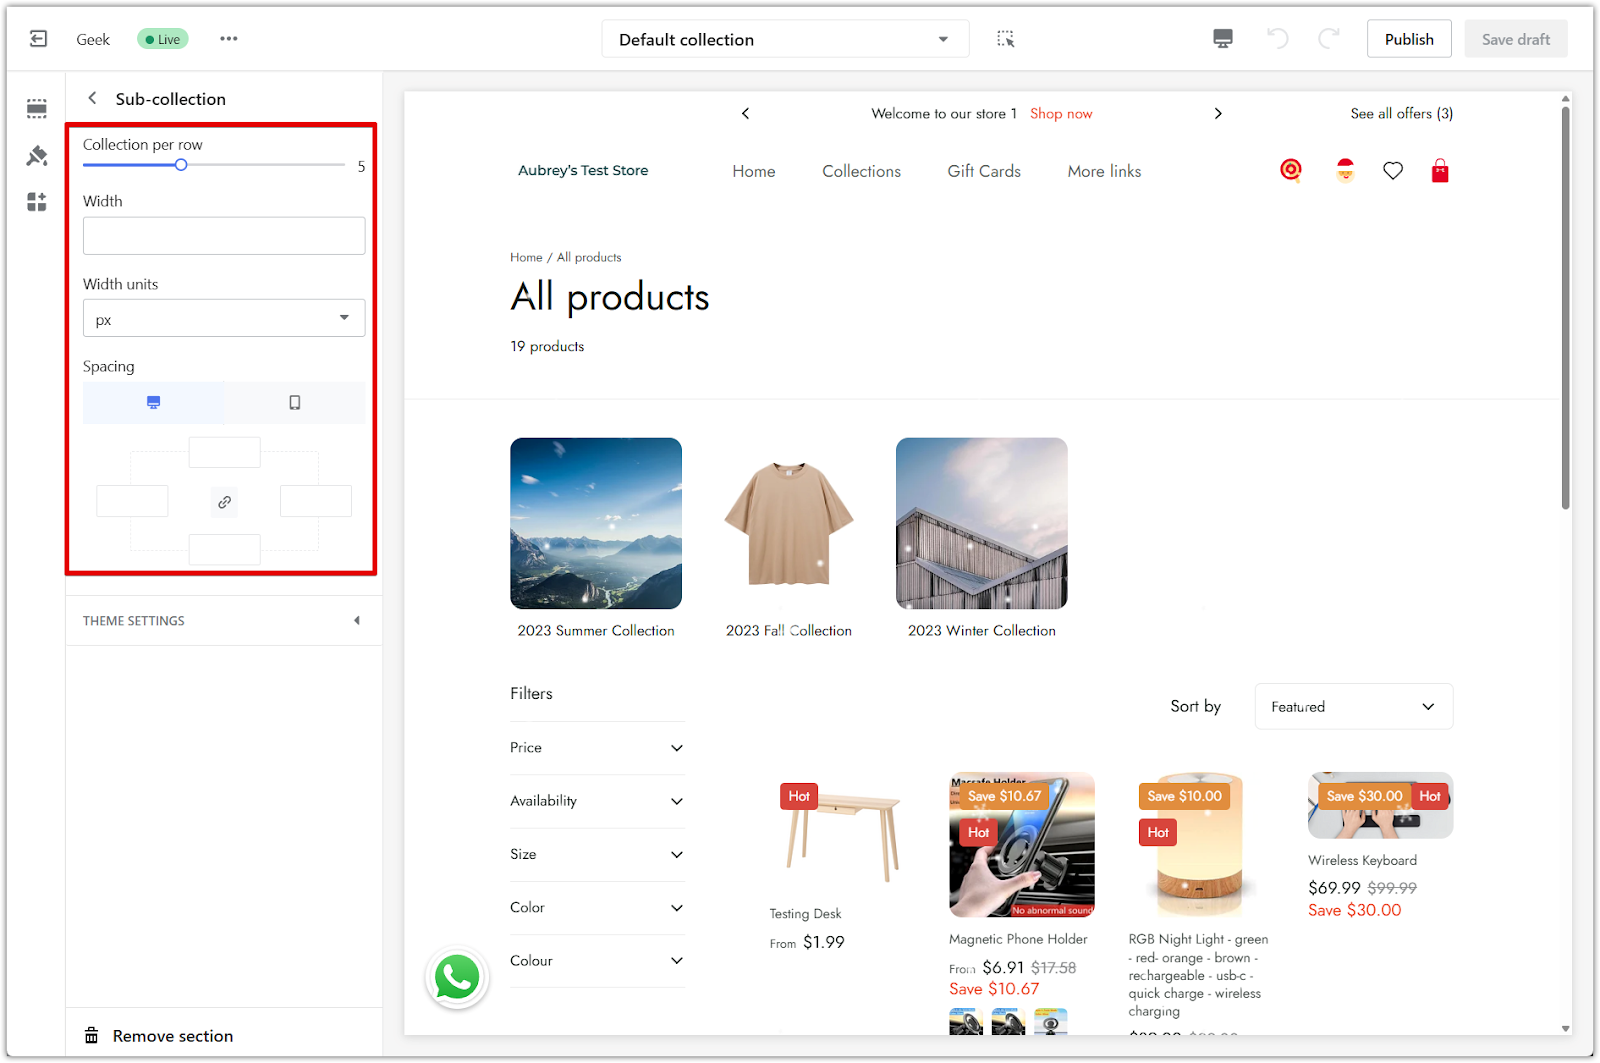
- Adjust layout settings: Customize the number of items per row, image aspect ratio, or spacing to match your store’s design.
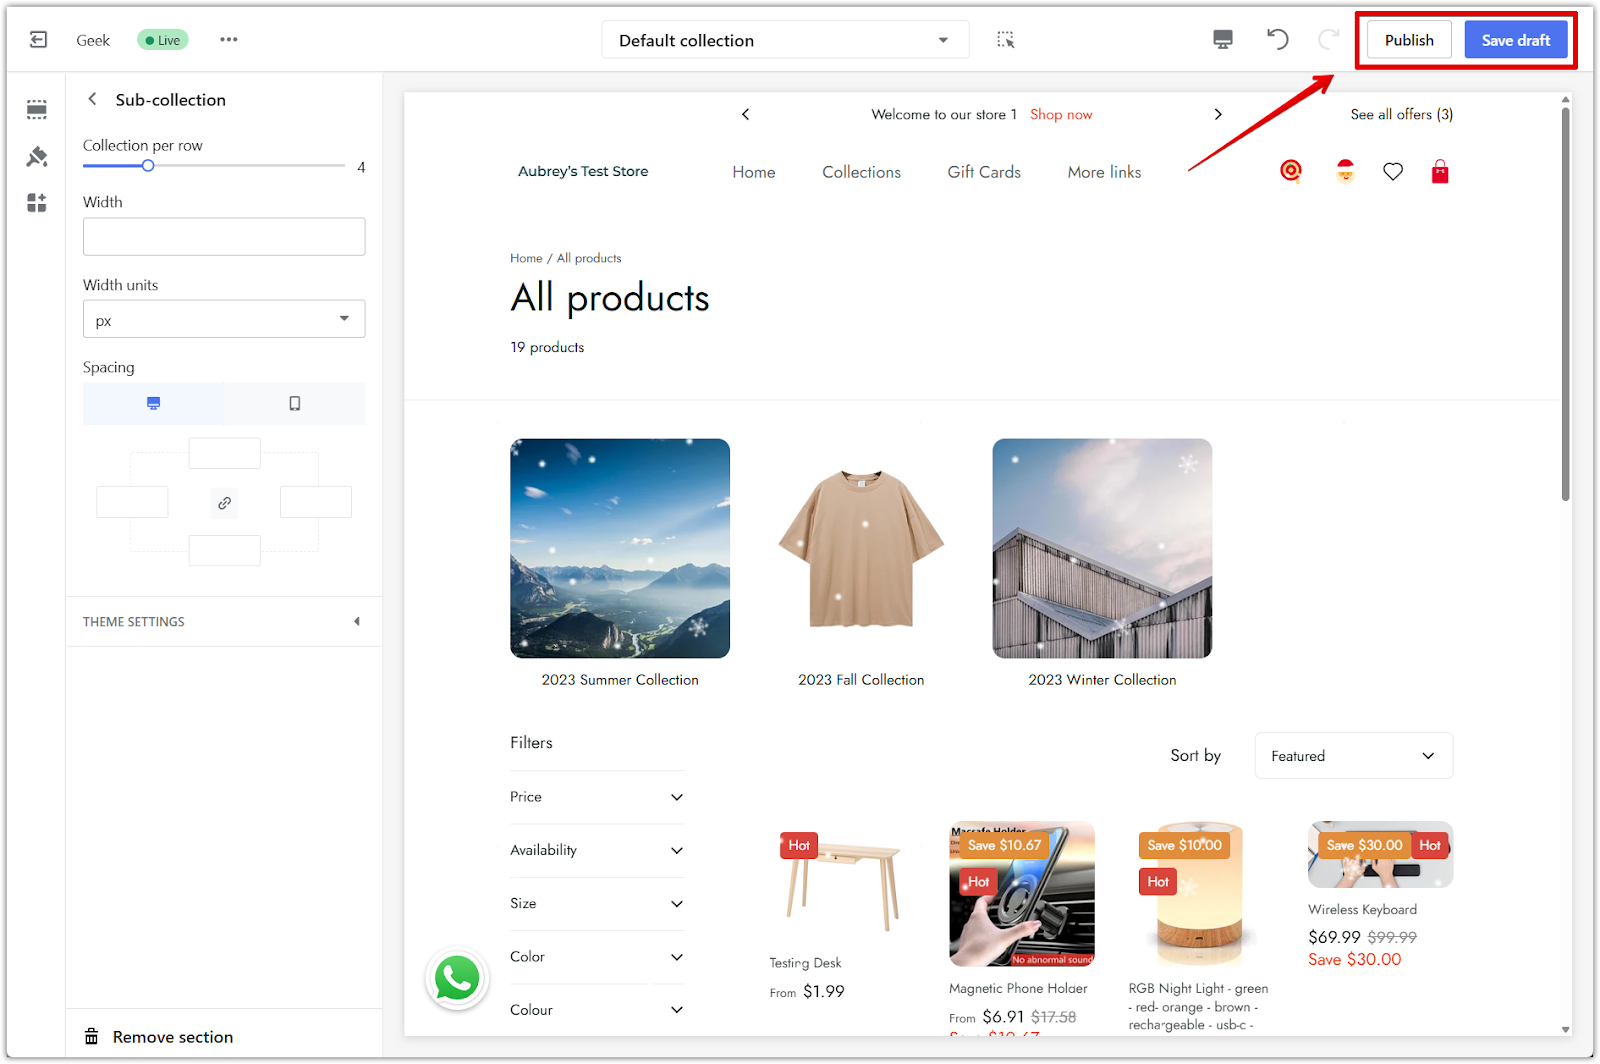
- Click Save draft or Publish: Once you're done, save your changes.
Previewing your sub-collections
After saving your theme updates, preview your storefront to make sure the sub-collections are working as expected.
- Visit your store and click the main menu item you created: Open your store in a new tab. Click the menu title that you linked to a collection page (for example, Collections or Shop).
- Check the layout: On that page, you should see a visual grid of all the sub-collections you linked in the navigation.
- Test different layouts if needed: If the layout doesn’t appear or needs adjusting, return to the theme editor and make changes under the Sub-collection section.

Organizing your collections into a clear menu structure and displaying them as sub-collections can make a big difference in how customers explore your store. This setup not only improves navigation but also helps highlight specific product categories in a more visual and engaging way.


Comments
Please sign in to leave a comment.