
Creating customer segments allows you to group customers based on specific criteria, deliver targeted marketing campaigns, and offer discount to the right audience. This is especially valuable for cross-border eCommerce businesses aiming to personalize promotions by market, region, or customer behavior. By organizing customer data through segmentation , you improve marketing precision , increase conversion rates , and simplify customer management .
Creating a customer segment
Custom segments are created by applying filters related to customer details, order behavior, and site interactions. All settings are managed under Customers > Customer segments in the Shoplazza admin.
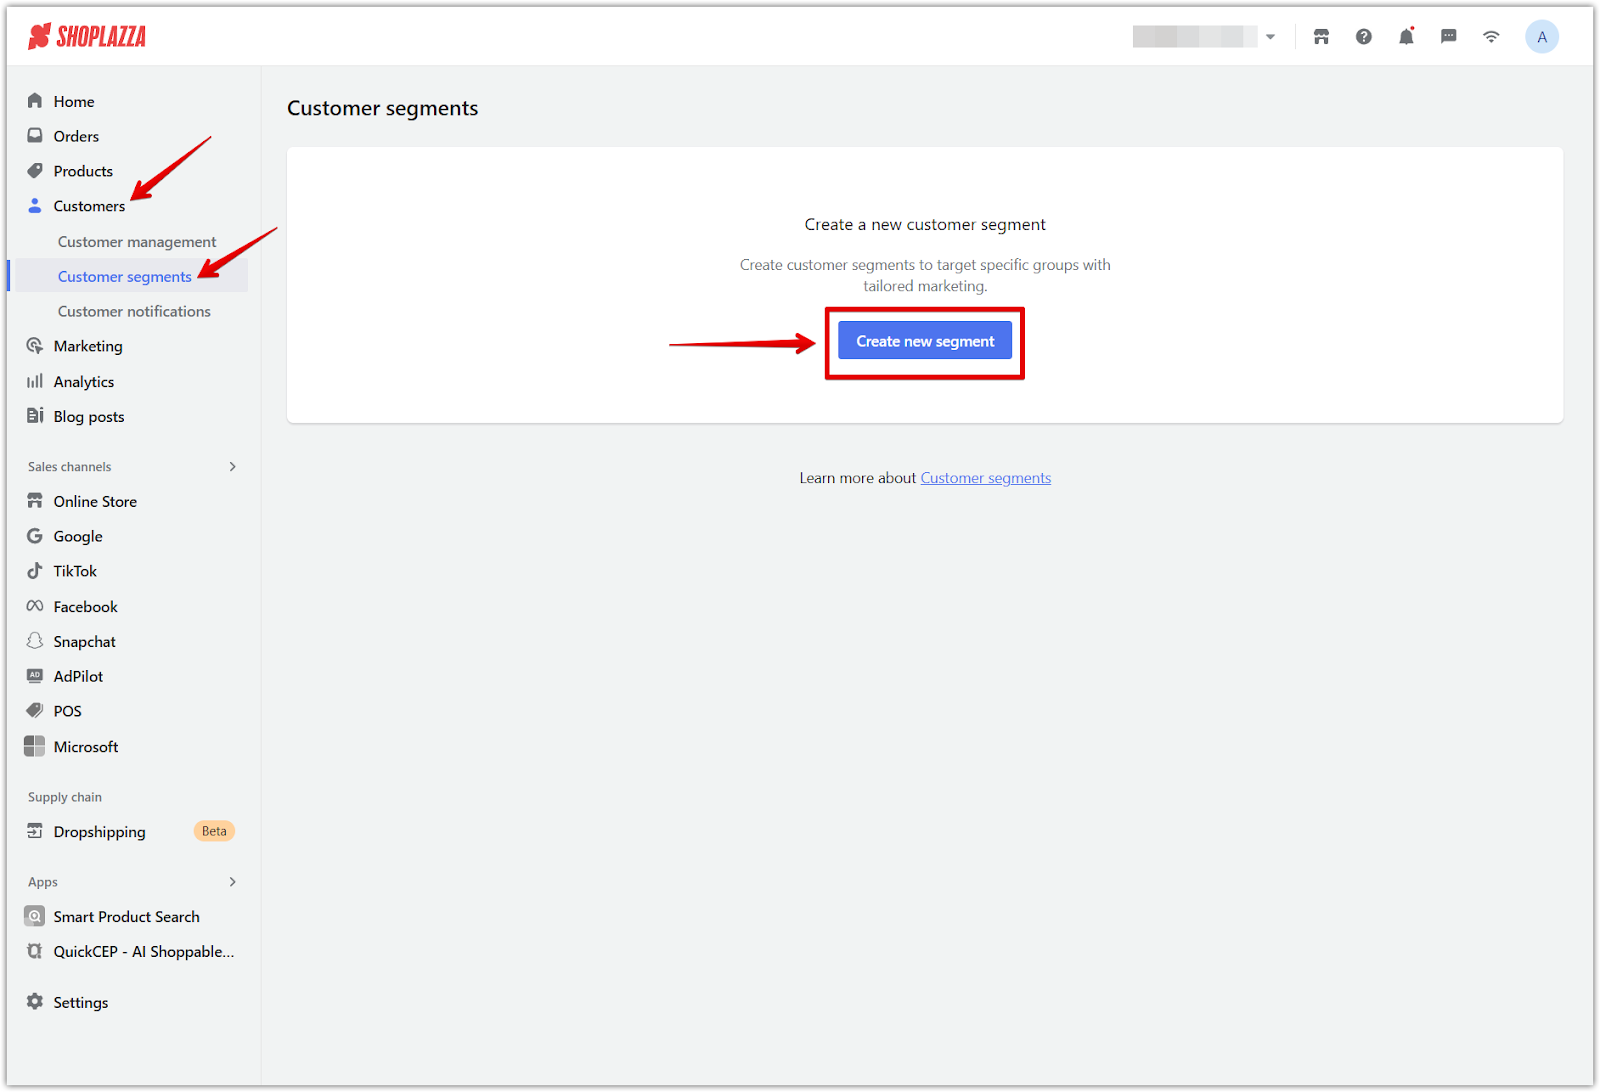
1. Go to the Customer Segments page: From the Shoplazza admin, navigate to Customers > Customer segments and click Create new segment.
2. Name the segment: Enter a clear, descriptive name to identify the segment easily across marketing tools and reports.
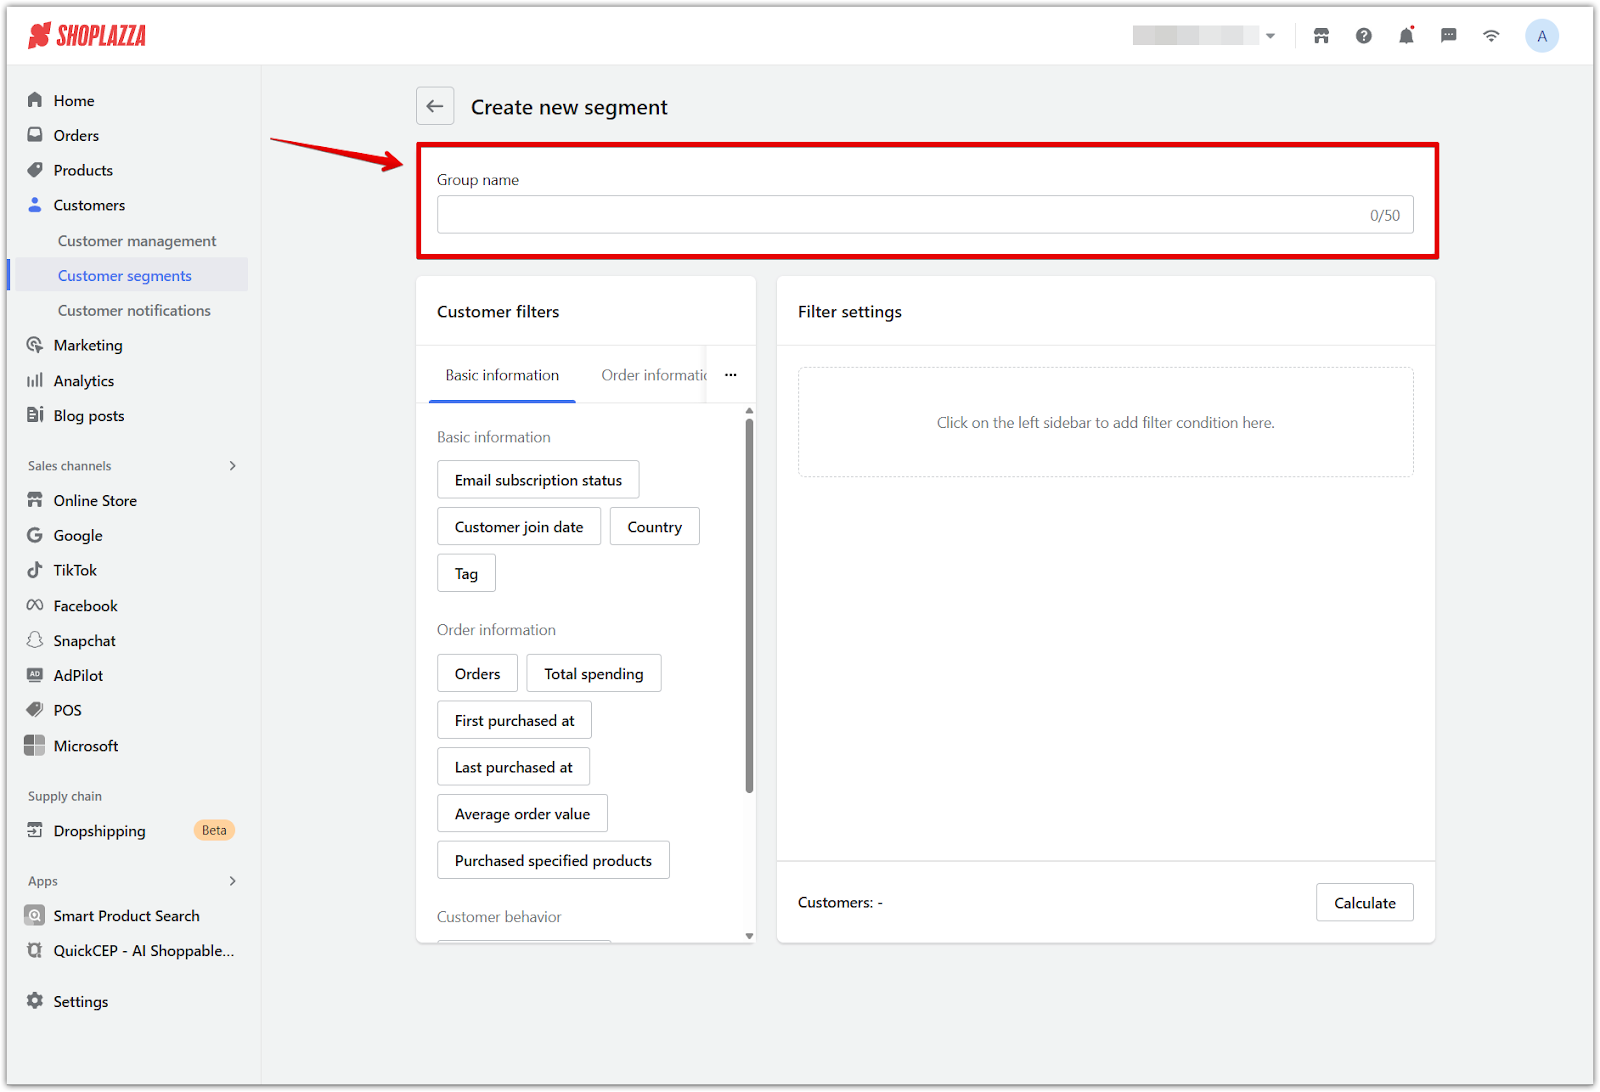
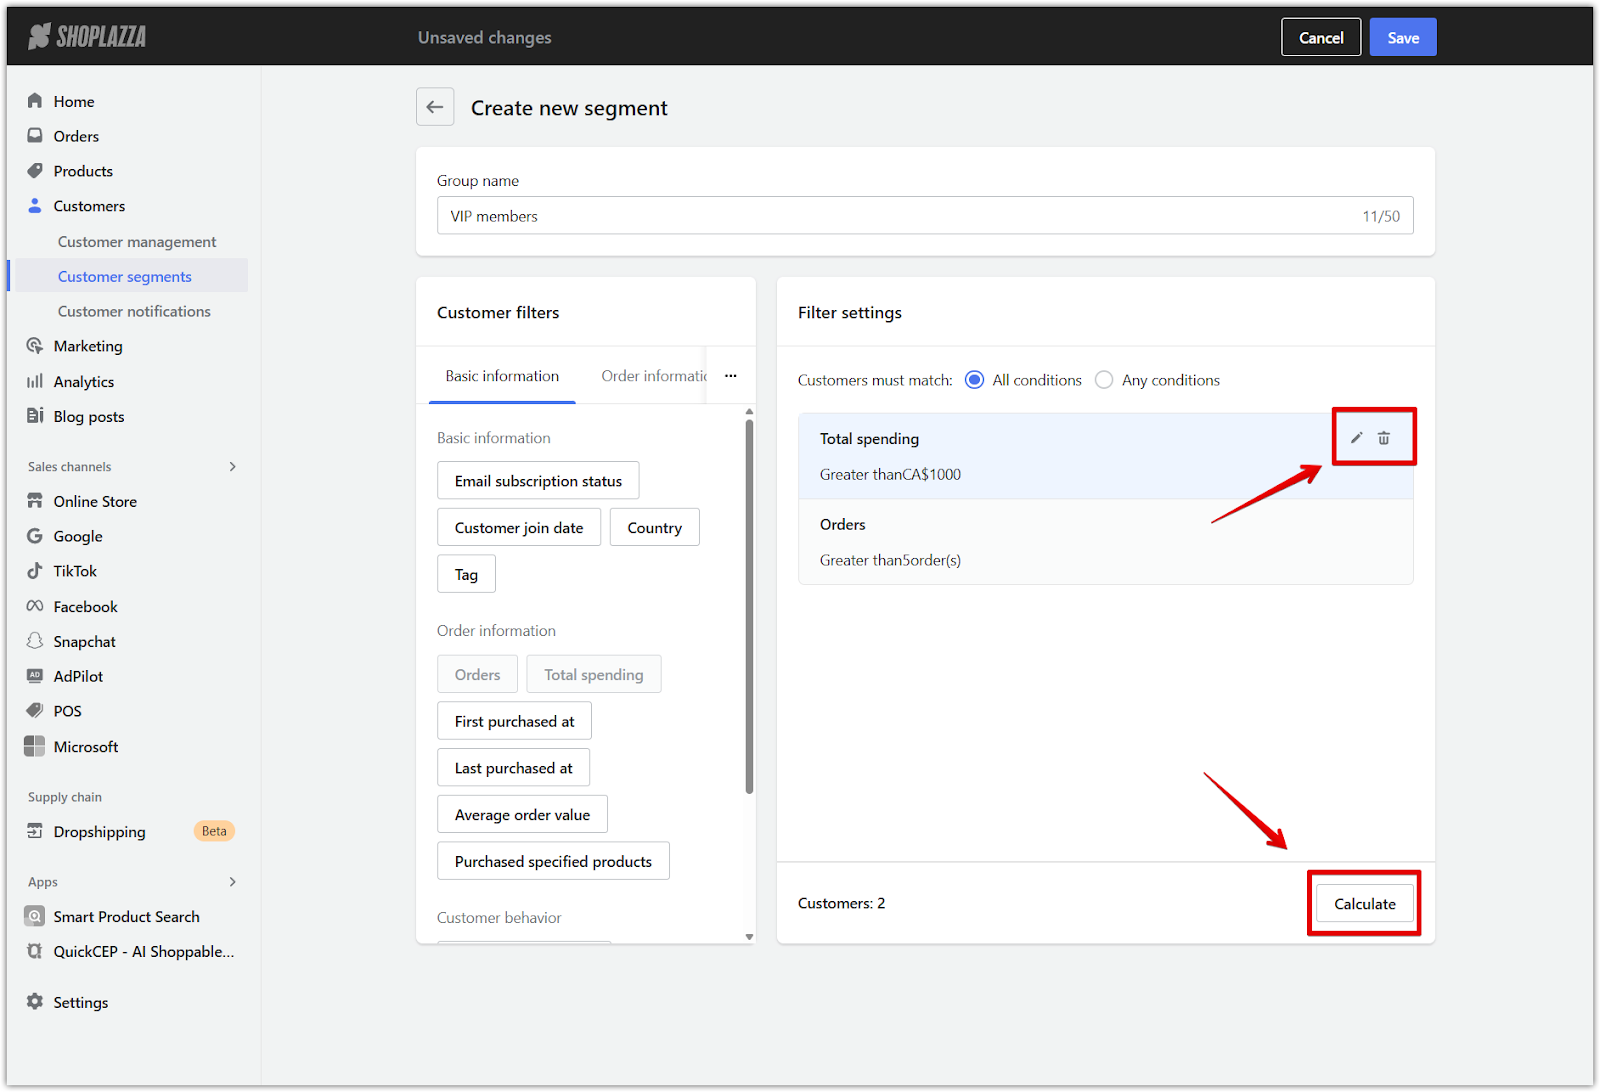
3. Set filtering conditions: Use the panel on the left to select conditions. Each selected filter will appear in the Filter Condition Settings panel on the right. Up to 10 filter conditions are supported per segment.
4. Choose match rules: Define how the selected conditions are evaluated when generating your customer segment. Two matching methods are available to control how strictly filters are applied. Once your filters are selected, click Confirm.
- Meet all conditions: Includes only customers who match every selected filter.
- Meet any condition: Includes customers who match at least one of the selected filters.
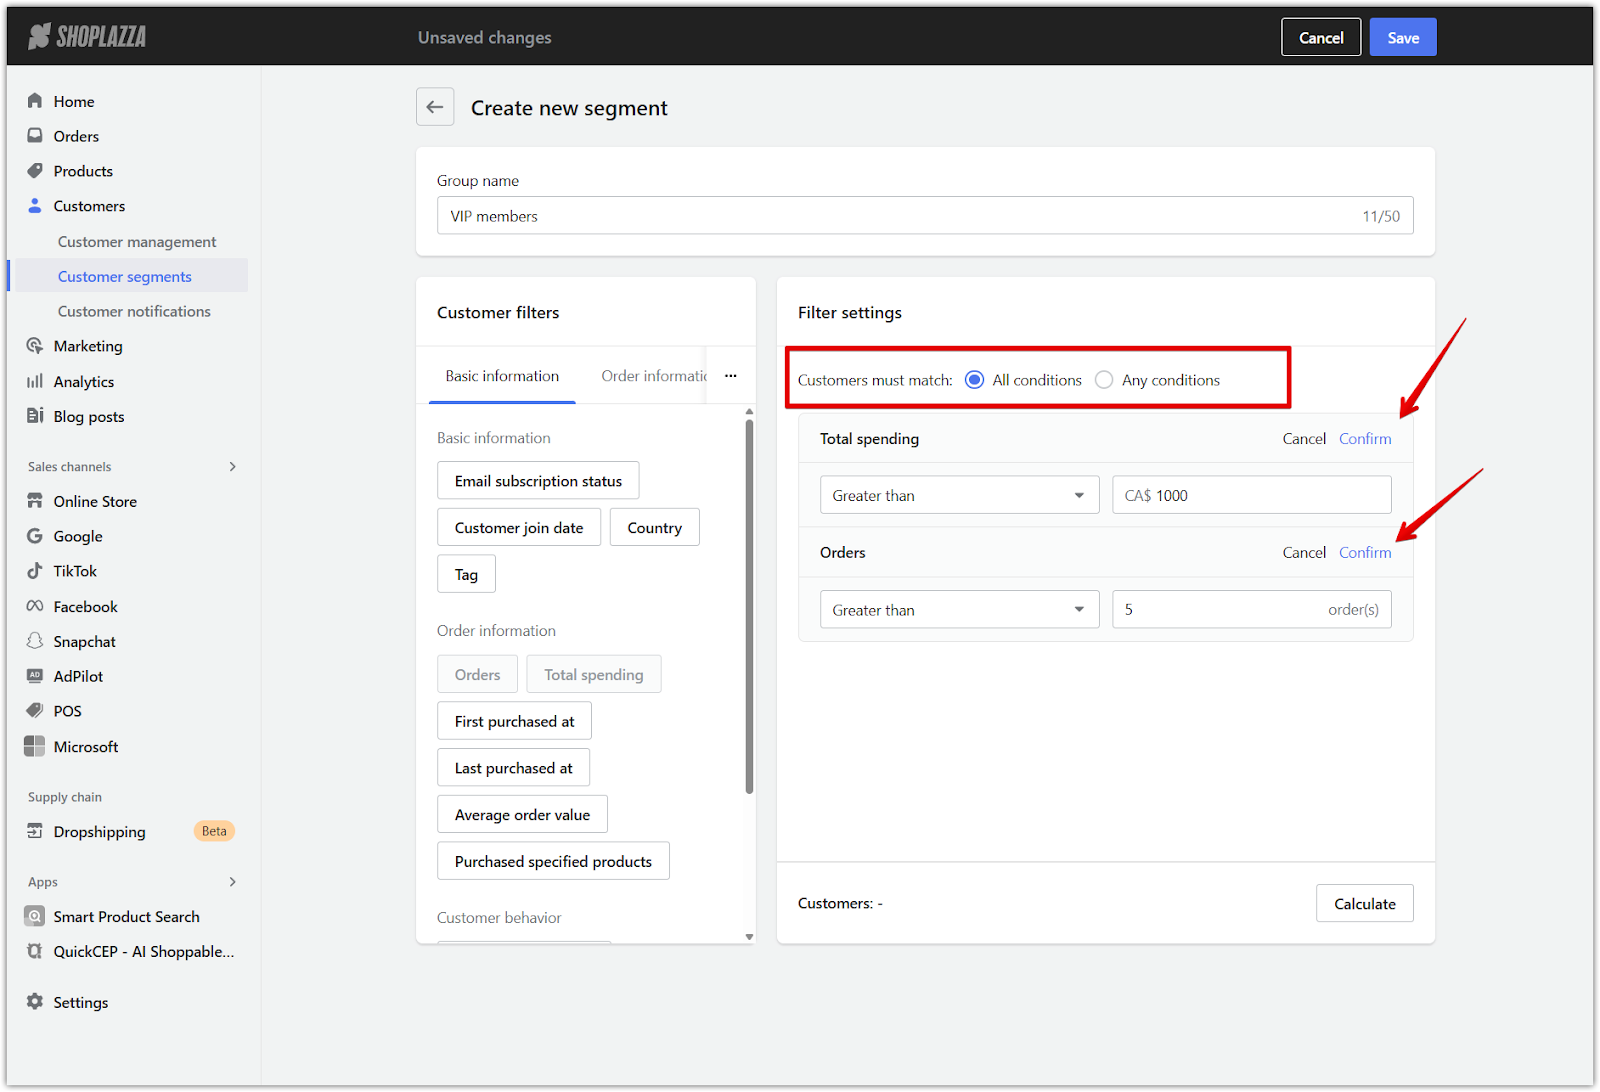
5. Edit filter values: Adjust filter settings to refine your segment before saving.
- Click the pencil icon to adjust a filter’s value or range.
- Use the trash icon to remove filters that are no longer needed.
- Click Calculate to preview how many customers meet the selected criteria.
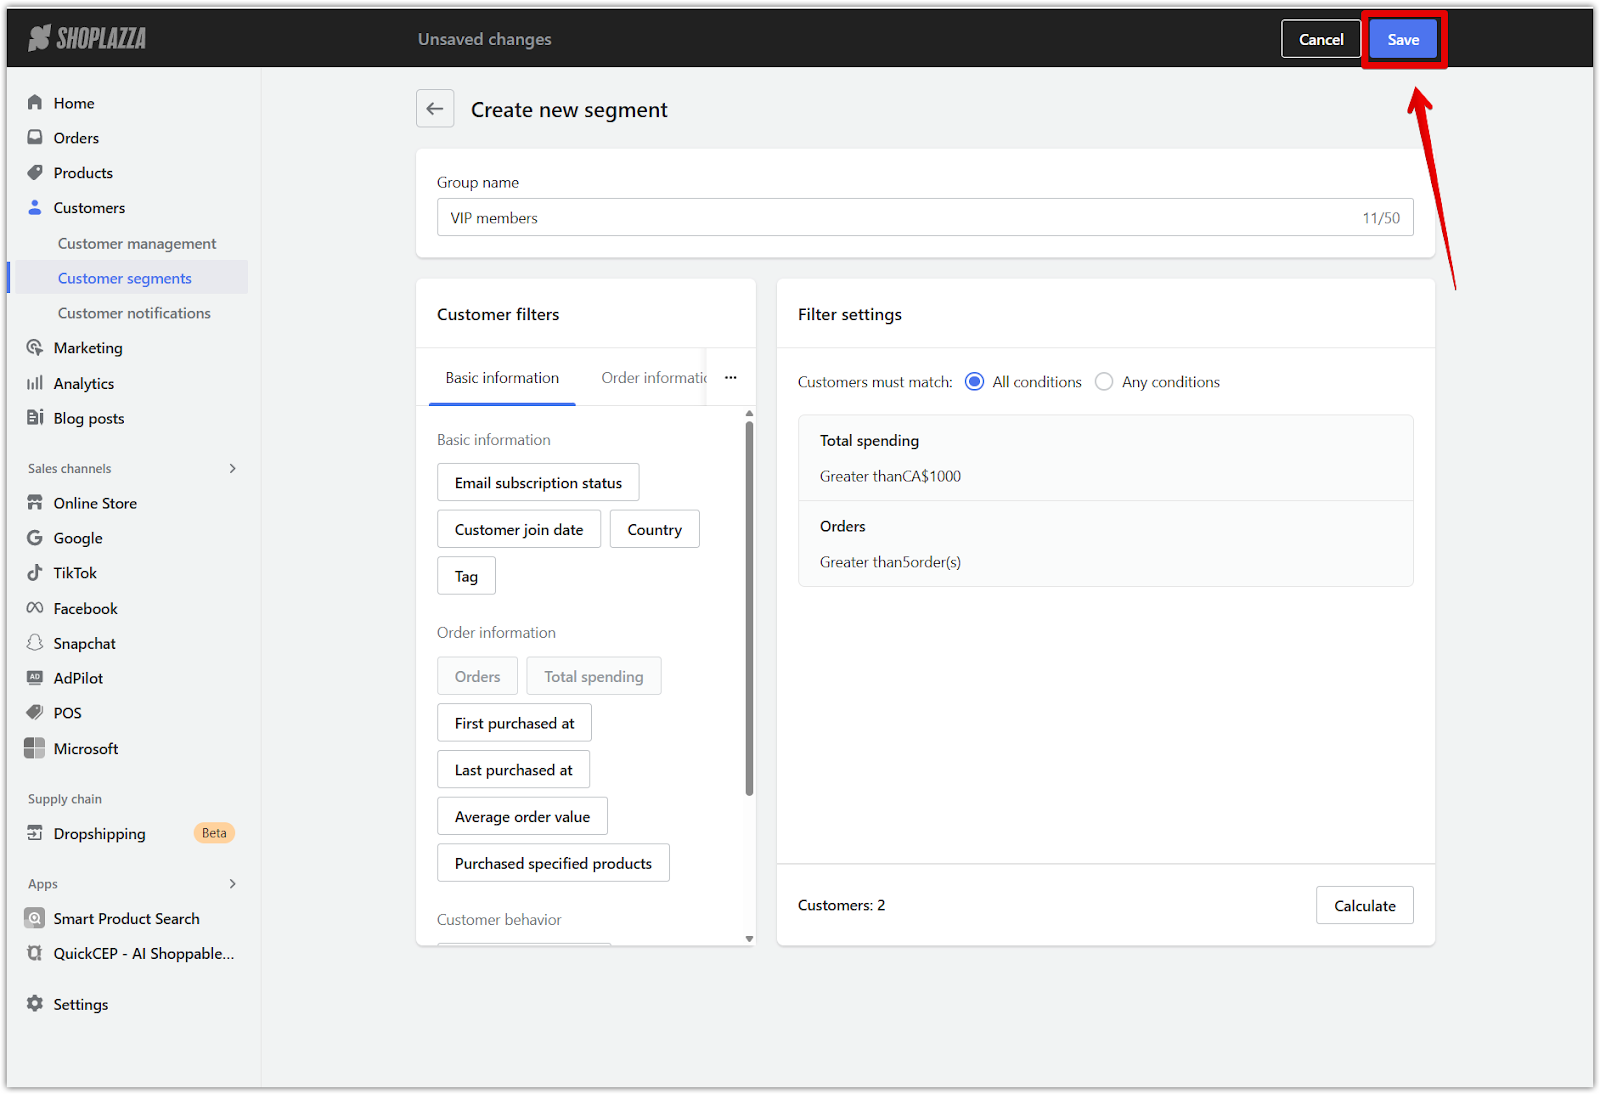
6. Save the segment: After configuration is complete, click Save in the upper-right corner to add the group to your segment list. Saved segments can be used in various marketing activities to target the right customers and improve campaign results.
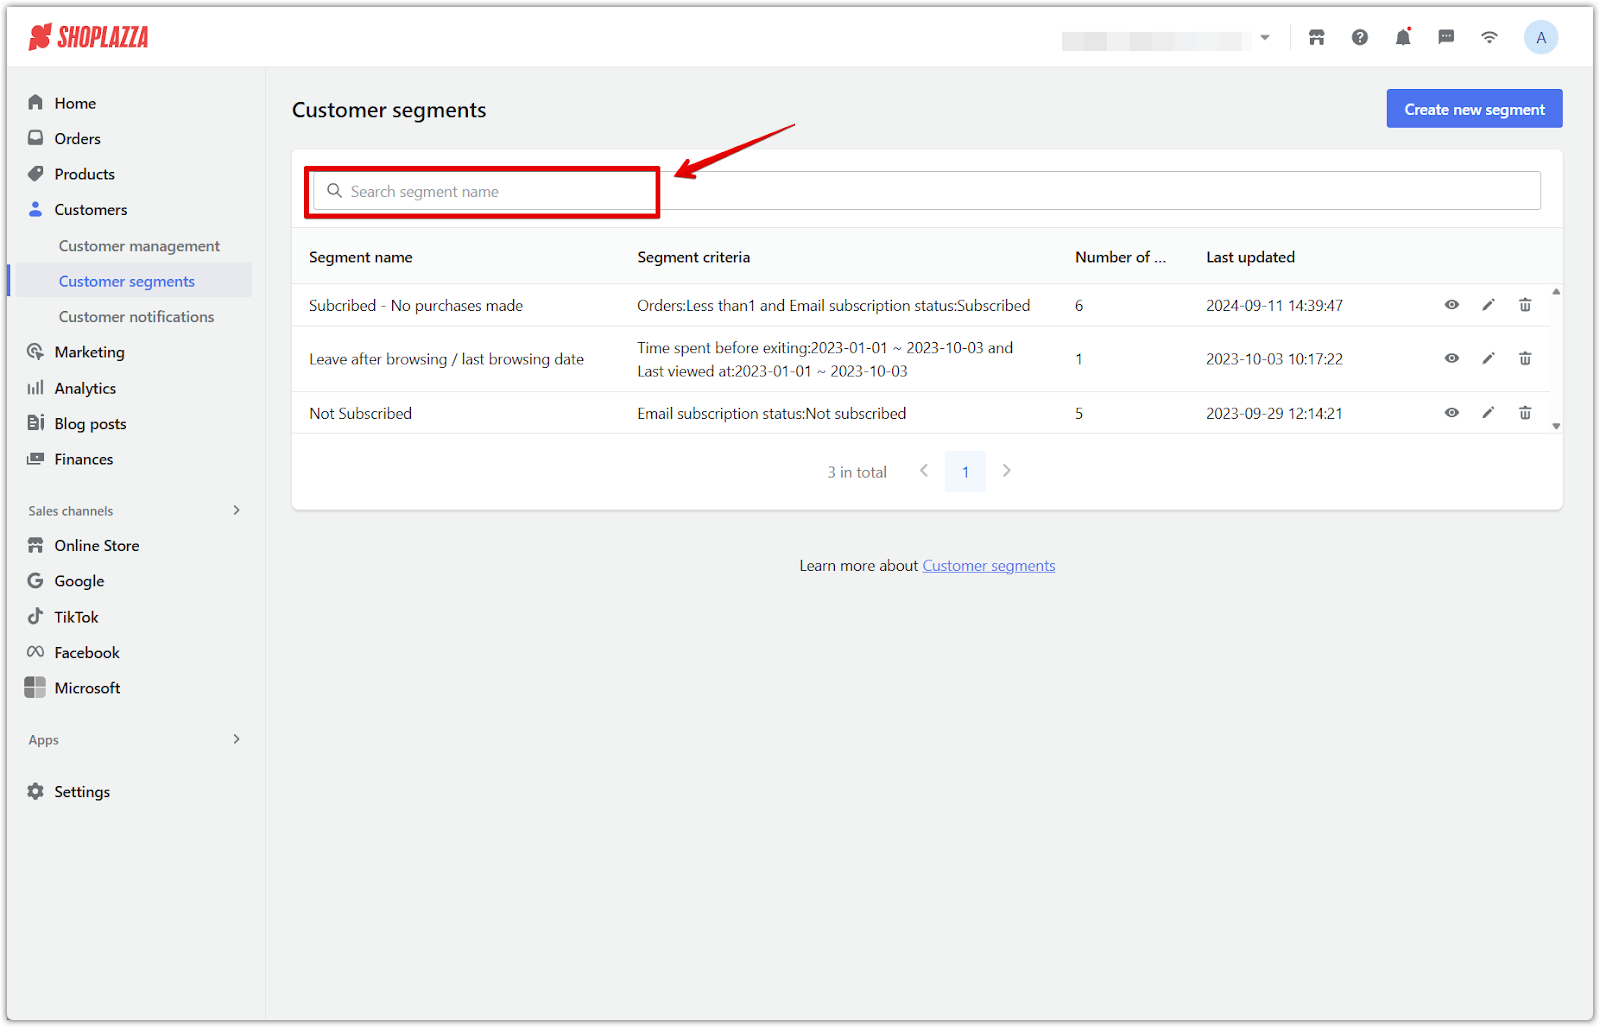
Managing existing segments
The Customer segments dashboard provides access to all saved groups and supports easy updates or removals as needed. Each segment entry shows its name, the number of matched customers, the filtering rules applied, and the last updated date, making it easy to monitor and optimize group performance.
1. Search by name: Locate a segment by entering its name into the search bar.
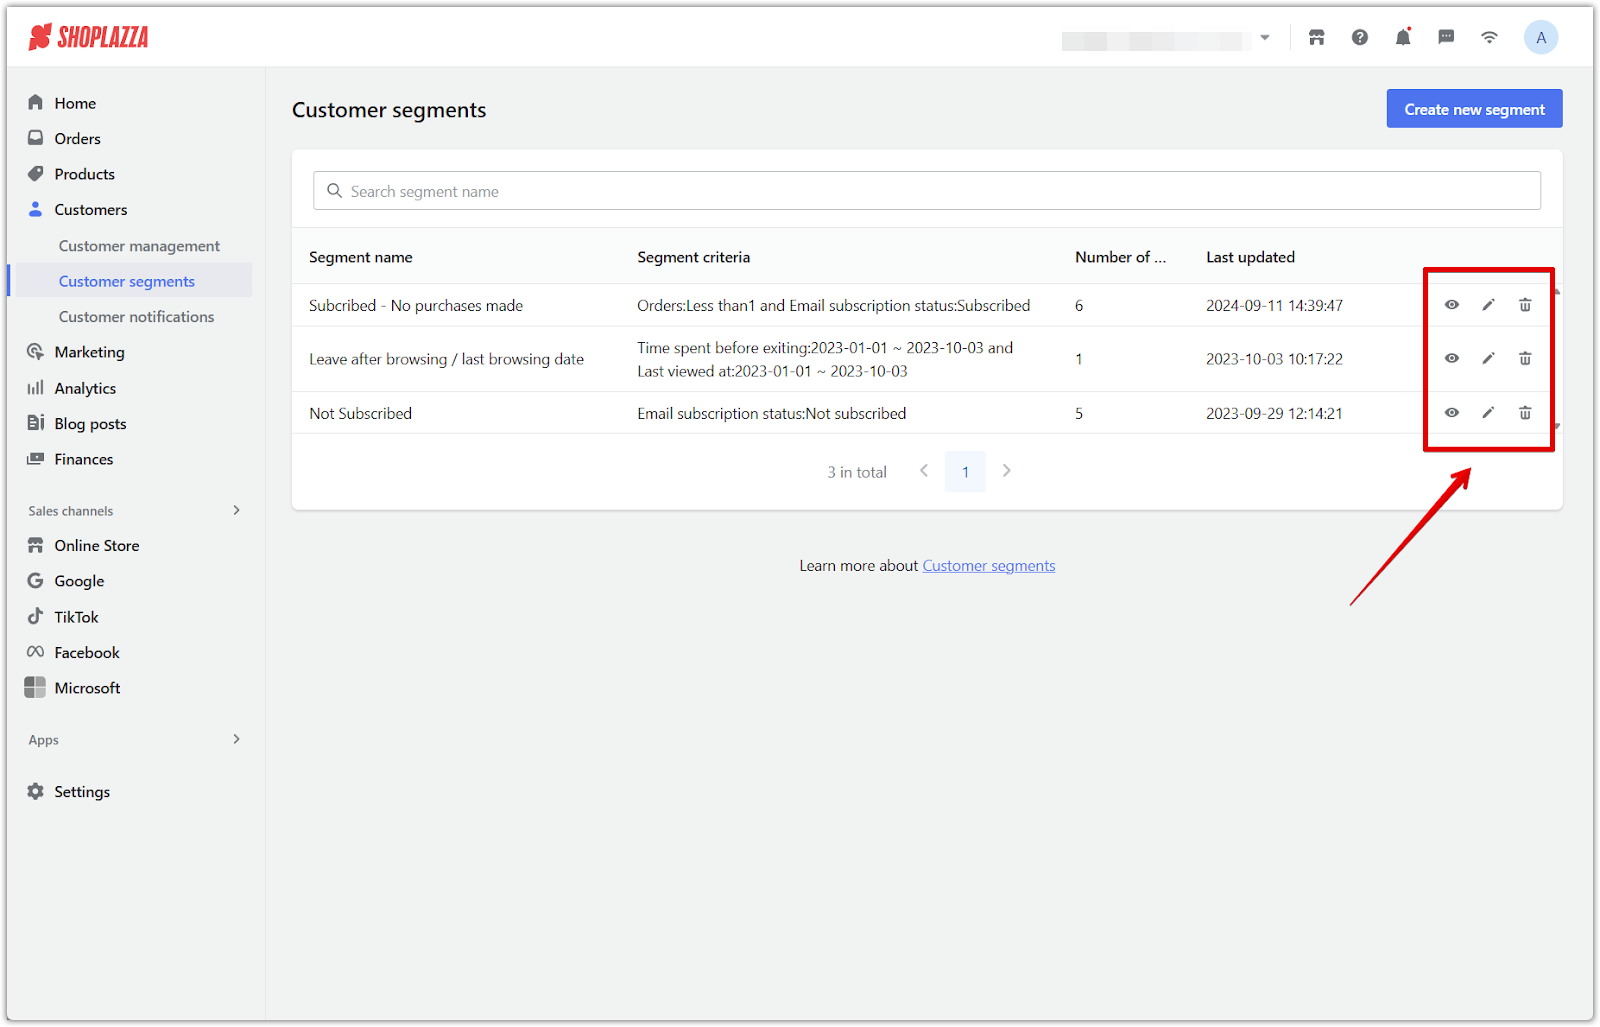
2. Edit group settings: Click the pencil icon to update filters, rename the group, adjust match rules, or delete a segment.
Supported filter types
Several time-based filters support preset date ranges, including past 7, 30, 90, or 180 days, as well as custom ranges. This applies to filters such as Customer join date, First purchased at, Last purchased at, Last added to cart at, Last viewed at, Time spent before exiting, and Abandoned checkout.
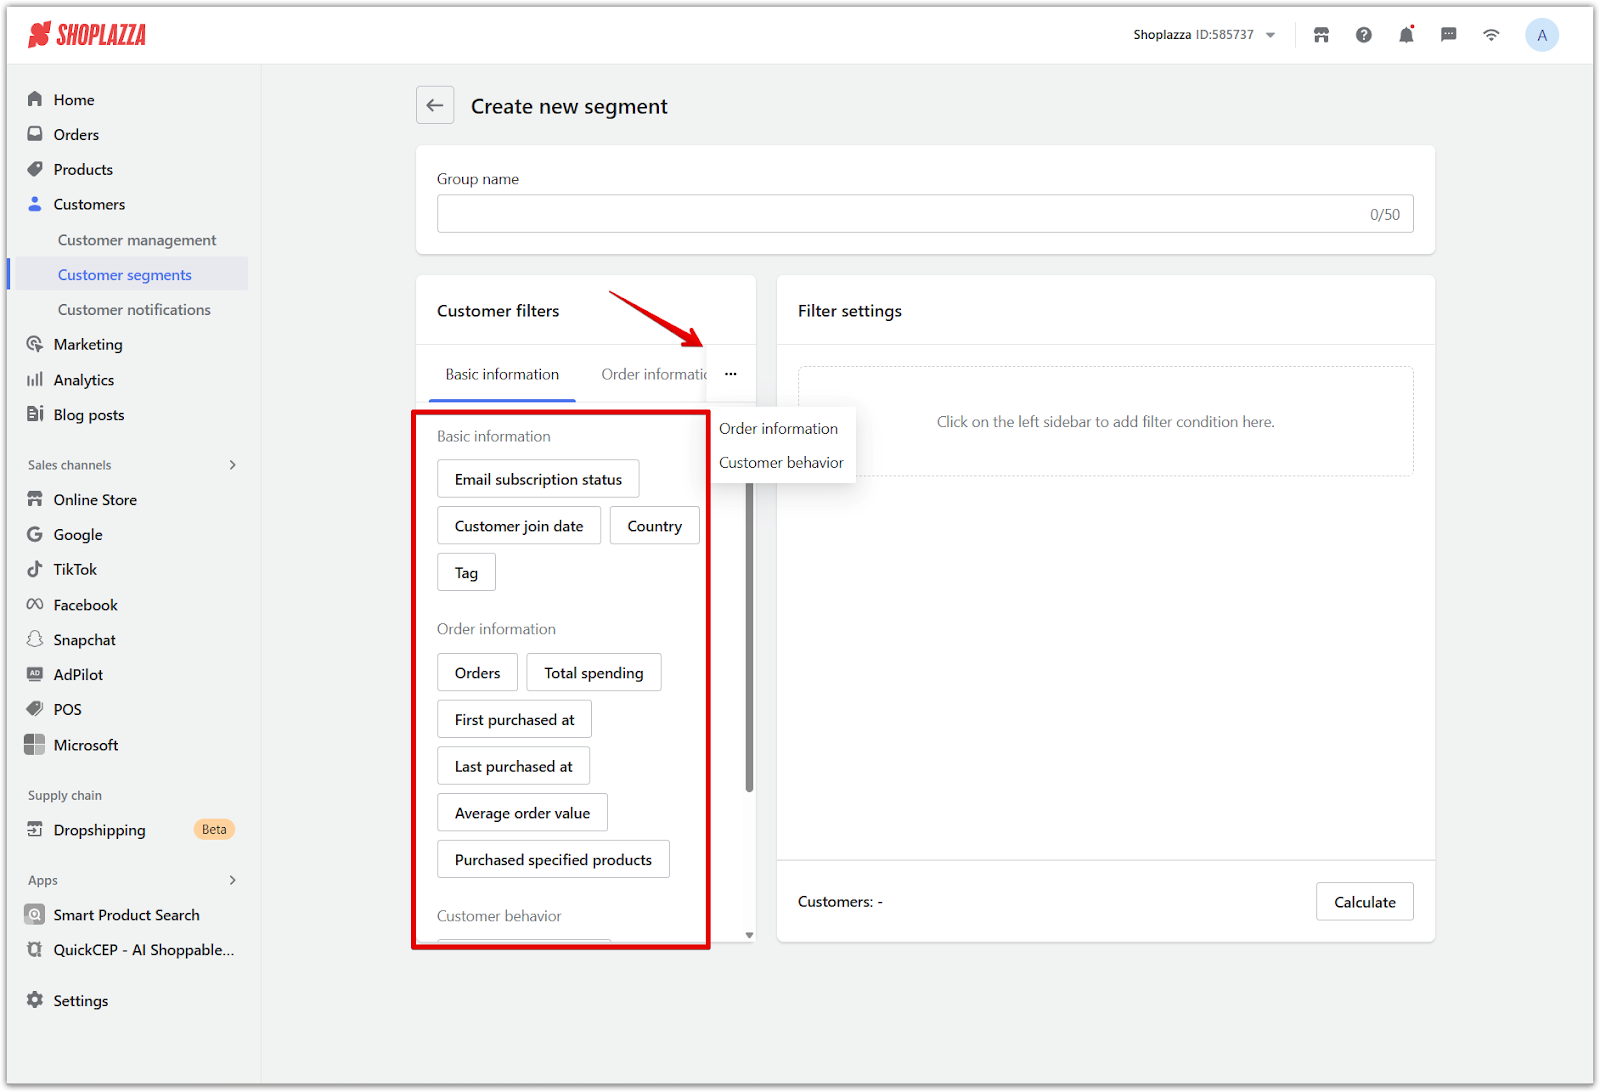
Filters are organized into three categories: basic customer data, order metrics, and storefront behavior. These filters allow for flexible and targeted segment building.
1. Basic information: Use profile-based filters to segment customers according to their account status and demographic attributes.
- Email subscription status: Filter by whether a customer has subscribed or unsubscribed from marketing emails.
- Customer join date: Segment by the date when a customer account was created. Use preset timeframes or specify a custom range.
- Country: Include or exclude customers based on their country. Only countries associated with existing customers are shown.
- Tag: Filter customers by assigned tags such as VIP, loyal, or wholesale to build groups based on custom labels.

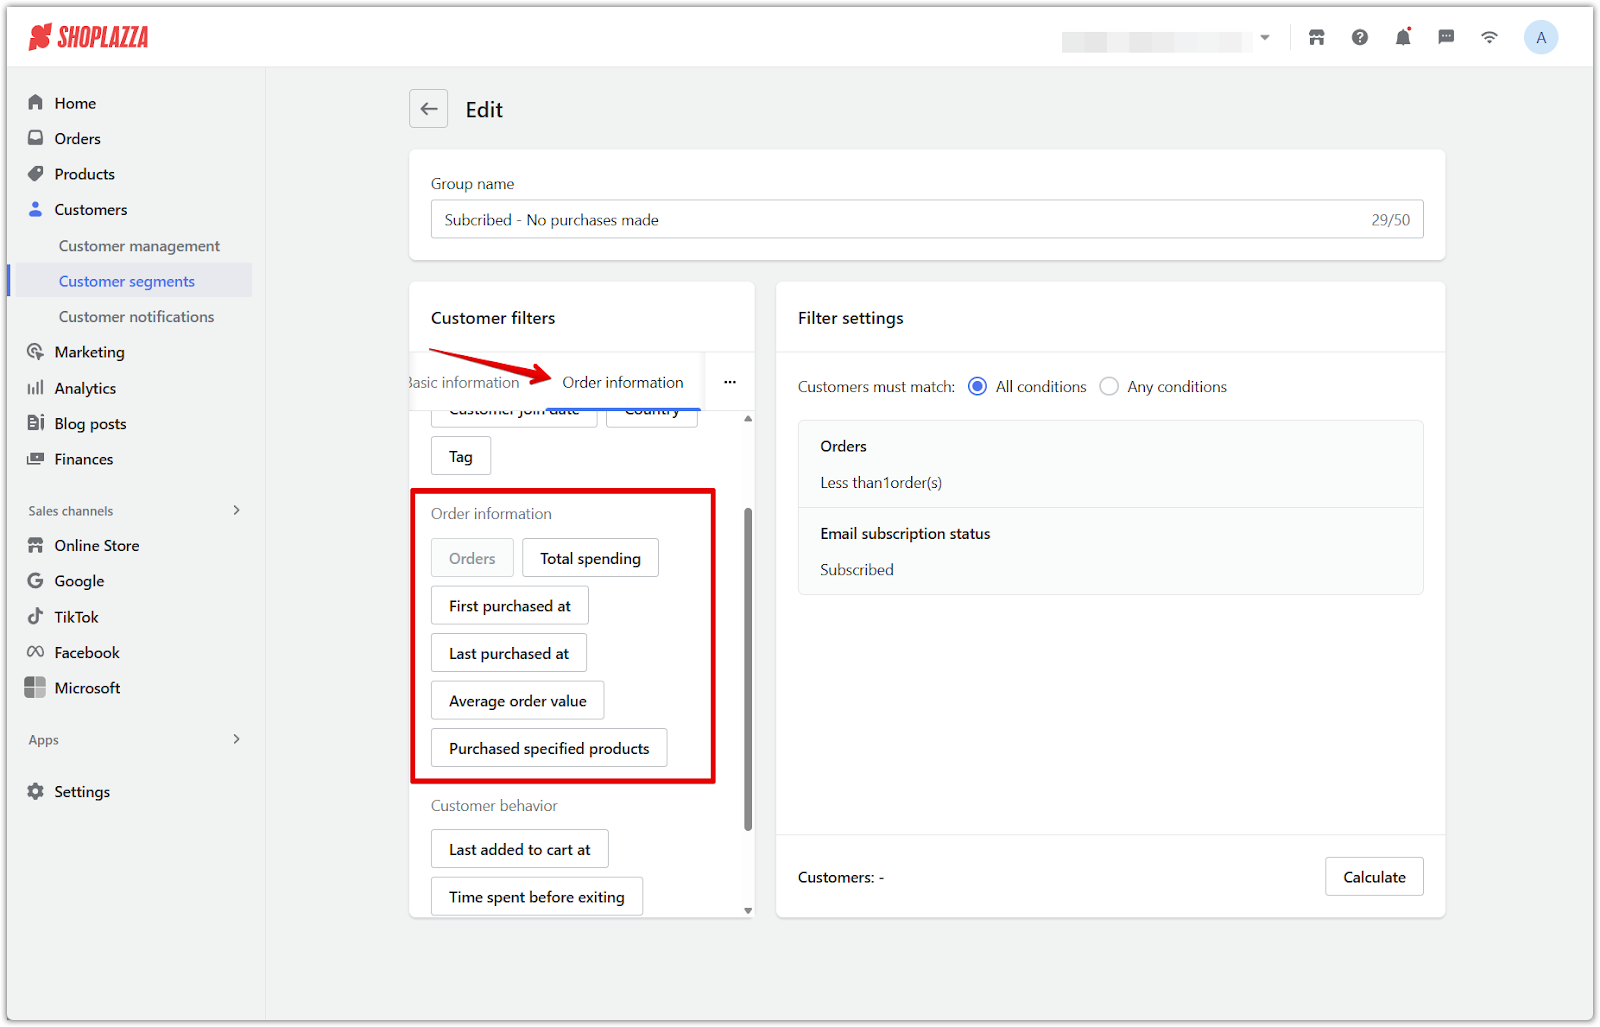
2. Order information: Group customers by purchase history and overall spending behavior.
- Orders: Filter by the total number of orders placed. Set conditions such as less than, greater than, or within a specific range to isolate new or frequent customers.
- Total spending: Segment by total amount spent across all orders. Define thresholds to focus on low-spending or high-value customers.
- First purchased at: Target customers based on the date of their first completed purchase. Select from preset timeframes or specify a custom date range.
- Last purchased at: Filter customers by the date of their most recent order to focus on inactive or recently engaged buyers.
- Average order value: Group customers by their average spend per order. This is helpful when identifying buyers with consistent high-value or low-value transactions.
- Purchased specified products: Include or exclude customers who have bought specific items. Select one or more products to target buyers with known interests.
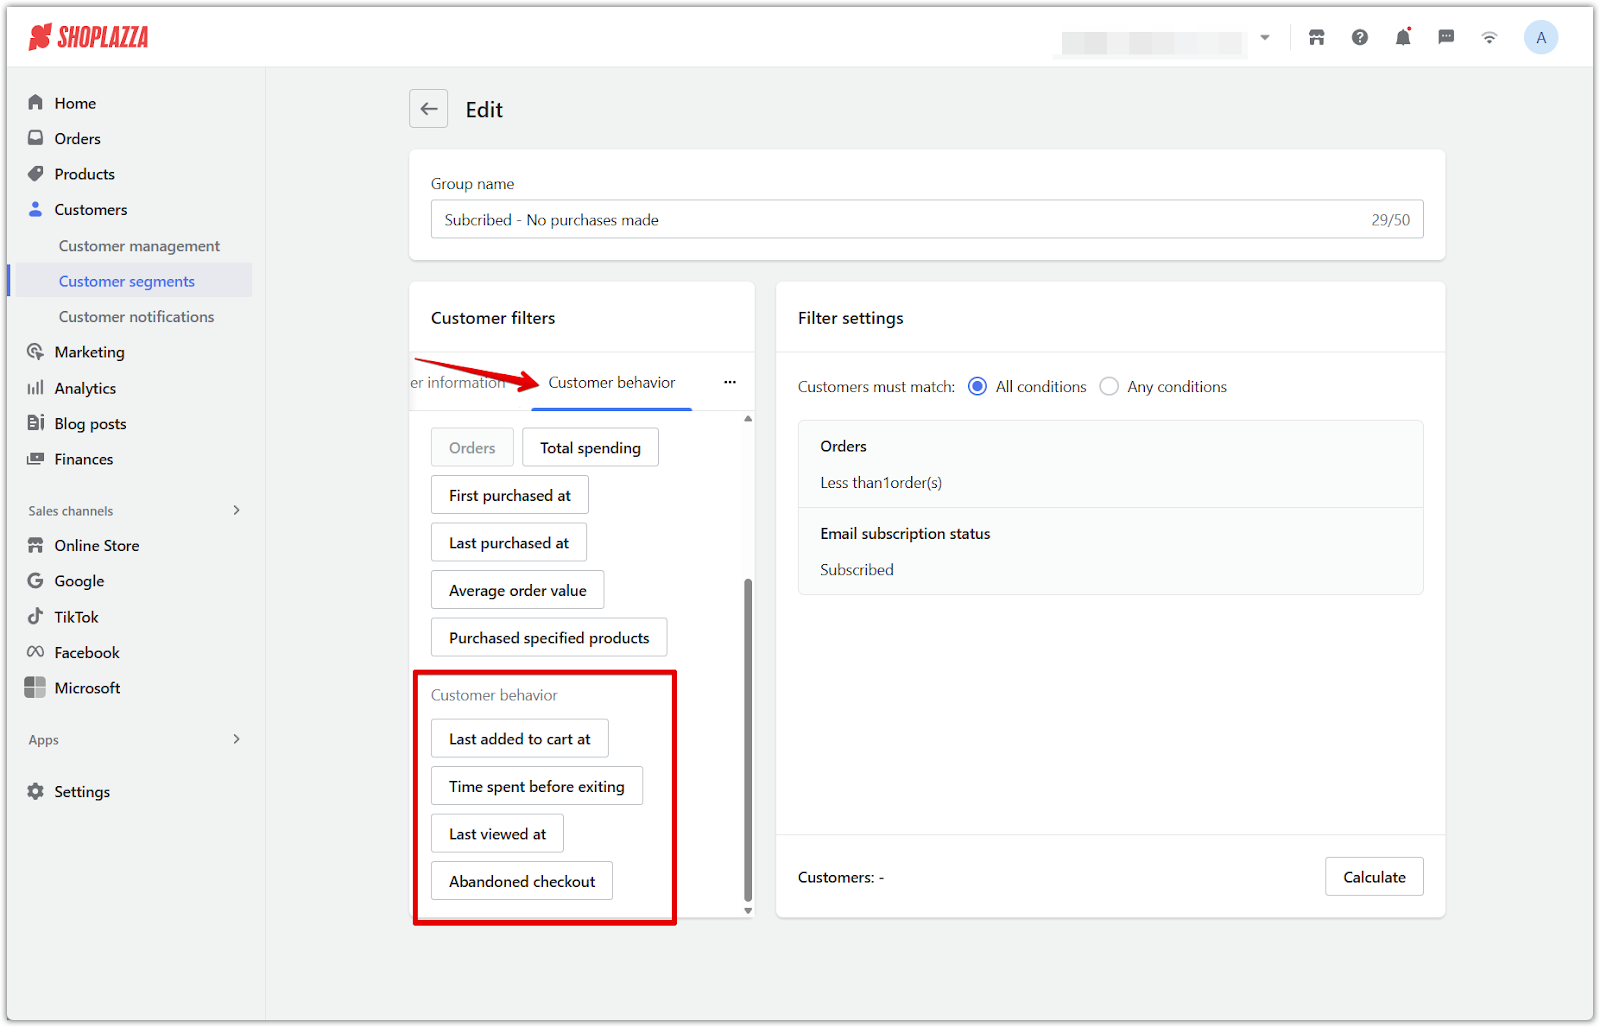
3. Customer behavior: Use activity-based filters to segment customers according to how they interact with your storefront.
- Last added to cart at: Filter by the most recent date a customer added any product to their cart. Helpful for targeting customers with intent to purchase.
- Time spent before exiting: Segment based on how long a customer stayed on the site before leaving. Useful for identifying highly engaged visitors.
- Last viewed at: Filter by the date of a customer’s most recent page or product view to re-engage recent visitors.
- Abandoned checkout: Target customers who entered checkout but did not complete their purchase. Ideal for follow-up campaigns and recovery strategies.
Customer segmentation enables personalized engagement, targeted promotions, and stronger retention. For global merchants, especially those with cross-border stores, it helps localize offers and reach the right audience. Segments support strategies like acquiring new shoppers, reactivating dormant ones, and rewarding loyal customers to drive long-term growth.


Comments
Please sign in to leave a comment.