Managing tax settings for a large product inventory can be time-consuming when done individually. Boost your operational efficiency with this step-by-step guide designed to make it easier to handle tax-inclusive prices for multiple products at once.
Step 1: Enable the option to Include tax for multiple products
1. From your Shoplazza admin > Products > All products, select the products to be taxed, click More and select More bulk actions in the dropdown.

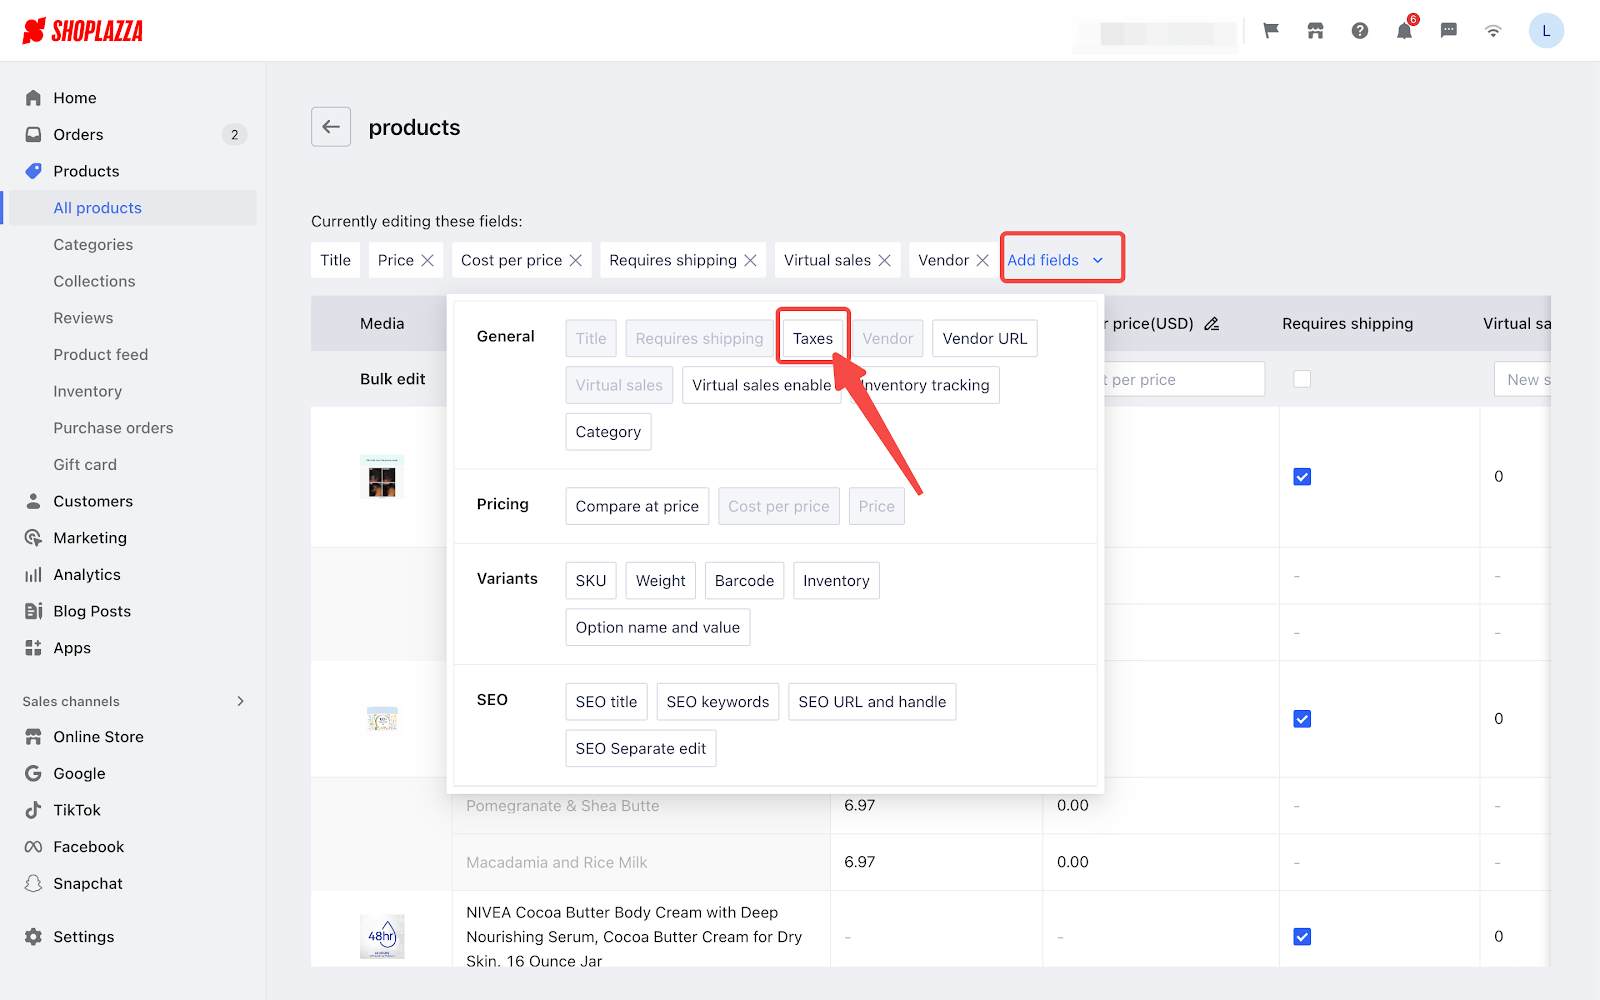
2. Click Add fields and select Taxes (if it has already been added, there is no need to add it again).

3. After that, scroll the page to the right to find the Taxes column. You can either select the products in bulk or seperately. Please remember to click Save when you finish your edits.

Step 2: Use export/import feature for bulk tax settings
For more details on how to export and import products, see Exporting/Importing Products.
1. From your Shoplazza admin > Products > All Products, select the products you wish to tax, then, click Export. Upon clicking, choose the Selected products option and click Export again to generate the list.


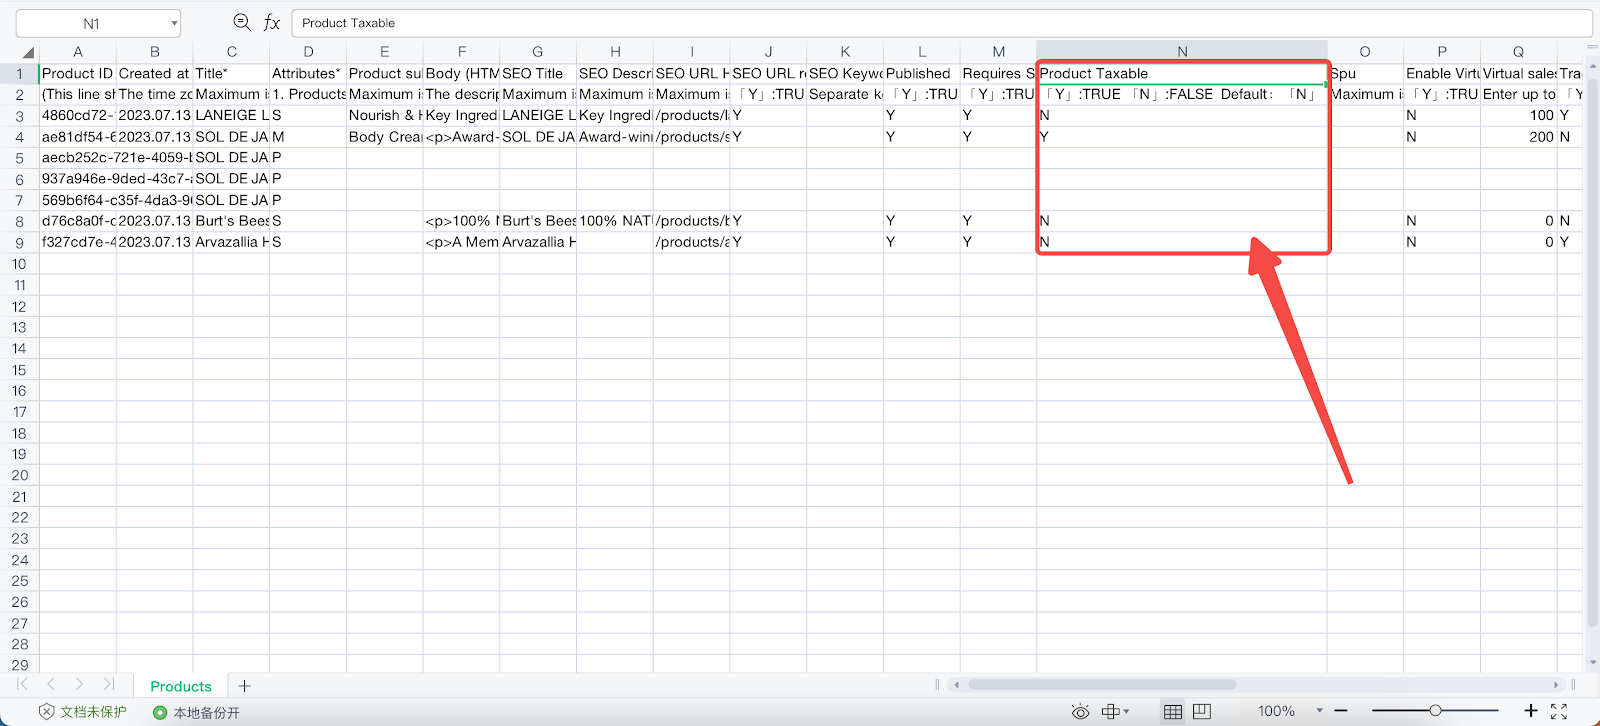
2. Open the downloaded document using a spreadsheet software (such as Google Sheets or Excel.) Mark products to be taxed with "Y" and those not to be taxed with "N". Don't forget to save the file once you are done updating.

3. Once you're back in your Shoplazza Admin, locate and click the Import button to upload your edited file. This will finalize your bulk tax settings, updating all selected products with the new tax-inclusive prices.


Comments
Please sign in to leave a comment.