
Allow your customers to view content in their native language, creating a more personalized shopping experience. By activating various languages from your admin, you can present your products and information in a way that feels more local and personal. Below, you'll find step-by-step instructions for setting up multi-language options for both store themes and customized content.
Note
1. Geolocation App: Installing the Geolocation App and enabling multiple languages is highly recommended. This allows customers to view pre-localized pages when they change the language settings in your store.
2. Multilingual settings App: When using this app, be mindful to avoid conflicts with your customized translations. It uses Google Chrome's built-in translation system to automatically scan the page, identify languages, and offer machine translations. Keep in mind that the quality and accuracy of translations are tied to Google's services.
3. Handling extensive inventory: If your store has a wide array of products, translating all the related content might seem like a hefty task. The Multilingual settings App can be a significant asset to easing this process and lessening your workload.
Adding languages
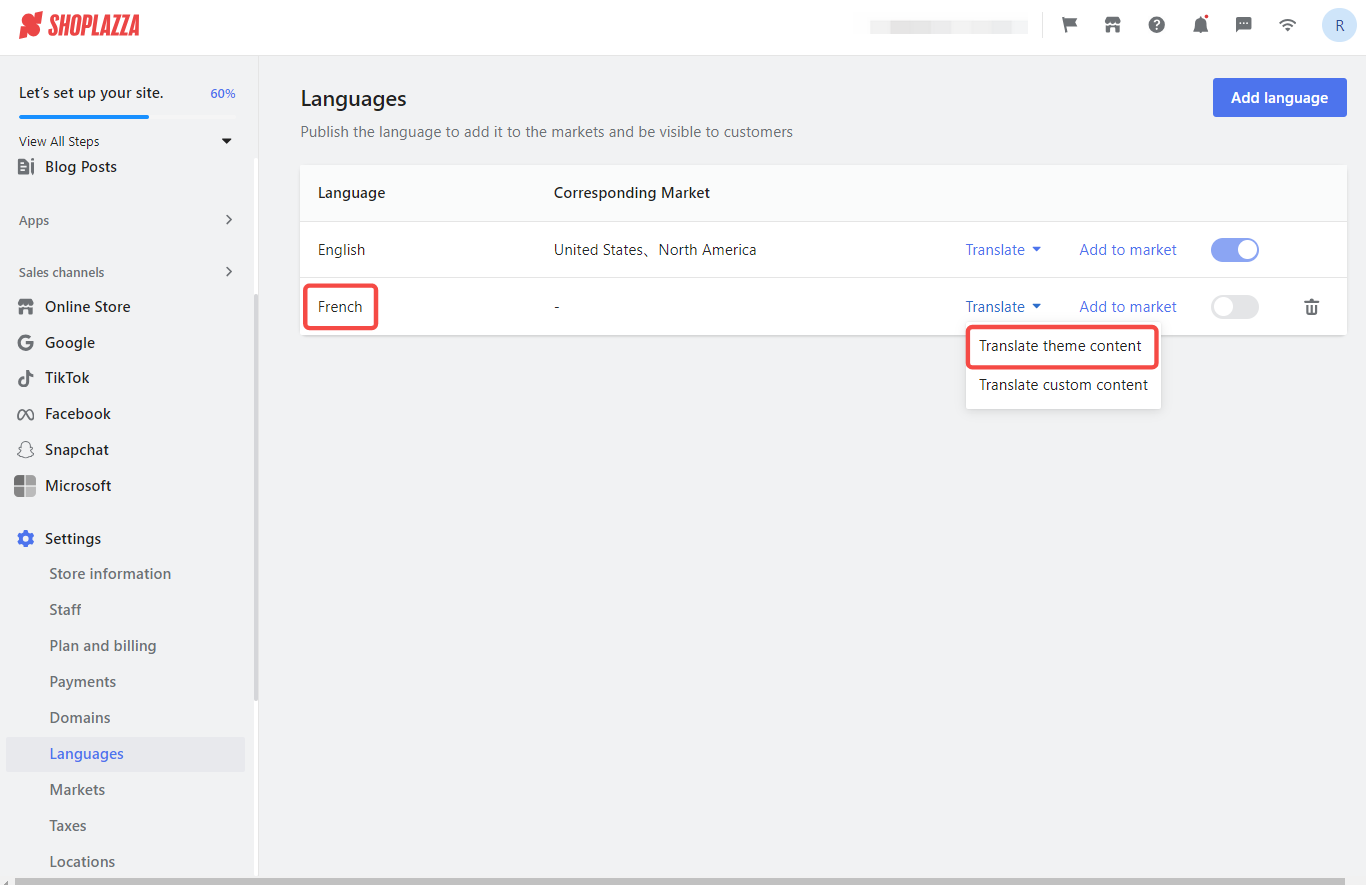
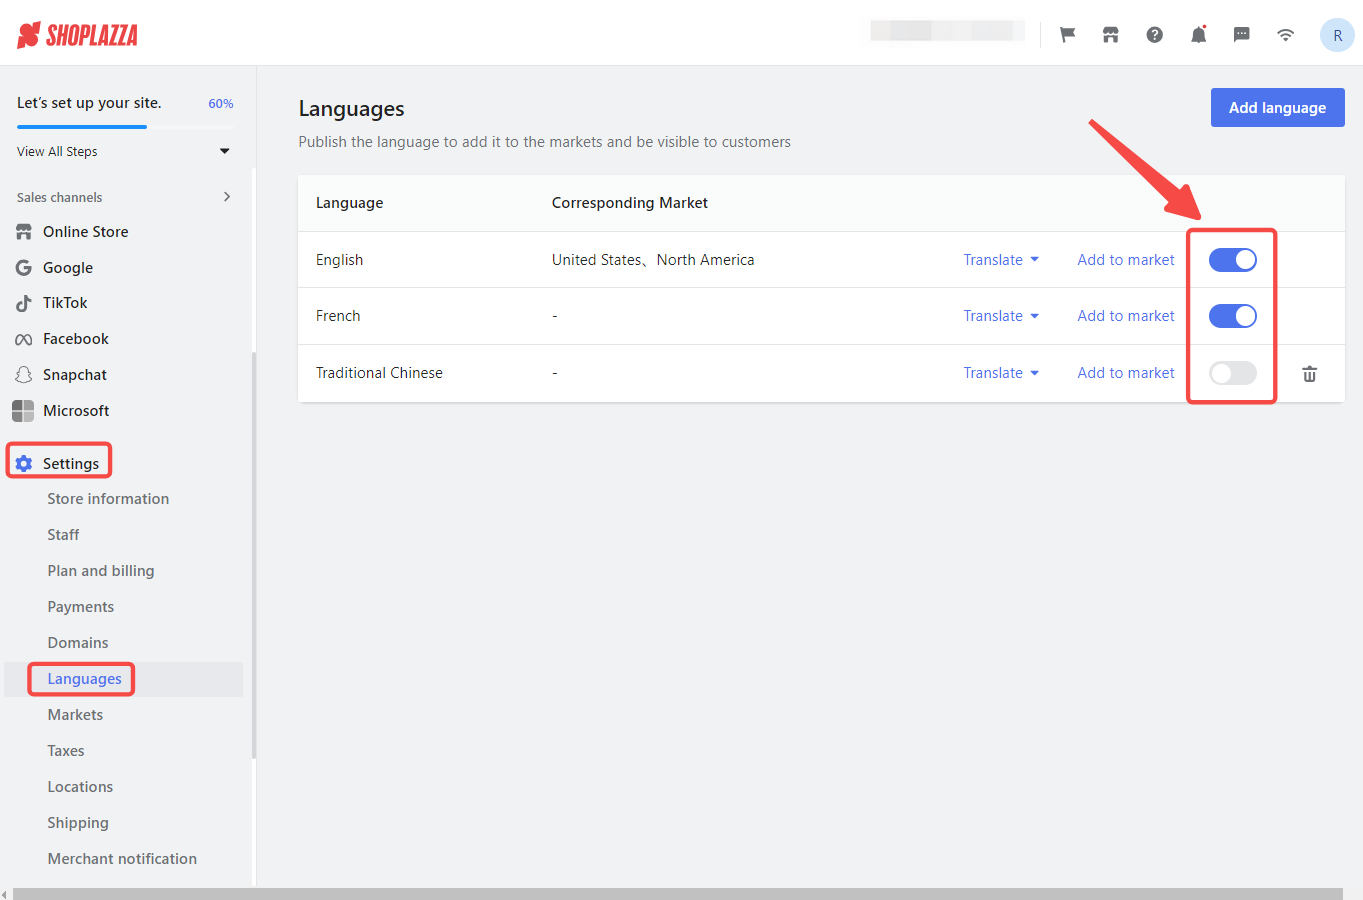
From your Shoplazza admin > Settings > Languages, click Add language for settings.

Translation
After adding a language, begin by translating the content that will be displayed in your store. If this step is skipped, customers will still see content in the default language of your primary market, even if they switch to the target language.
The following two kinds of content require translation:
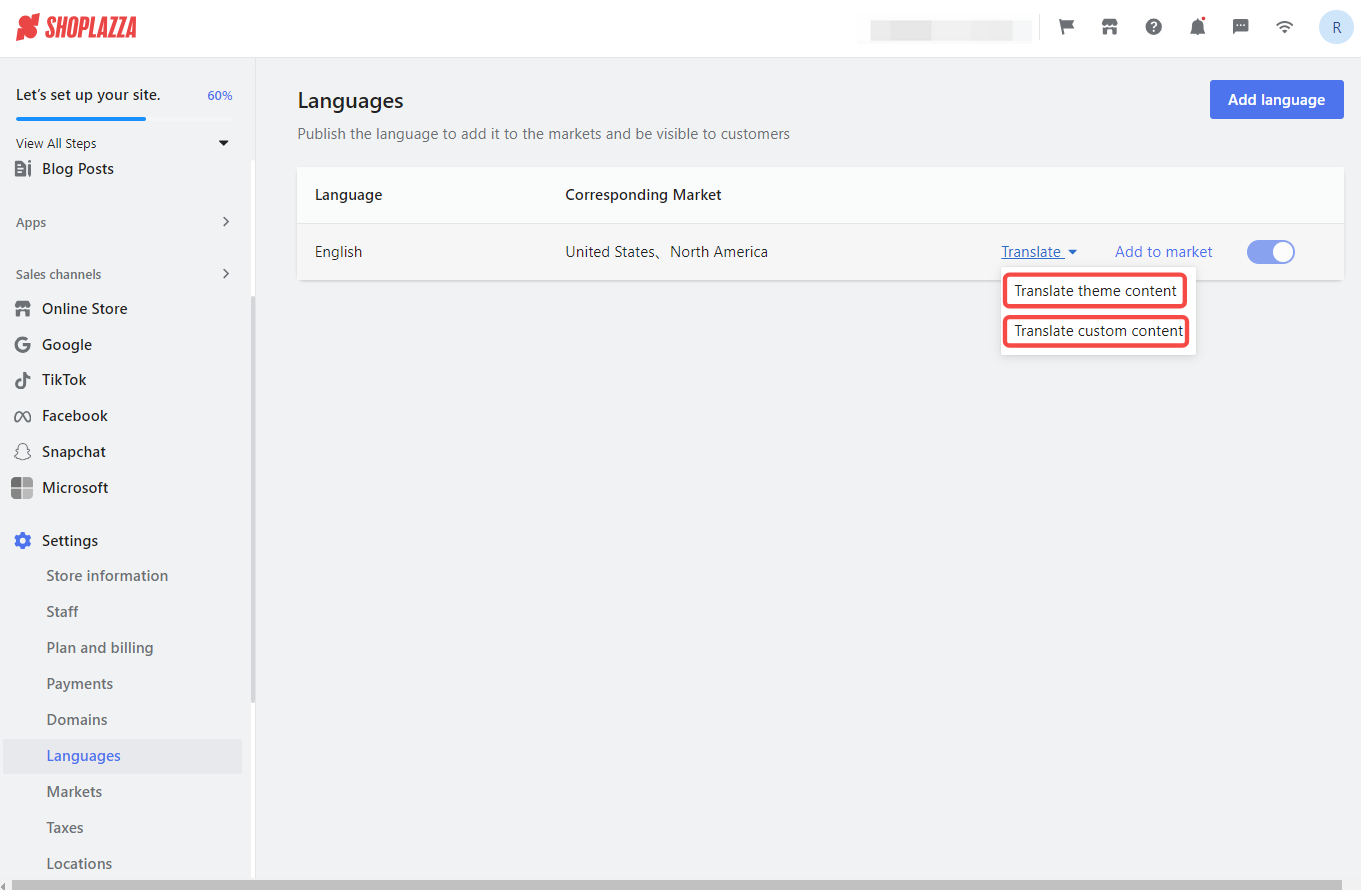
1. Theme content: You can click Translate theme content to access the page where you can translate the content of your store.
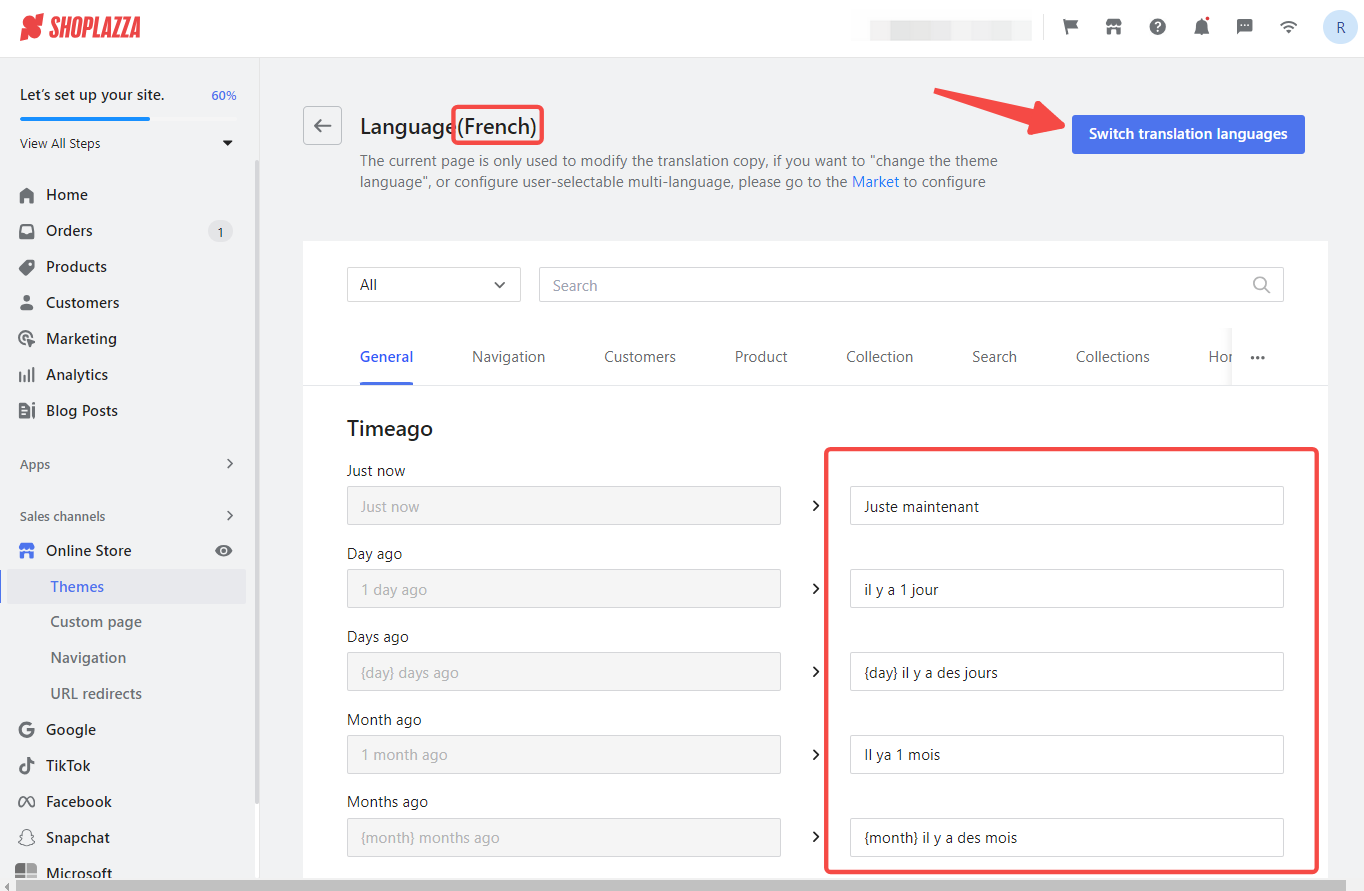
- The system will automatically translate the default text on the left into the target language you select. However, if you want to modify or refine the automated translation on the right, you can do so easily. For example, if the default language of this theme is English and you want to translate the content into French, please first select French under Languages and click Translate theme content. Then, you can polish the corresponding French words like "Continuer vos achats" in the boxes on the right according to the English content on the left.

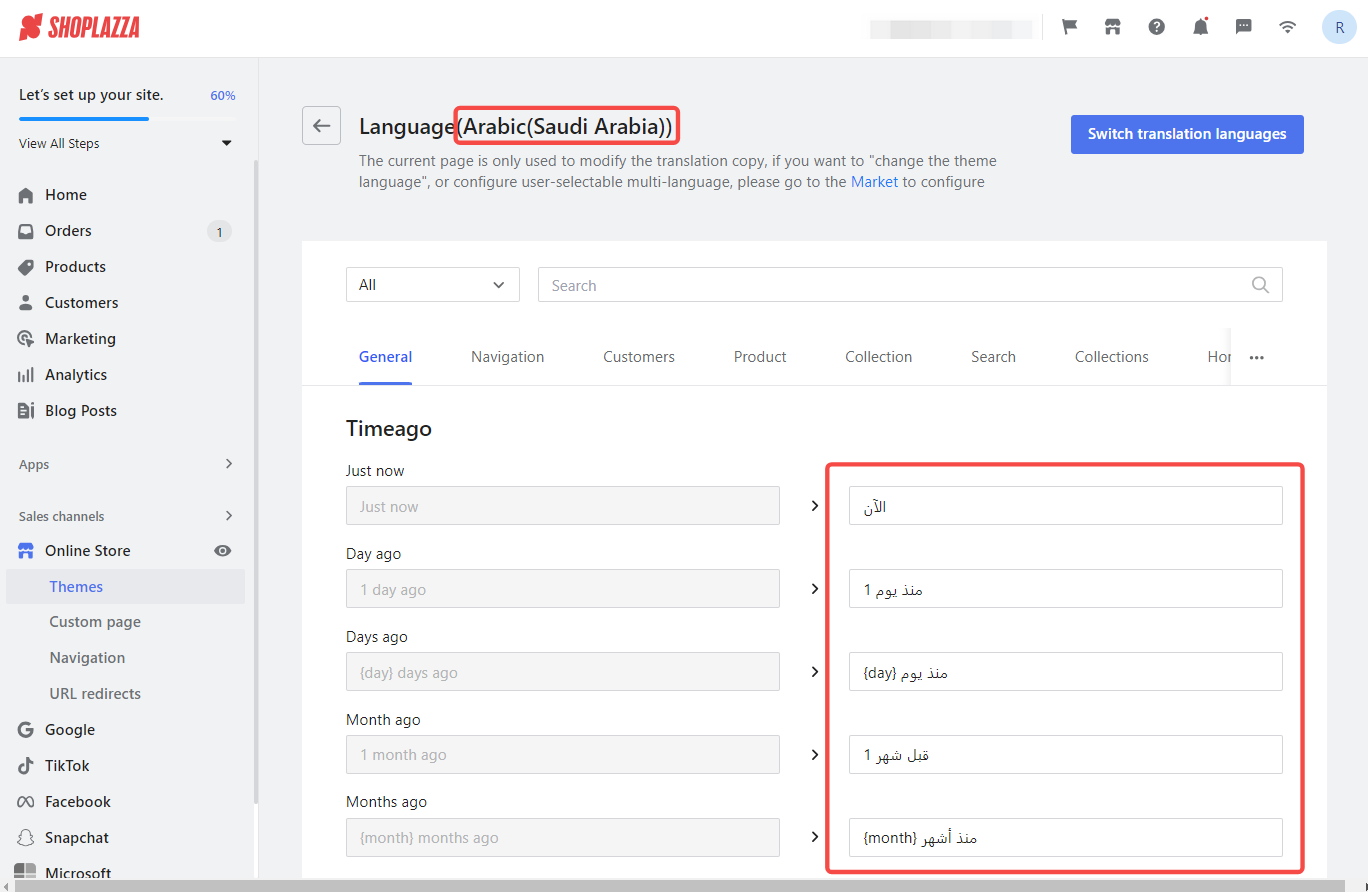
- If you click Switch translation languages, the target language on the right will change as well. For example, if you want to translate the English content into Arabic instead of Chinese, you can click Switch translation languages and select Arabic. Then, the target language on the right will change into Arabic.

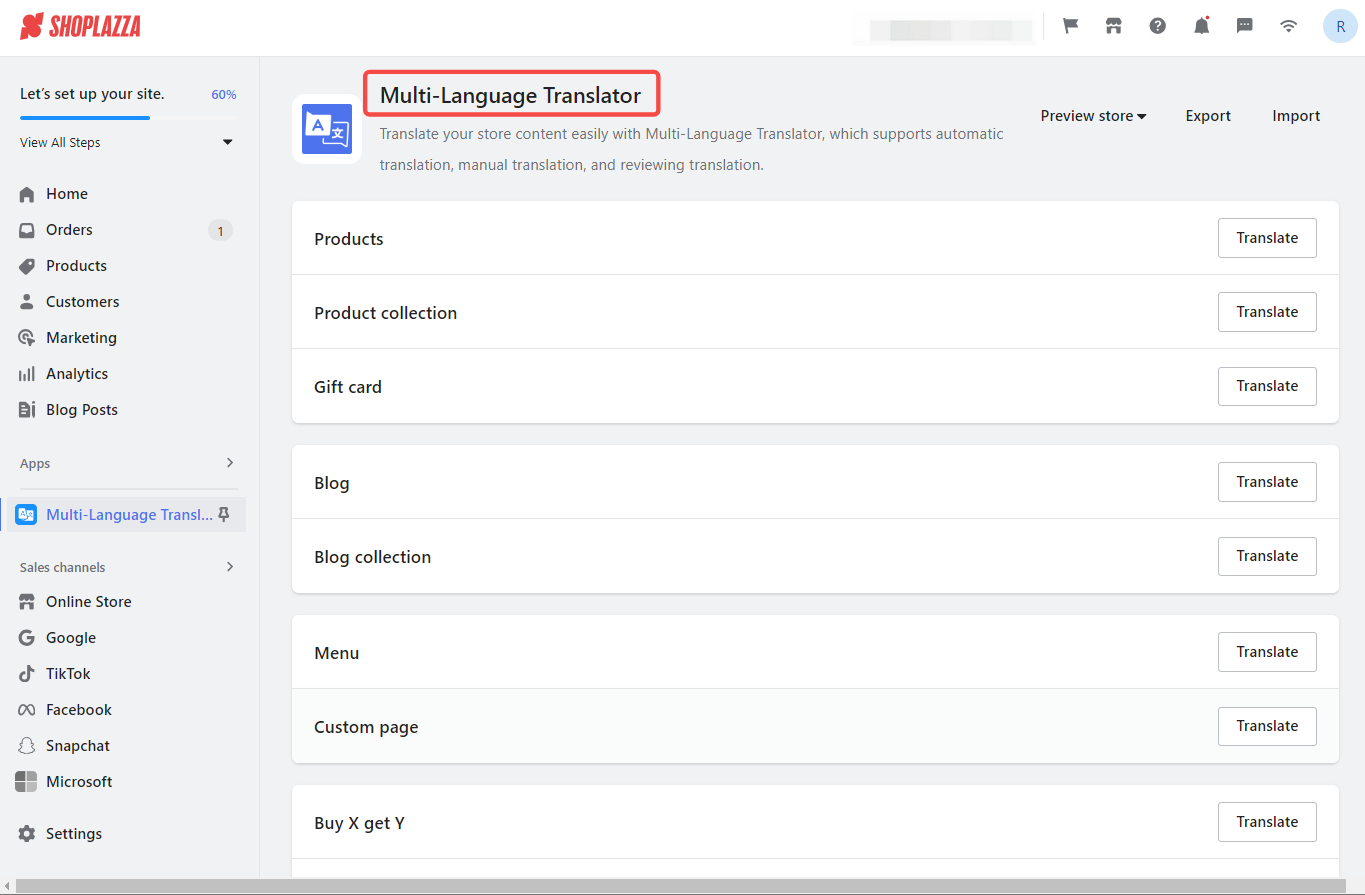
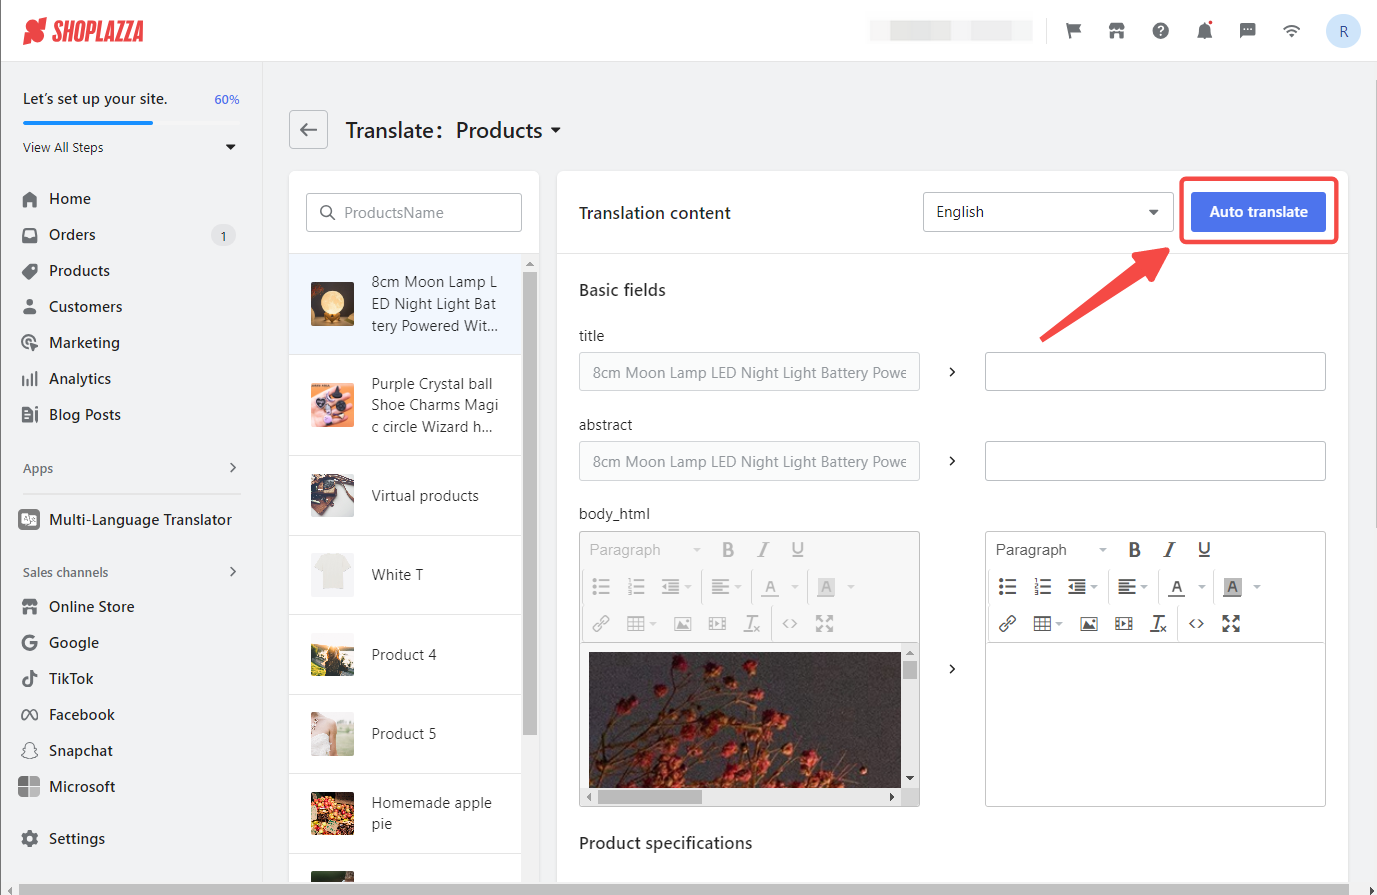
2. Custom content: If you want to translate custom content, click Translate custom content. If you haven't already installed the Multi-Language Translator App, you'll be redirected to do so. Once installed, you can directly access and begin adjusting your translation settings within the Multi-Language Translator App.
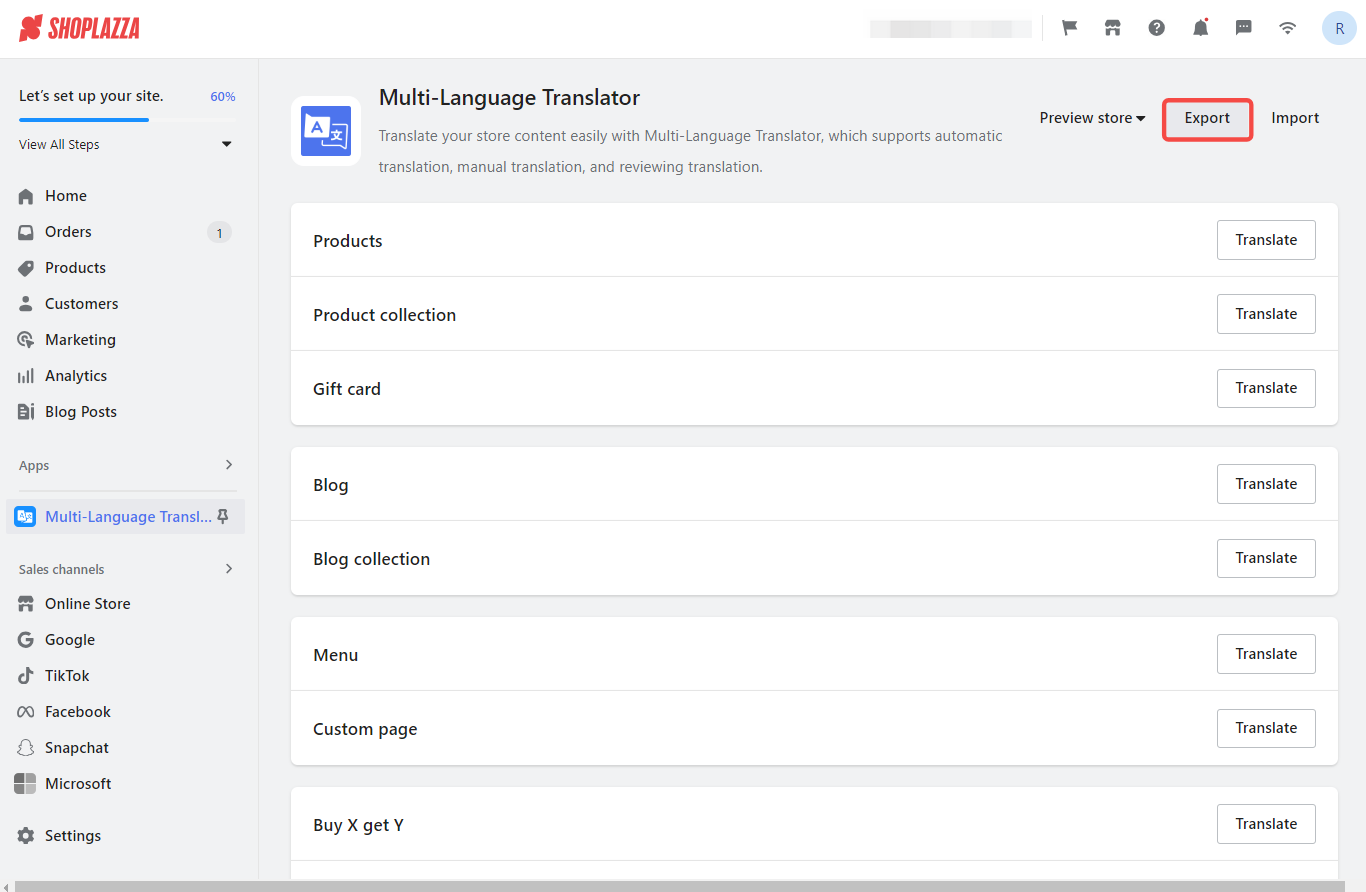
- You can first click Export to download the translated content and make modifications to it, and then click Import to upload it.
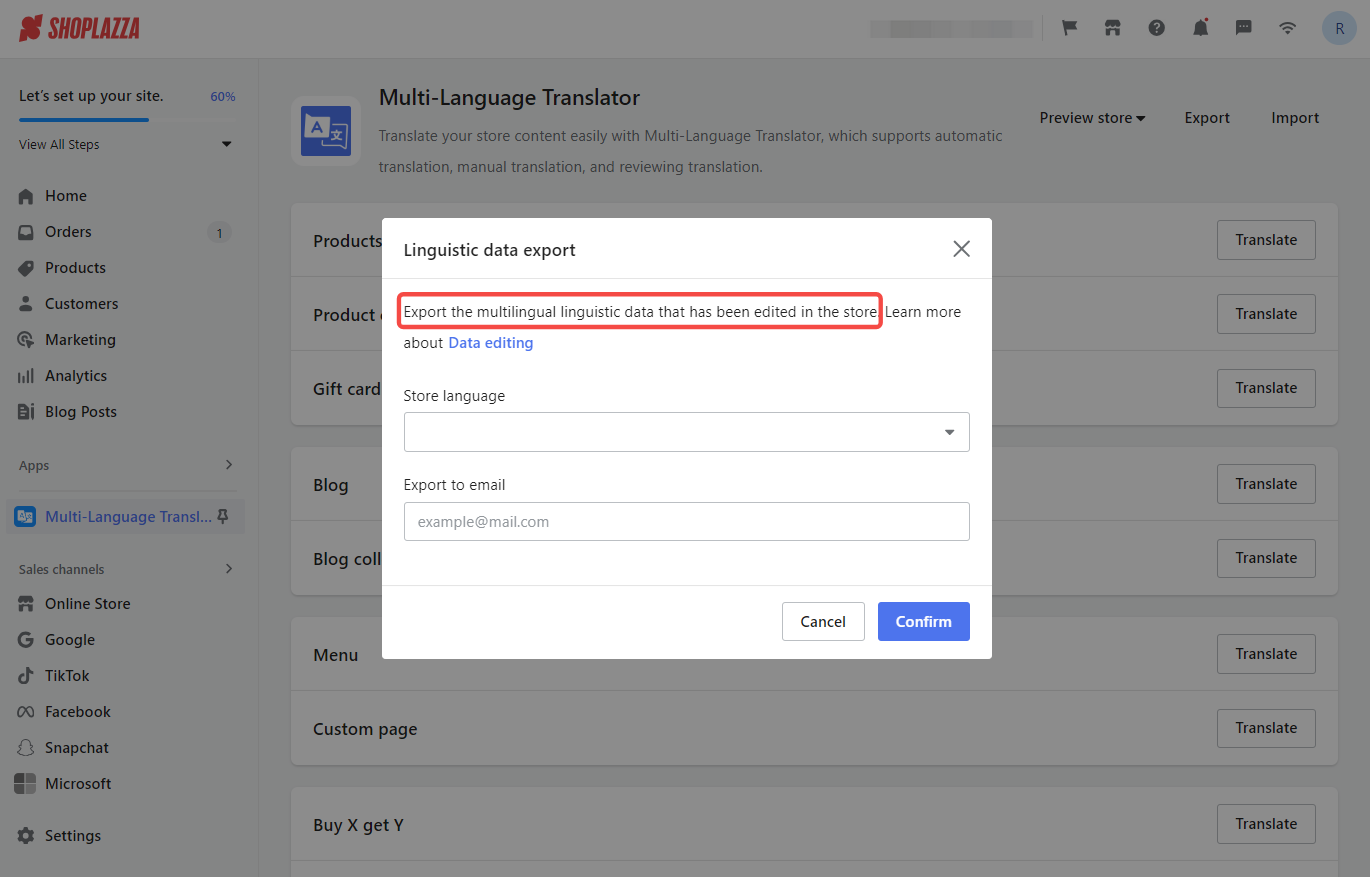
- The exported form will consist of the following fields:
| Field | Description |
| Type | Type of resource, used for recognition during importing. |
| Identification | ID of the resource, used for recognition during importing. |
| Field | The specific fields of resources, used for recognition during importing. |
| Language | The target language shown in the "Translated content". |
| Default content | The original text for "Translated content". |
| Translated content | The content to be translated. This is the only editable item in the form. Input the translated content here. |
Note
The Type, Identification, Field, and Language are used for recognition purposes during import and should not be changed. Only the Translated content field should be edited with your translated text.
- You can input your own translation in the "Translated content" column of the exported form, and import the revised form.
- If you select the checkbox option for "Cover any existing translations in this language" when importing, all the content will be translated according to the imported form.
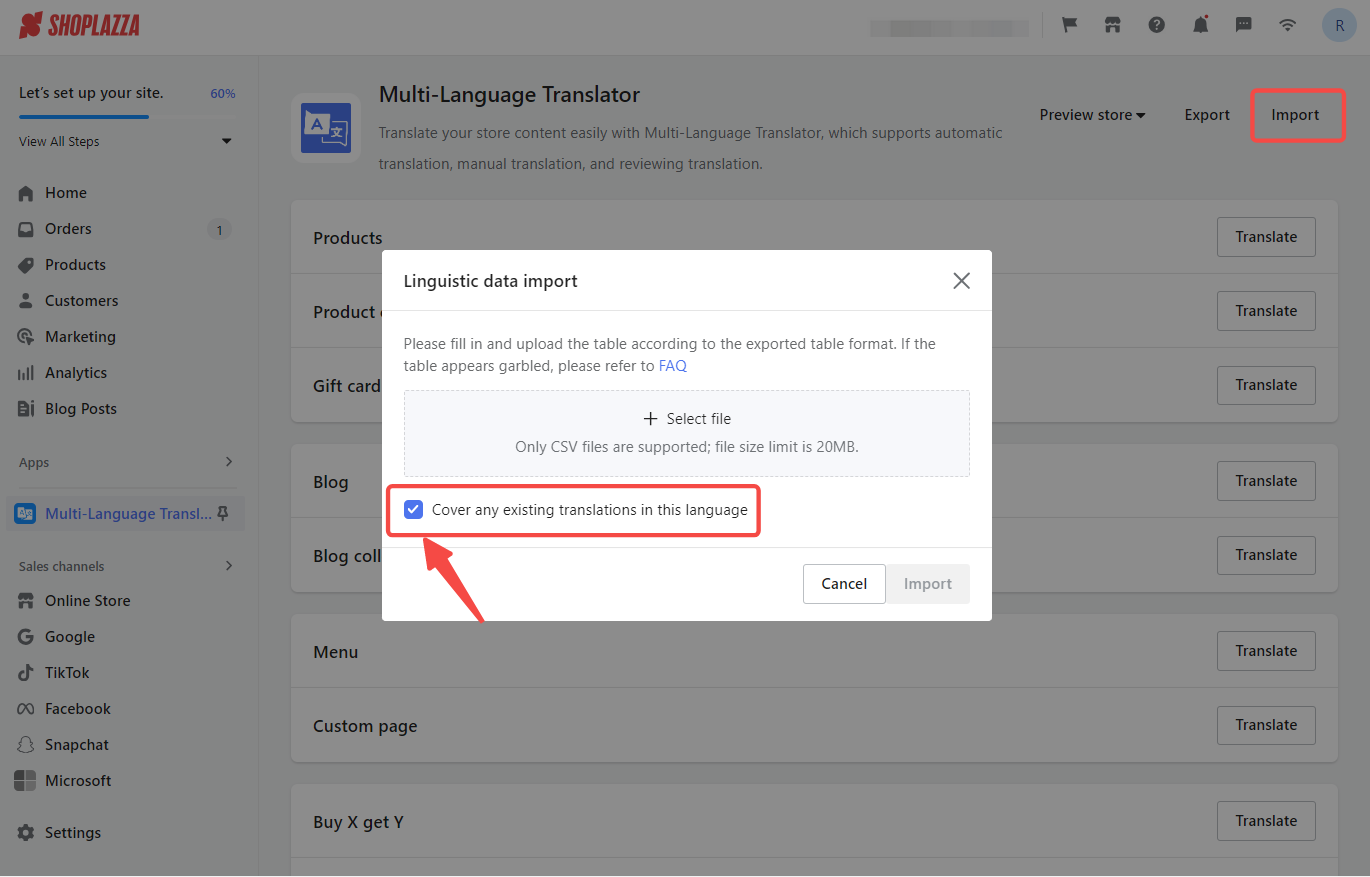
-
- Please note that, if there is no content in the "Translated content" column, there will be no translation after you import the form.
- Click on Translate to edit the translation for customized content including Products, Blog, Navigation, Custom page and others.
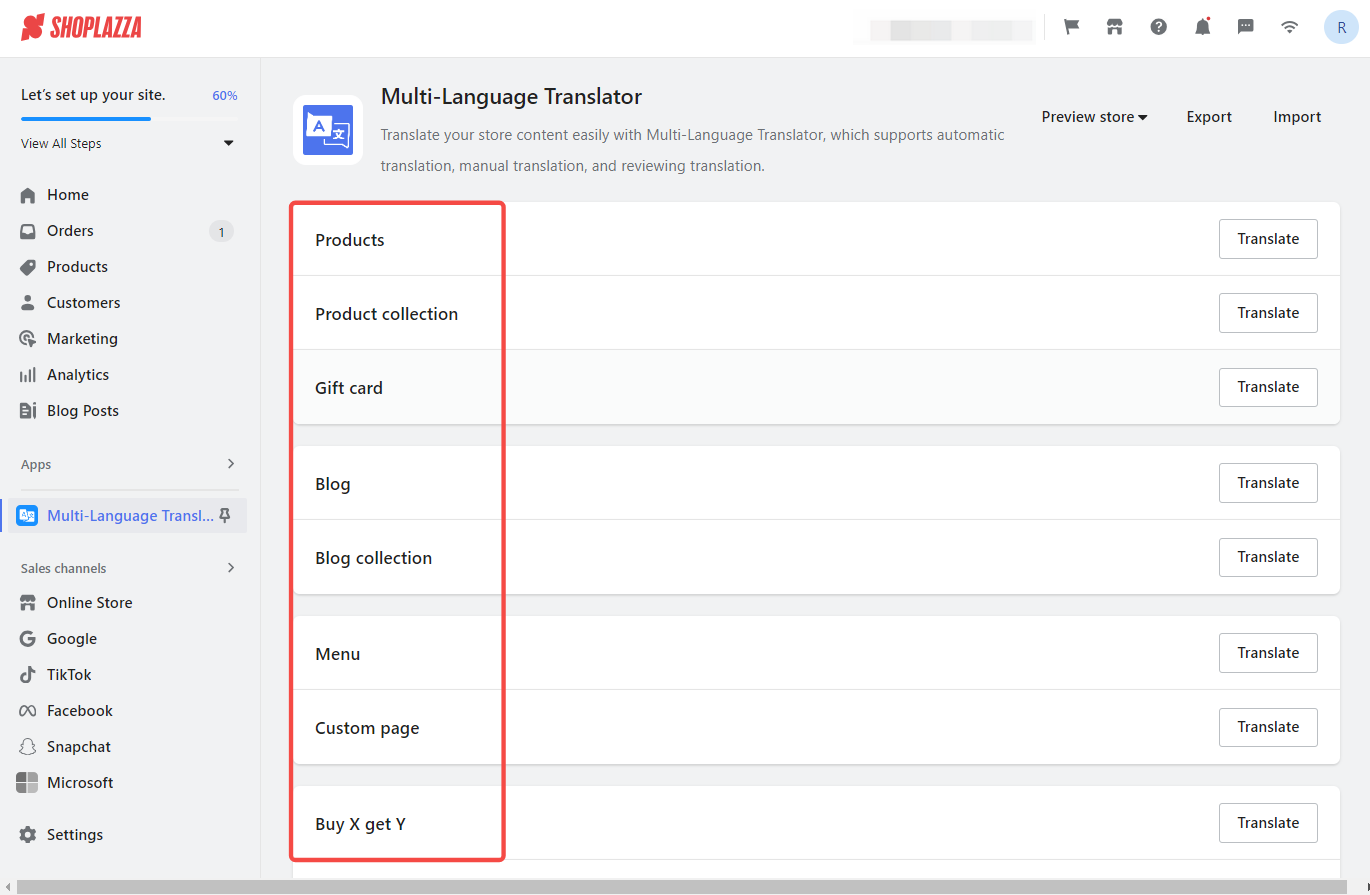
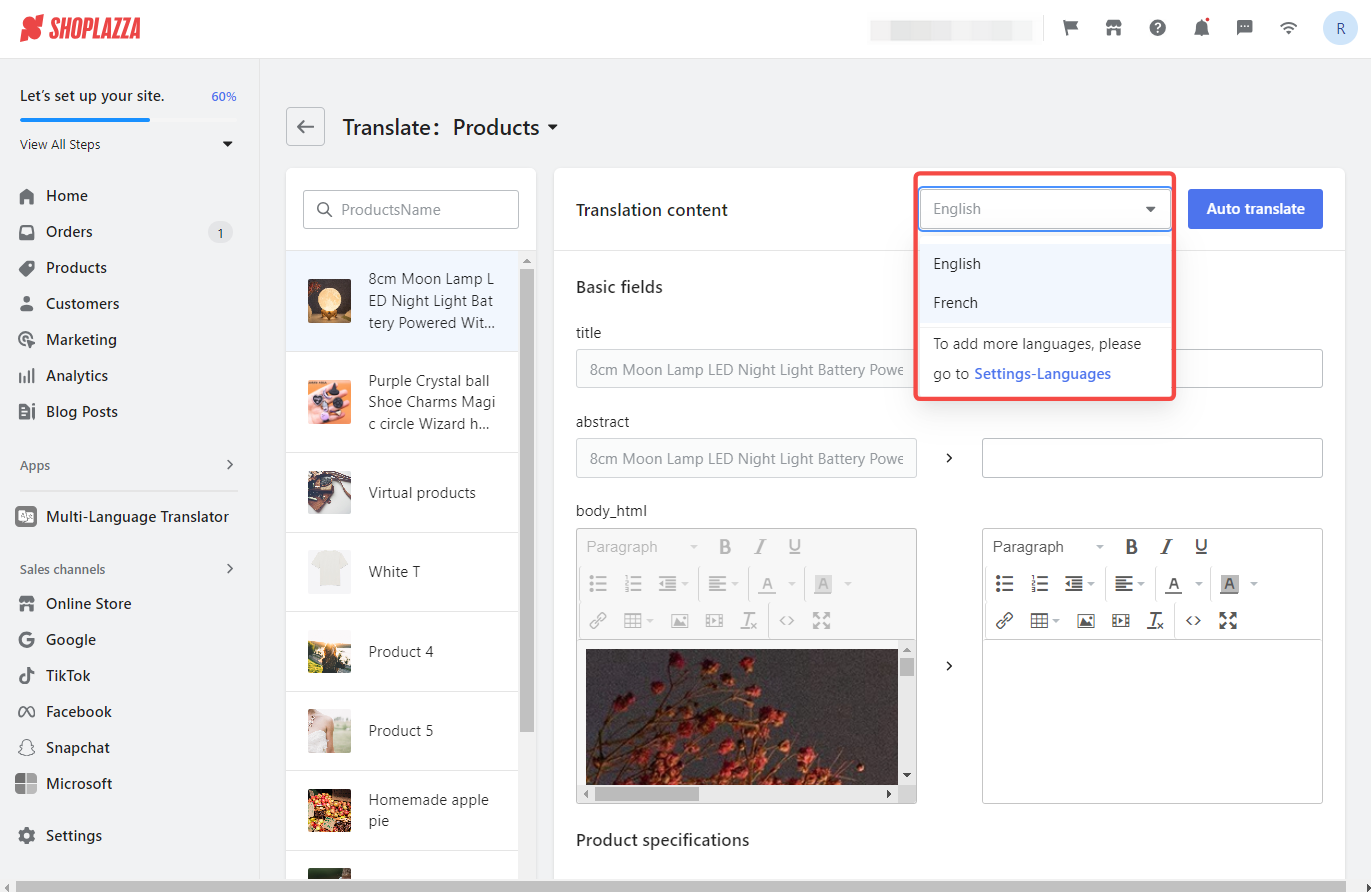
- Use the Auto translate option to quickly customize translations of specific content.
- You can also switch between languages as needed for your translation work.
Publish a language to add it to the market
Only when you publish a certain language in your market, it will be visible to your customers.
Note
If you don't want a certain language to be visible to your customers, here are two solutions below:
1. From your Shoplazza admin, go to Settings > Languages, and click on the rightmost button to disable the language.
2. From your Shoplazza admin, go to Settings > Markets, and click Manage to open the Domains and Languages page. Then, click Manage, look under Languages and click Remove to disable the language.
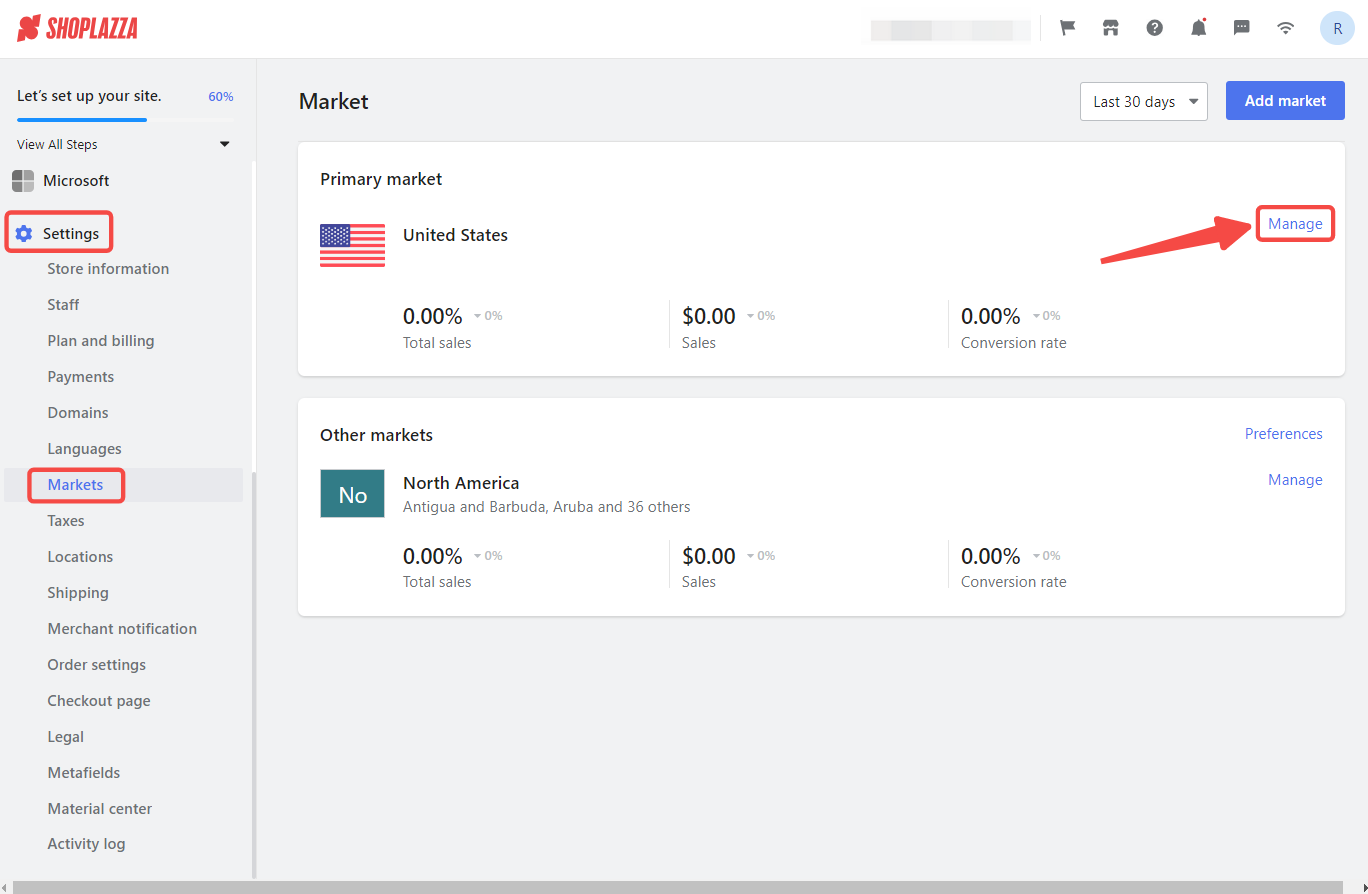
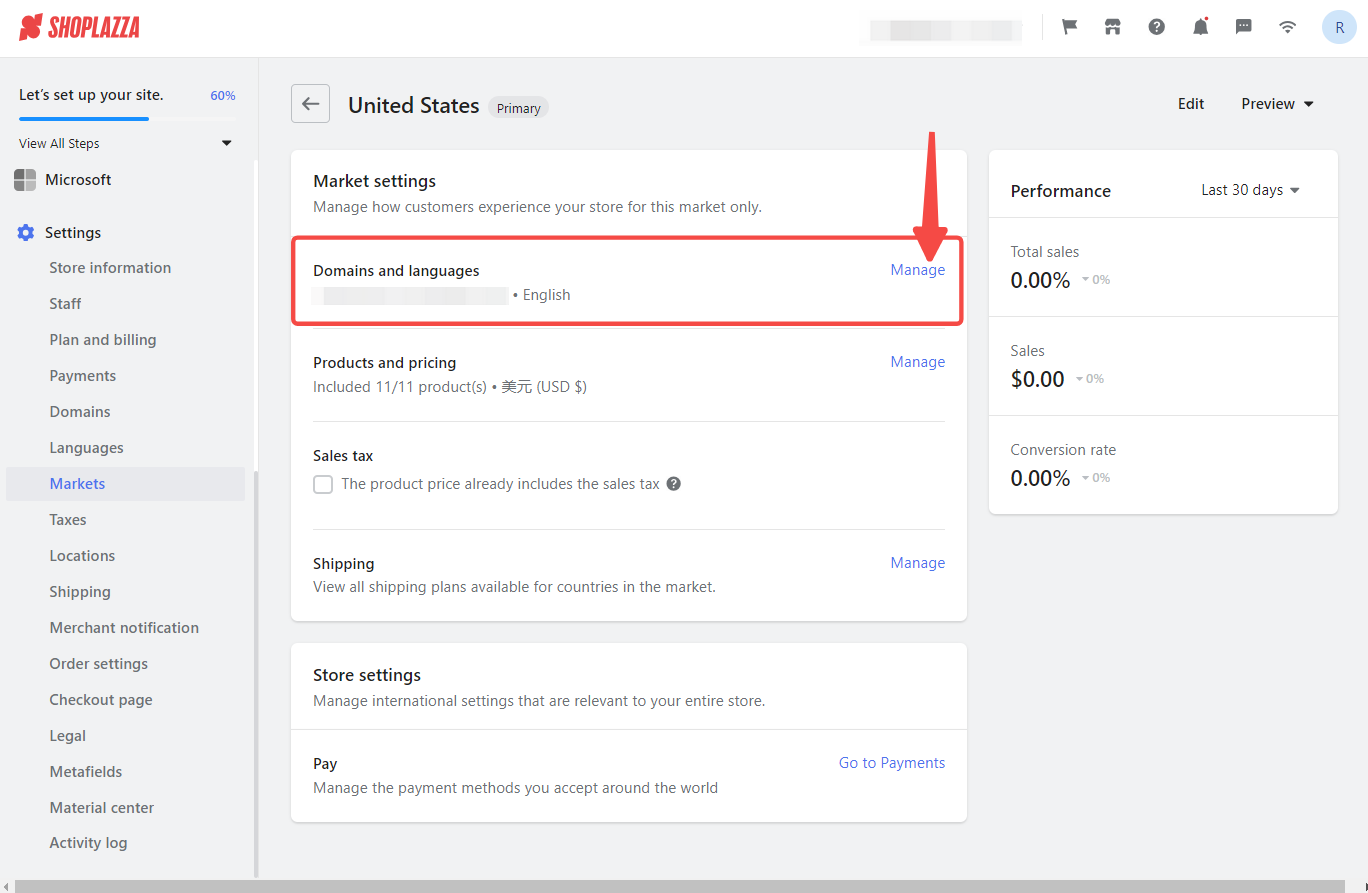
Manage languages for markets
To manage your languages for your markets, go to your Shoplazza Admin > Settings > Markets, and click Manage under one of the markets. From there, click Manage again under the Domains and Languages section.
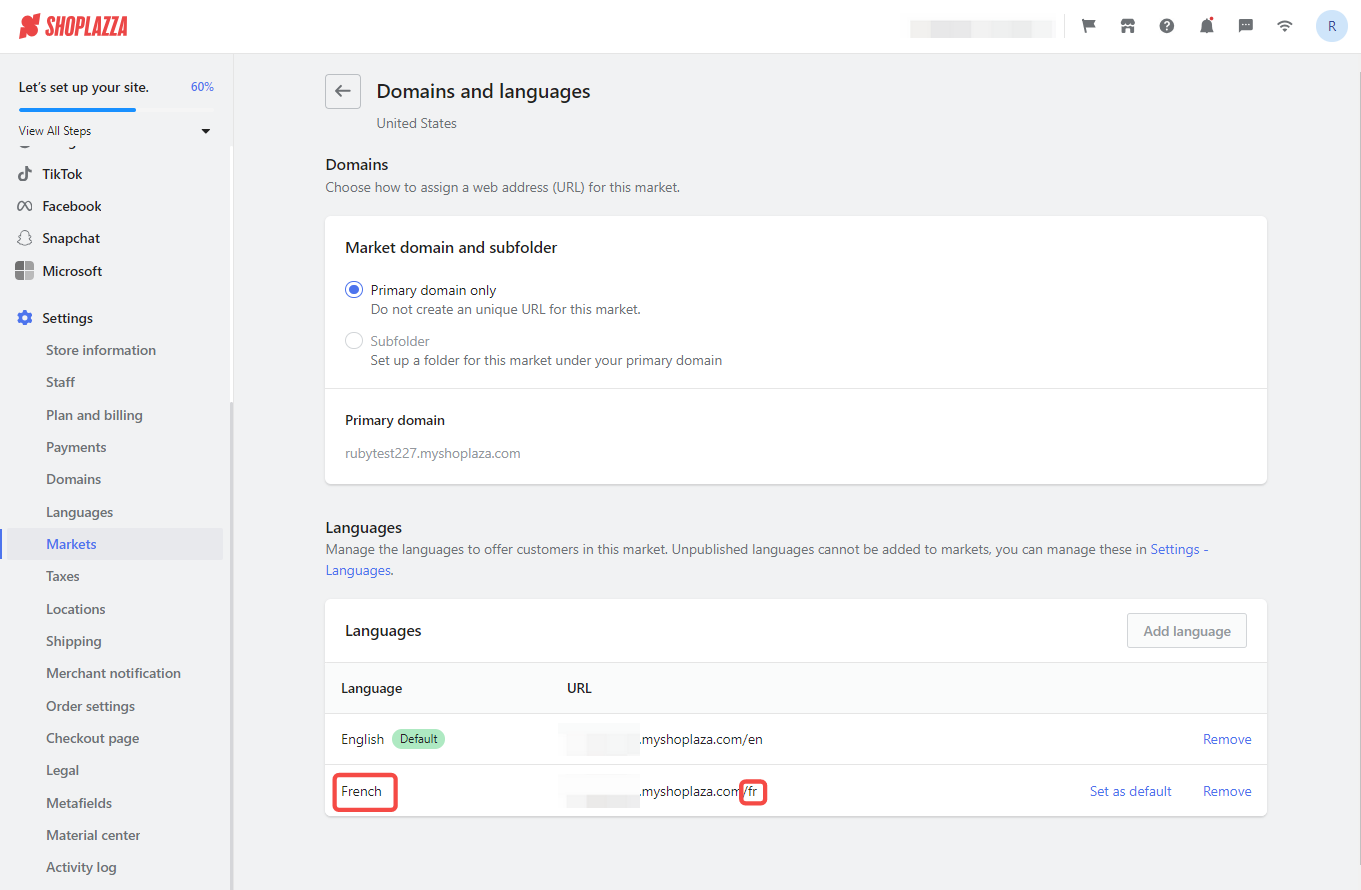
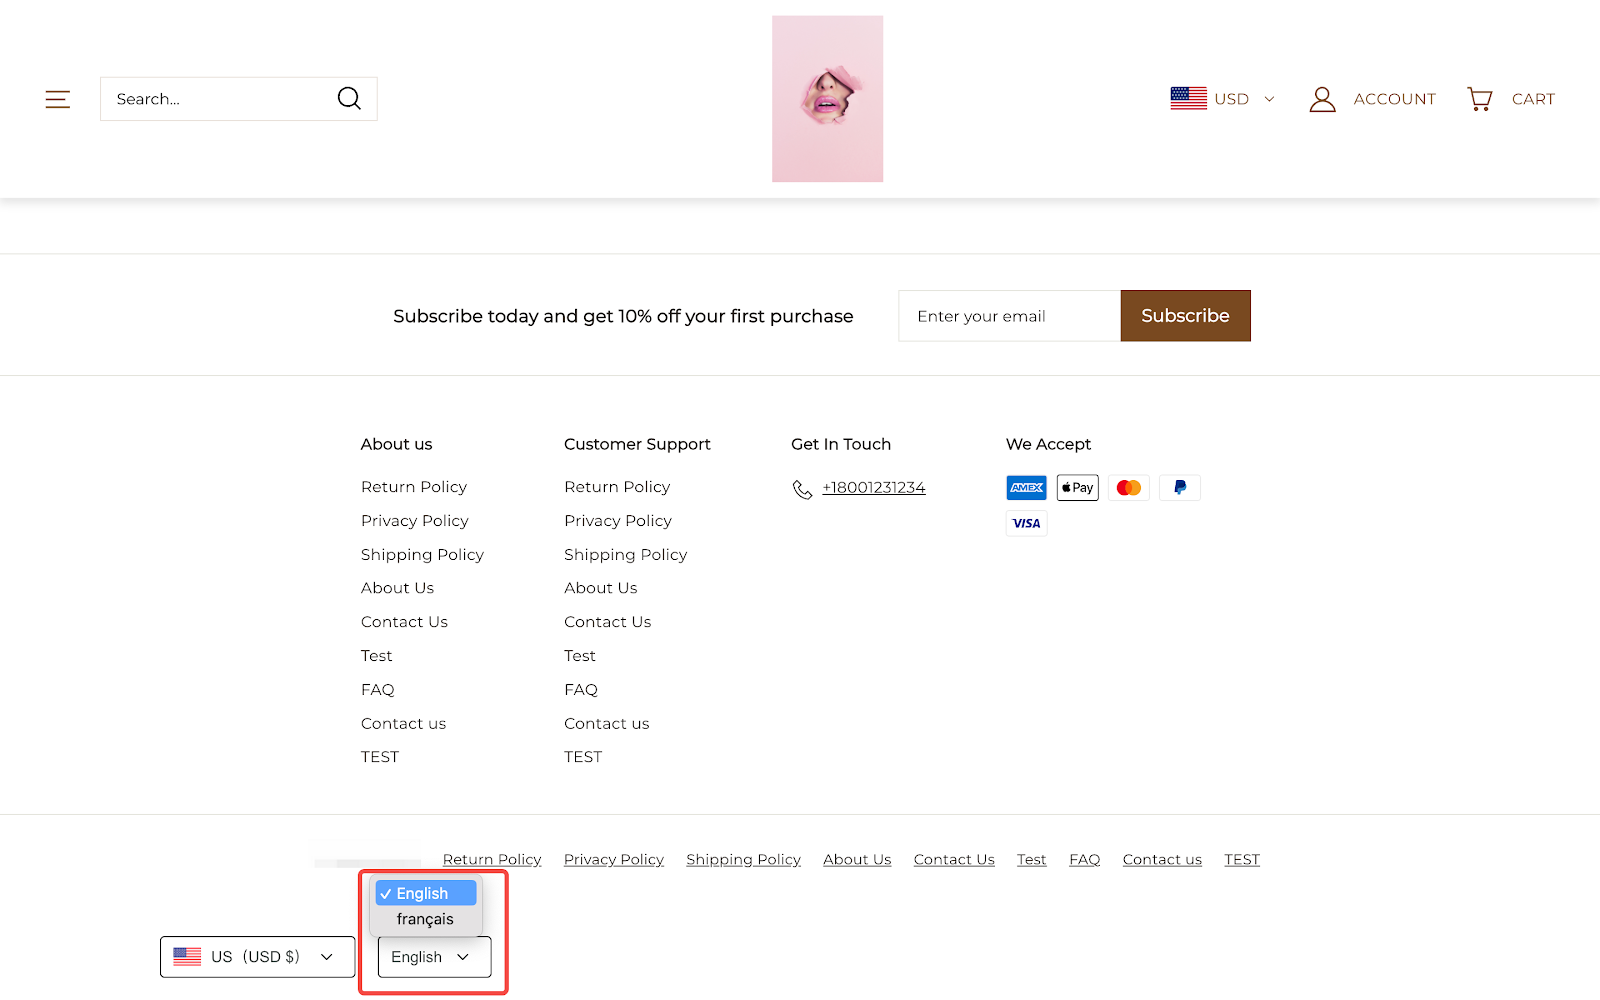
1. You can designate a default language for a specific market. If customers visit a market domain without any language-specific information in the URL, the content will appear in this default language. For instance, if customers access "www.examplestore.myshoplaza.com", they will see the store displayed in English, as shown below.
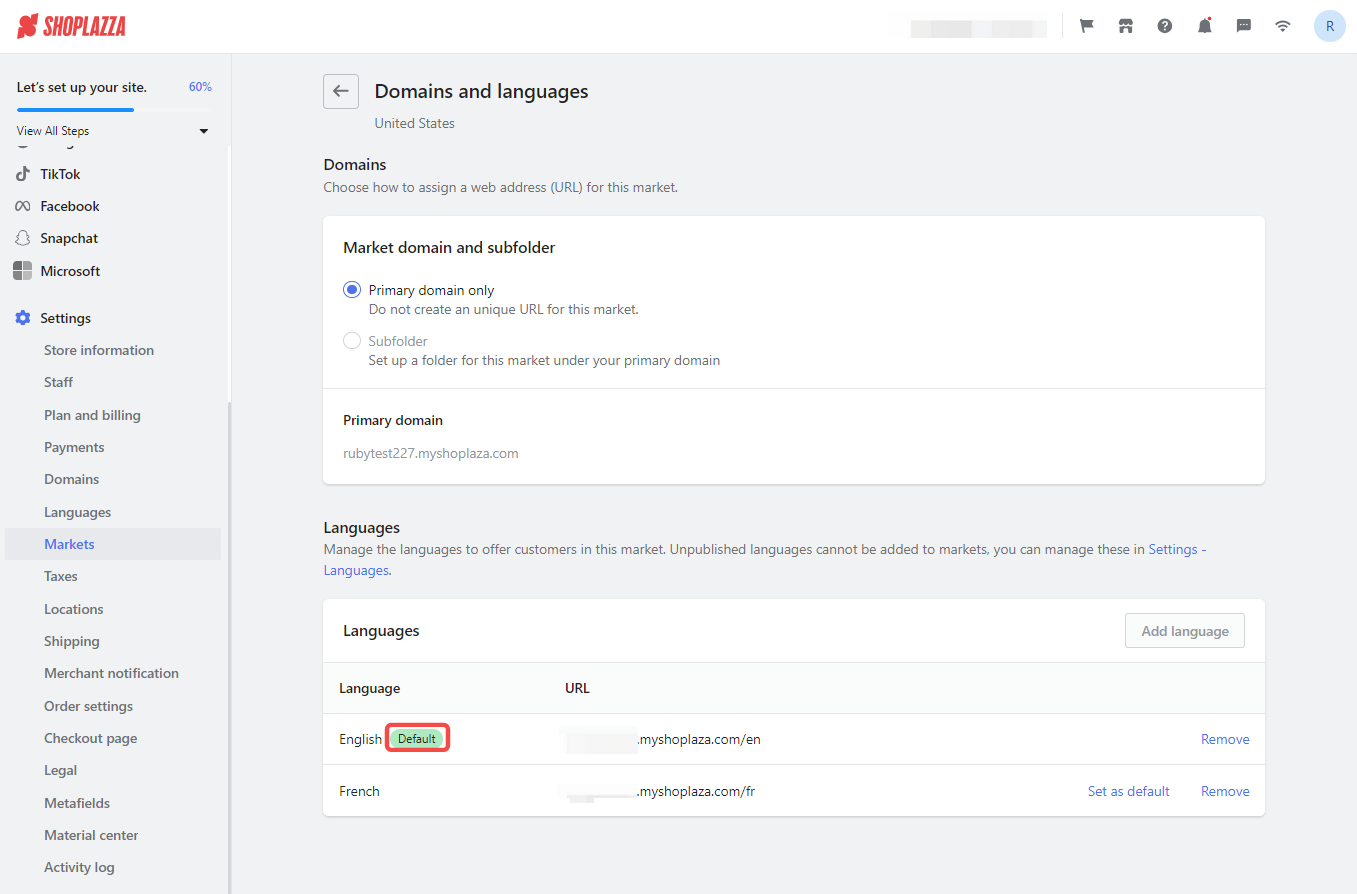
2. The URLs of markets differ based on languages. Your customers can directly visit the URL with a language-related suffix. For example, if your customers visit "www.examplestore.myshoplaza.com/fr", your store will present them with a French interface.
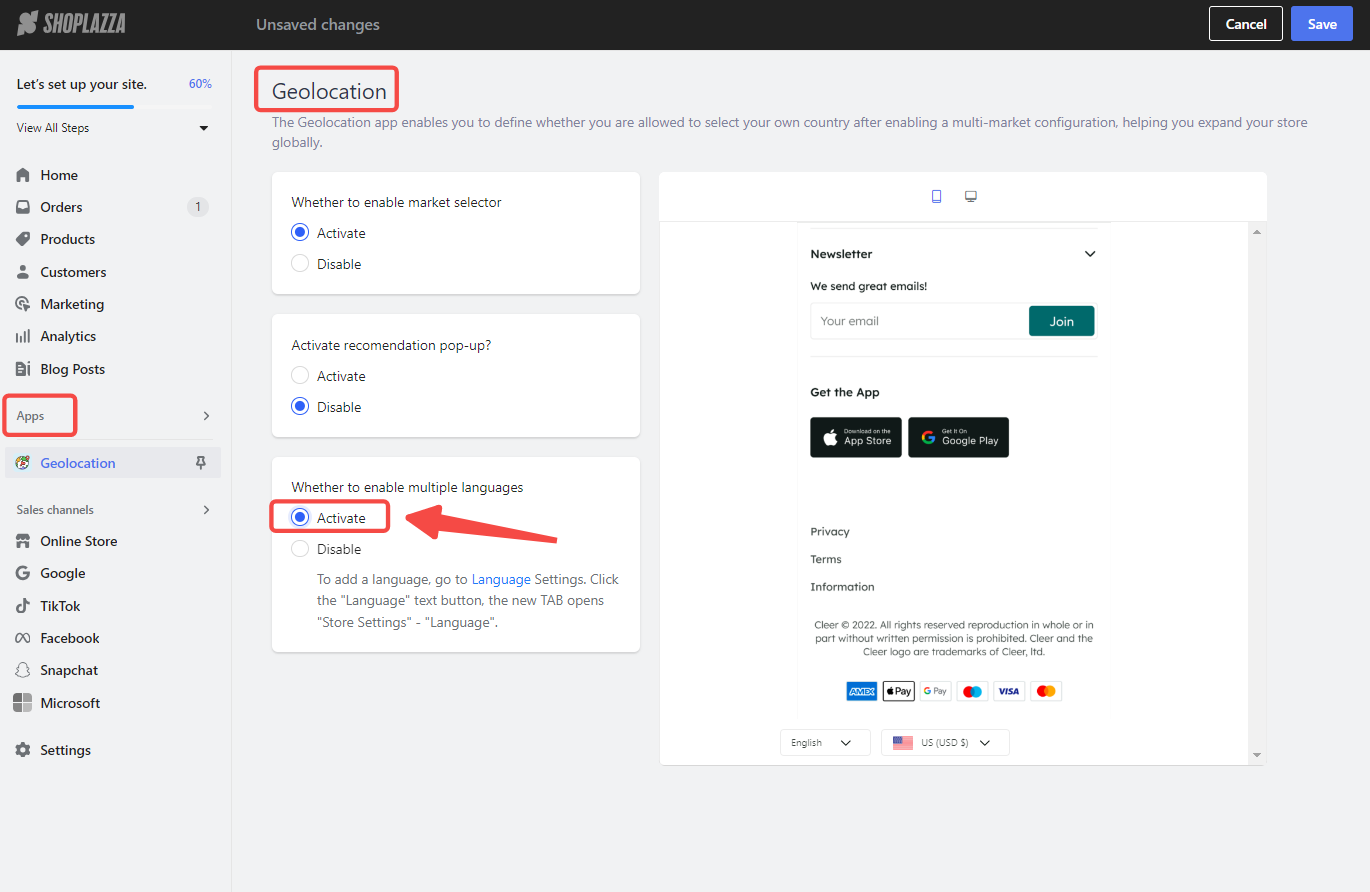
Geolocation App
Now that you've finished setting languages and corresponding markets, you can enhance the customer experience by installing the Geolocation App. To do this, navigate to your Shoplazza Admin > Apps > Visit App Store and search for Geolocation. Once you find it, select Activate to enable multiple languages. This feature will allow your customers to easily select their preferred language when browsing your store.


Comments
Please sign in to leave a comment.