
Effectively displaying products in your online store is important for a good customer experience. This guide explains how to showcase products in your store's top menu. We cover creating and organizing products into collections, setting up menu structures, and linking menu items to specific pages. This helps customers easily find their needs, potentially increasing sales and improving their overall experience.
Linking collections in menu navigation
Here’s how to link collections to your navigation menu:
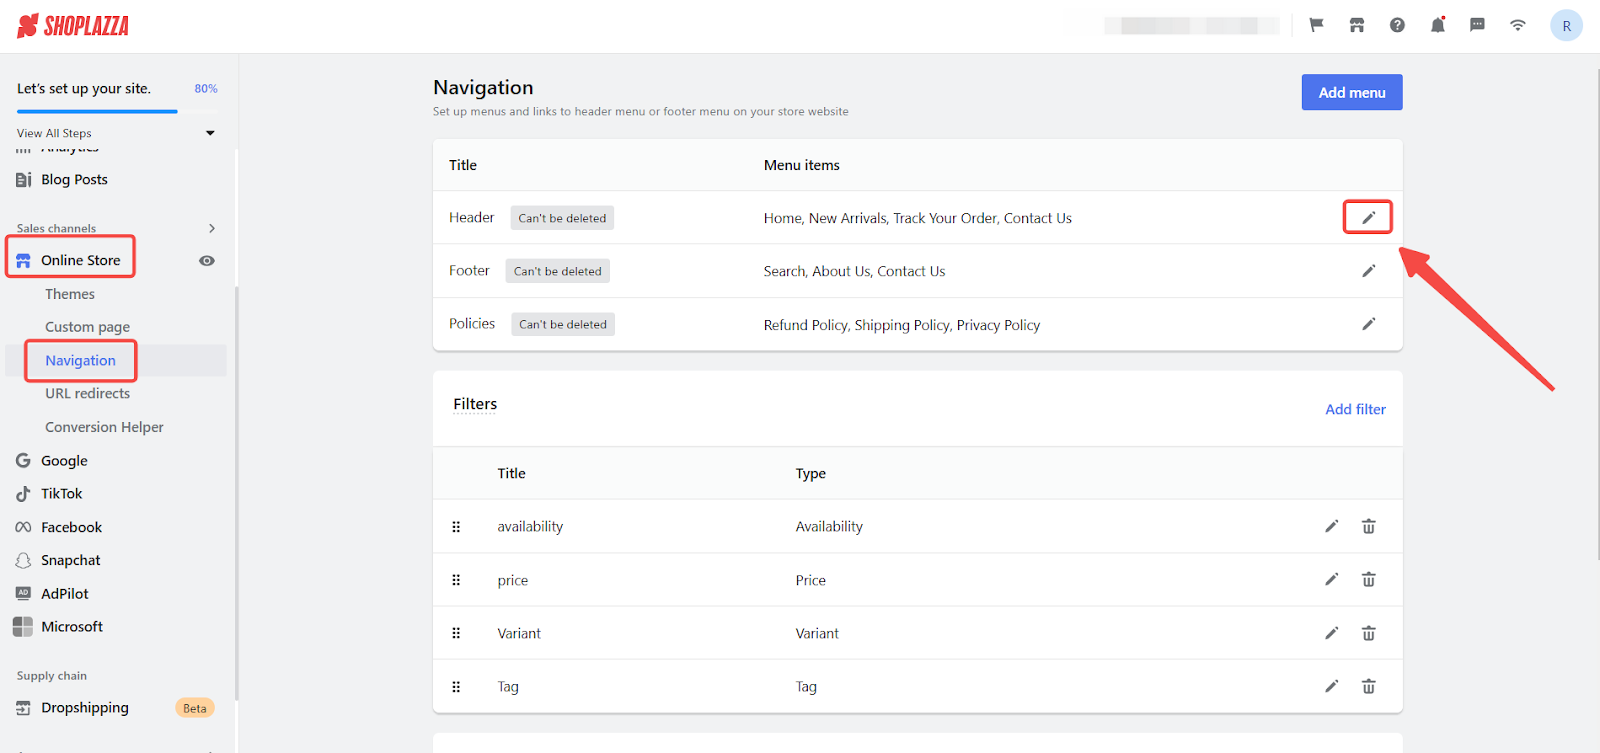
1. Access navigation: From your Shoplazza admin, go to Online store > Navigation > Edit Header. This takes you to the menu editing interface, where you can manage your store's main navigation. You'll see a list of existing menu items and options for adding new ones.
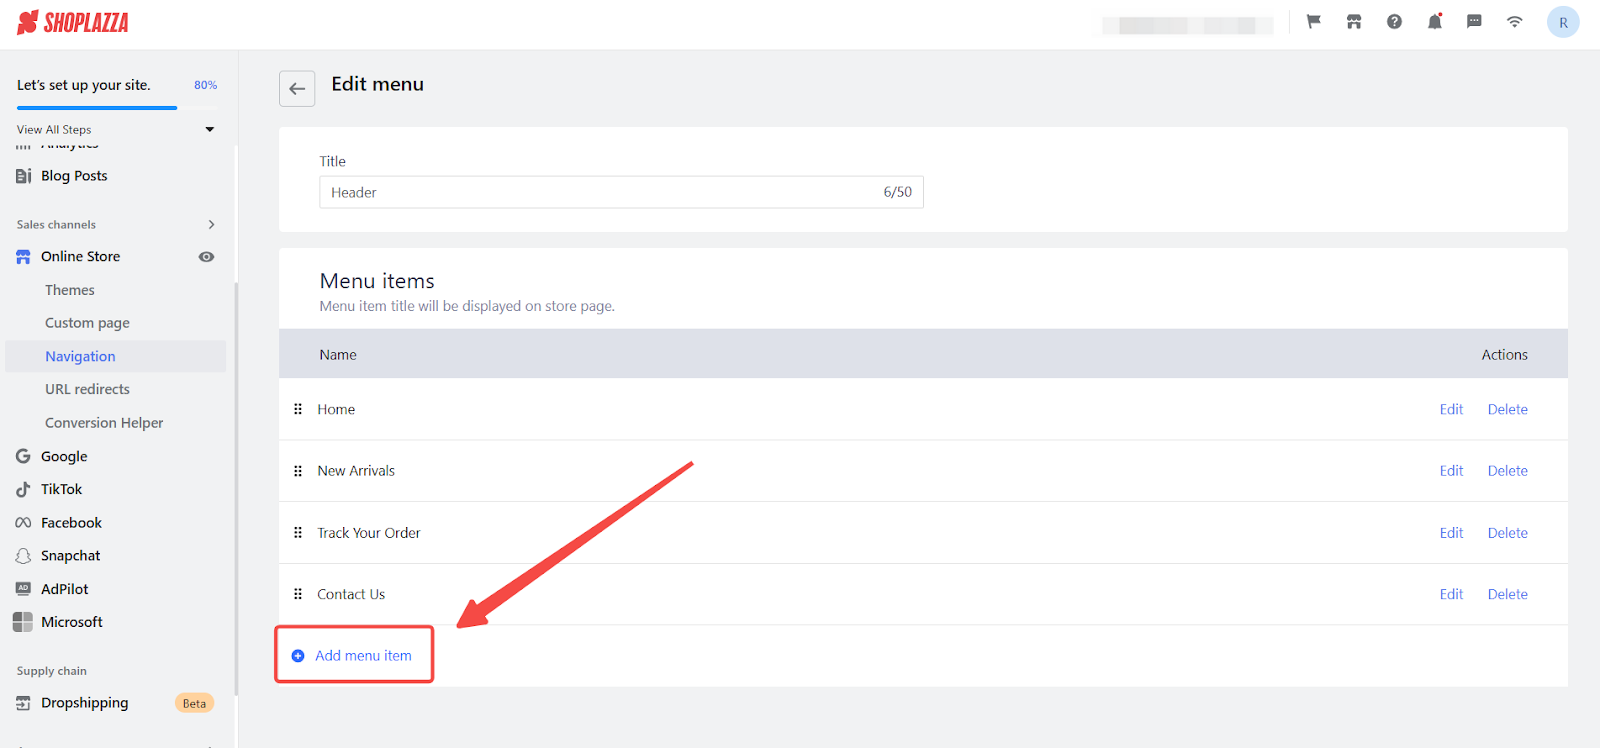
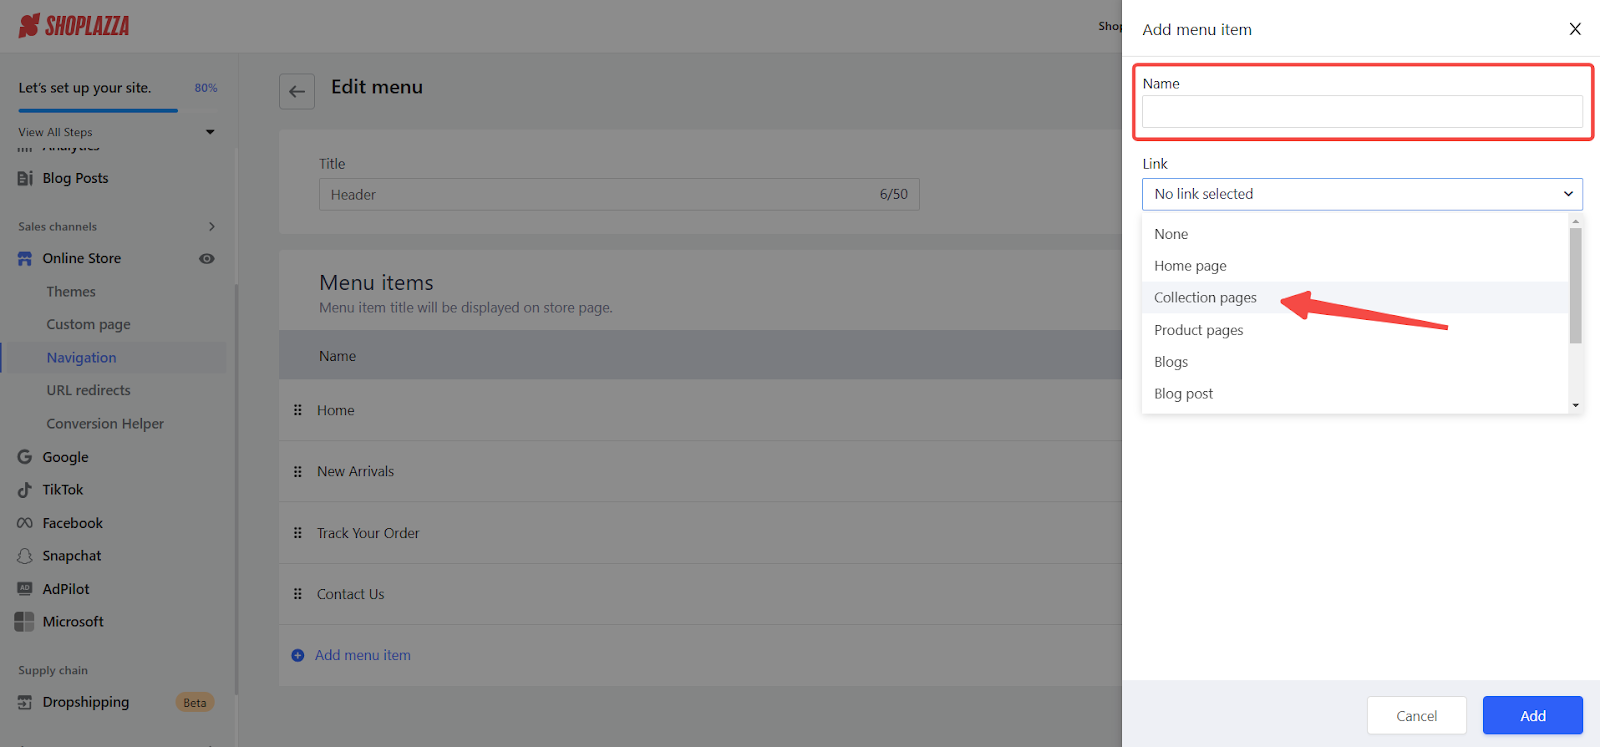
2. Add menu item: Click Add menu item, enter the menu name (e.g., "Collection"), and select Collection Page as the menu link. This ensures the menu item links to a specific product collection.
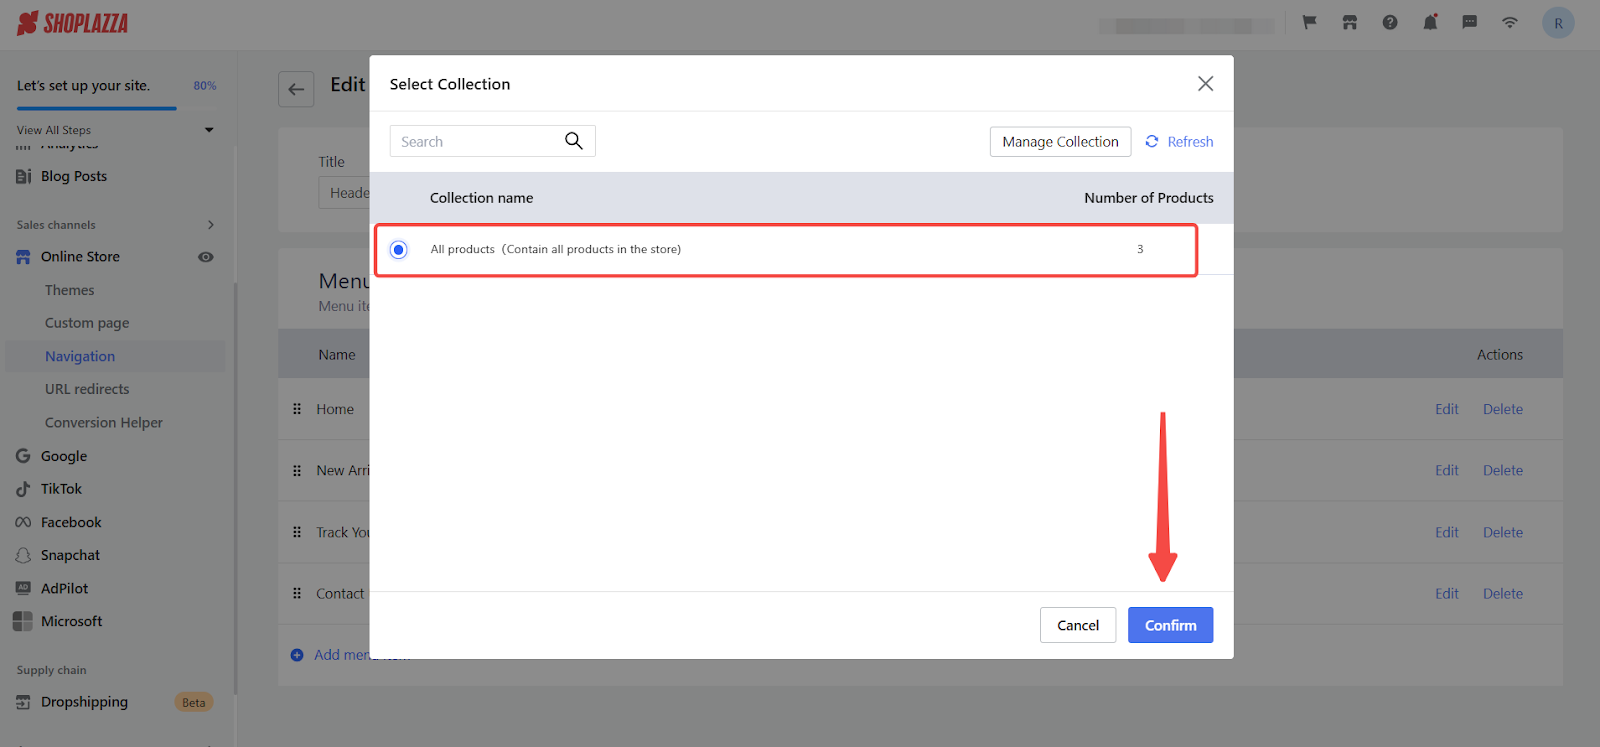
3. Choose a collection: A pop-up listing your existing product collections appears. Select the one you want to feature in the navigation and click Confirm.
4. Confirm and add: Double-check the name and link, then click Add to insert the new menu item into your navigation.

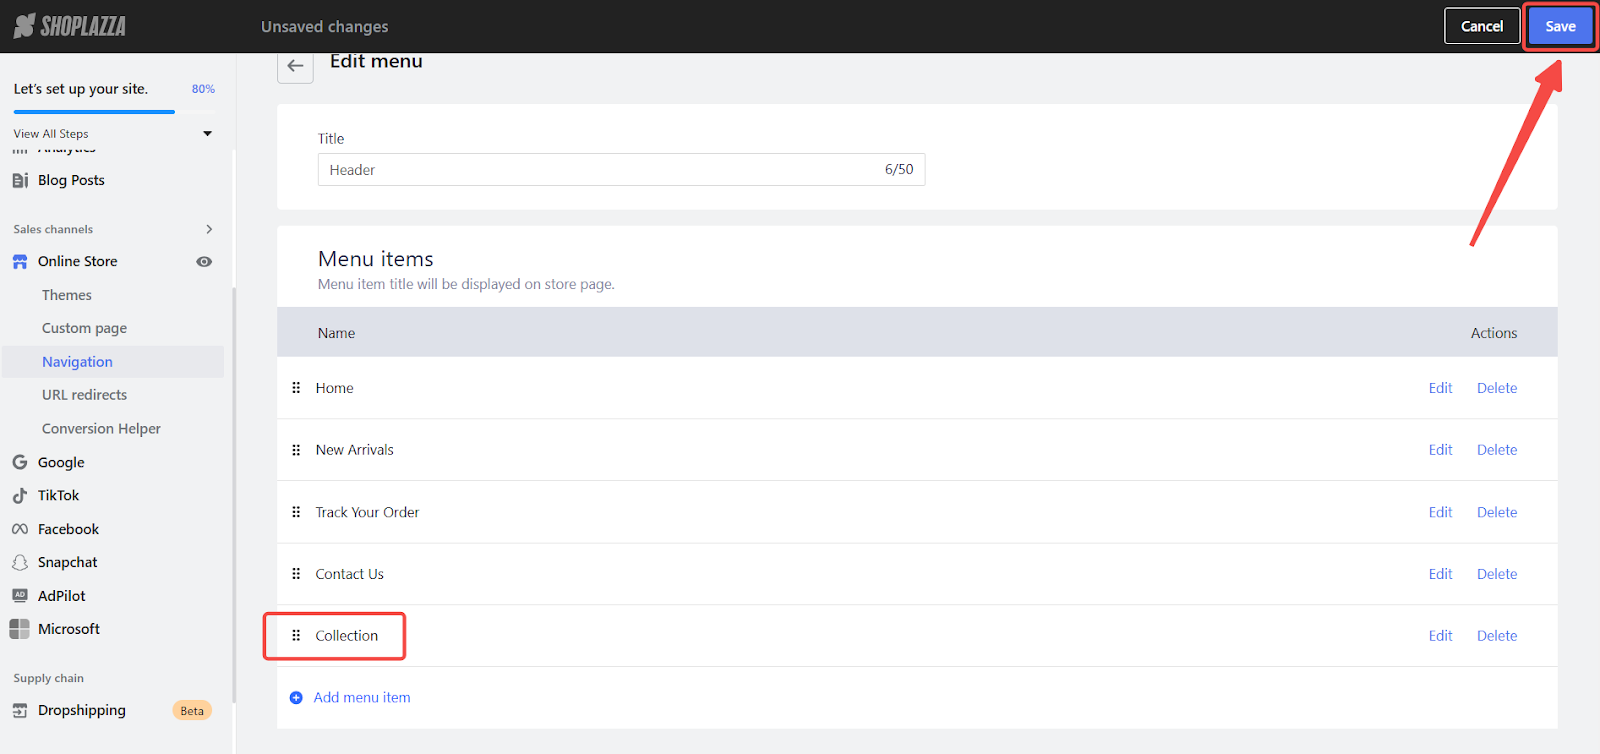
5. Save changes: Click Save to apply the updates to your online store's menu.
6. Verify link: Visit your store and check the navigation bar. Click the new menu item to ensure it correctly links to the intended collection page.

Linking products in menu navigation
Here’s how to link individual products to your navigation menu:
1. Access navigation: From your Shoplazza admin, go to Online store > Navigation > Edit Header Menu. Just like with collections, this gets you to the menu management area.
2. Add menu item: Click Add Menu item, enter the menu name, and select Product page as the menu link.
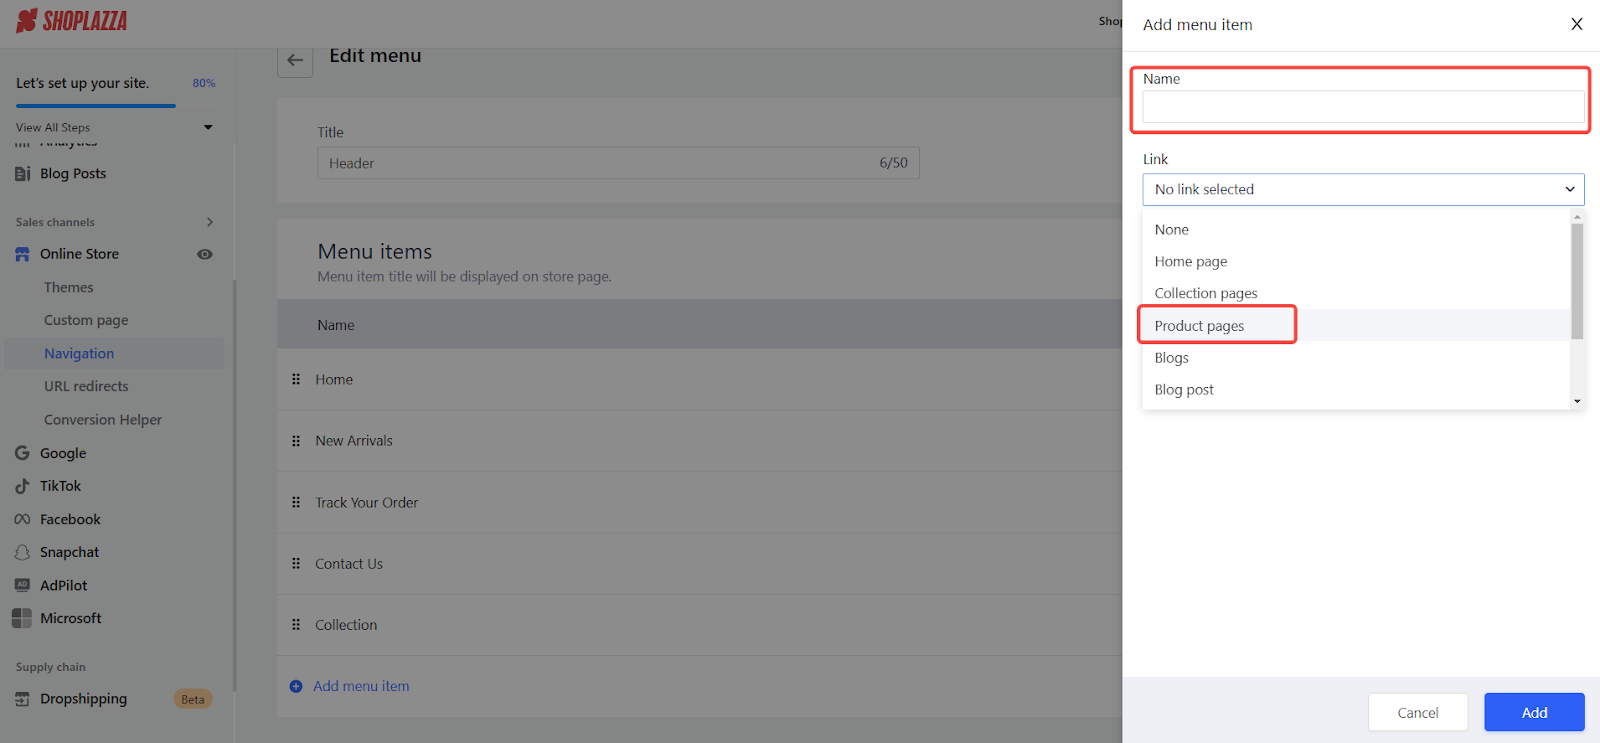
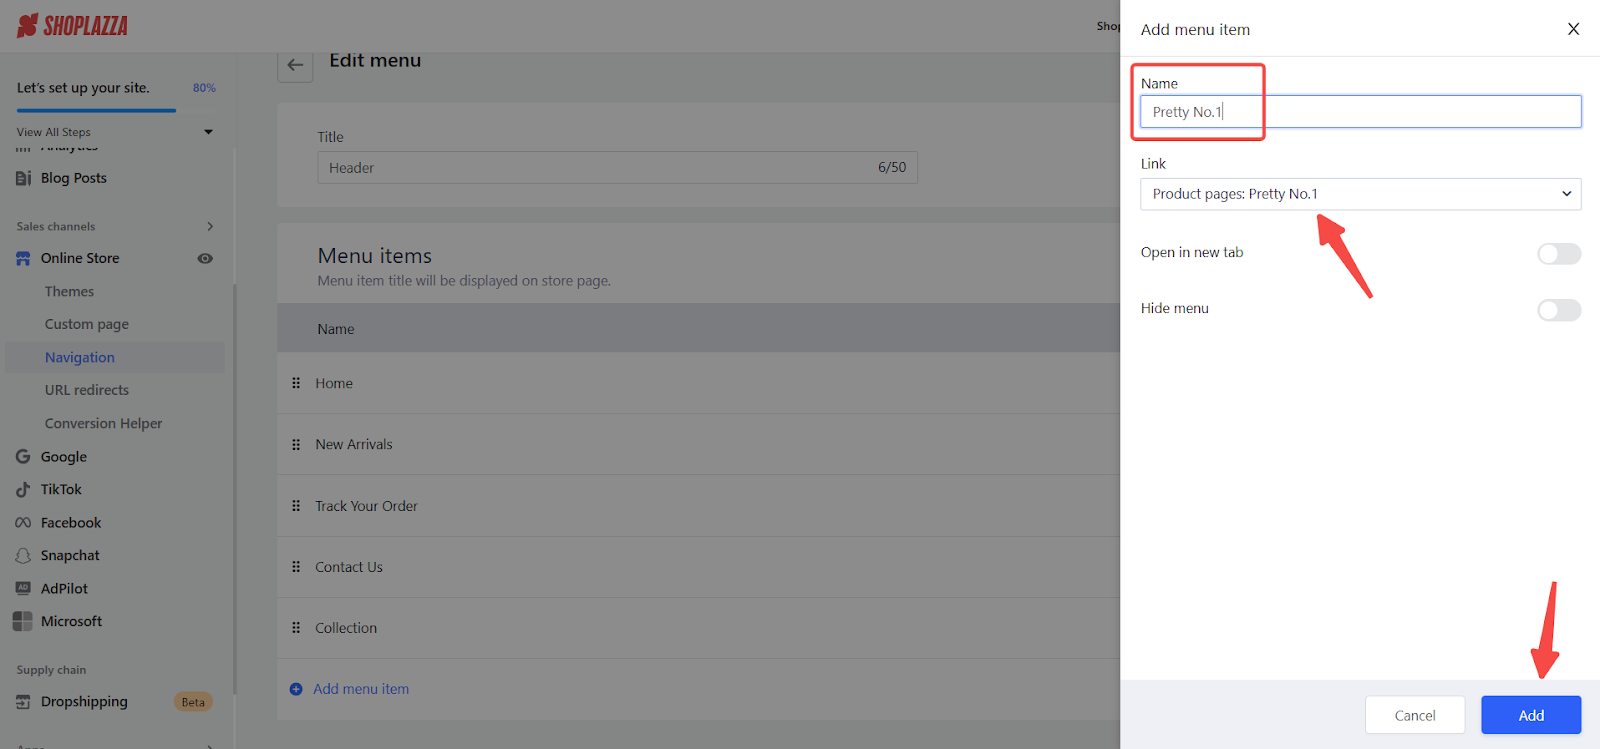
3. Choose a product: A pop-up listing all your products appear. Select the one you want to feature and click Confirm.

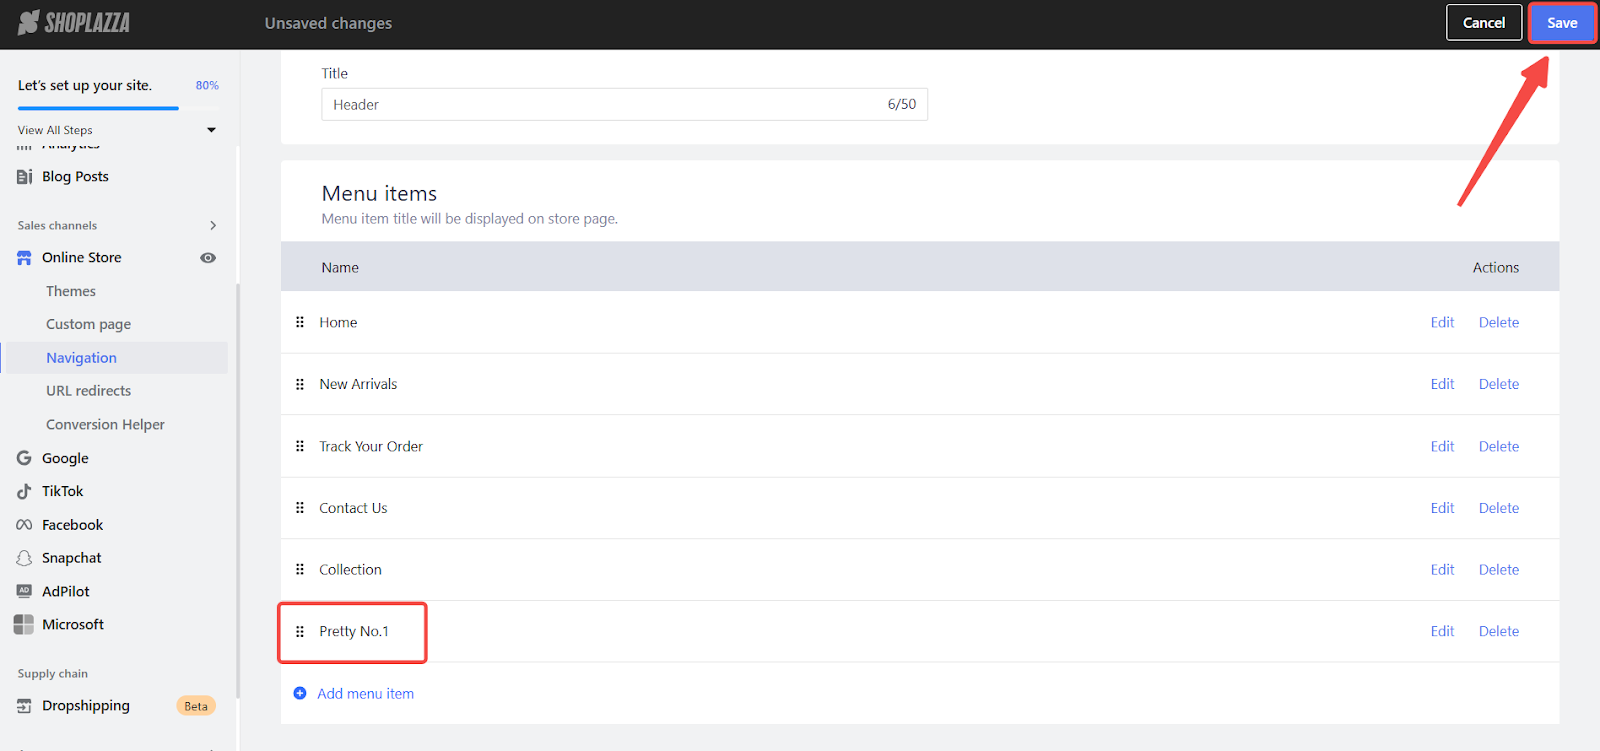
4. Confirm and save: After verifying the name and link, click Add to insert the product into the navigation. Click Save to apply changes to your store’s menu.
5. Create submenu (optional): To create a submenu under a collection or another product, drag the product menu item to the right until it snaps into position. Click Save to finalize the nested structure. This helps organize products and collections into dropdown menus for better navigation.
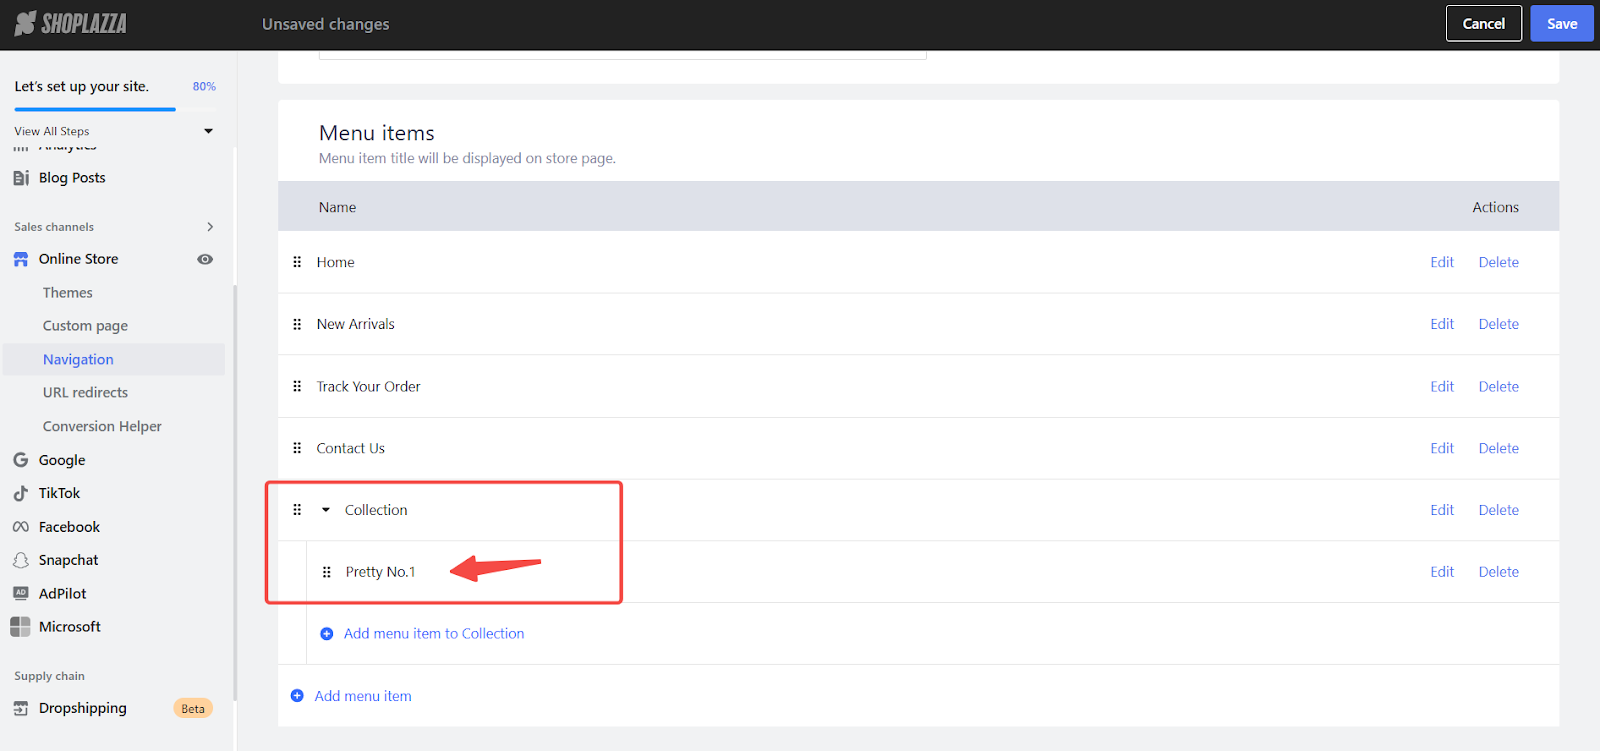
6. Verify link: Visit your store and check if the new menu item links correctly to the product details page.

By following these steps, you create a clear and organized navigation menu, making it easy for customers to find products. This improved navigation contributes to a better shopping experience and can increase sales. A well-structured menu is essential for a positive user experience, helping customers discover and purchase desired items quickly.


Comments
Please sign in to leave a comment.