
A well-structured header menu helps users quickly navigate your website and locate the content they’re looking for. It enhances the browsing experience and can contribute to increased engagement and conversions. Below, we’ll explore the benefits of adding menu navigation to your header, considerations for designing it effectively, and detailed steps for setting up the menu navigation in your Shoplazza admin.
Benefits of adding menu navigation to your header
A well-designed header menu offers several advantages to your website’s usability and overall aesthetic.
- Improved website navigation: Header menus are displayed at the top of your webpage, giving users easy access to your website’s main categories and content. This makes it simple for users to navigate quickly and find what they need.
- Enhanced user experience: A well-organized header menu allows users to locate information easily, which can lead to greater satisfaction, loyalty, and conversion rates.
- Improved aesthetic: A carefully designed header menu enhances the overall look of your website, giving it a polished and professional feel.
- Convenient website management: Header menus provide a simple way to manage your website’s content. You can add, modify, or remove menu items as needed, keeping your website up-to-date.
Considerations when designing your header navigation menu
When designing your header menu, it’s important to keep a few factors in mind to ensure a smooth user experience.
- Keep it simple: Your top navigation menu should include only the most important and frequently used links. Avoid overcrowding with excessive submenus.
- Use clear labels: Menu links should be labeled with easily recognizable and understandable words, helping users quickly identify them.
- Ensure accessibility: Make sure your menu is easily accessible across both desktop and mobile devices for a seamless browsing experience.
- Set active states: To help users know where they are on your site, set the link corresponding to the current page as active.
Adding menu navigation
Follow these steps to add and customize your header menu navigation within your Shoplazza admin.
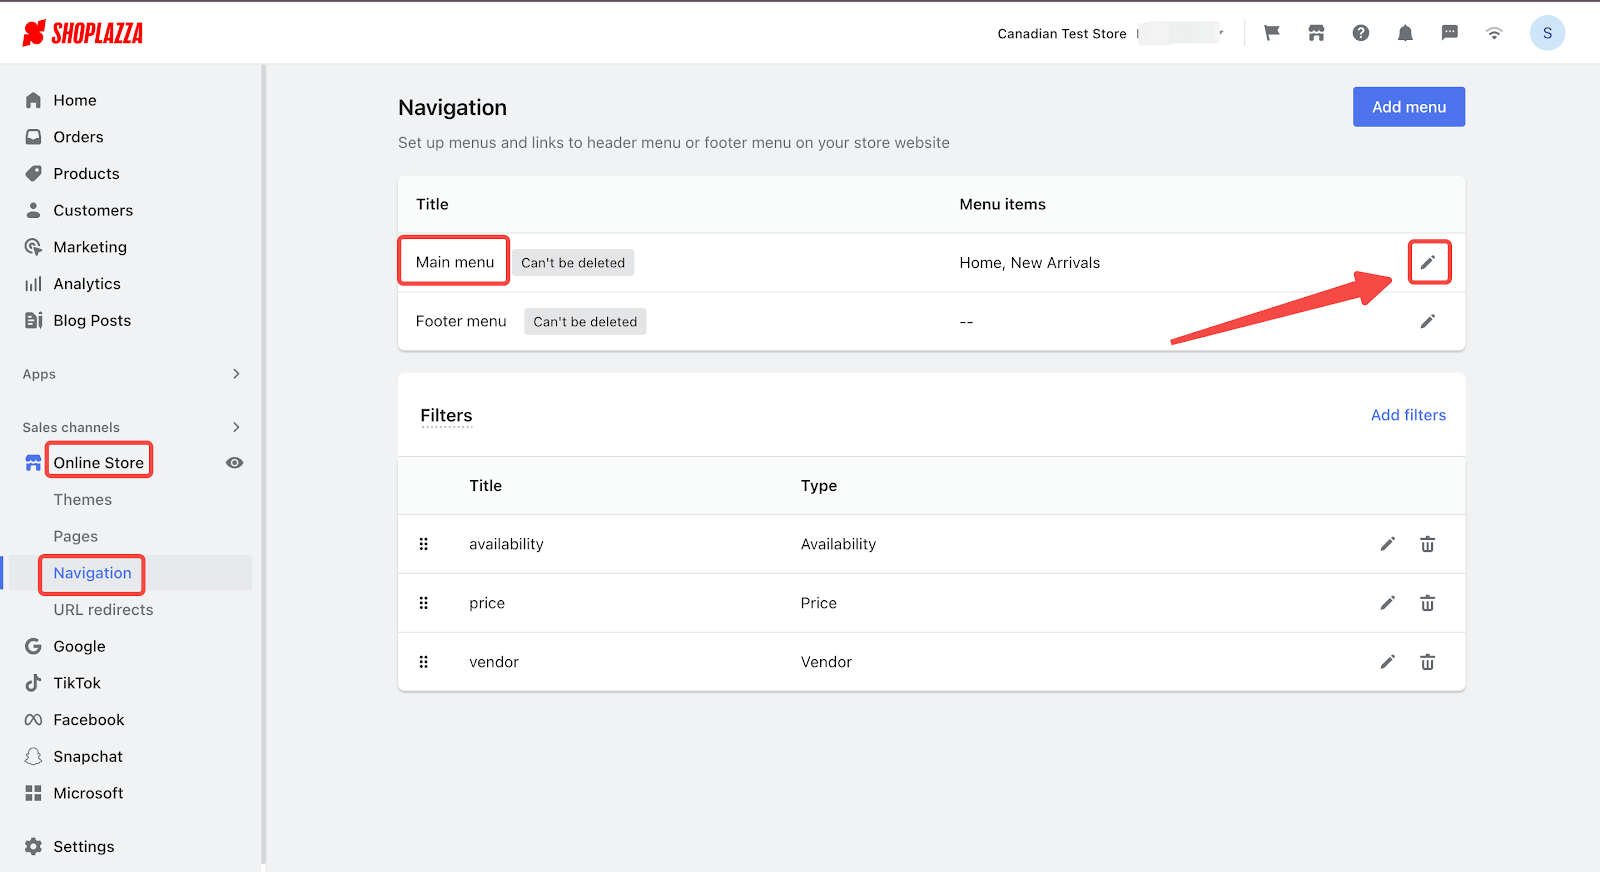
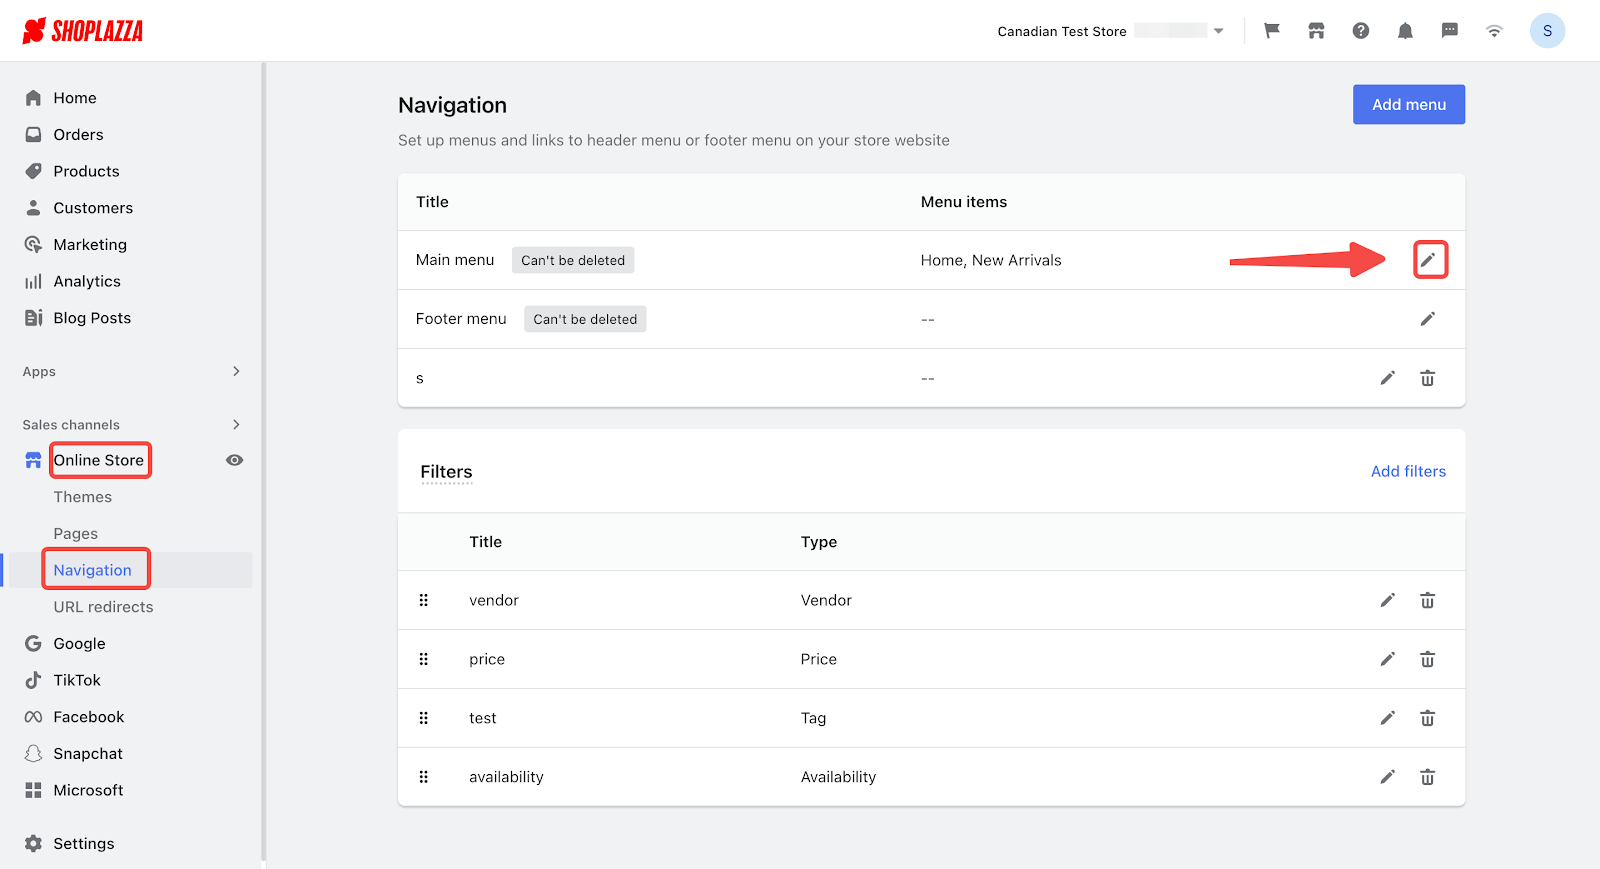
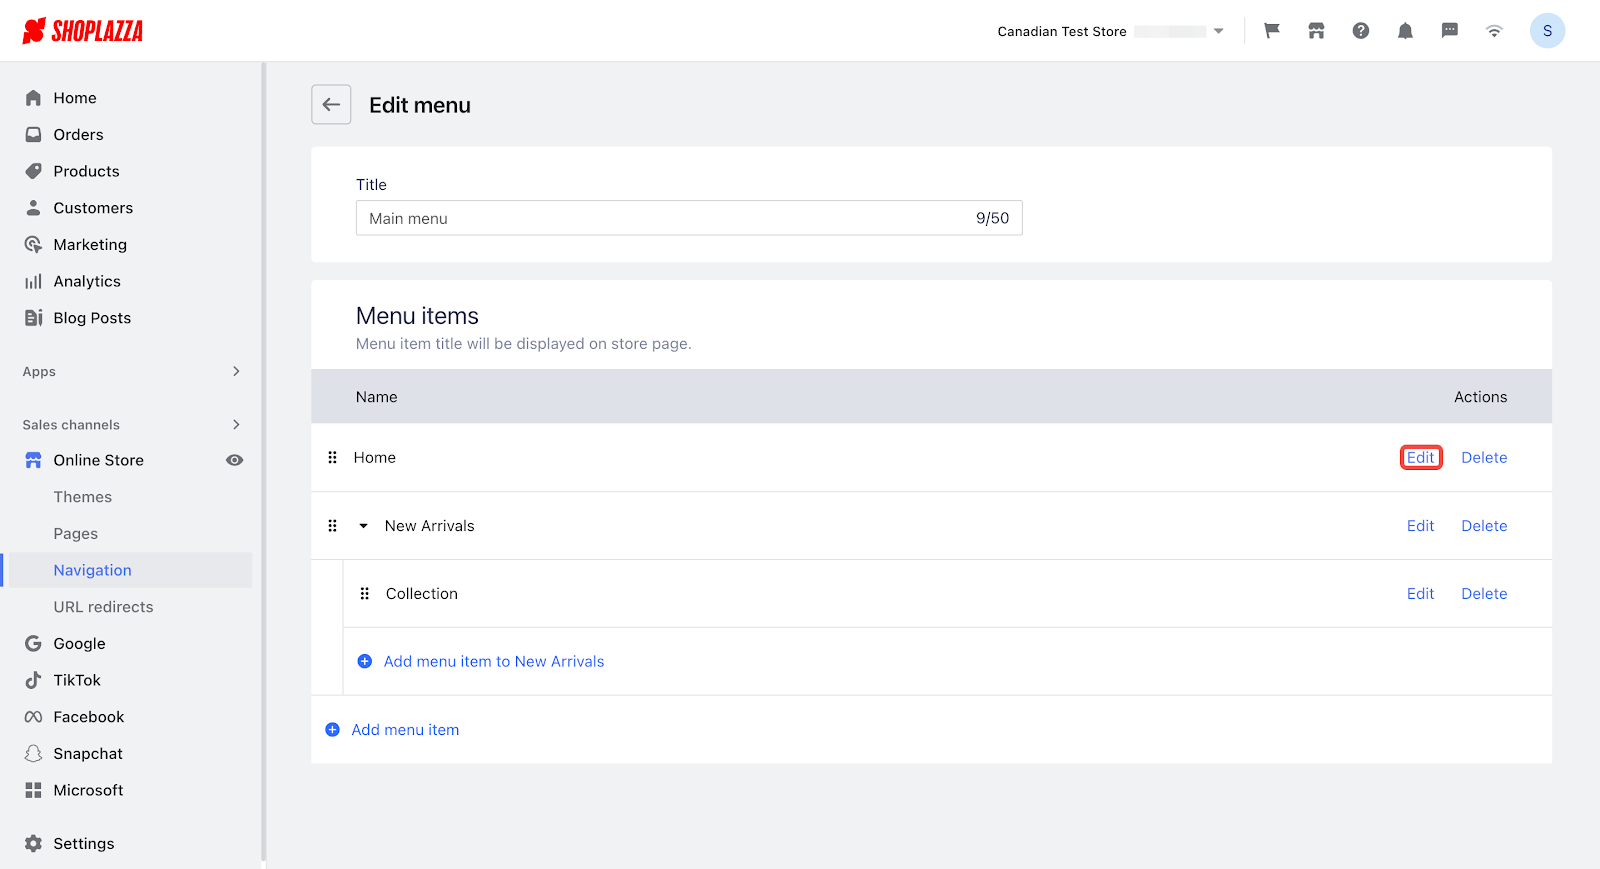
1. Open navigation settings: From your Shoplazza admin, click Online Store > Navigation and then click the edit button next to the top menu navigation template.
2. Customize the menu name: Edit the name of your top menu navigation based on your preference. You can also set options such as linking the menu, opening a new window, or hiding it.
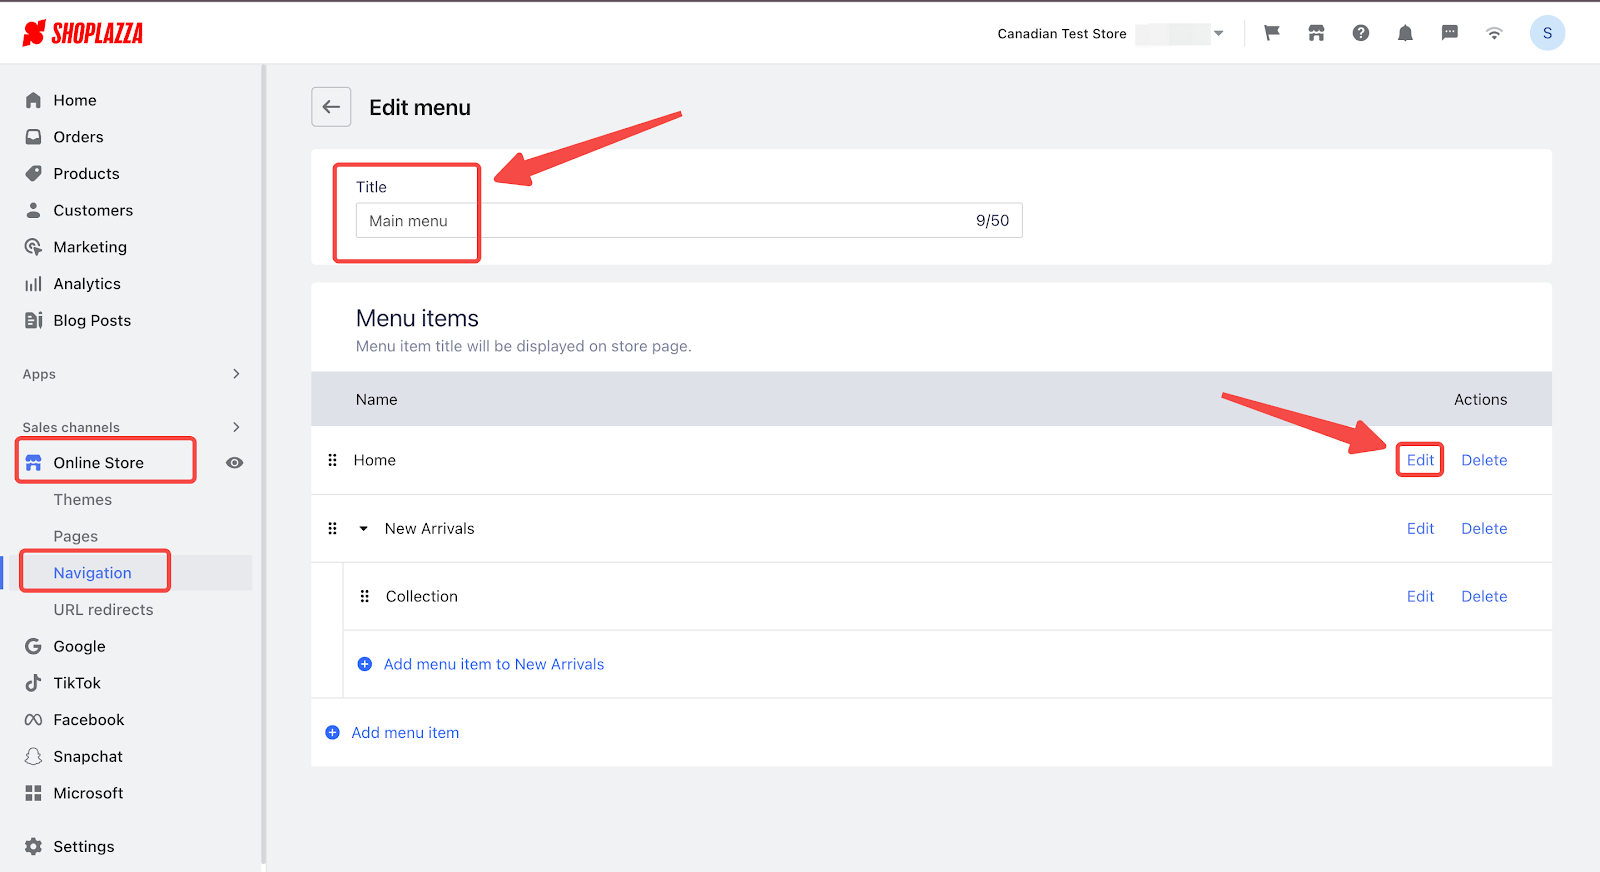
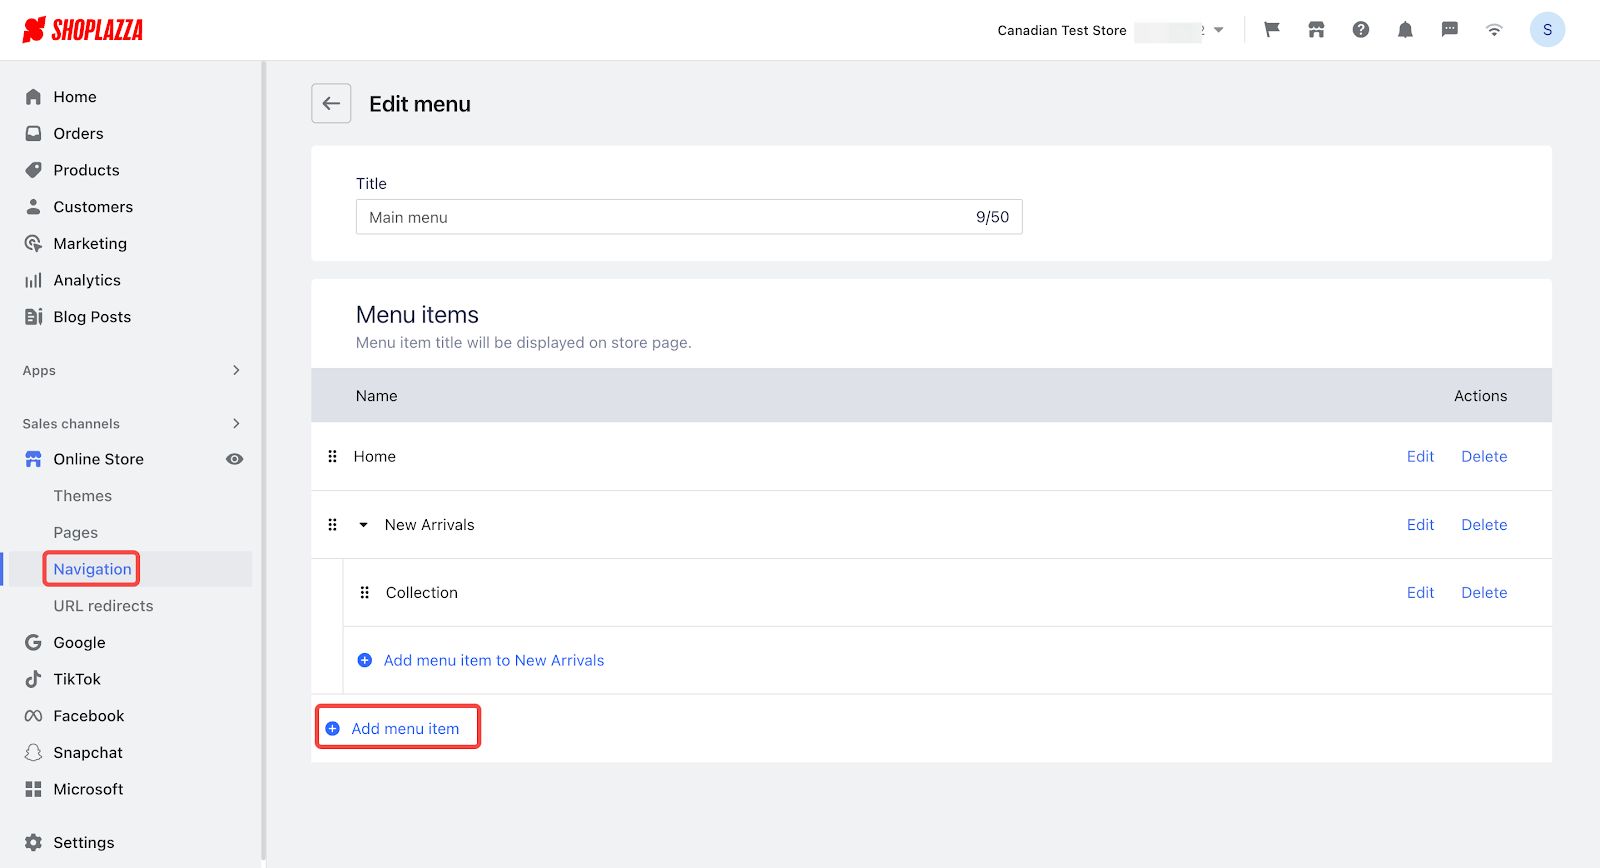
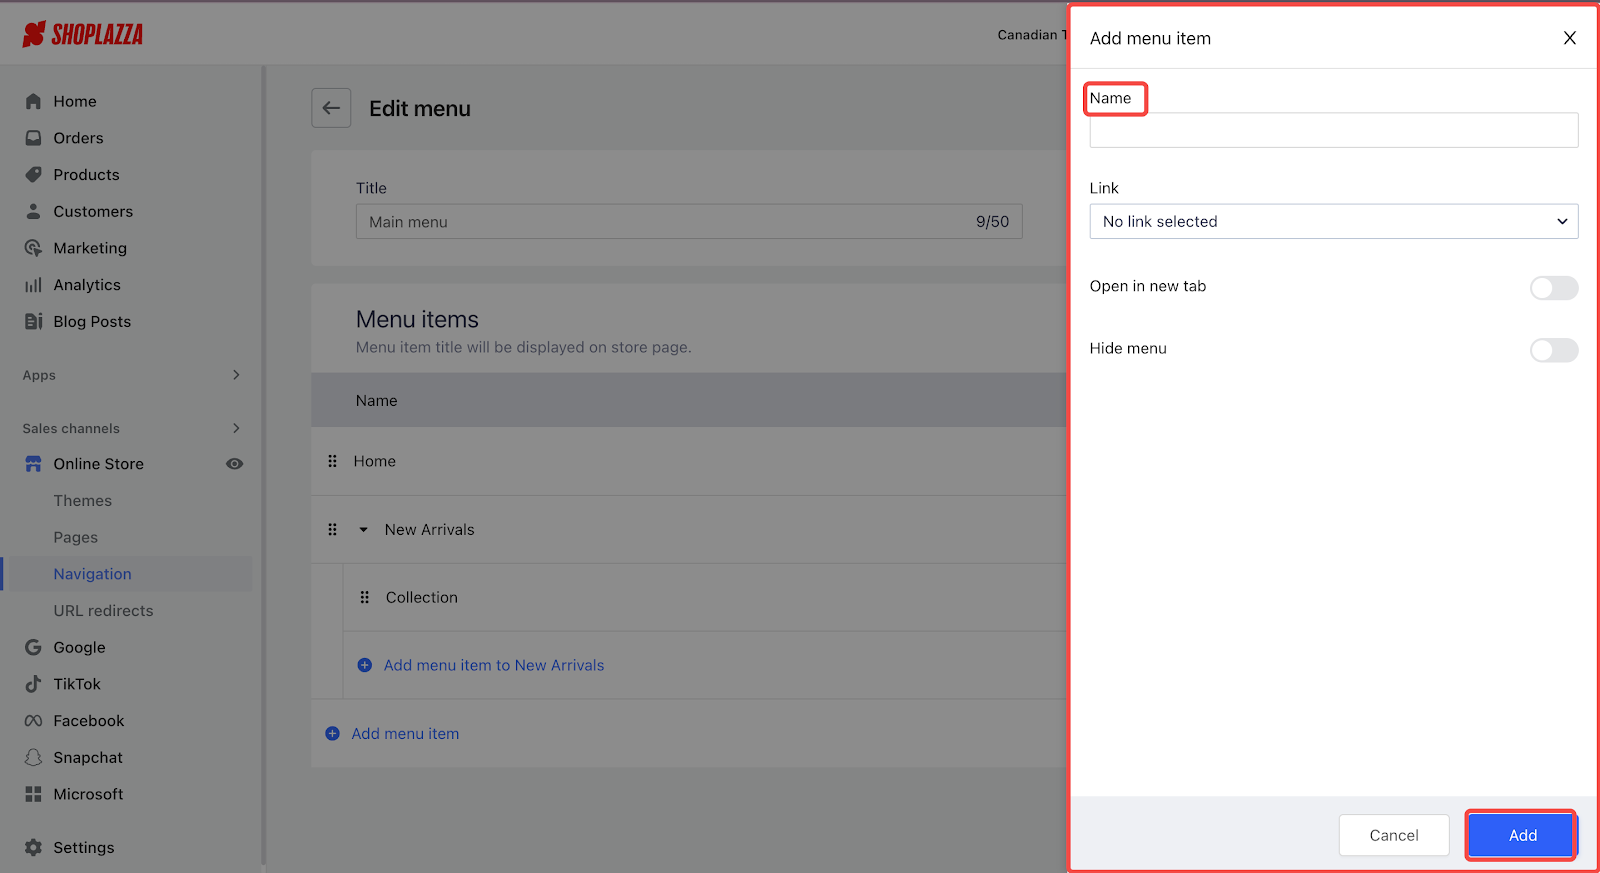
3. Add new items to the menu: Click Add Menu > Add Menu Item, type in the menu name, and click Add to include it in your navigation.
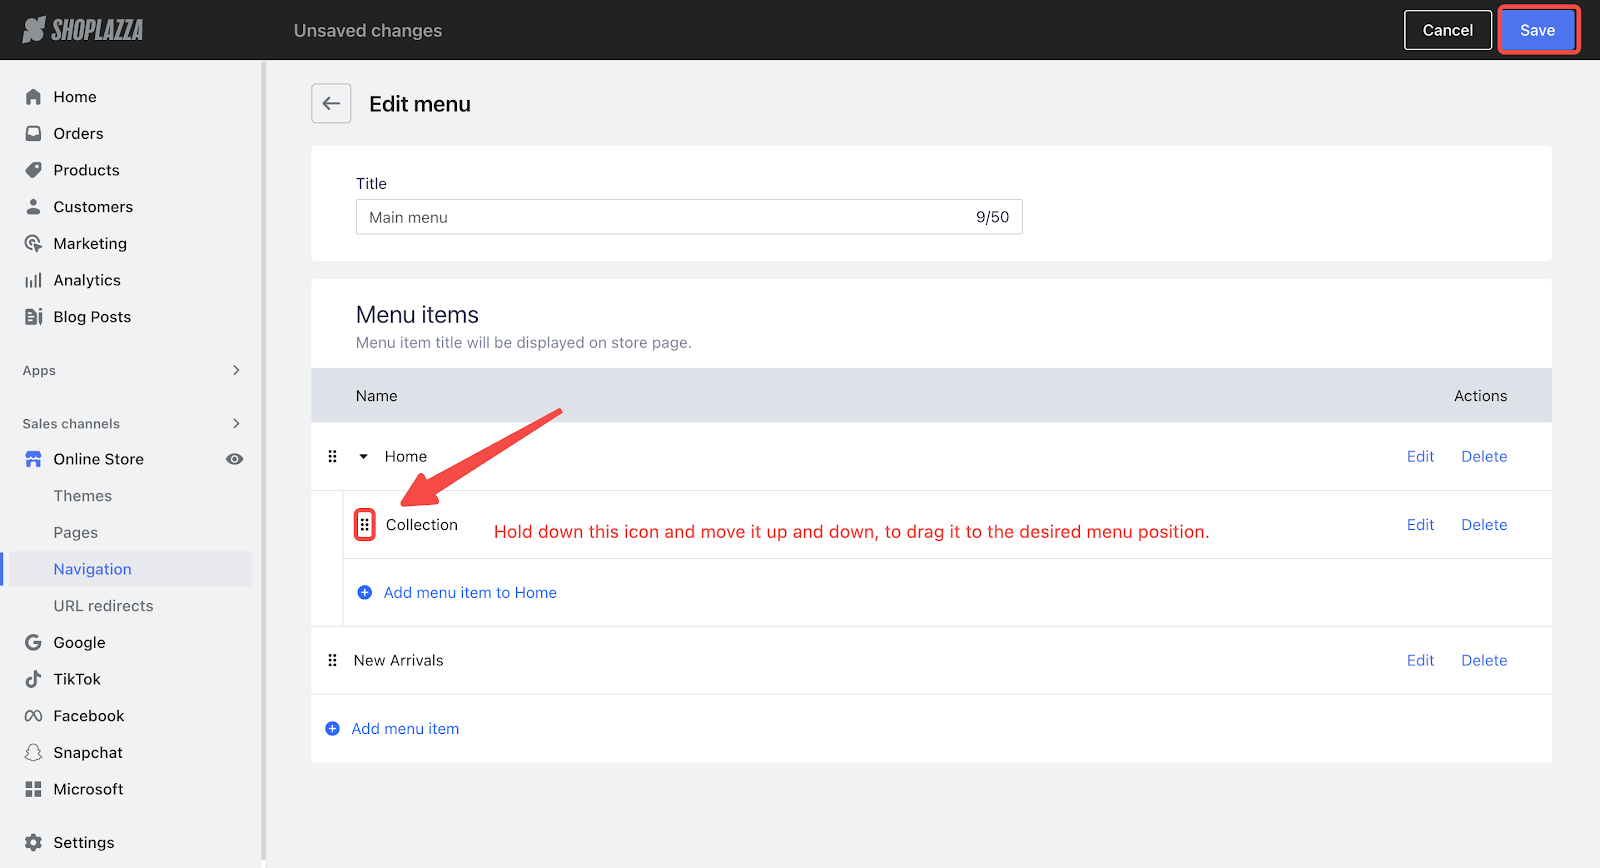
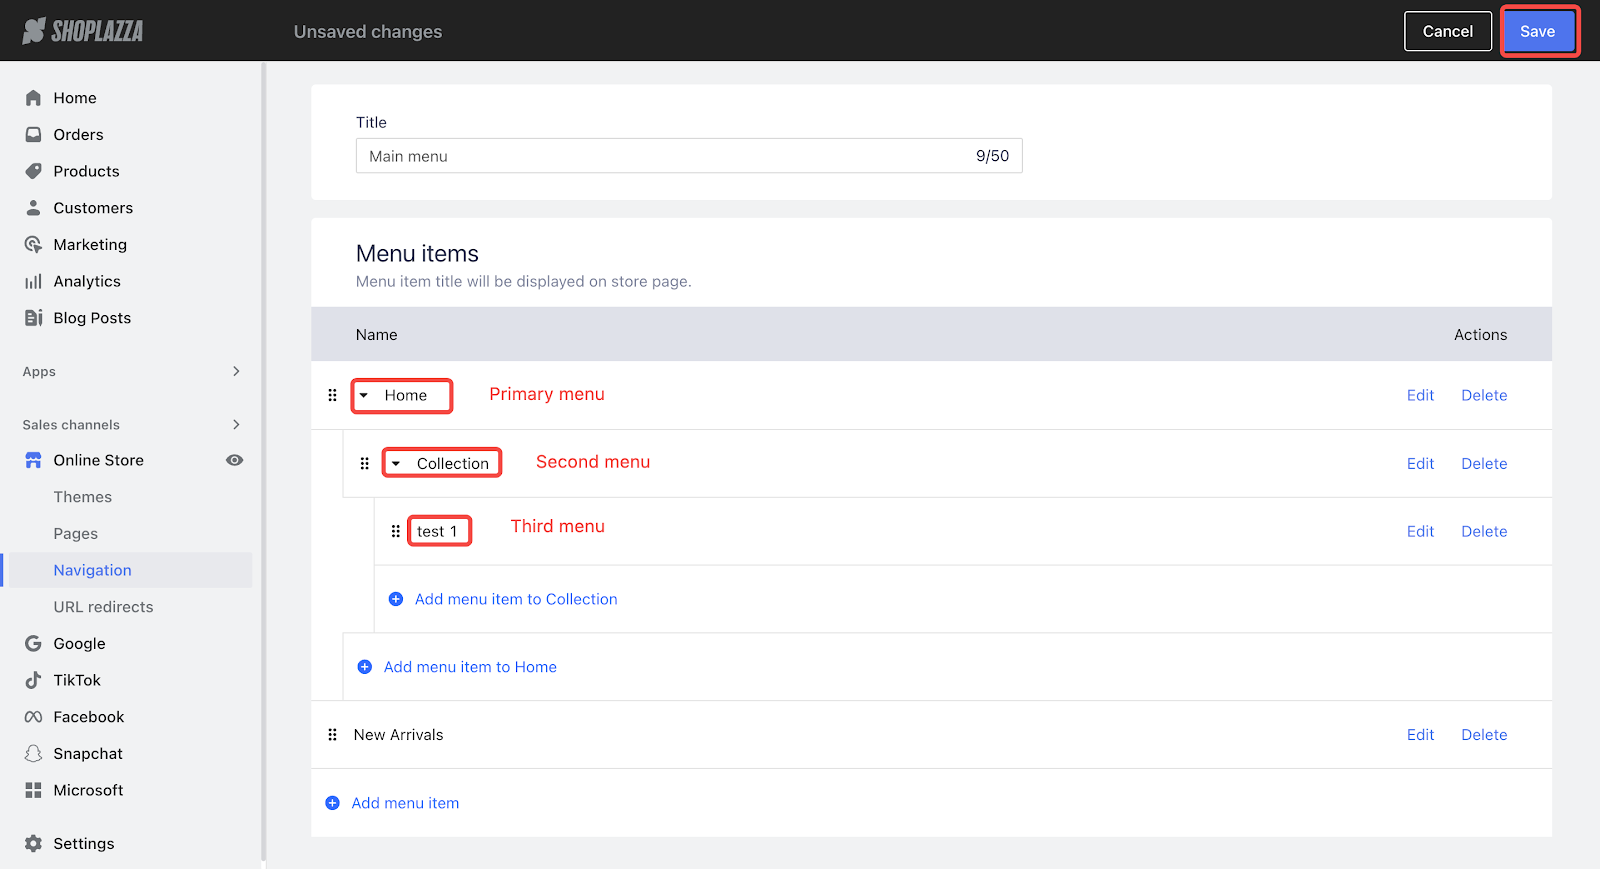
4. Rearrange menu items: You can drag and drop menu items under the main or secondary items to create submenus. Up to three levels of menus can be set.
Linking menu items to pages
To ensure a smooth user experience, make sure the menu items are linked to the right pages.
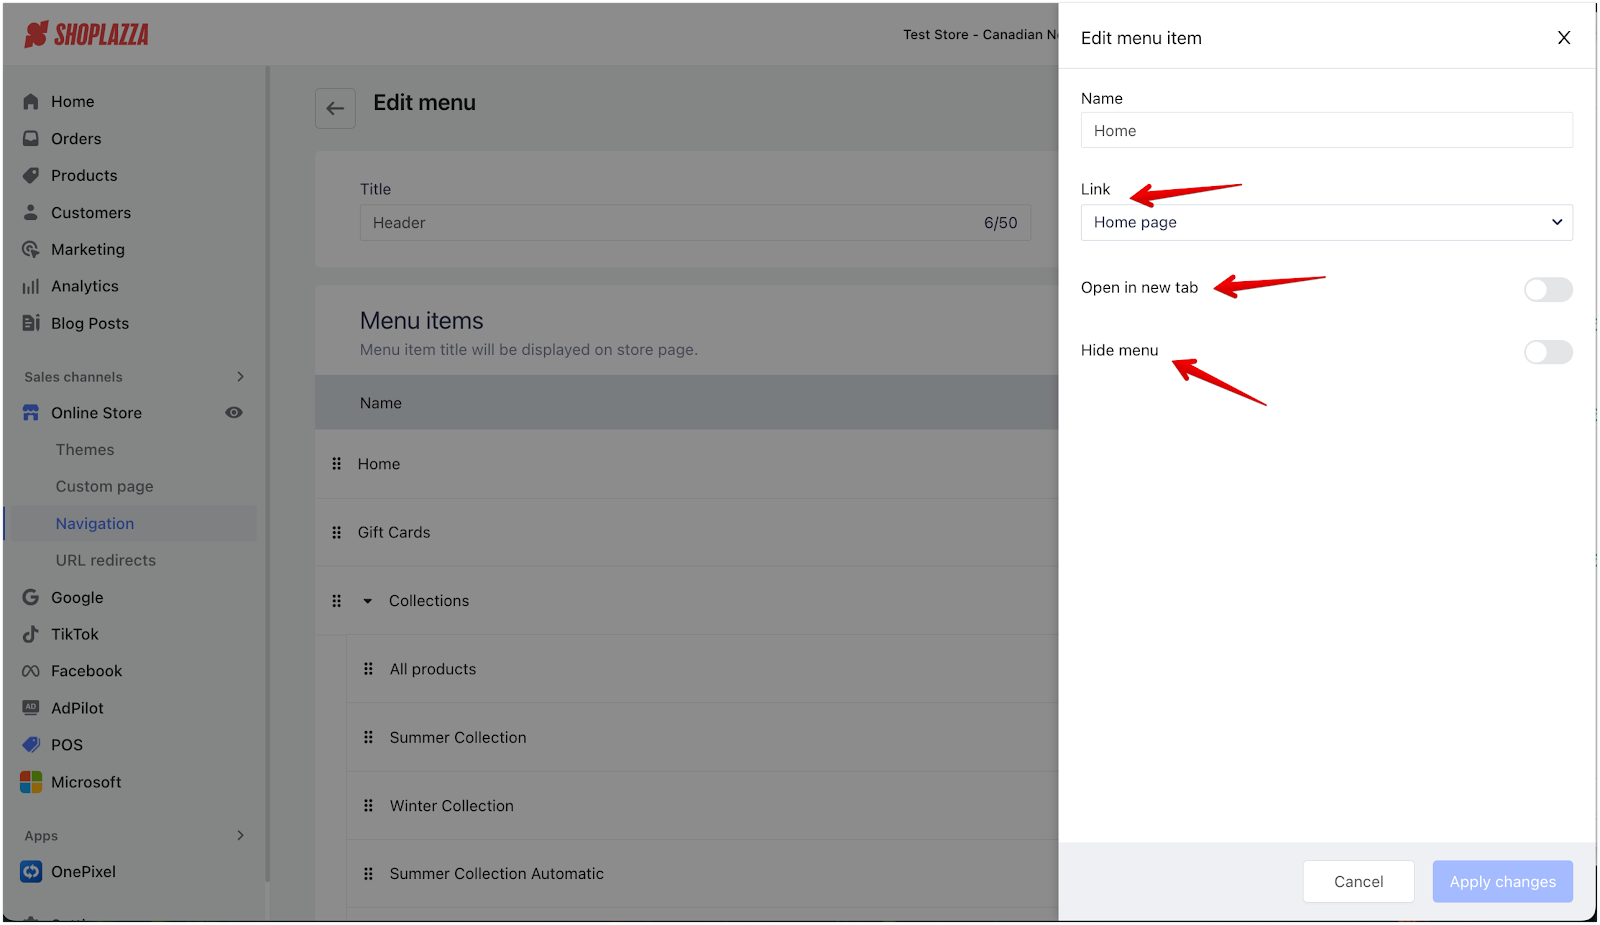
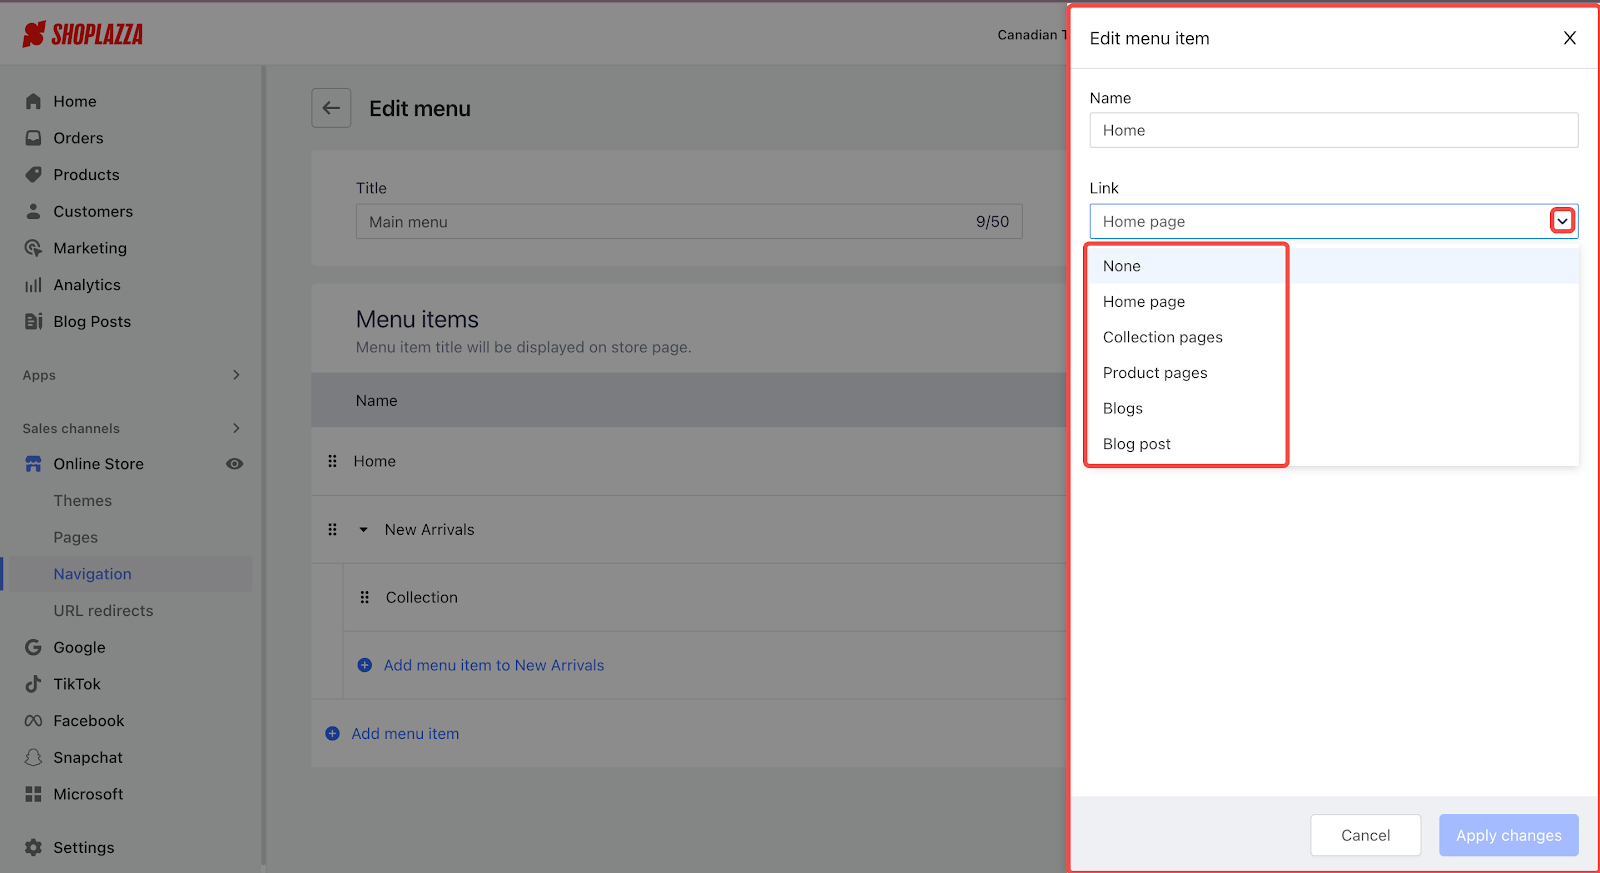
1. Edit menu links: In your Shoplazza admin, go to Online Store > Navigation > Main Menu / Header, then click the edit button next to the item you want to link.
2. Select the page to link: Click on Edit and choose the page you want to link to in the menu link section. You can connect to product collections, detail pages, custom pages, order lookups, or blogs. After selecting, click Apply Changes and save.
Changing your top navigation menu
You can switch the header menu to display different navigation menus that you’ve already set up in your theme settings.
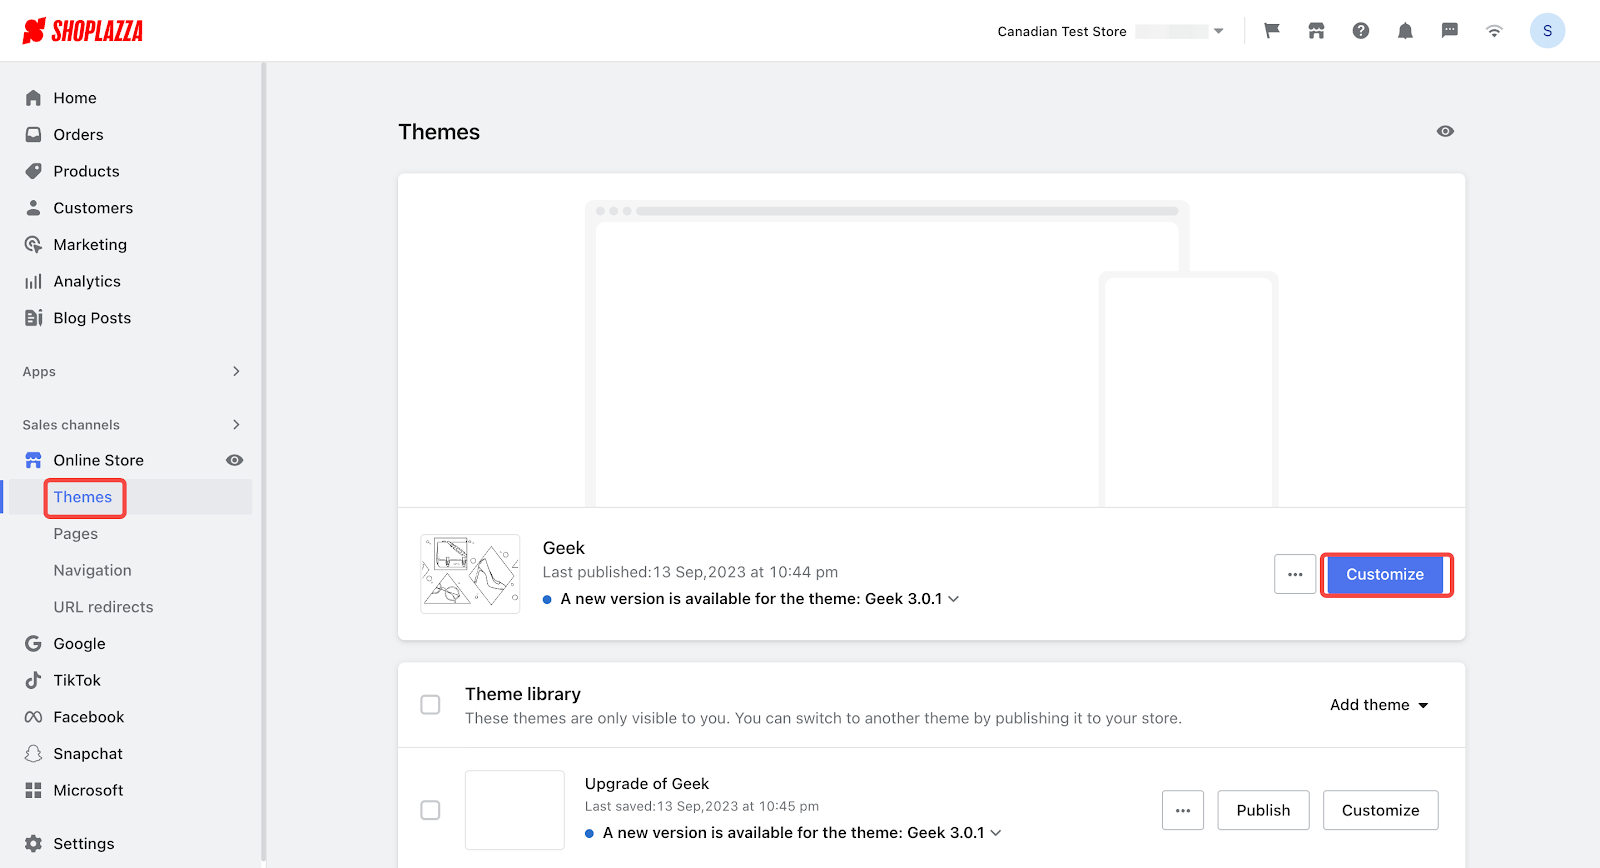
1. Switch the menu: In your Shoplazza admin, go to Online Store > Theme > Customize.
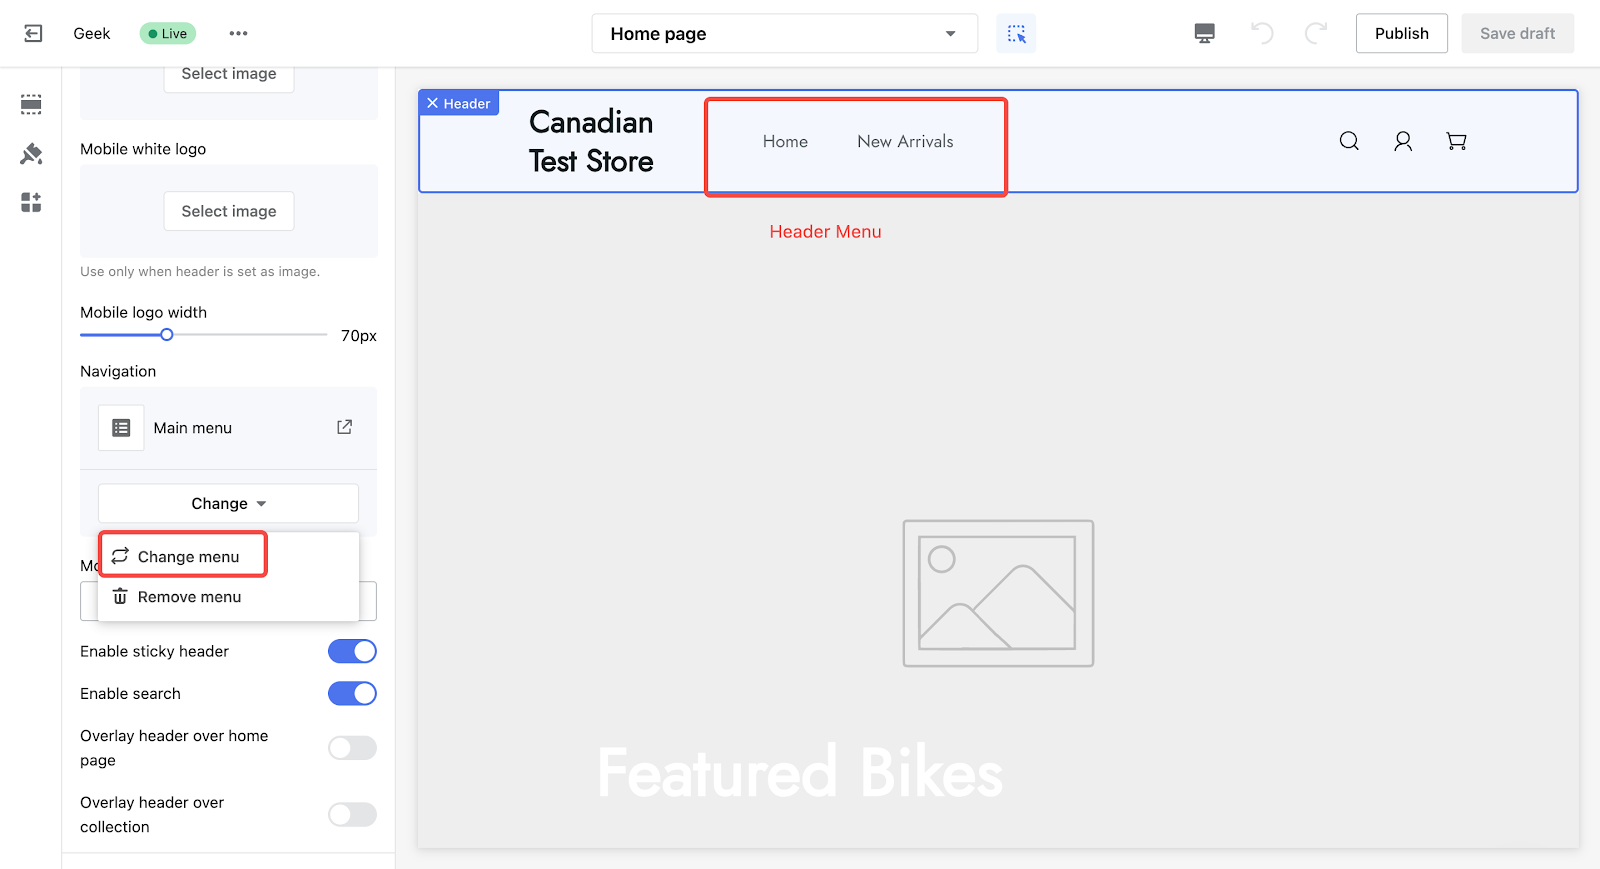
2. Edit the header menu: On the theme editing page, click Header to open the header menu settings.

3. Select a new menu: In the navigation menu, click Change Menu, choose the one you want to display and click Publish or Save Draft to confirm.
A well-designed header menu improves user experience, enhances your website’s look, and makes managing your content easier. By following these steps, you’ll create a user-friendly header that keeps visitors engaged and satisfied.


Comments
Please sign in to leave a comment.