
Reassuring your customers about transaction security is essential for building trust in your online store. One way to do this is by adding secure payment icons to your product details page. This guide will help you add these icons to your Shoplazza store, specifically for the Hero, Halloween, Modern, and Wind themes, as well as the Nova 2023, Bamboo, Morning, Moon, Night, Sweet, Geek, Christmas, Impress, and OnePage themes. Adding these icons can boost customer confidence and give your site a more professional look.
Note
You will need to upload a single image that includes all the payment icons you want to display. Ensure this image is high-quality and represents the payment methods you support.
For the Hero, Halloween, Modern, and Wind themes
These themes allow you to easily add payment icon images next to the product details, enhancing trust and professionalism. Follow these steps to add your icons:
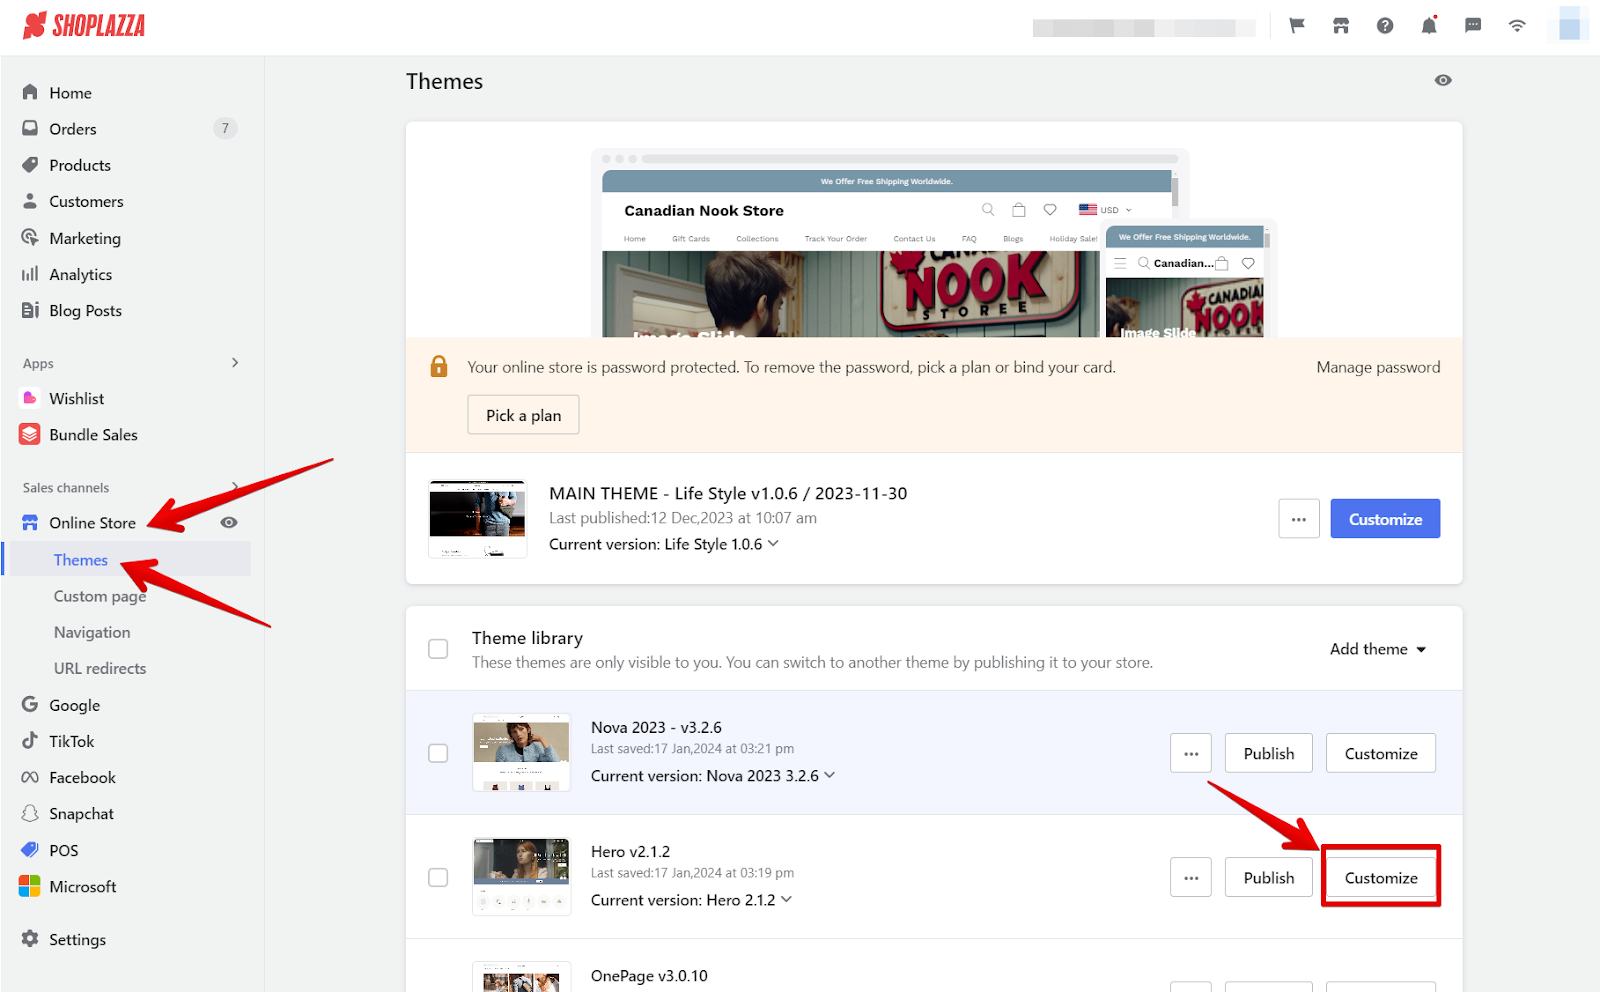
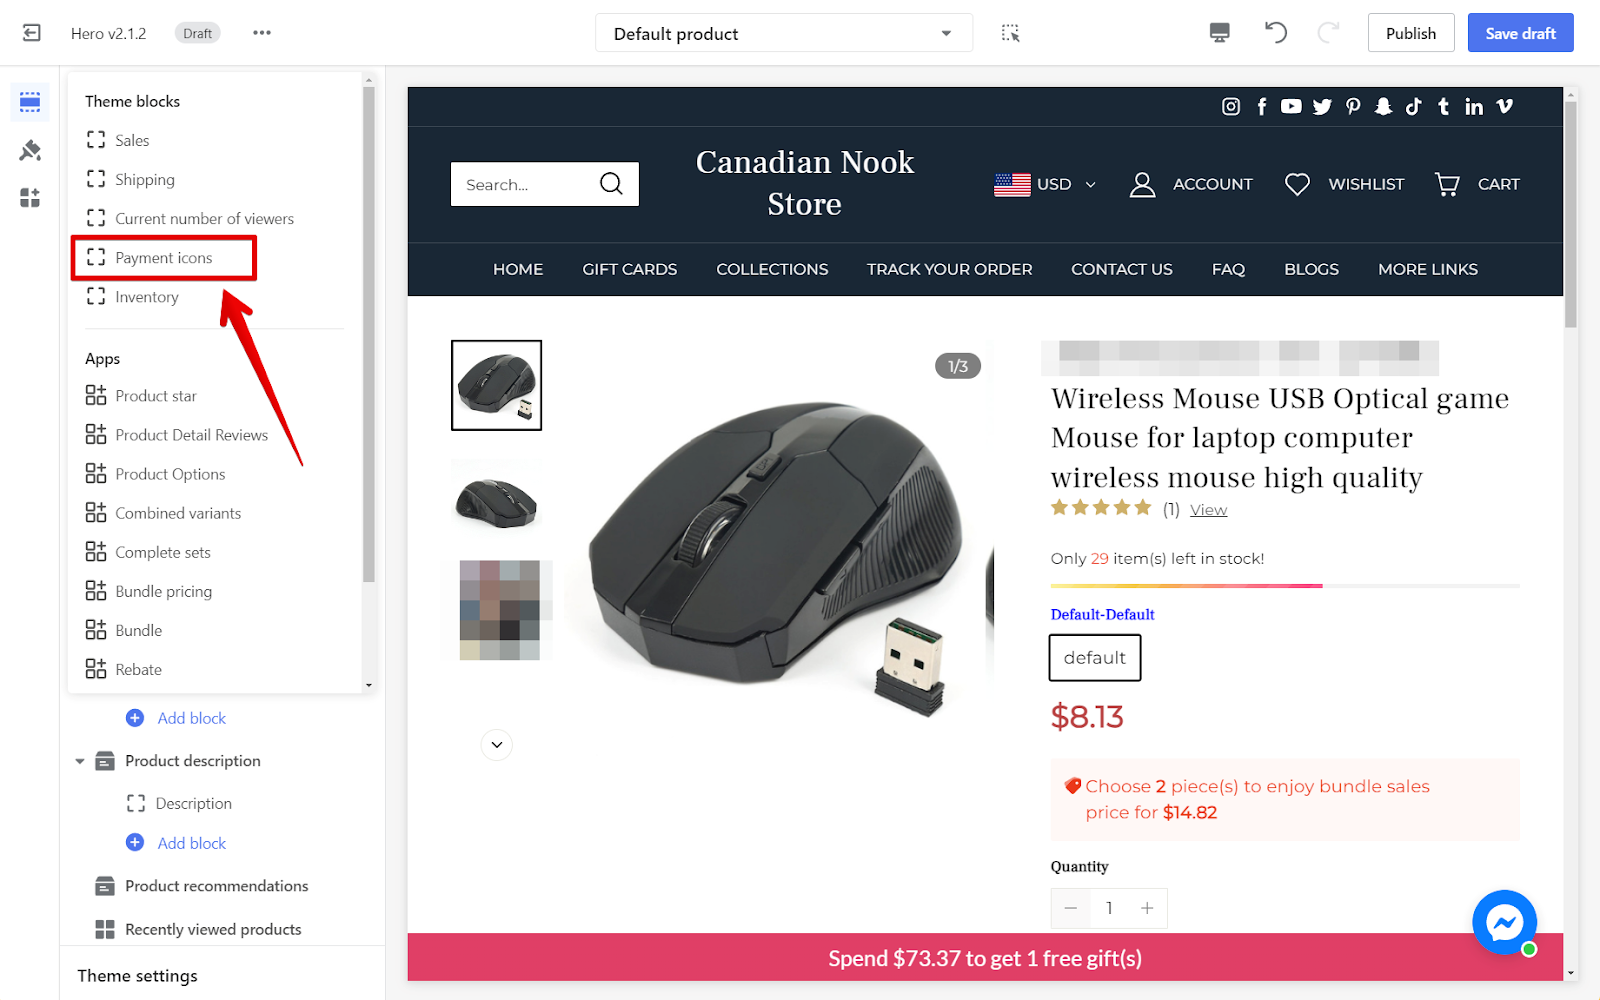
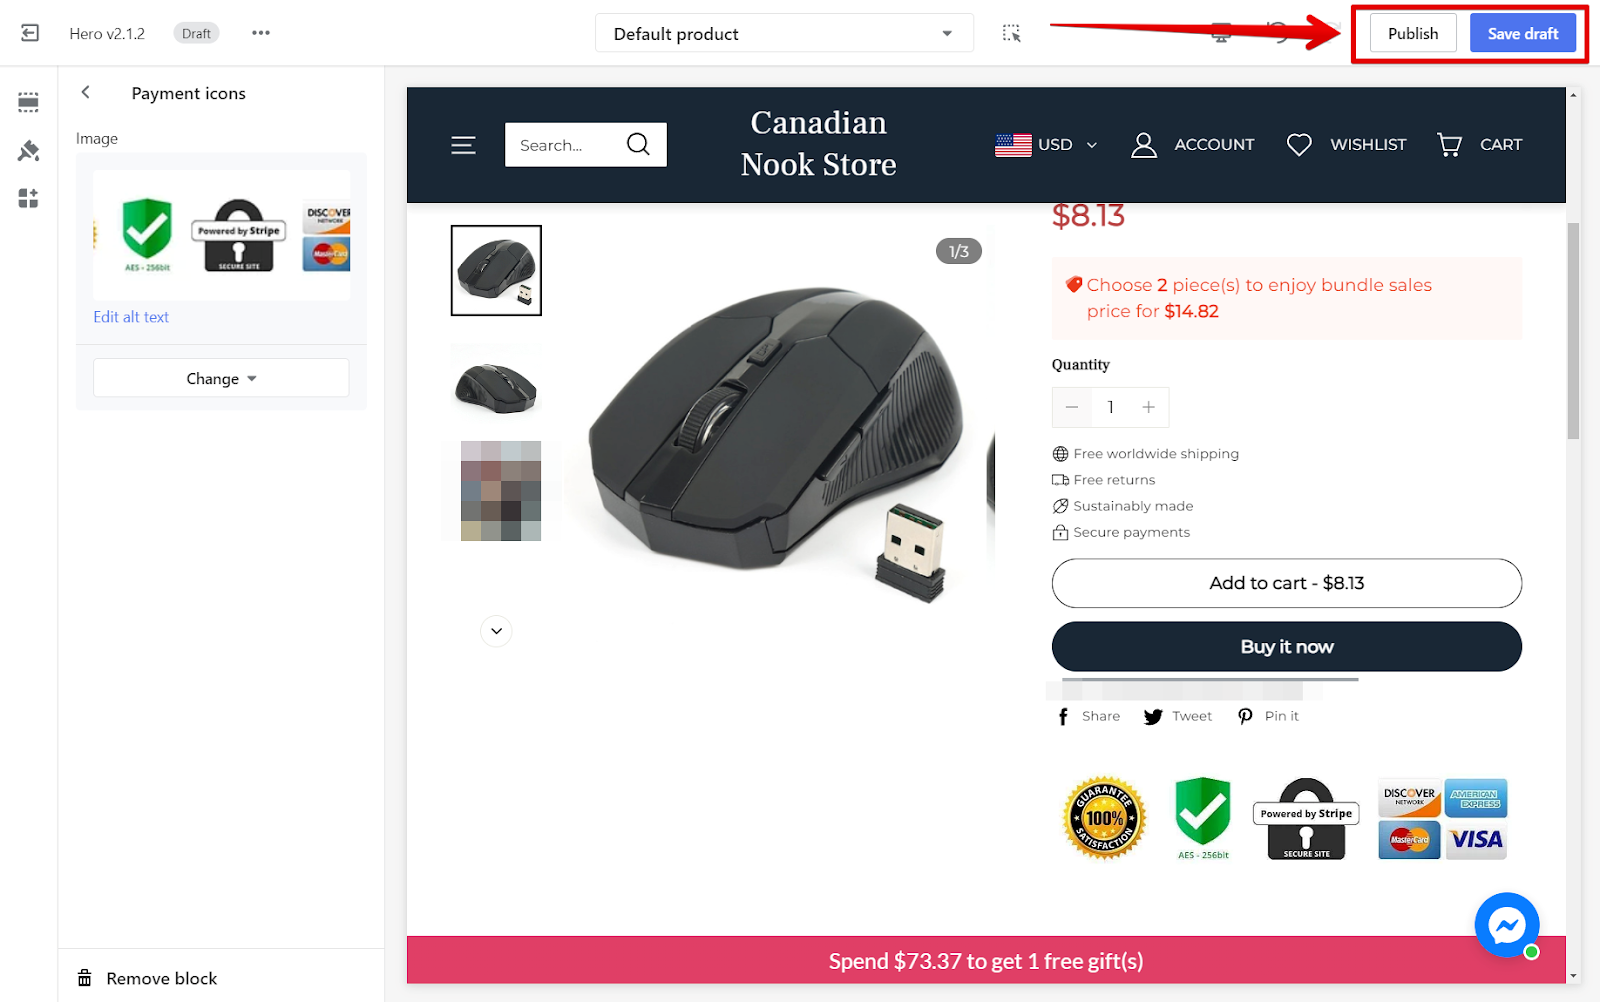
1. Theme settings: Go to your Shoplazza Admin > Online Store > Themes. Select the theme you want to update and click on Customize.
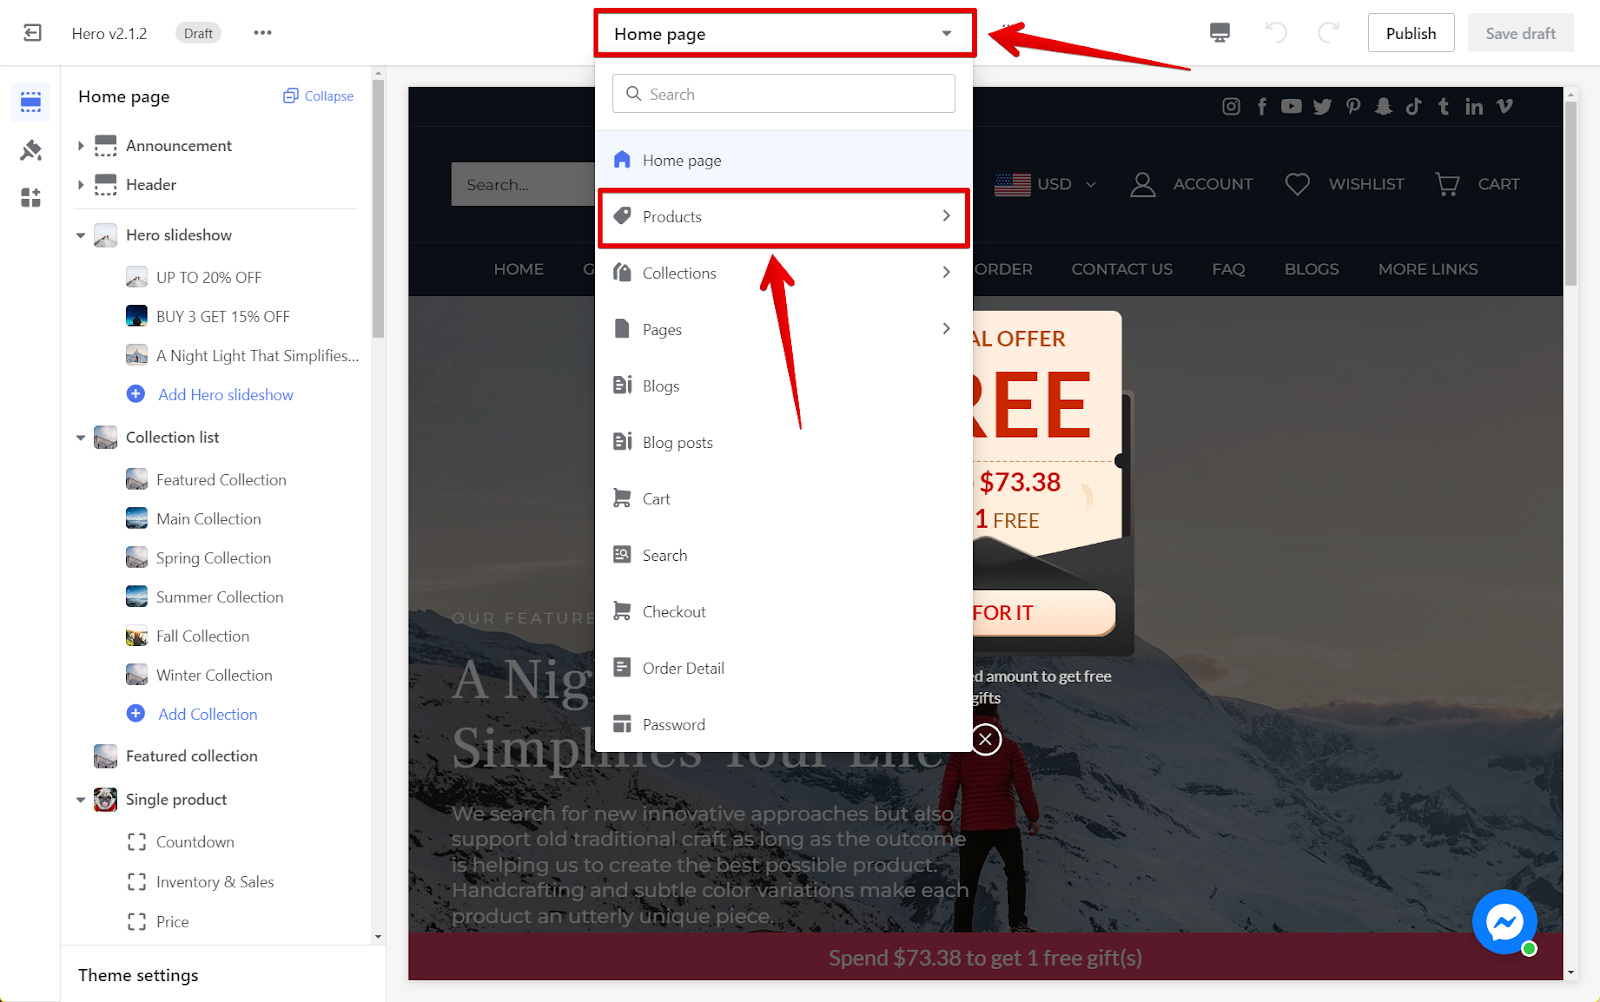
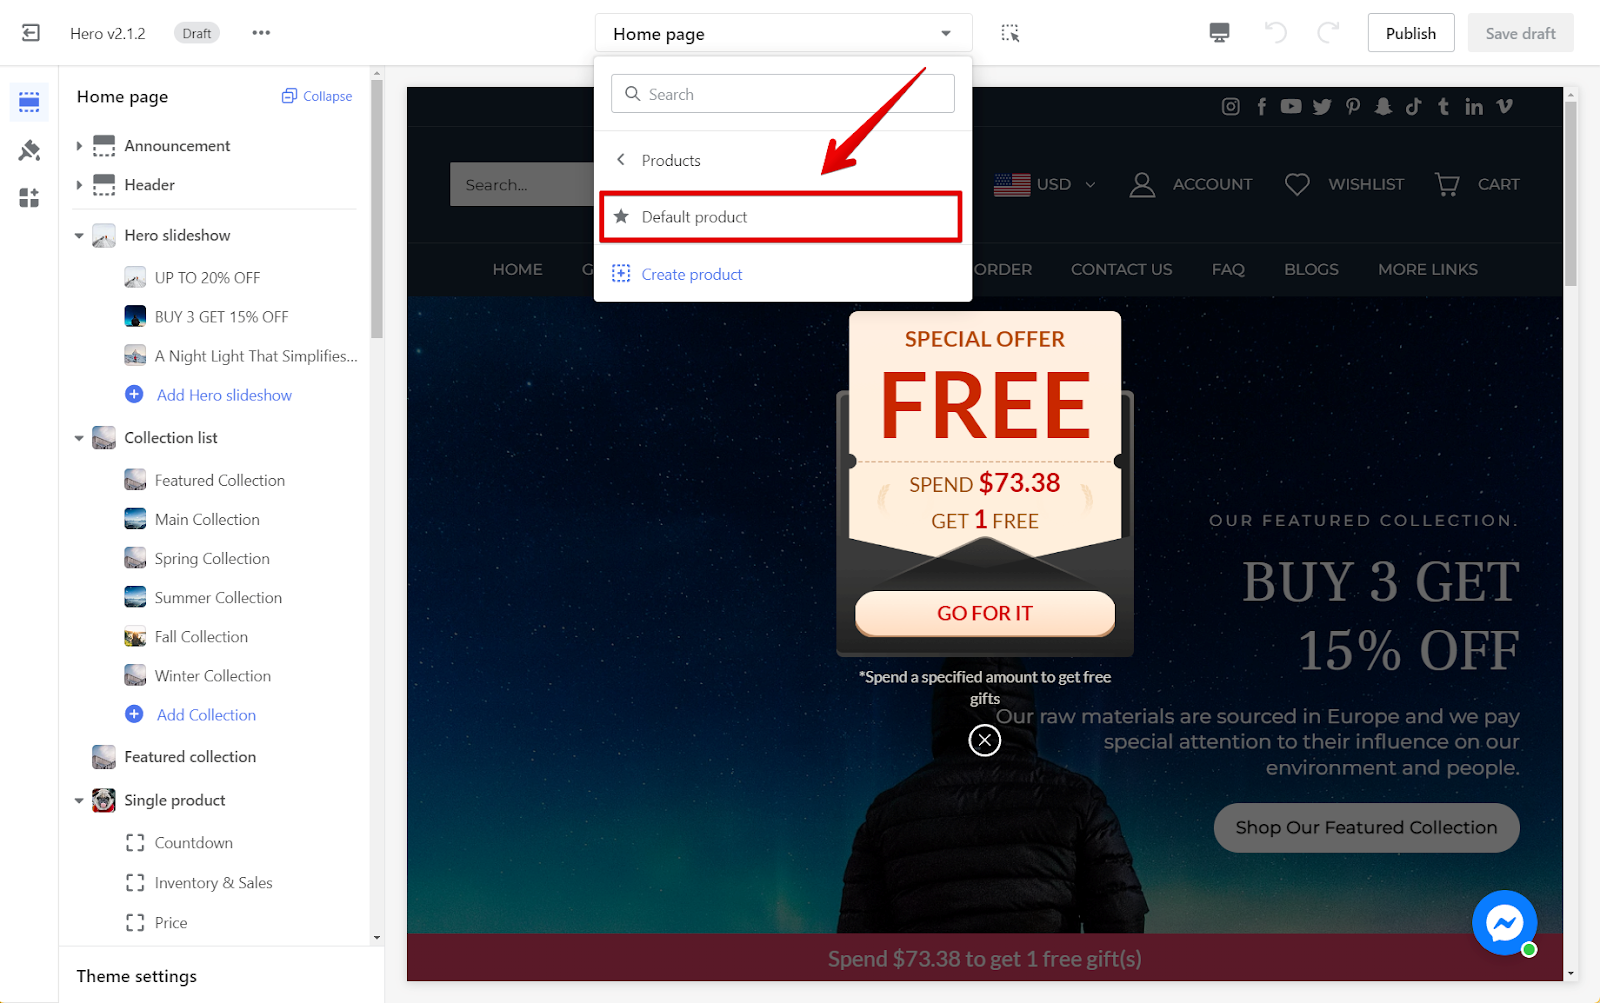
2. Switch to the product page: Use the dropdown menu at the top to select the Products Page.
3. Add the payment icons block: Locate the Product section and click on Add block.
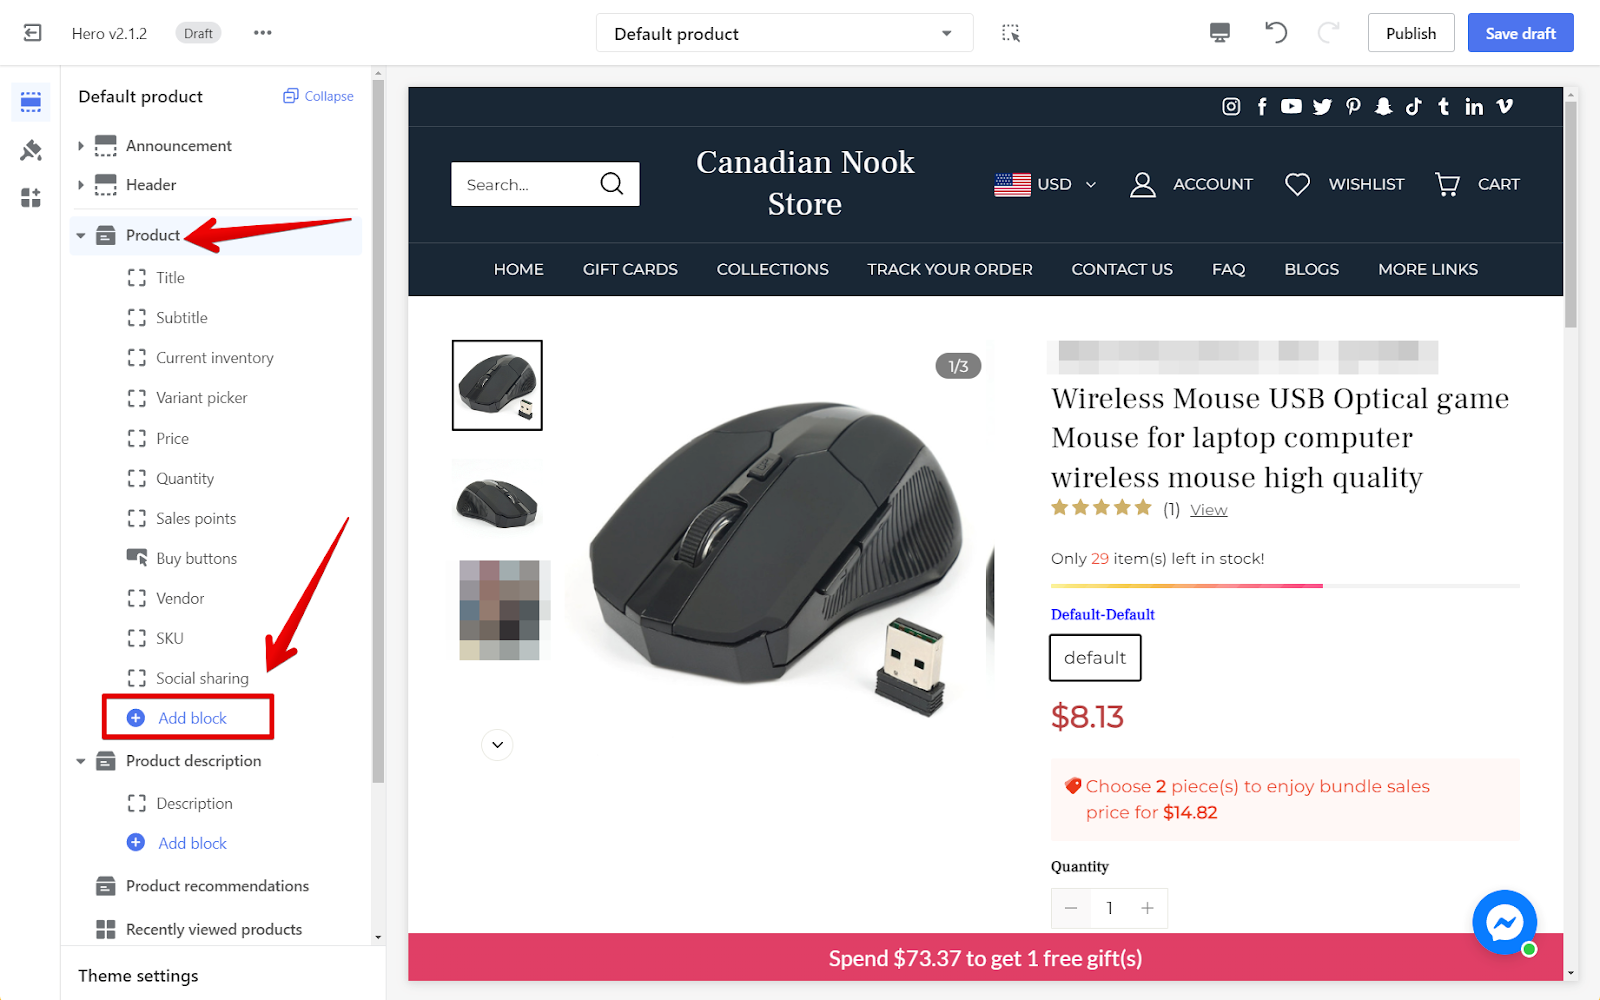
4. Add payment icons: Choose Payment Icons to add the block.
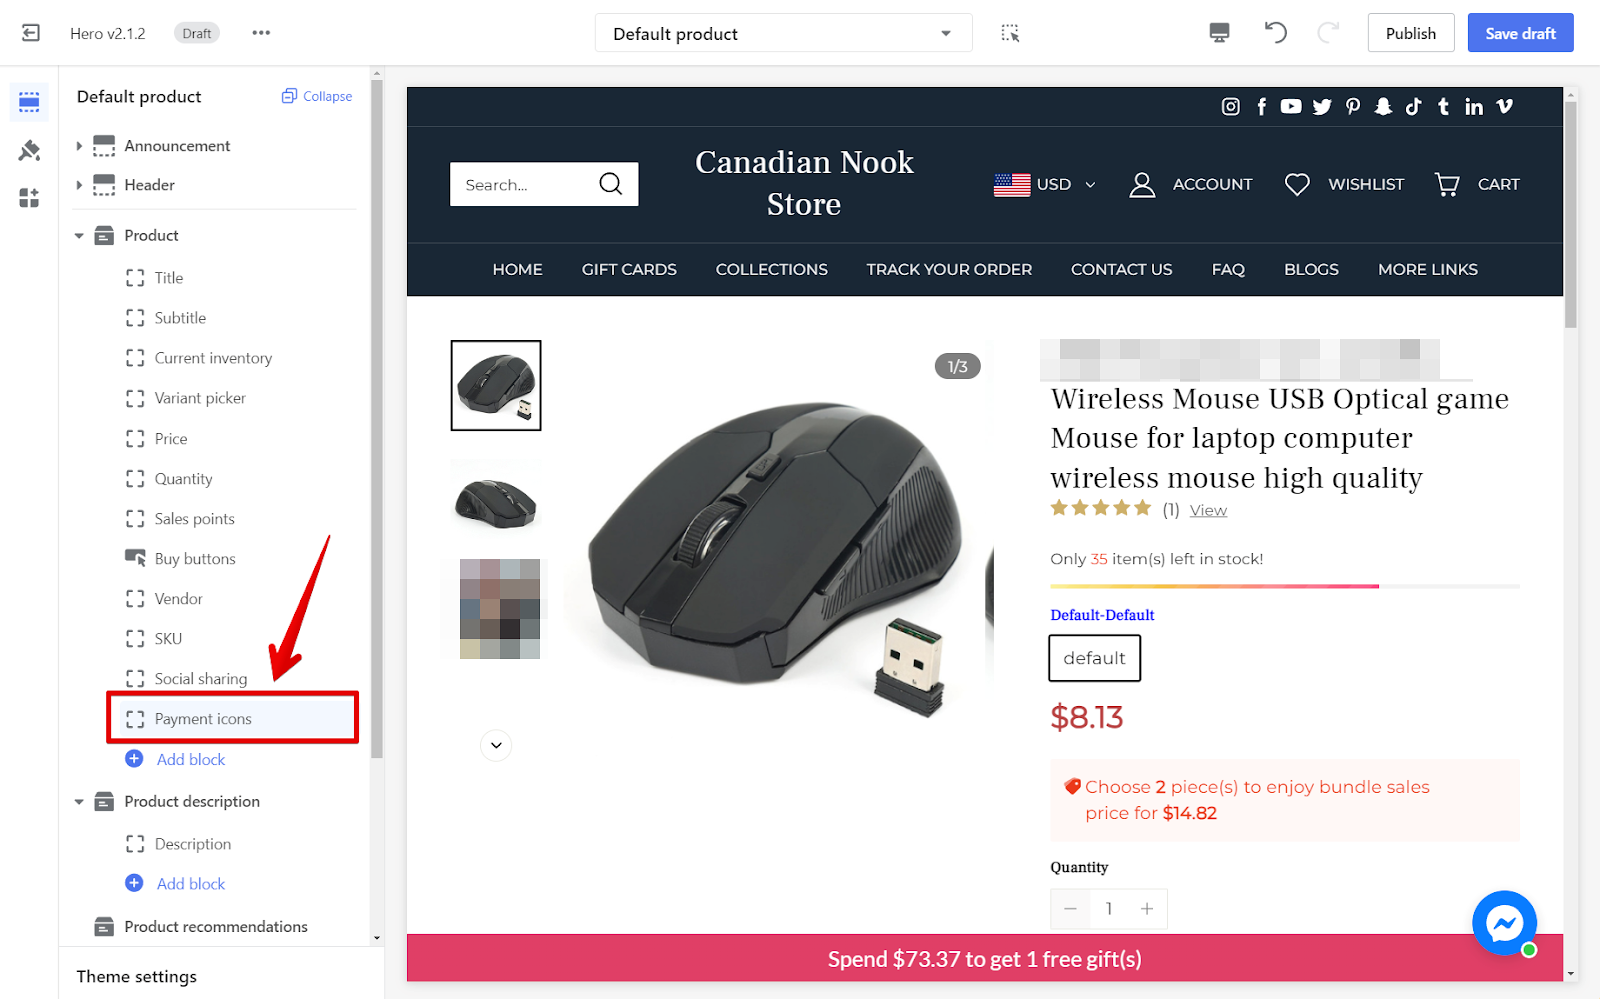
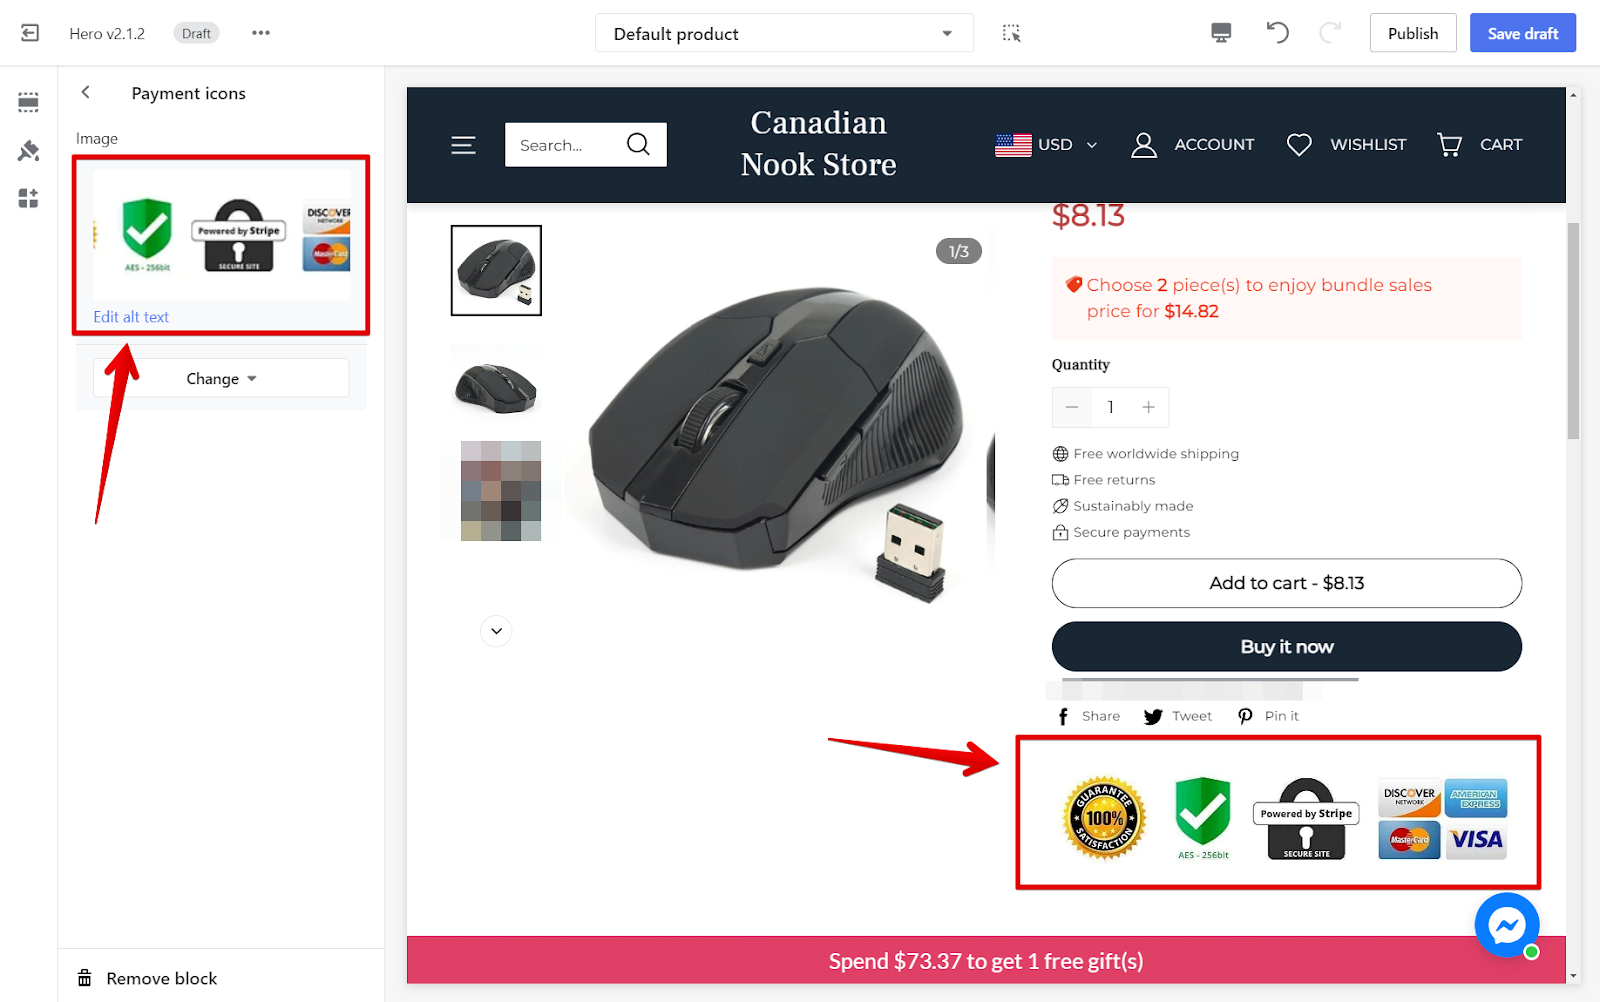
5. Edit the payment icons block: Click on the Payment Icons title and select the payment icon image you prefer.

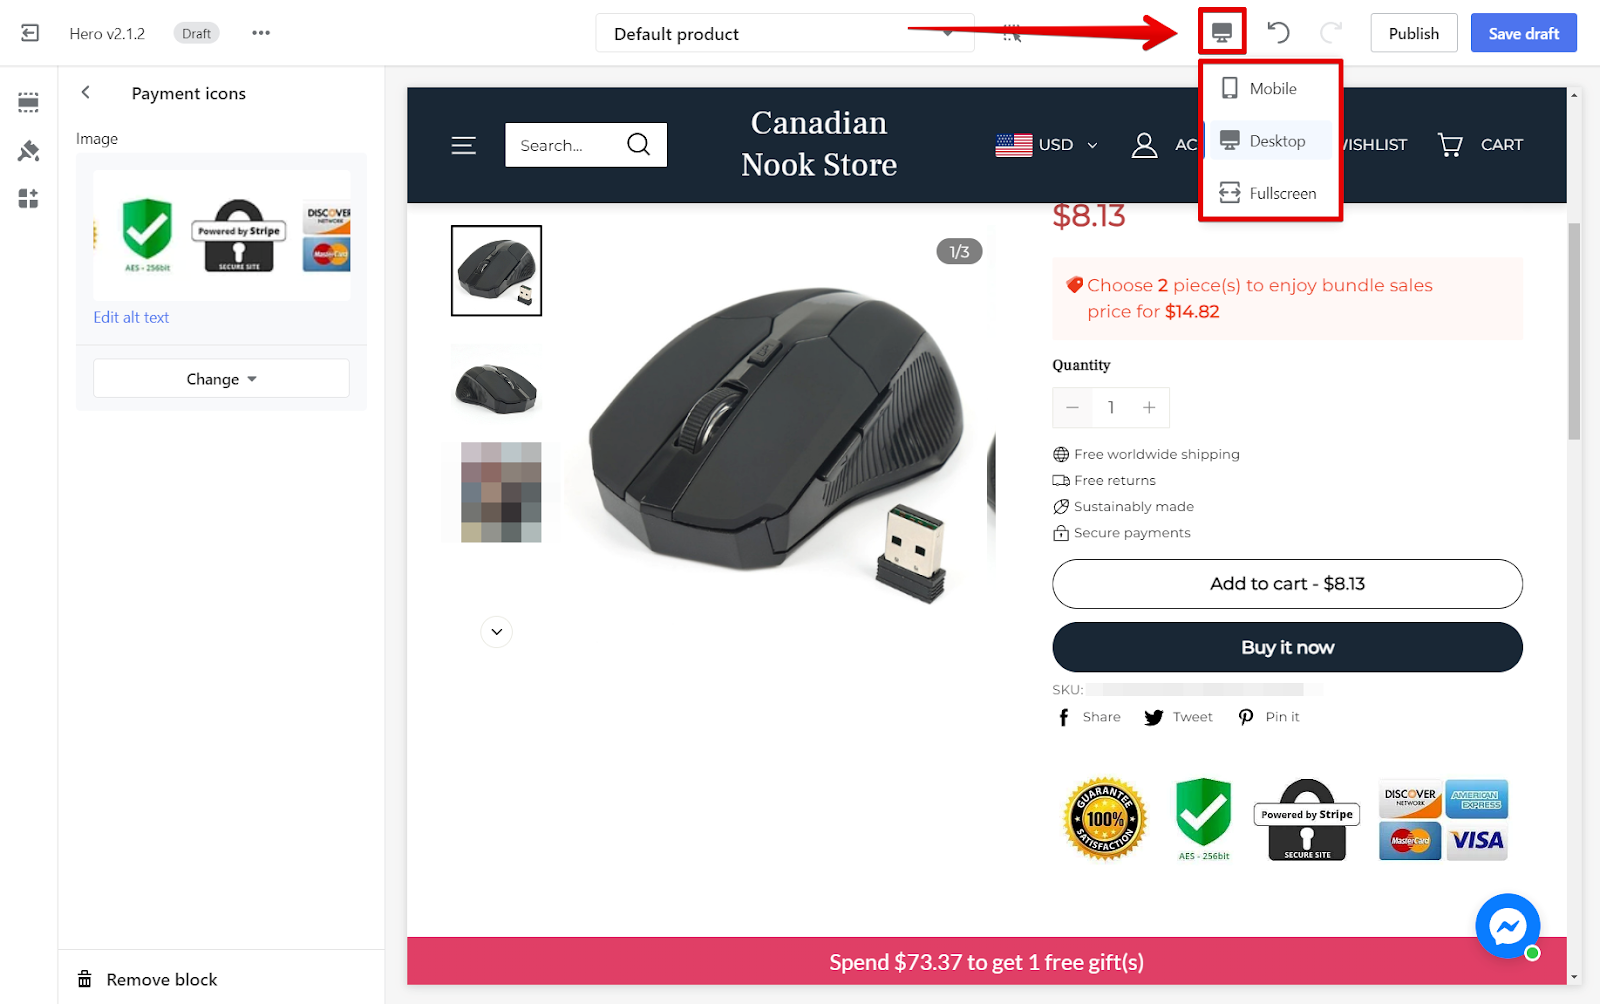
6. Preview your changes: Click the preview icon to see how the icons display on Mobile, Desktop, or Full-screen mode.
7. Save your changes: Click Save Draft or Publish to make the updates live.
For the Nova 2023, Bamboo, Morning, Moon, Night, Sweet, Geek, Christmas, Impress, and OnePage themes
These themes require a slightly different approach,such as using a custom page to add your payment icons. Here’s how to get started:
Creating a custom page
First, you’ll need to set up a custom page to house your payment icon image.
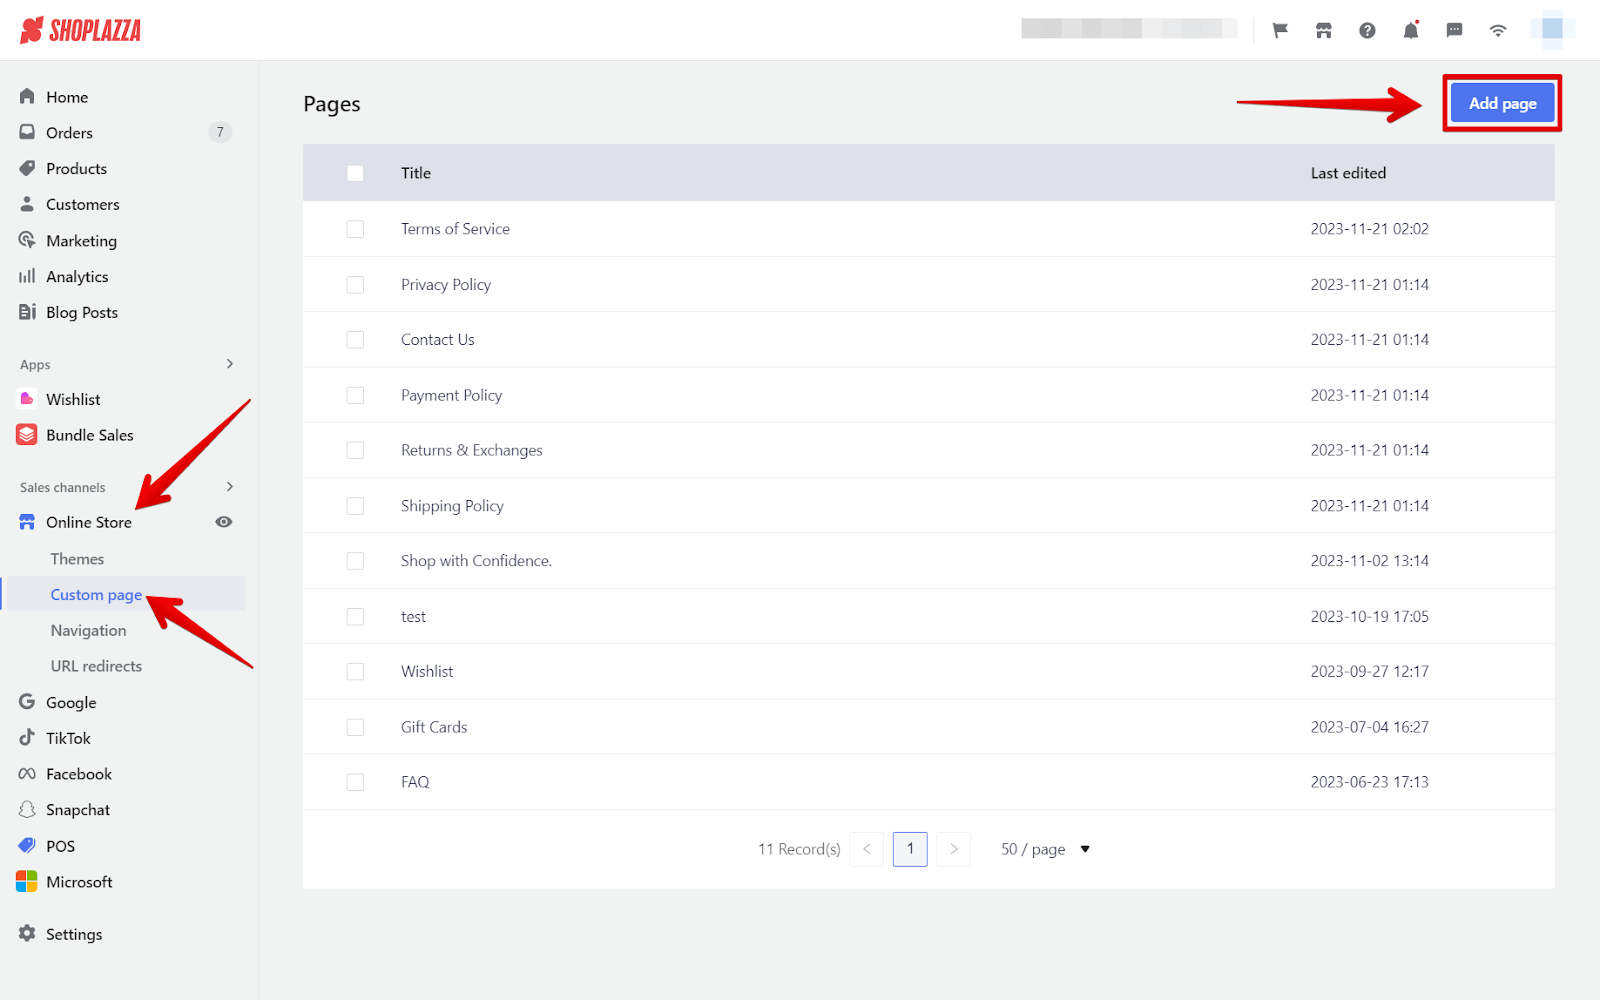
1. Create a new page: Go to your Shoplazza Admin > Online Store > Custom page, and click Add page.
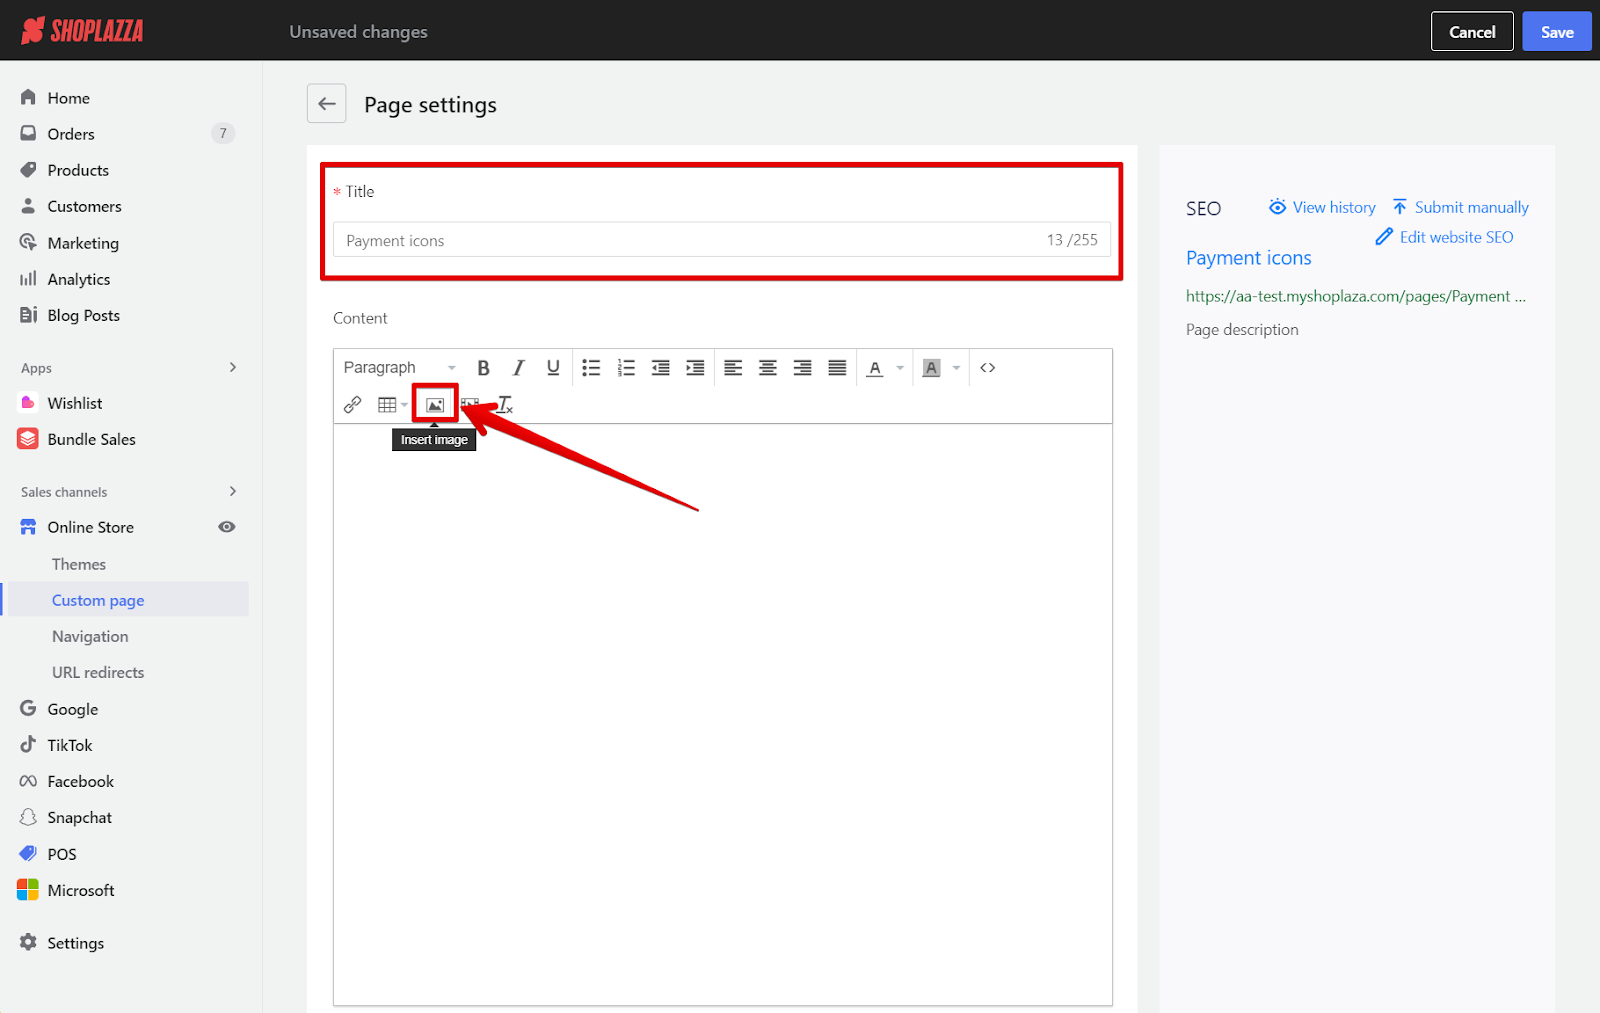
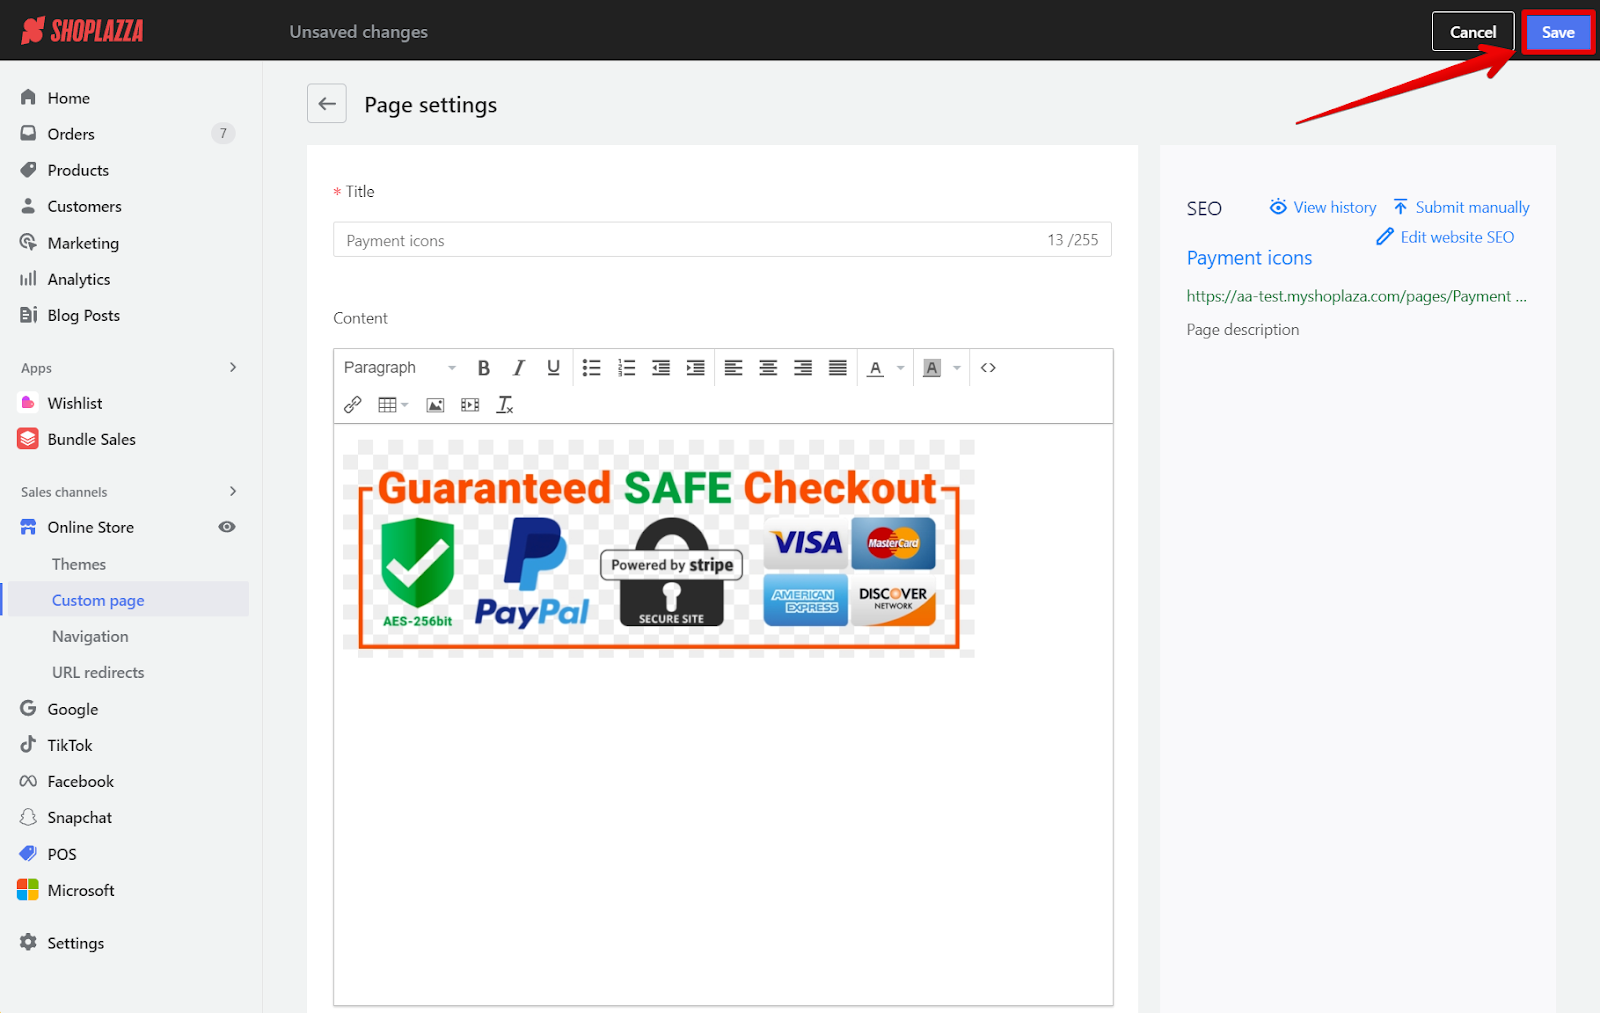
2. Add images: Name your page and use the content module to click on the Insert Image icon. Upload your single image containing all the payment icons, then save your changes.
Adding the custom page to your theme
Next, you’ll integrate your custom page into your product details using the theme editor settings.
1. Theme settings: Return to your Shoplazza Admin > Online Store > Themes. Select the theme to update and click on Customize.
2. Switch to the product page: Use the dropdown menu at the top to select the Products Page.
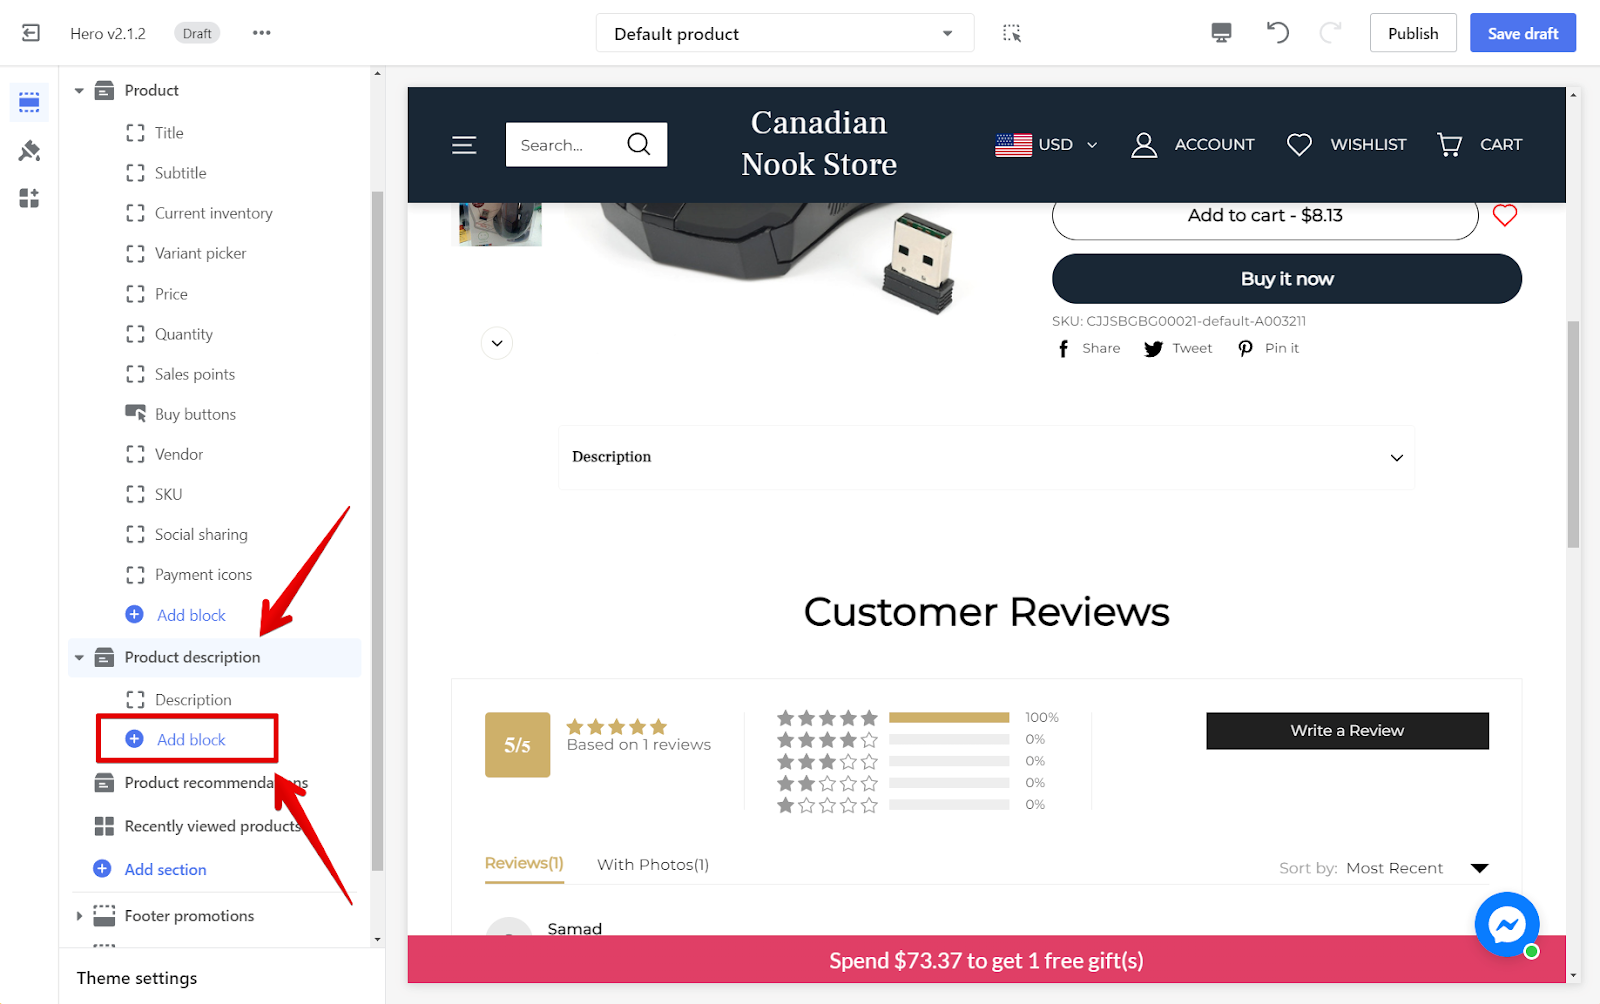
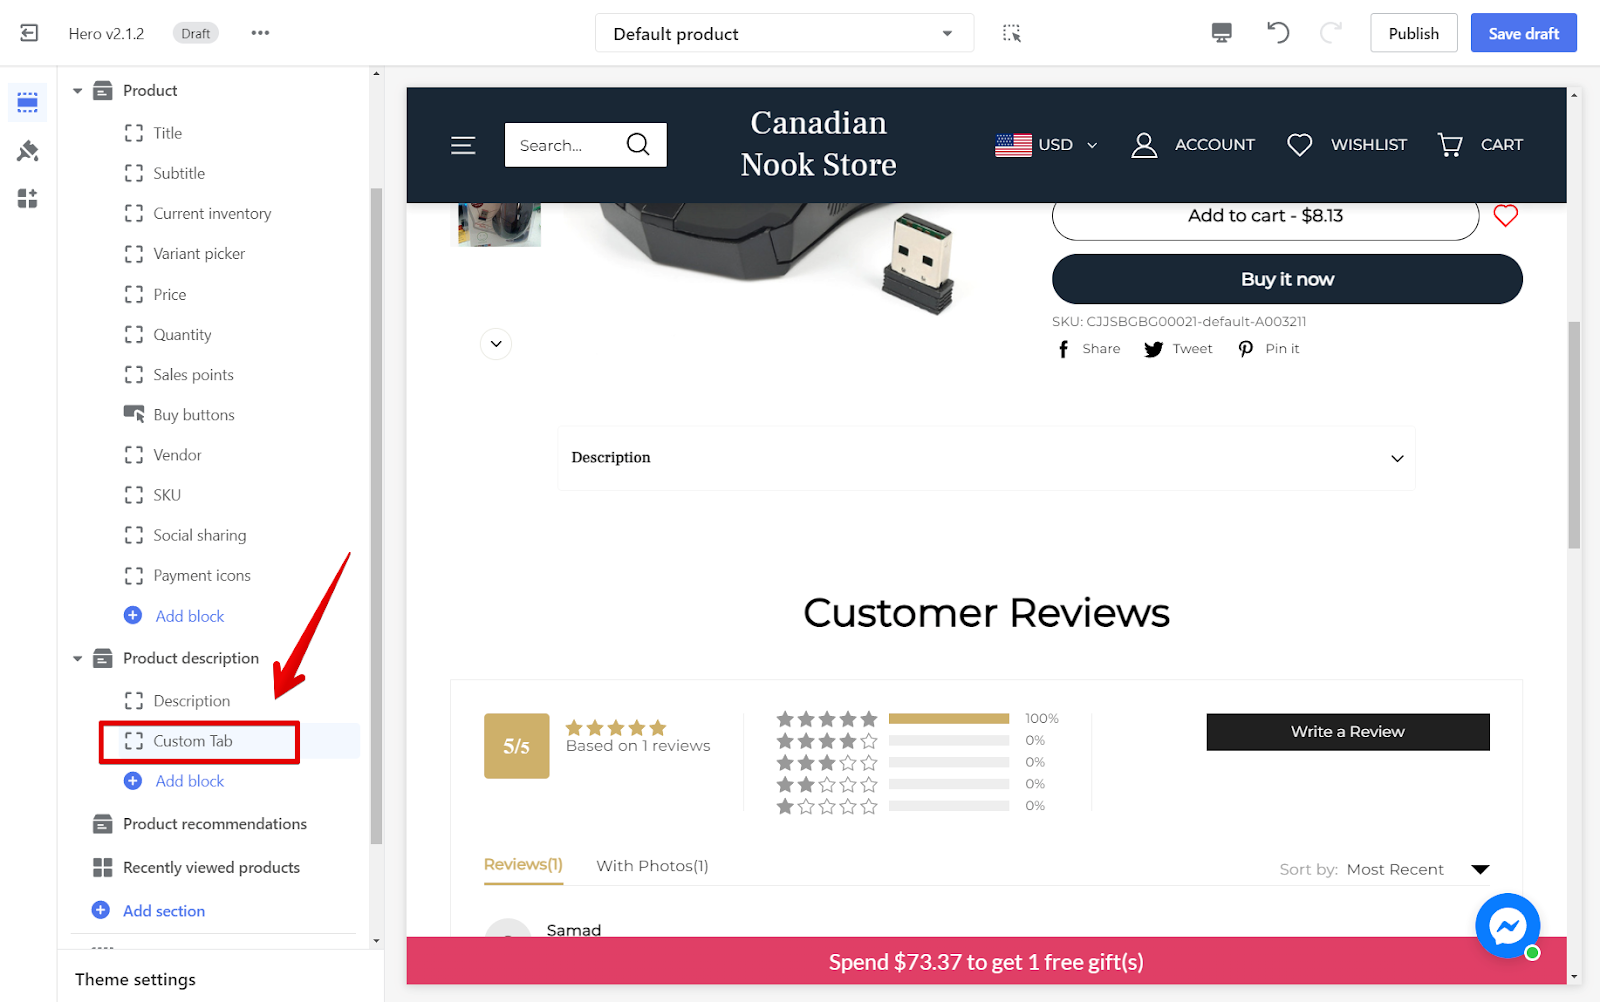
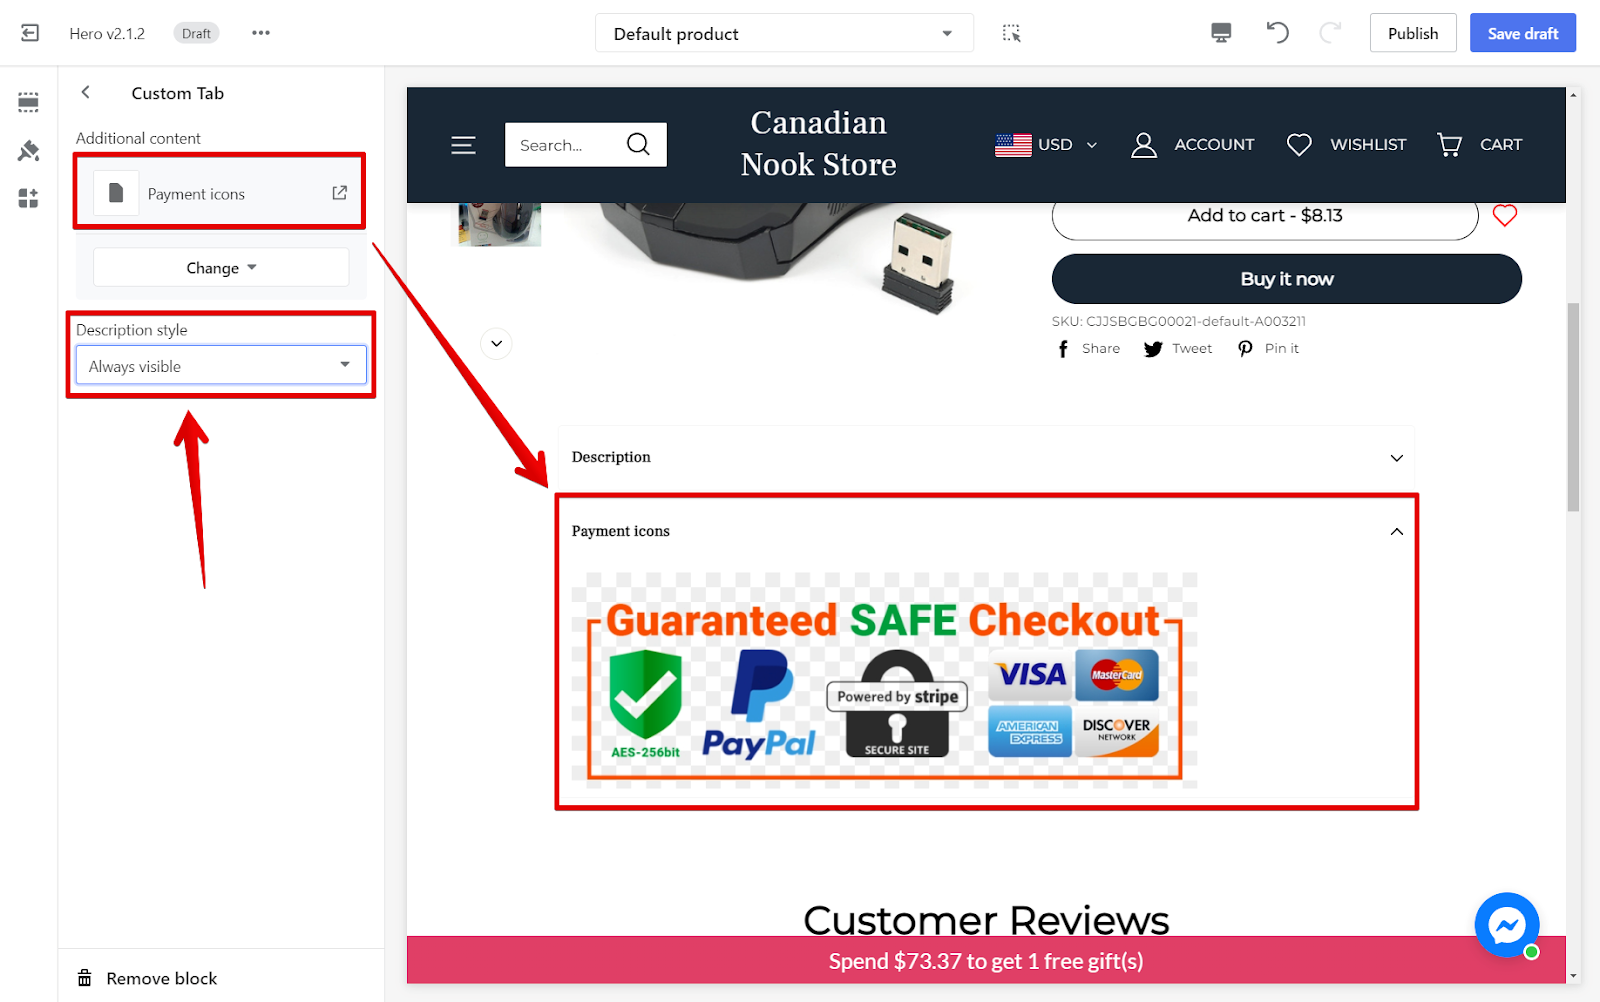
3. Add the custom tabs block: In the Product description section, click Add block. Ensure you are selecting the Product description block, not the Product block. Search for Custom Tab and add it.

4. Edit the custom tab block: Click on the title and select the custom page you created in the earlier steps.
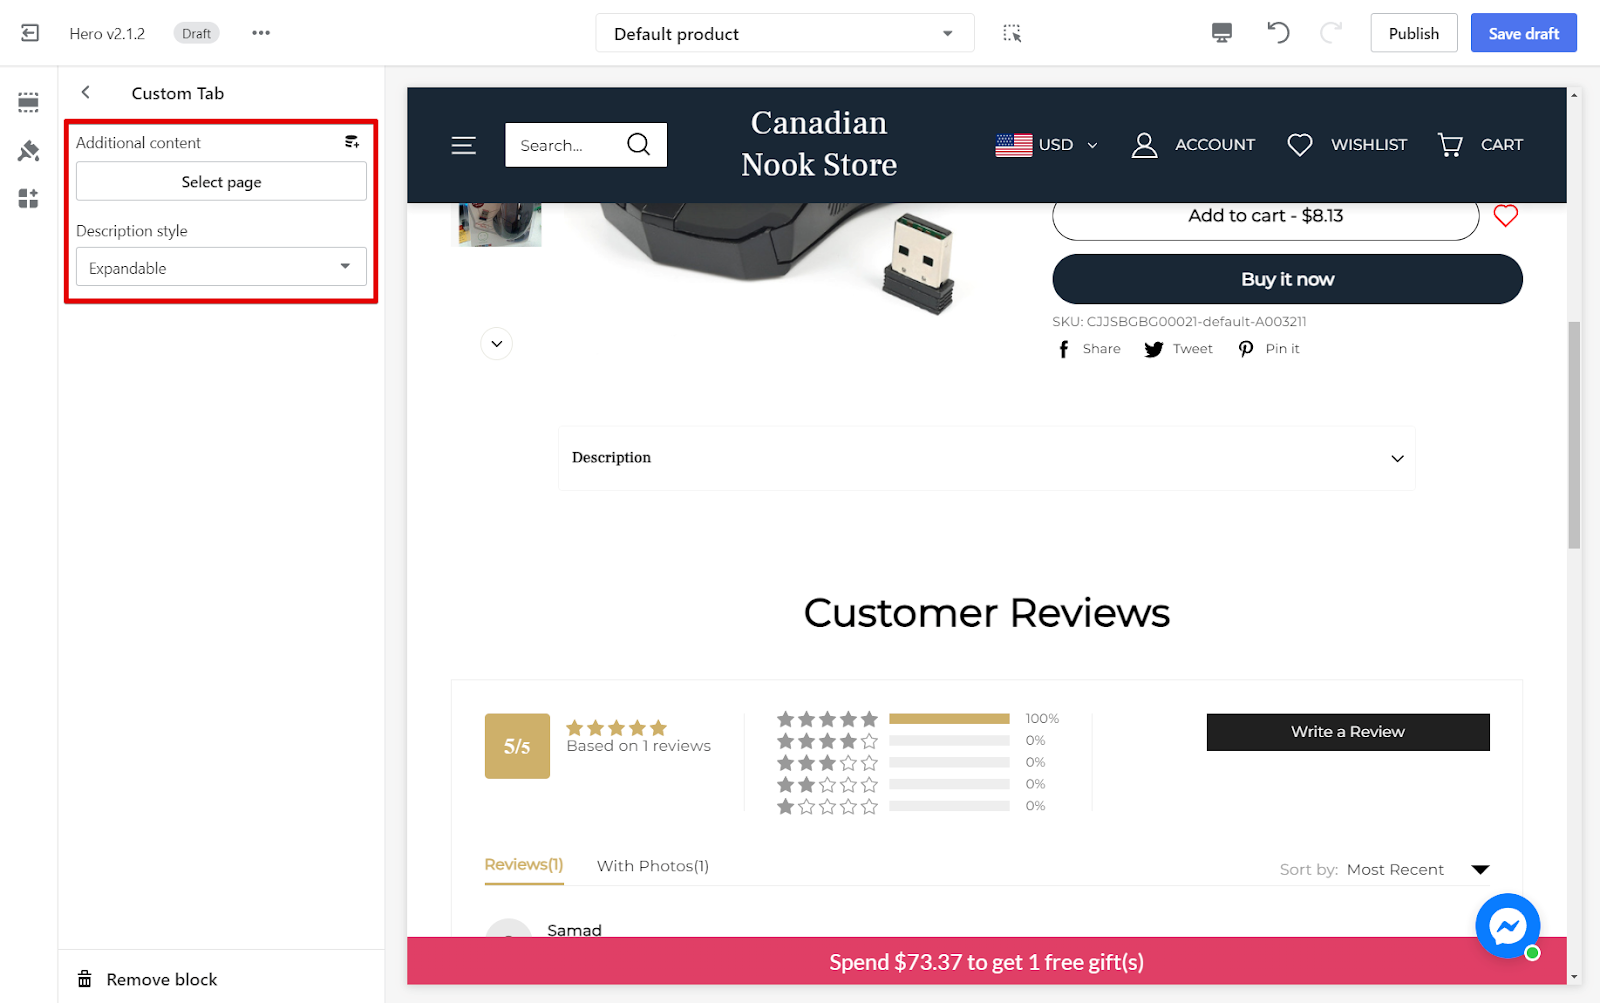
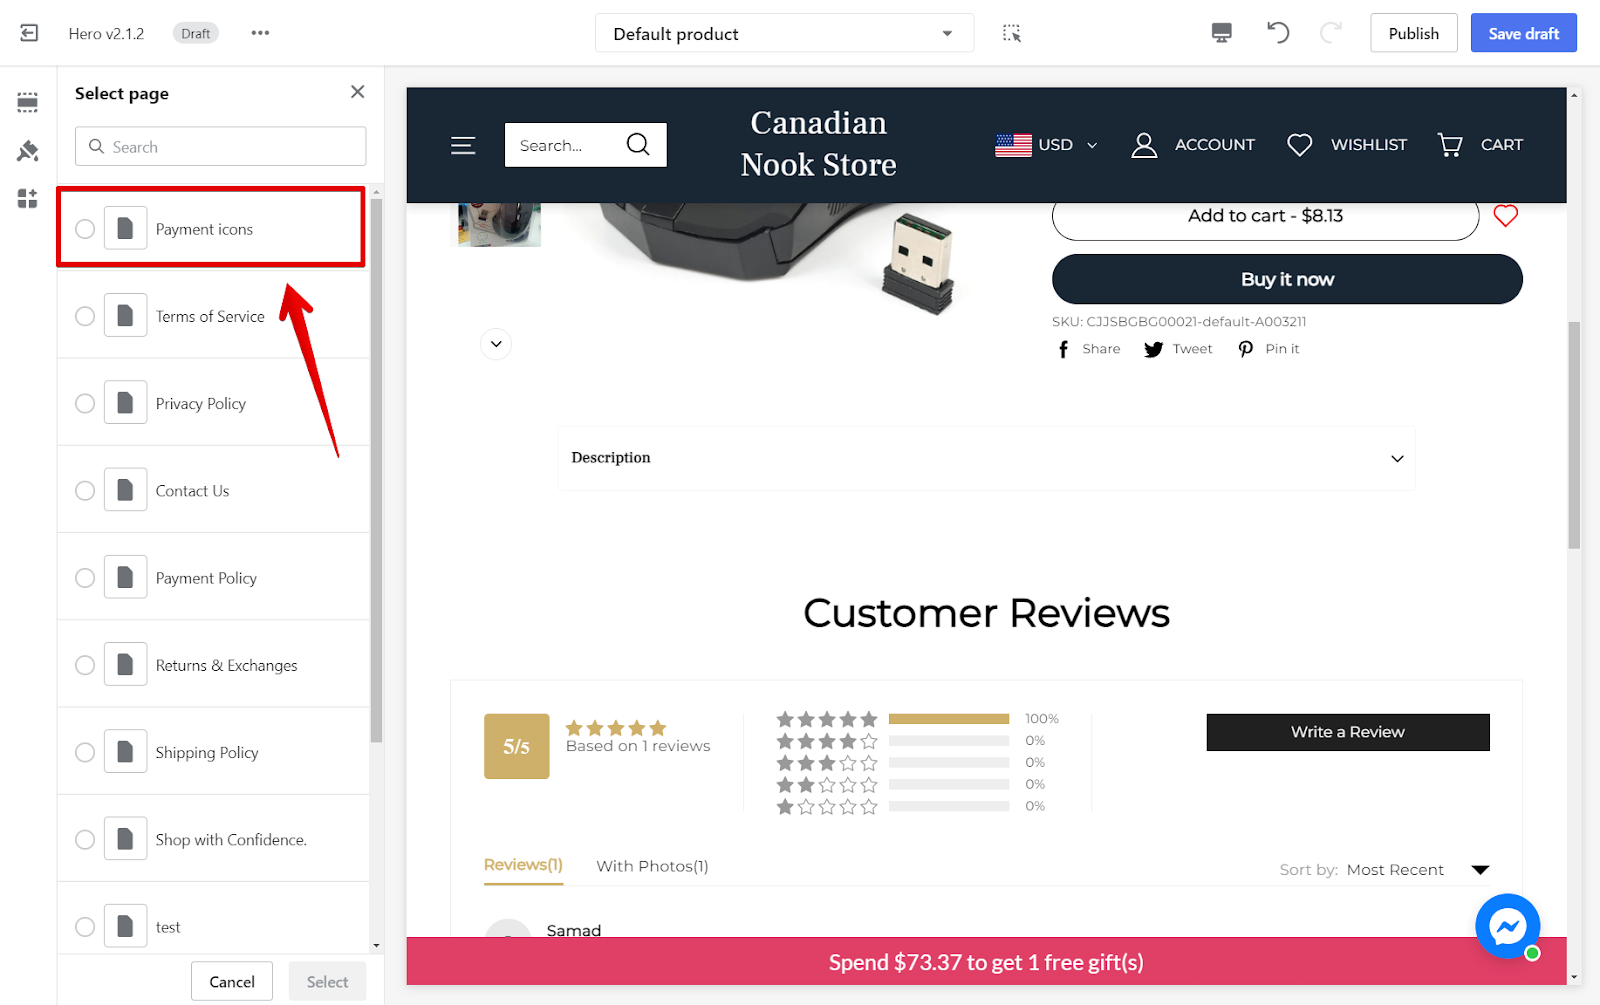
5. Select the custom page: Choose the page with your single image of payment icons. In the Description style dropdown, select Always Visible to keep them visible.
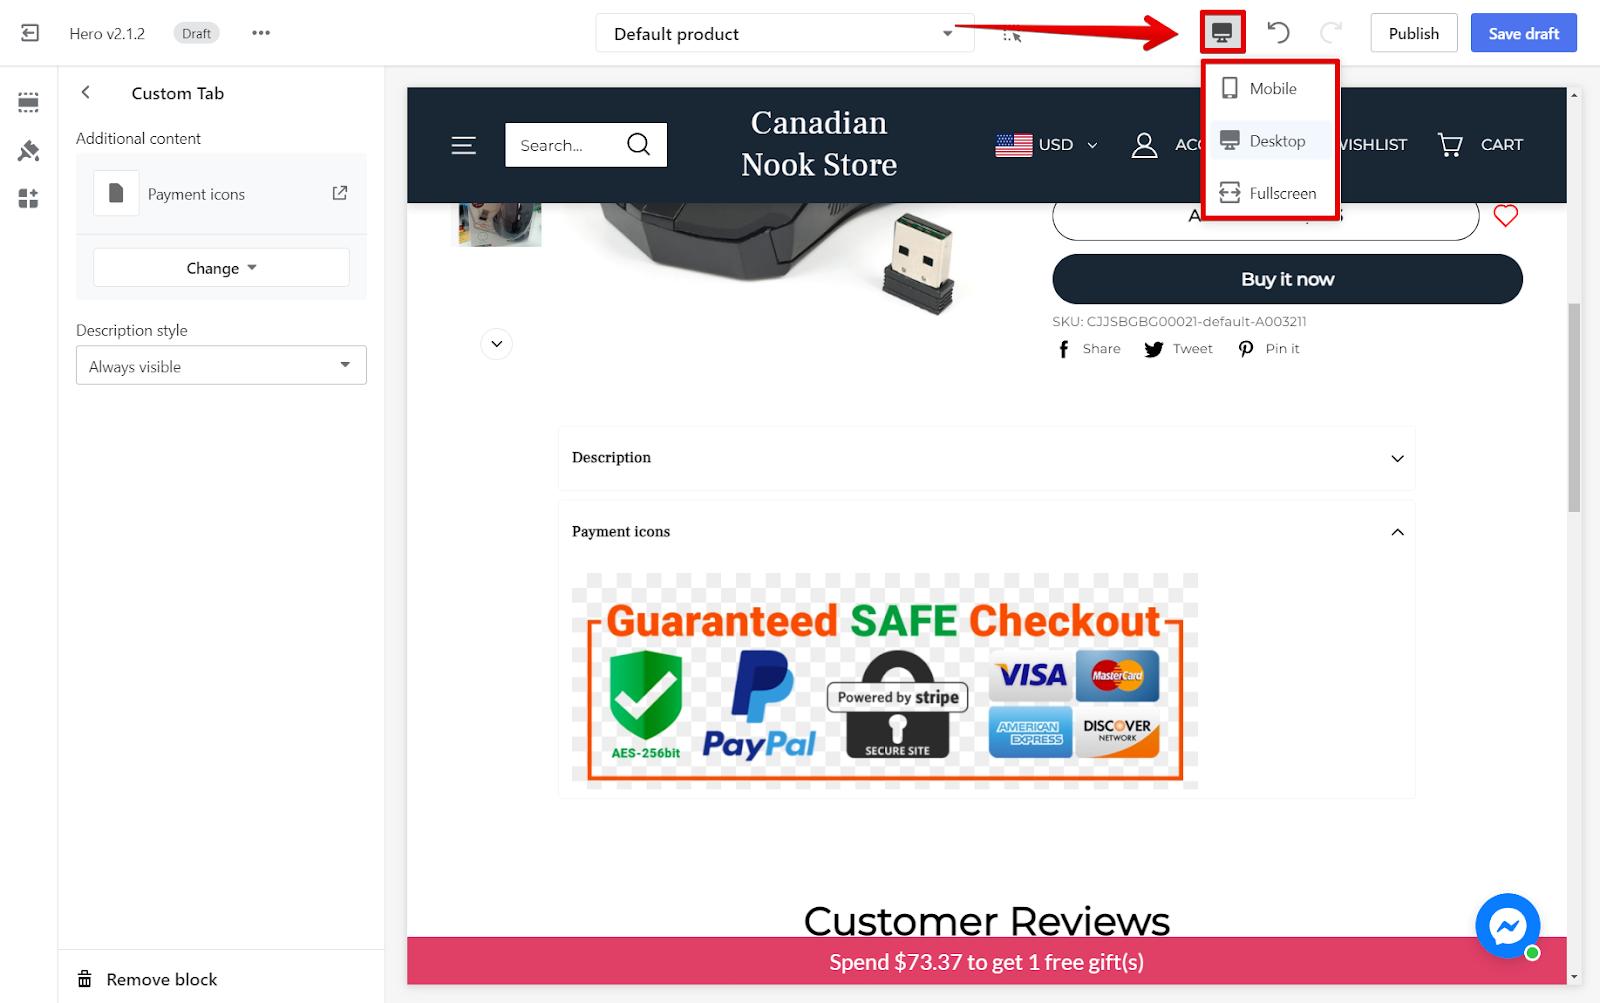
6. Preview your changes: Use the preview icon to check how they look on Mobile, Desktop, or Full-screen mode.
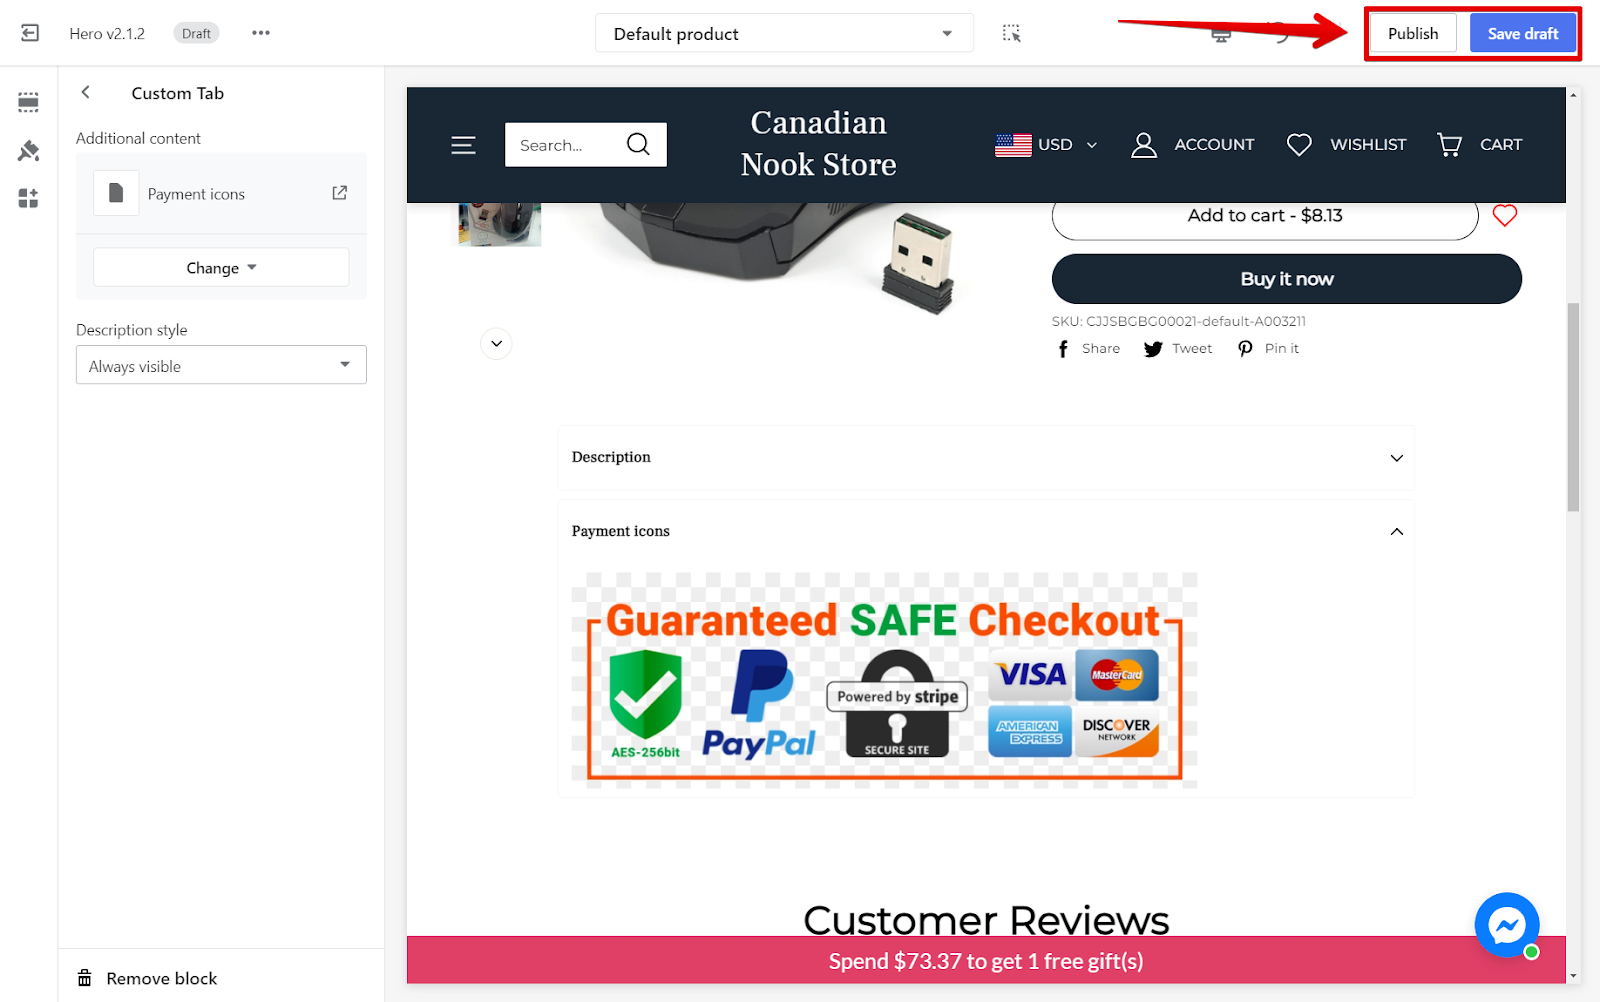
7. Save your changes: Click Save Draft or Publish to finalize.
Secure payment icons are easy yet effective in building customer trust and giving your store a polished appearance. Using a single image with all the icons and following these steps can make your customers feel safe and confident while shopping, leading to increased satisfaction and loyalty. Implement these updates today to see the positive impact on your store!


Comments
Please sign in to leave a comment.