Ensuring customers can easily access your terms of service builds trust and transparency. Our Generating the Terms of Service page guide helps you create a compliant page that aligns with Google’s requirements, ensuring a smooth experience using Google Ads. For more details, refer to the guide here.
If you’ve used the auto-generated terms of service, a custom page has already been created, and you only need to link this page to your footer menu. If you haven’t used the auto-generated form, you’ll need to create the page manually. Follow the steps below based on your setup.
Linking the auto-generated terms of service to the footer menu
If you’ve used the auto-generated terms of service, follow these steps to add it to the footer:
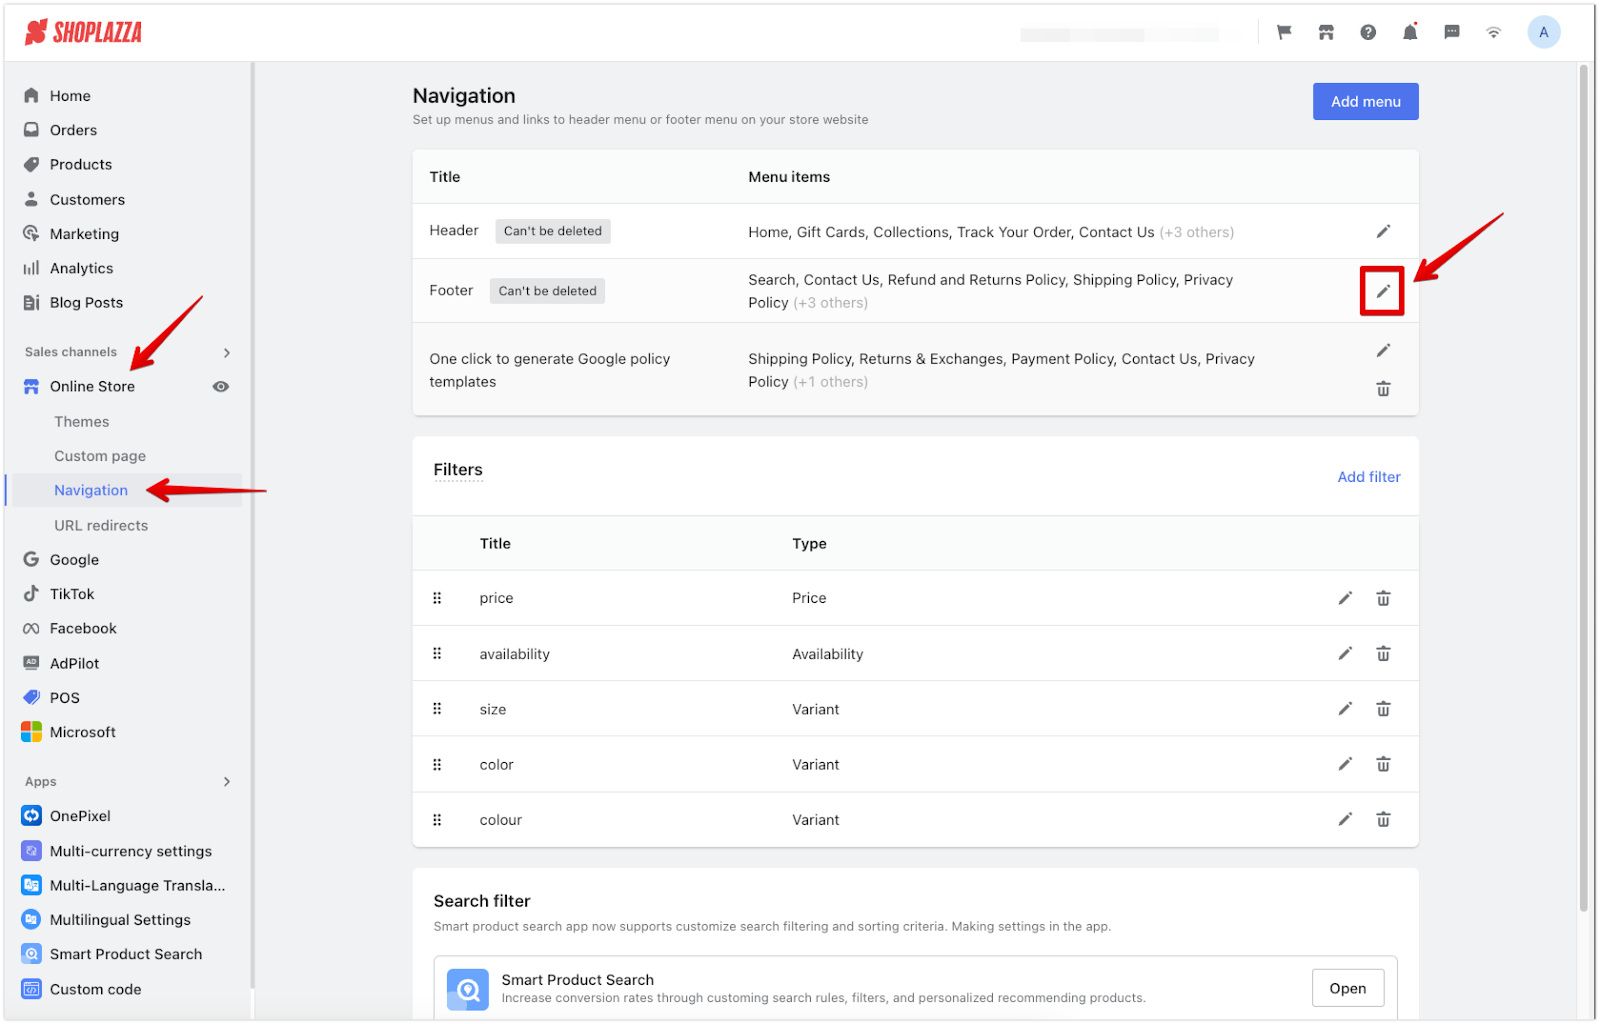
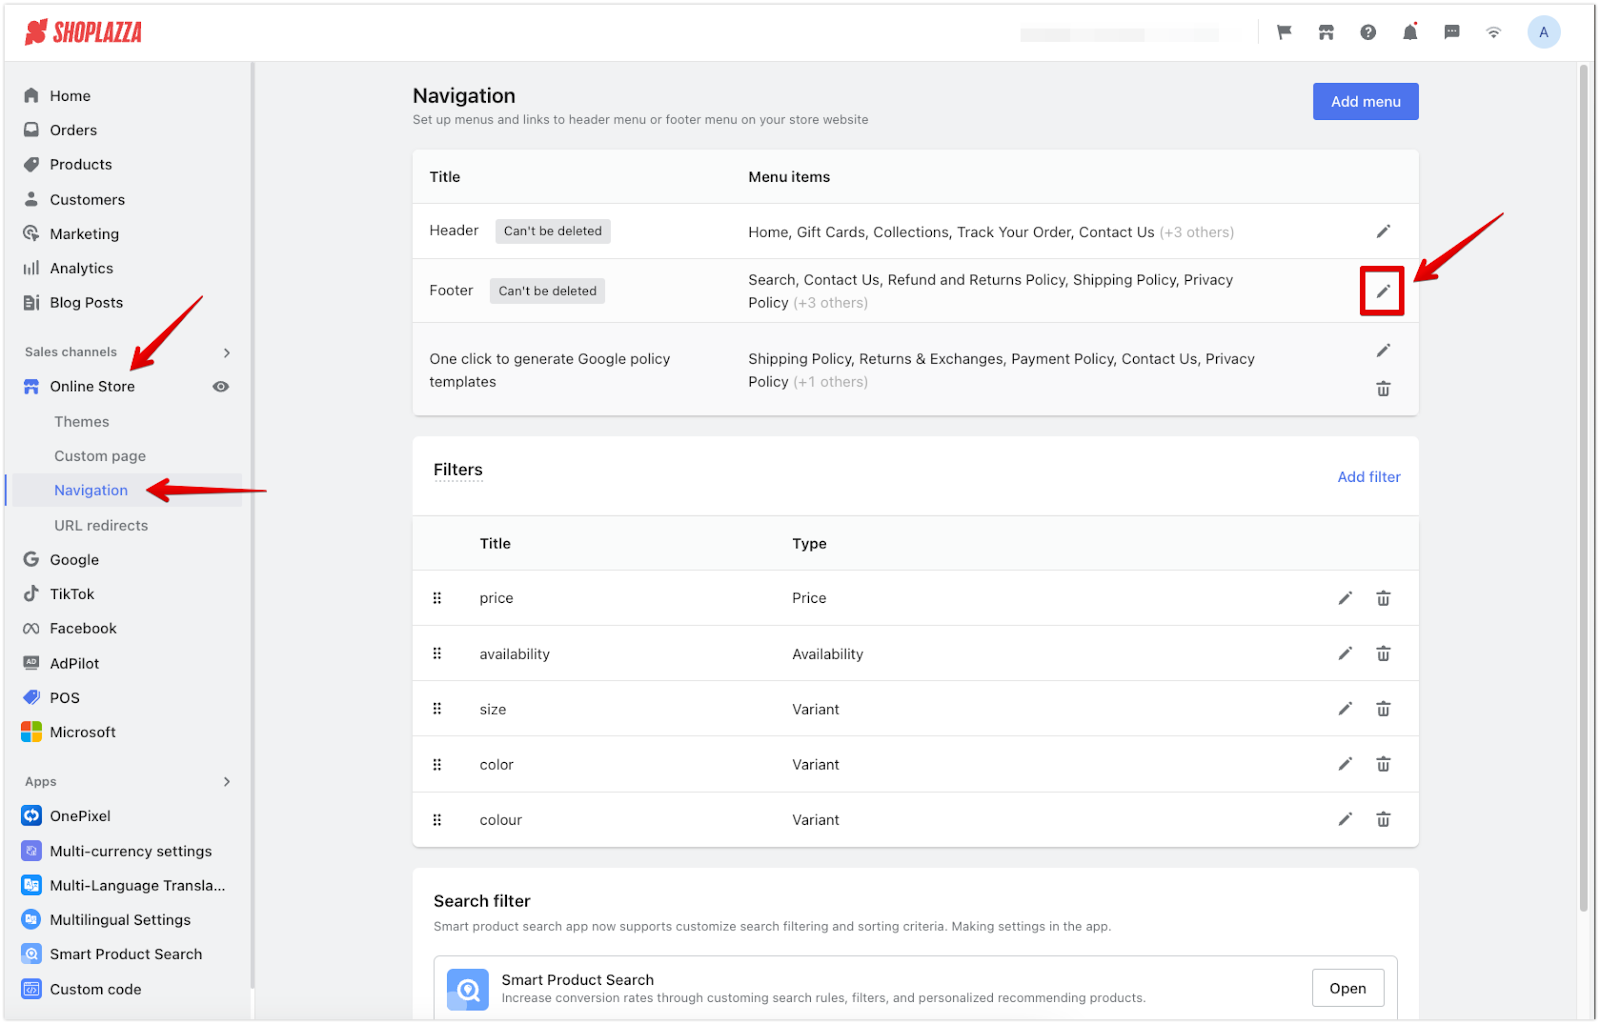
1. Edit the footer menu: Go to your Shoplazza Admin and navigate to Online Store > Navigation, then click the edit icon next to the Footer menu. This is where you’ll link the existing terms of service page.
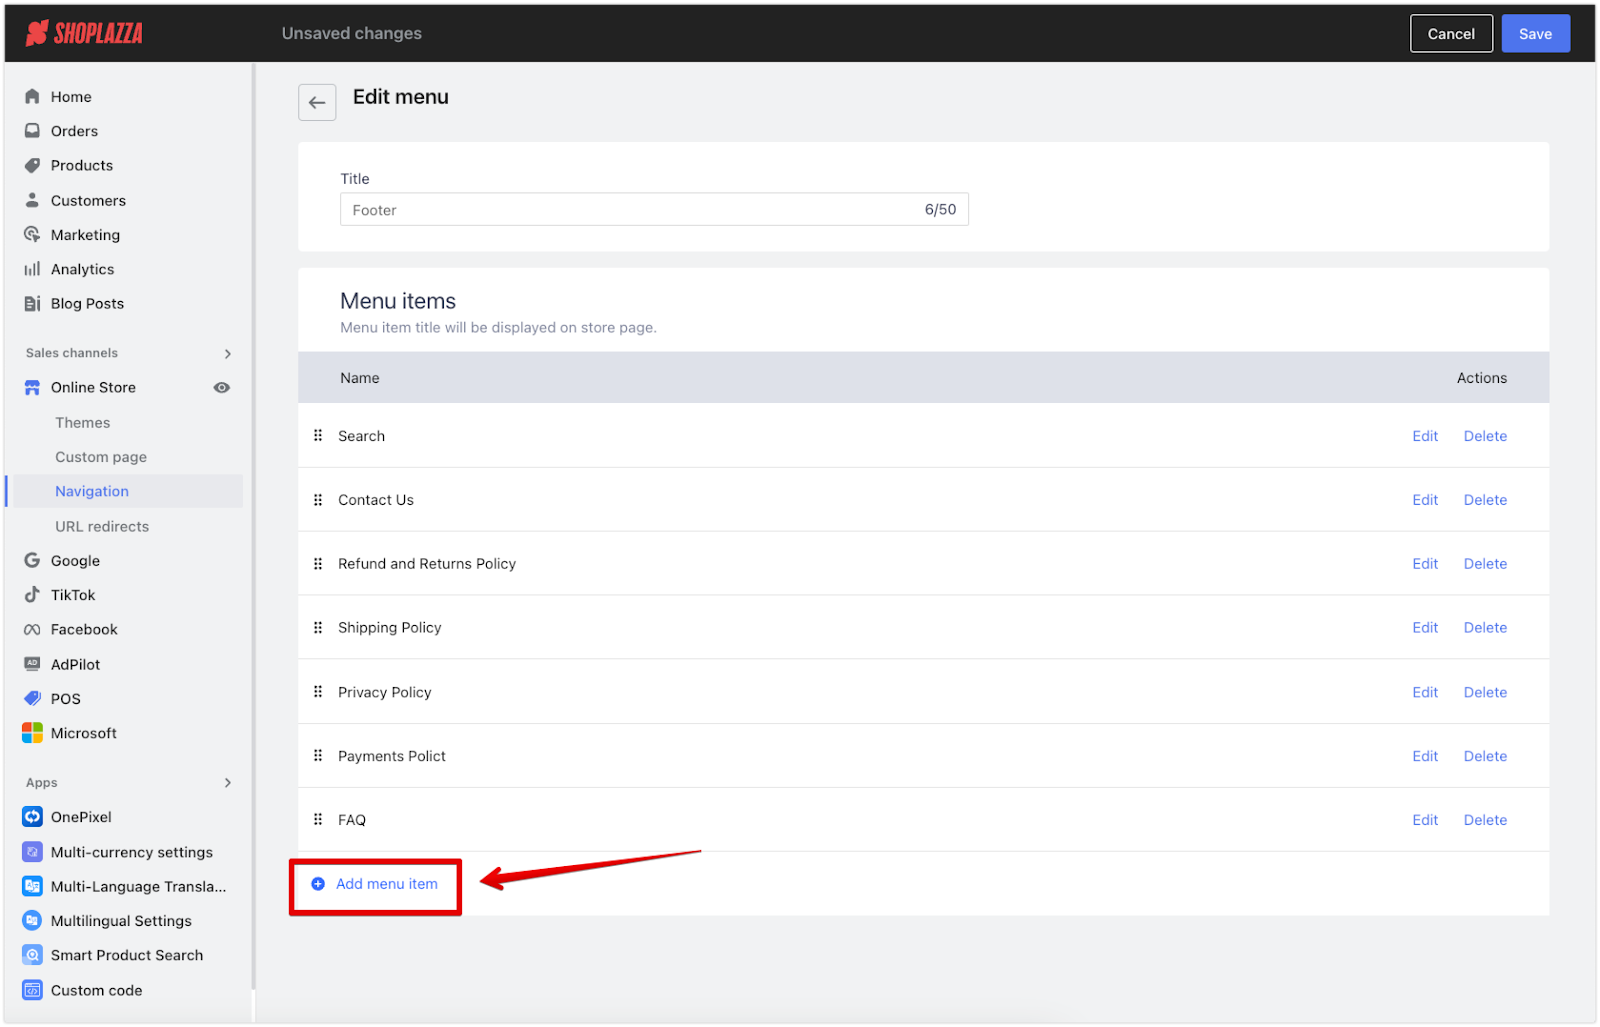
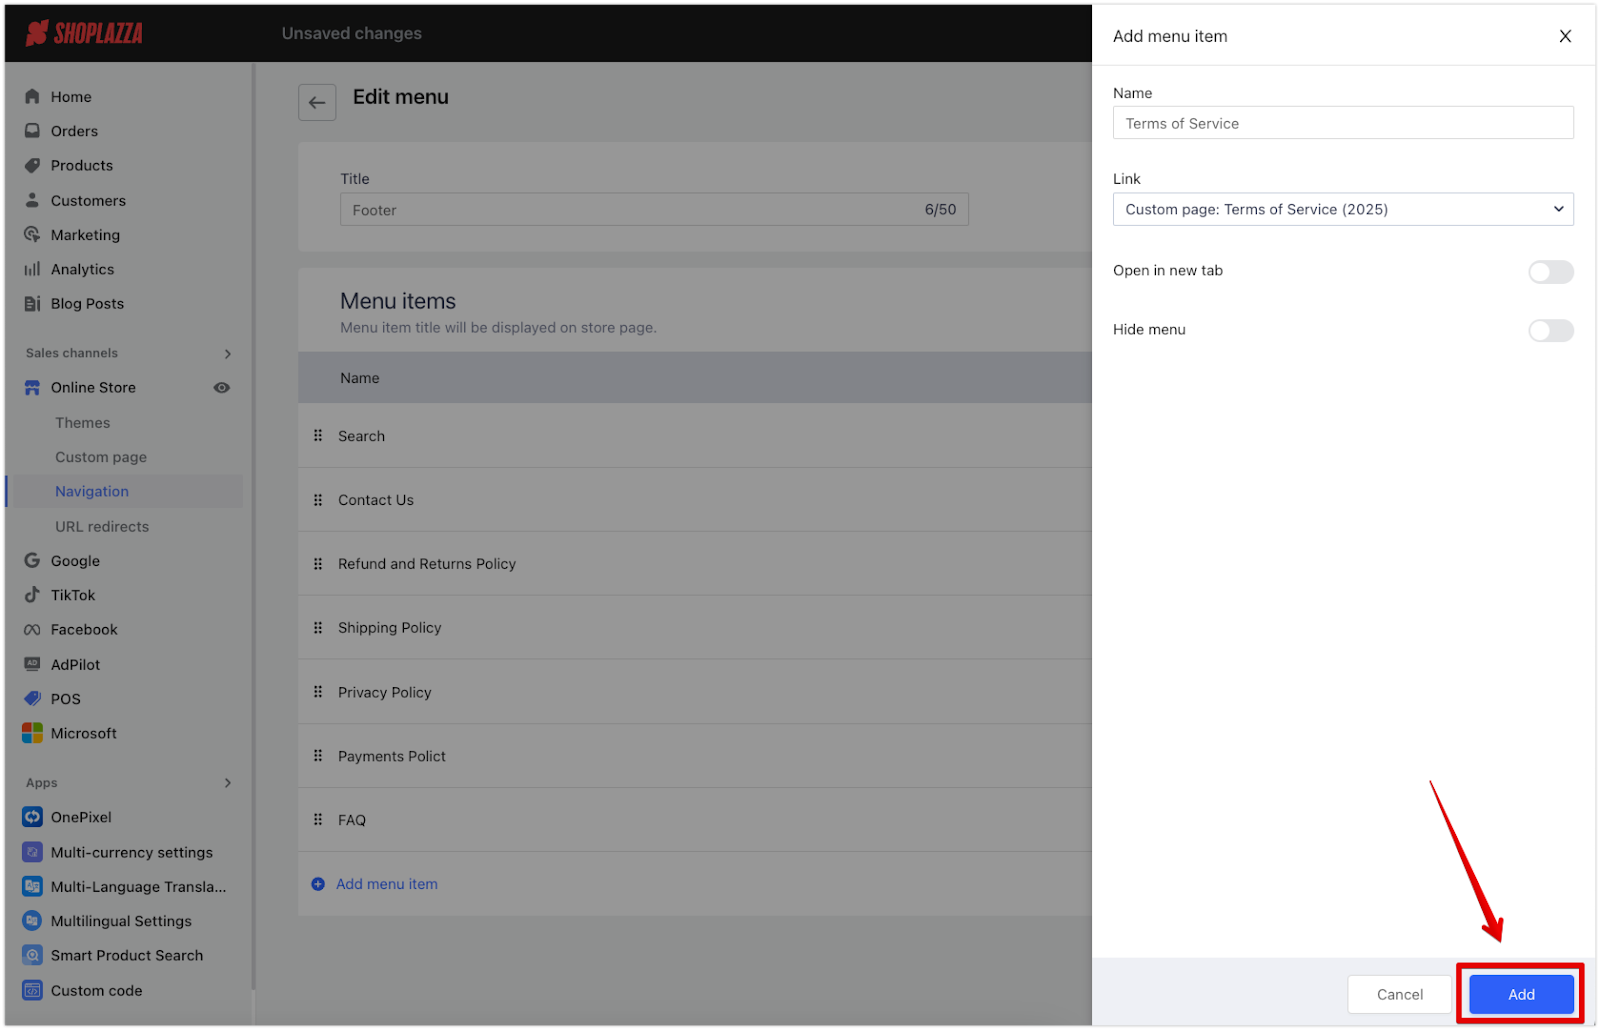
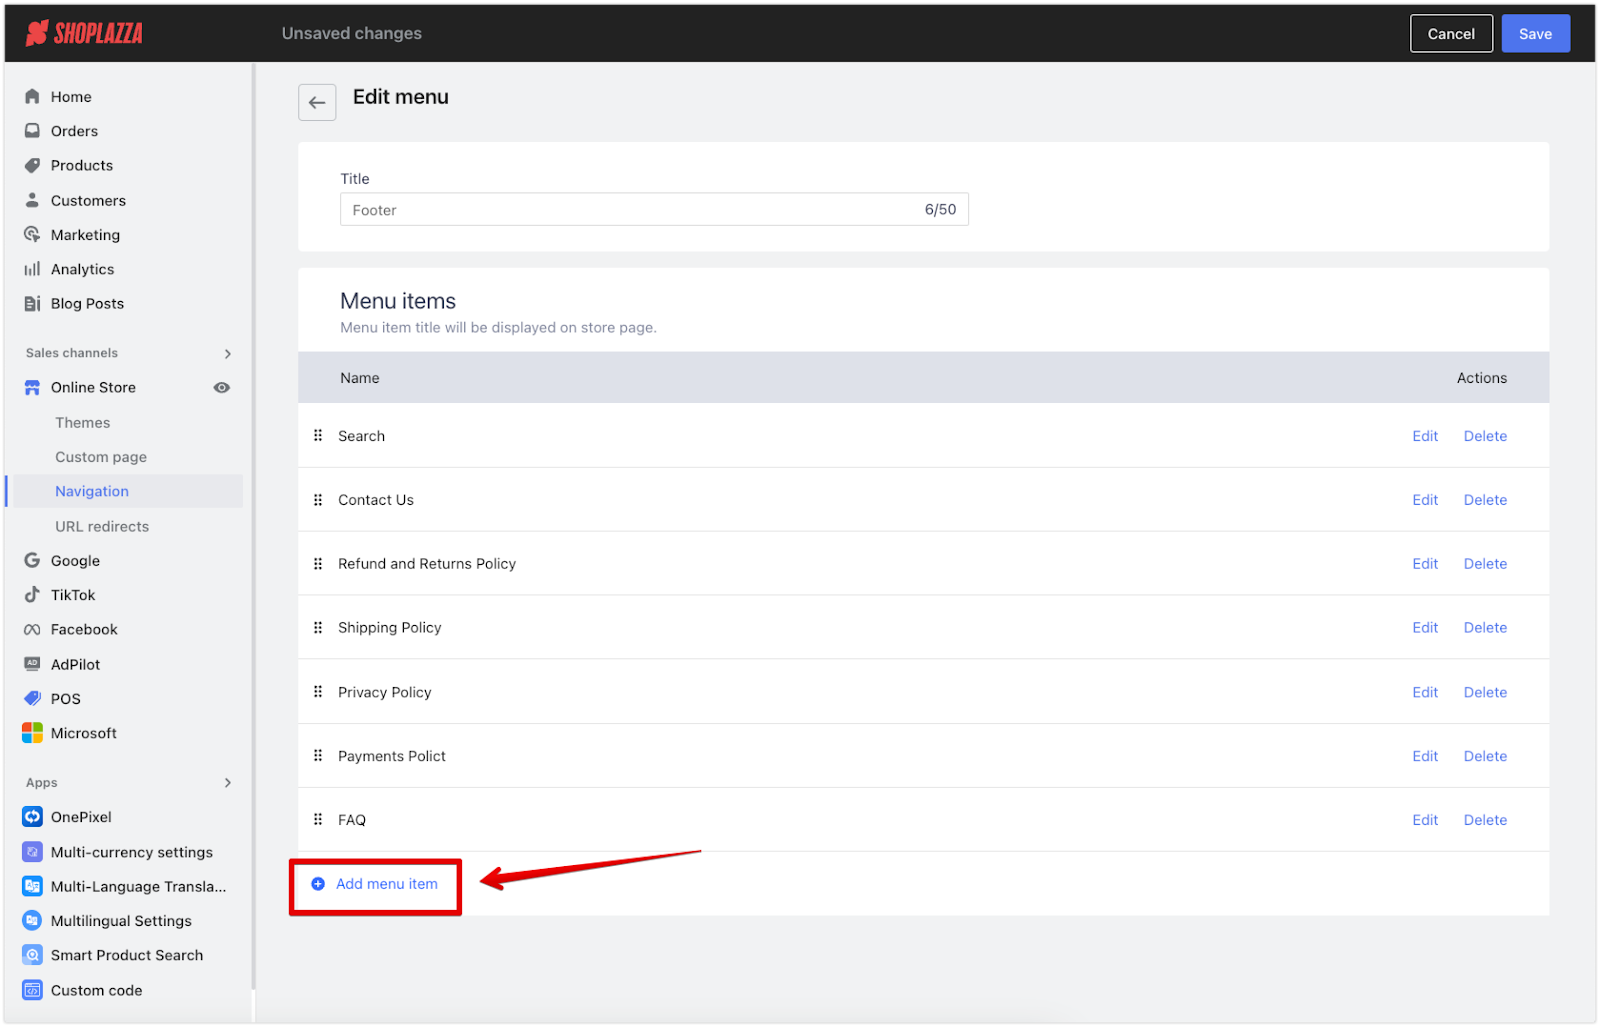
2. Add a menu item: On the Edit menu page, click Add menu item to include the link.
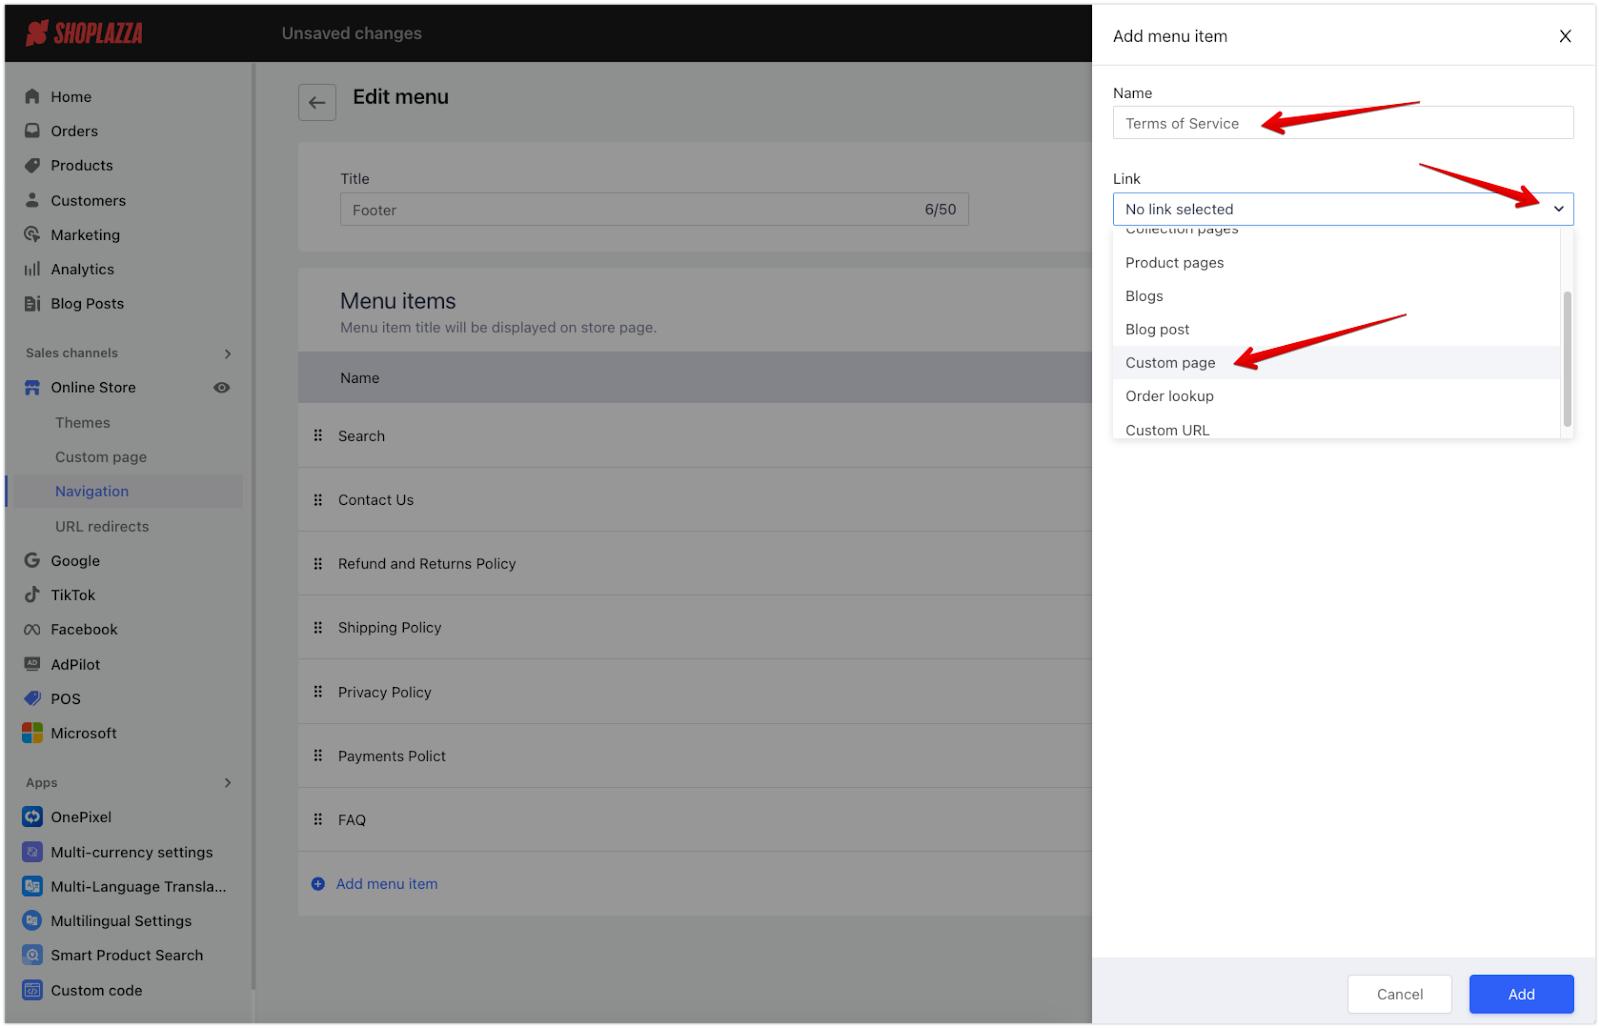
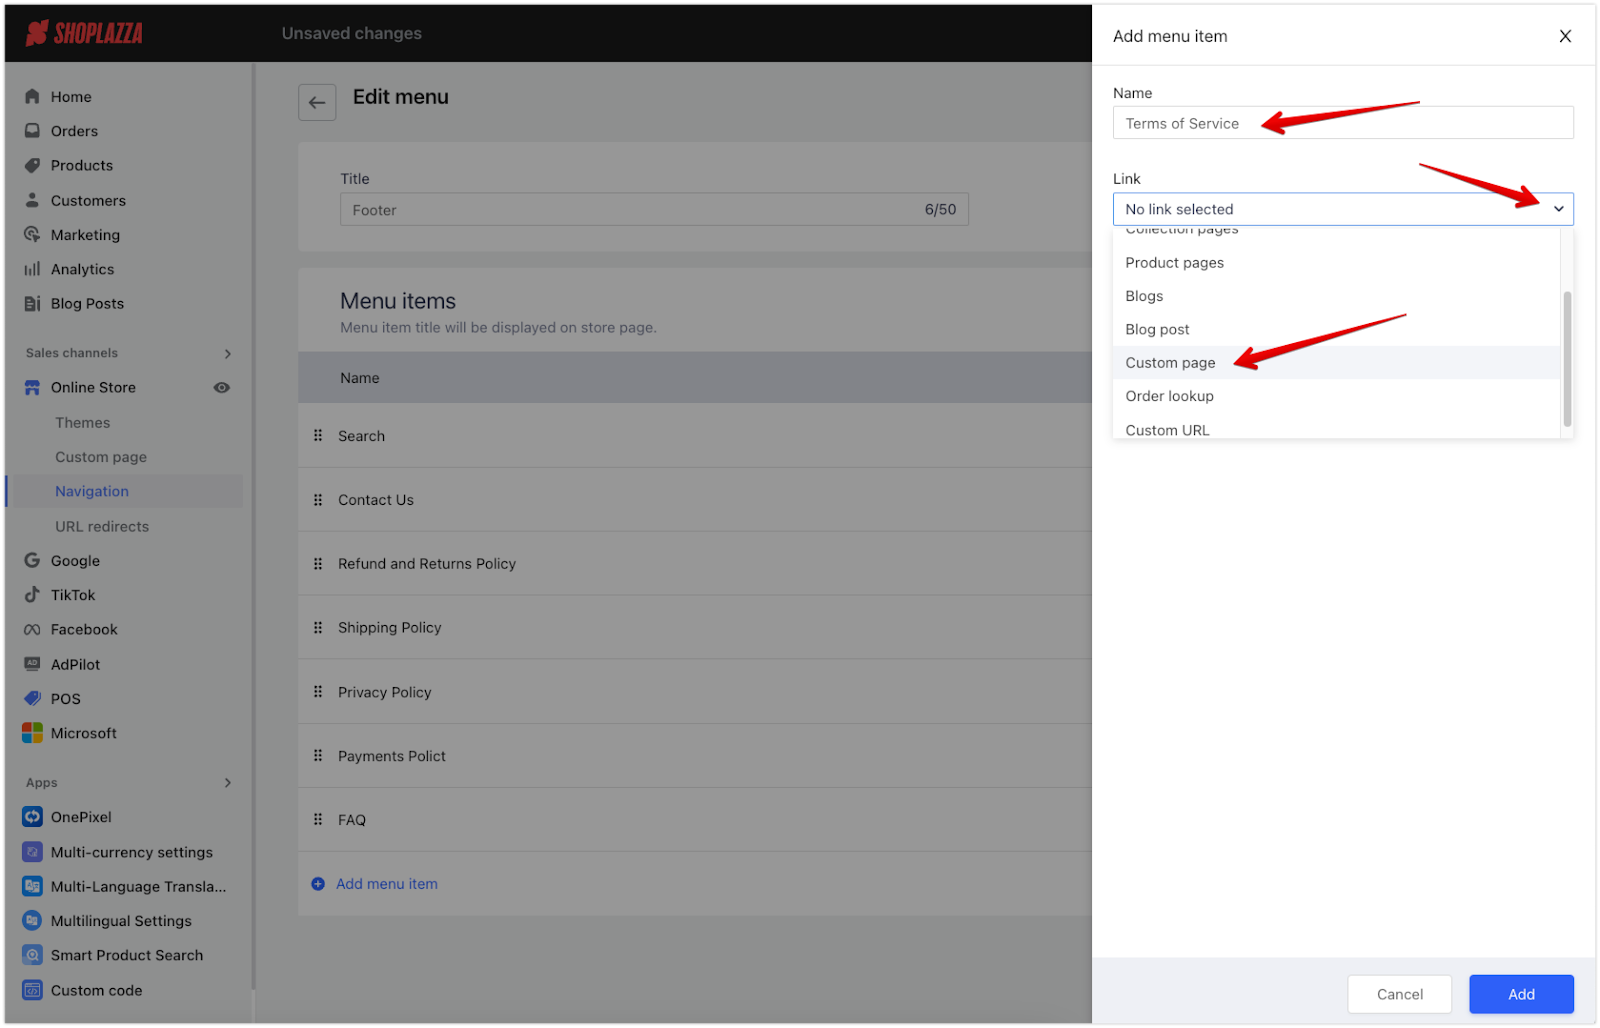
3. Name the menu: Enter “Terms of Service” as the menu name, select Custom page to link it to the Terms of Service page, and click Confirm.
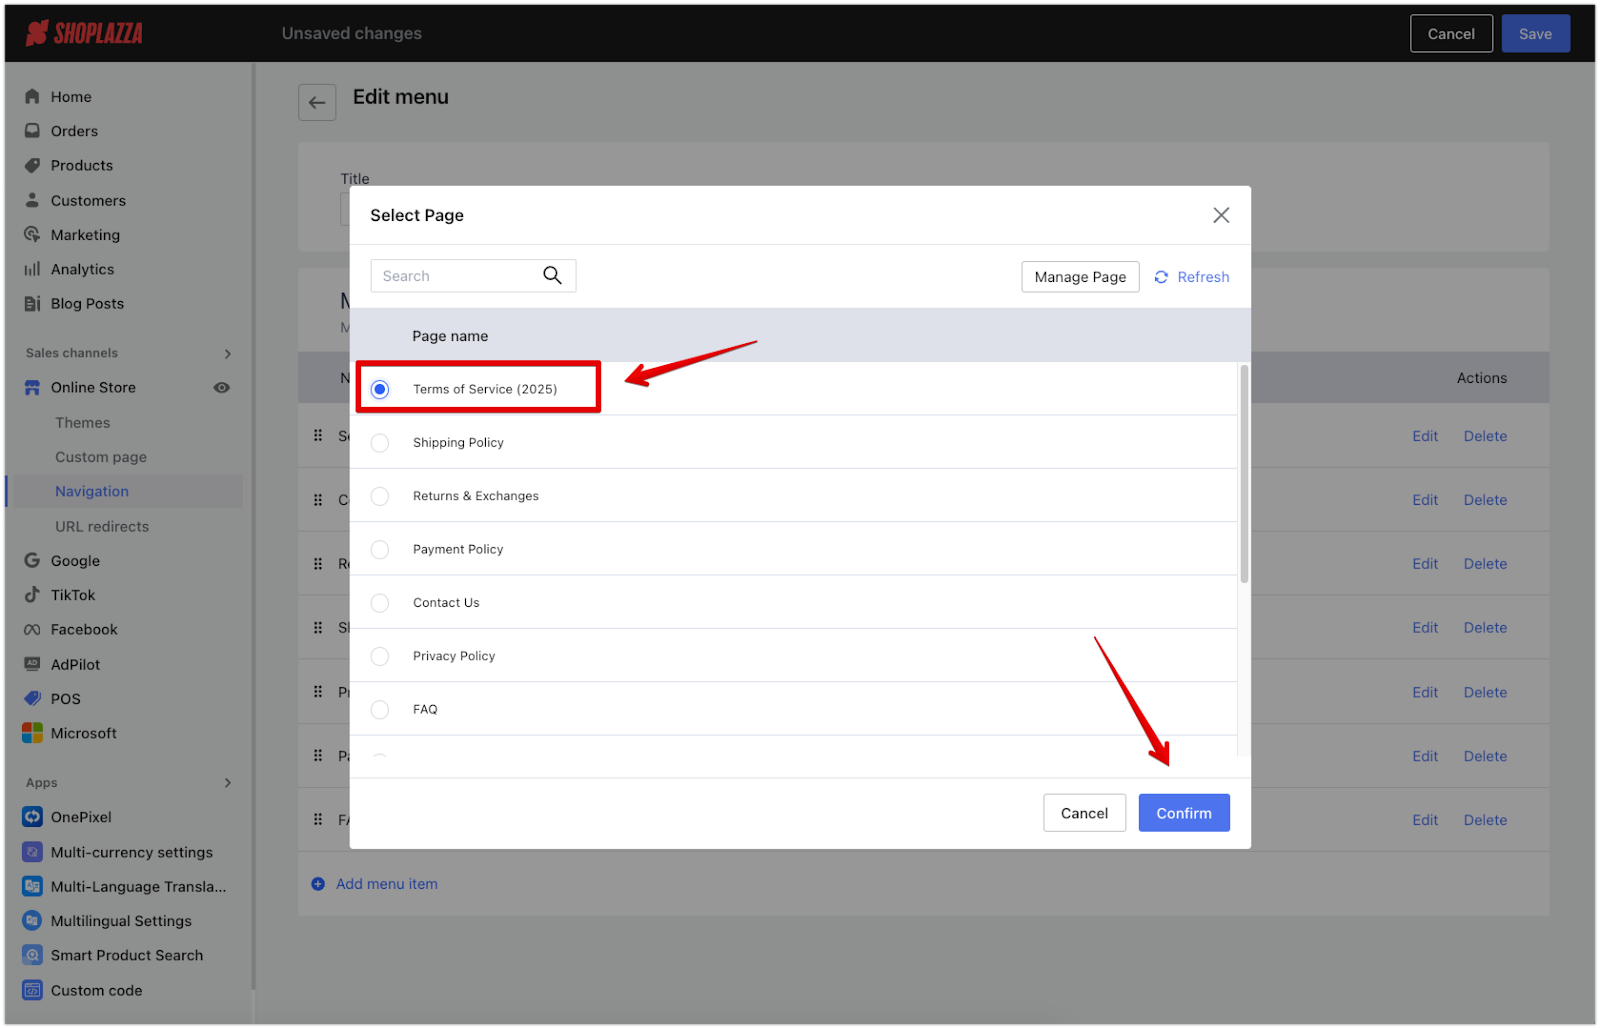
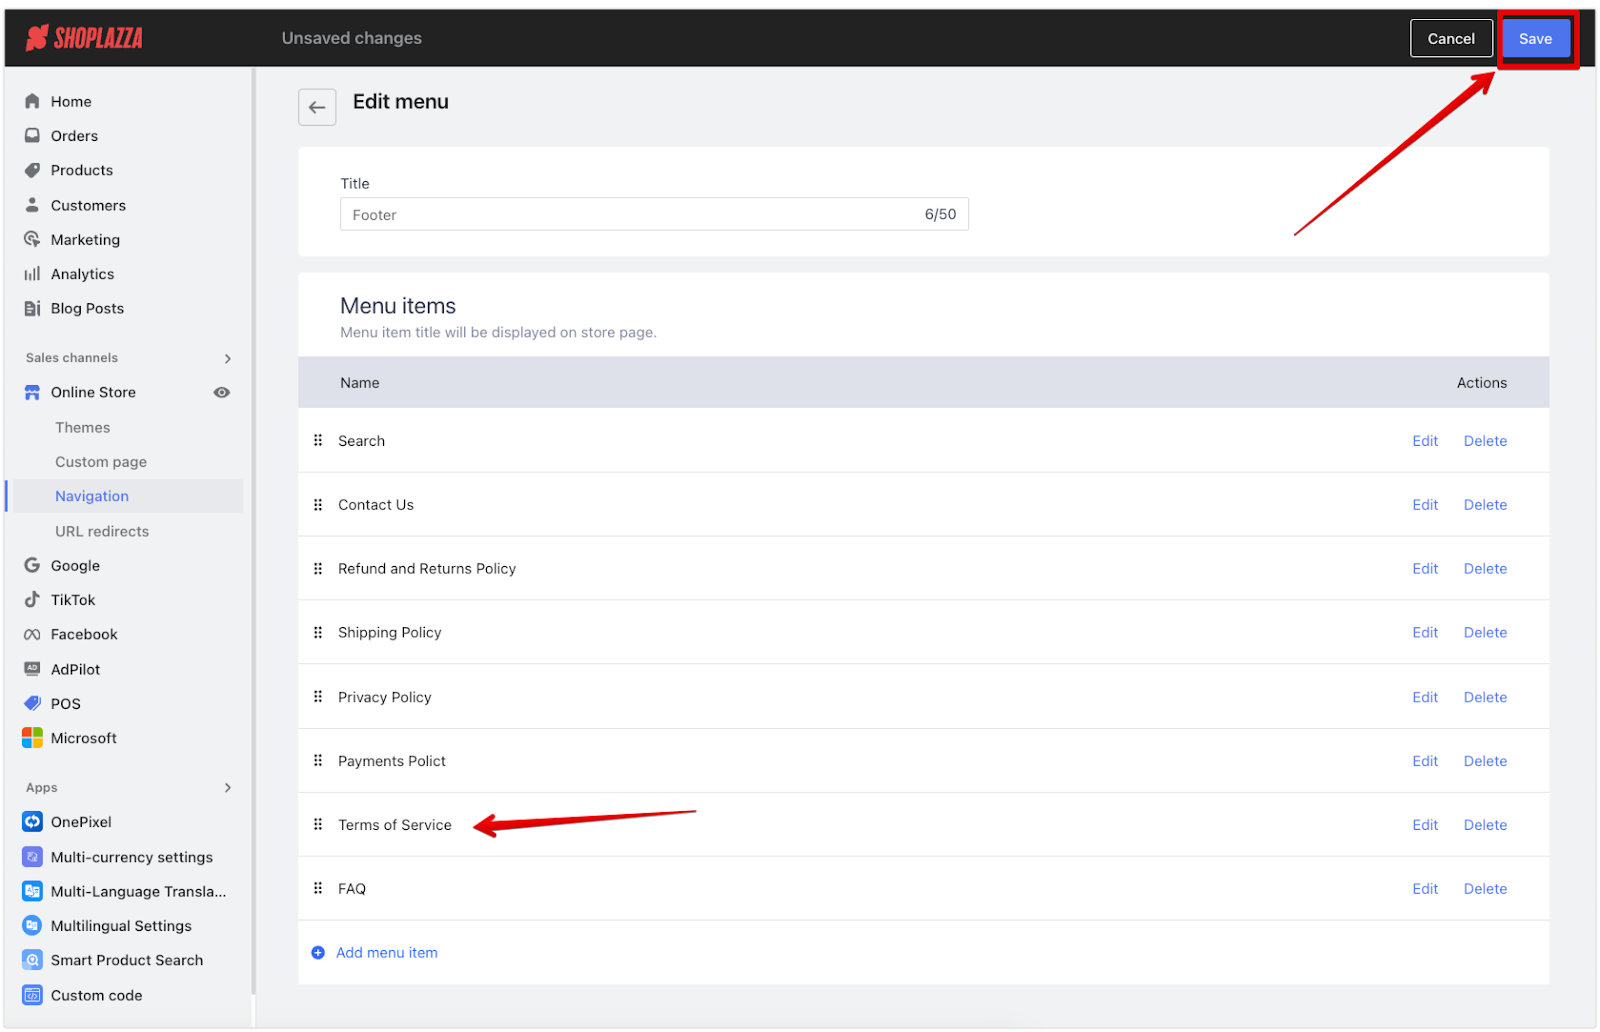
4. Finalize and save the menu: Click Add, then return to the Edit menu page to ensure the link appears correctly. Click Save to complete the setup. Your terms of service will now be accessible from the footer.
Note
Use the drag-and-drop feature to reorganize the menu items as needed.
Manually creating and linking the terms of service page
If you haven’t used the auto-generated form, follow these steps to create and link a custom page manually:
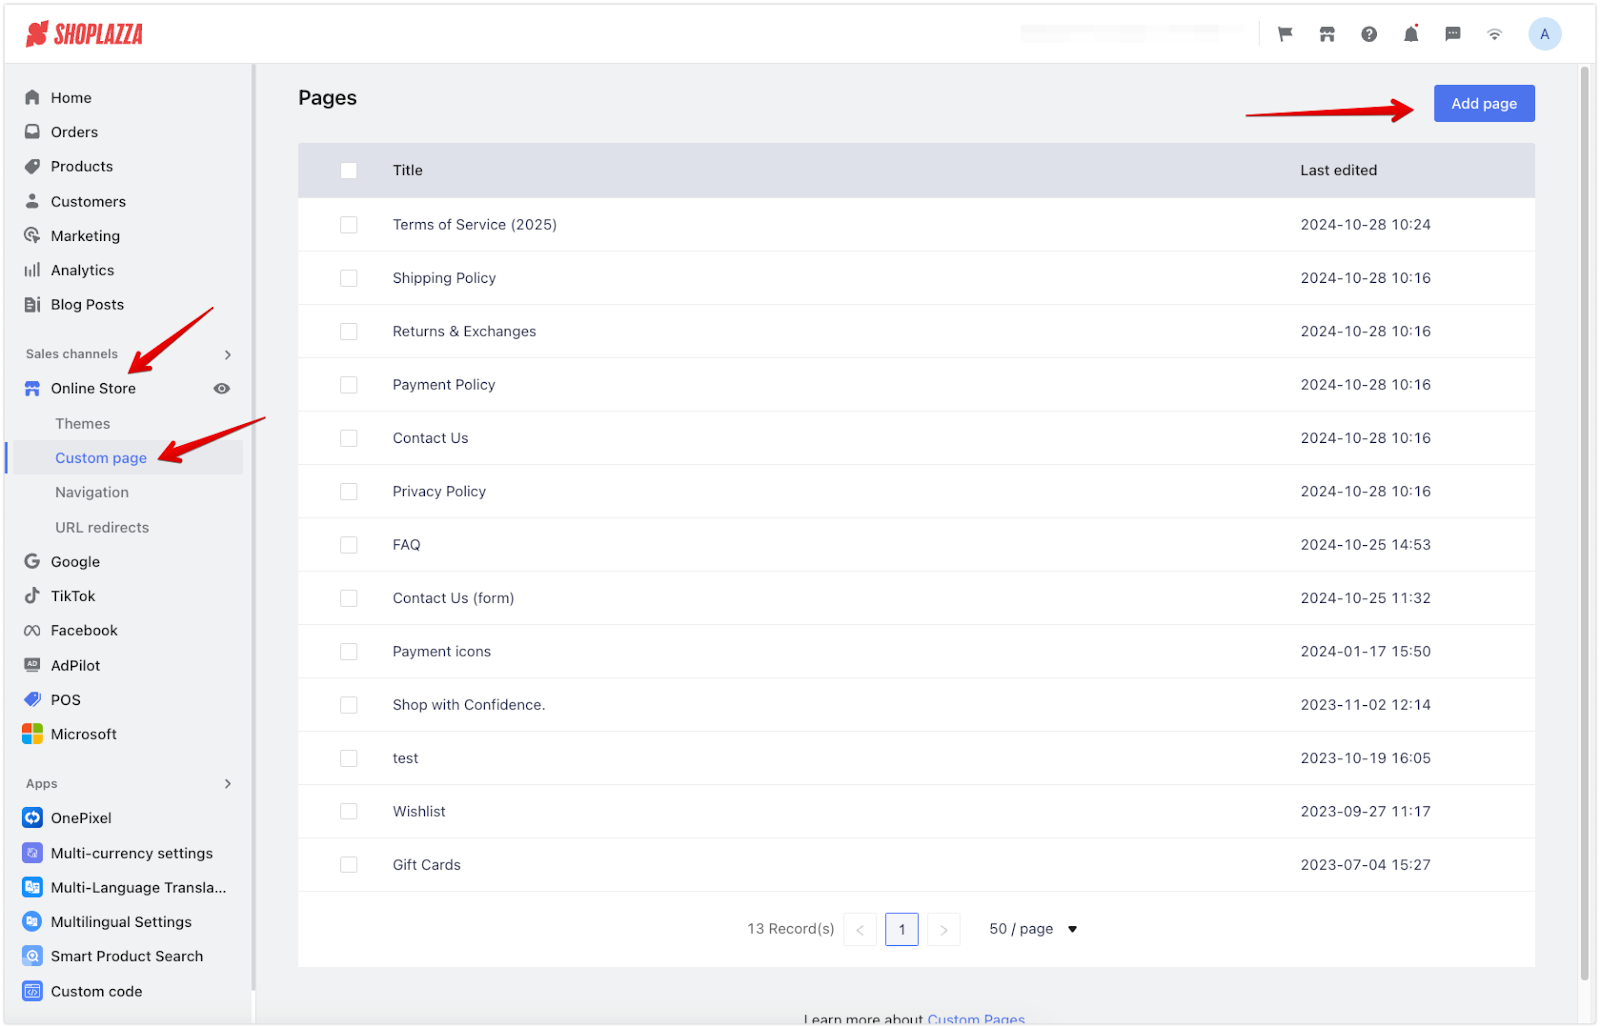
1. Create the page: Go to Online Store > Pages and click Add page. This will start a new page where customers can view your policies.
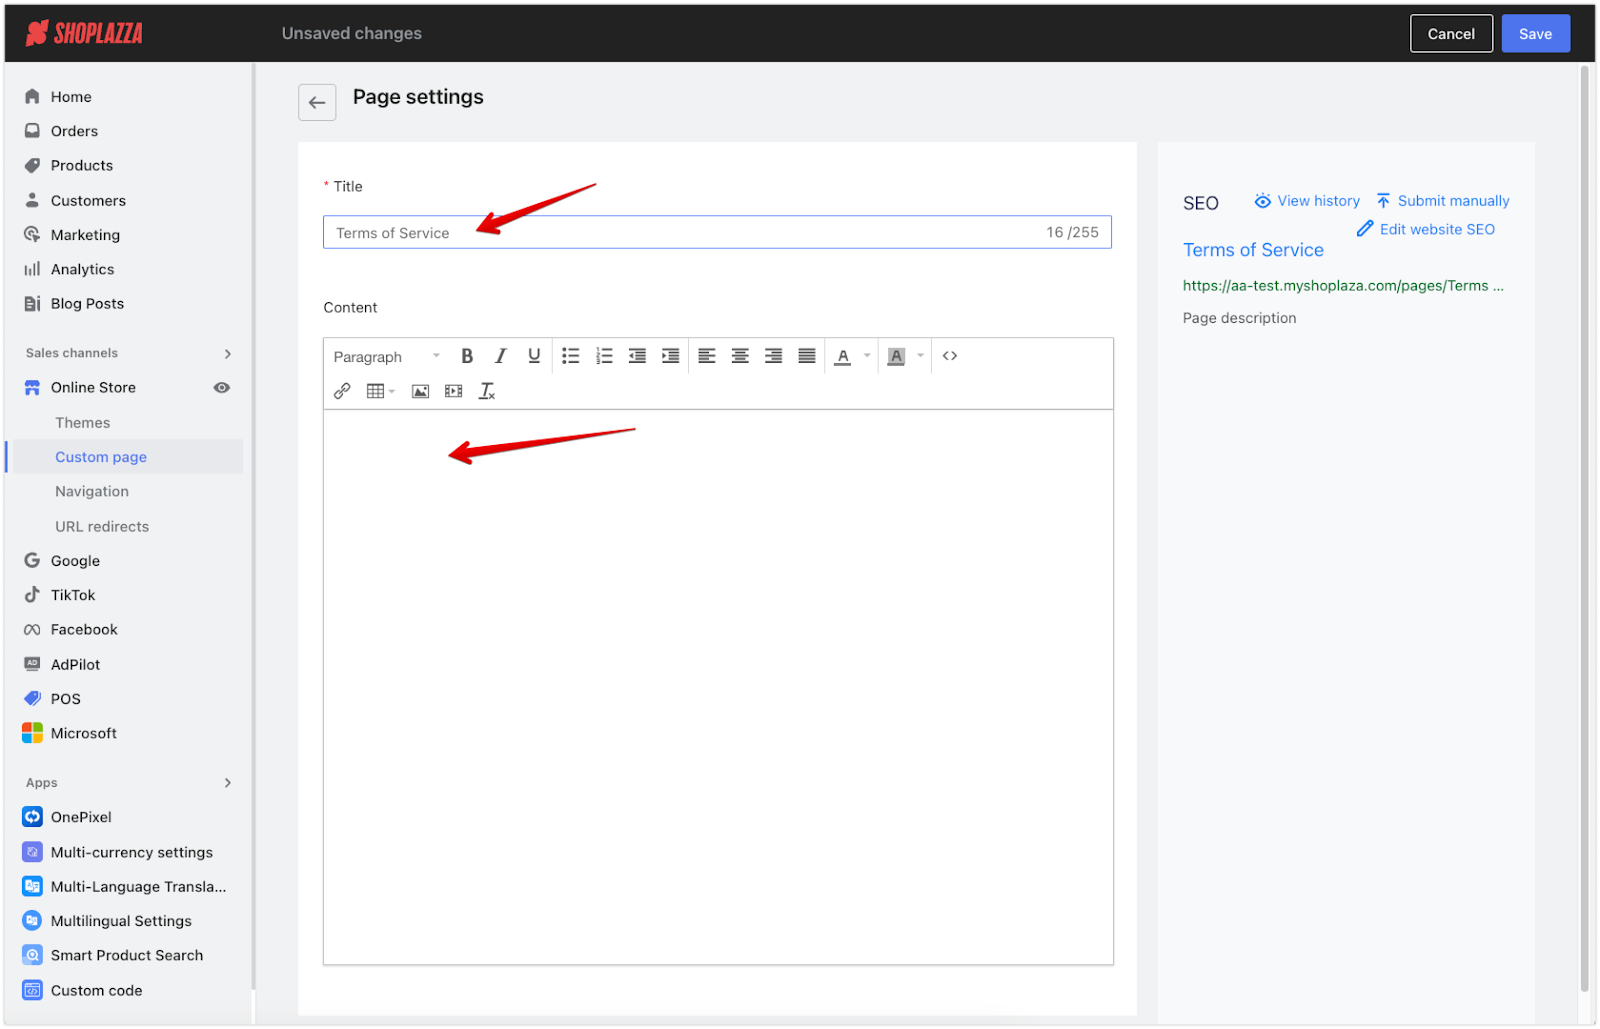
2. Page settings: Name the page “Terms of Service,” add your terms of service content, and click Save to make the page live.
3. Edit the footer menu: Go to Online Store > Navigation, then click the edit icon next to Footer menu to start adding the link.
4. Add a menu item: On the Edit menu page, click Add menu item to include the link to your manually created page.
5. Name the menu: Enter “Terms of Service” as the menu name, select Custom page to link it, and click Confirm.
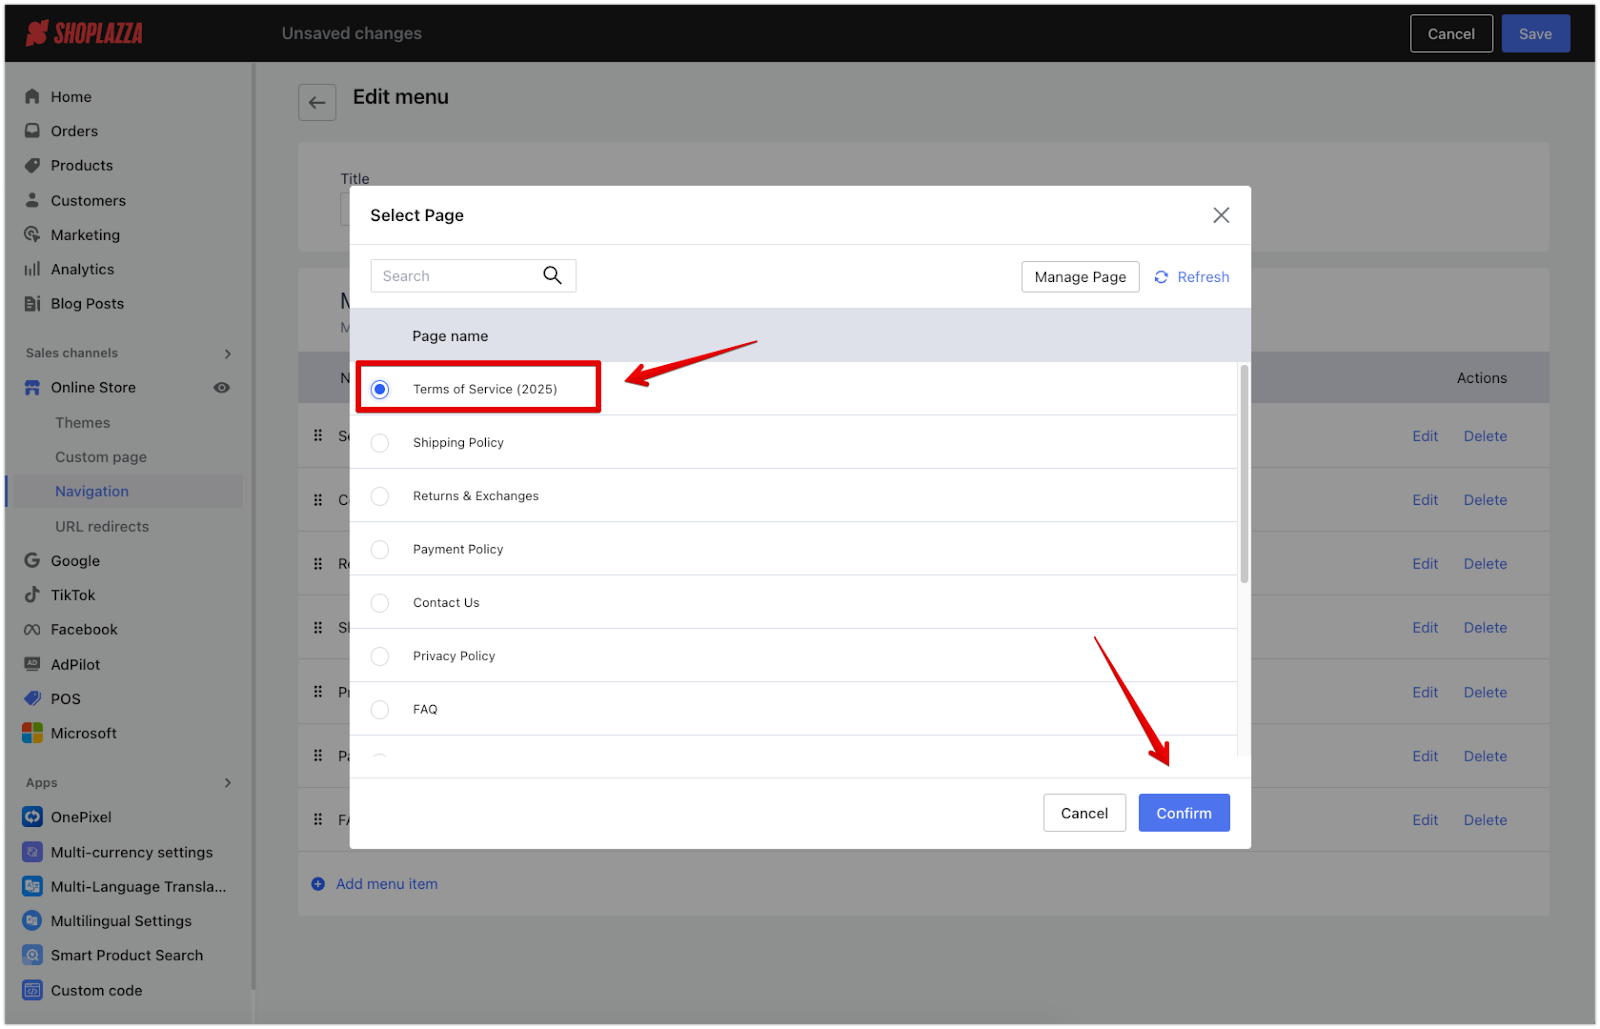
6. Finalize and saving the menu: Click Add, then return to the Edit menu page to verify that the link appears correctly. Click Save to complete the setup. Your terms of service will now be accessible from the footer.


Adding terms of service to a theme
Add a new navigation menu to your theme's footer to make the terms of service visible across your site. This allows you to display the footer with the terms of service link, and you can customize which menu to use:
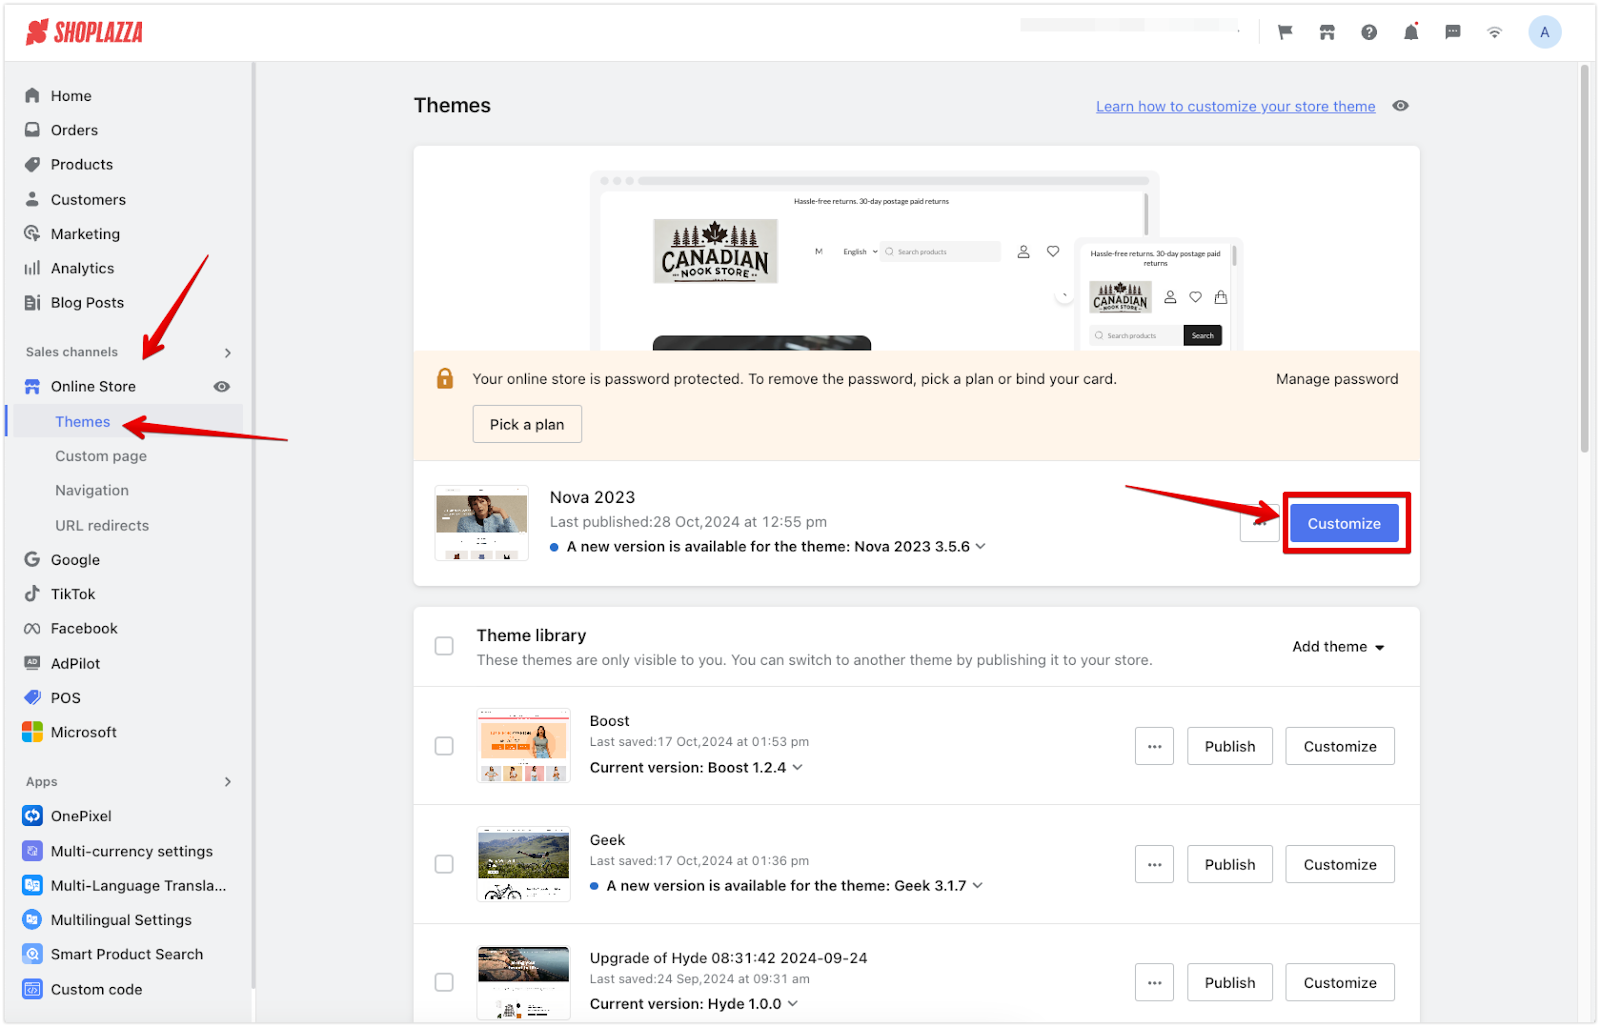
1. Customize the theme: Go to Online Store > Themes > Customize to start personalizing your theme.
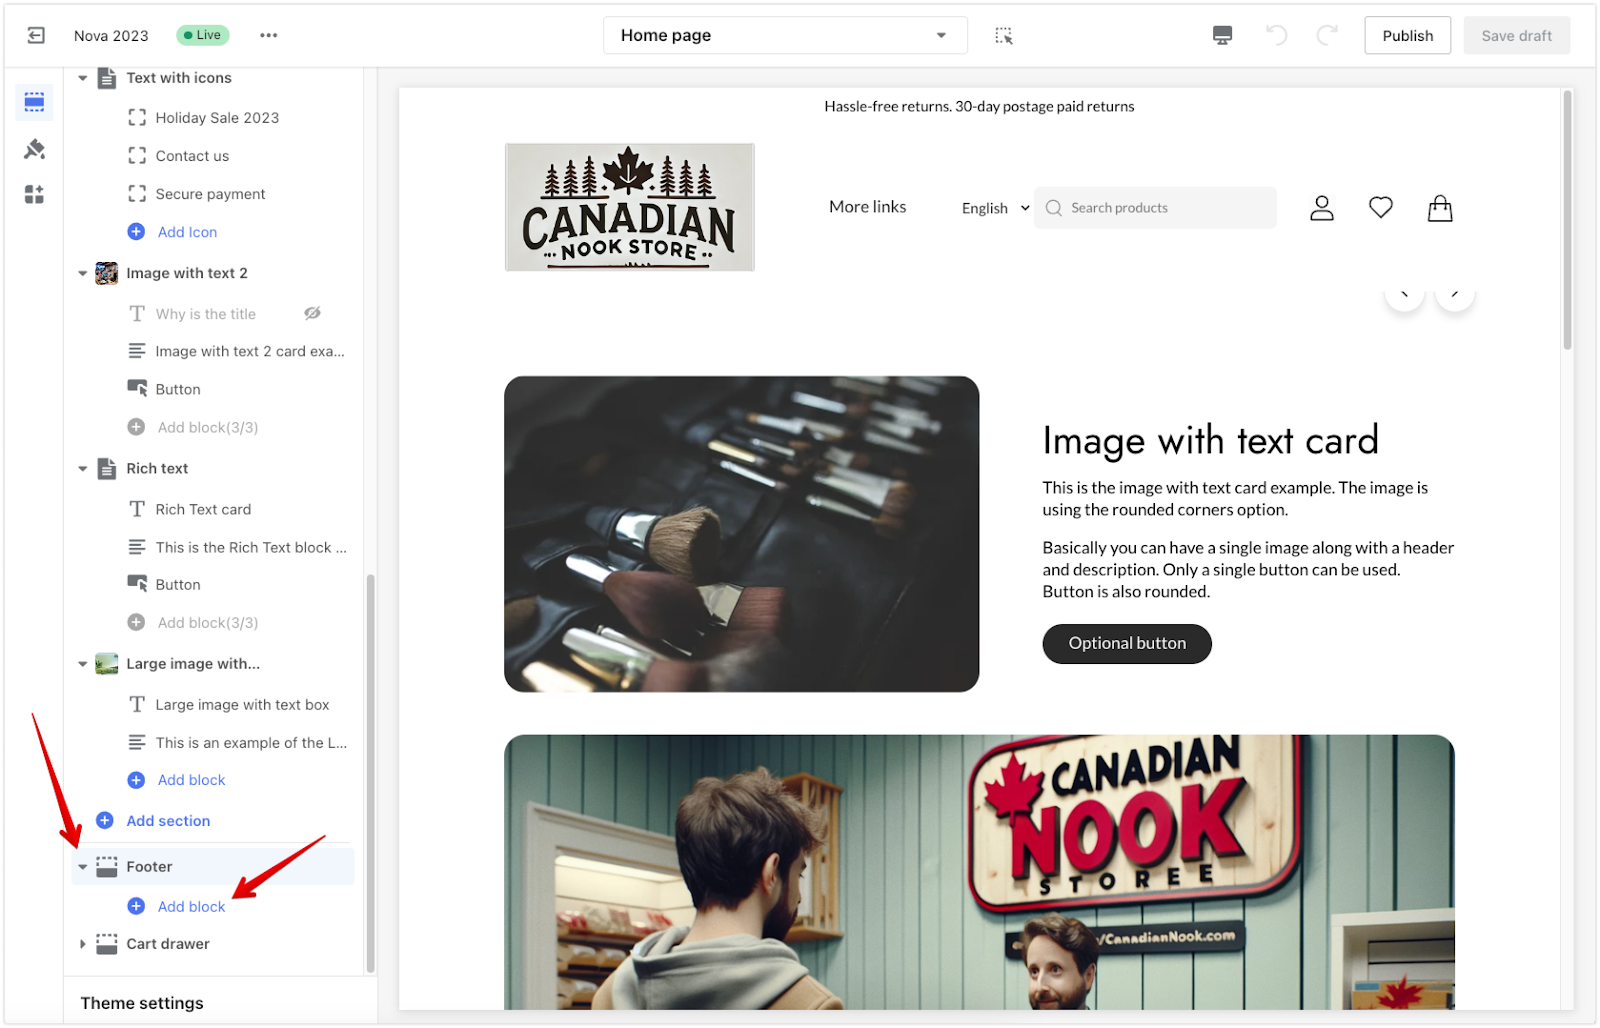
2. Add a block: On the Customize page, scroll down to the Footer section, select the dropdown arrow, and click Add block. This adds a new block specifically for the footer’s navigation.
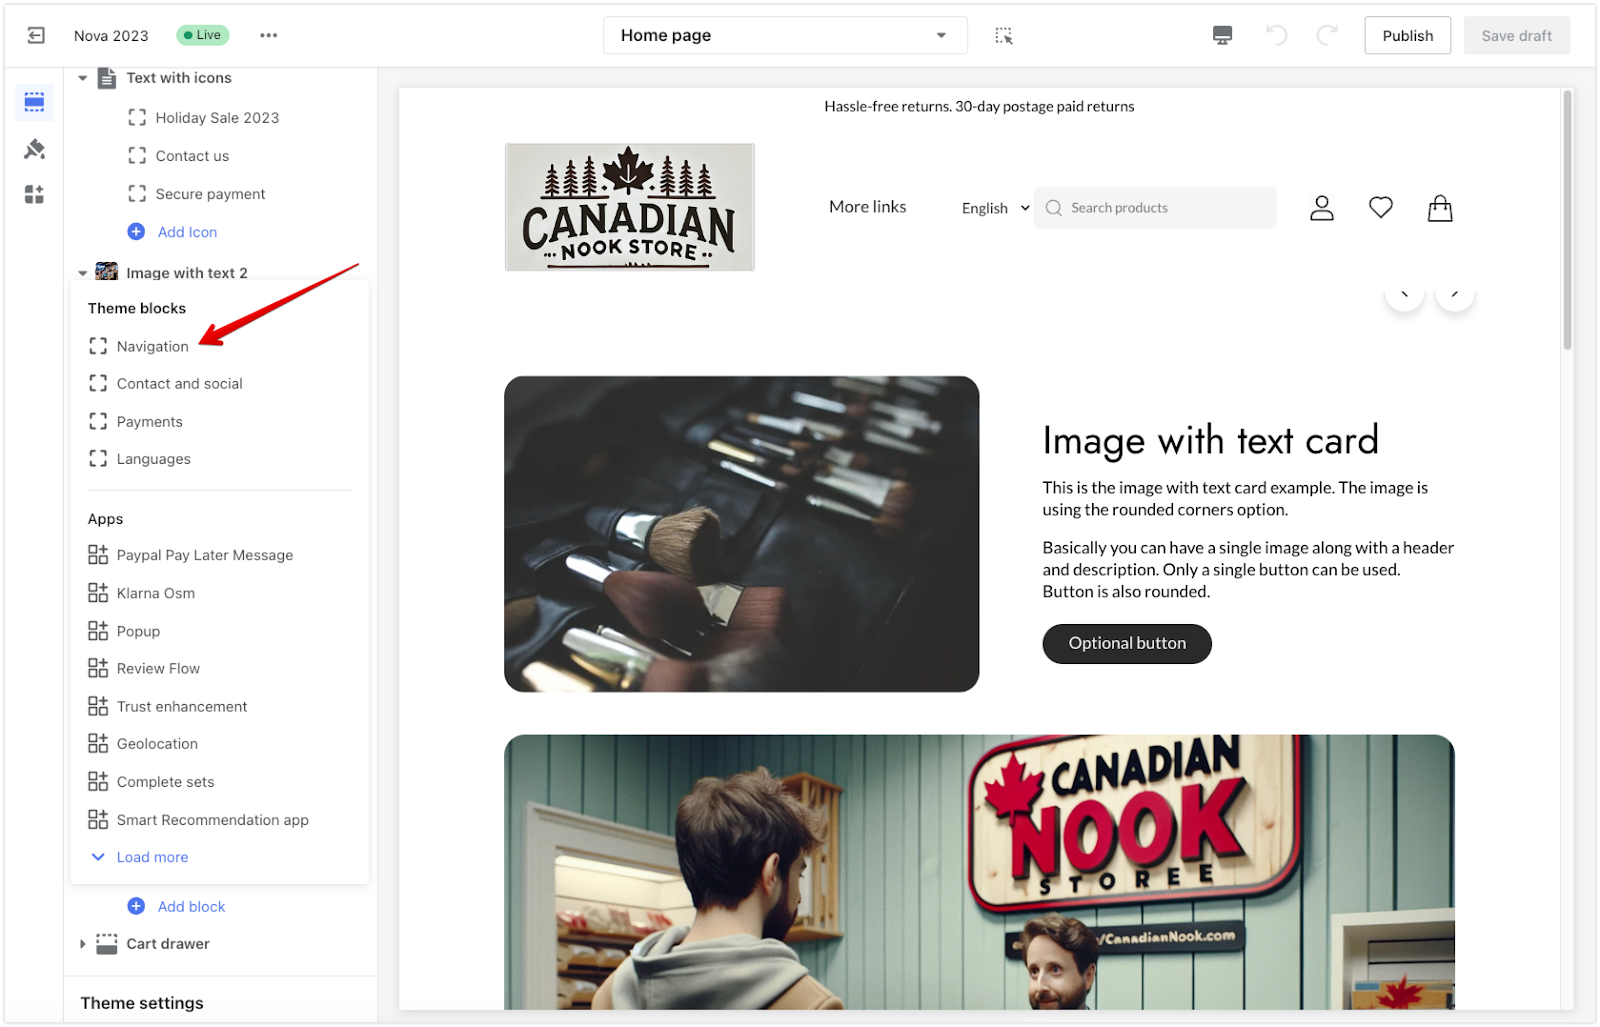
3. Navigation block: Choose the Navigation block to add to the footer. By default, it displays the footer menu, but you can adjust which menu is used in the settings to include the terms of service link.
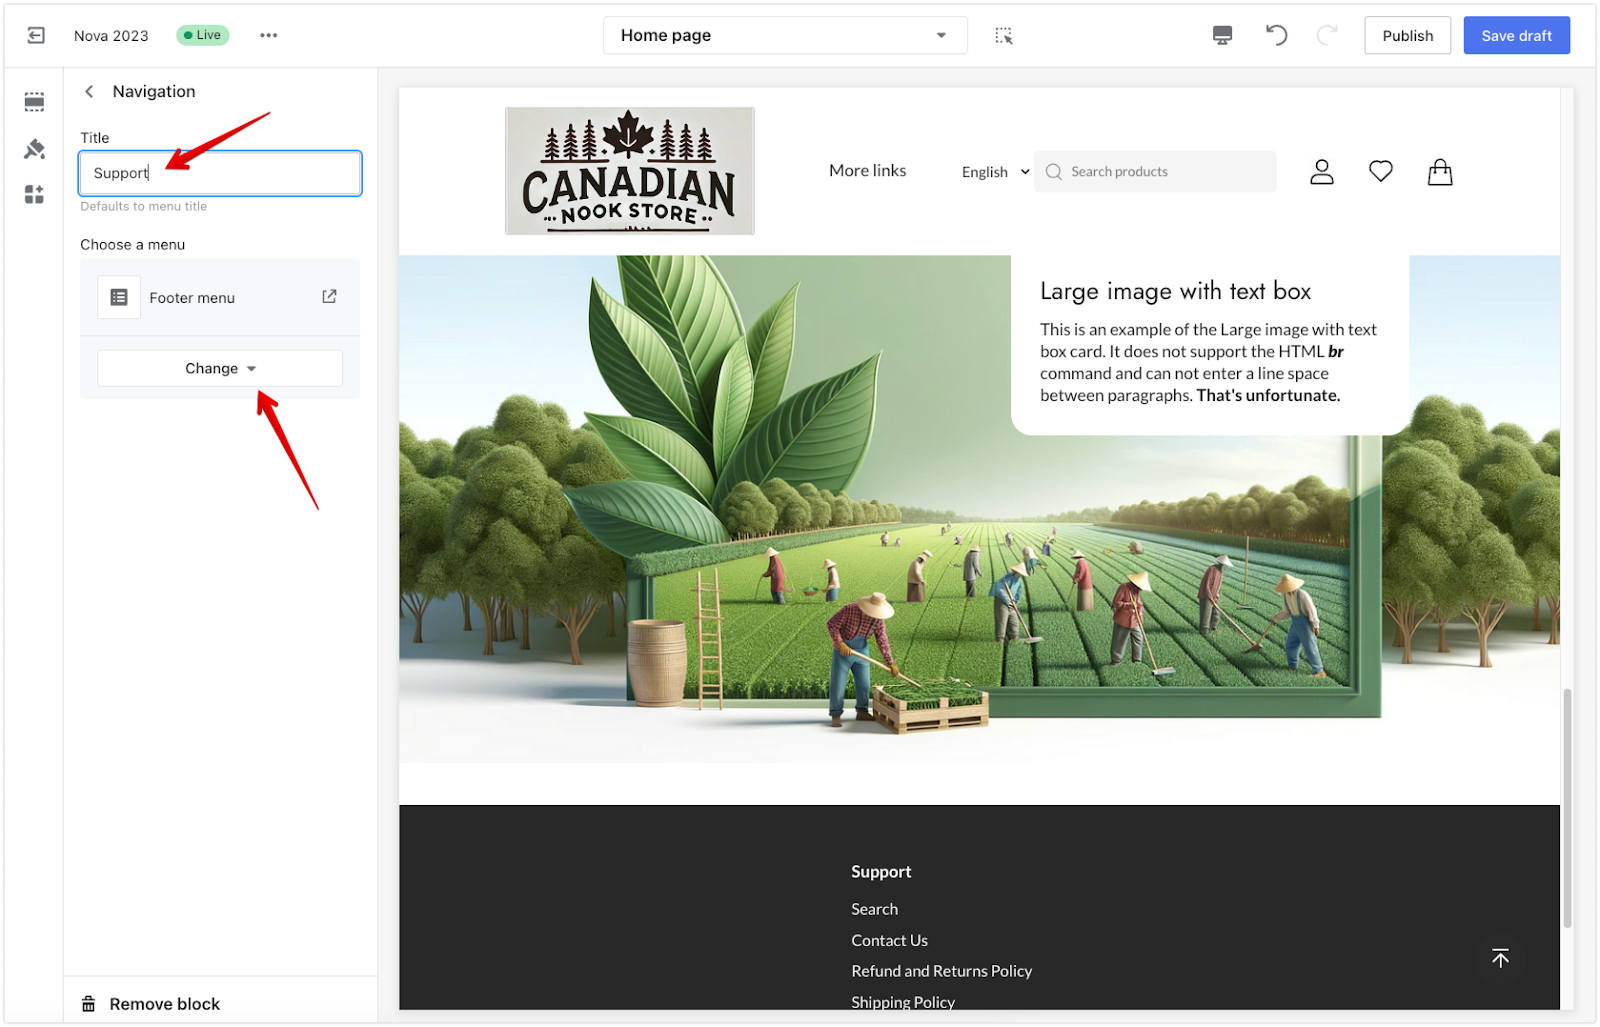
4. Configure the navigation: Click on Navigation to modify the menu, ensuring the terms of service link is included. Enter a title for the block, such as “Support” or “Footer Menu.” Under Choose a menu, select the dropdown labeled Change to pick the desired navigation menu with the terms of service link. This gives you the flexibility to choose which footer menu is displayed.
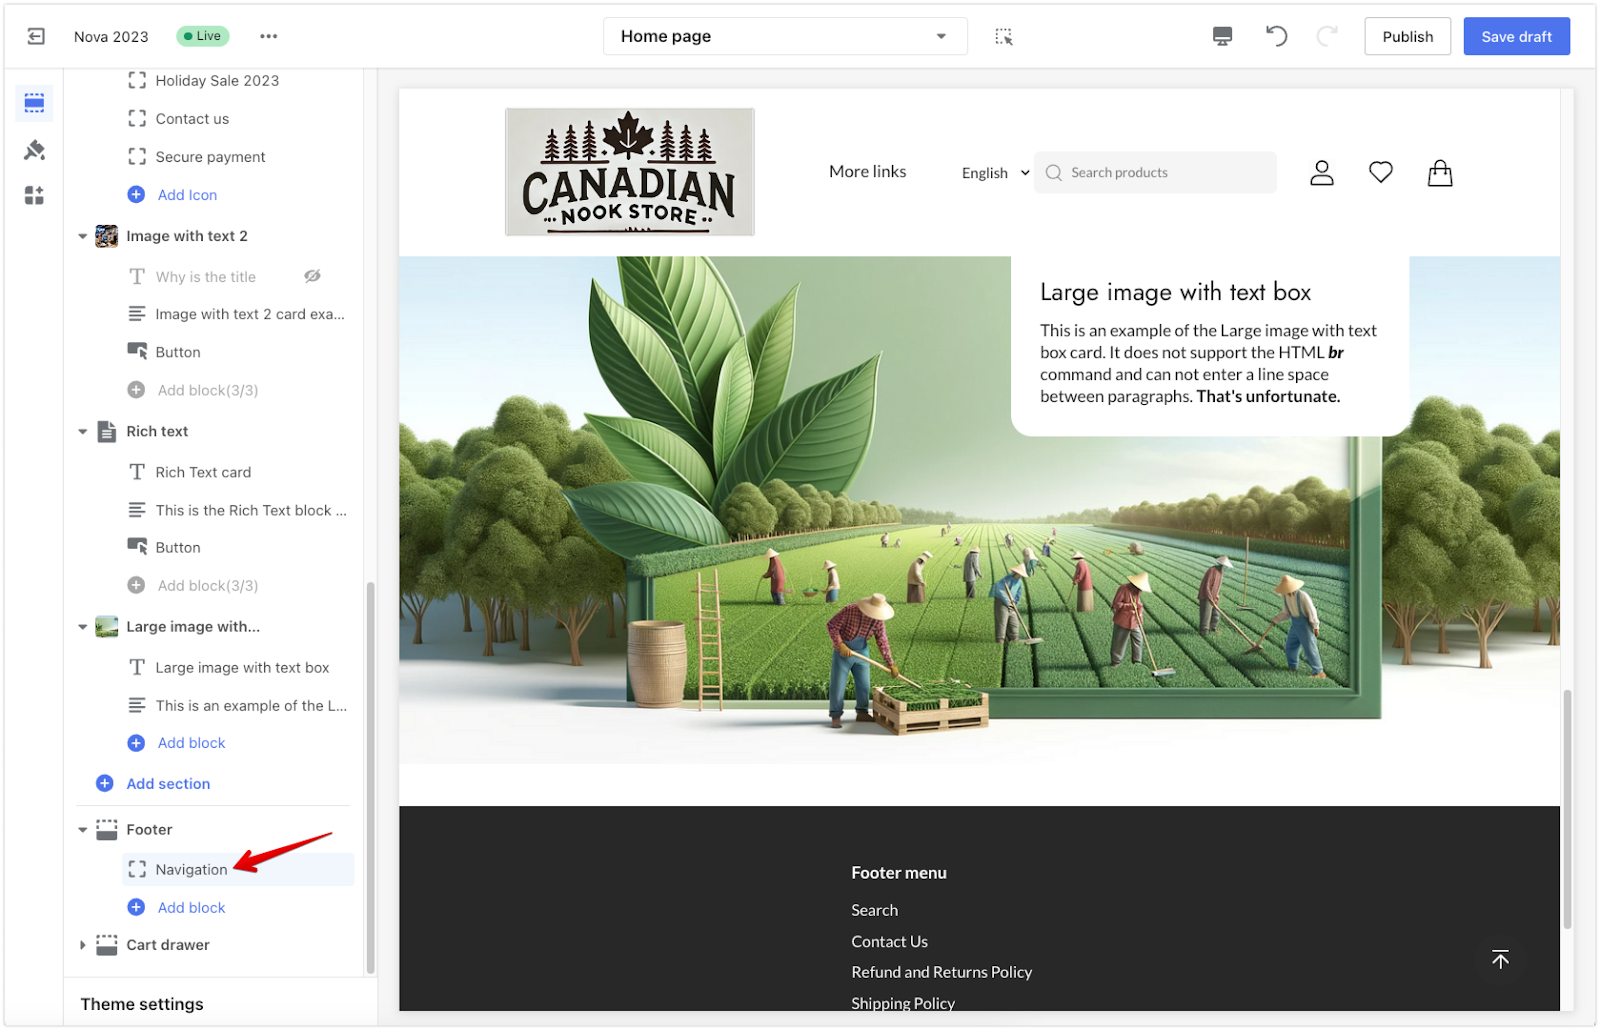
5. Publish changes: Click Save draft or Publish to apply your changes and make the terms of service visible site-wide.
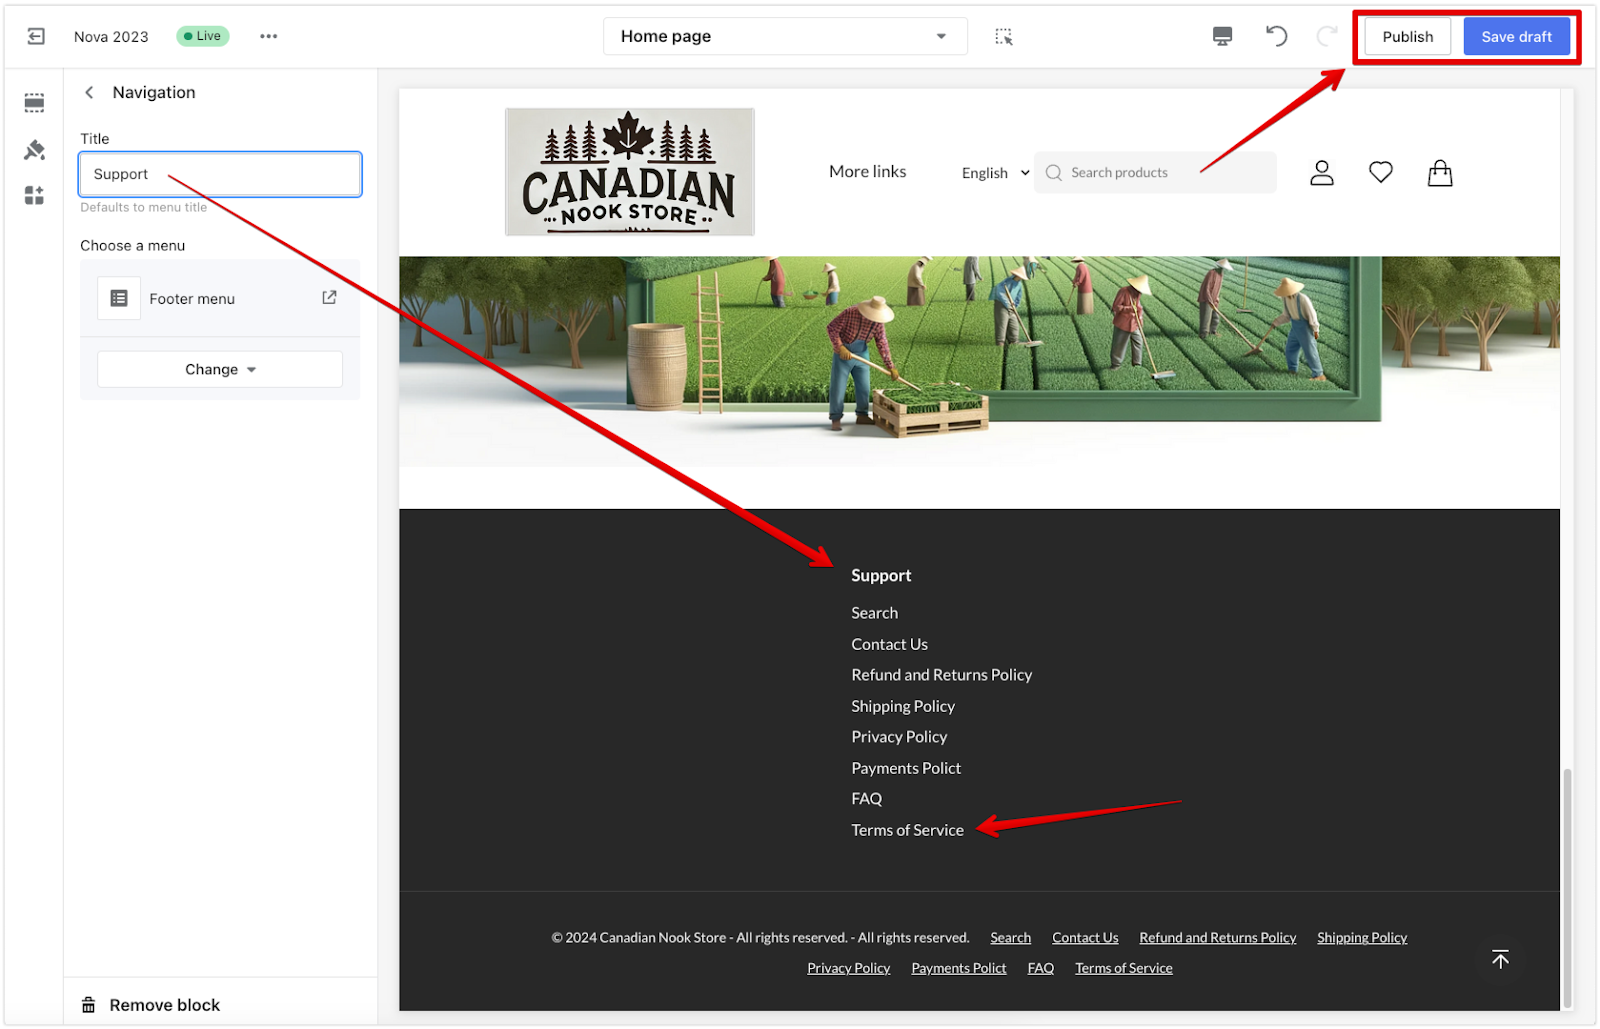
Adding your terms of service to the footer and theme ensures customers can always find it. This keeps your store transparent and supports a smooth experience, especially when using Google Ads.


Comments
Please sign in to leave a comment.