The footer is a key part of your store’s homepage, located at the bottom of the page. It provides easy access to important pages such as Terms of Service, Contact Us, FAQ, Privacy Policy, Return Policy, and About Us. Adding these links in the footer helps customers find essential information quickly, enhancing their shopping experience and building trust in your brand. To include these pages in your footer, create custom pages and link them to your menu. Here’s how:
Adding custom pages to your footer menu
This section explains adding custom pages to your footer menu by linking them through the navigation settings.
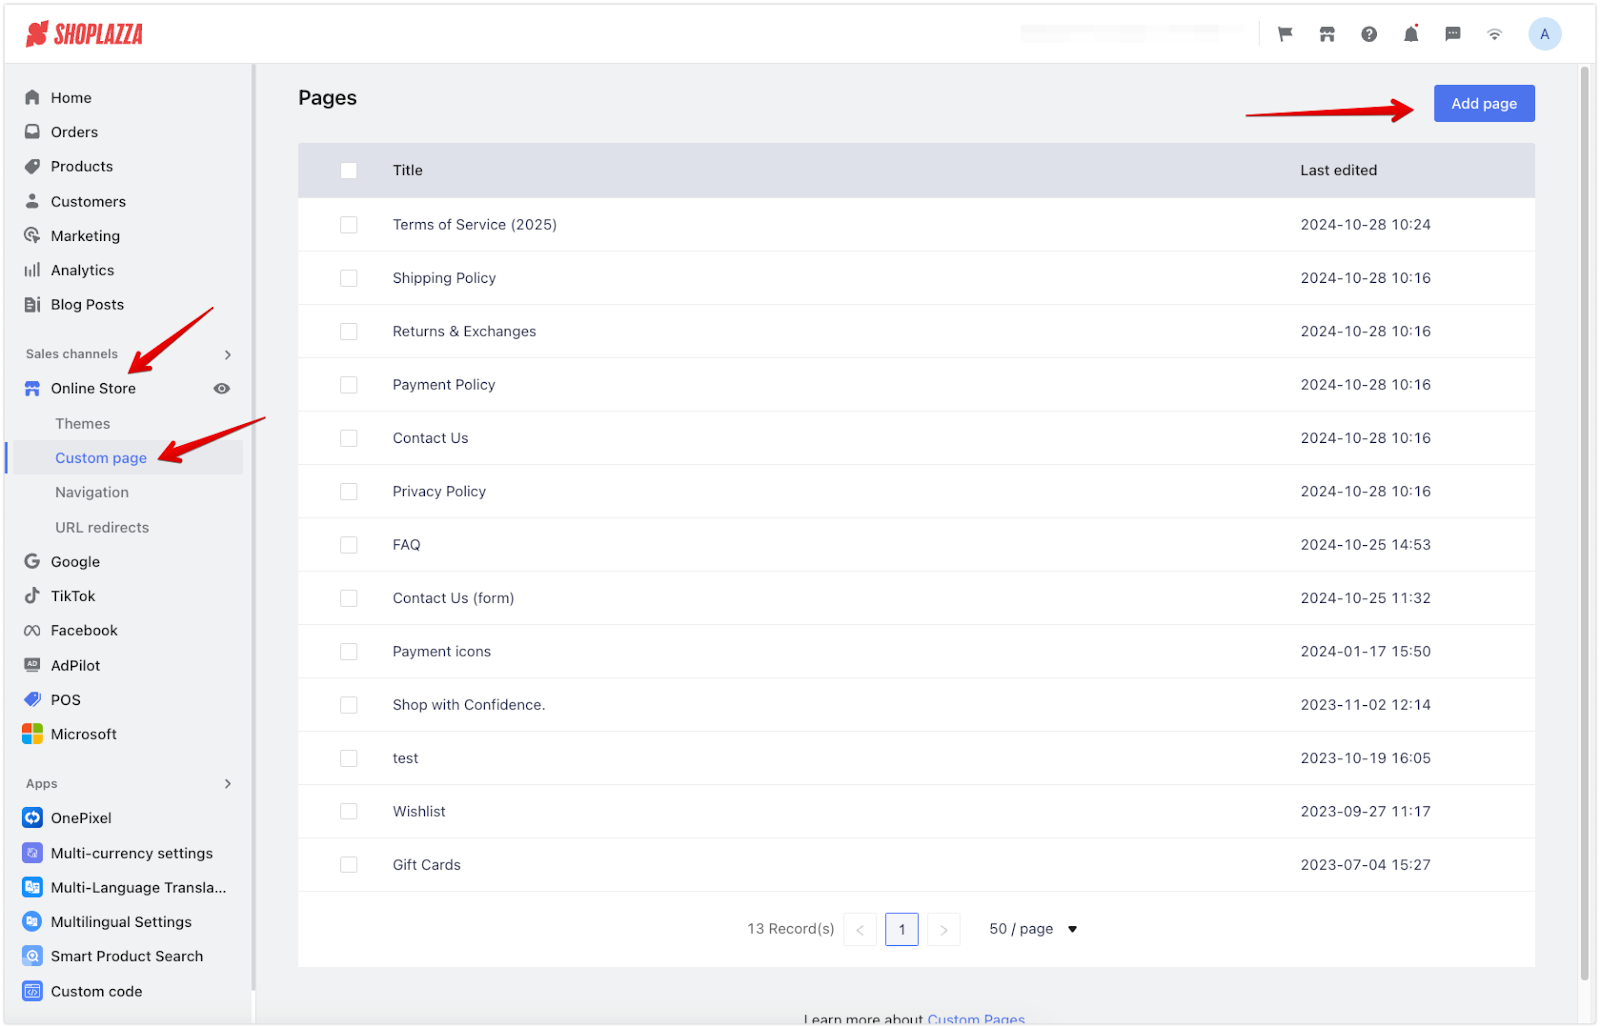
1. Create custom page: Go to Online Store > Custom Page and click Add page. This will start a new page where customers can view your policies or other important information.
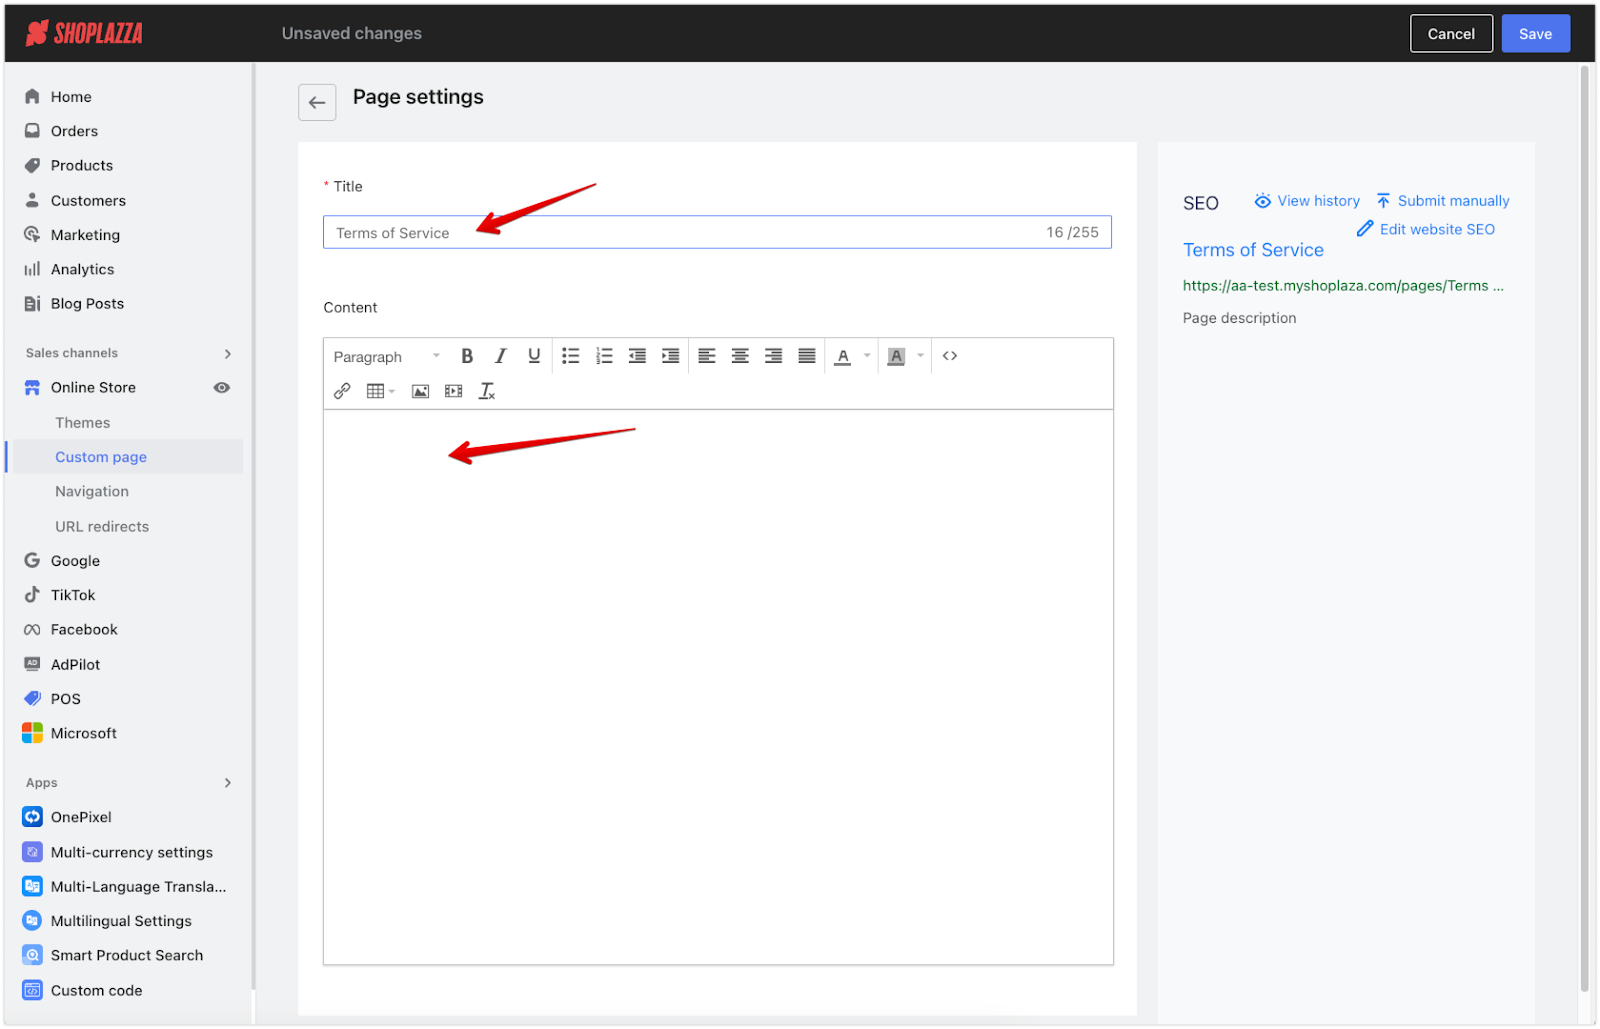
2. Page settings: Name the page for your content, such as “Terms of Service. " Add your terms of service content, and click Save to make the page live.
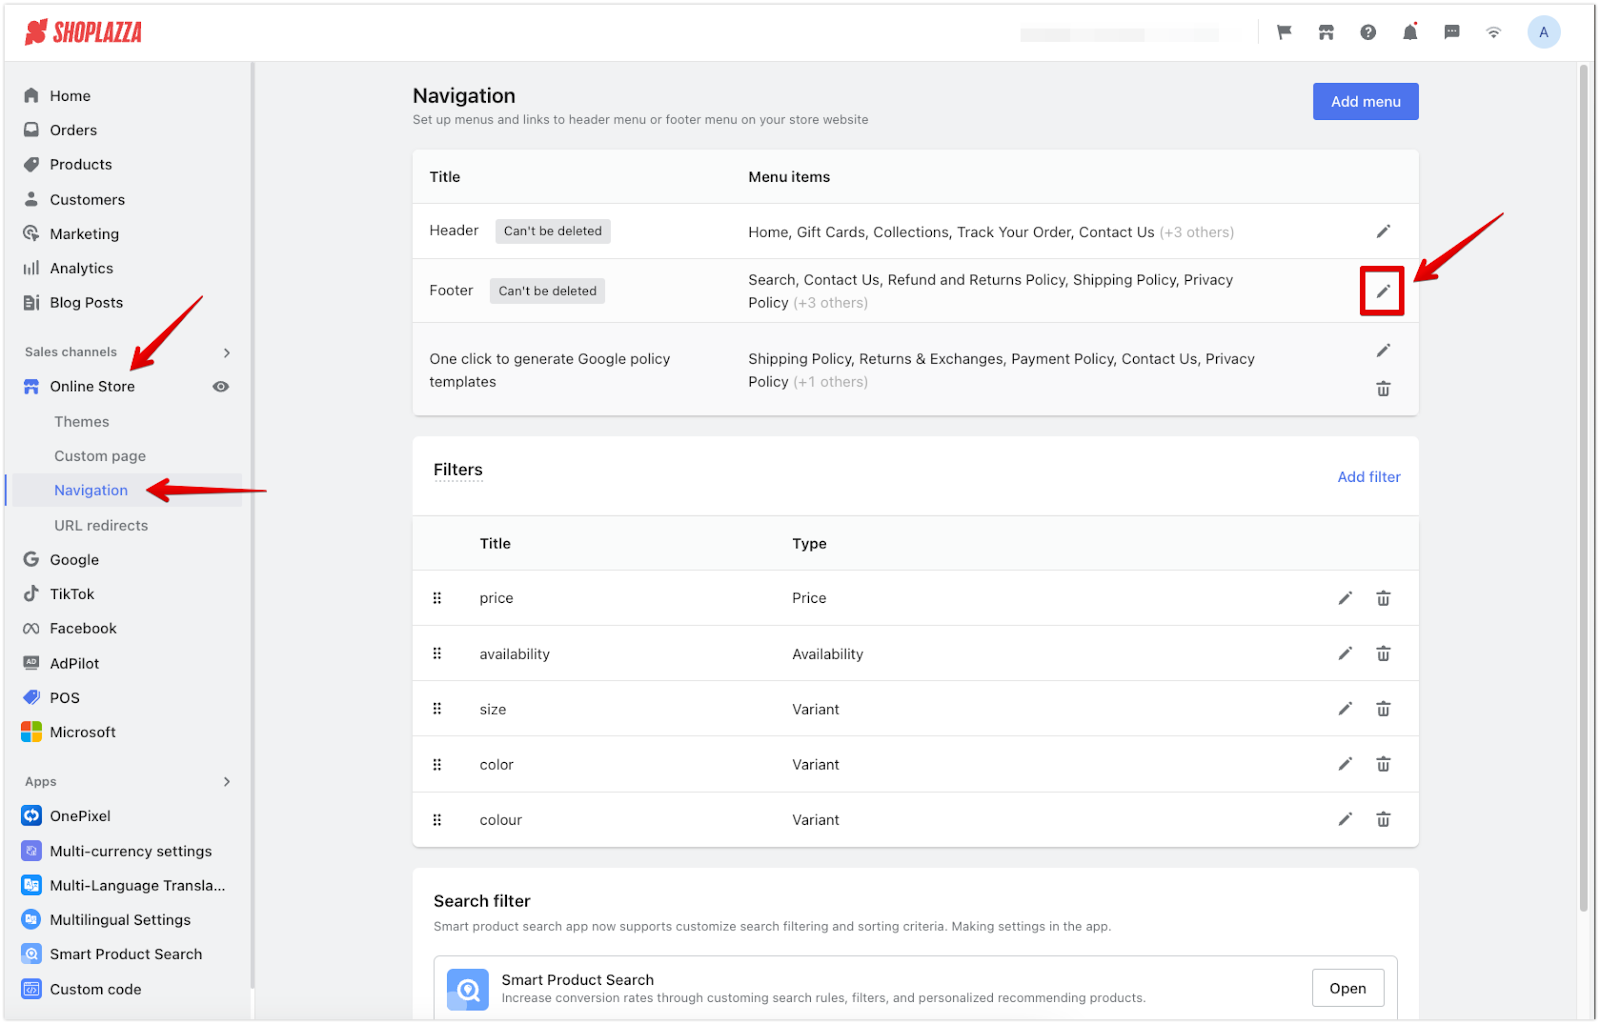
3. Edit the footer menu: Go to Online Store > Navigation, then click the edit icon next to the Footer menu to add the link.
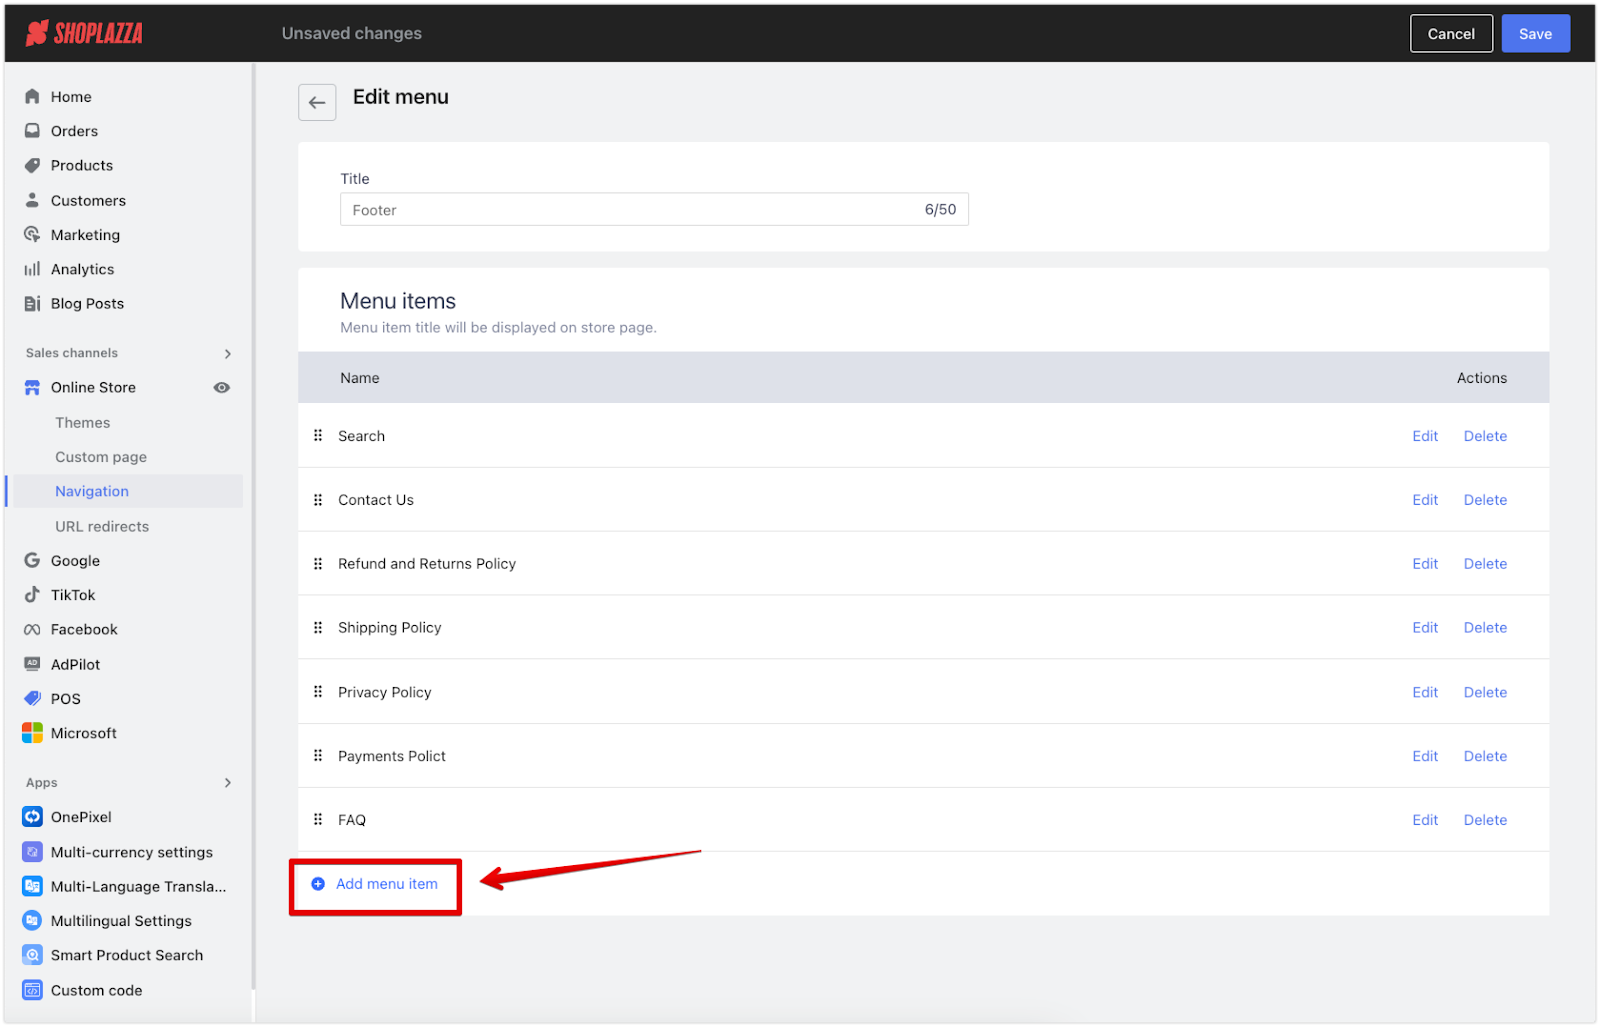
4. Add a menu item: On the Edit menu page, click Add menu item to include the link to your manually created page.
5. Name the menu: Enter “Terms of Service” as the menu name, select Custom page to link it, and click Confirm.
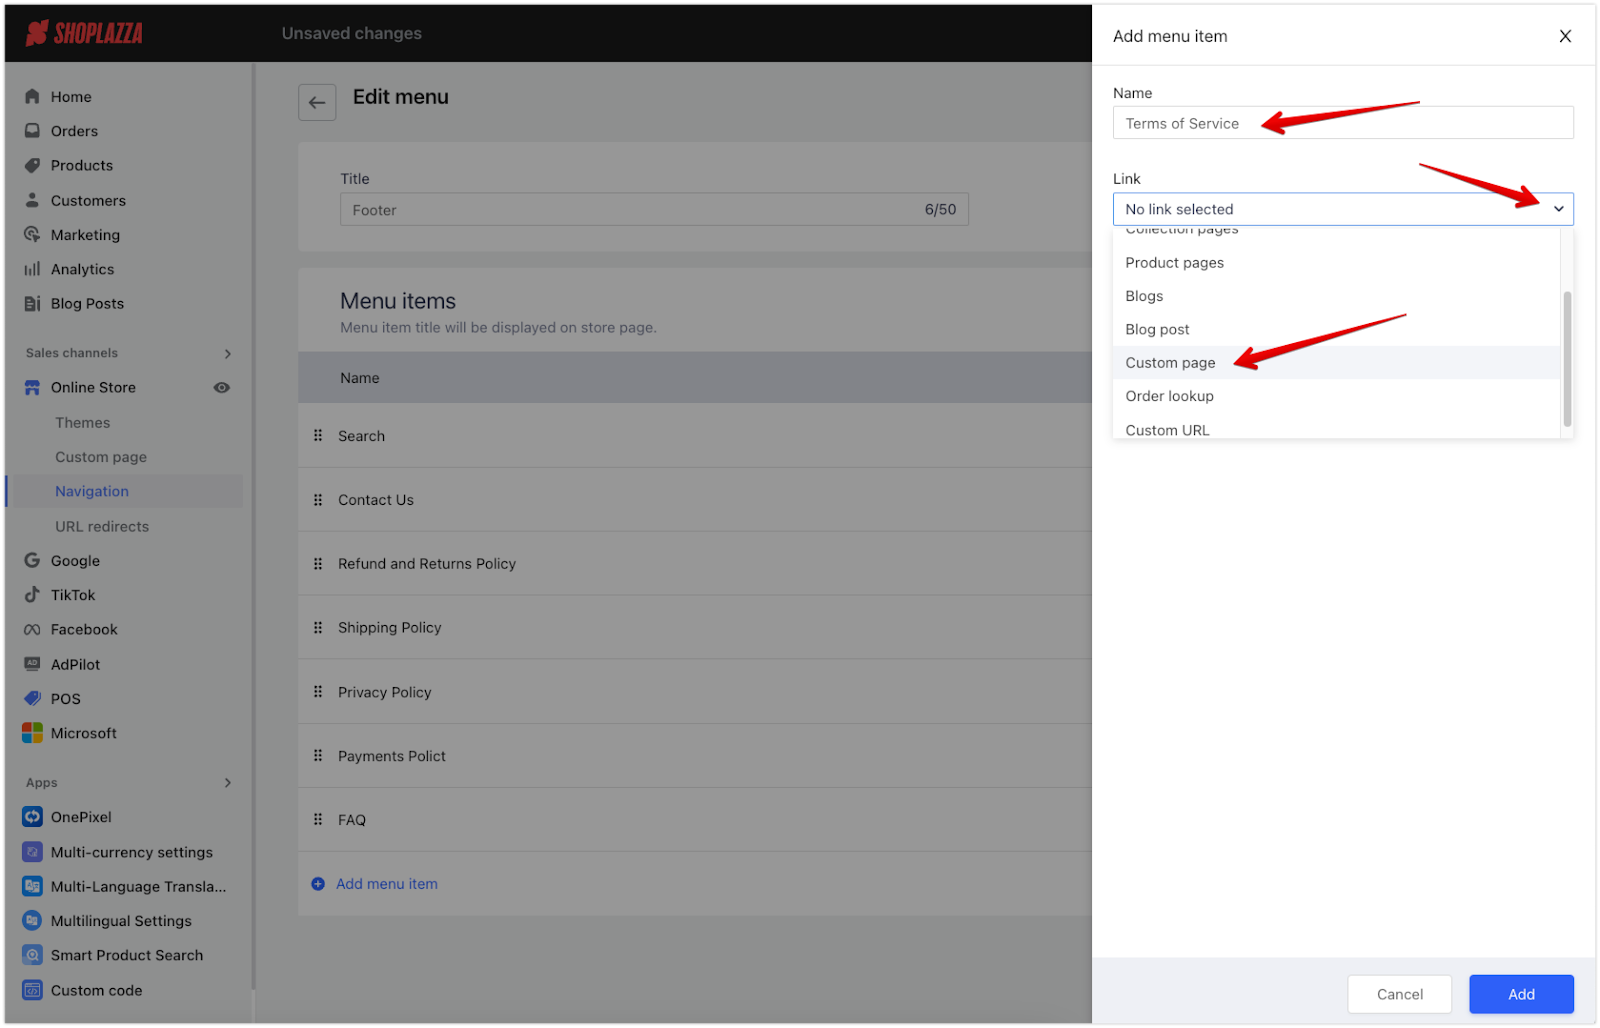
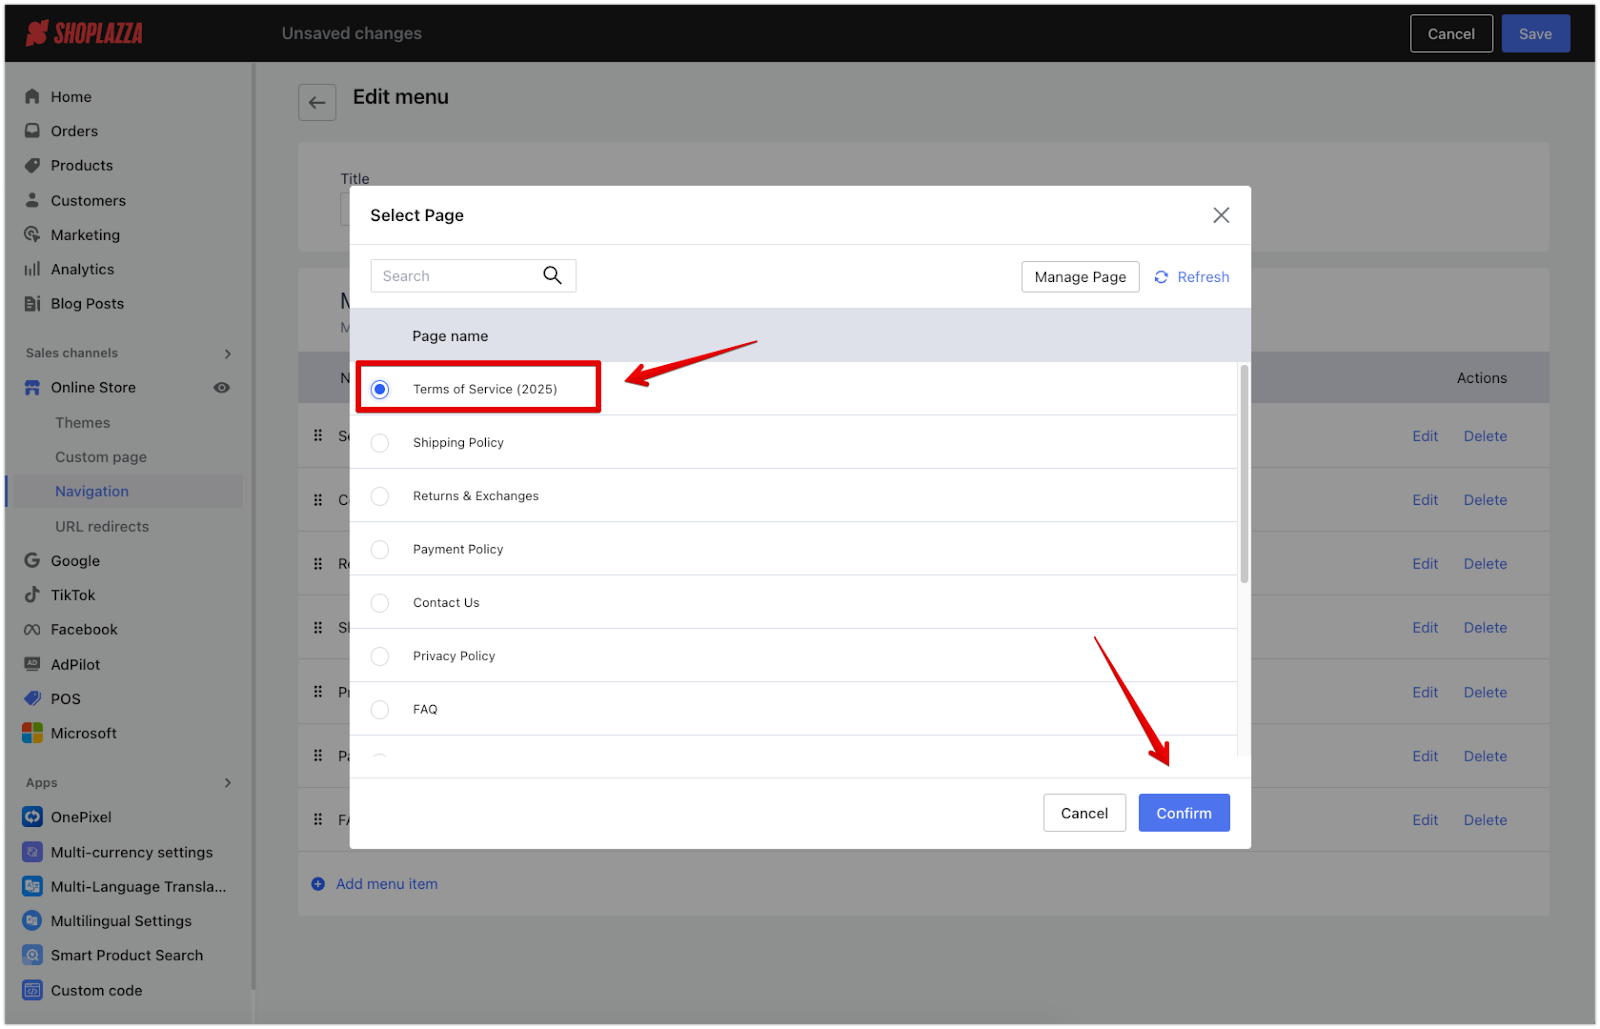
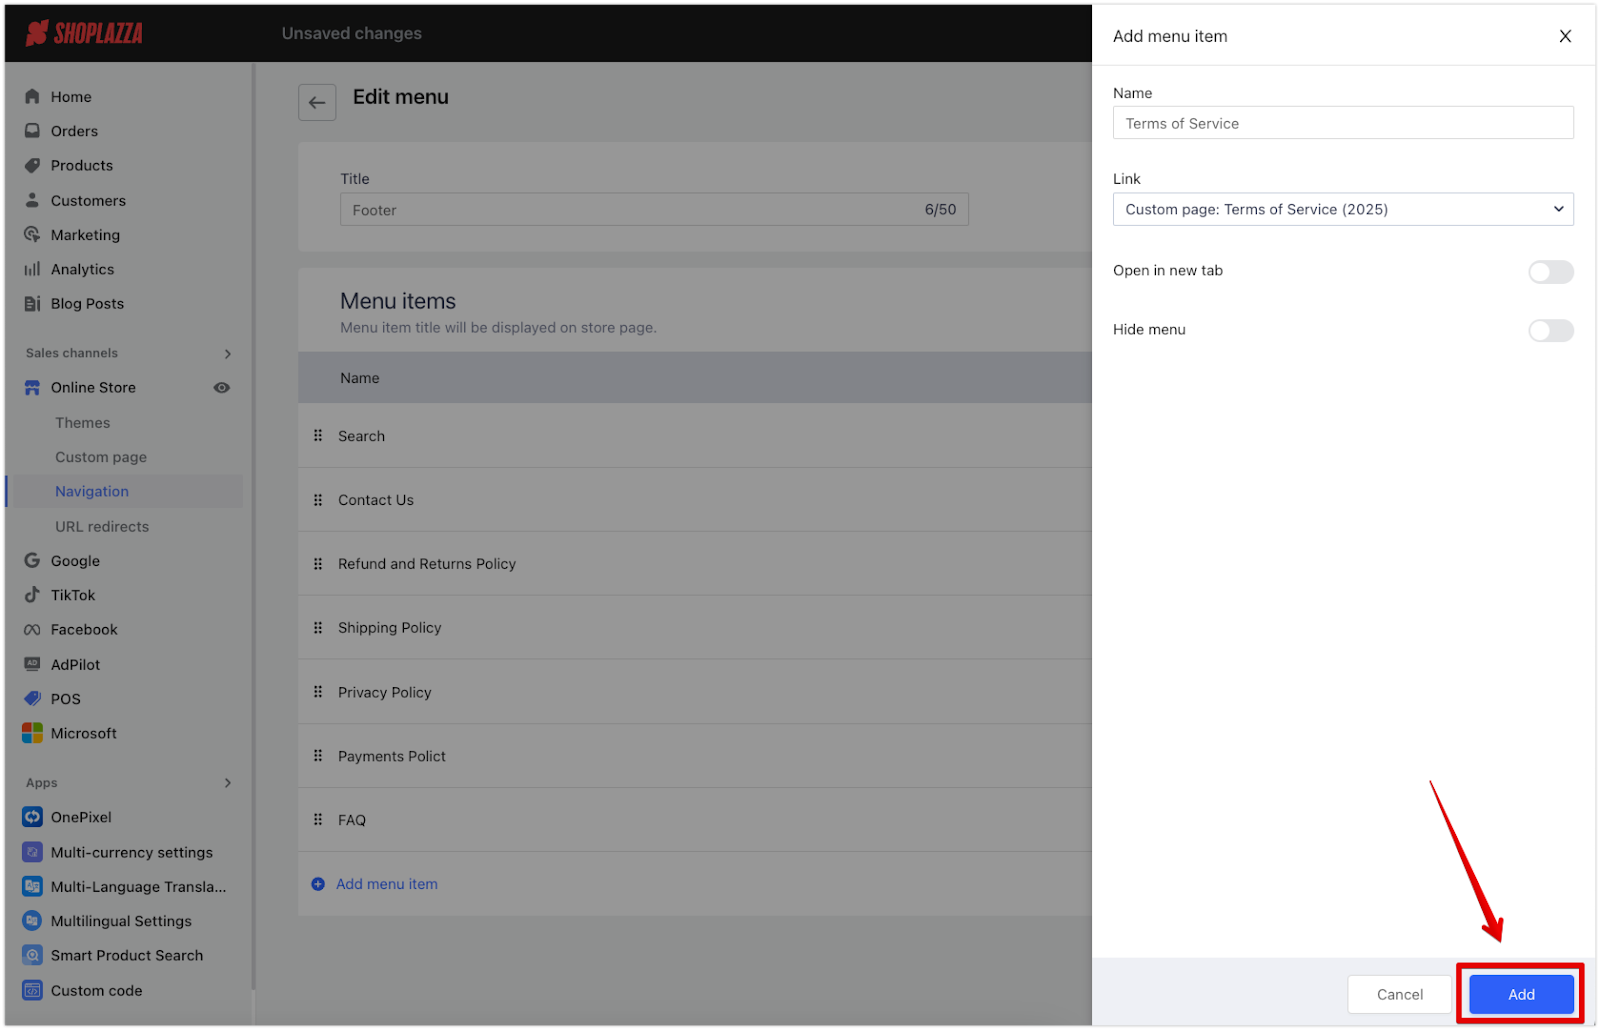
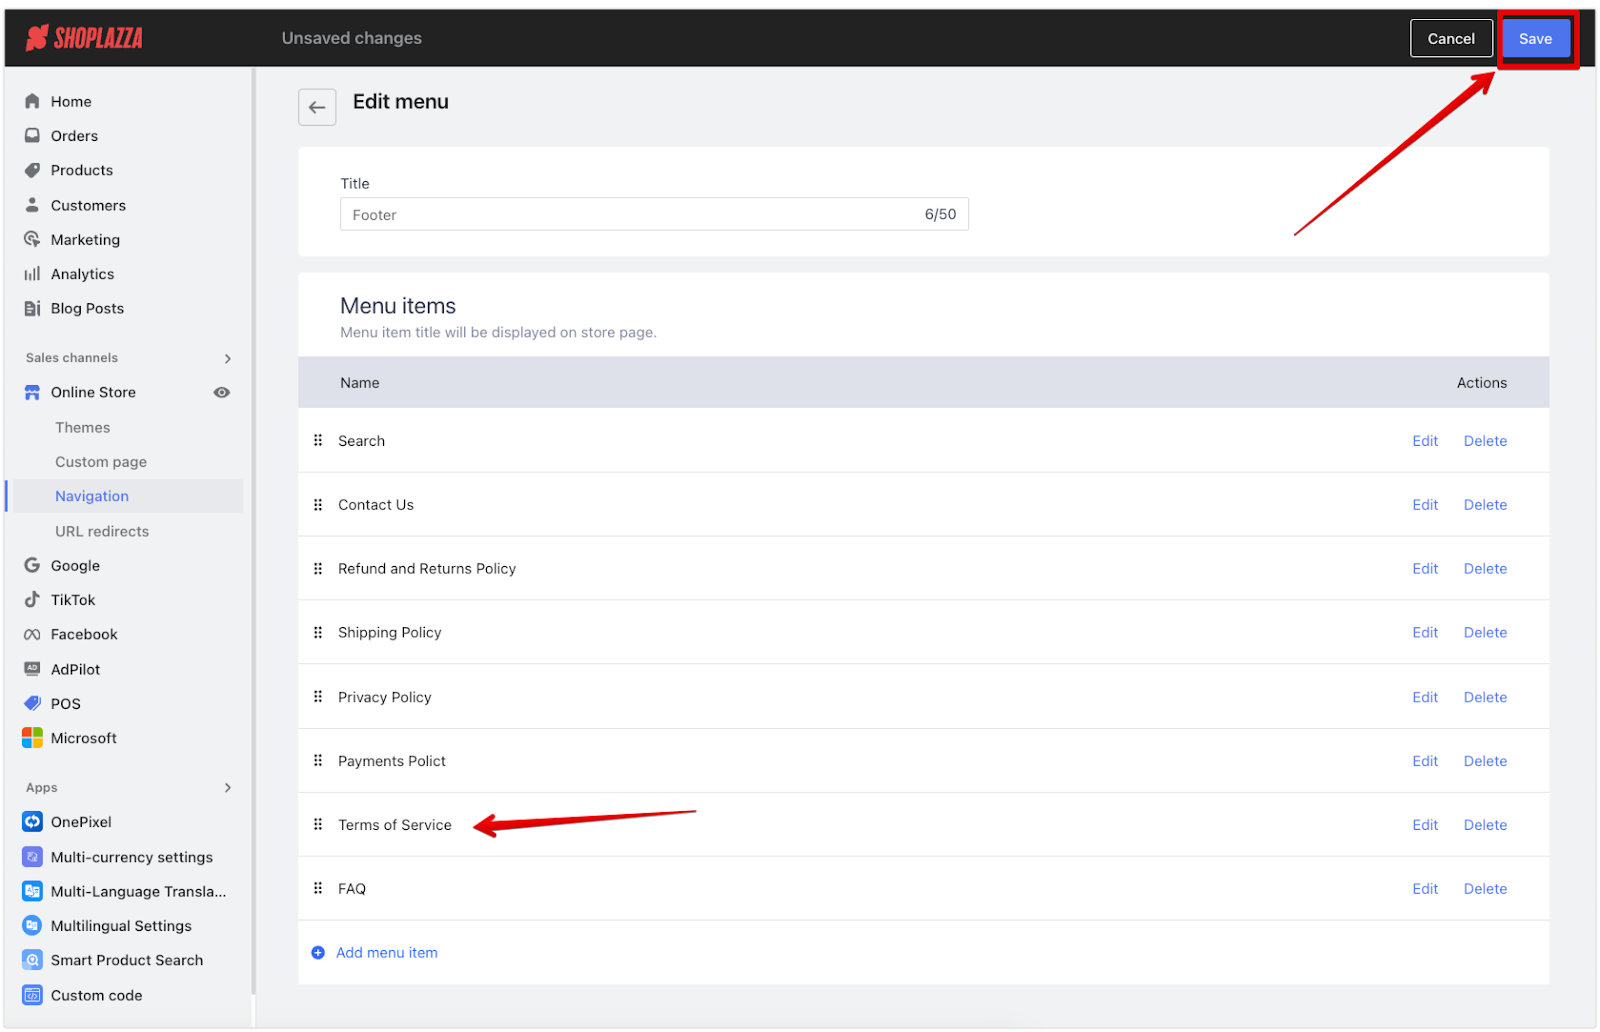
6. Finalize and save the menu: Click Add, then return to the Edit menu page to verify that the link appears correctly. Click Save to complete the setup. Your terms of service will now be accessible from the footer.
Adding a navigation menu block in your theme
This section covers how to add a navigation menu block within your theme editor to display menu links in your store’s footer to display your custom pages and customize which menu to use:
1. Customize the theme: Go to Online Store > Themes > Customize to start personalizing your theme.
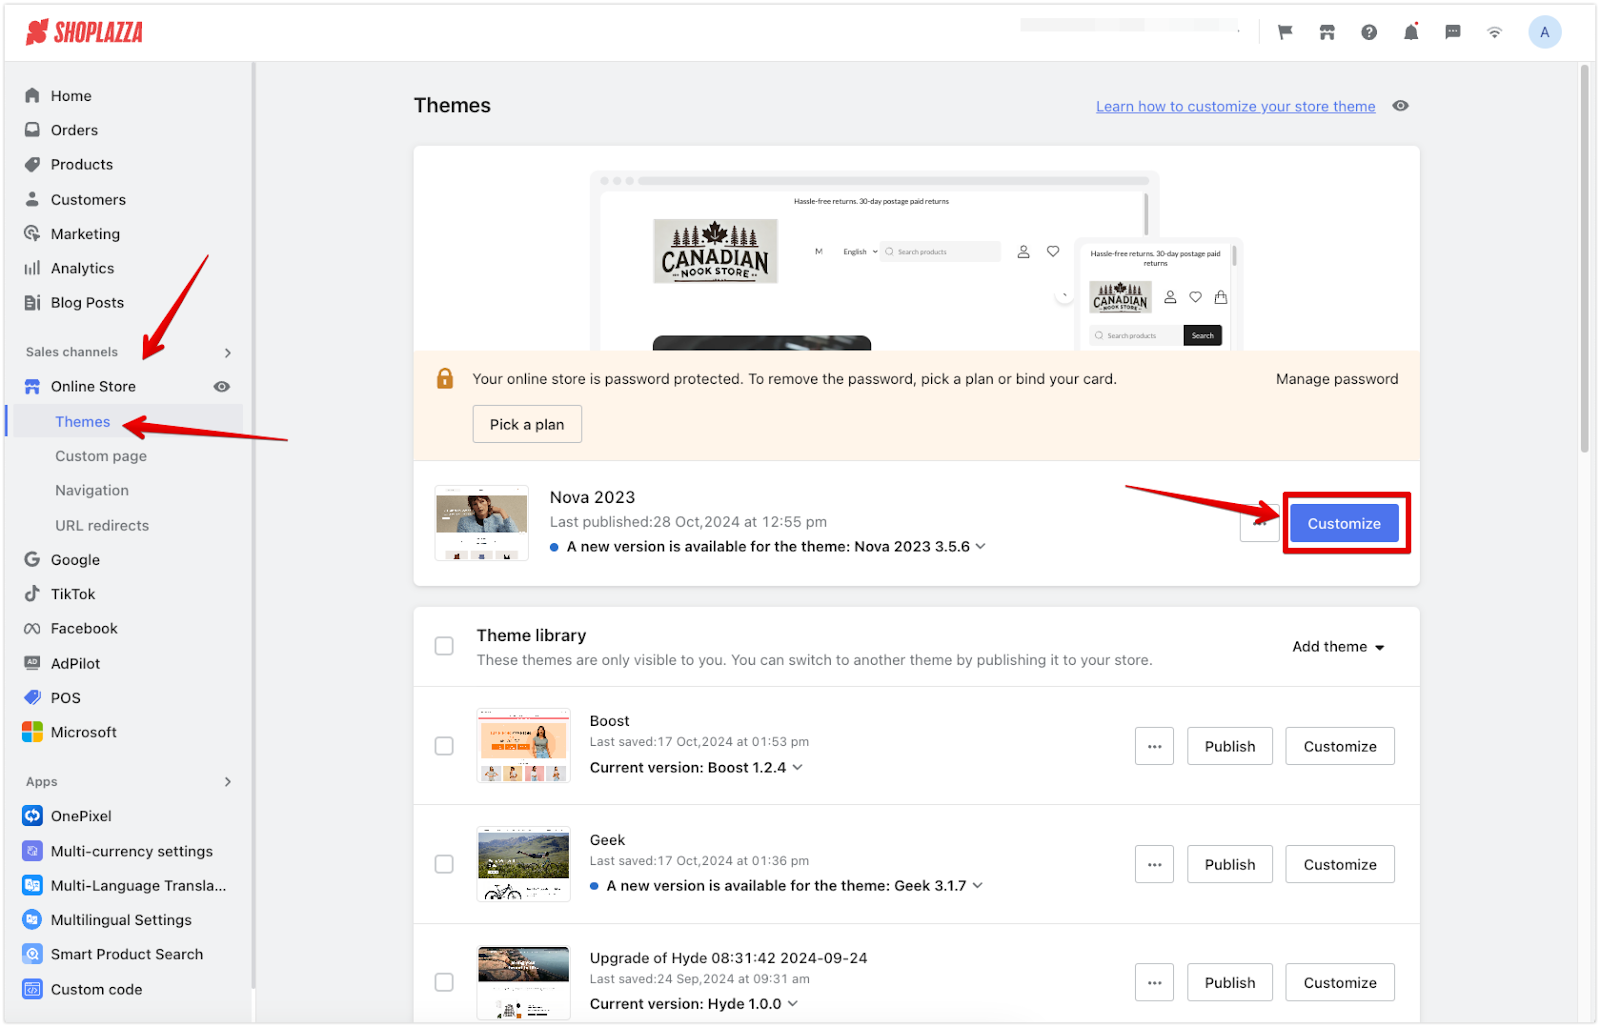
2. Add a block: On the Customize page, scroll down, select the dropdown arrow in the Footer section, and click Add block. This adds a new block specifically for the footer’s navigation.
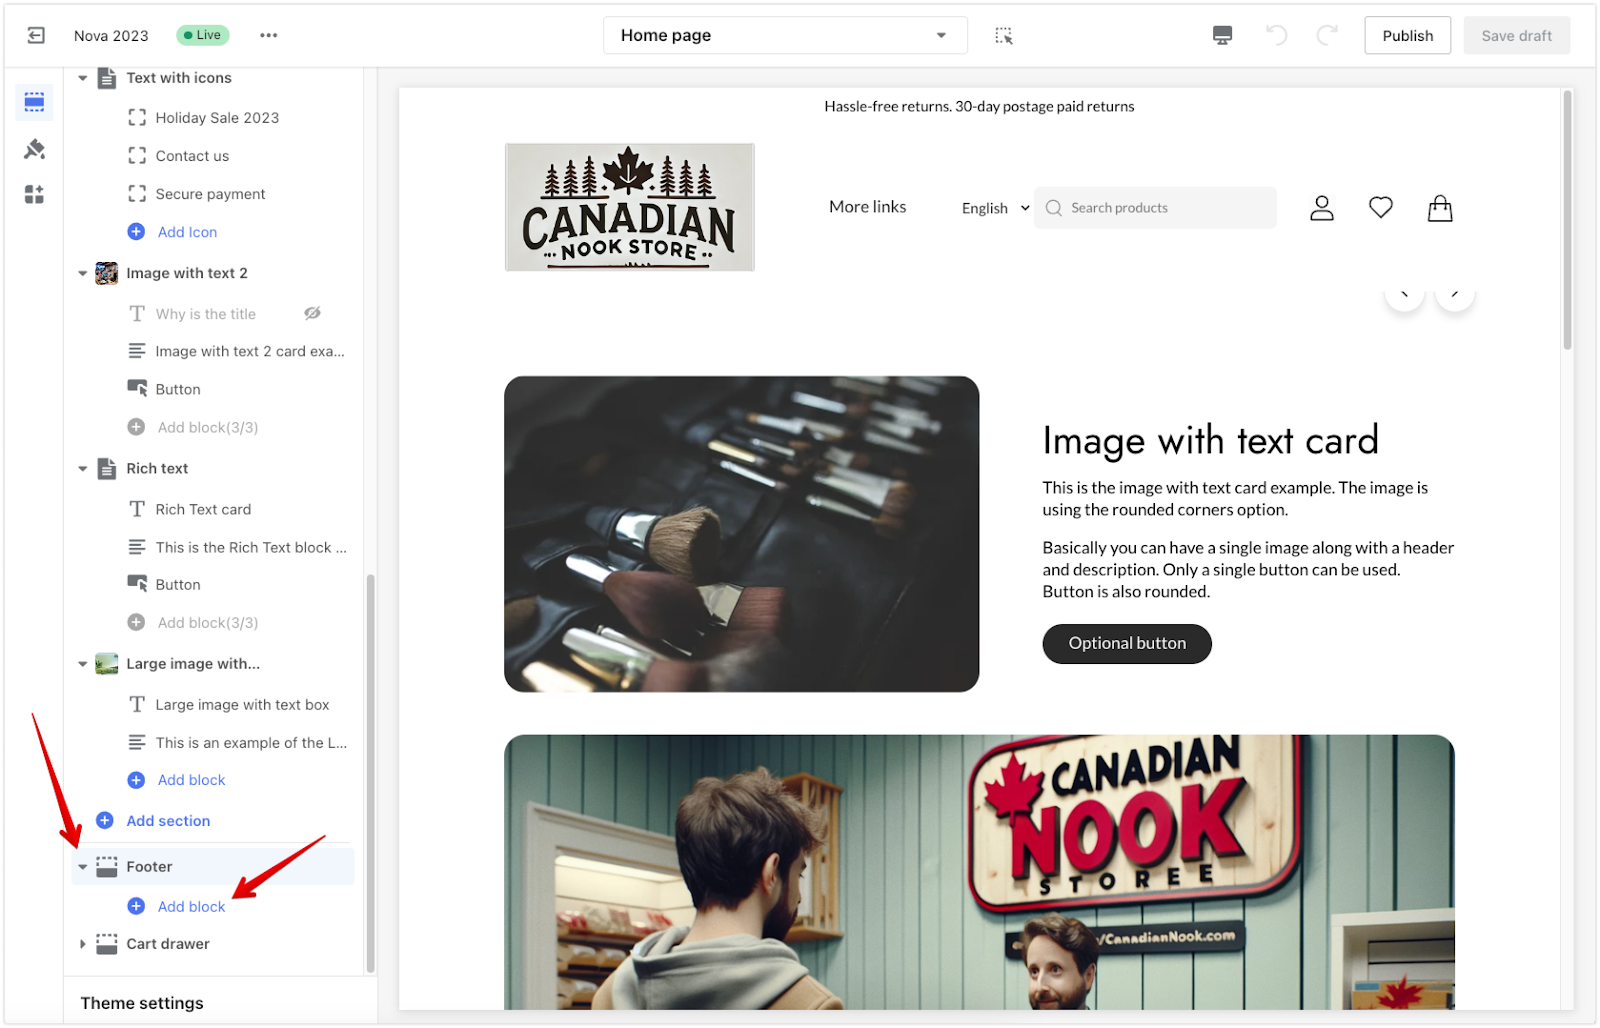
3. Navigation block: Choose the Navigation block to add to the footer. By default, it displays the footer menu, but you can adjust which menu is used in the settings to include the terms of service link.
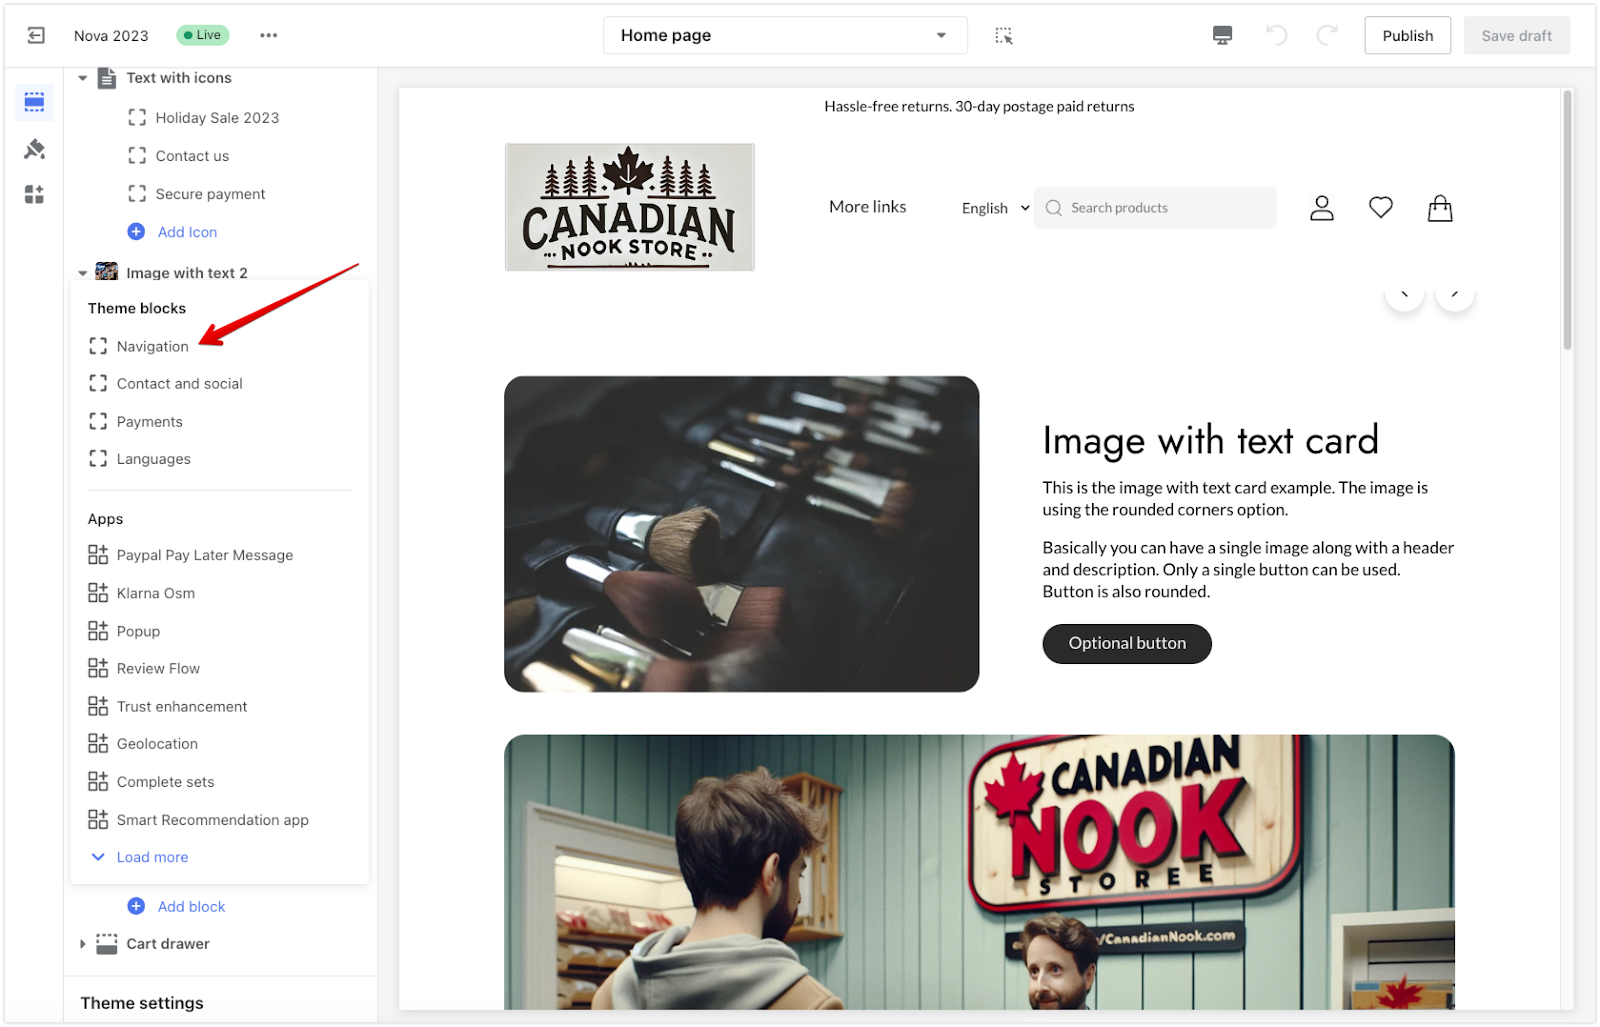
4. Configure the navigation: Click on Navigation to modify the menu, ensuring the terms of service link is included. Enter a title for the block, such as “Support” or “Footer Menu.” Under Choose a menu, select the dropdown labeled Change to pick the desired navigation menu with the terms of service link. This gives you the flexibility to choose which footer menu is displayed.
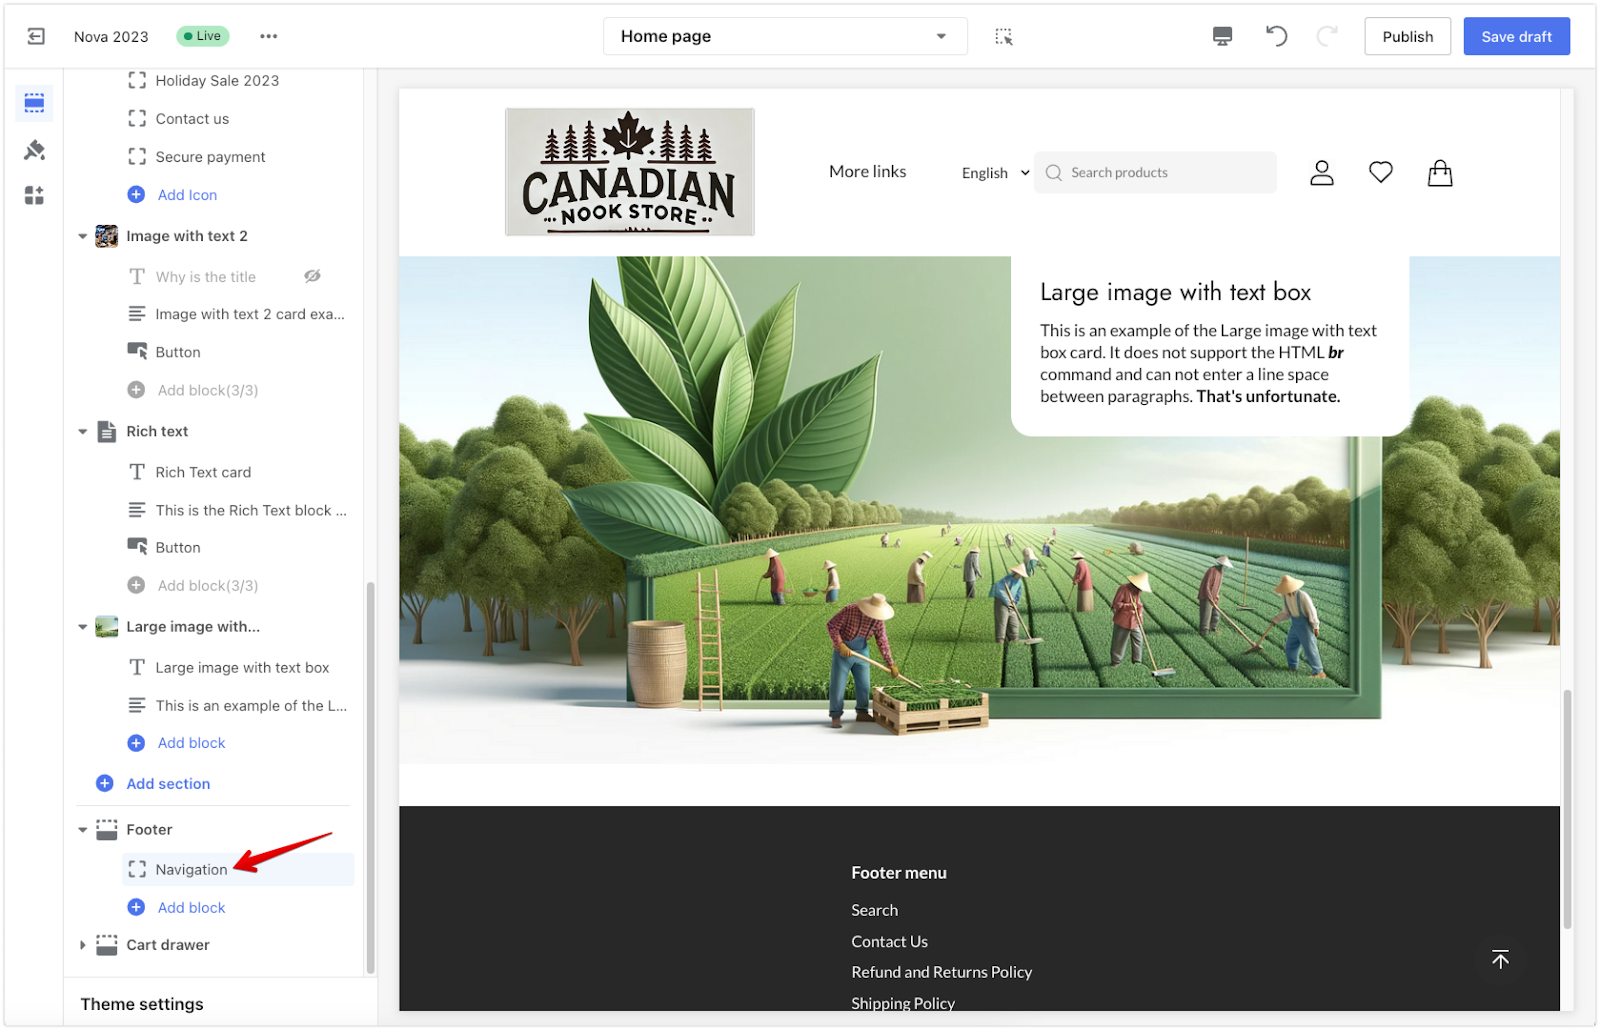
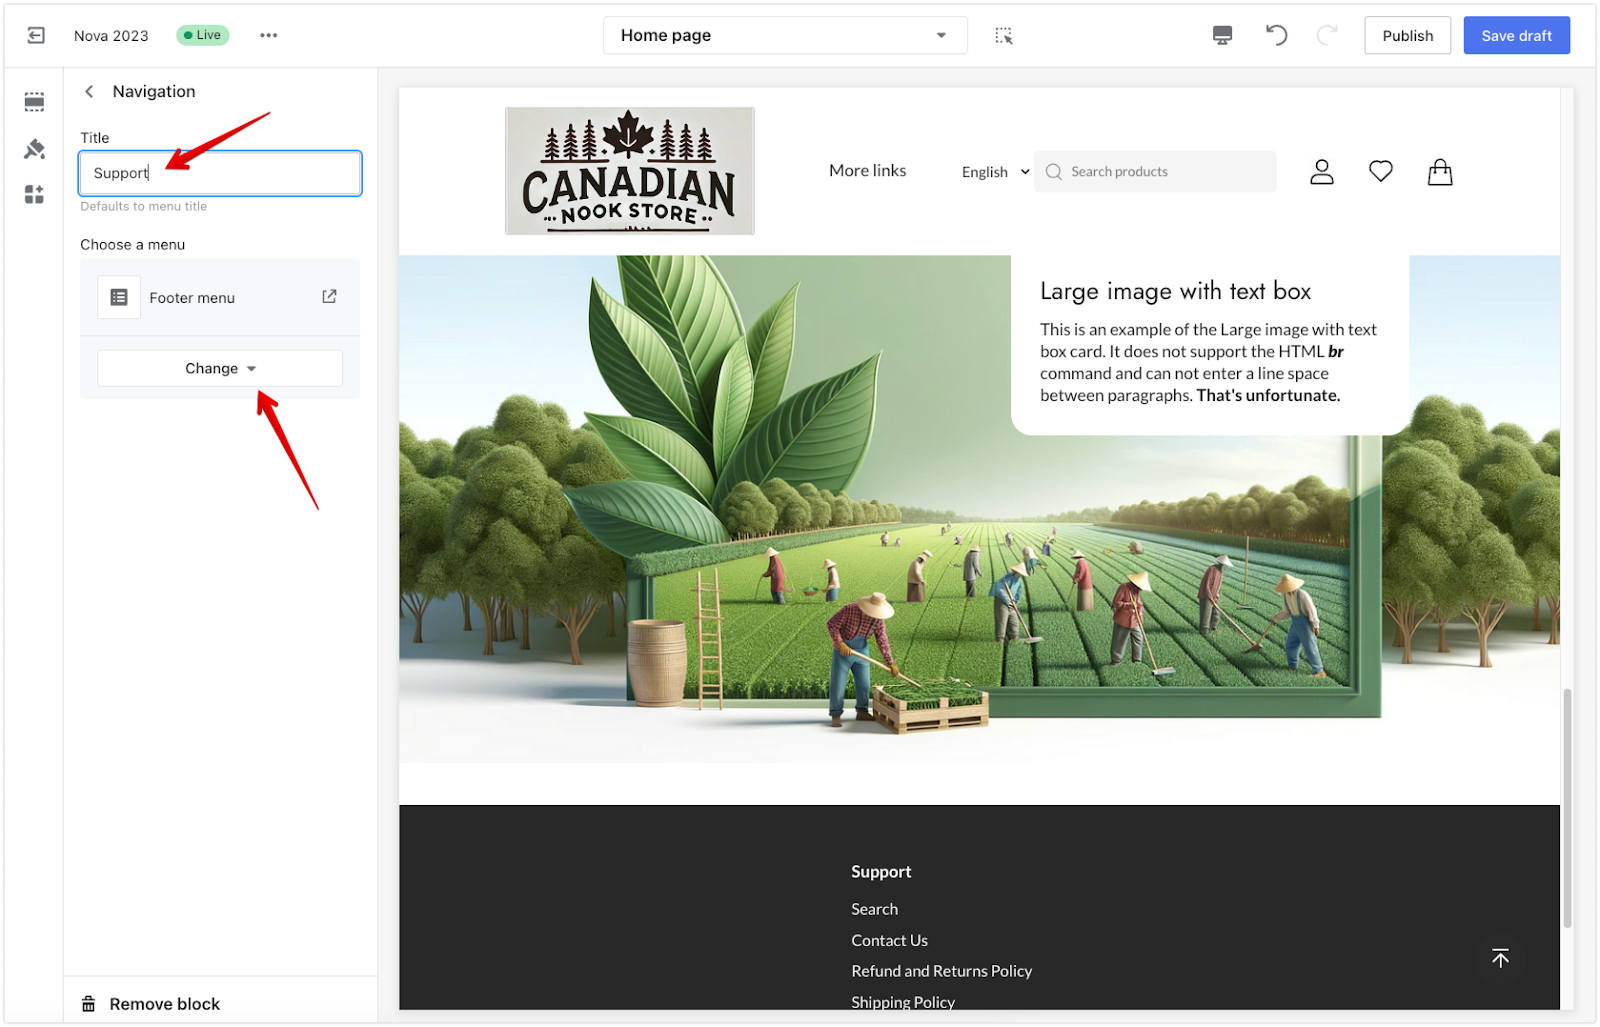
5. Publish changes: Click Save draft or Publish to apply your changes and make the terms of service visible site-wide.
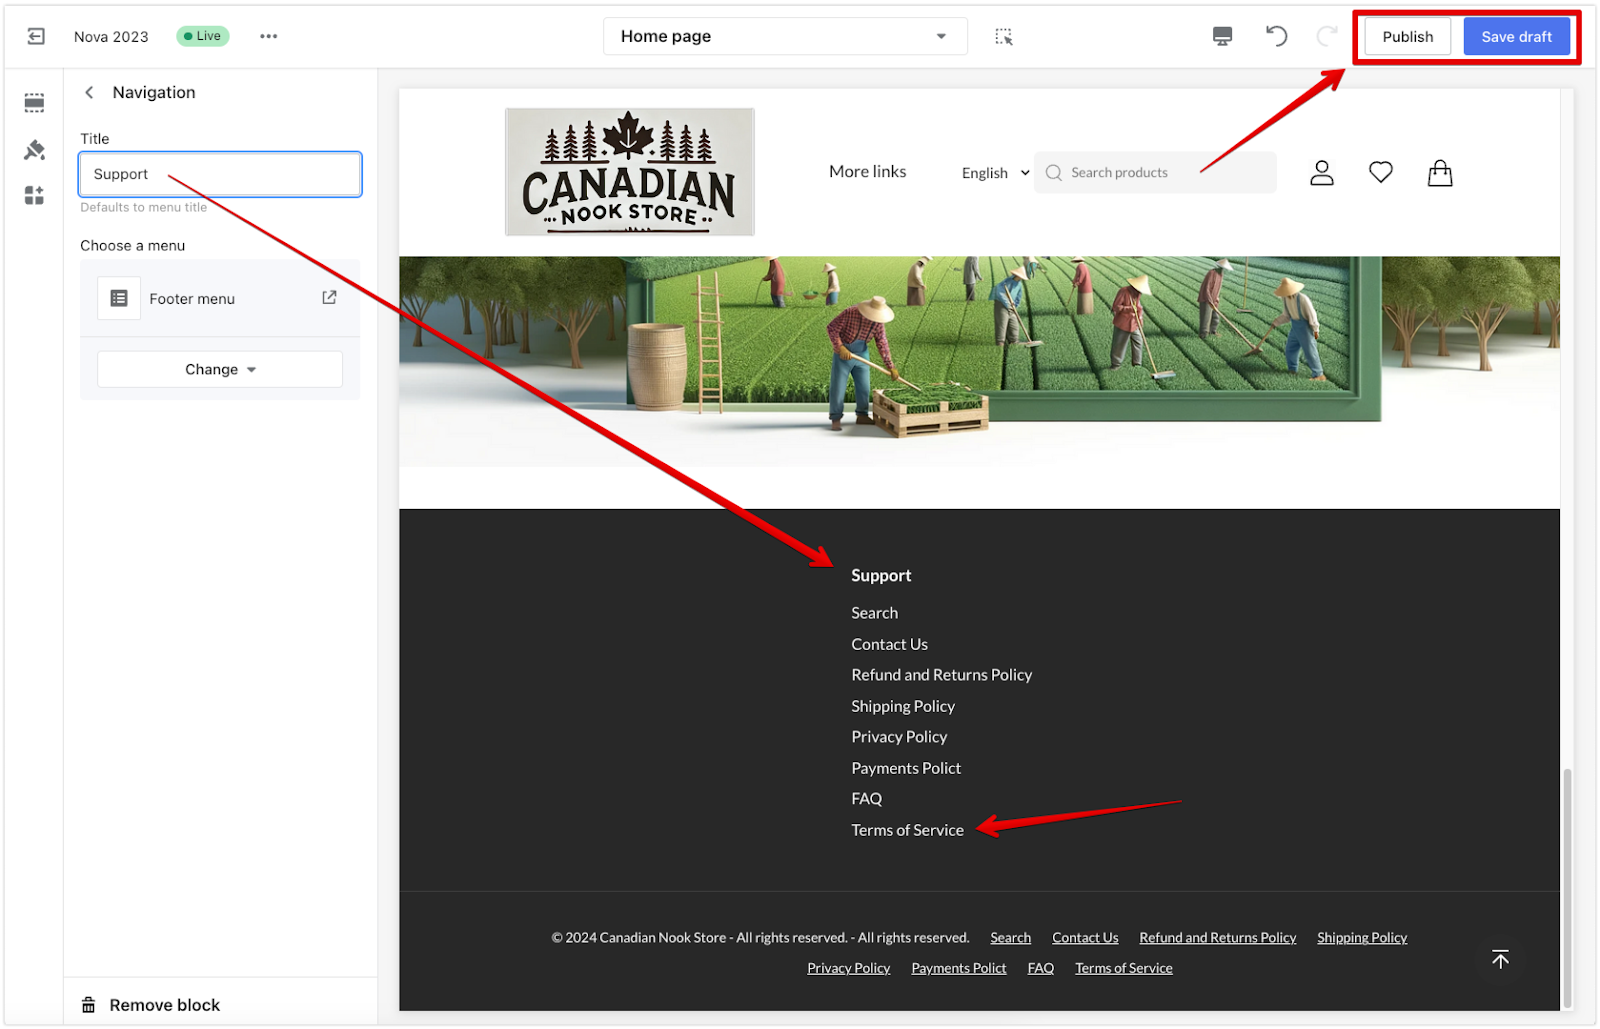
Creating a well-organized footer makes it easier for customers to find key information, improving their browsing experience. By setting up a clear navigation menu, you’re making your store more user-friendly and accessible, ensuring customers have everything they need right at their fingertips.


Comments
Please sign in to leave a comment.