
The coupon feature in your admin is your key to offering customer discounts that drive sales. When they receive a coupon, customers can easily apply it during checkout, streamlining purchases.
Craft different coupons for various discounts or spending levels, and target specific customer groups. Customize the coupon style for a cohesive brand experience that further entices customers.
Setting up a coupon activity
1. Start the process: Head over to your Shoplazza Admin > Marketing > Coupons and click on the New activity button.

2. Configure activity options: To set up your coupon's activity, start by configuring the rules for the coupon. You can set the coupon's basic information, including the name and the duration of the campaign.
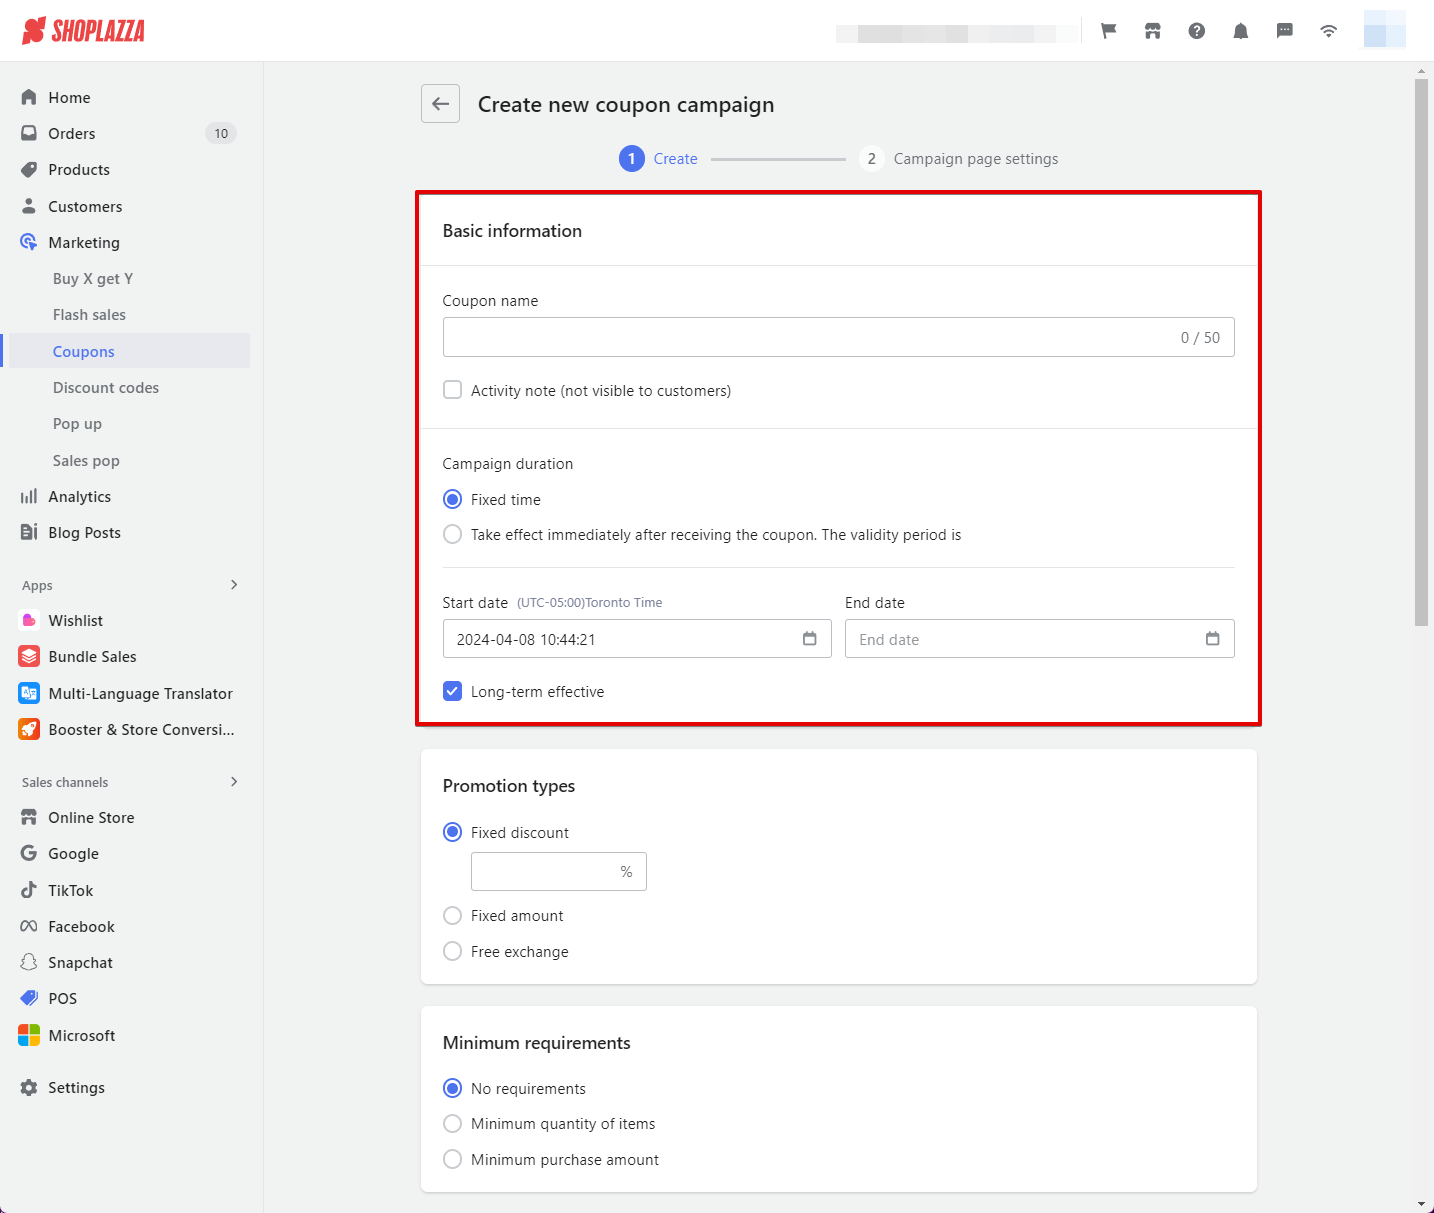
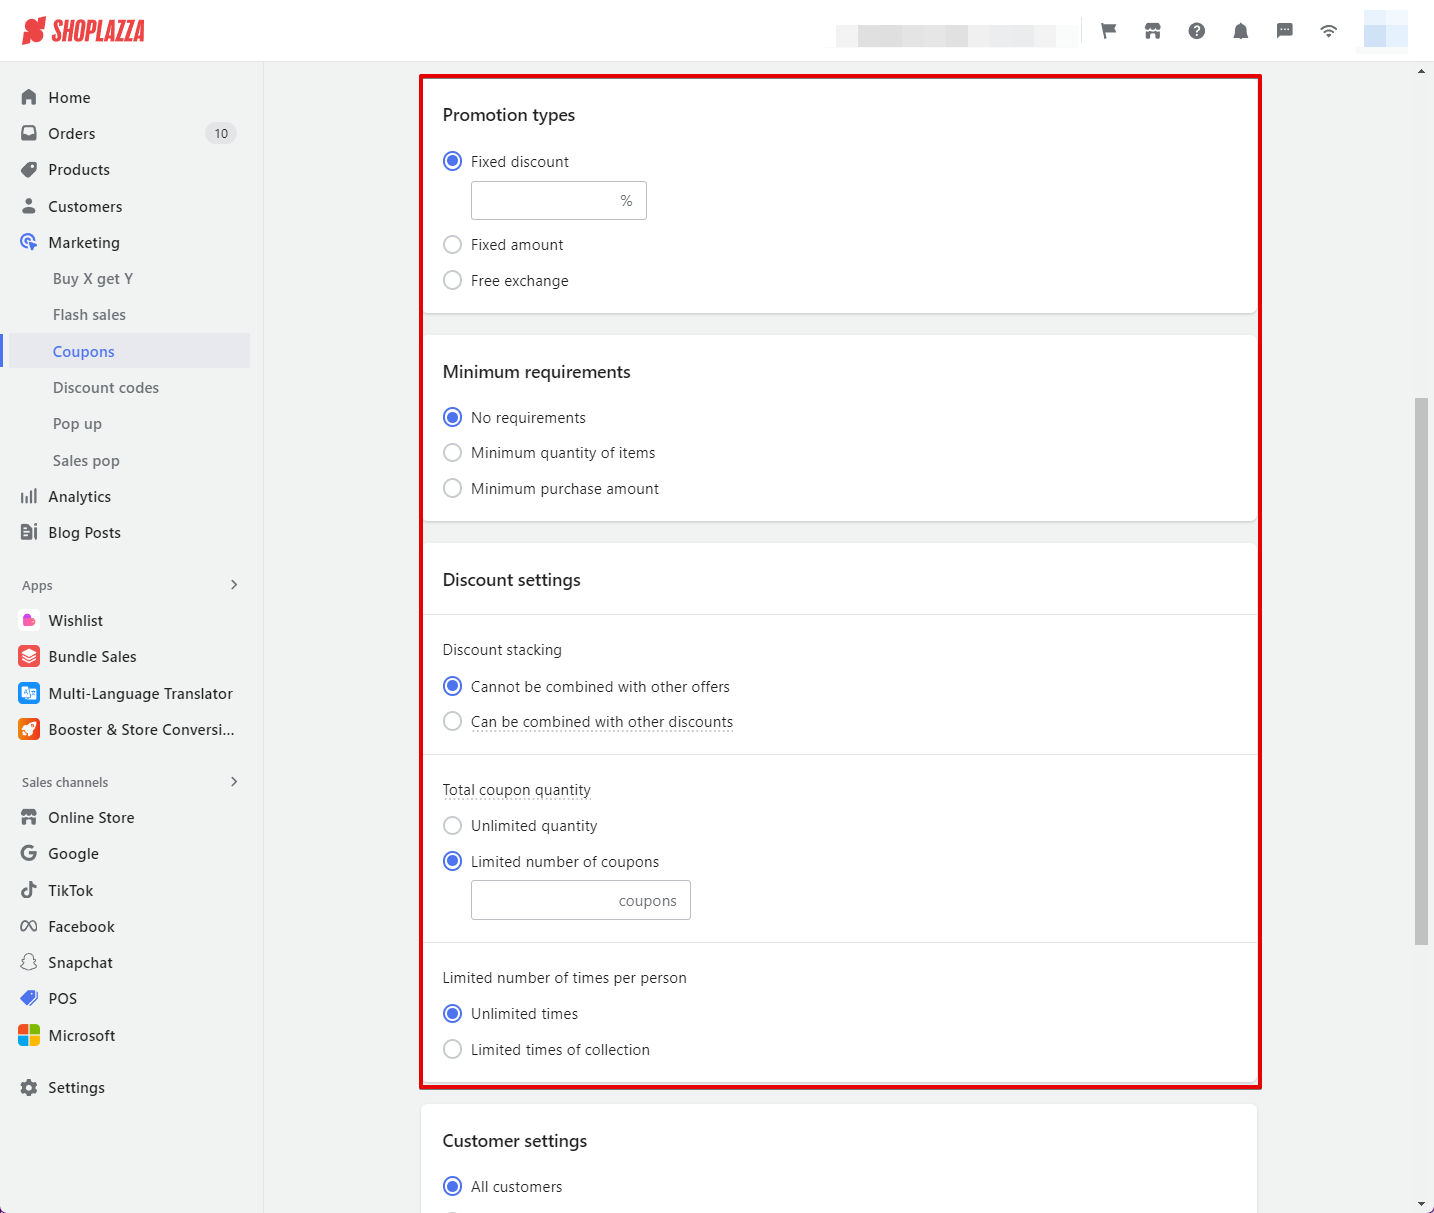
3. Select the discount types, requirements and settings: Select whether the coupon is for a fixed discount, fixed price, or free exchange. Set the minimum requirements for the coupon to be active and whether it can be used in combination with other marketing coupons.
Note
Free exchange in promotion types: This option lets you create coupons where customers can exchange designated products for free, encouraging them to explore your offerings and potentially spend more. You can send free exchange coupons to targeted customer groups. For example, a clothing company can offer a free exchange coupon for any t-shirt, enticing new customers to try their product. Or, you could create a coupon that allows customers to exchange a product (priced at $2.50 USD) for free with a minimum purchase of $10 USD, increasing the average order value.
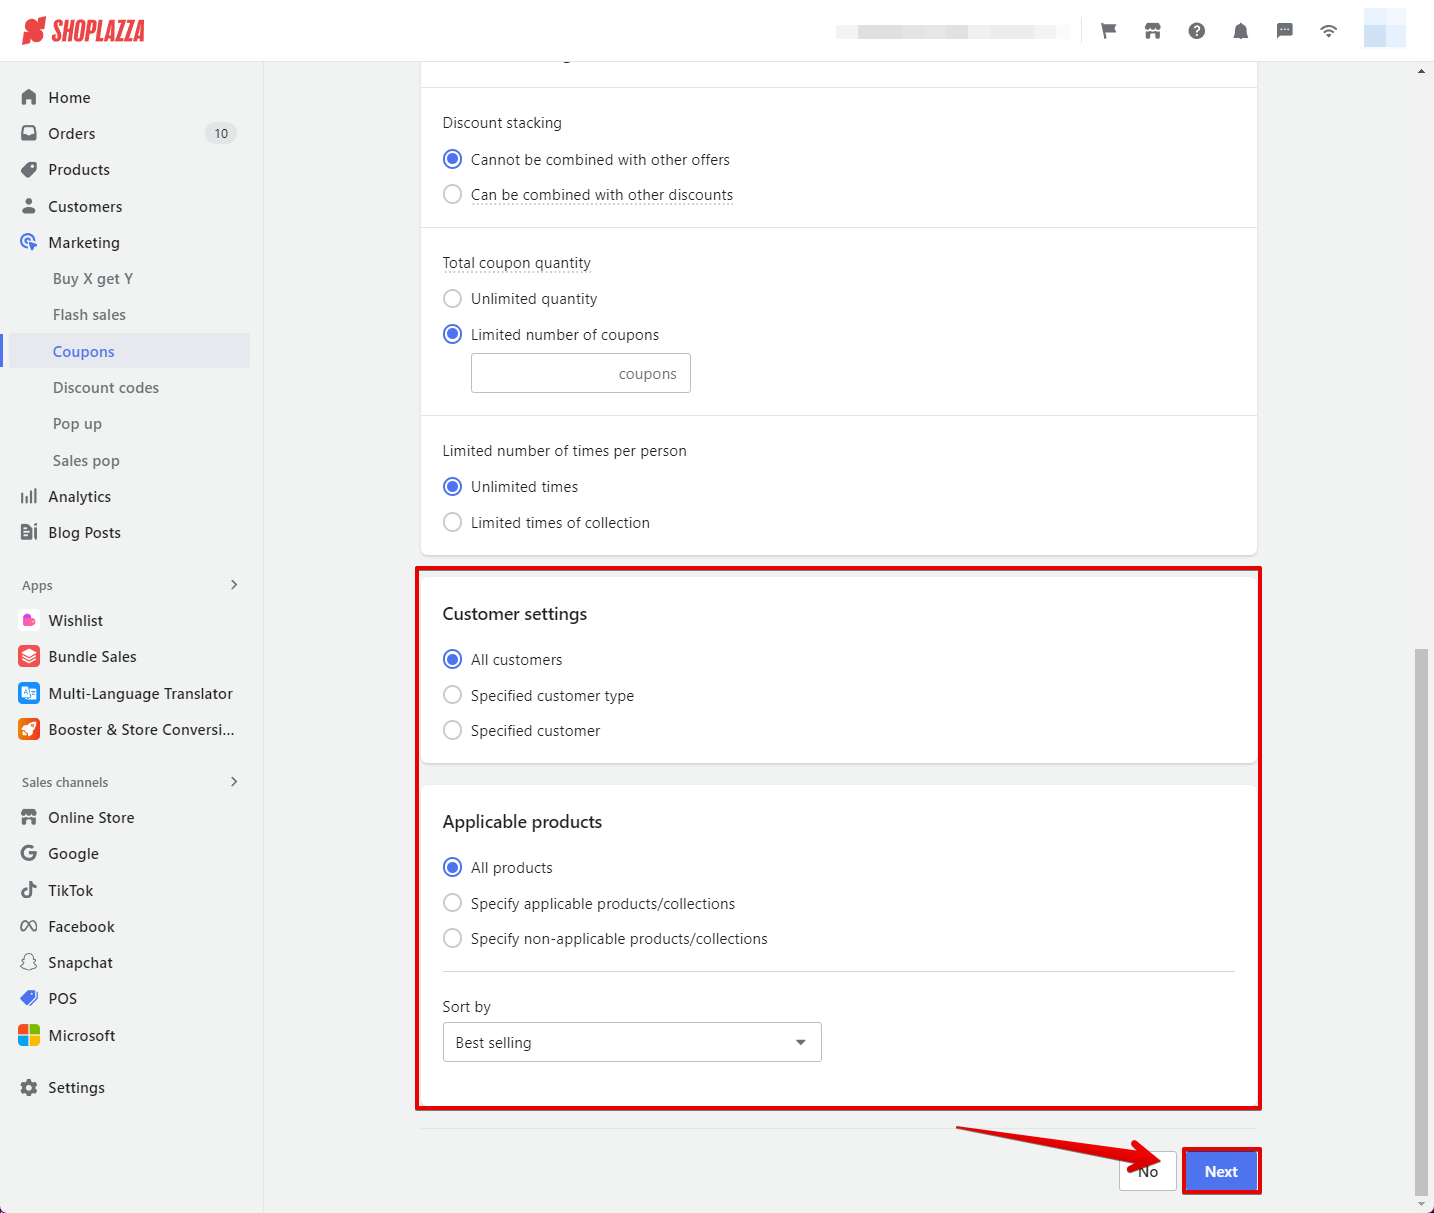
4. Customer settings and applicable products: Decide on how the activity will be applied to your customers by choosing all, specified customer type or a certain customer. For this last part, set the scope of the coupon on which this would apply to, which can be all products or specific products / albums that can or can not use the coupon. Click Next to proceed to configure how your coupon activity is displayed.
Note
When choosing the Specific customer segments option, you can choose from registered, subscribed, unpurchased, or purchased customers. Keep in mind that when selecting multiple customer types, your customers must meet all selected criteria to redeem the coupon.
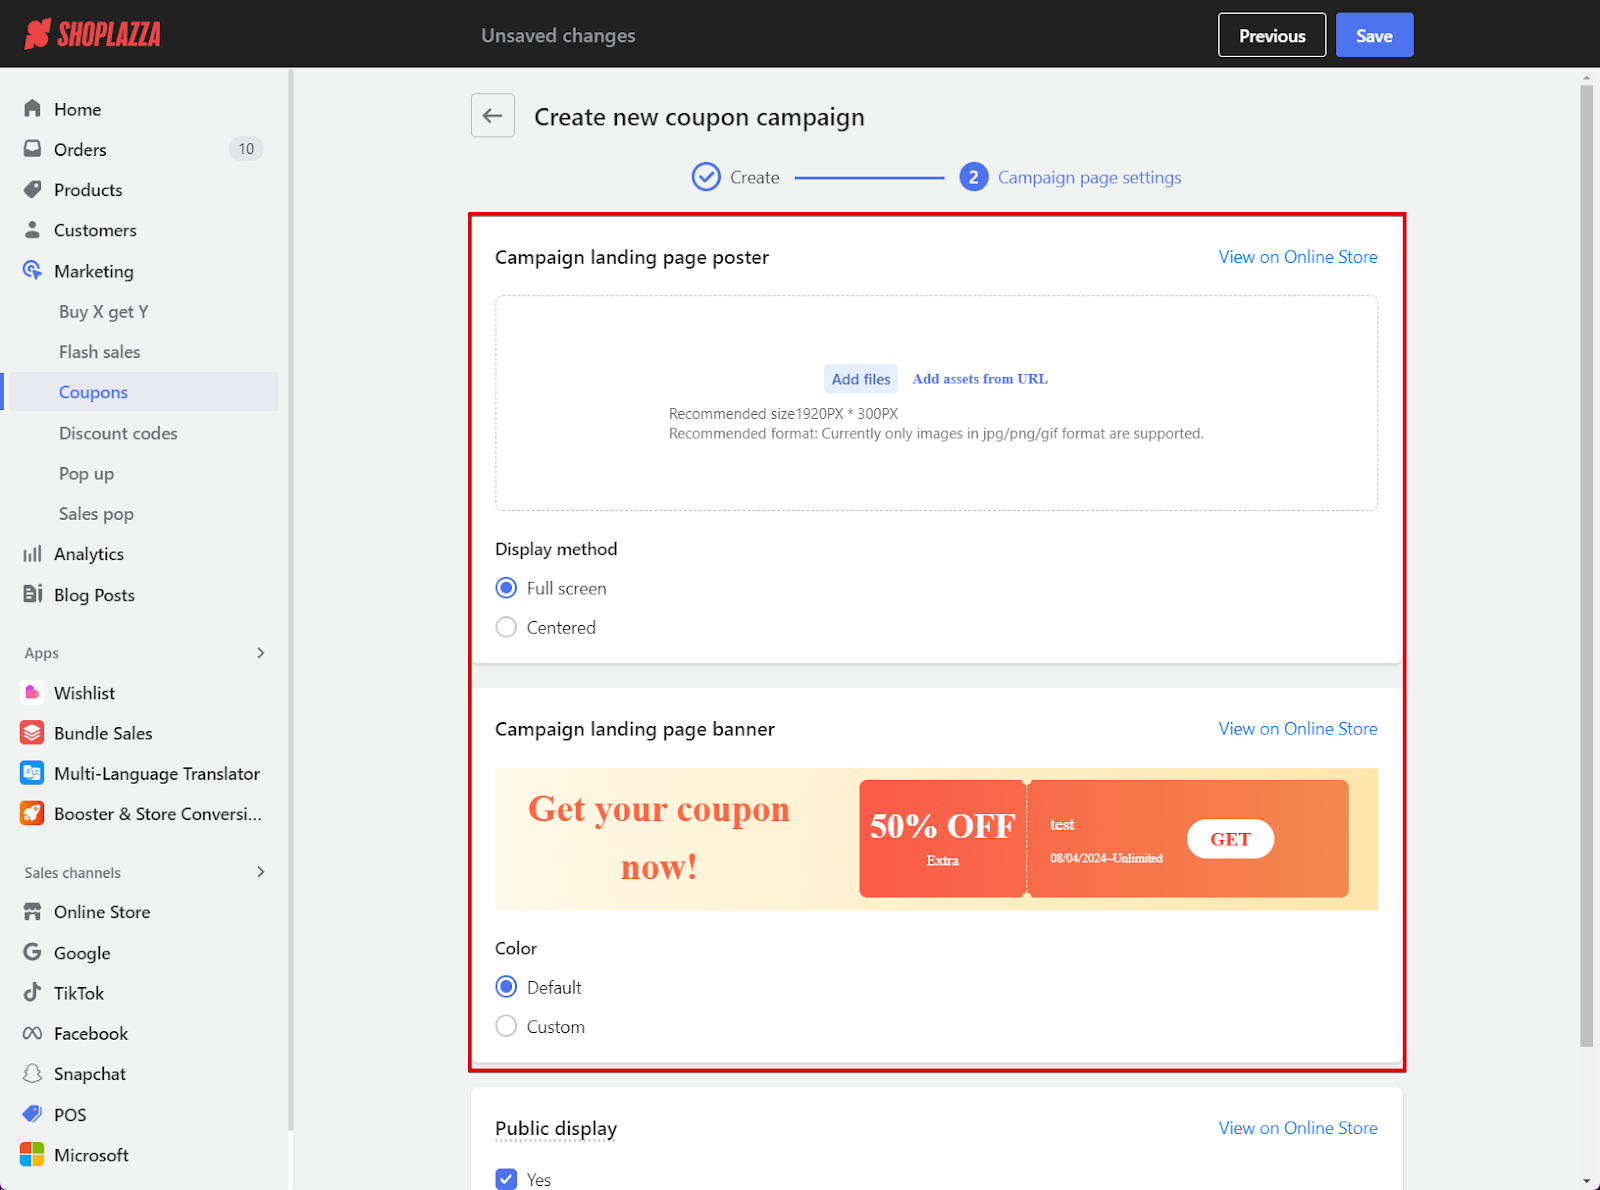
5. Design your campaign's display: Set up the landing page for your coupon campaign promotion.
- Campaign poster (optional)
- You have the option to upload a personalized poster image that will be displayed. Alternatively, leaving this blank will not show any poster.
- Campaign landing page banner
- Personalize your banner by selecting Custom and choosing your colors to reflect your brand. Alternatively, you can leave the default selection to use the default colors.
6. Display settings and finalizing your activity: Choose whether to display the coupon campaign--on the product details page or on the homepage of your store. Coupon cards must be configured on the home page and product details in the theme editor in order for the coupon to appear. Click Save to finalize.

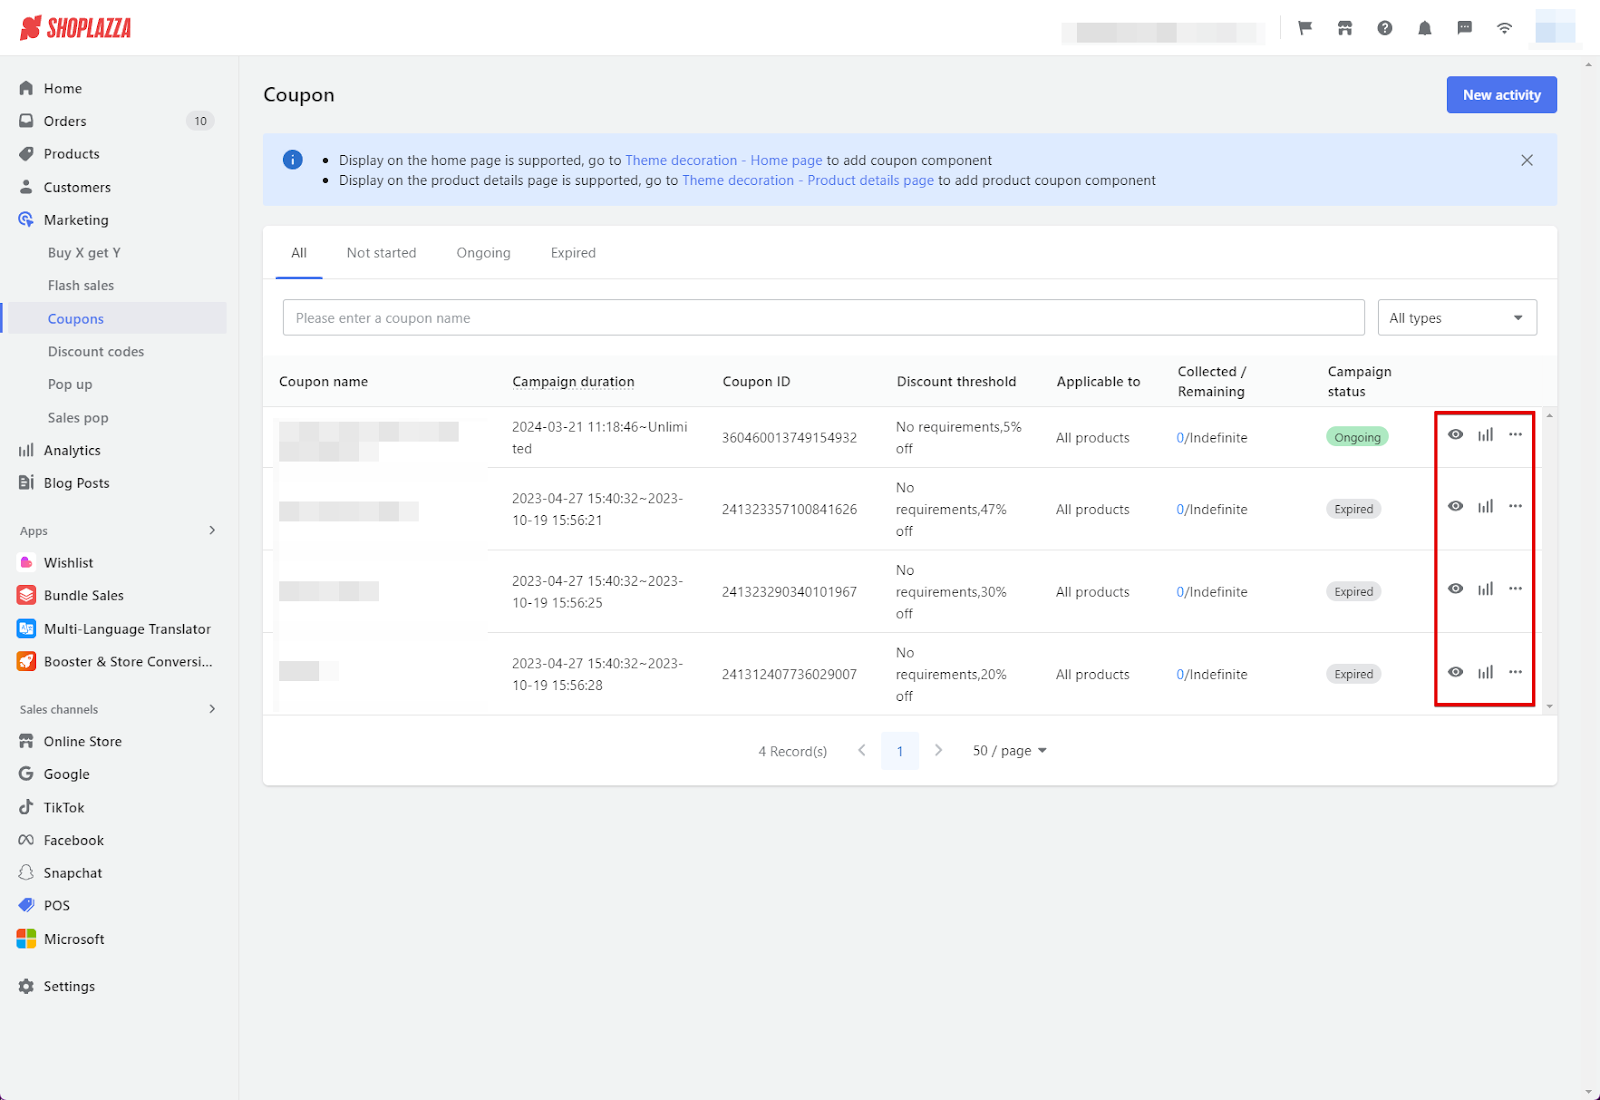
7. Coupons overview: Once you have created your coupon activity, you will be redirected to the main page of your Coupons section where you can see your newly created campaign. From there, you can preview the campaign, view the data breakdown of the campaign or terminate the campaign early. To share with your customers, copy and paste the URL link.
Note
If you end the coupon campaign early, customers will no longer be able to redeem the coupon, but those who already have received it can still use the coupon.
Configuring the style of your coupons
Configuring your coupon style is an essential aspect of your website's brand design, as it allows you to customize the appearance of your coupons and attract more customers. By personalizing the look and feel of your coupons, you can create a stronger store image, improve your customer's experience, and ultimately increase sales. Taking the time to configure your coupon style can have a significant impact on the success of your online store.
Adding a coupon to the Products page
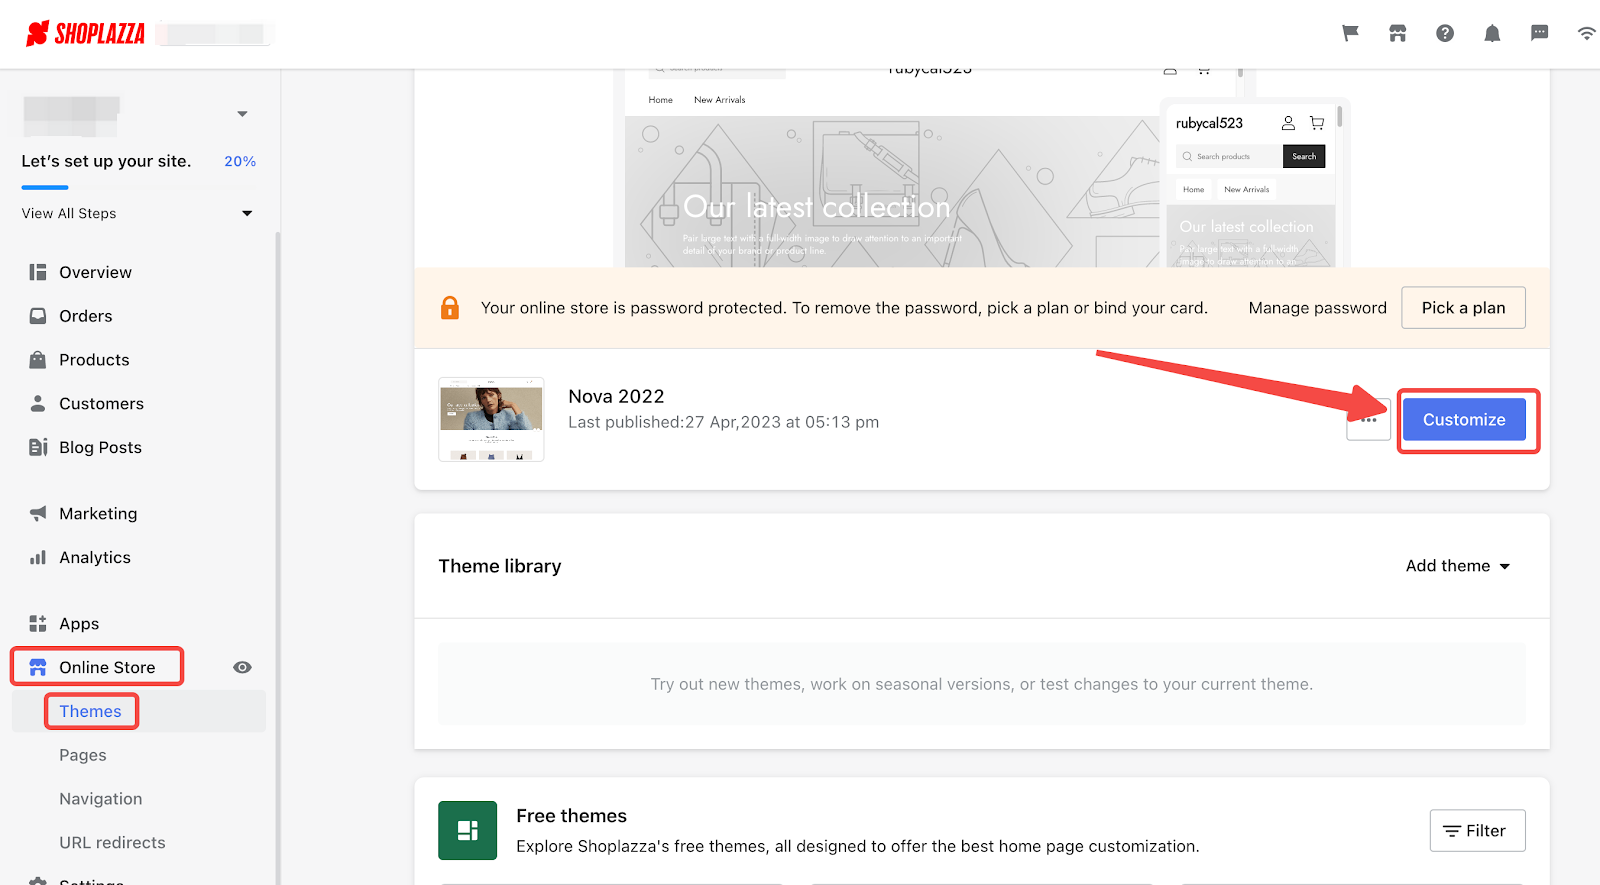
1. Access theme: From your Shoplazza Admin, go to Online store > Themes > and click the Customize button on the targeted theme.
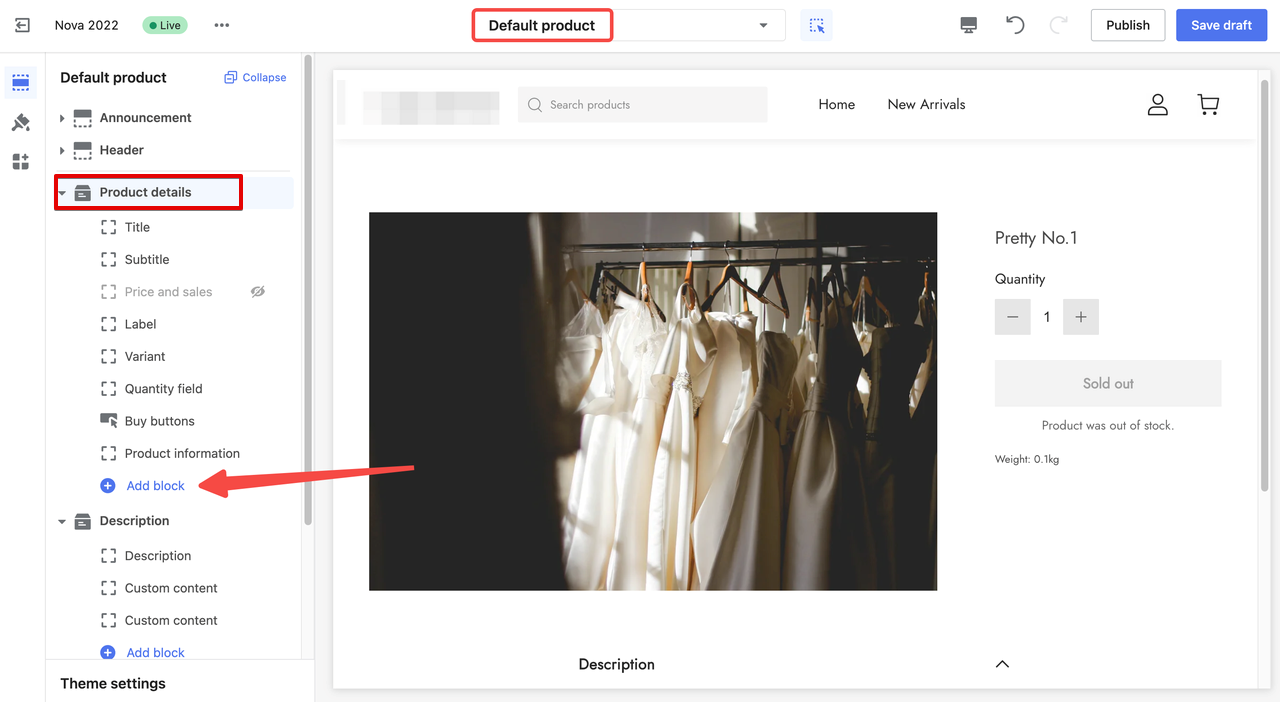
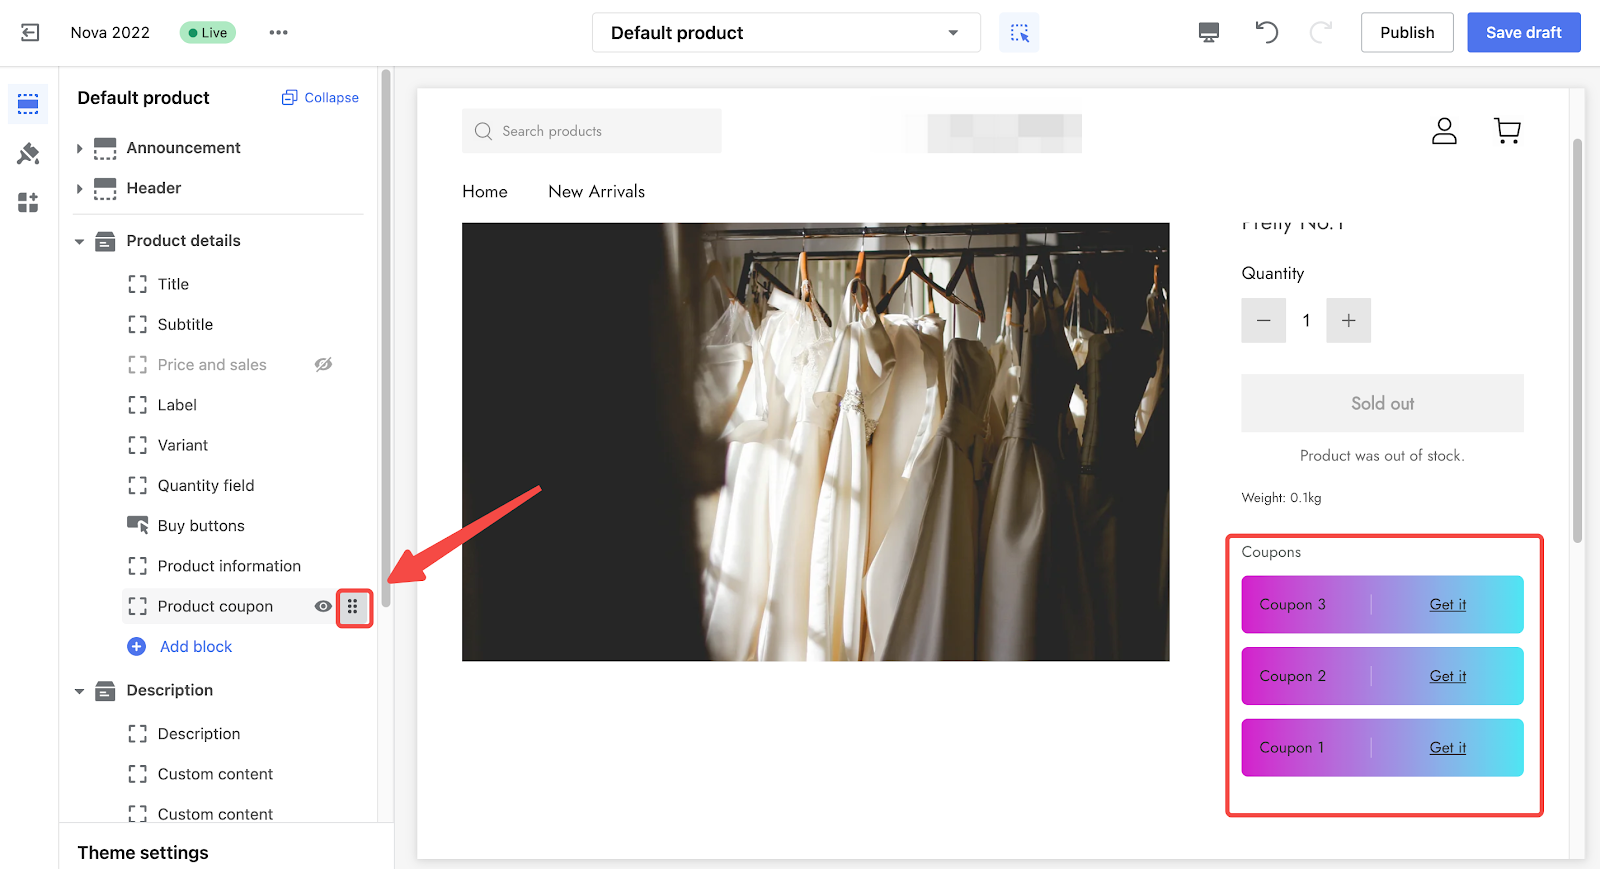
2. Access default product page: From the Homepage dropdown menu, select Products > Default product, and click Add block under Product details.
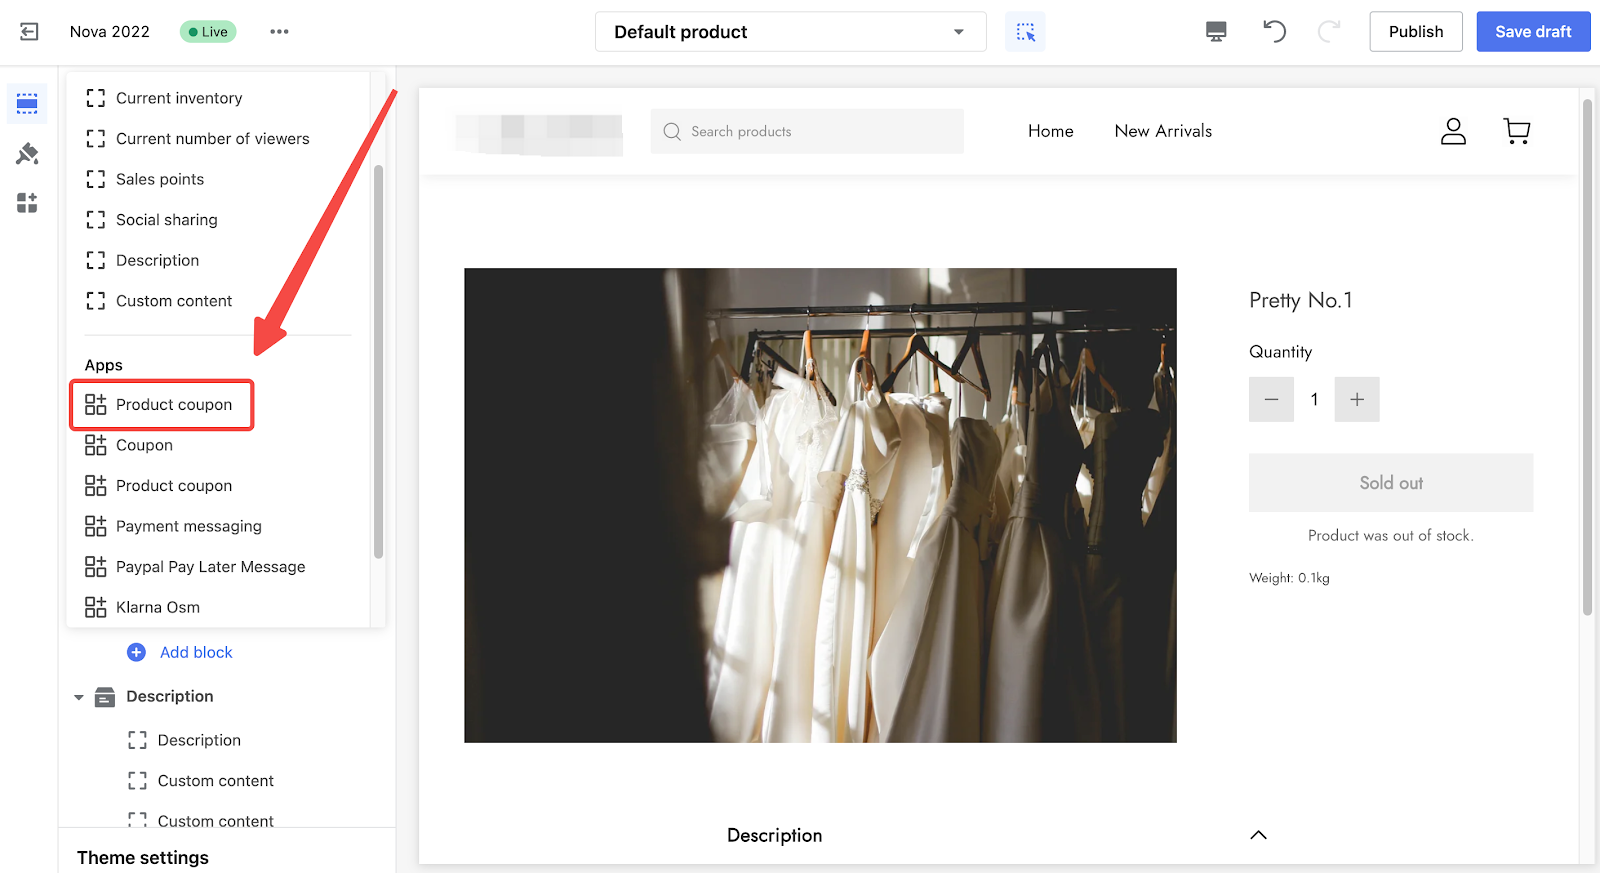
3. Locate Product coupon app: Select Product coupon from the list of Apps.
4. Reposition the coupons section: The Product coupon will be added to the default product page. To reposition the Products coupon section, use the Drag indicator to place it anywhere on the layout. You can also preview the changes live.
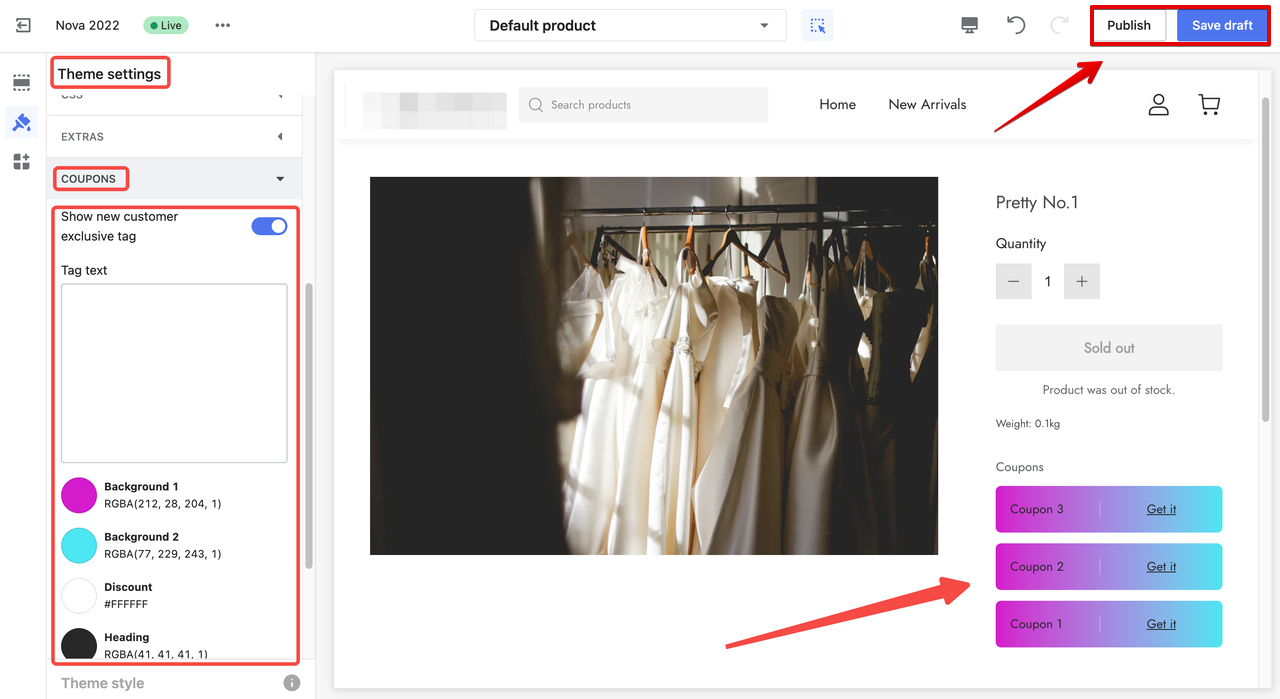
5. Configure the coupons section: Scroll to the bottom and click Theme settings. Select Coupons and enable the Show new customer exclusive tag, add Tag text, or edit the colors display. Click Save draft to save your changes or Publish to go live.
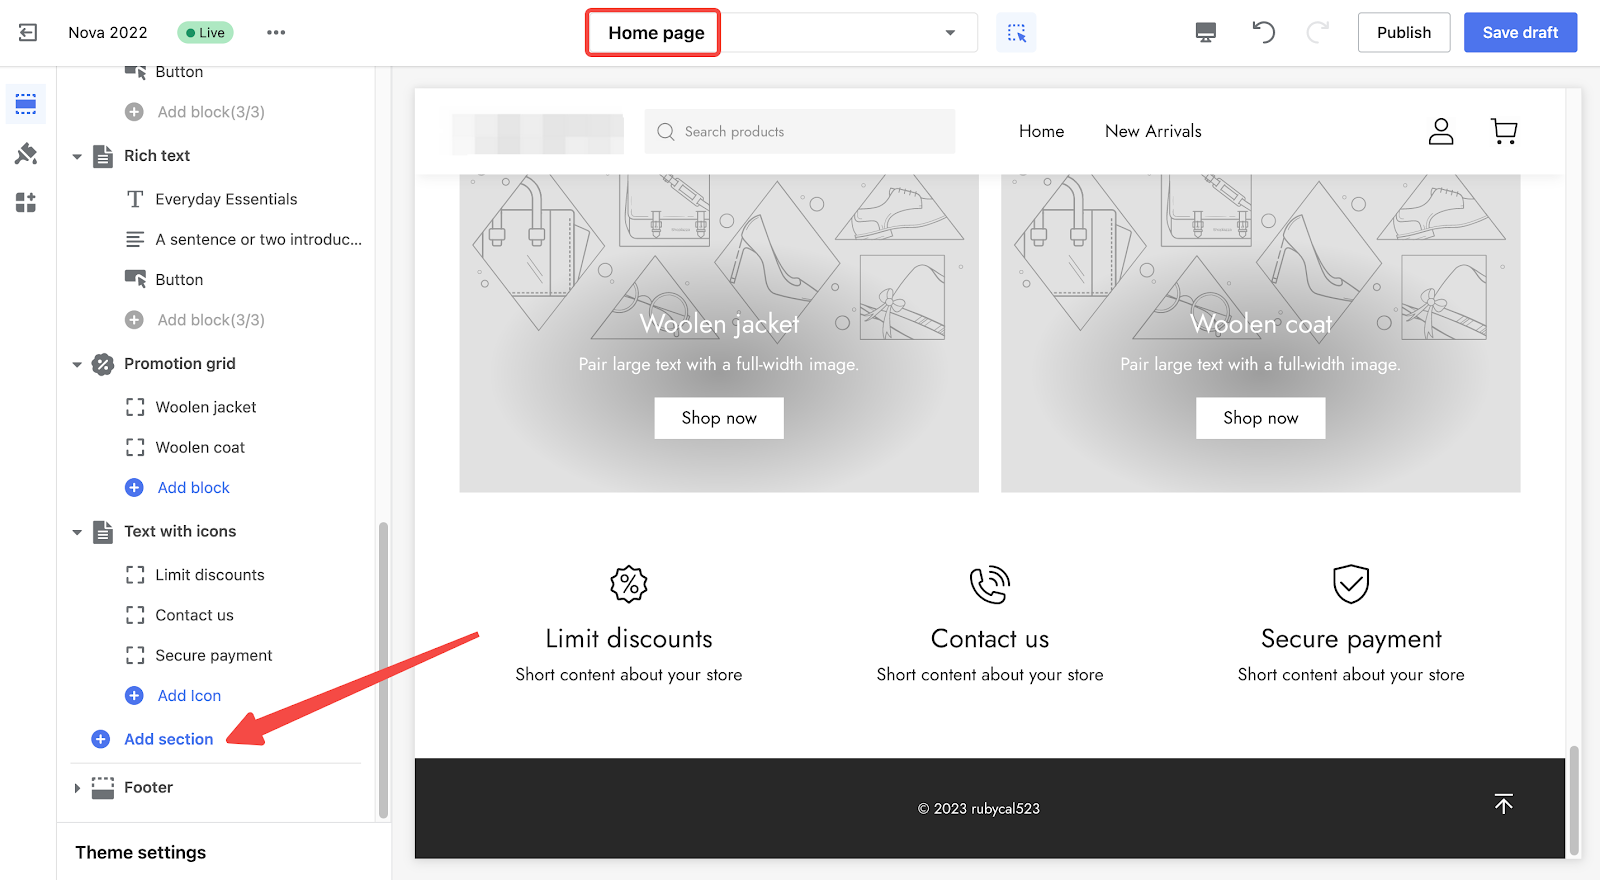
Adding a coupon to the Home Page
1. Add new section: From the dropdown menu, select Home page, and scroll down to click the Add section.
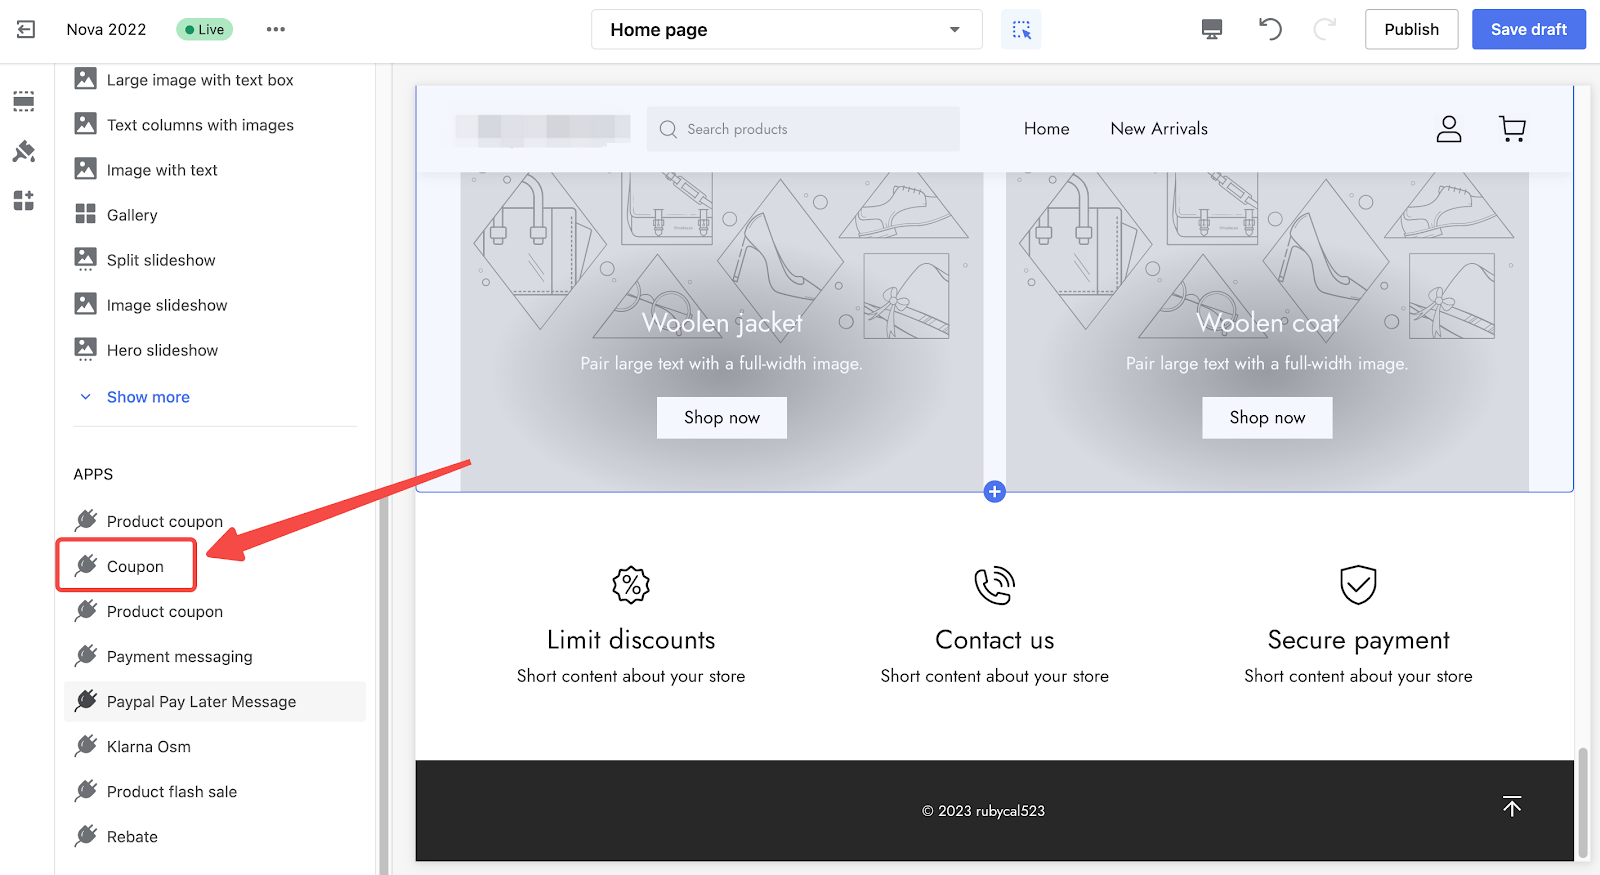
2. Locate Coupon app: Select Coupon from the list of Apps.
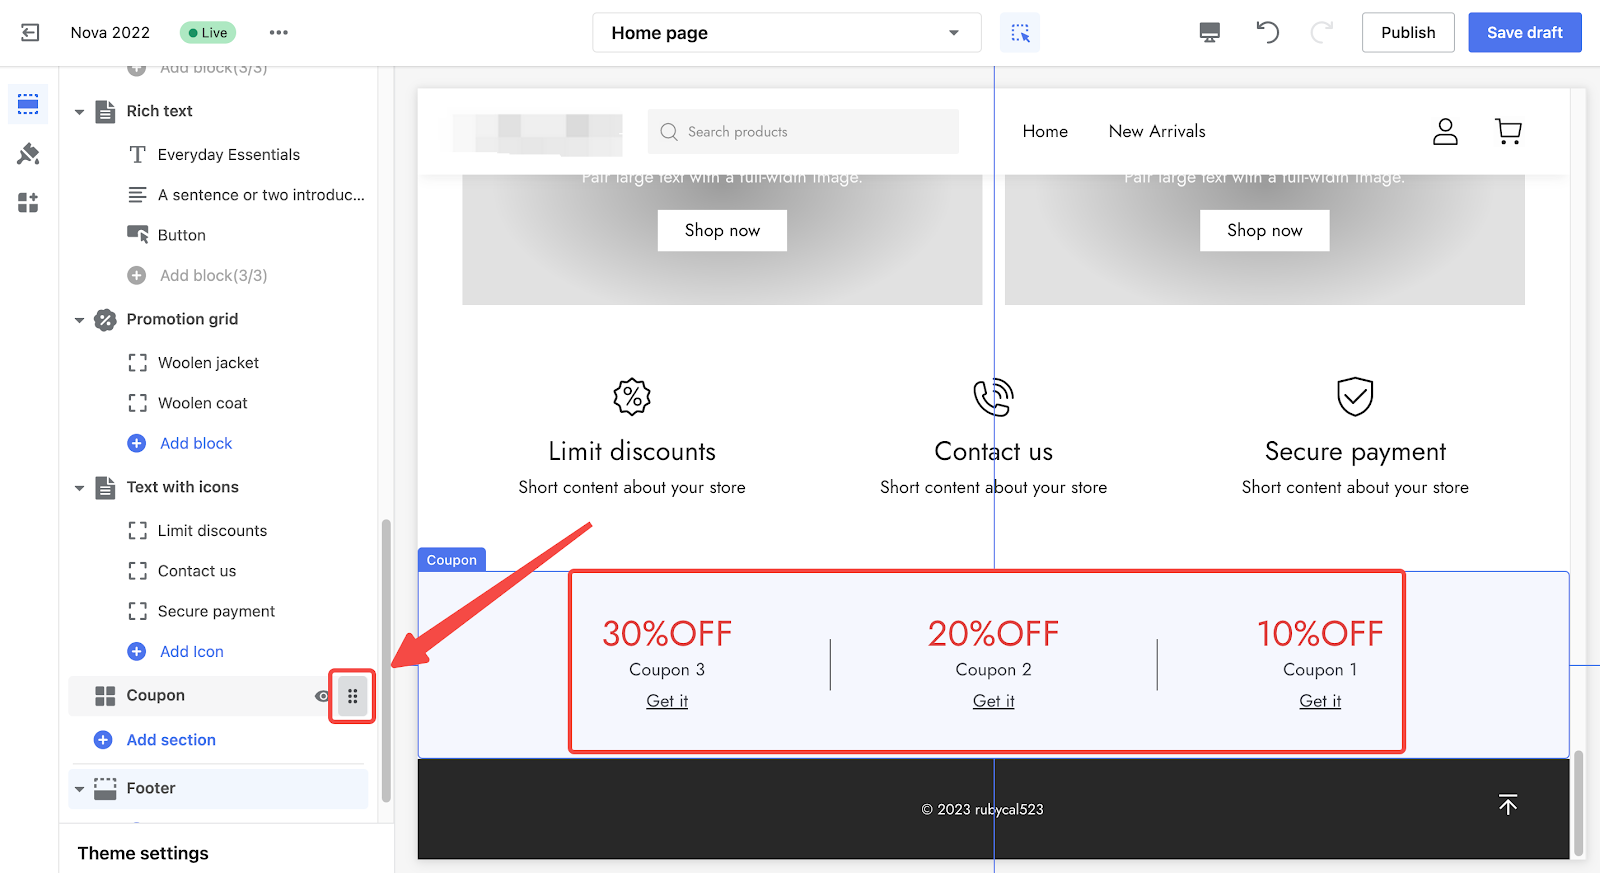
3. Reposition the coupons section: The Product coupon will be added to the default product page. To reposition the Products coupon section, use the Drag indicator to place it anywhere on the layout. You can also preview the changes live.
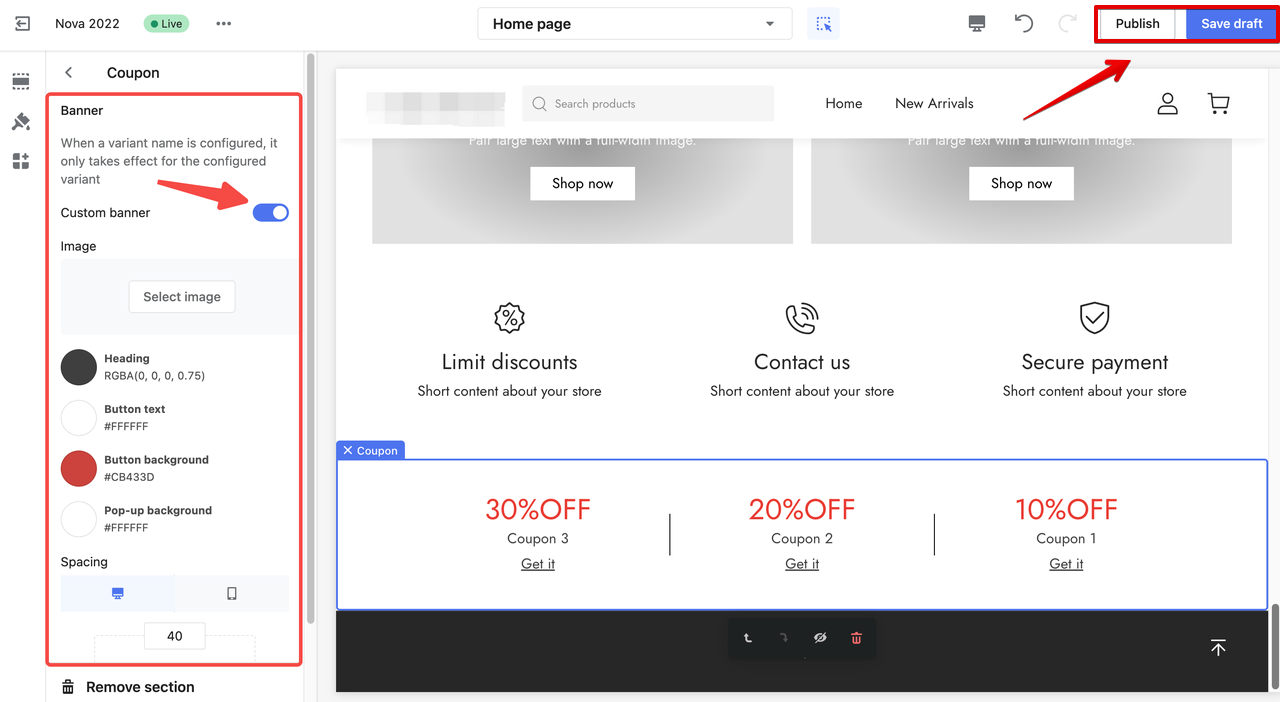
4. Configure the coupon section: Click on Coupon. Upload your own banner and enabling the Custom banner option will display your personalized image. Click Save draft to save your changes. Here you can enable the Custom banner option. Click Save draft to save your changes or Publish to go live.
Shoplazza's coupon feature is a powerful tool to attract customers and increase sales for your online store. By creating customized coupon campaigns and configuring coupon styles, you can improve the customer experience and create a strong brand image. With Shoplazza's easy-to-use interface, creating and managing coupon campaigns is now easier than ever.


Comments
Please sign in to leave a comment.