Countdown timers are a great way to create a sense of urgency and encourage customers to make a purchase. The Countdown promotion section allows you to easily add this feature to your Shoplazza store. It helps you highlight limited-time offers like sales on past collections and remaining inventory, generate excitement for new products, and potentially increase sales overall.
Getting Started
Adding a countdown timer to your store is straightforward.
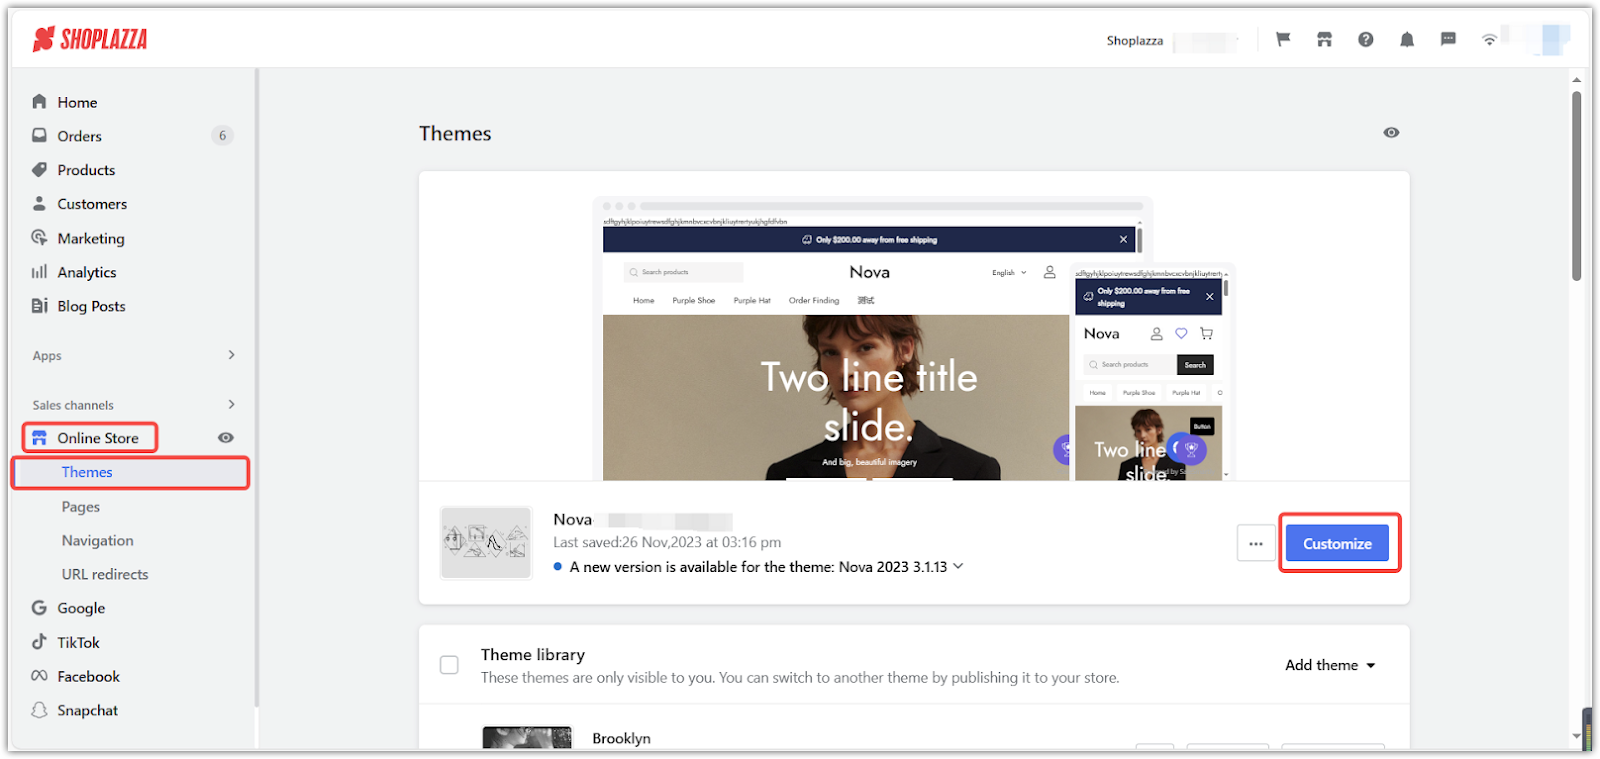
1. Access the theme editor: In your Shoplazza Admin, go to Online store > Themes. Next to your theme, click Customize.
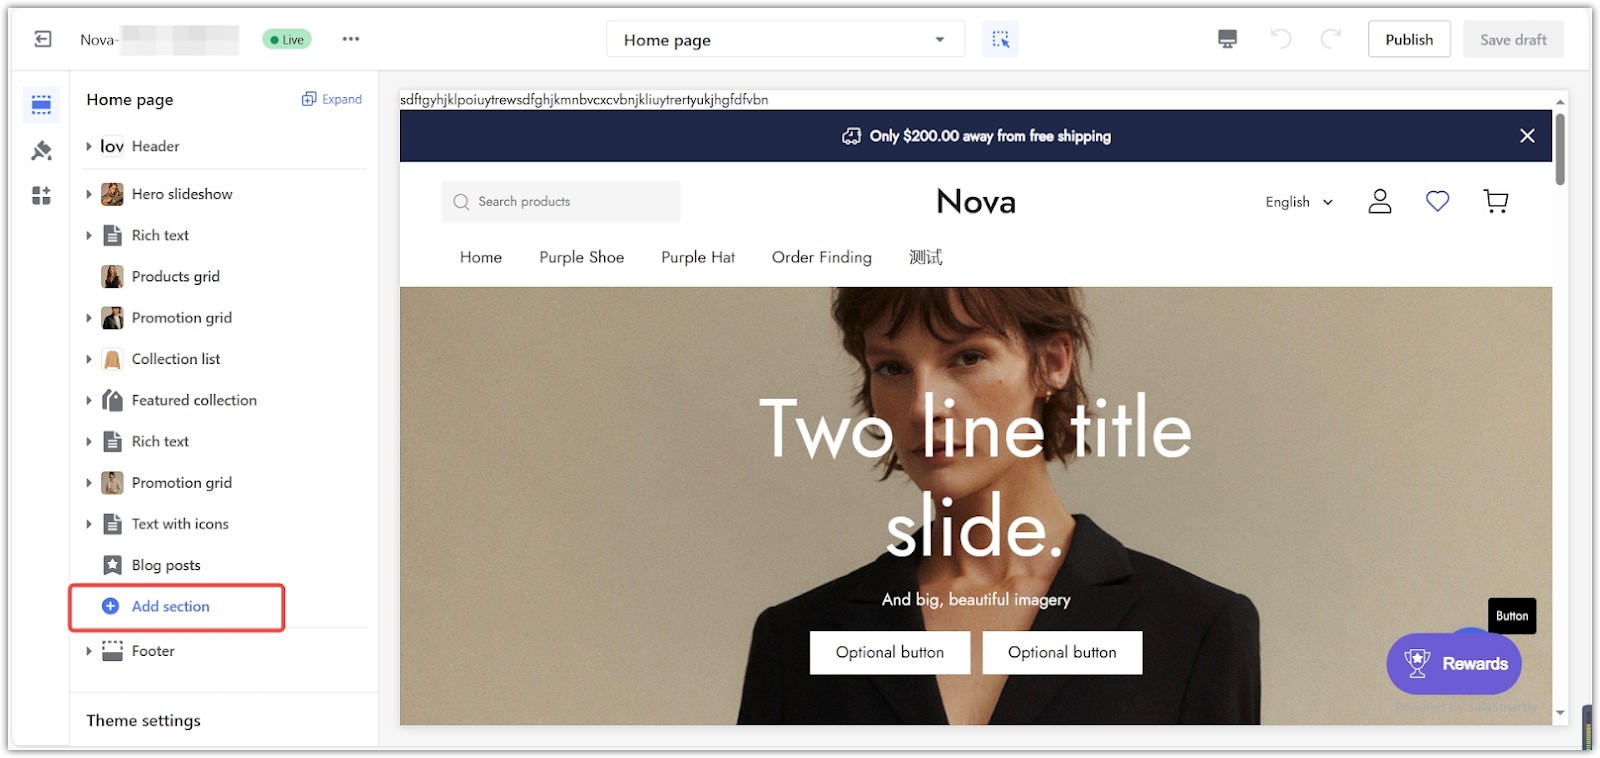
2. Add section: Click Add section.
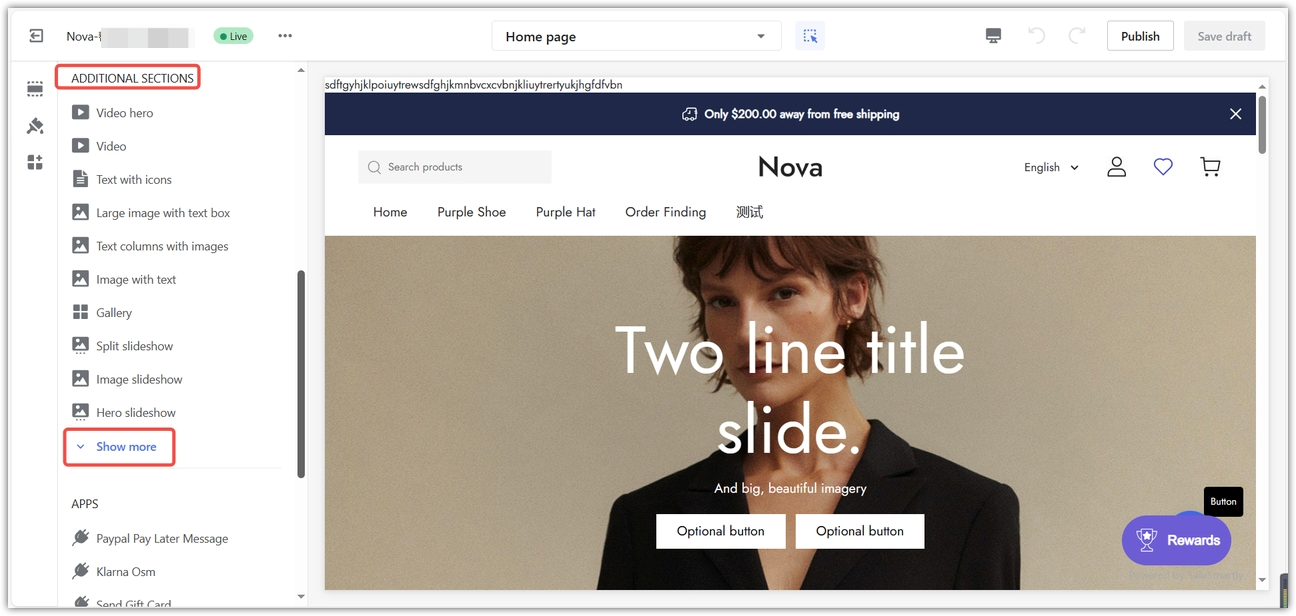
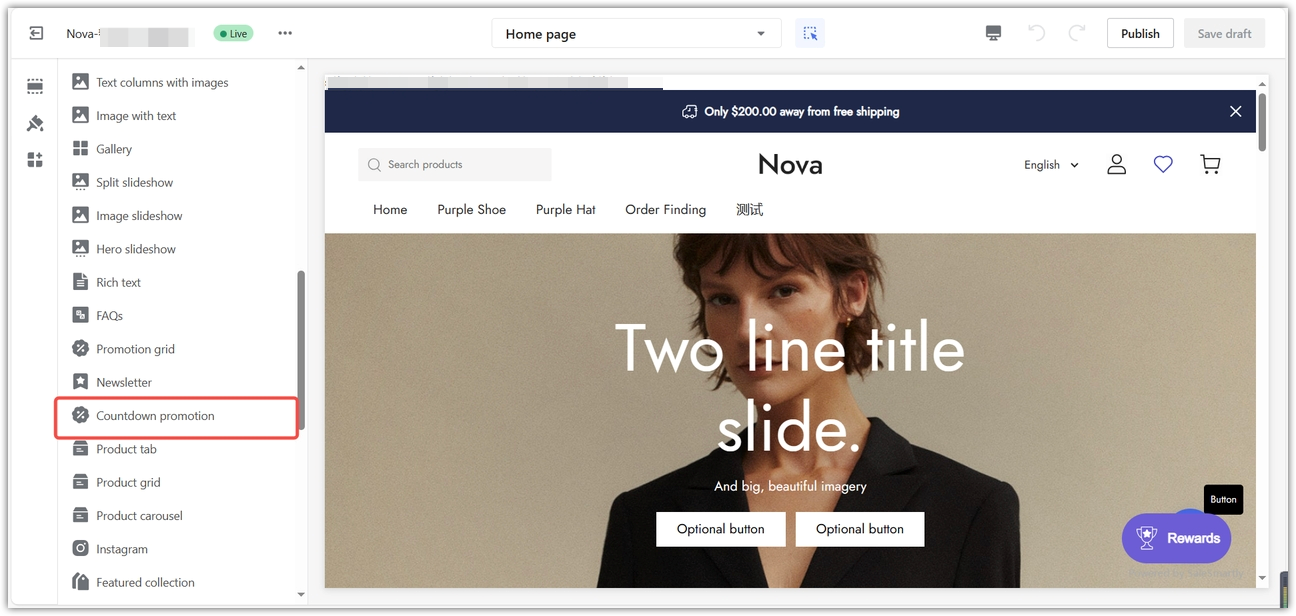
3. Find the countdown promotion: Under Additional sections, click Show more to find the Countdown promotion block.
Showcasing your products
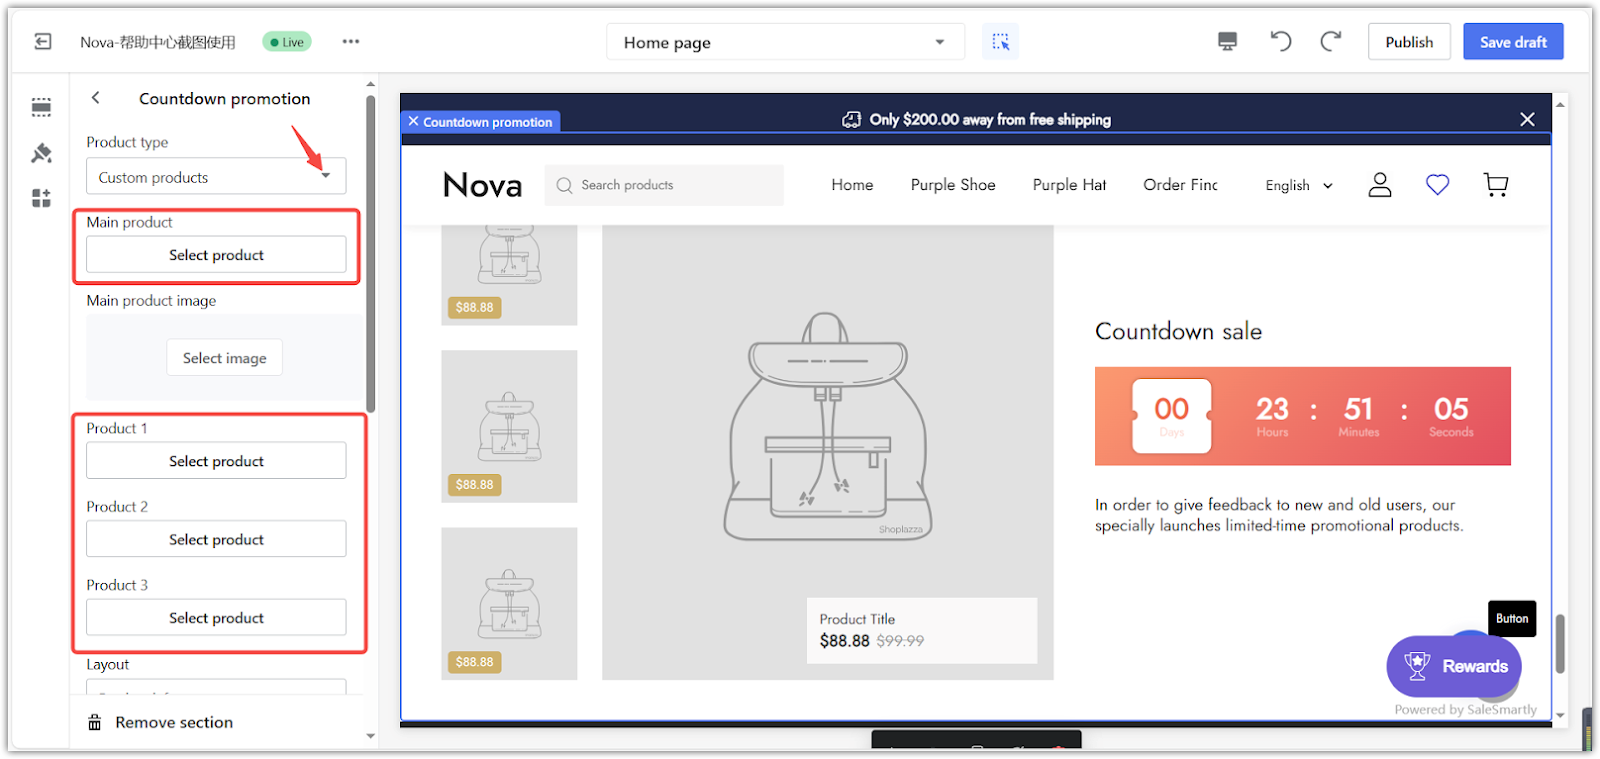
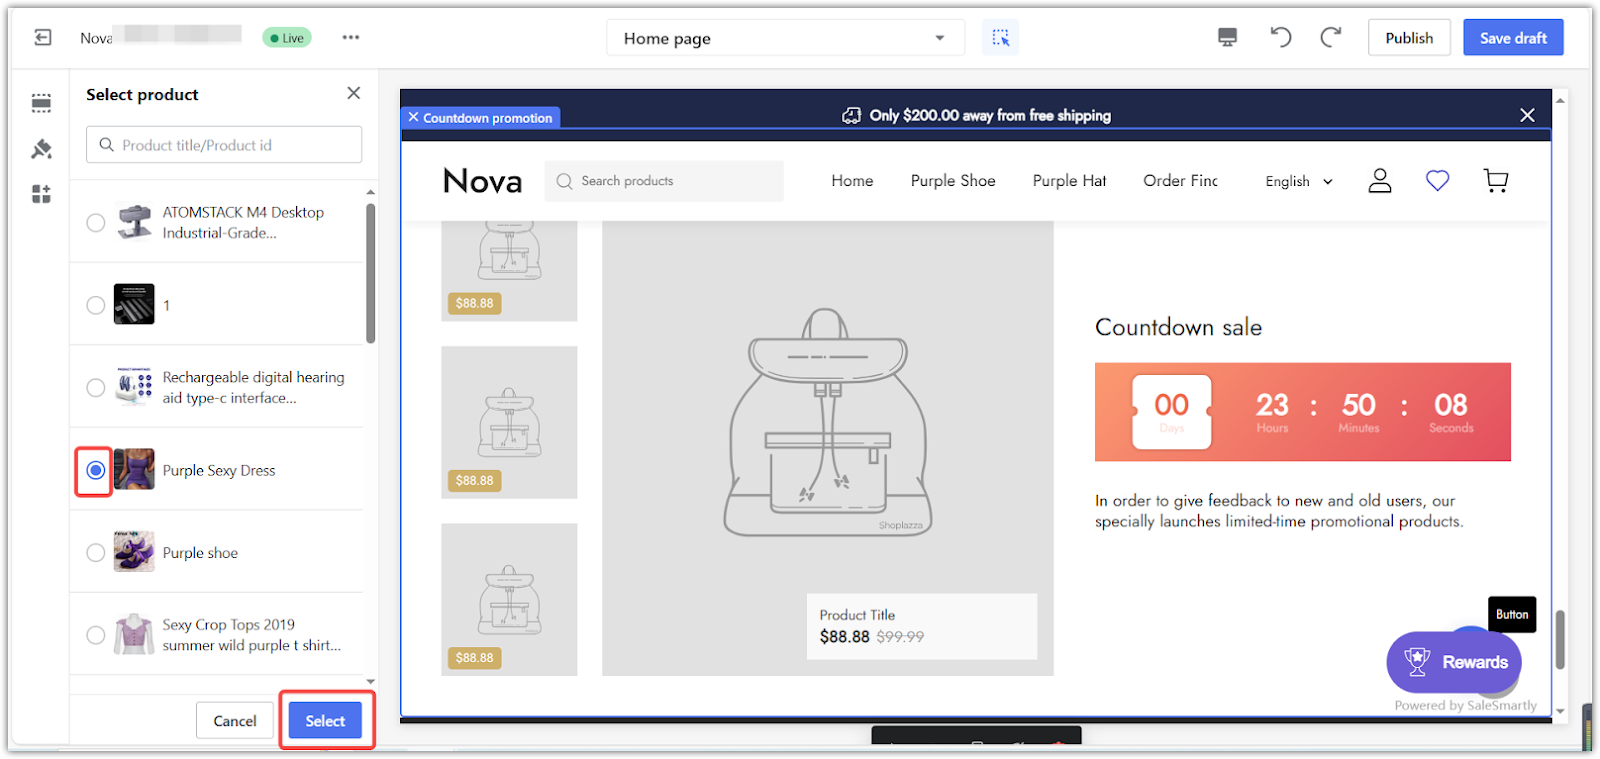
Once you've added the Countdown promotion section, you can select the products you want to feature. This allows you to focus attention on specific items or collections, potentially increasing visibility and sales.
1. Manage products: Click on the section's title.
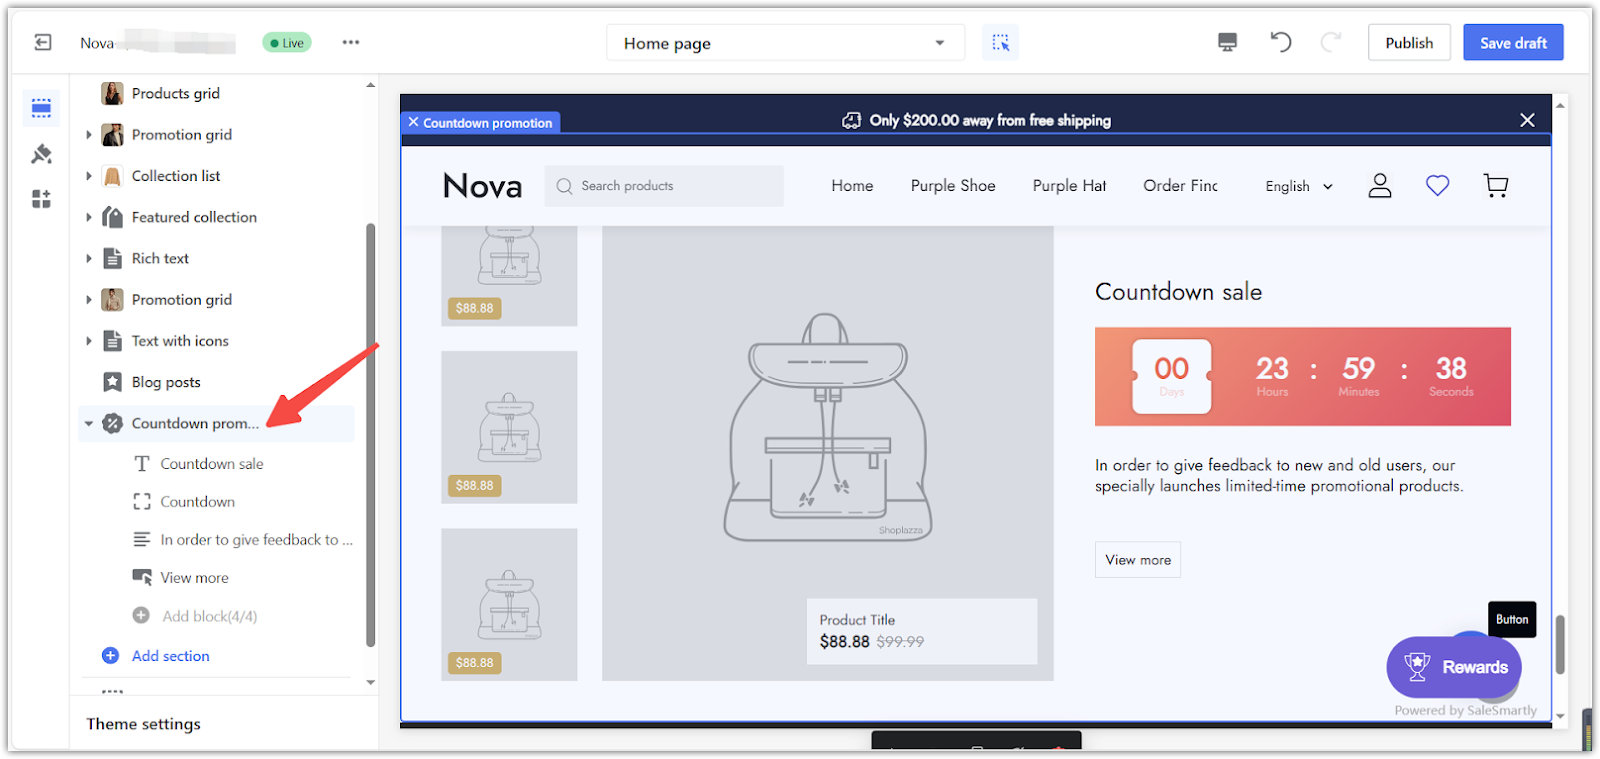
2. Choose product or collection: Choose between featuring a collection or a specific product.
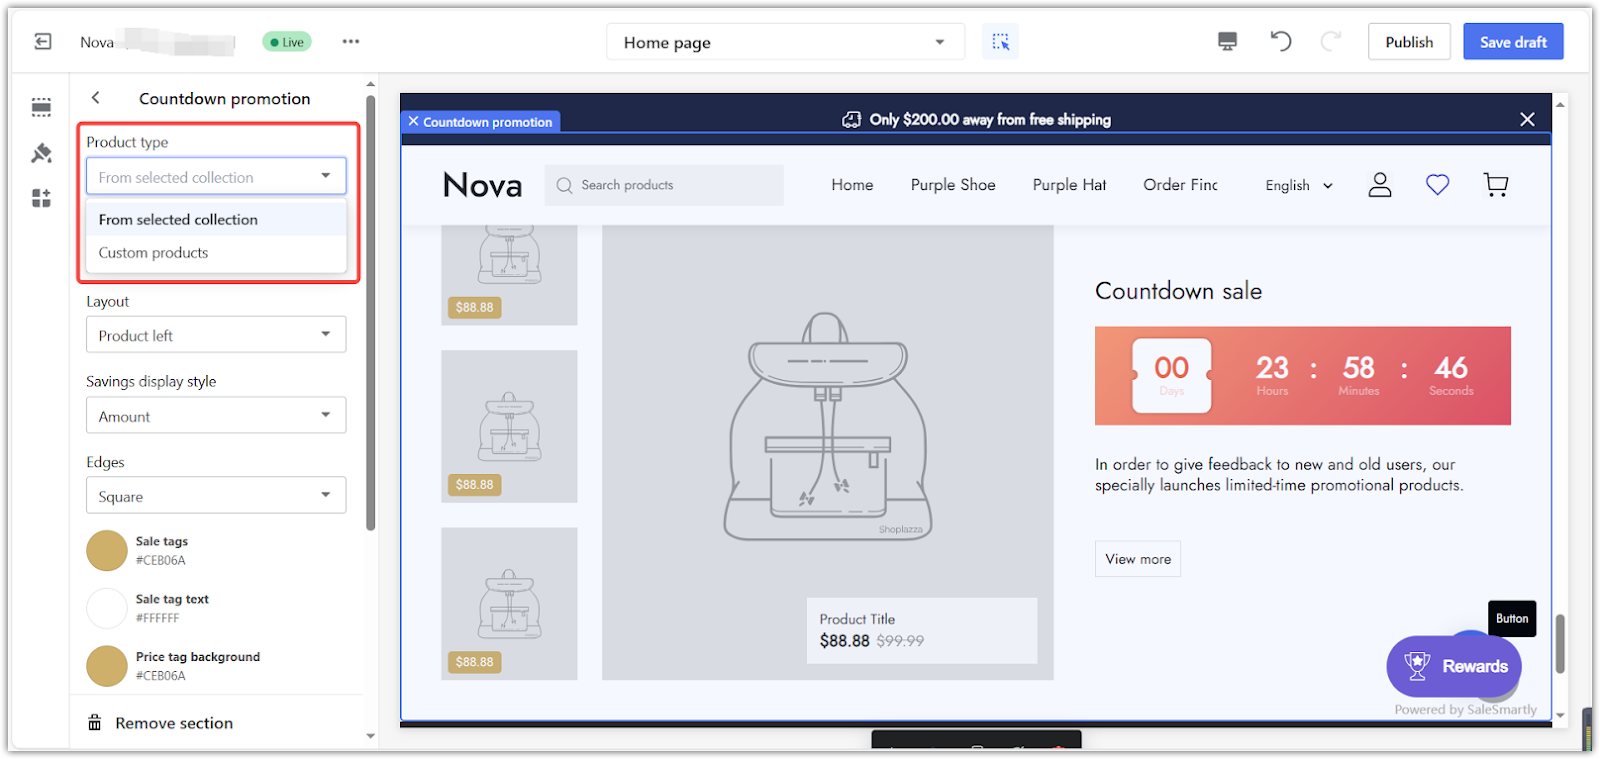
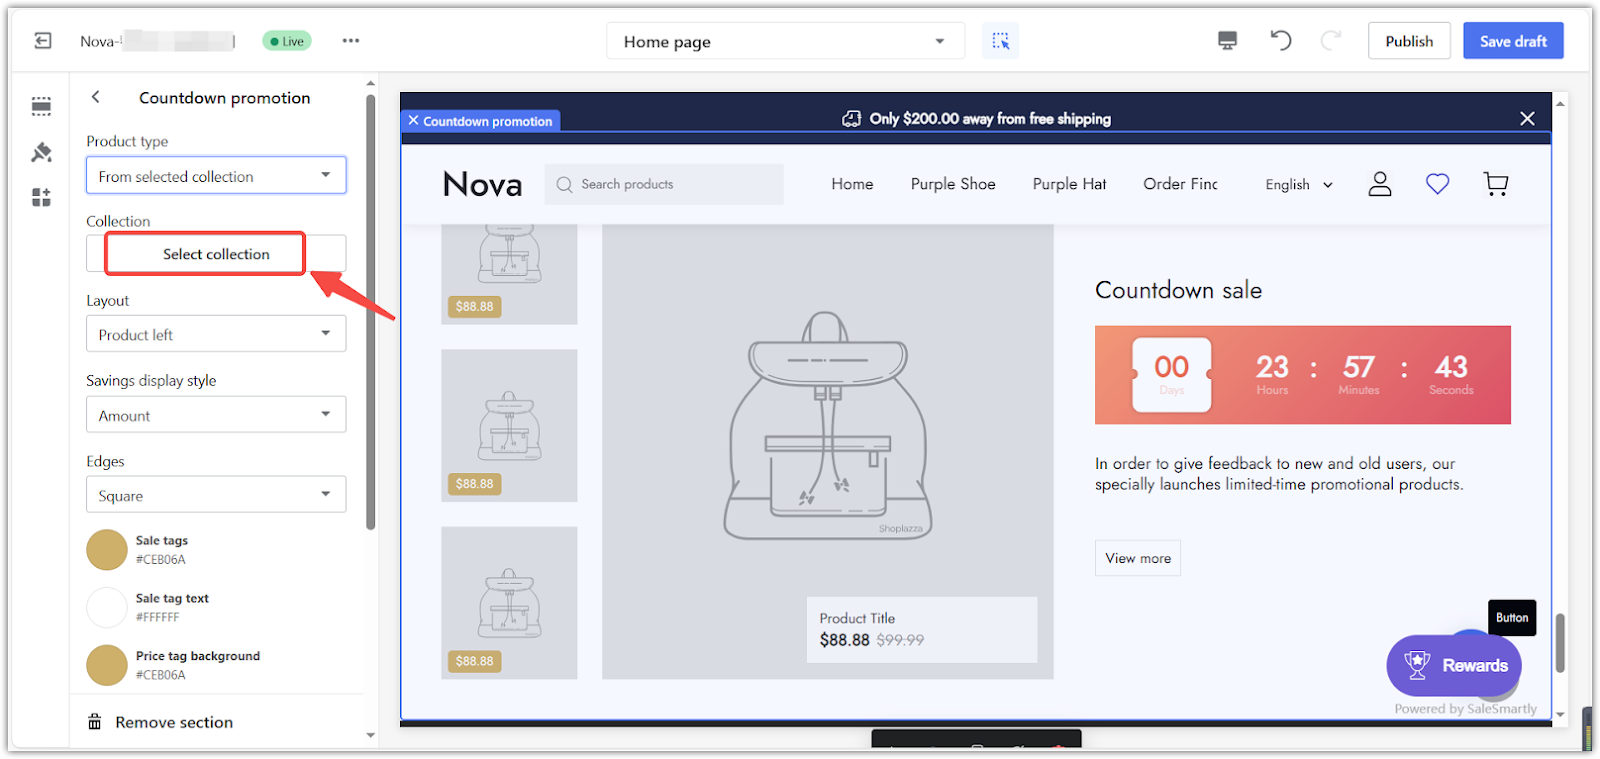
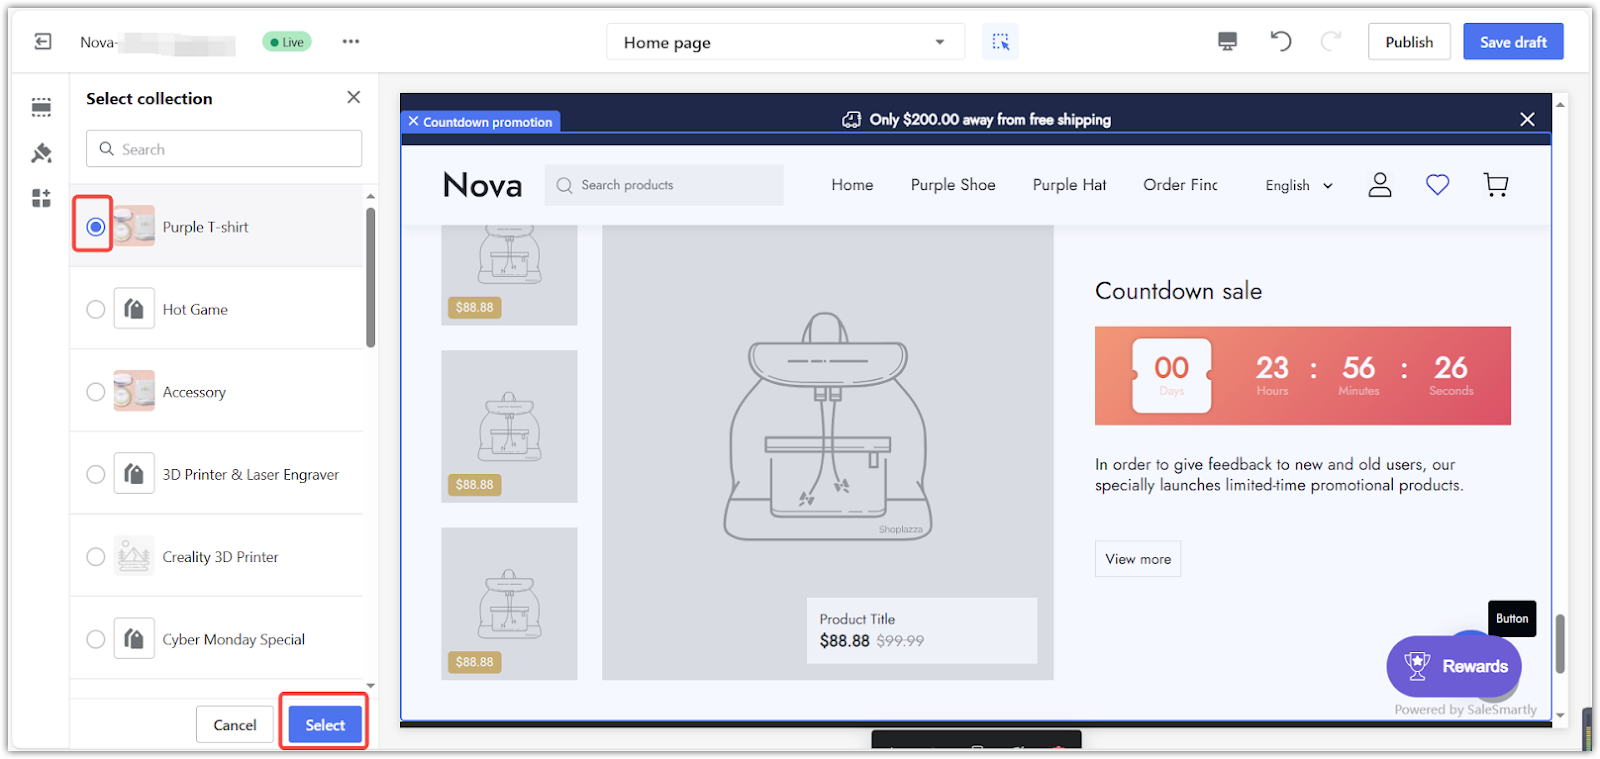
- Adding a collection: Click From selected collection and choose the one you want to feature.
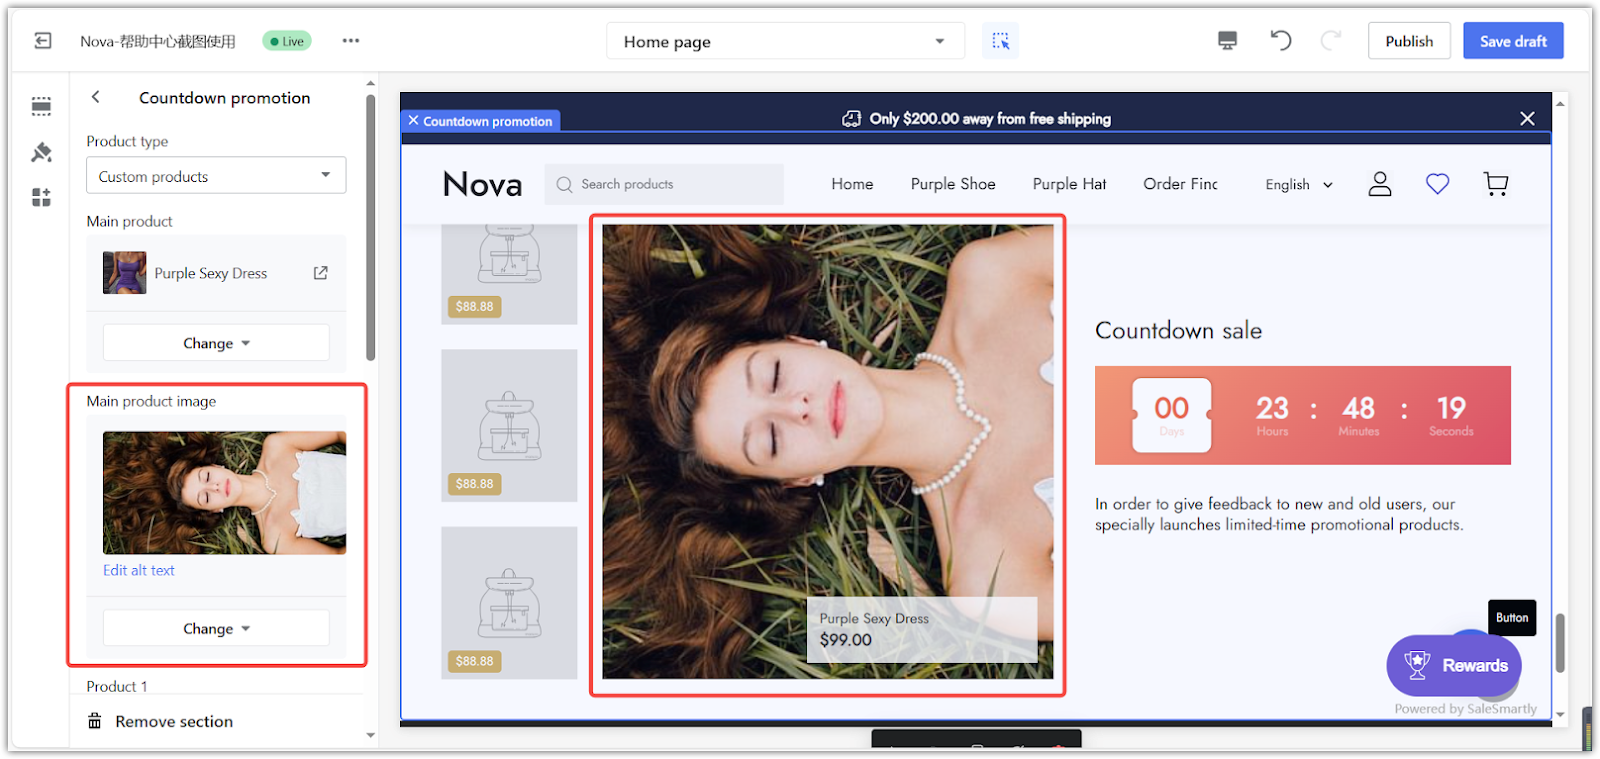
- Adding a product: Click Custom products and choose the product you want to showcase. If needed, change the main product image here.
Customizing the look
The appearance of your countdown timer can significantly impact its effectiveness. By customizing the layout, colors, and spacing, you can create a visually appealing timer that integrates seamlessly with your store's design and effectively captures customer attention.
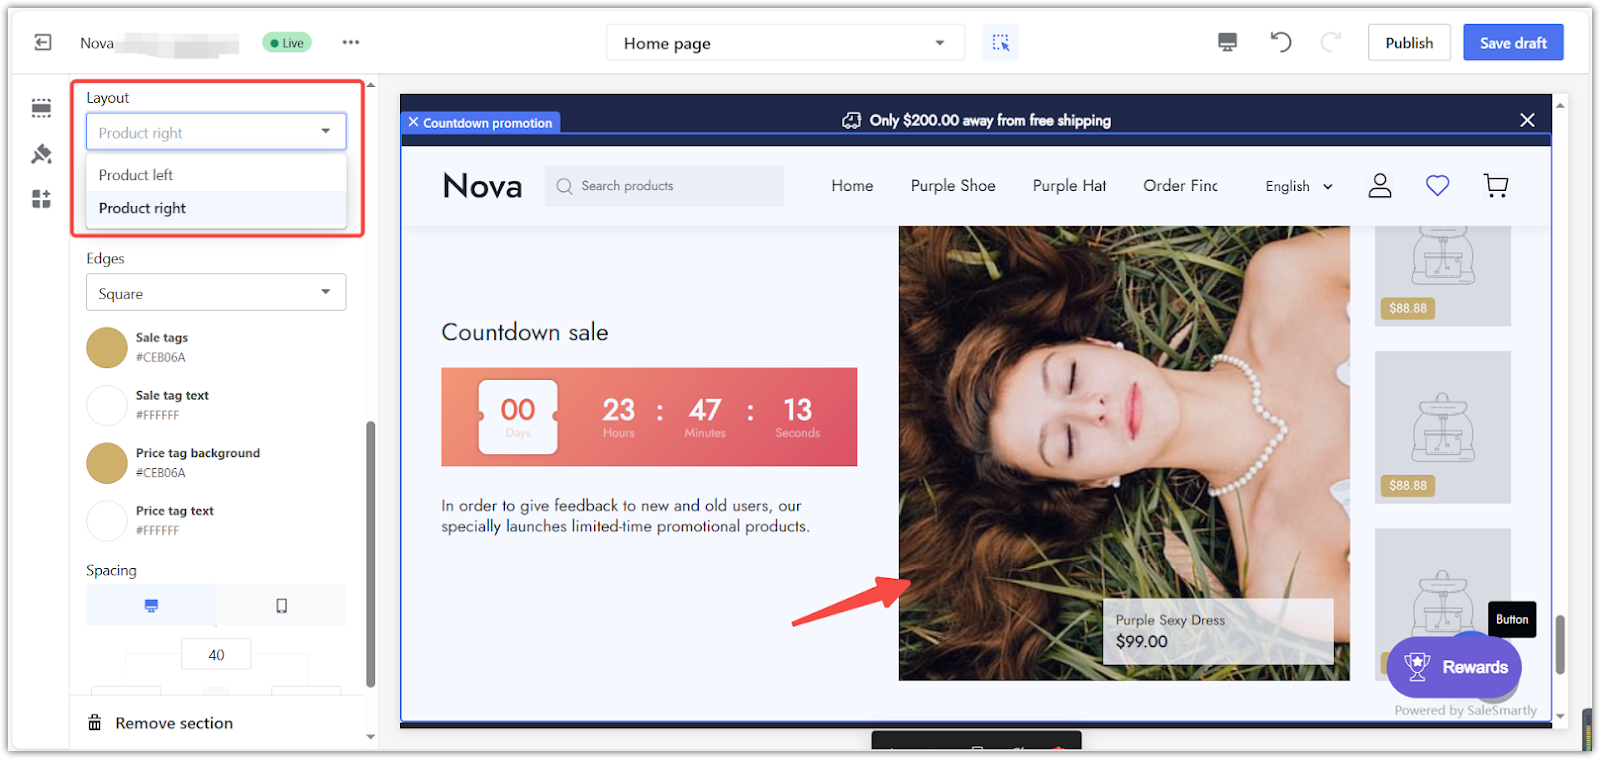
1. Layout: Position the image to the left or right.
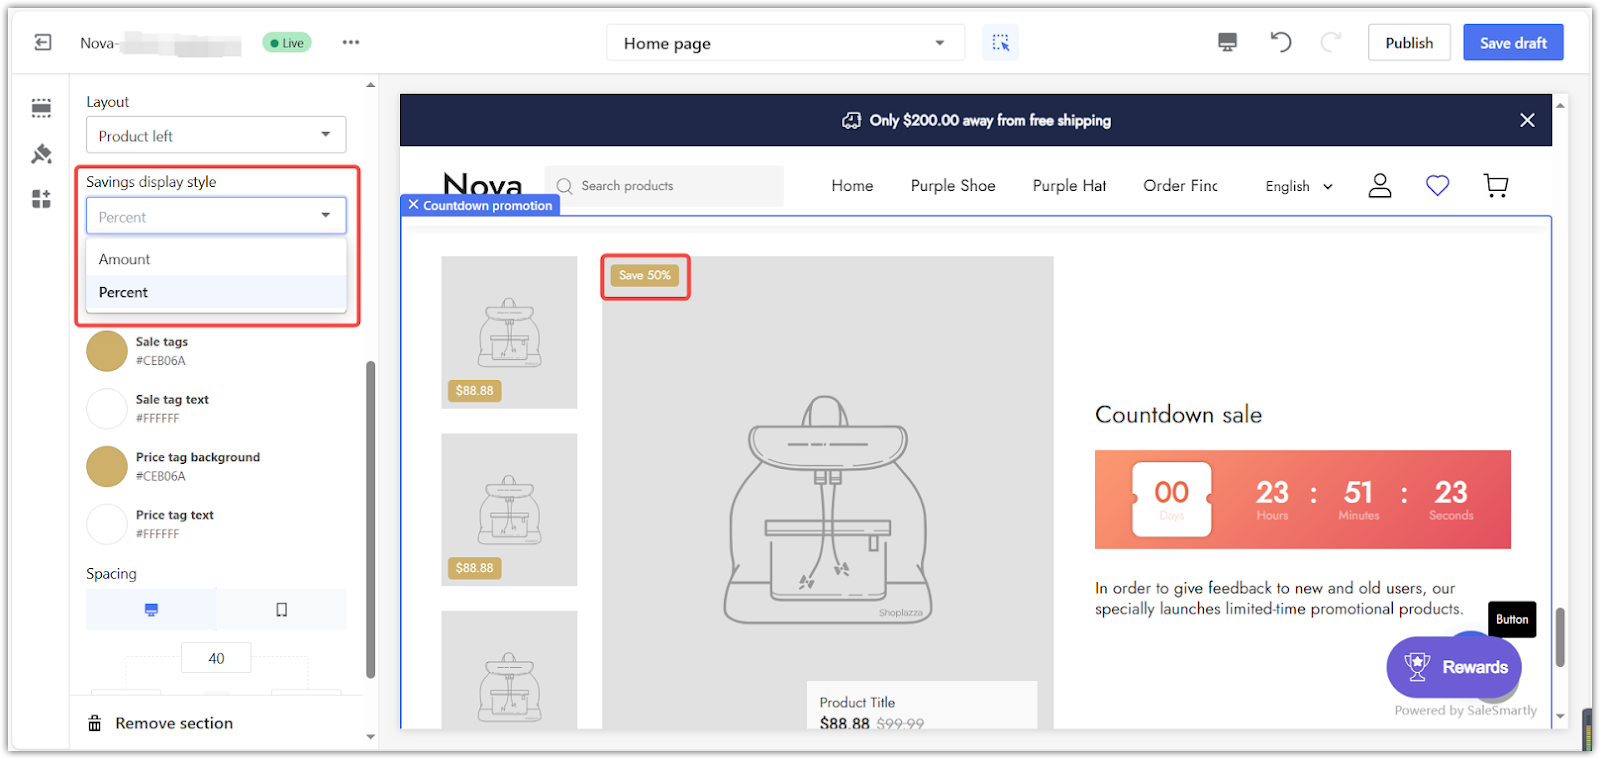
2. Savings display: Choose to display savings as a dollar amount or a percentage.
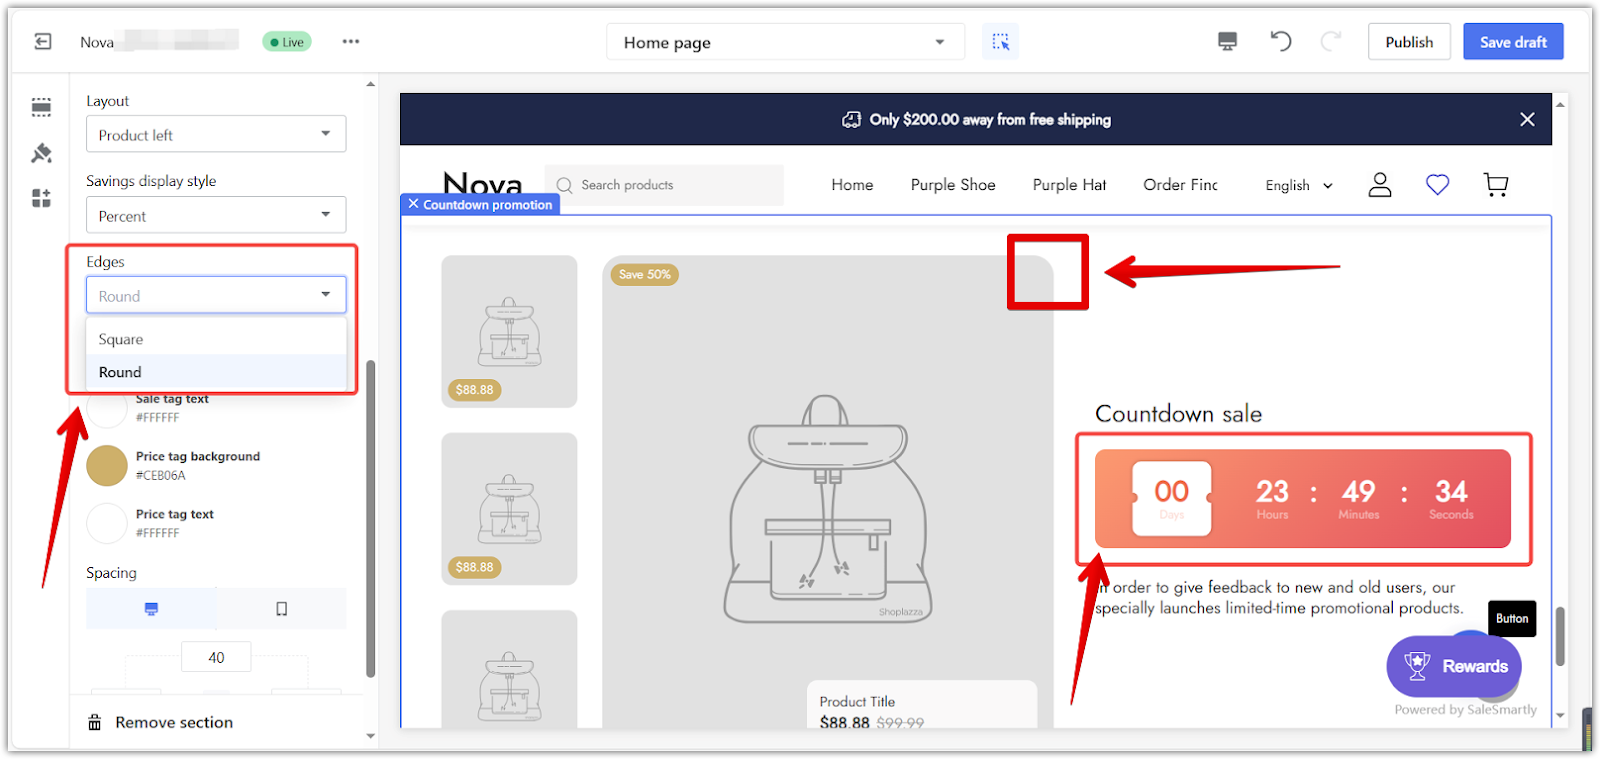
3. Edges: Customize the look of the countdown timer.
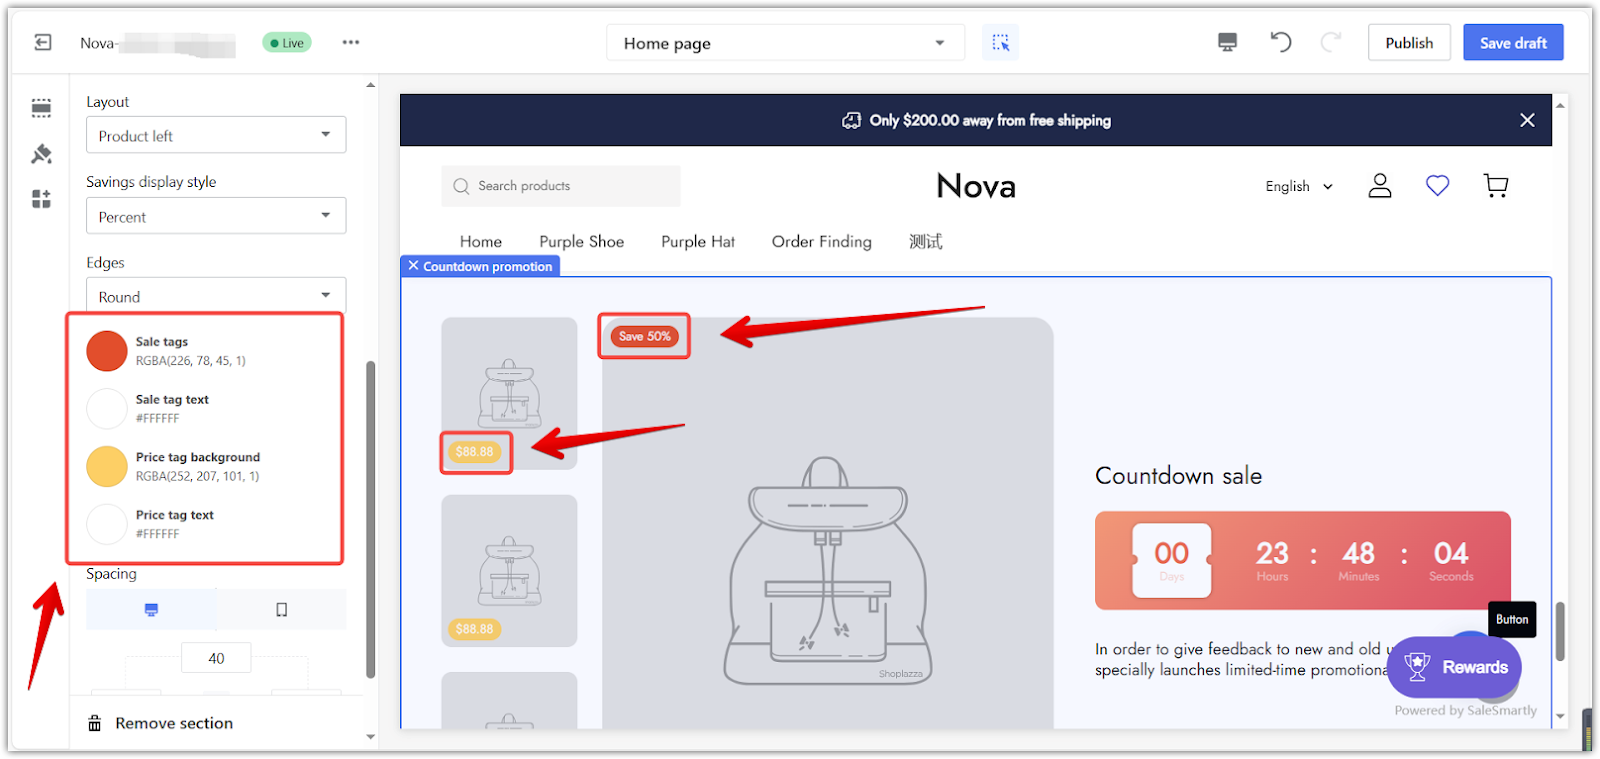
4. Colors: Use the color palette to change the section's colors.
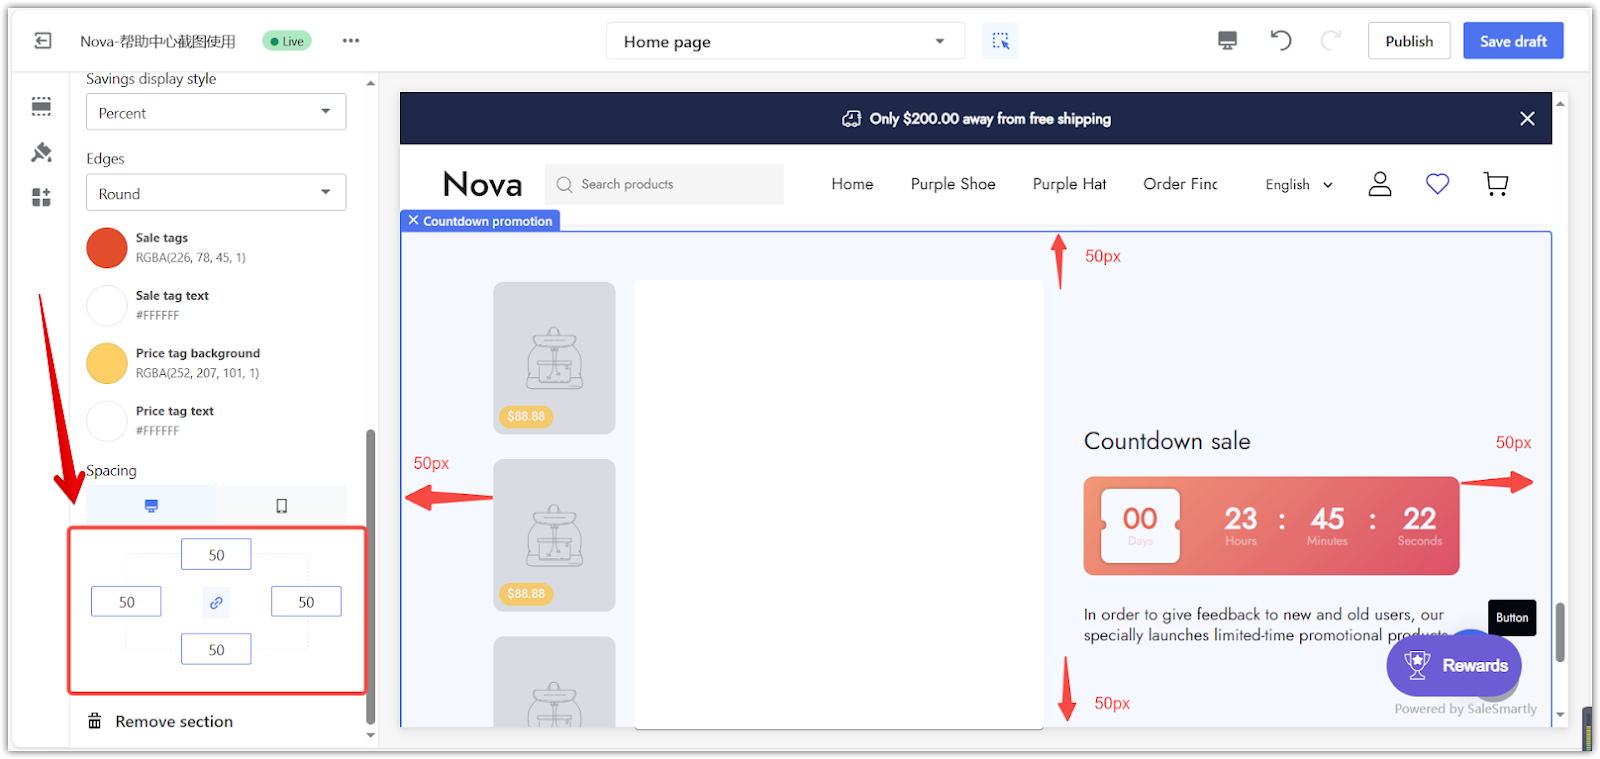
5. Adjust spacing: Use the padding editor to adjust the spacing around the section. You can adjust the spacing evenly or for each side individually.
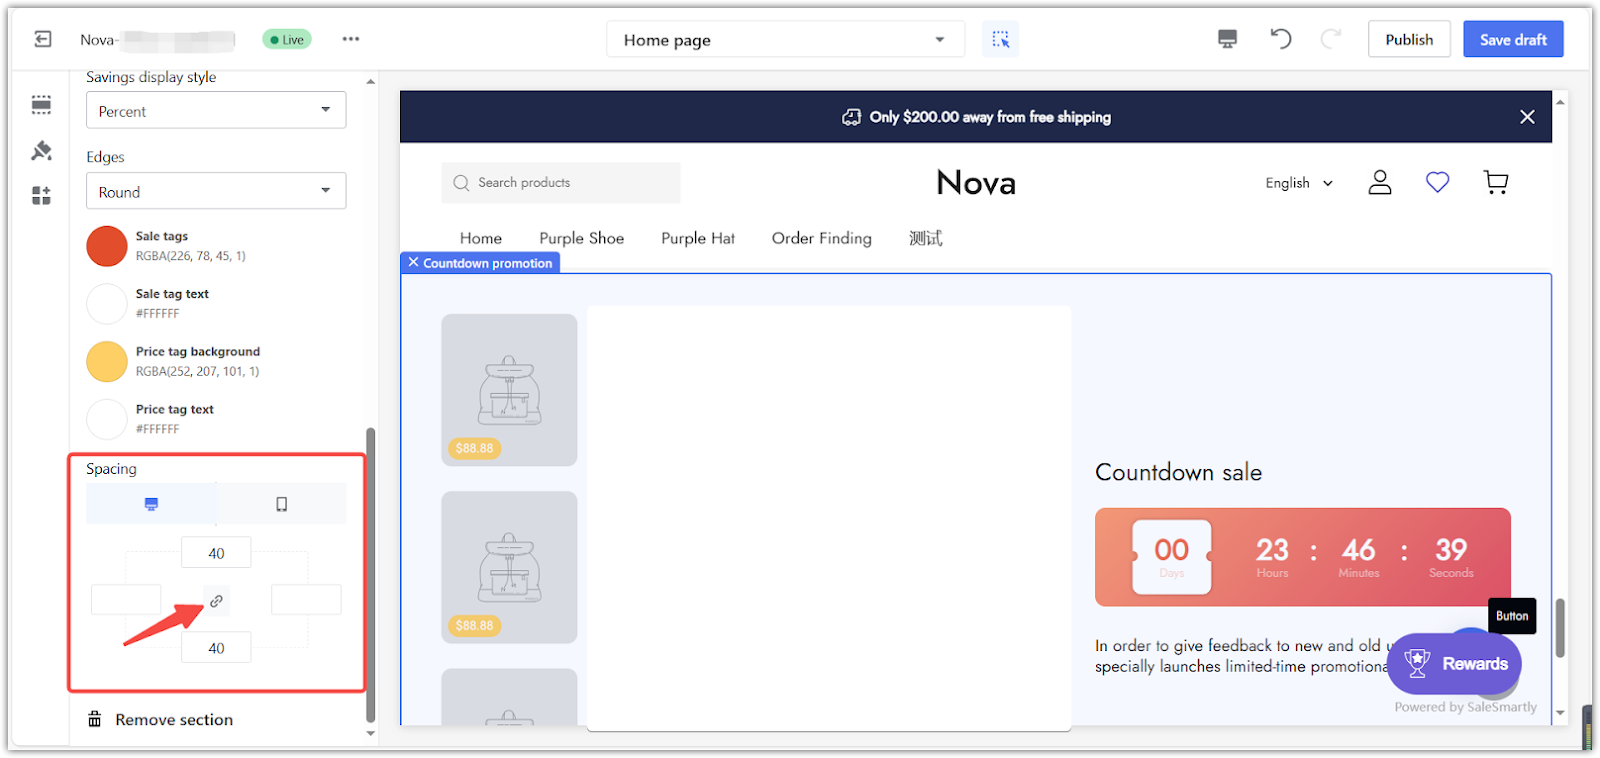
- Example: Here's an example of how to add more space on each side.
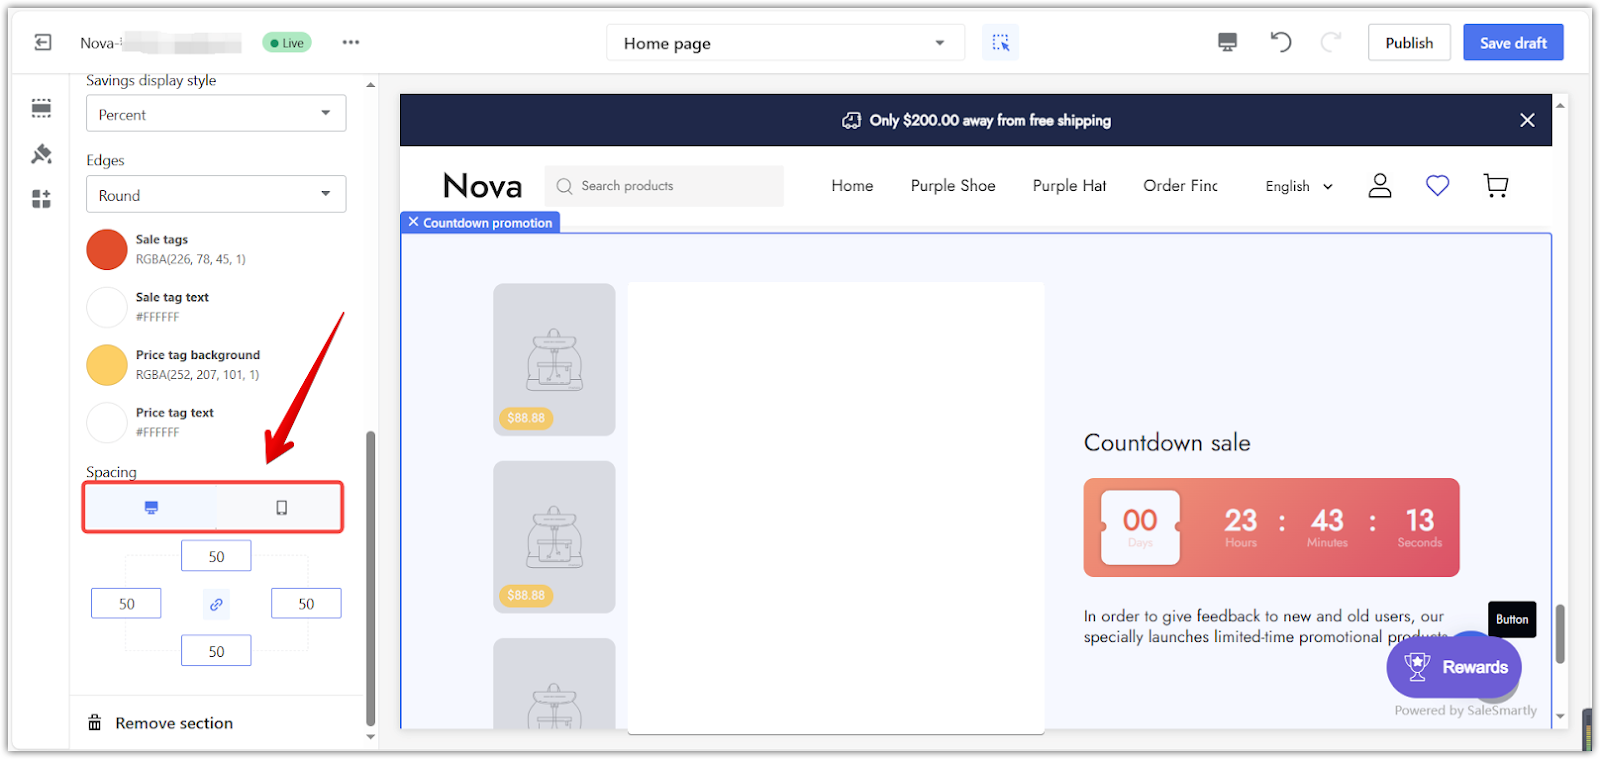
- Preview: Preview how your layout looks on desktop or mobile.
Fine-Tuning details
Adjust the heading, text, and call-to-action buttons to refine your countdown timer. These elements provide important information about the promotion and guide customers to make a purchase.
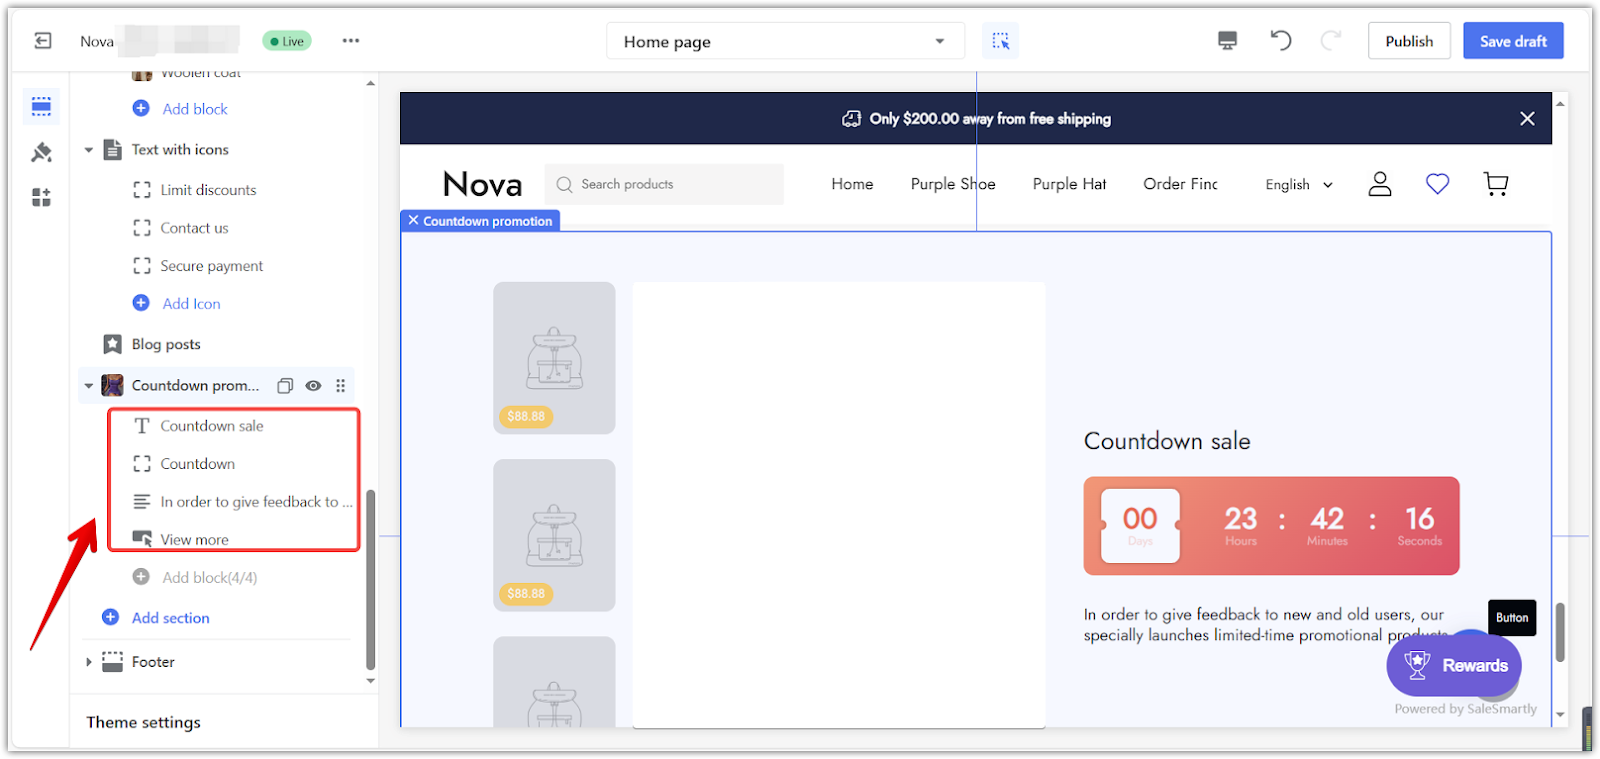
1. Customize blocks: Go back to the main editing page. Click on each block under the Countdown promotion section to change its details.
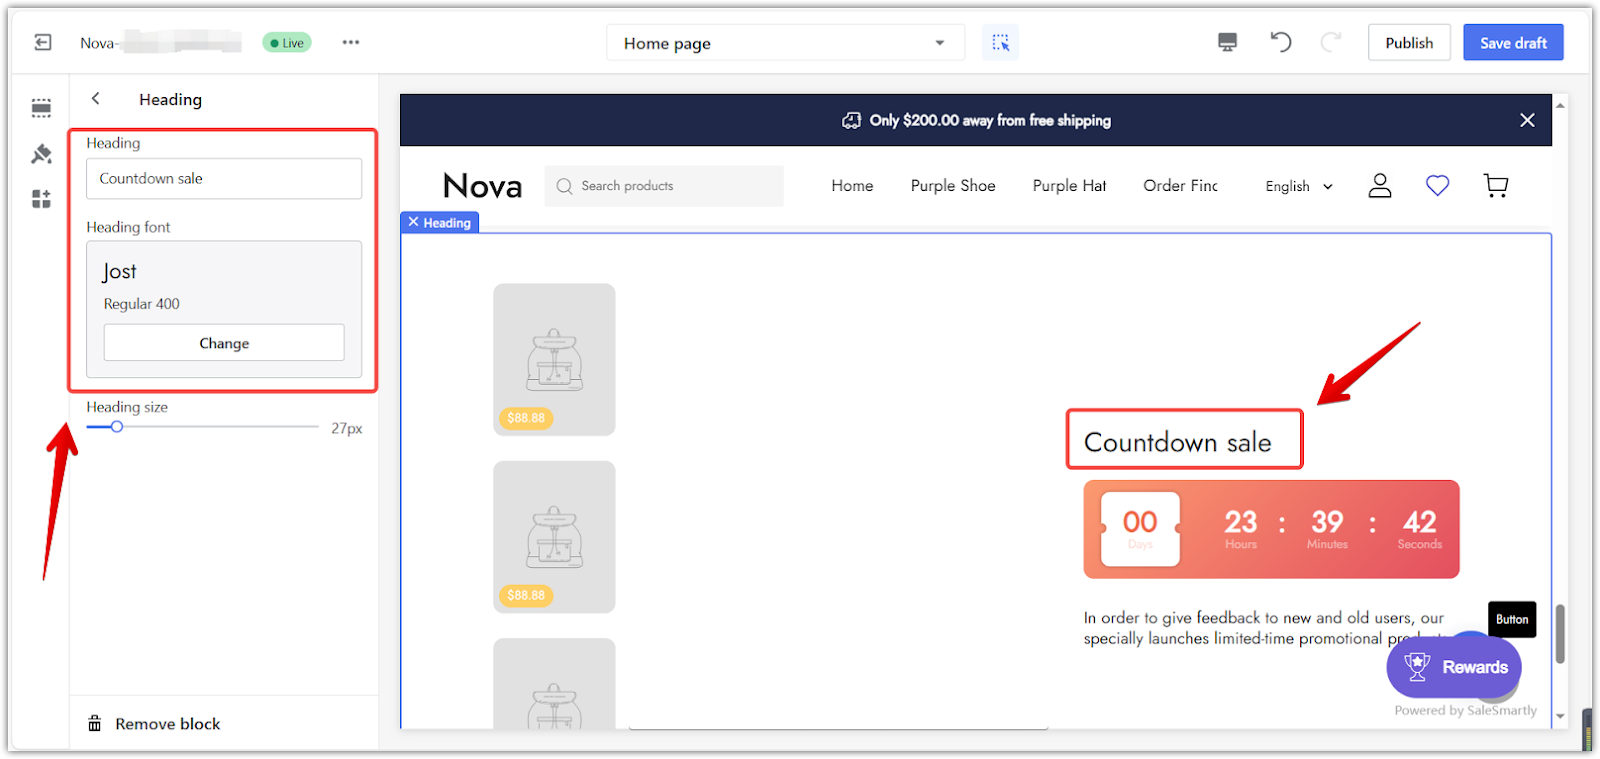
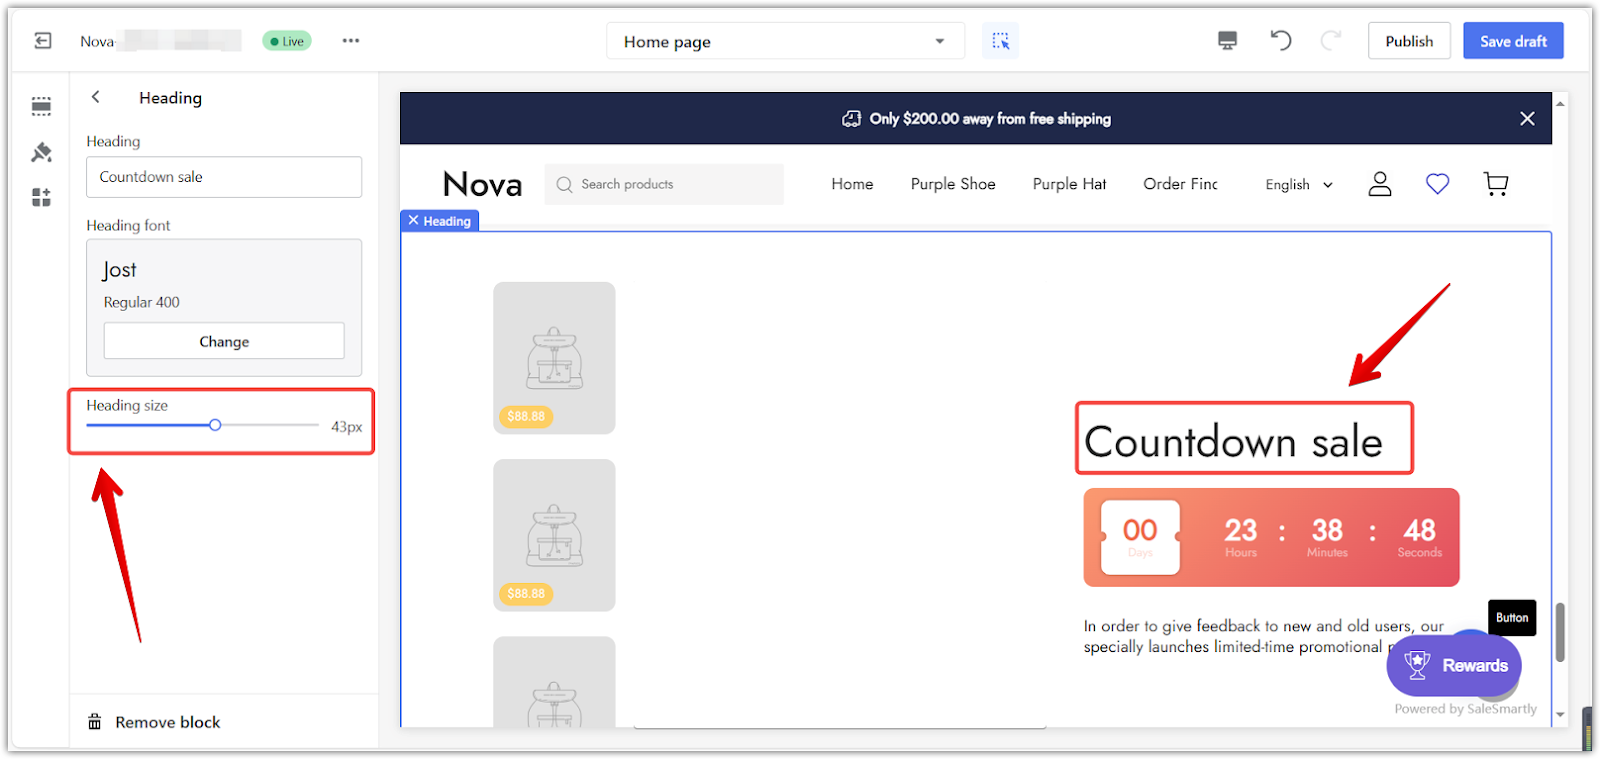
2. Customize the Countdown Sale block: Update your title by changing the name, font, and size.
- Modify the Heading: Change the title of your countdown timer.
- Adjust the Heading Font: Change the font style of the title.
- Adjust the Heading Size: Adjust the size of your heading.
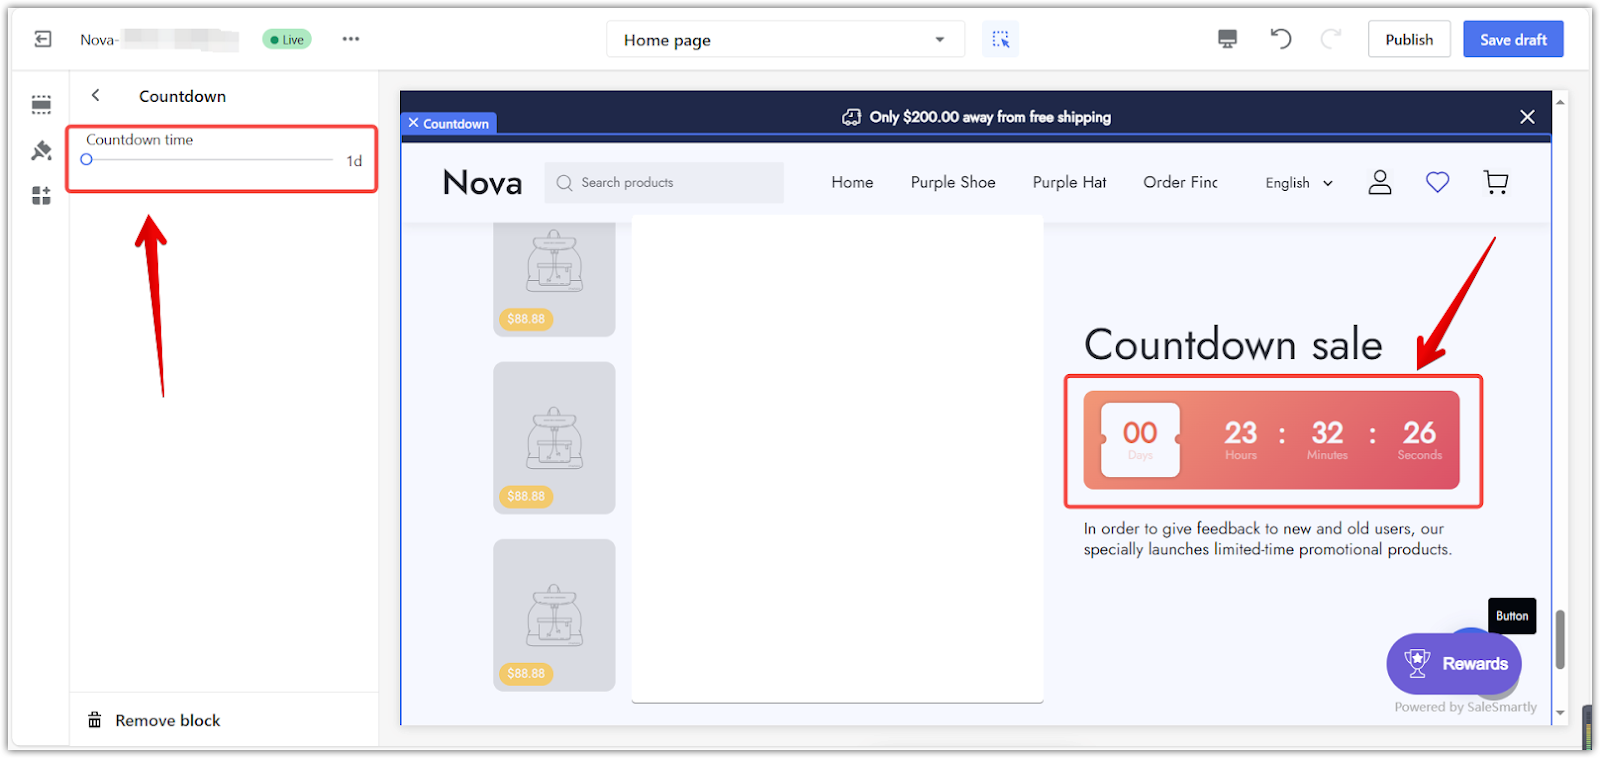
3. Customize the Countdown Block: Set how long your countdown will last.
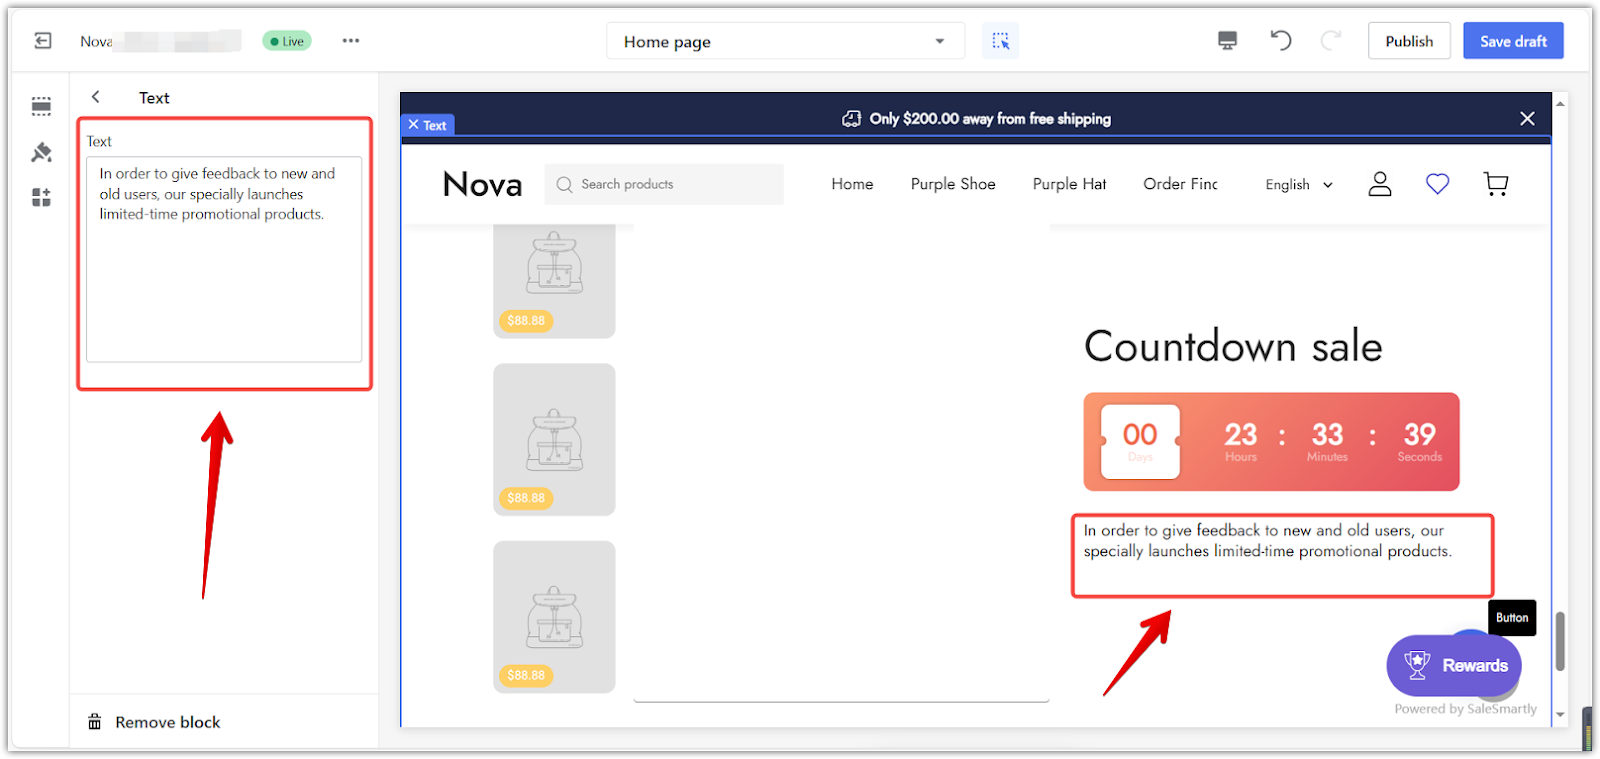
4. Customize the Text Block: Change the main text that appears under your countdown timer.
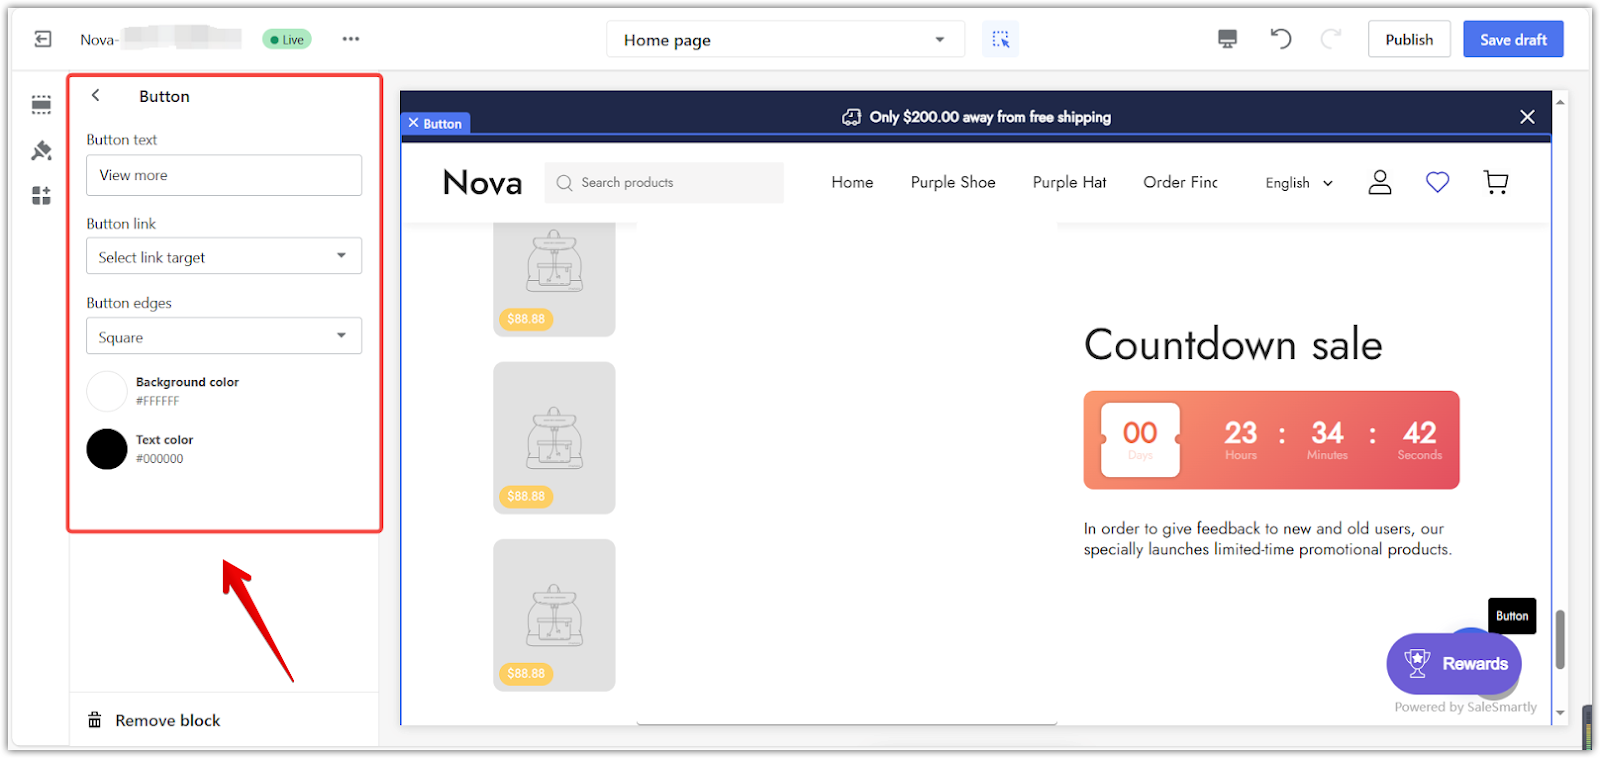
5. Customize the View More Block: This is where you create the button that links to your promotion. You can add a button, customize the text, choose where it links to, and style it.
- Add a Button: Click to add a button that links to other pages within your store.
- Set the Button Text: Set the text displayed on the button.
- Set the Button Link: Choose the page to which the button will link.
- Adjust Button Edges: Change the shape of the button and use the color palettes to customize its appearance.
Note
Choose a destination page using the Button link before previewing the button.
By incorporating countdown timers into your Shoplazza store, you create a sense of excitement and encourage prompt action from your customers. This can lead to increased sales and a more engaging shopping experience overall.


Comments
Please sign in to leave a comment.