
An image slideshow is a great way to create a visually appealing storefront with a clean, focused look that highlights your products. This feature allows for the display of full-screen images without any distracting text or buttons, creating an elegant and sophisticated aesthetic. It's perfect for showcasing high-quality images of your products or brand story.
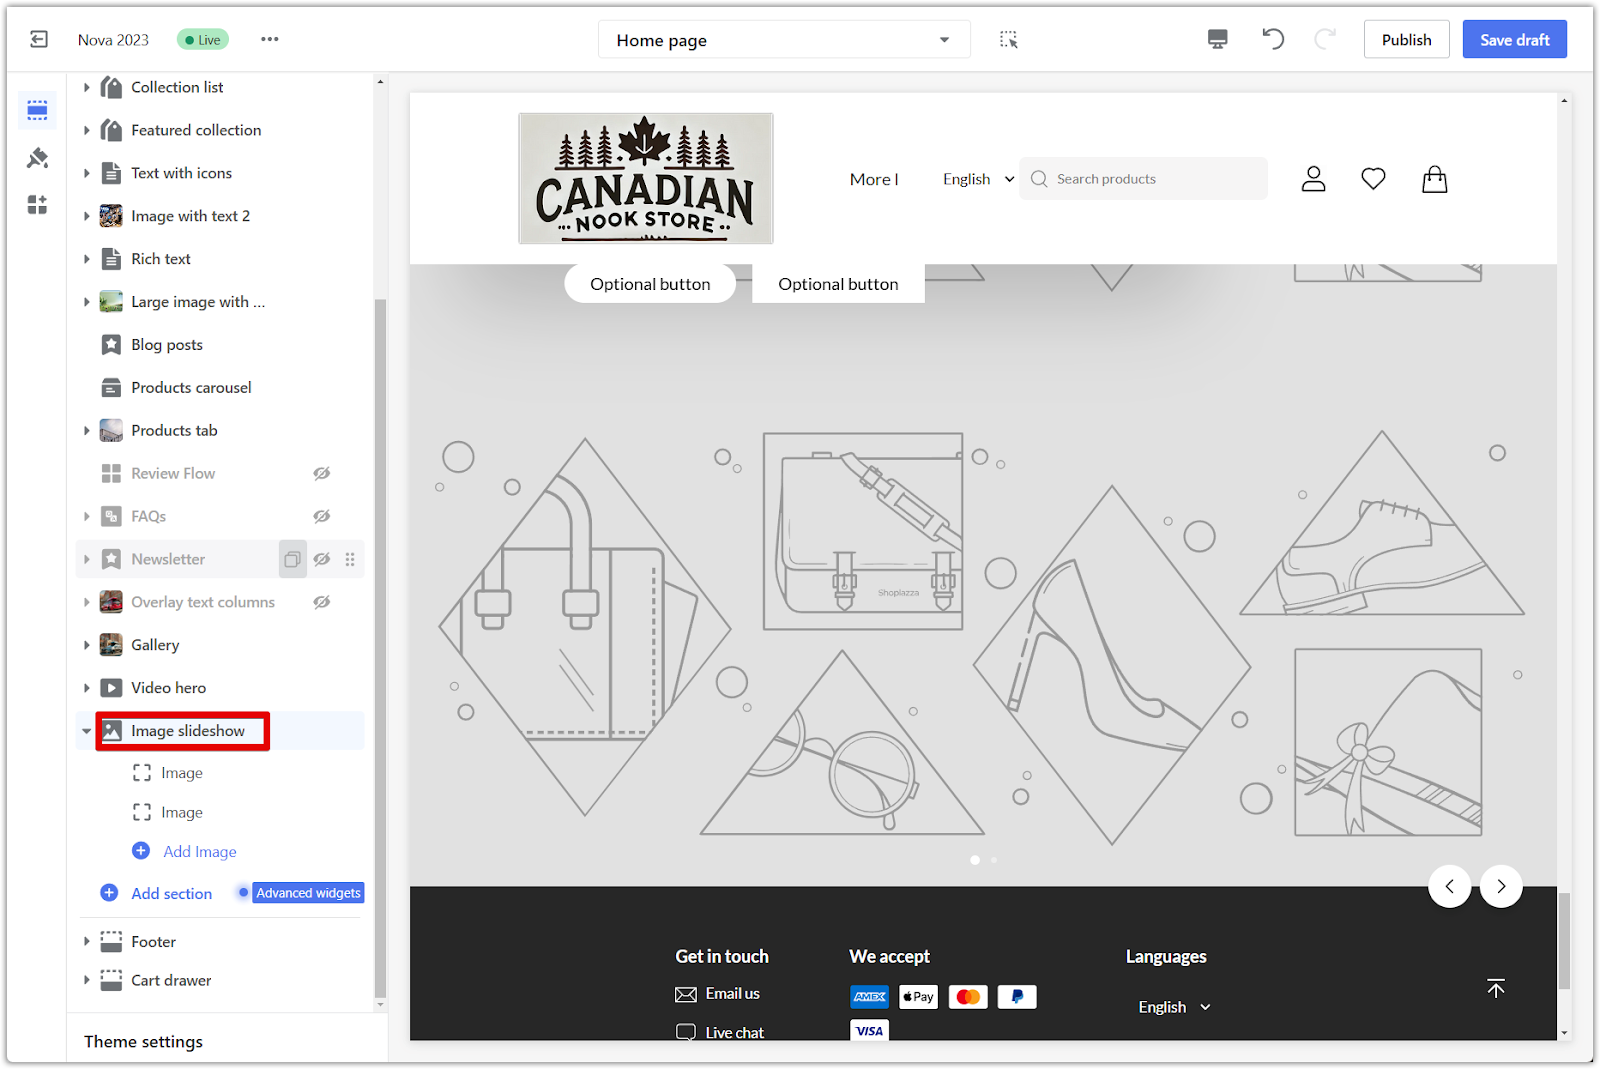
Adding an image slideshow
This section guides you through adding an image slideshow to your store theme.
1. Access the theme editor: From your Shoplazza admin, go to Online Store > Themes, and then click Customize next to the theme you want to edit.
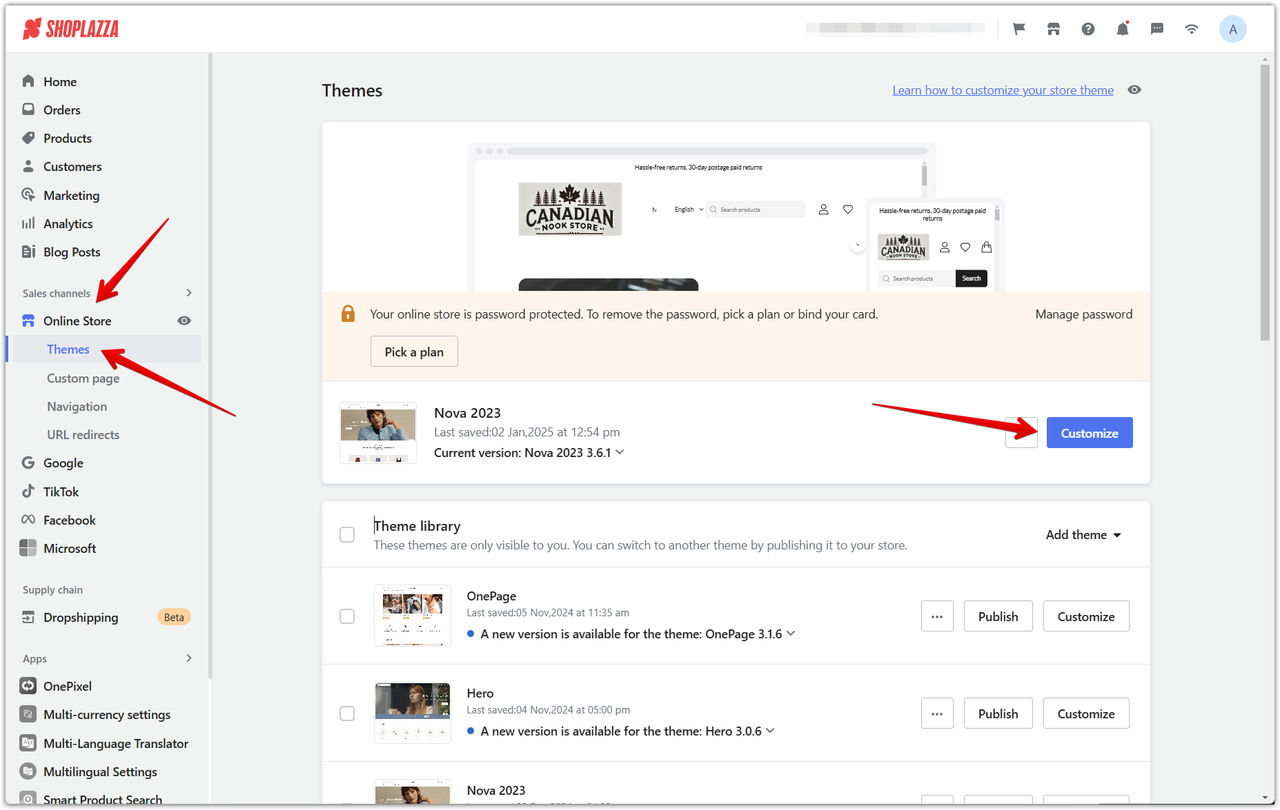
2. Add the section: In the theme editor, scroll down and click Add section to view the available sections.
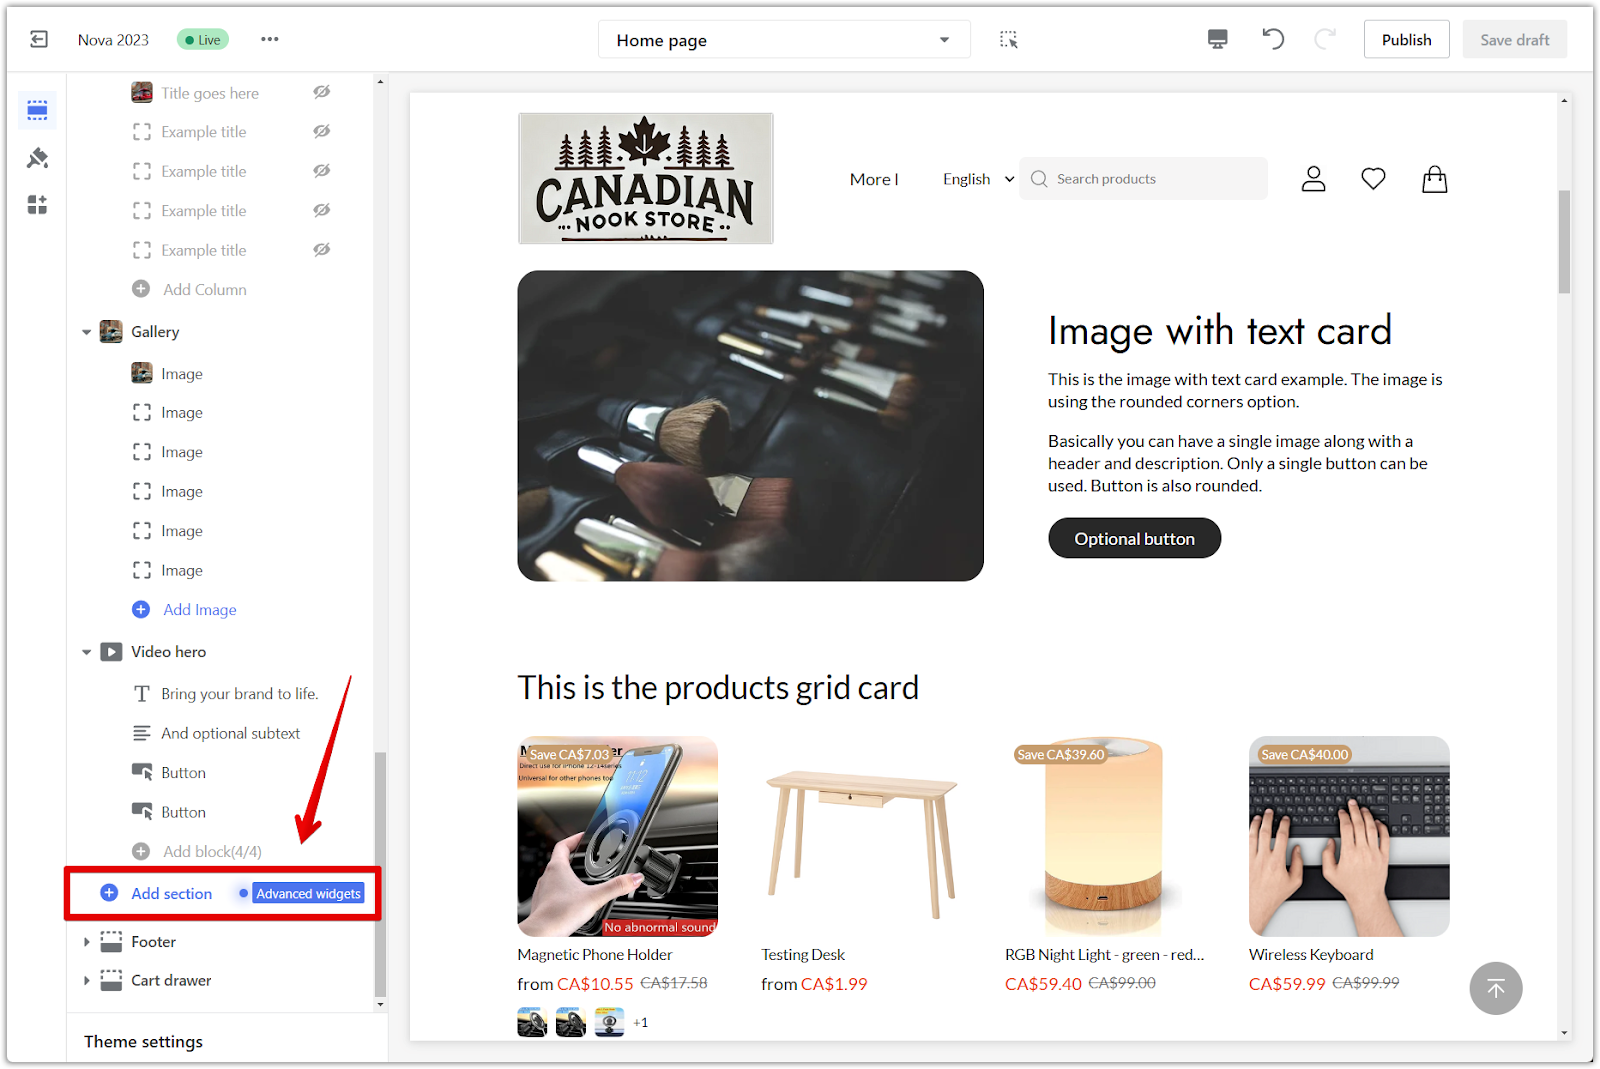
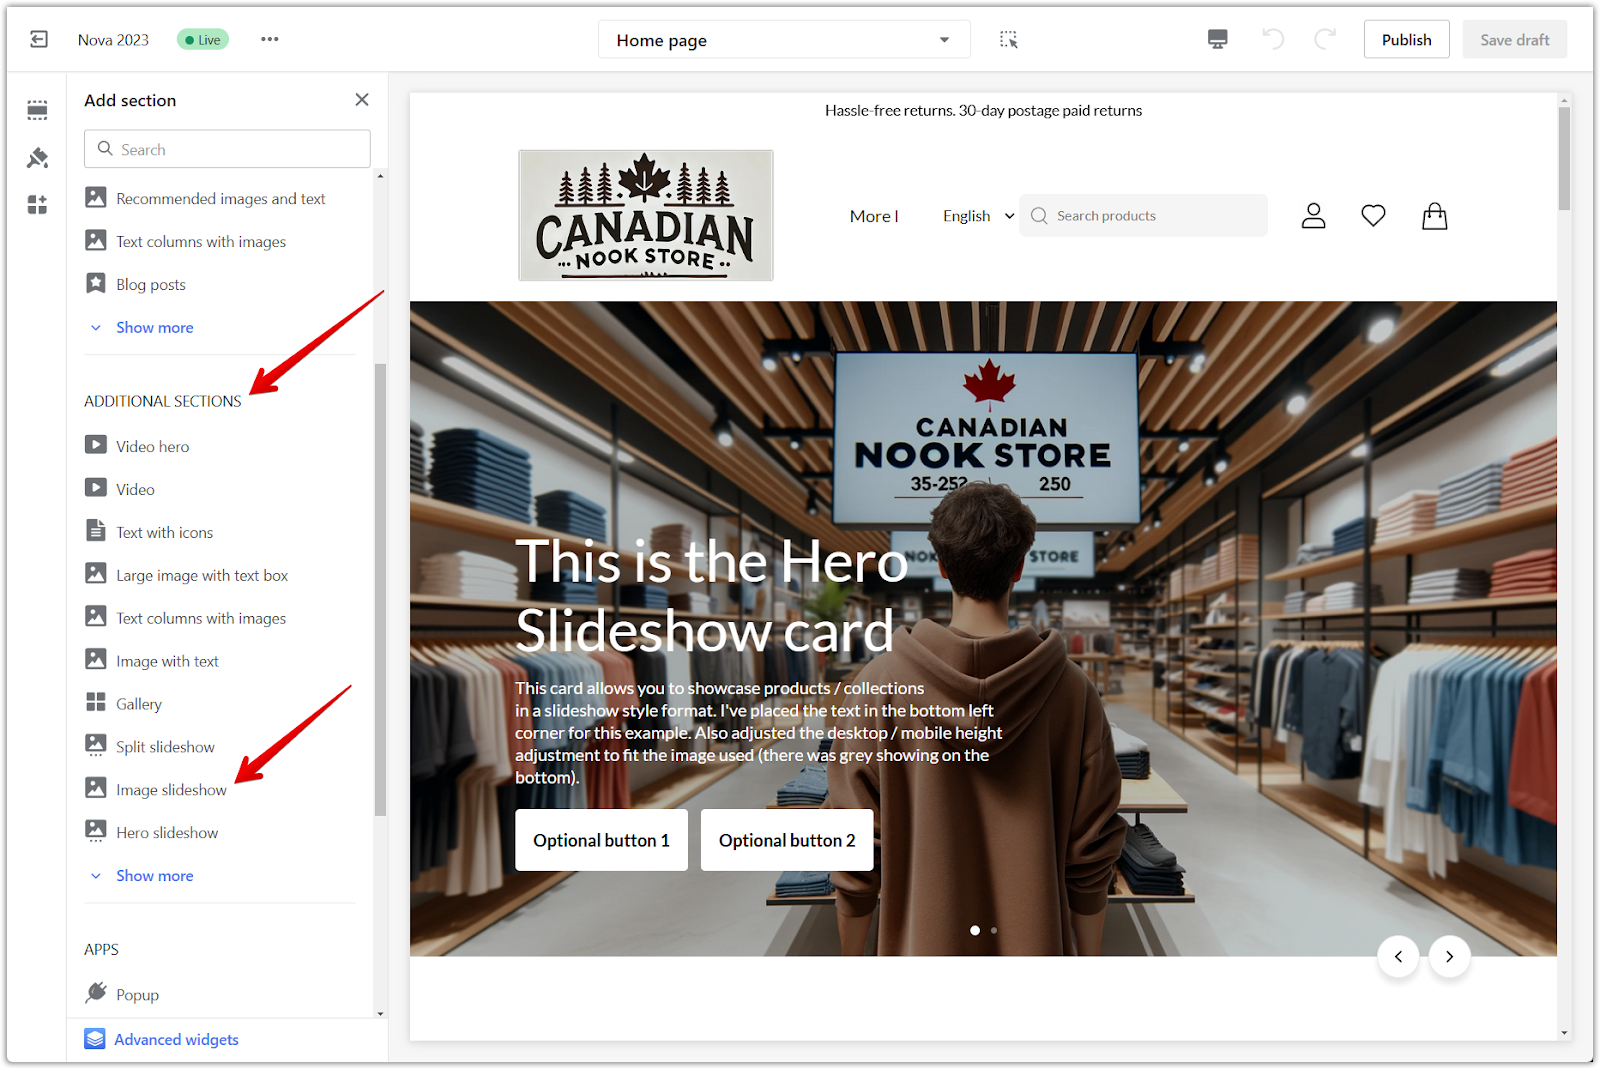
3. Select the image slideshow: Under Additional sections, select Image slideshow.
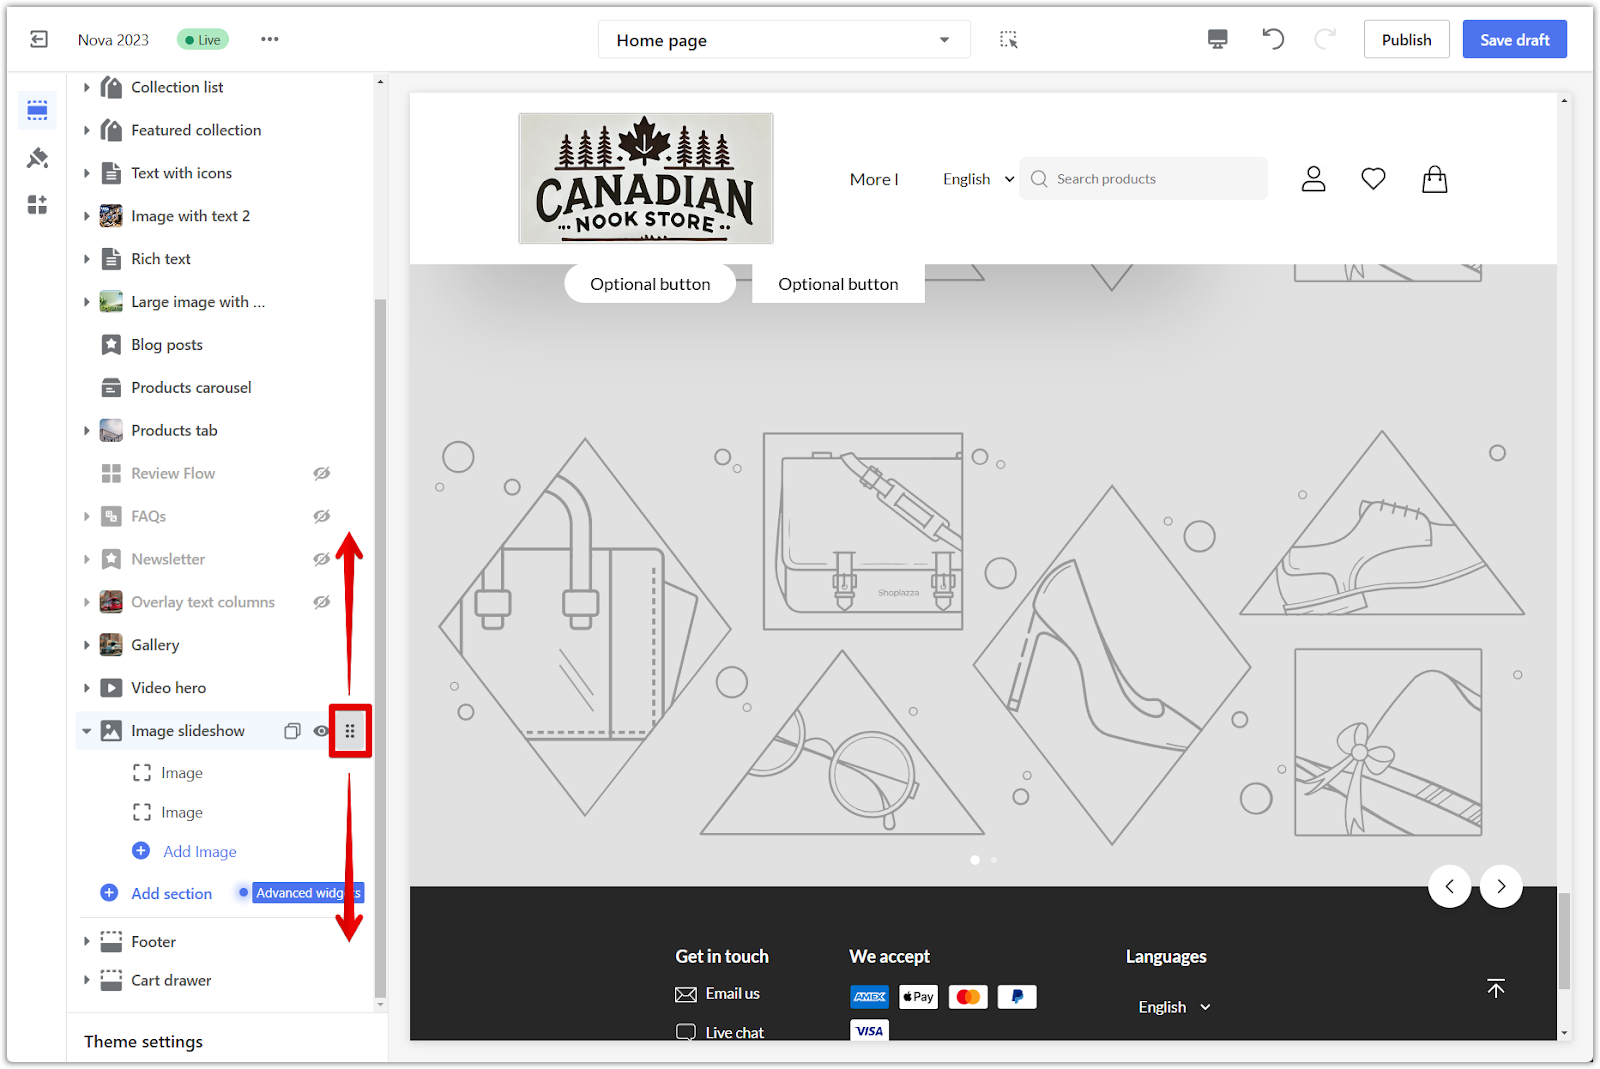
4. Rearrange sections: To reposition the image slideshow, drag and drop it using the drag and drop icon.
Customizing the section style
Adjust the slideshow's appearance and behavior, allowing for a tailored visual experience.
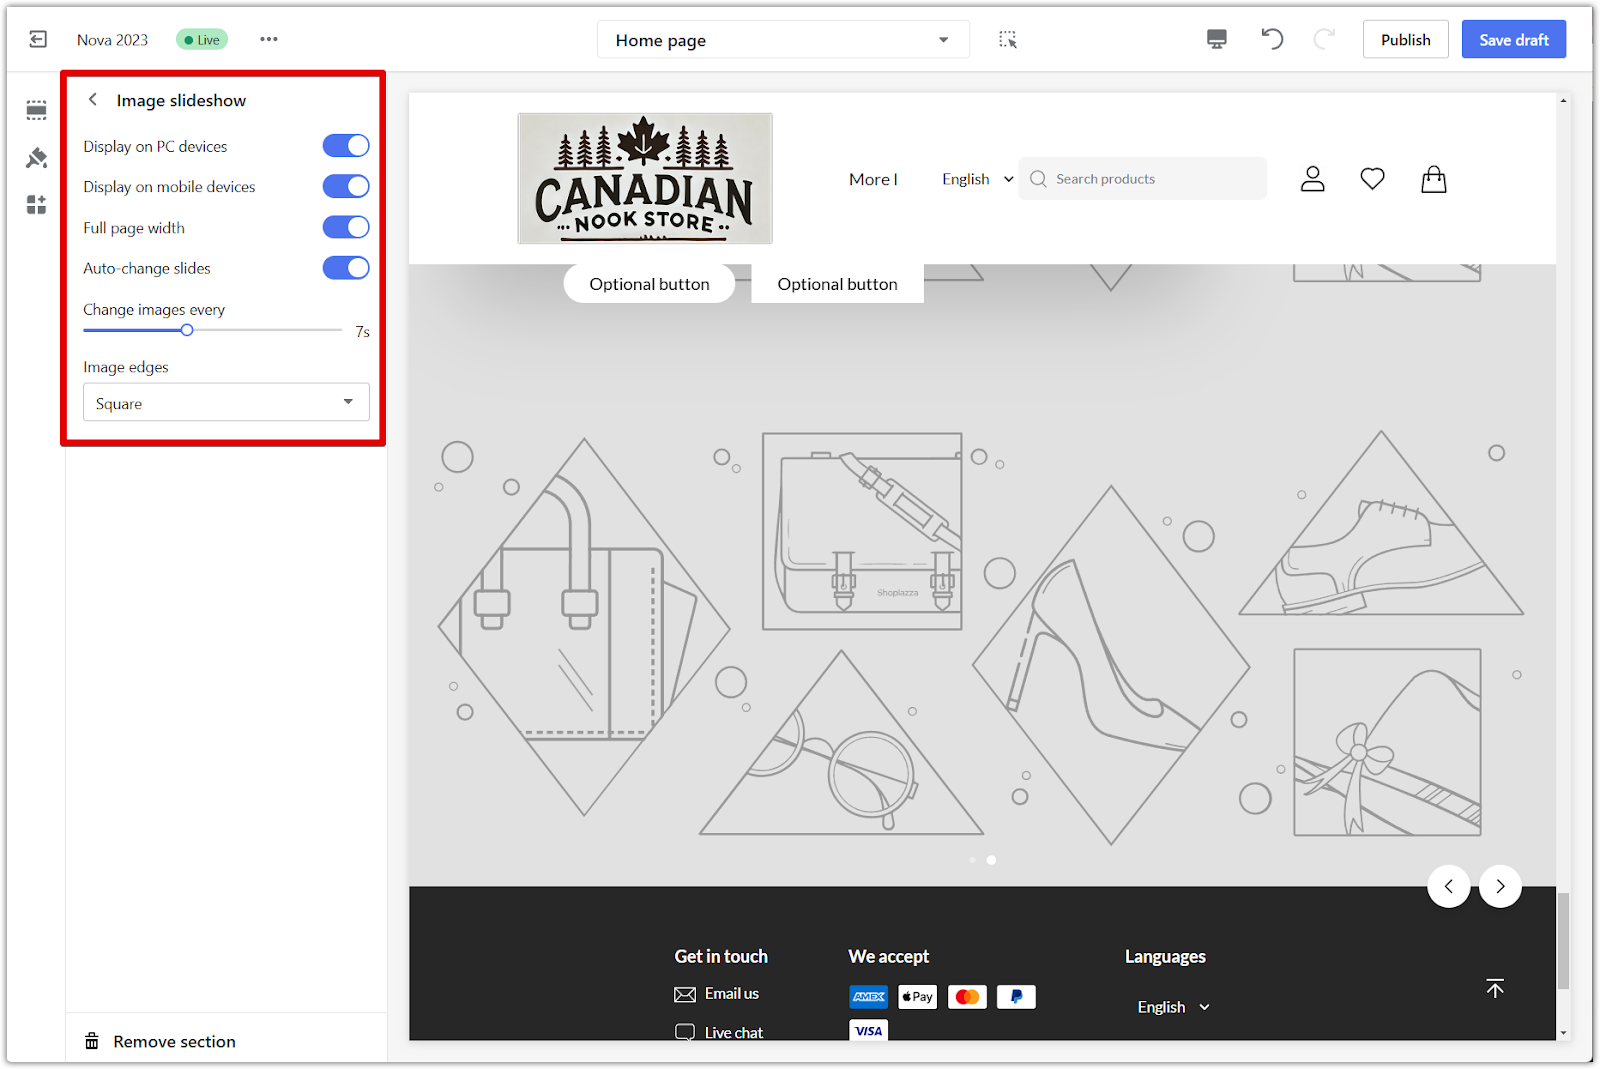
1. Configure settings: Click the section title to configure settings for the section. This opens a panel with various options to tailor the slideshow's appearance and behavior.
- Display on PC devices: Choose whether to show the image slideshow on PC devices.
- Display on mobile devices: Choose whether to show the image slideshow on mobile devices.
- Full page width: Enable full page width for a seamless look. This removes any gaps between the background and the slideshow.
- Auto-change slides: Turn on auto-change slides to automatically cycle through your images. Adjust the timing using the slider to control the speed.
- Change image every: Set the time interval between slide changes.
- Image edges: Choose between square and rounded image edges to subtly change the shape of your images and add visual interest.
Editing the slideshow content
Populate your image slideshow with engaging content that showcases your brand and products.
1. Access individual slides: Click on each image block within the slideshow to access its settings and make changes.
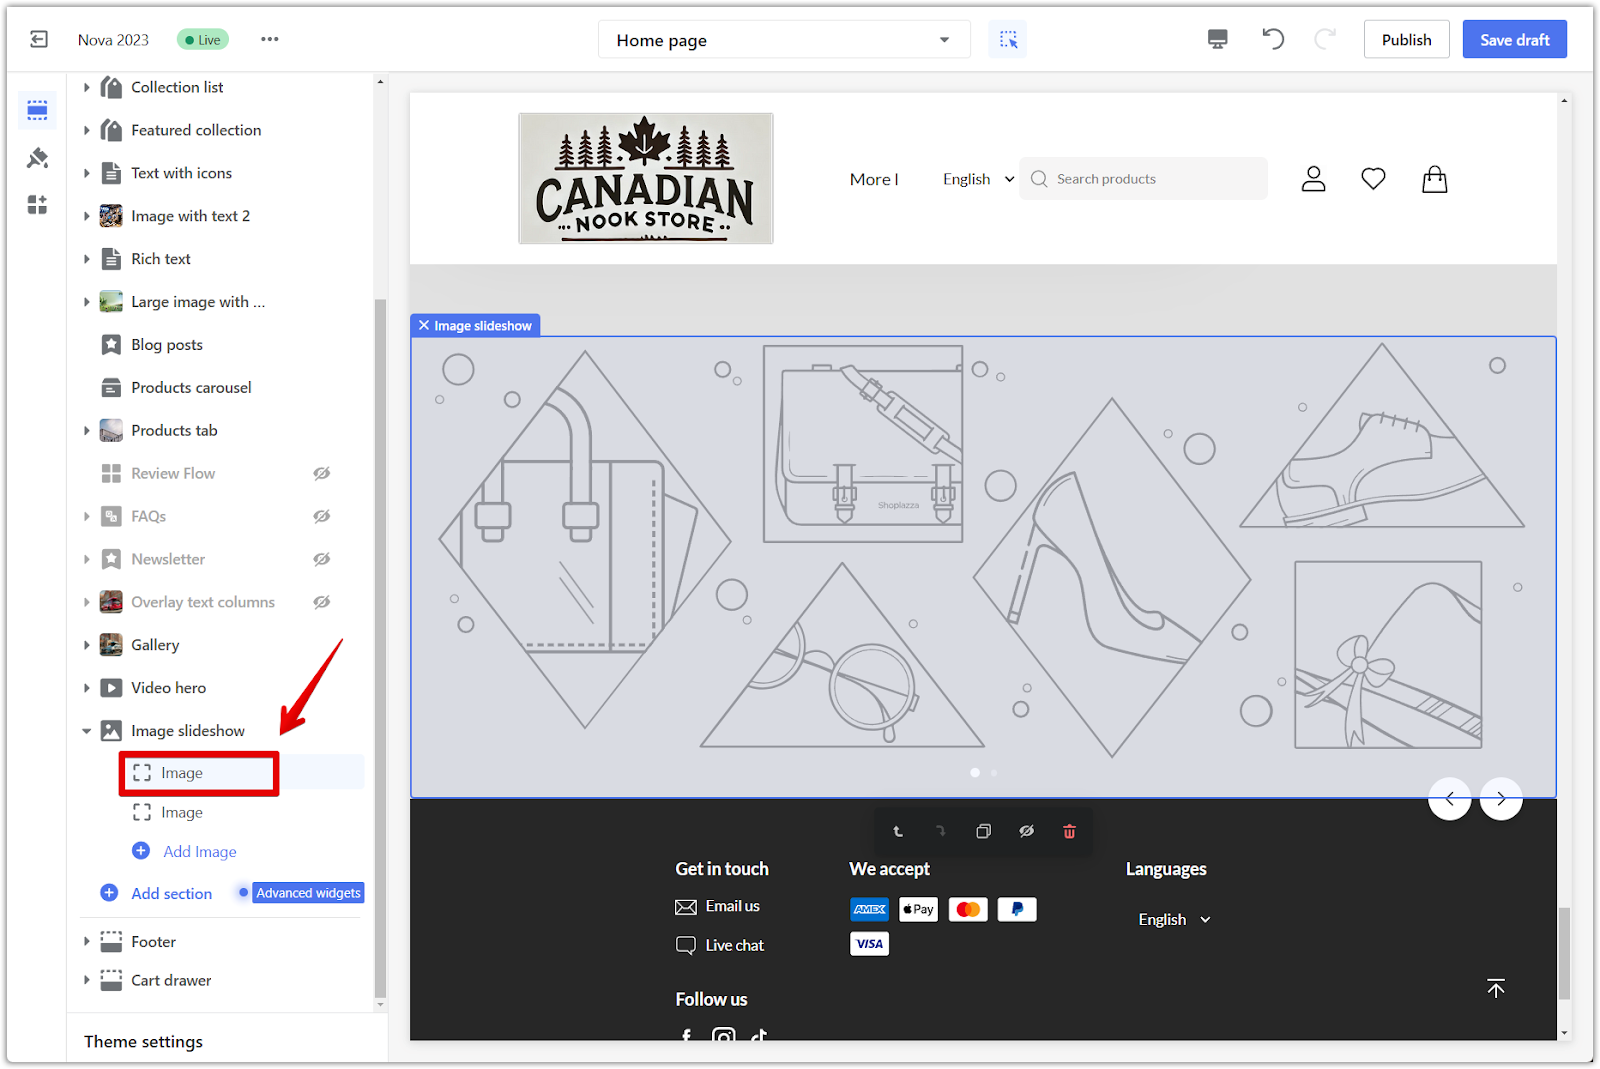
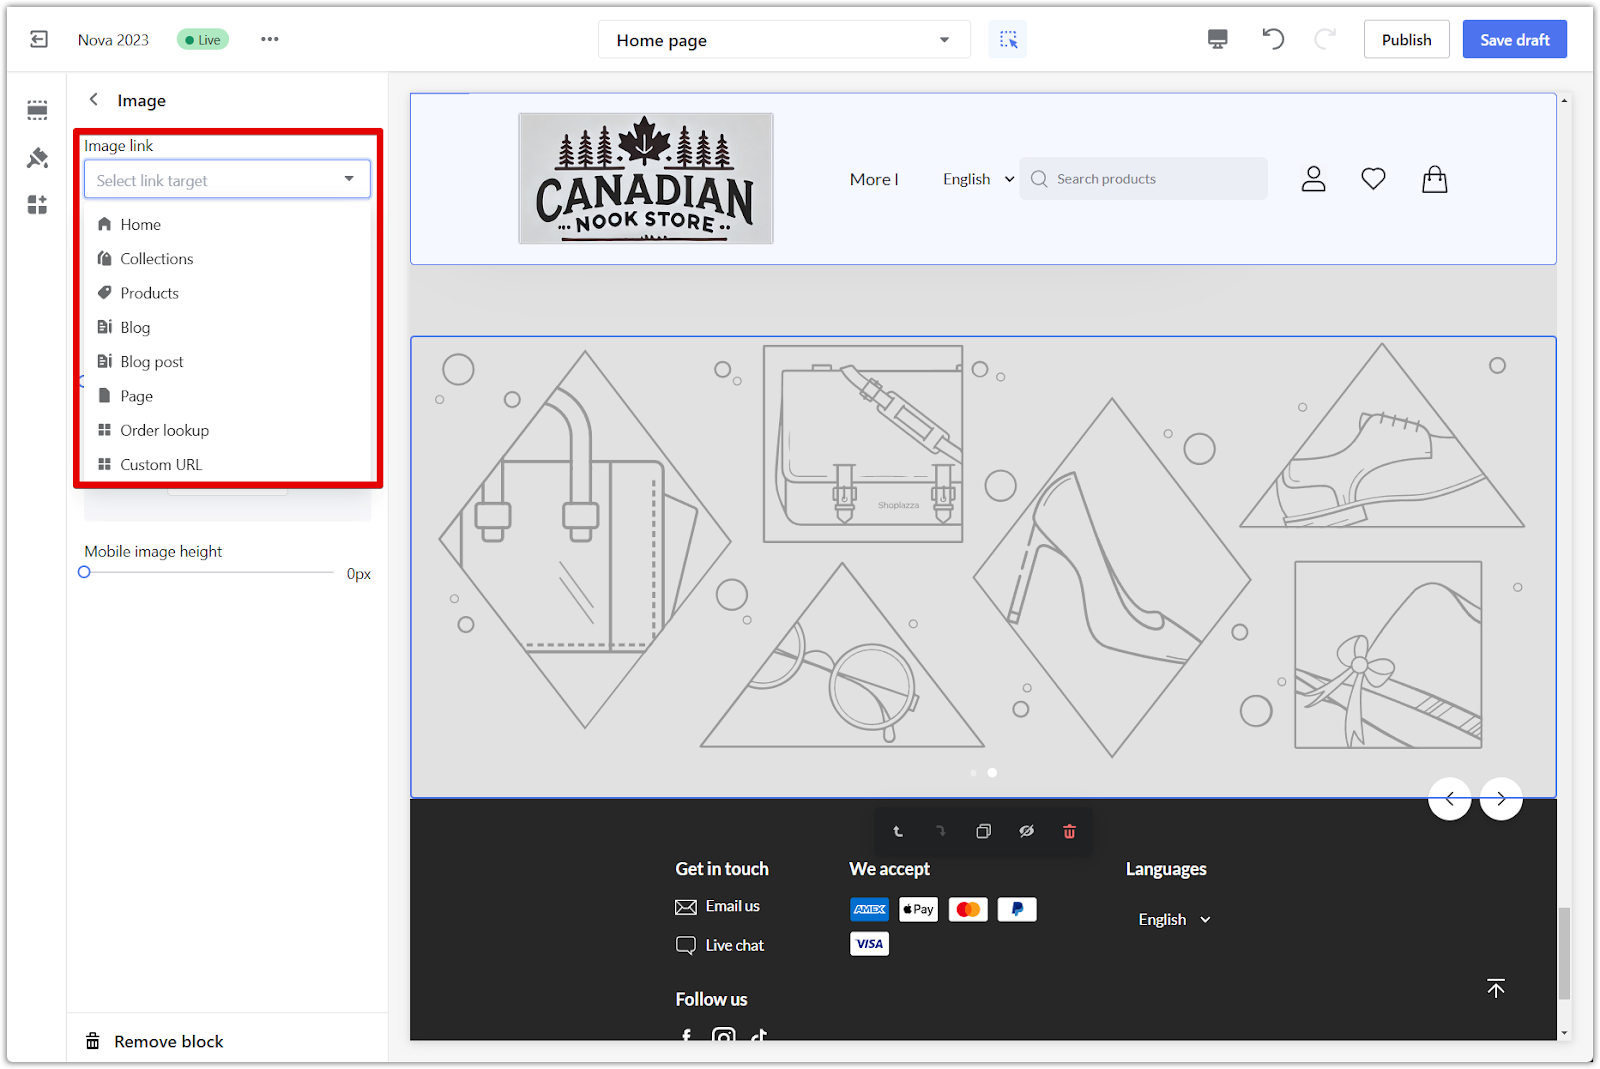
2. Link images: Make your images interactive by adding links to collections or other pages. This allows customers to explore relevant products or learn more about your brand easily.
3. Add an image:
- Desktop image: Click Select image under Image to choose an image from your library or upload a new one for desktop devices.
- Mobile image: Click Select image under Mobile image to choose a different image specifically for mobile devices or use the same image as the desktop version.
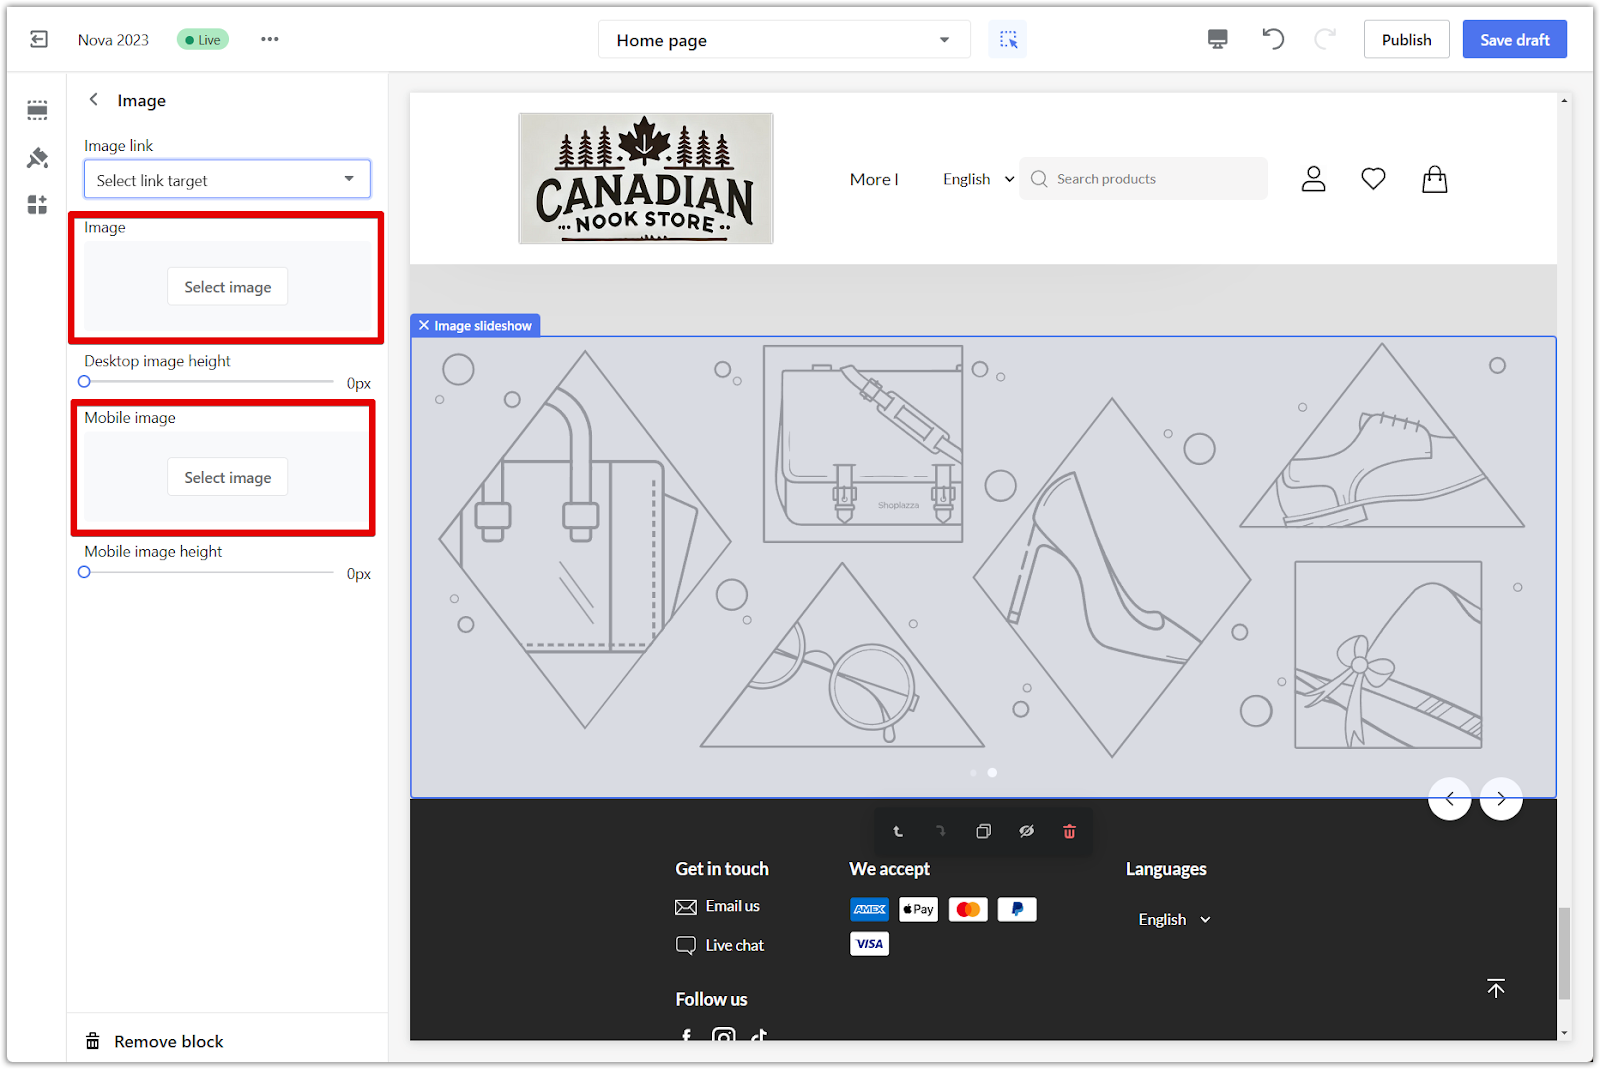
4. Adjust image height:
- Desktop image height: Use the Desktop image height field to set the desired height for the image on desktop devices. Enter the height in pixels (e.g., 300px).
- Mobile image height: Use the Mobile image height field to set the desired height for the image on mobile devices. Enter the height in pixels (e.g., "200px").

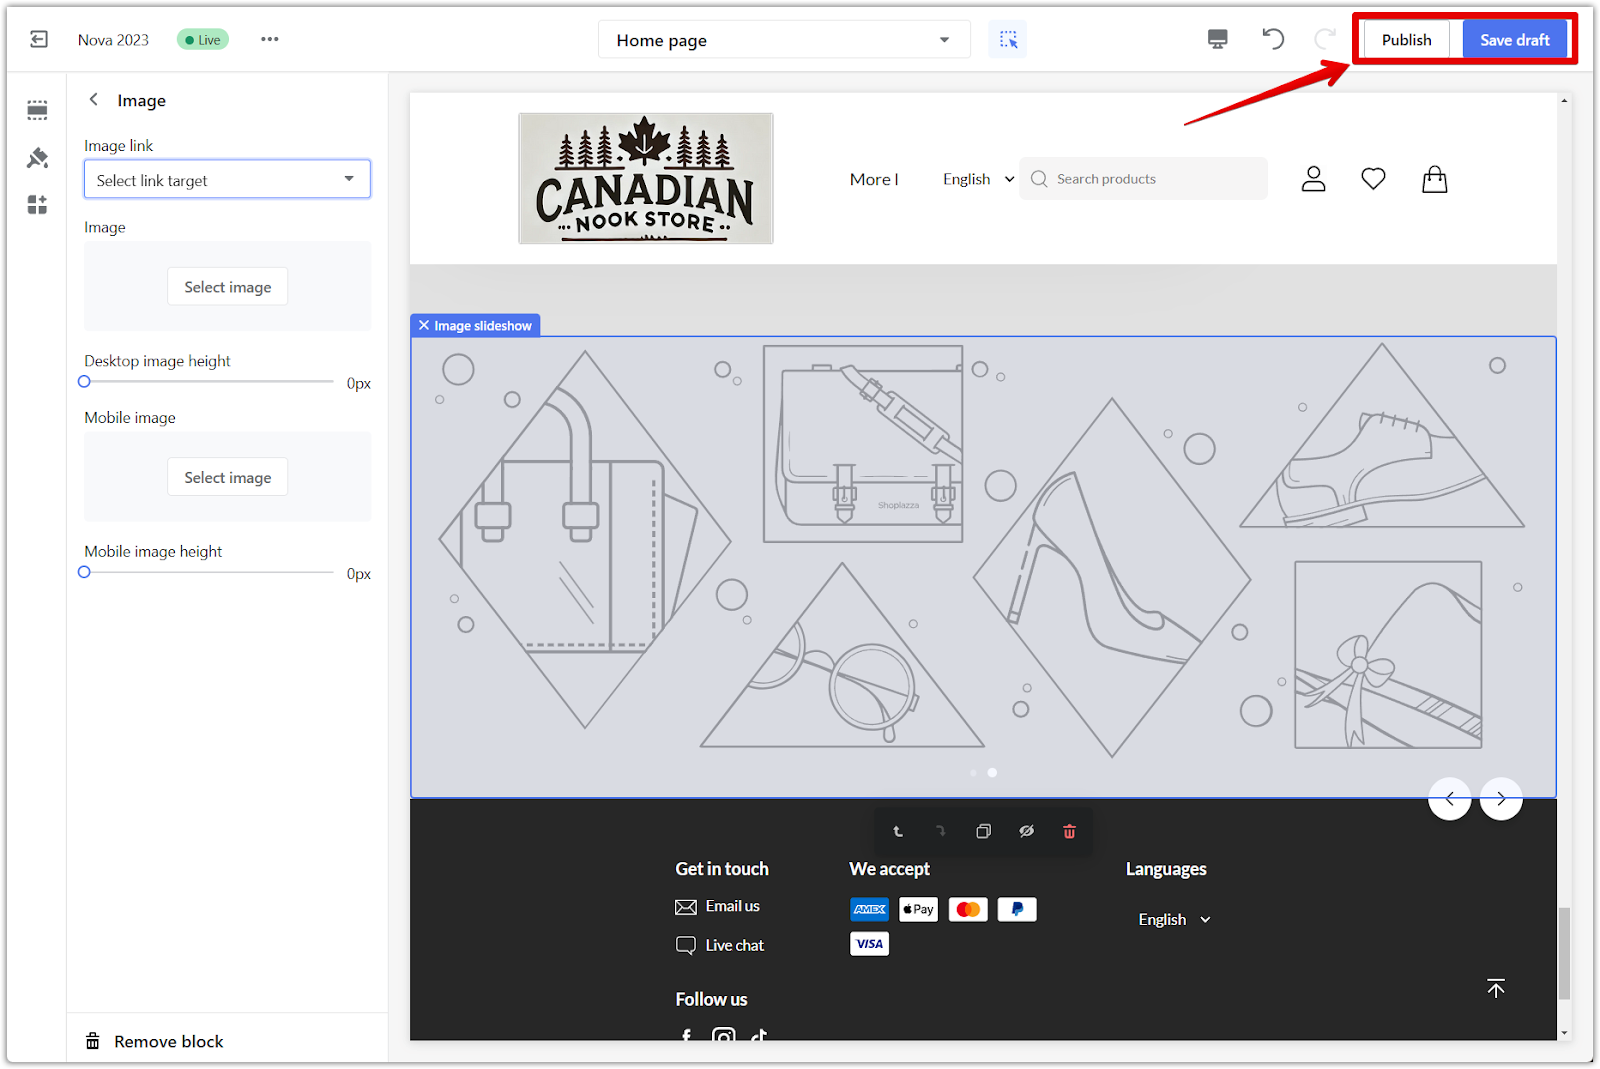
5. Save your progress: Click Publish to make your changes live on your store, or click Save draft to save your changes without publishing.
Optimizing image settings
Ensure your images look their best on all devices.
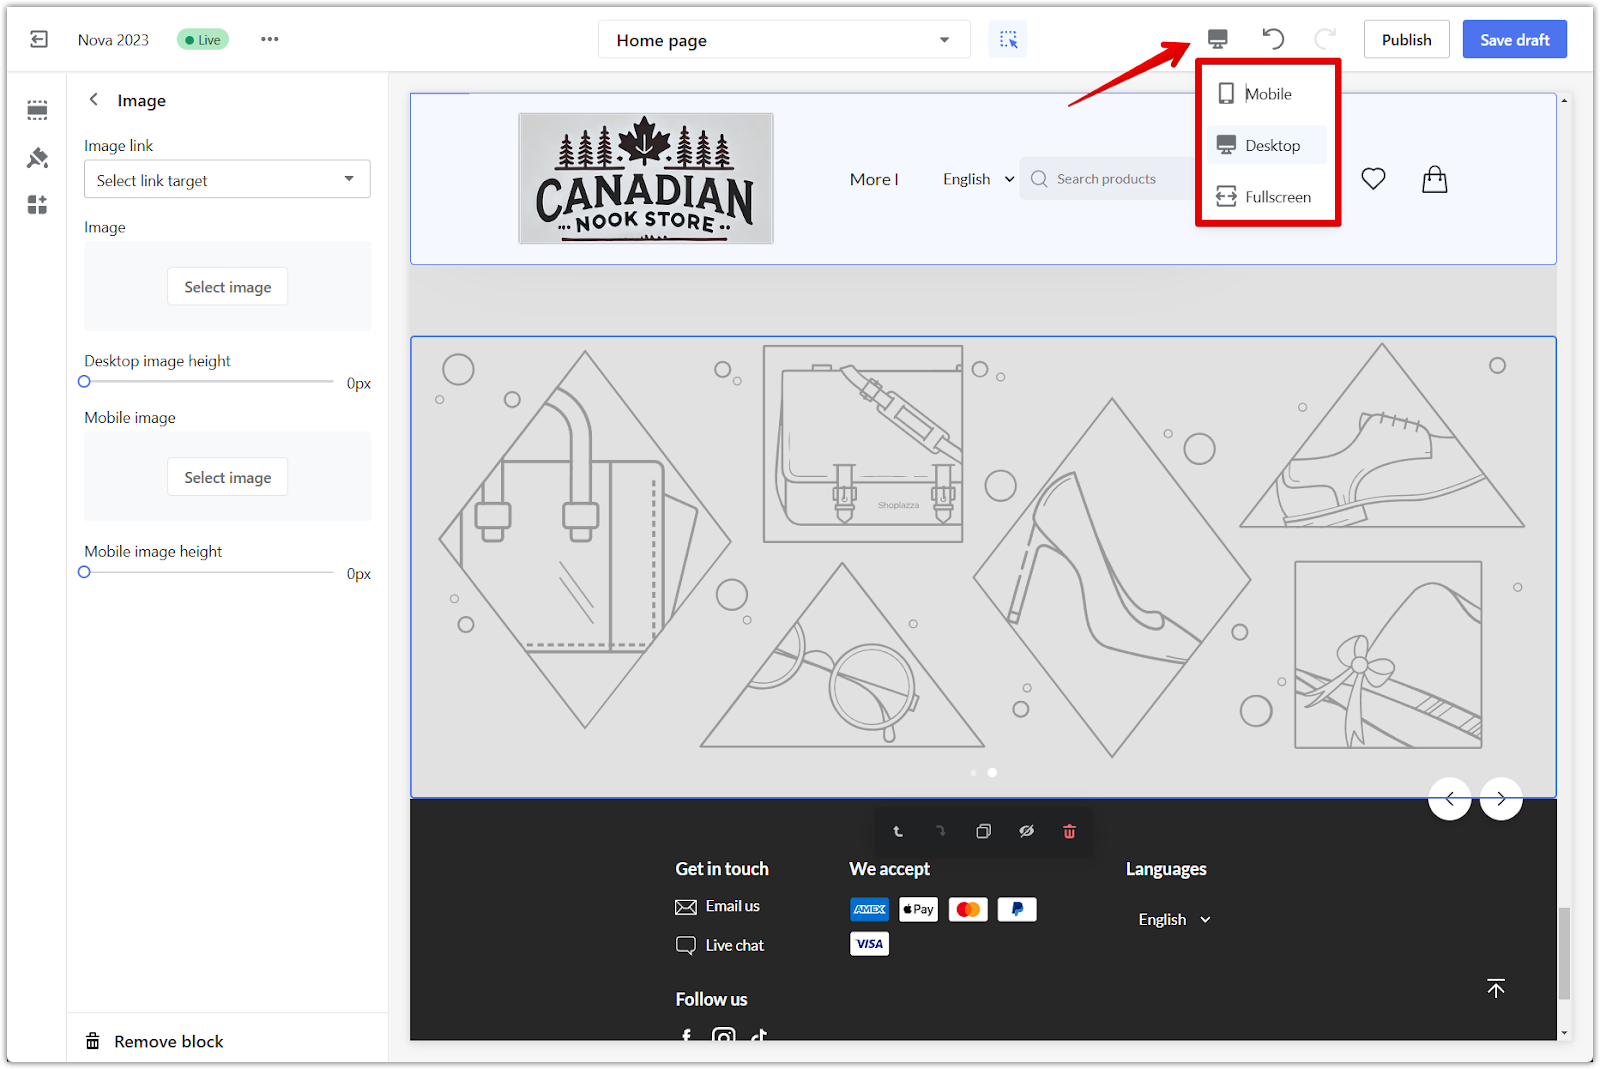
1. Refine image properties: Adjust image settings to optimize their appearance. Use the preview icon in the top right corner to preview how your slideshow will appear on mobile, desktop, or fullscreen.
Adding an image slideshow to your storefront will create a dynamic and engaging visitor experience. This feature enhances the visual appeal of your store, helps capture customer interest, and encourages interaction.


Comments
Please sign in to leave a comment.