
This integration boosts sales by offering customers the option to pay in 4 interest-free installments through Klarna. A small message appears on product pages, informing customers of this convenient payment option. This can increase conversions and average order value while enhancing customer satisfaction.
Integrating Klarna On-Site Messaging
This guide outlines integrating Klarna On-Site Messaging into your Shoplazza store.
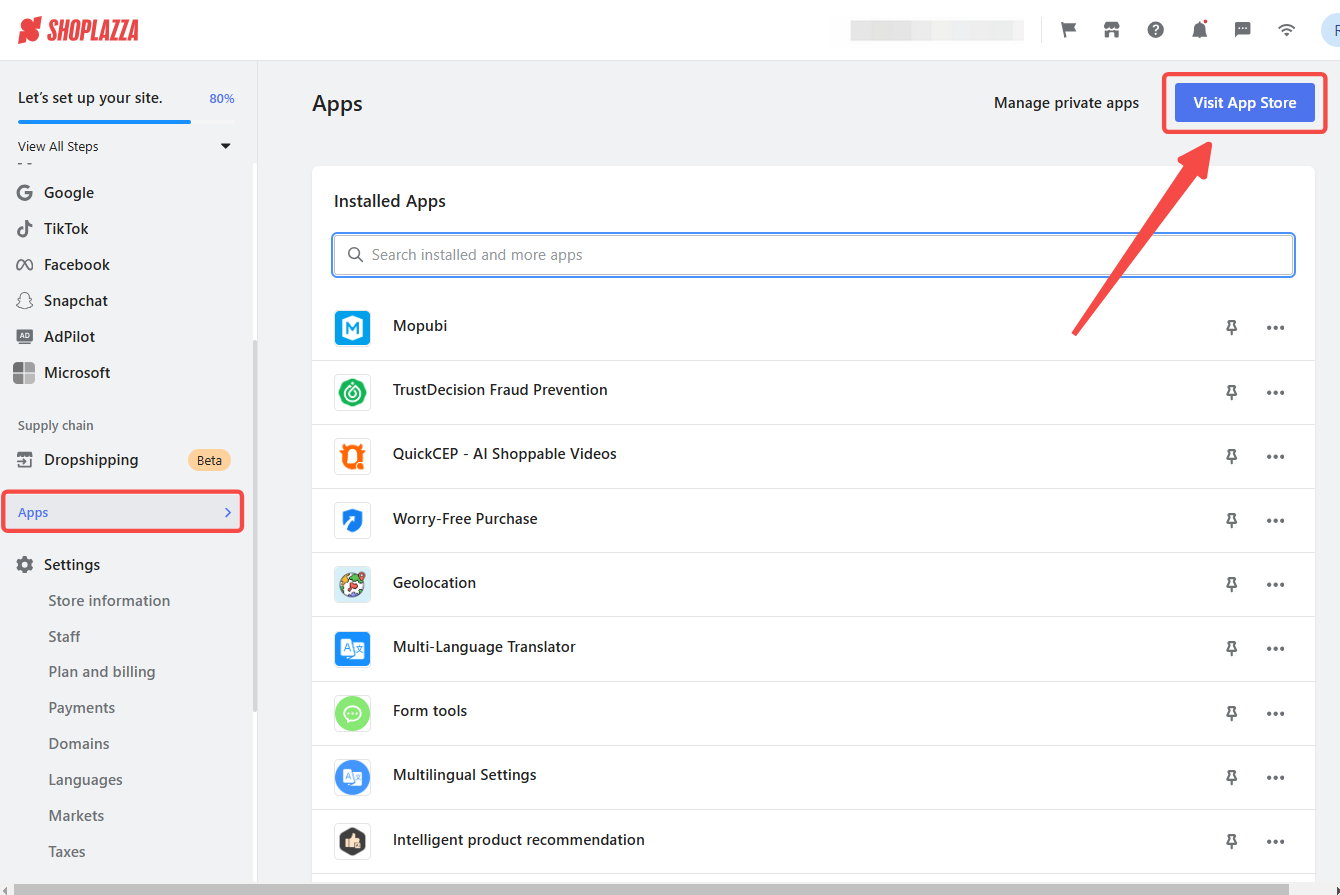
1. Navigate to the App Store: From your Shoplazza admin > Apps, click Visit App Store.
2. Find the app: Search for Klarna On‑Site Messaging in the search box and click Add app to add it to your store.

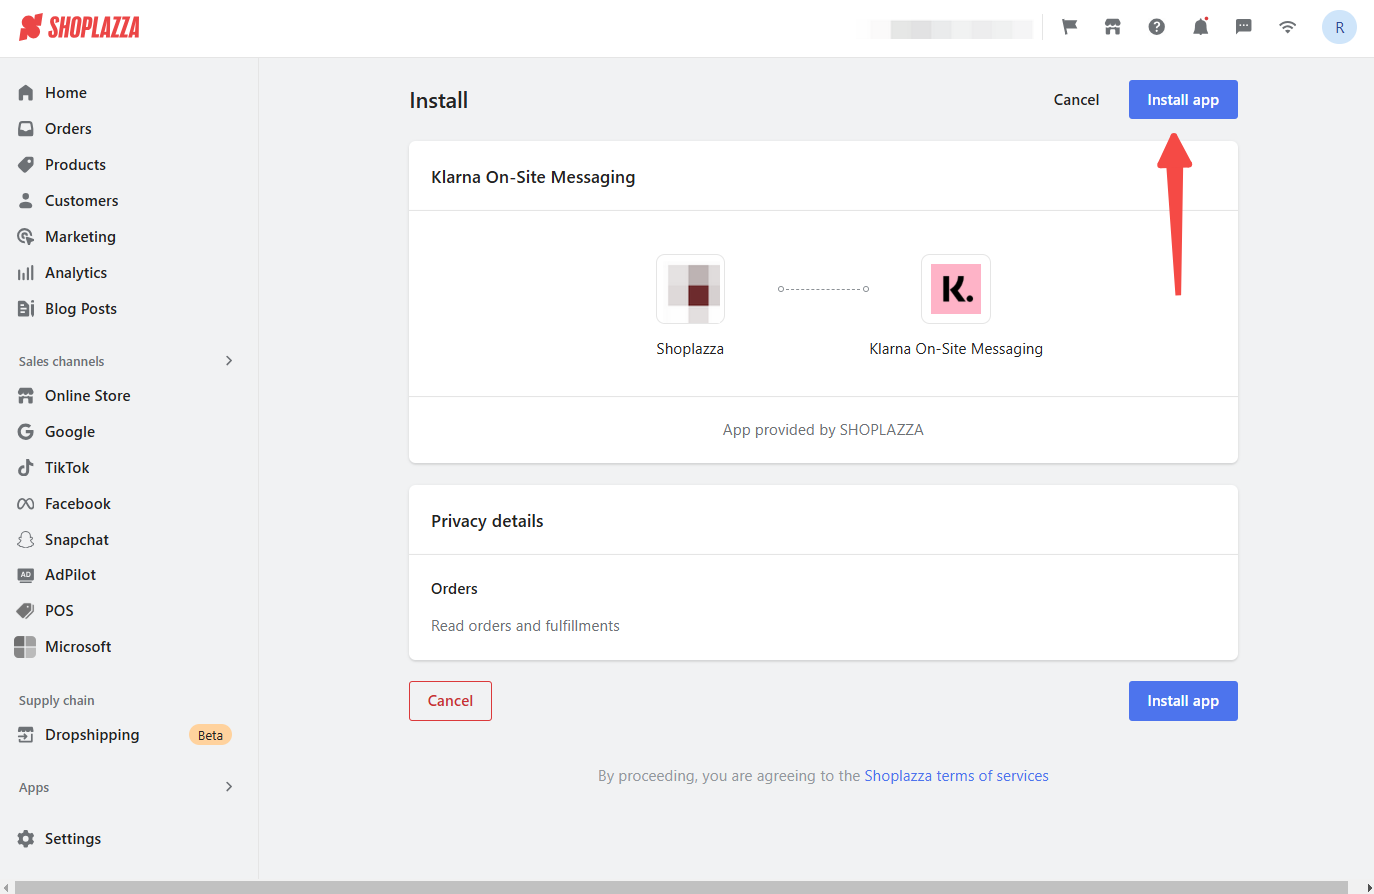
3. Install the app: On the agreement page, click Install app.
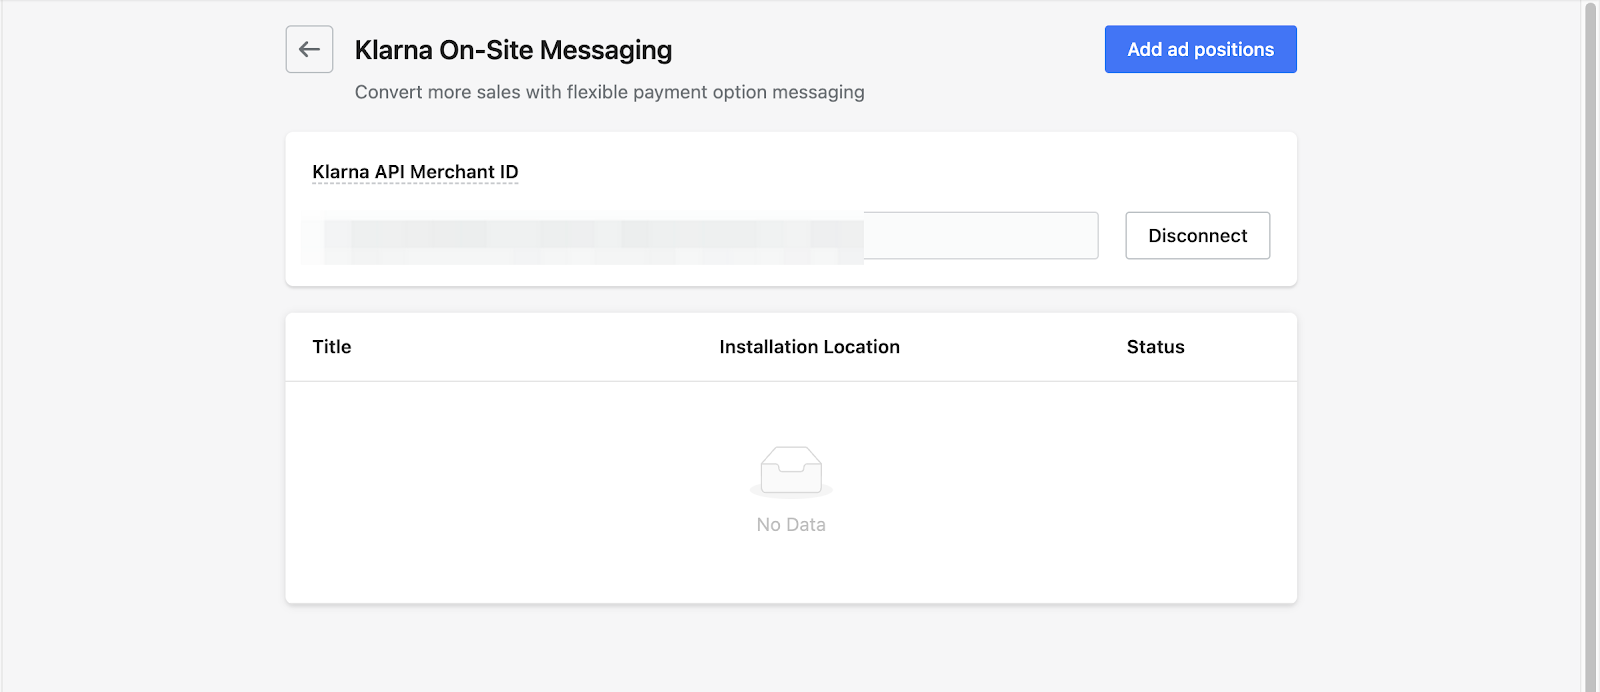
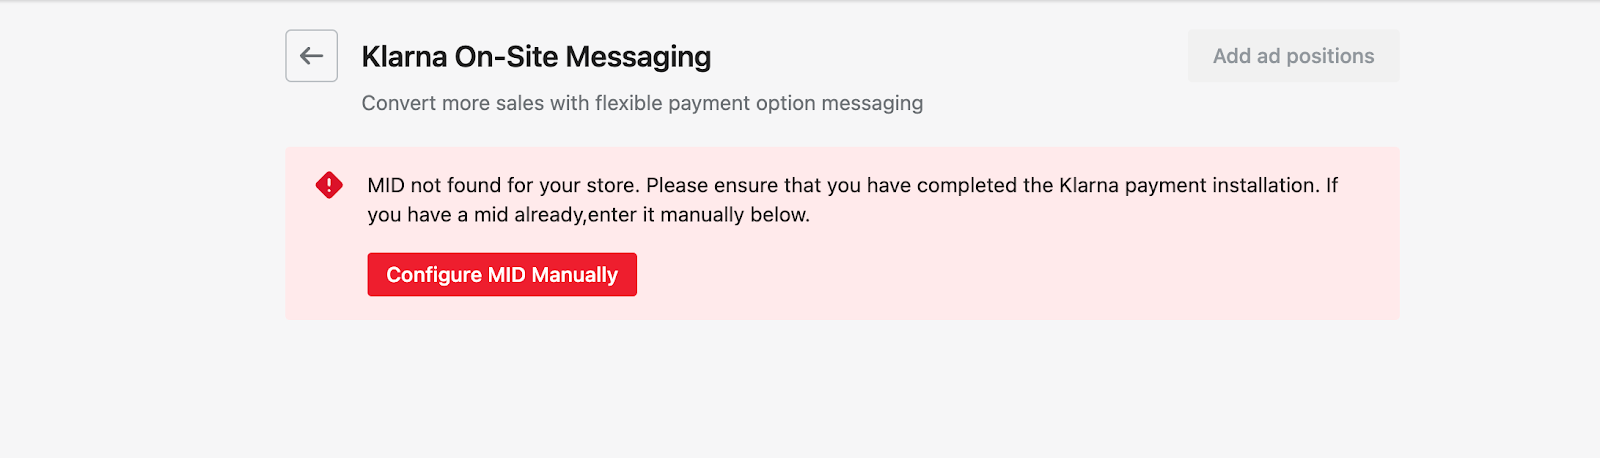
4. Connect to Klarna: Shoplazza automatically identifies and connects to your Klarna ID if Klarna is enabled as a payment method. It is recommended that you complete all Klarna payment settings beforehand. To connect your Klarna account, visit Link Klarna with Shoplazza or click Configure MID manually.
Customizing your Klarna On-Site Messaging
These settings allow for a customized installment plan.
1. Configure Klarna on-site messaging: Gain more control over the messaging by adjusting the settings below:
- Maintain consistency: Ensure consistent installment information across all pages (product detail, shopping cart, etc.).
- Toggle visibility: Display or hide Klarna OSM on web pages.
- Choose a title: Enter a preferred name for the installment option.
- Select locale: Choose the language for installment information.
- Select installment page: Choose where installment information should be displayed.
- Select placement: Choose a writing style and design. Options include displaying detailed installment payment information or using a minimalistic design without detailed information.
- Position information: Choose where the information should appear on the webpage.
- Explore theme options: Explore visuals and other options.
- Save settings: Click Save to store your settings.


Note
This integration may cause unexpected issues with certain themes. Review your store / theme to ensure proper functionality on all web pages after completing the setup.
By integrating Klarna On-Site Messaging, you can provide your customers with a seamless and user-friendly payment experience, encouraging higher conversions and increased customer satisfaction.


Comments
Please sign in to leave a comment.