In the digital commerce arena, seamless payment integration is essential for effective business management. Adyen, a renowned online payment service provider, delivers a wide array of payment methods such as credit cards, bank transfers, and localized payment solutions. By integrating Adyen with Shoplazza, a comprehensive e-commerce platform, merchants are empowered to offer diverse payment channels including internet, mobile, and POS systems. To leverage these benefits, it's important to first configure your Adyen account before activating it in Shoplazza's admin. If you have not signed up with Adyen, contact them by click here. Once you've configured Adyen, you'll need to transfer certain details to your Shoplazza Admin for the integration to work seamlessly. This guide details the process of linking Adyen with Shoplazza, ensuring a smooth setup for your online store.
Initial Configuration
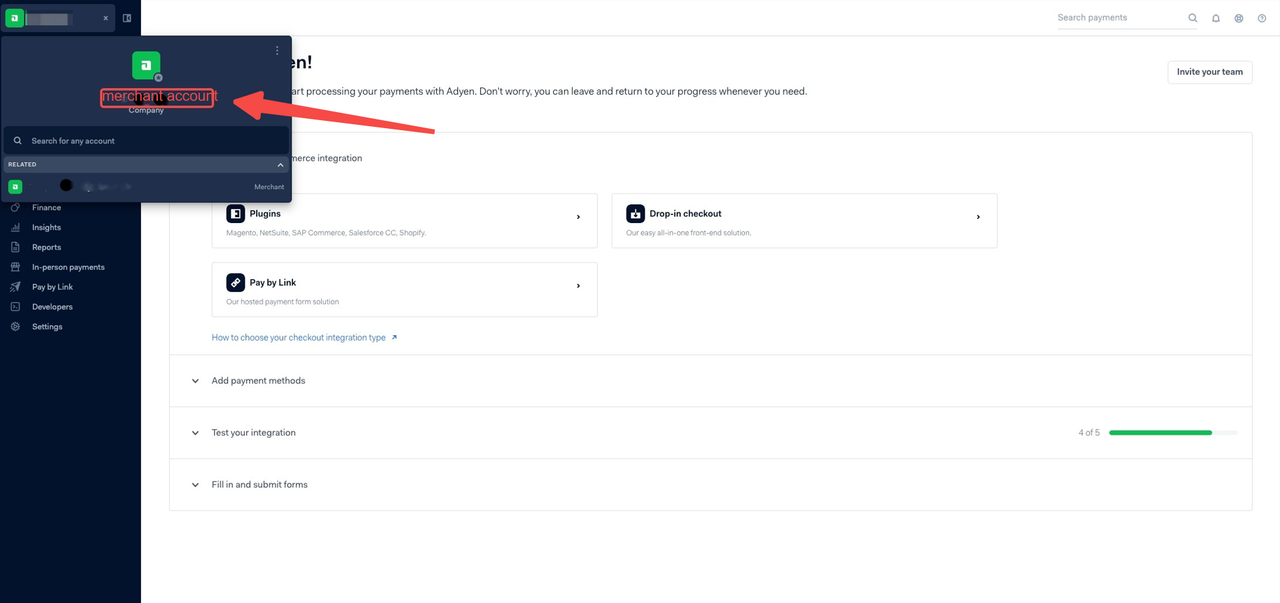
Obtaining necessary details from Adyen1. Merchant Account Name
- Sign in to your Adyen account.
- Your merchant account name is visible at the top left corner of the dashboard.
- You will need to copy and paste this name into your Shoplazza Admin in the Adyen configuration page (explained more in the next section below).

2. API Key Generation and Storage
- Log in to your Adyen’s Customer Area.
- Proceed to Developers > API credentials.
- Select the integration username, for example, 'ws@Company.YourCompanyAccount'.
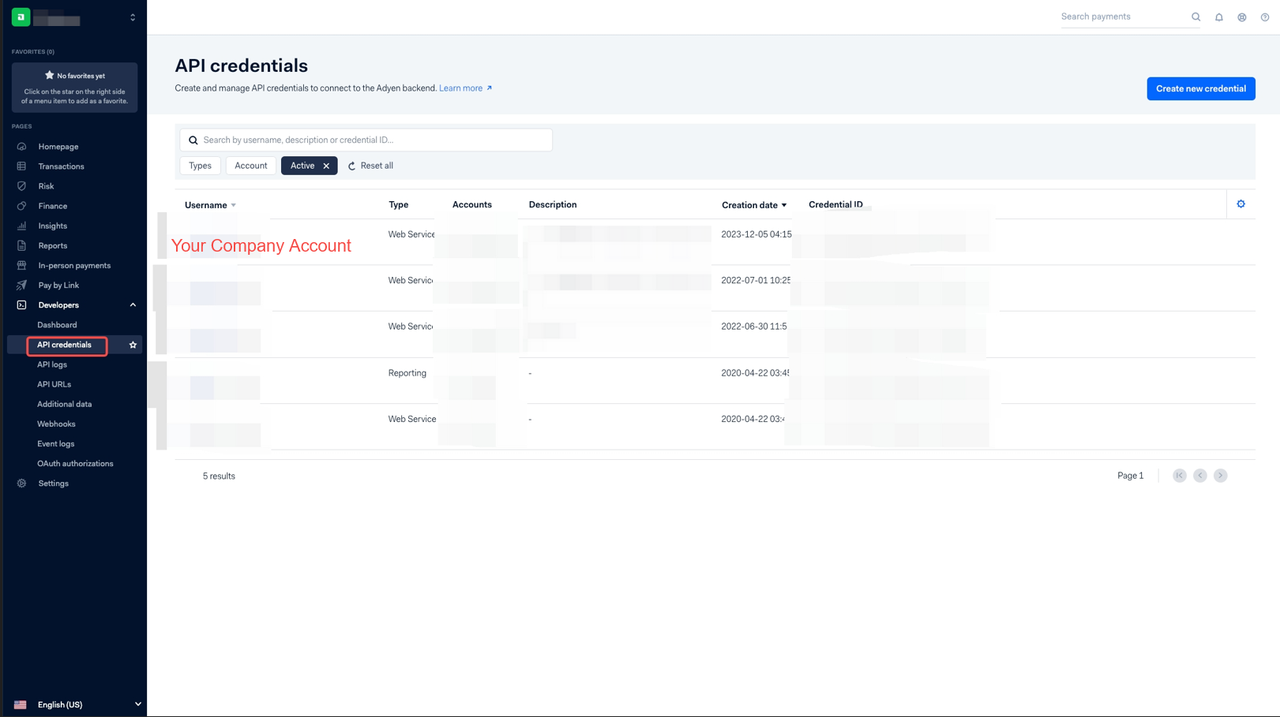
- Under Server settings > Authentication, access the API key tab.
- Click Generate API key. You will need to copy and paste this name into your Shoplazza Admin in the Adyen configuration page (explained more in the next section below).


3. API URL Prefix Location
- In Adyen, access the live Customer Area.
- Go to Developers > API URLs.
- On this page, you can see the configured data centres and prefixes for your company account.
- You will need to copy and paste this information into your Shoplazza Admin in the Adyen configuration page (explained more in the next section below).


4. Obtaining CSE Public Key
- Log in to your Customer Area using your company-level account.
- Navigate to Developers > API credentials.
- Select the integration username, for example, 'ws@Company.YourCompanyAccount'.
- Find the Client-Side Encryption section and copy the Public Key. You will need to copy and paste this key into your Shoplazza Admin in the Adyen configuration page (explained more in the next section below).


After obtaining these details from Adyen, follow these steps in your Shoplazza Admin:
1. Add the Adyen payment method: From your Shoplazza admin, go to Settings > Payments, click Add payment method.
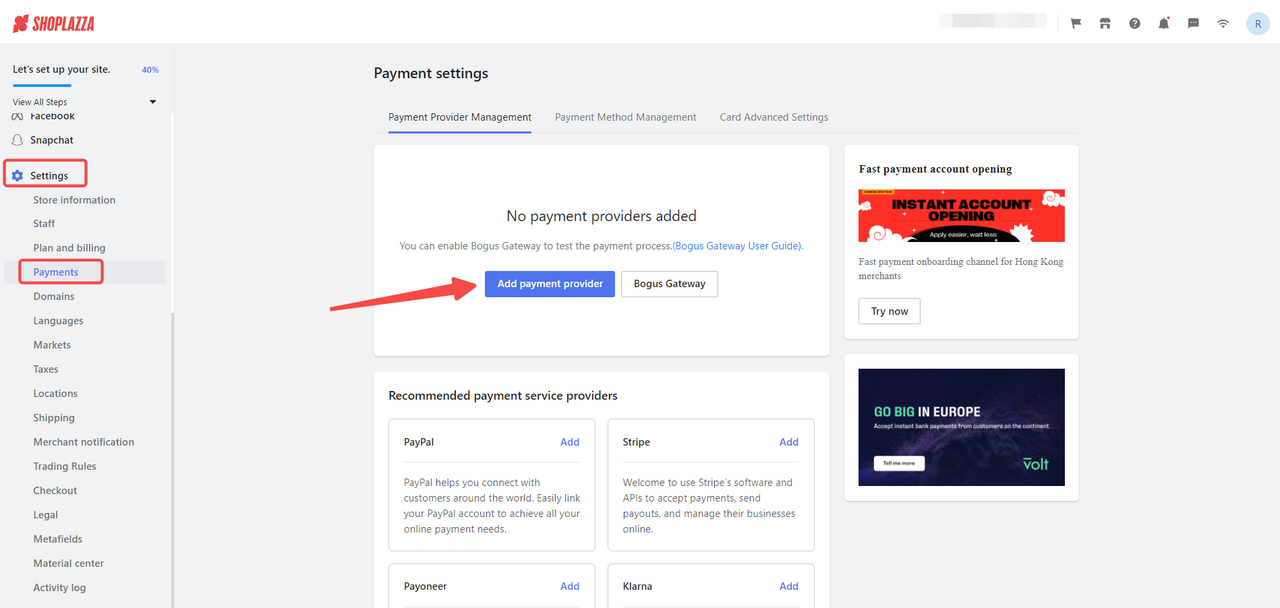
2. Search for Adyen payments: Within the payment settings, click on the Search by payment provider tab. Search for Adyen and choose Activate.

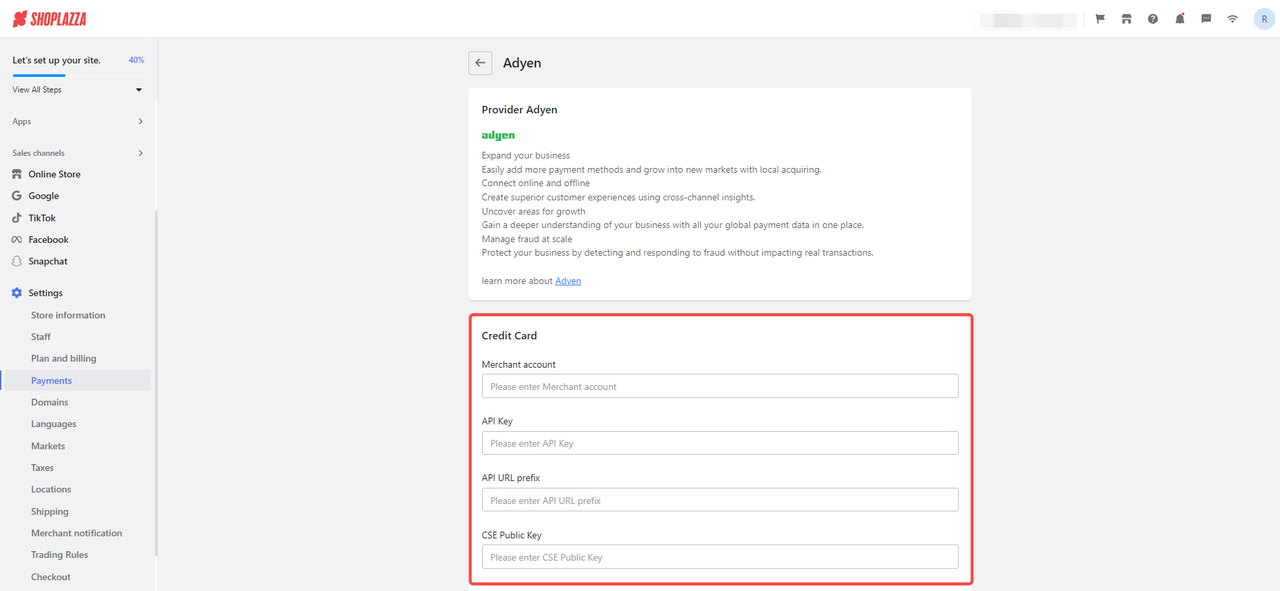
3. Enter required details: Fill out the copied details from above and paste them in the respective fields:
- Merchant account name
- API Key
- API URL prefix
- CSE Public Key
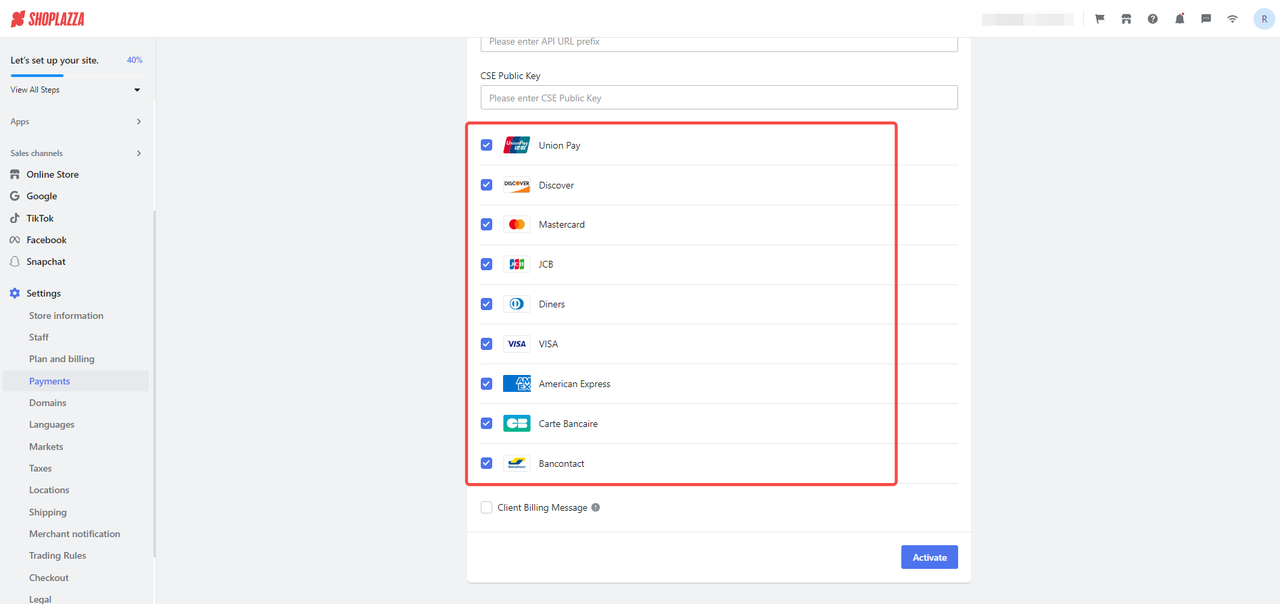
4. Select services: Decide on the types of credit cards your store will accept.
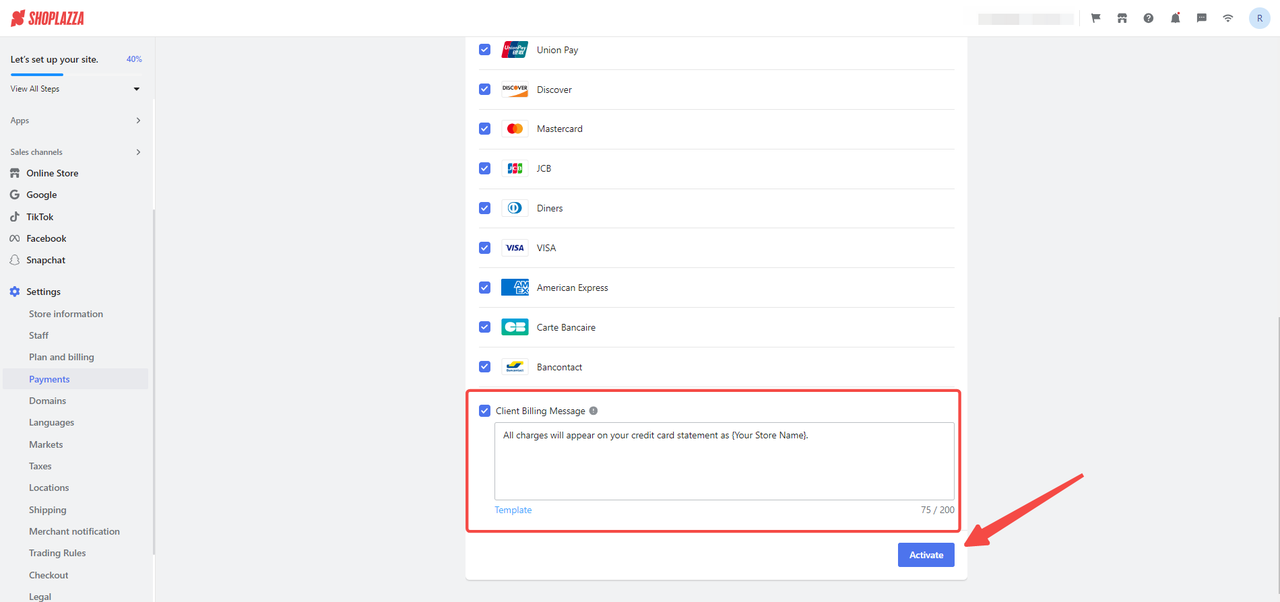
5. Finalize setup: Add a client billing message for your customers. Click Activate to start accepting payments through Adyen.
Understanding Supported Payment Methods
Understanding the variety of payment methods supported is important for a smooth checkout experience. Shoplazza stores can benefit from Adyen's inframe integration, allowing customers to input payment details directly on the checkout page, thereby supporting a variety of payment methods.
|
Payment provider |
Payment method |
Payment channels |
|
Adyen |
Credit card |
- Union Pay - Discover - VISA - Mastercard - JCB - American Express - Diners - Carte Bancaire - Bancontact |
Enhanced Integration Options
Setting up webhooks
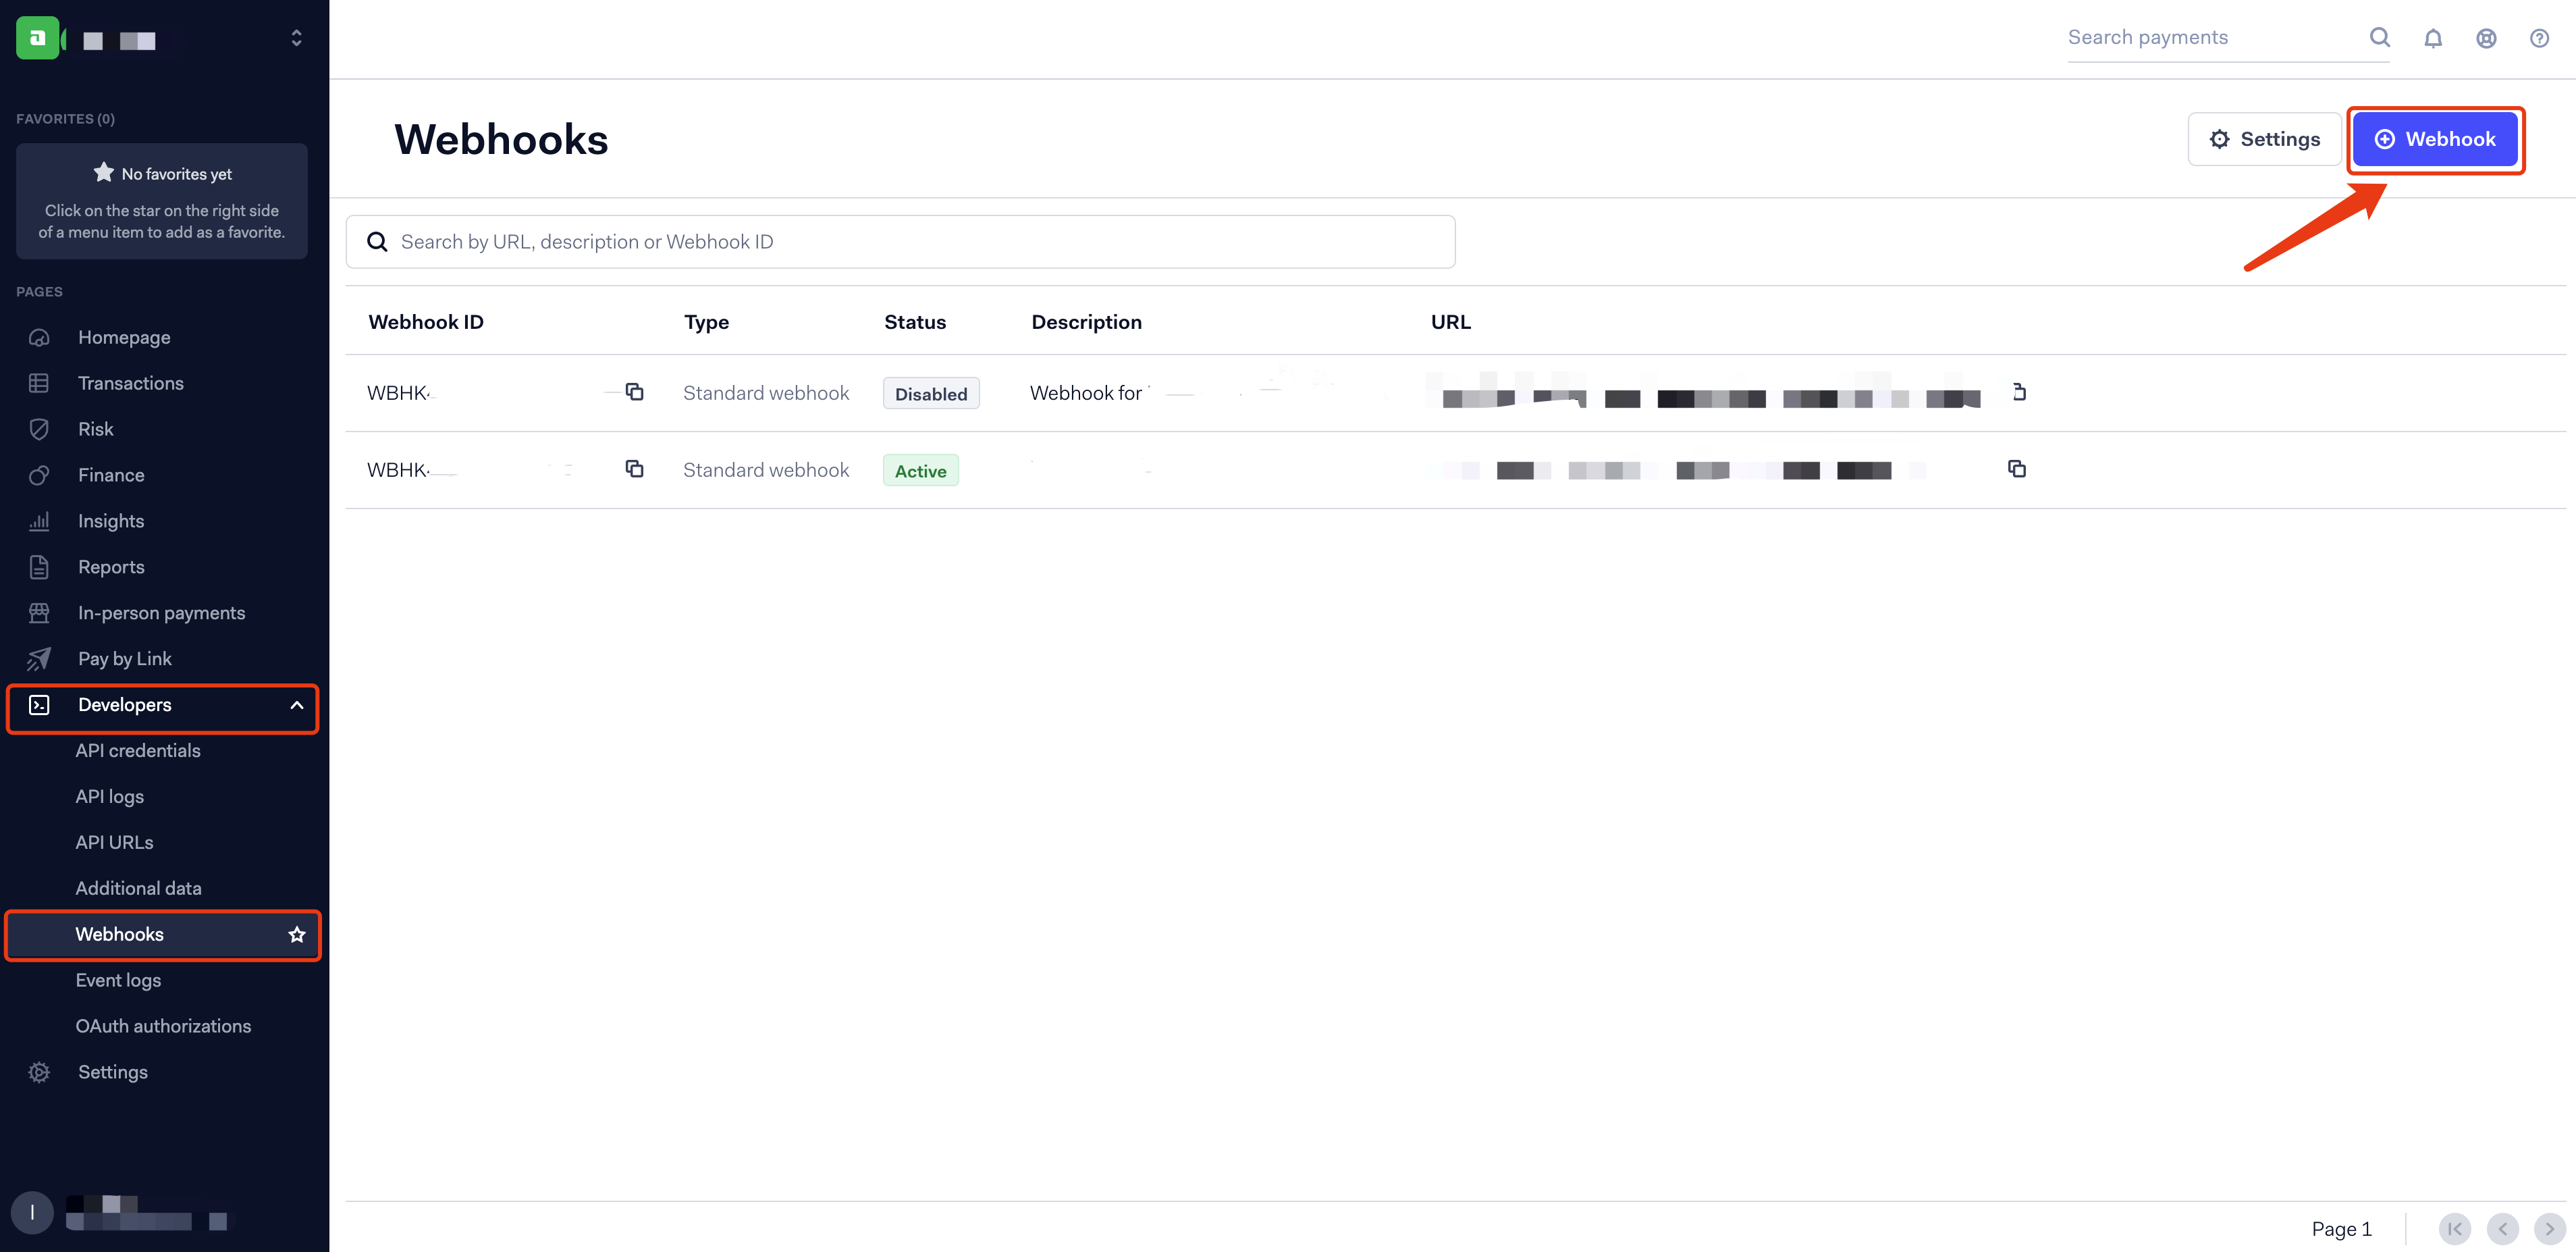
Implement webhooks in Adyen for real-time updates and efficient data exchange with Shoplazza: 1. Access Webhook Configuration: Log into Adyen management dashboard and navigate to Developers Webhooks.
1. Access Webhook Configuration: Log into Adyen management dashboard and navigate to Developers > Webhooks.
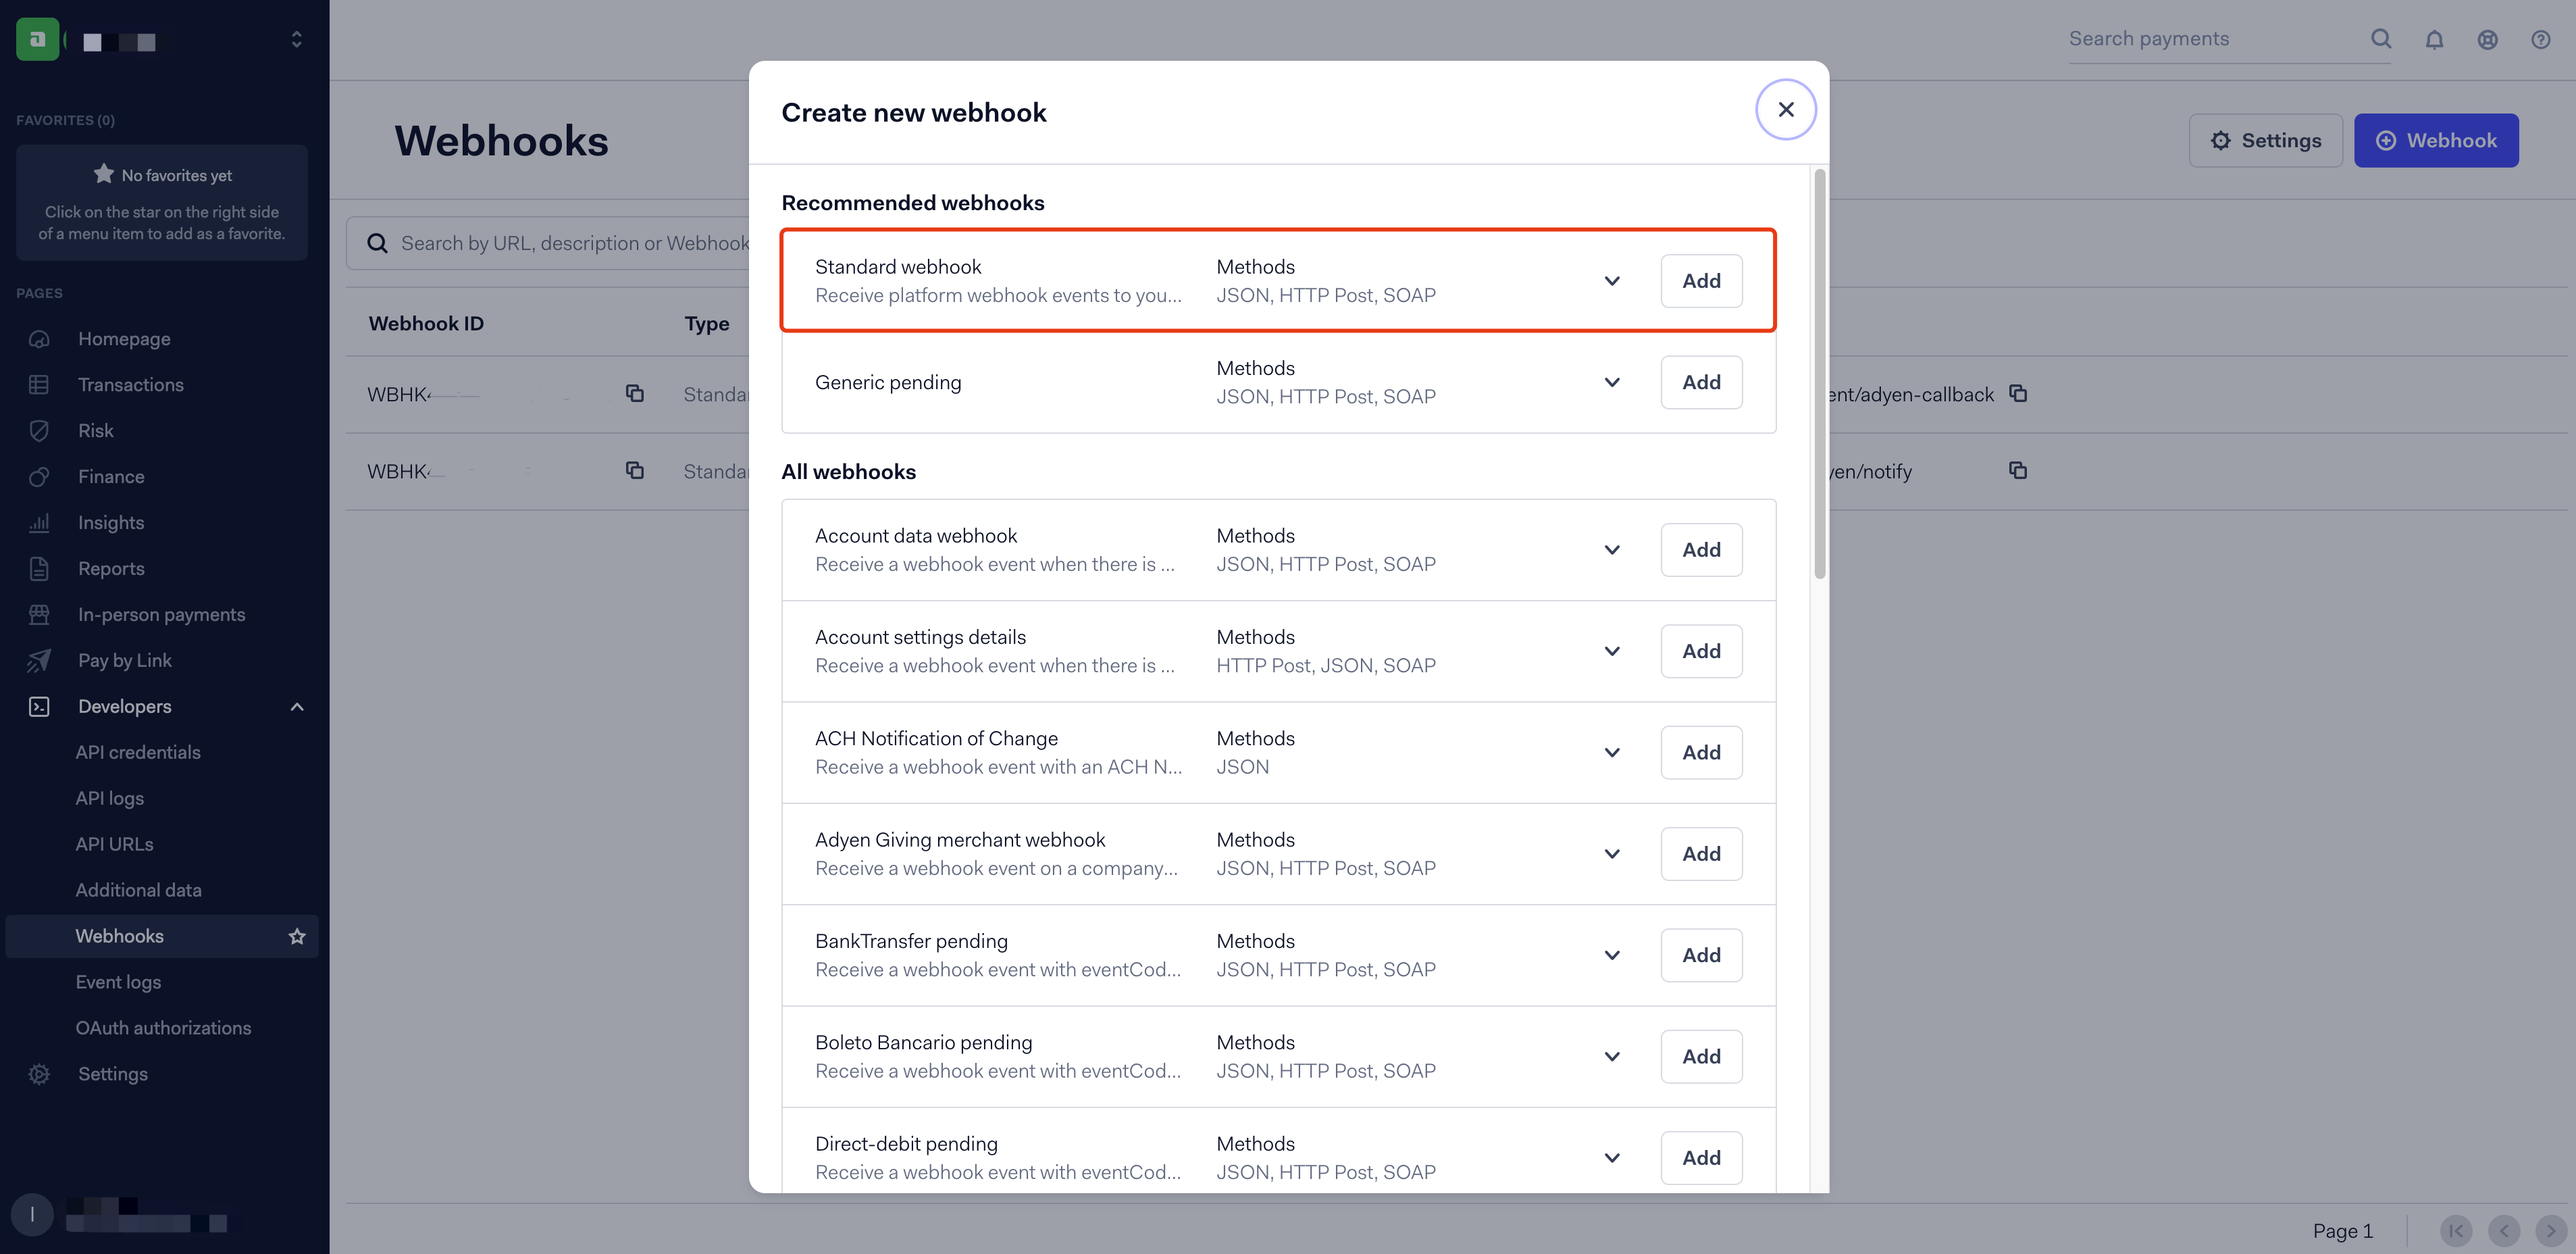
2. Add a New Webhook: Choose Standard webhook in the pop-up window and click the Add button.
3. Name your Webhook: Assign a name to your newly added Webhook in the 'Description' field to facilitate easy identification and management.
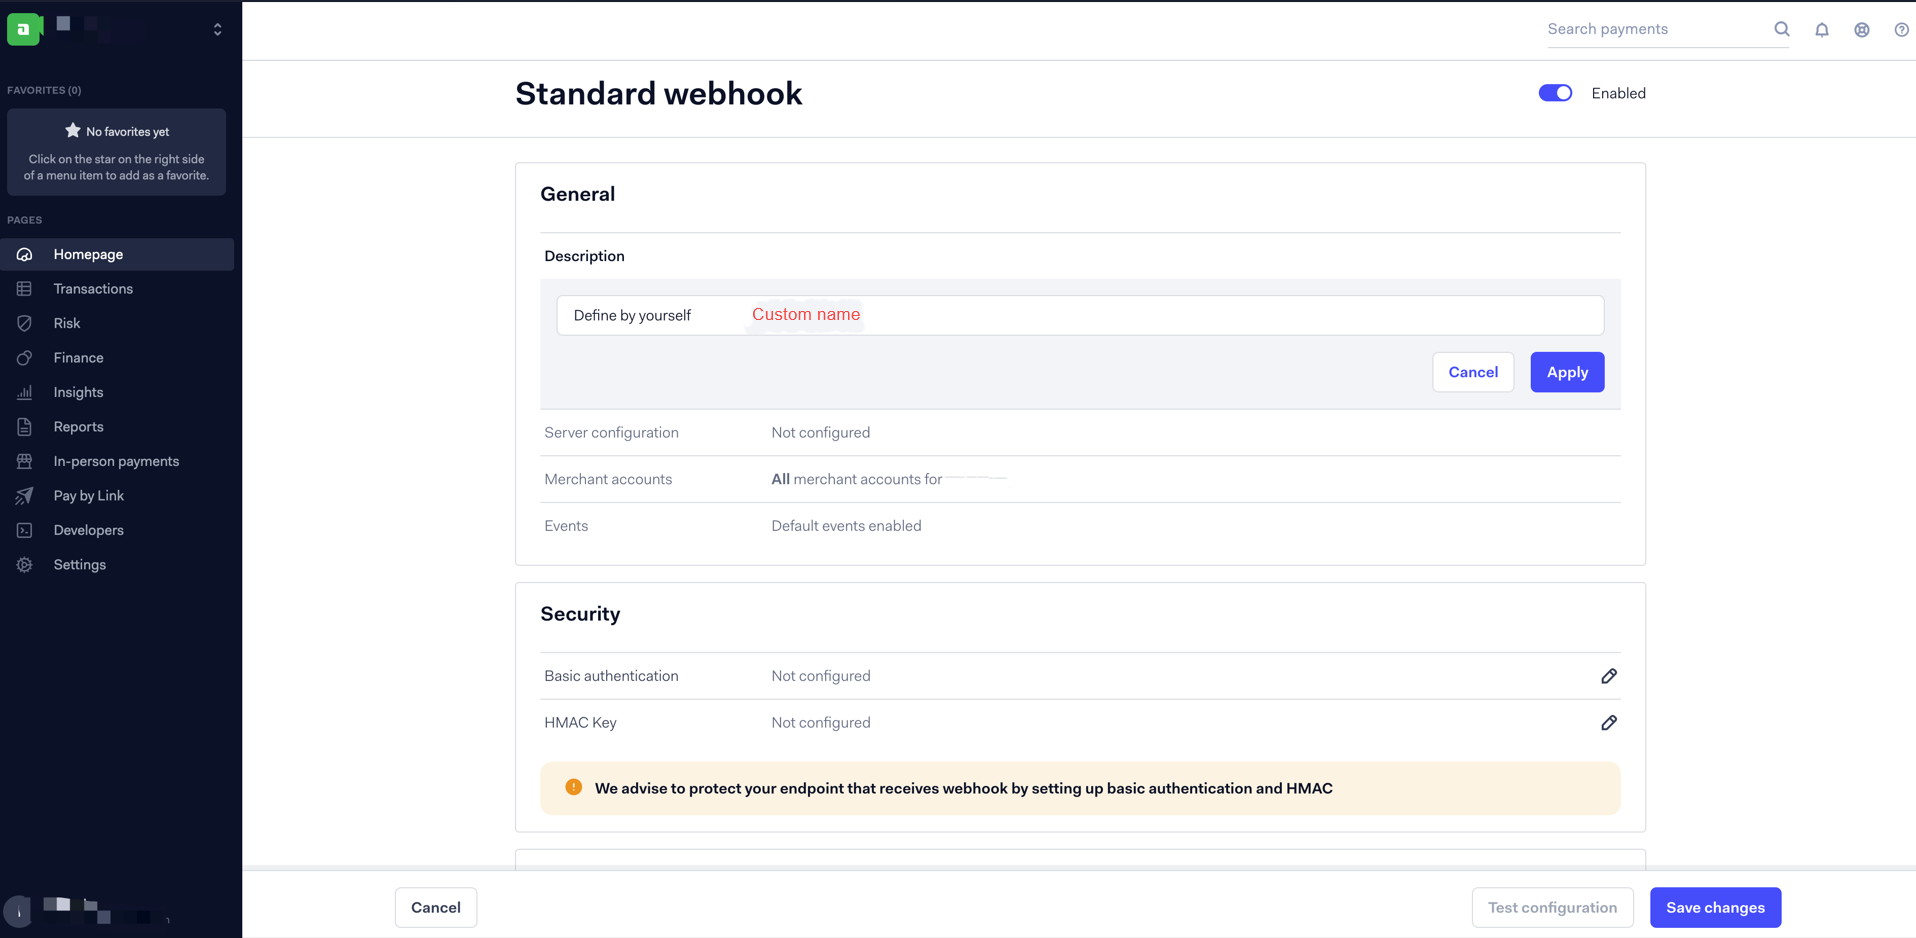
4. Enter the Webhook Address: In the "URL" field, input the webhook address designated for Shoplazza’s Adyen channel: https://callback.shoplazza.com/api/payment/adyen-callback.
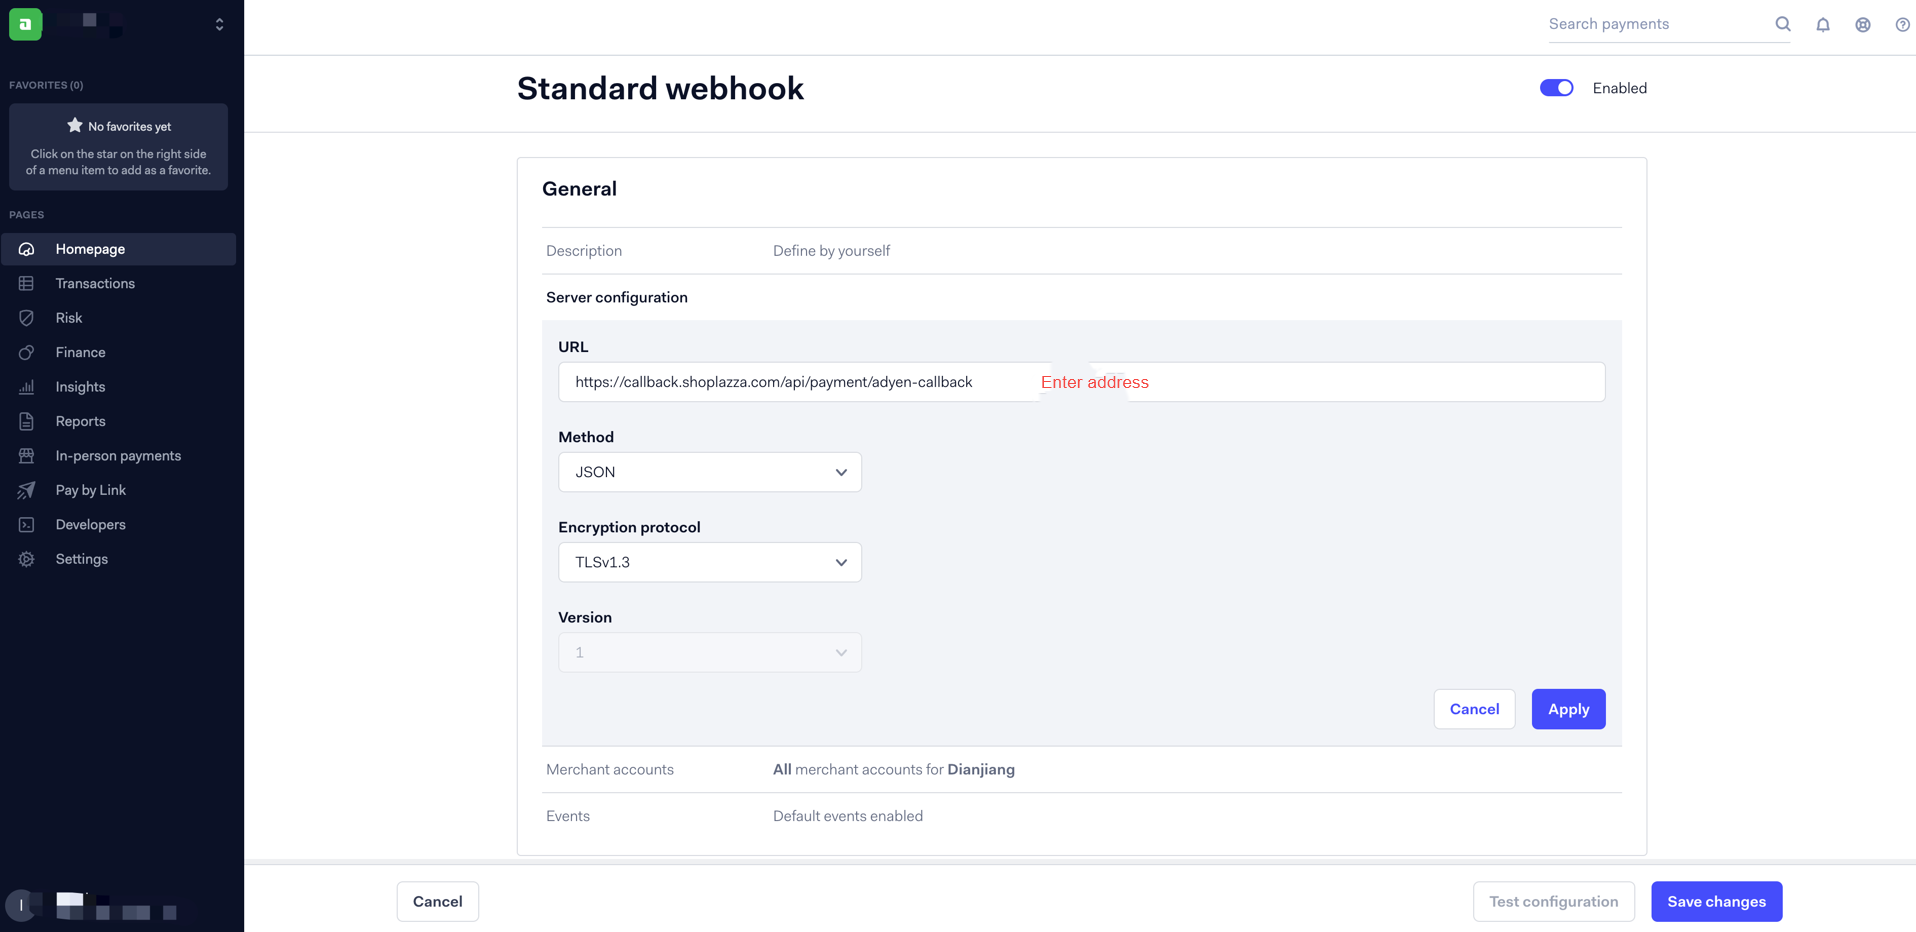
Note
No modification is needed for the Method or Encryption protocol settings.
5. Select Events to Monitor: In the 'Events' section, select the specific events you need to monitor. Commonly, the following should be included, as they are usually part of the default settings:
- AUTHORISATION
- CAPTURE
- CAPTURE_FAILED
- REFUND
- REFUND_FAILED
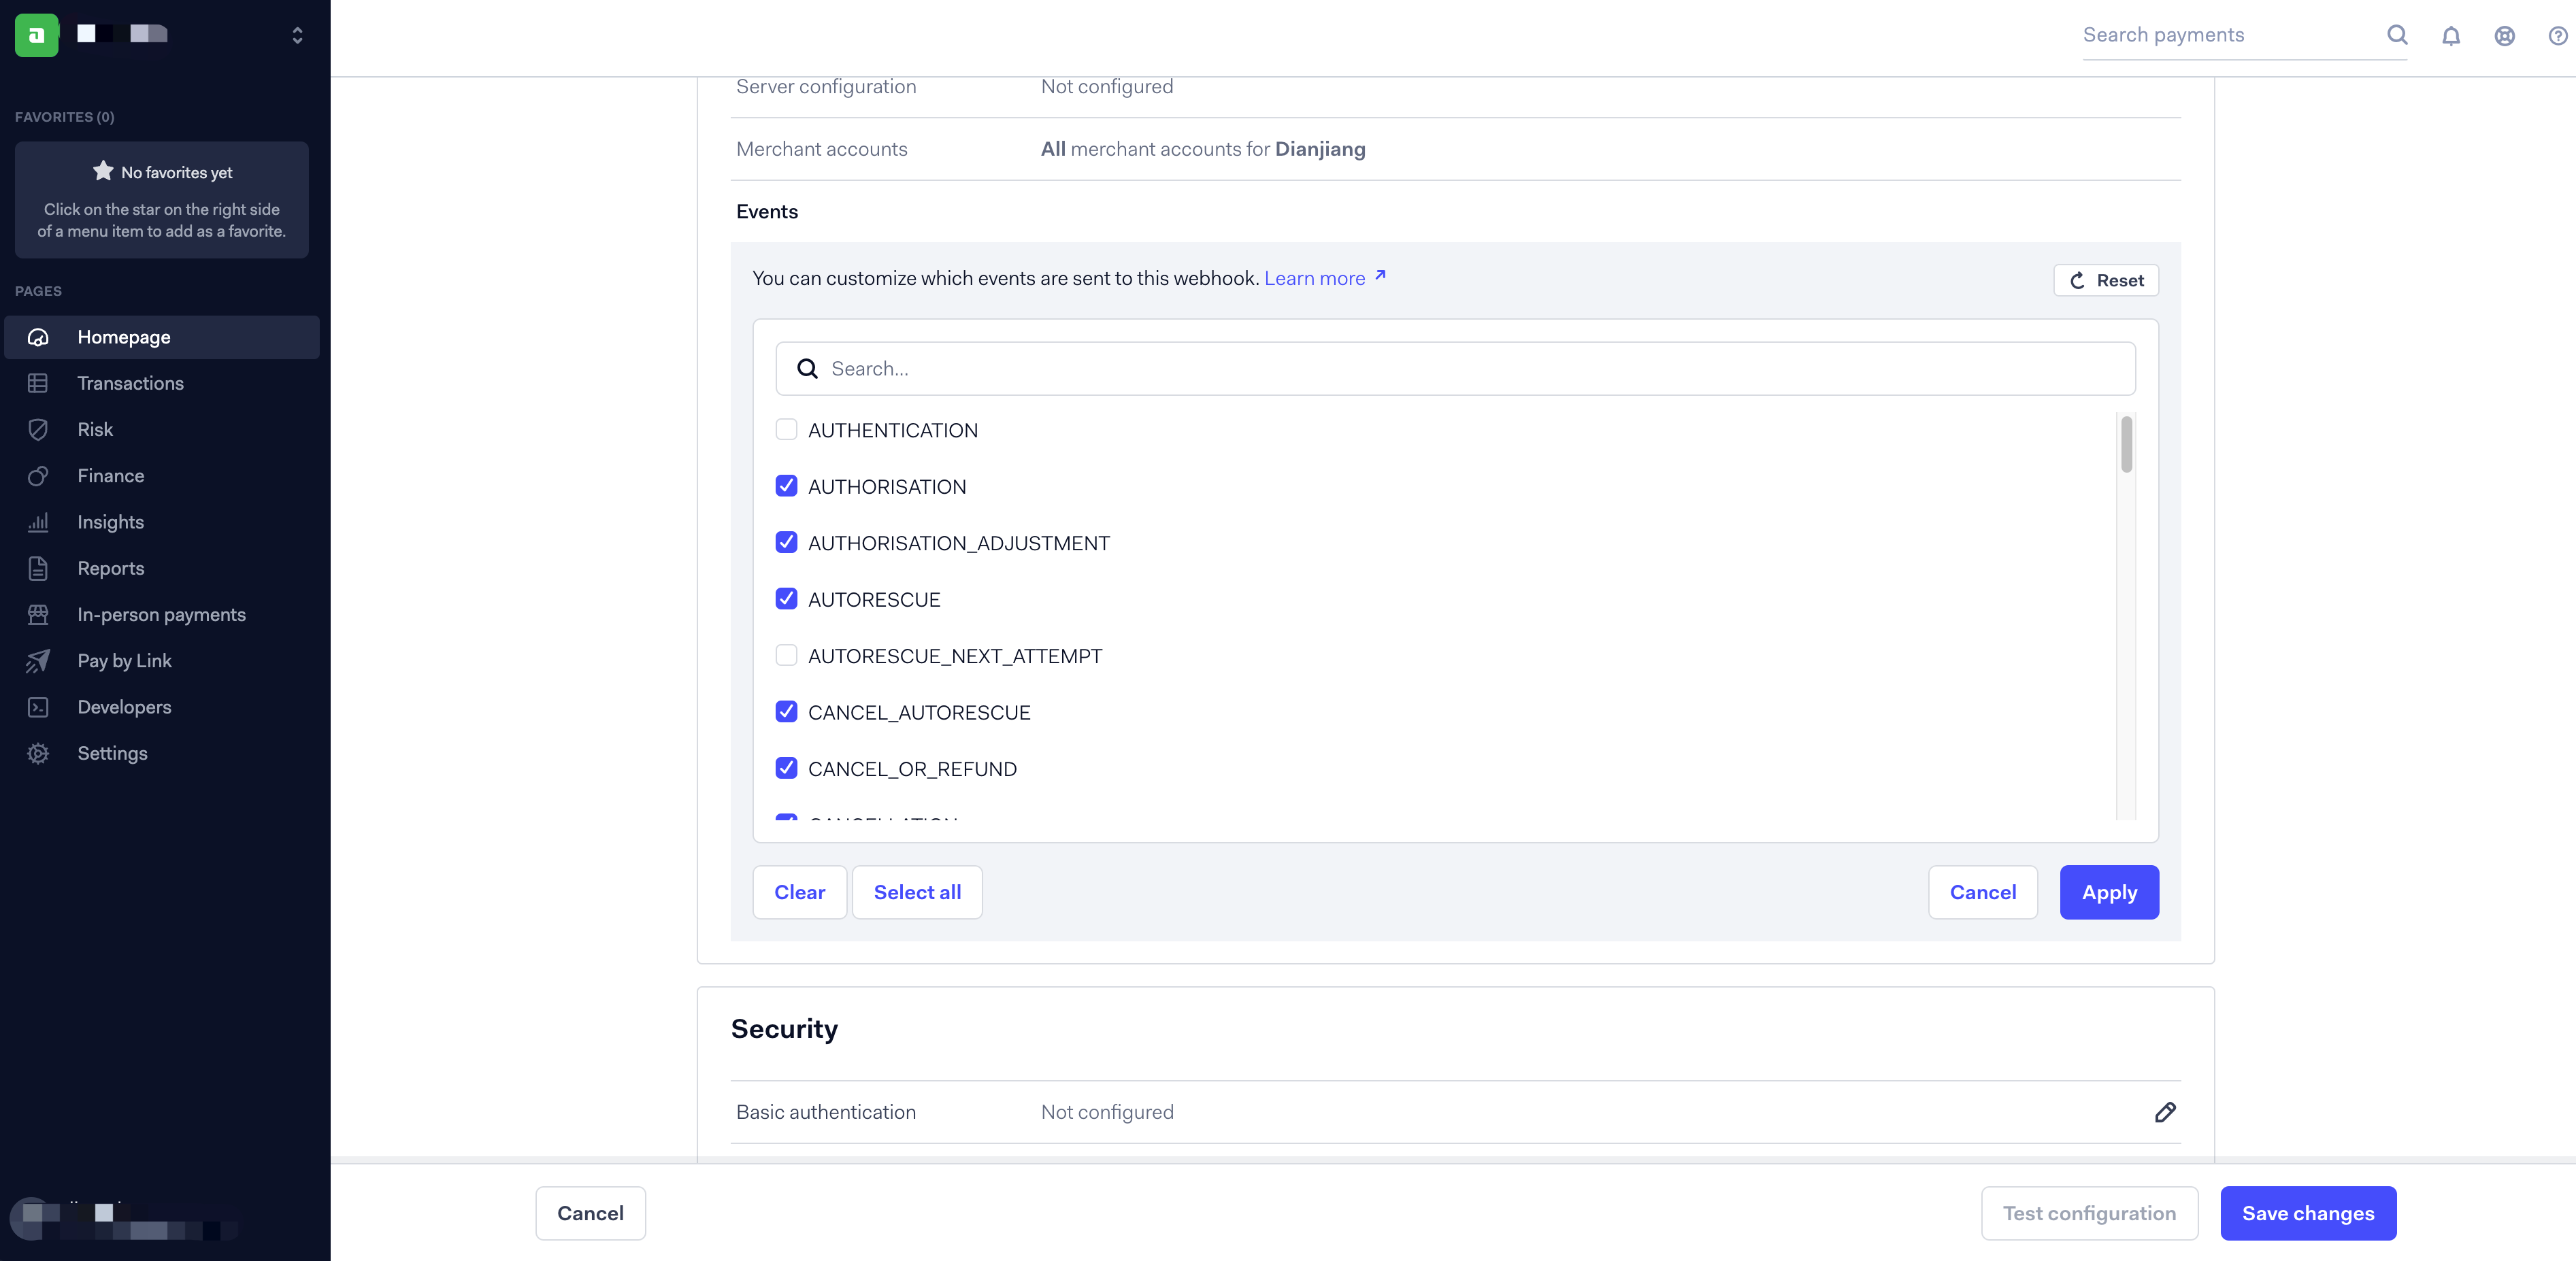
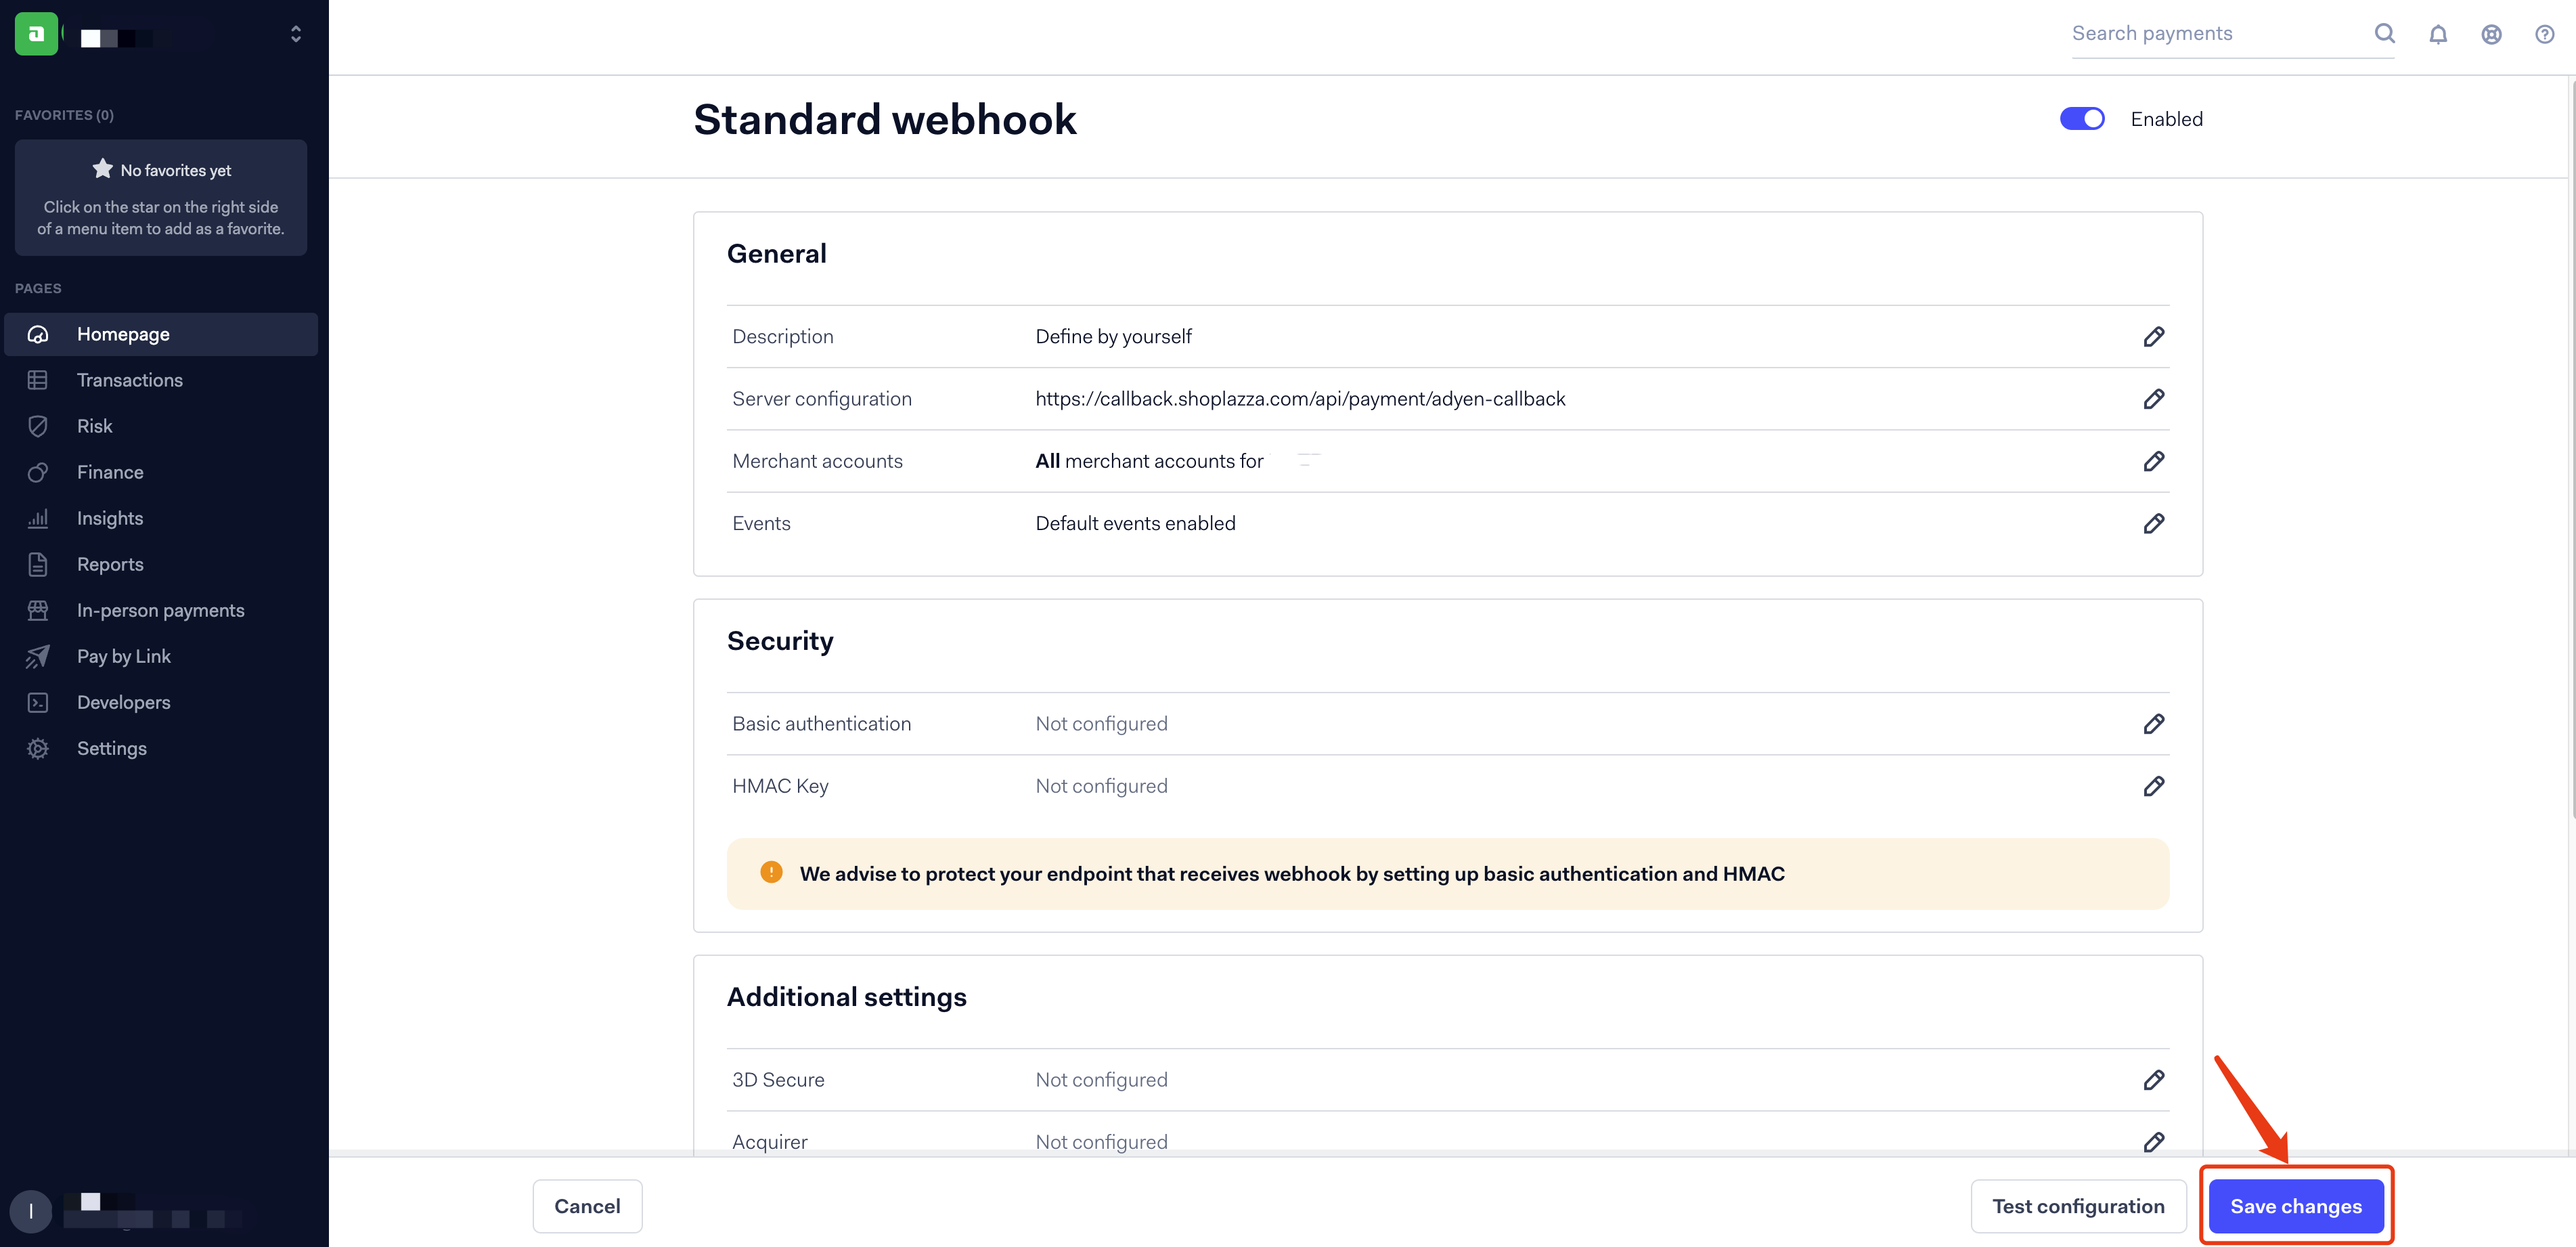
6. Save your Configuration: Finalize the setup by clicking the Save changes button.
Technical Support and Troubleshooting
For technical issues or queries during integration, visit Adyen’s Help Center, access their Documentation, or check the System Status for real-time updates.
Ensure you regularly check for updates on both Adyen and Shoplazza to maintain compatibility and take advantage of new features.
Integrating Adyen with Shoplazza streamlines the payment process, enhancing the capabilities of your e-commerce platform. By following these steps, merchants can provide a seamless, secure payment experience, catering to a range of customer preferences and expanding the potential customer base with diverse payment options.


Comments
Please sign in to leave a comment.