
The Microsoft Pixel ID is an essential tool for tracking and reporting website traffic through Microsoft Ads. This unique identifier allows you to monitor your ad campaigns' performance and gain insights into how users interact with your website. Collecting data on visitor behavior, sources, and activities, the Microsoft Pixel ID helps you optimize your advertising strategies and improve conversion rates. This guide will walk you through everything you need to get started, from installing the OnePixel app to obtaining your Microsoft Pixel ID and setting up conversion goals to track specific actions on your site.
Installing the OnePixel app
To start using OnePixel, you’ll first need to install the app in your Shoplazza store. Here’s how you can do it:
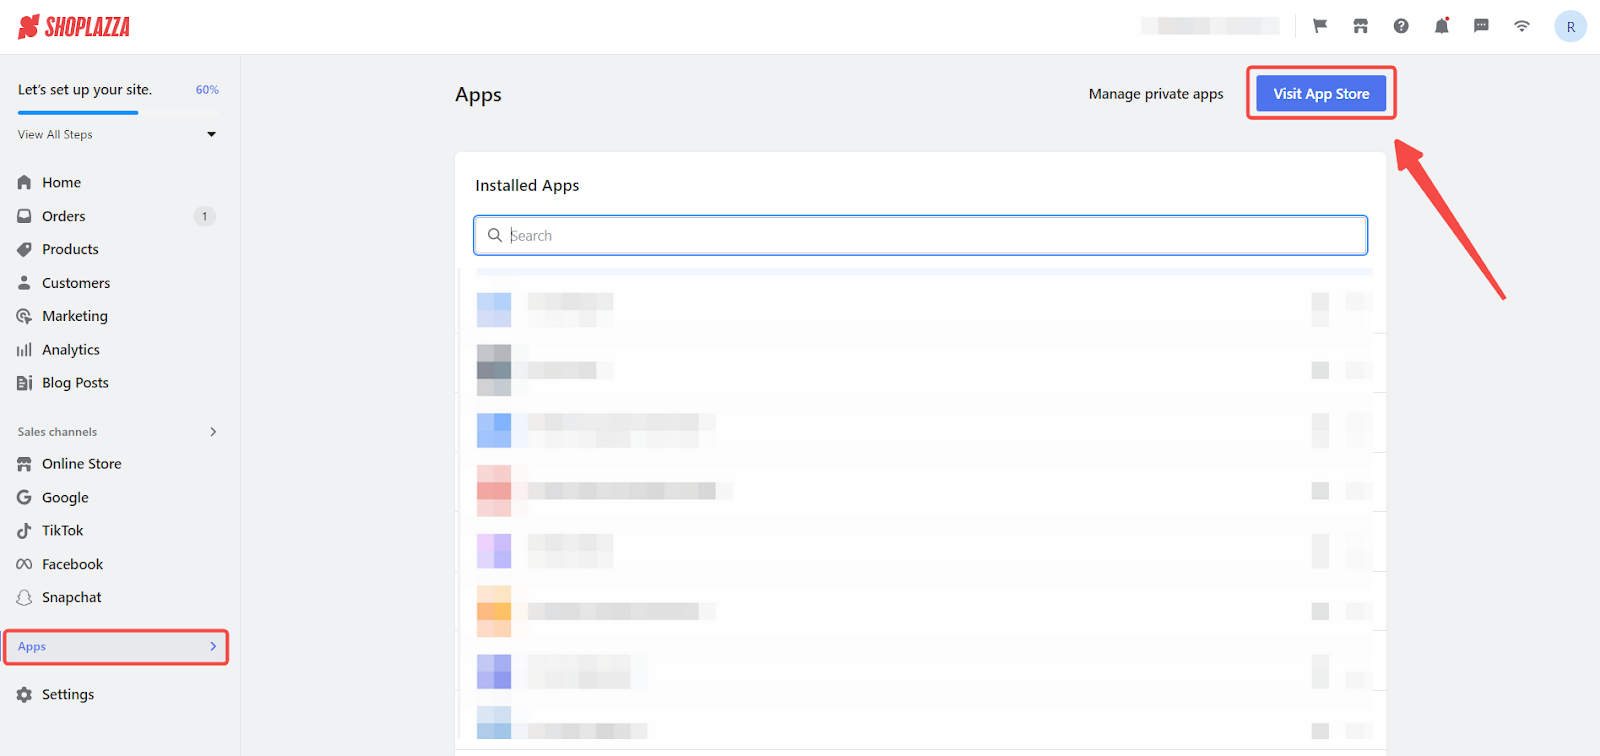
1. Access the App Store: Access the App Store by navigating from your Shoplazza Admin > Apps, and clicking Visit App Store.
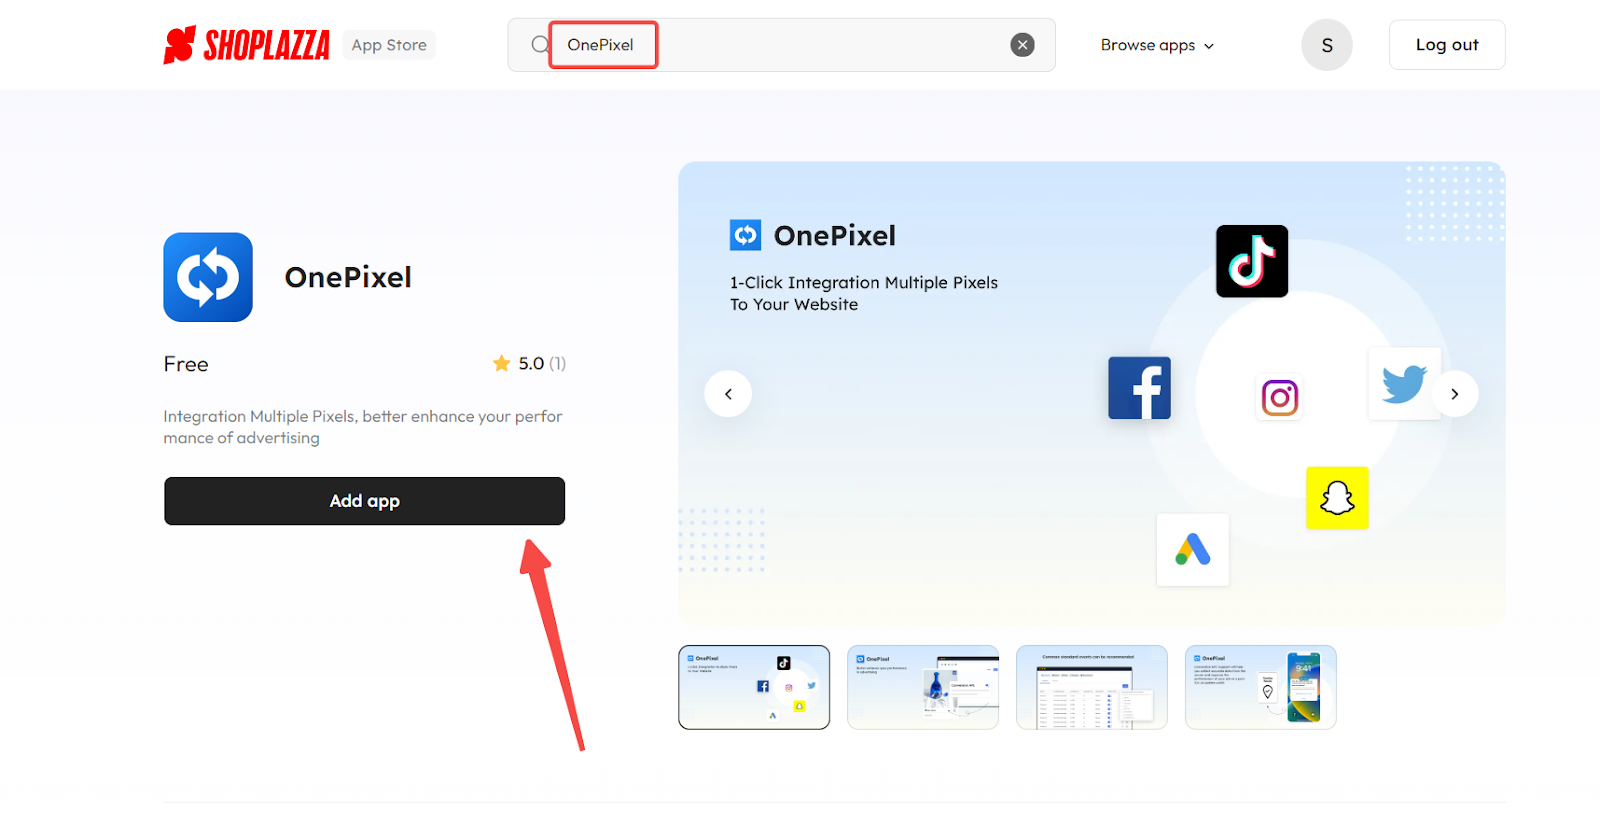
2. Find the app: Find the One Pixel app by entering the app name “One Pixel” in the search box and clicking on Add app.
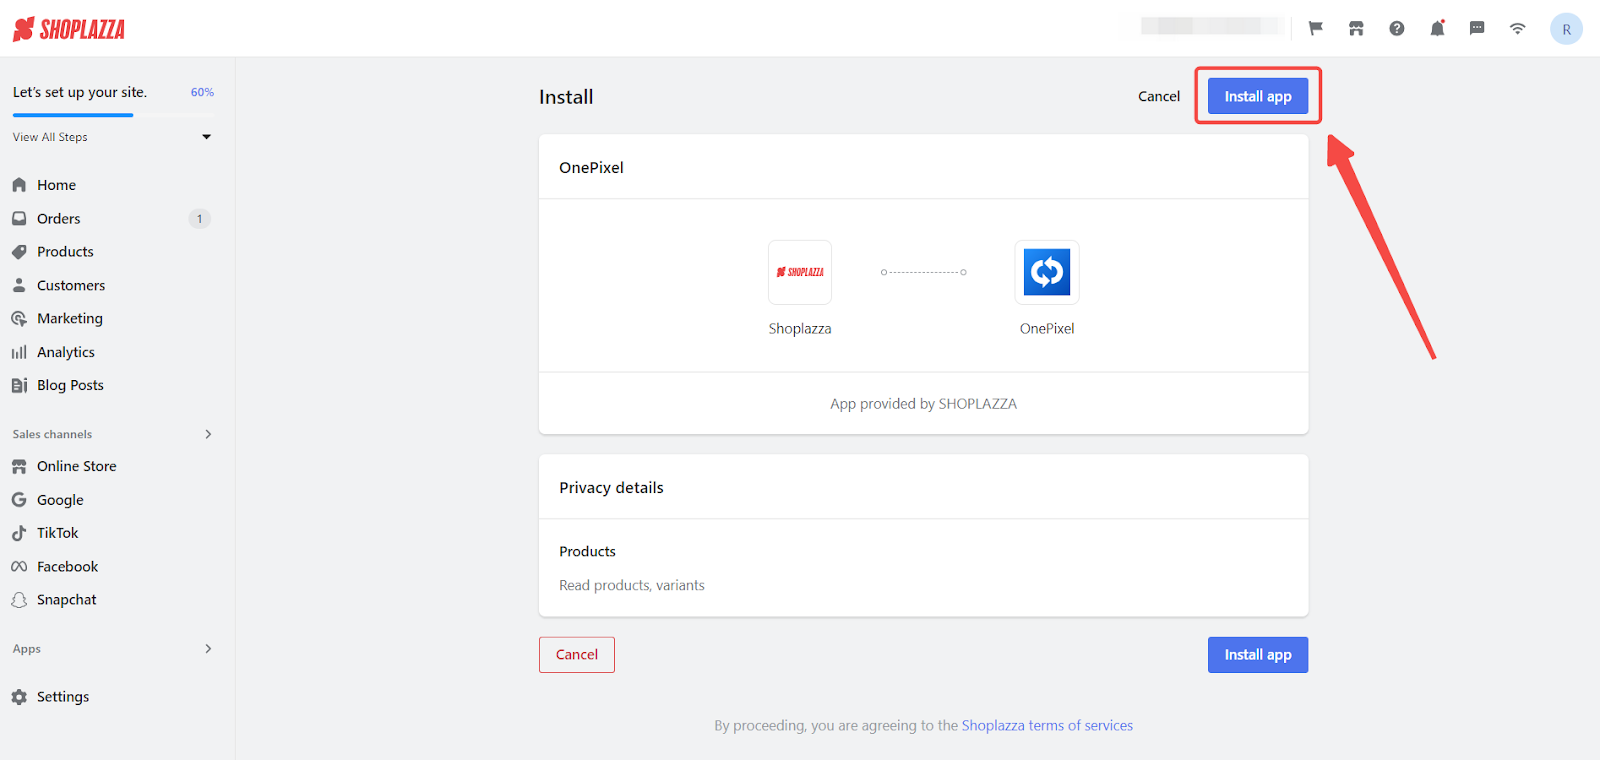
3. Install the app: Install the One Pixel app by clicking Install app to complete the app installation.
Obtaining your Microsoft Pixel ID
If you already have a Microsoft Pixel ID, you can follow the steps below to add it to your Shoplazza store. If you don't have one, the next section will guide you through creating it.
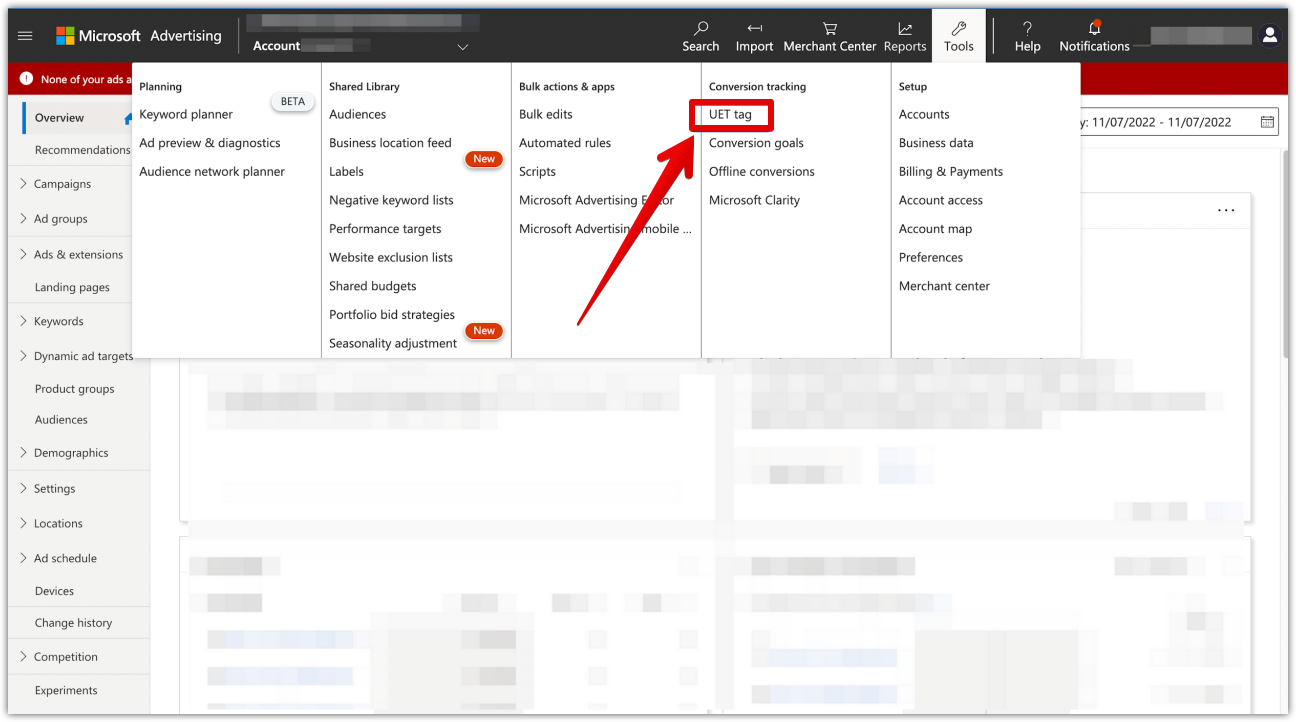
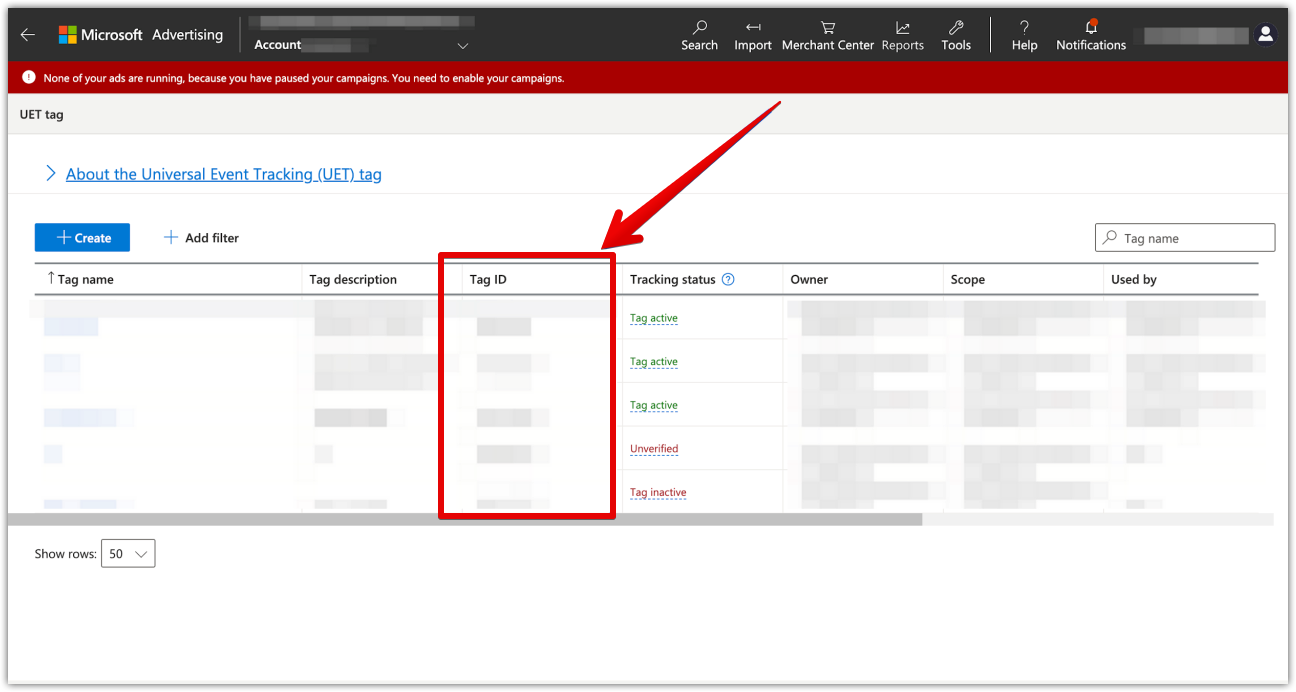
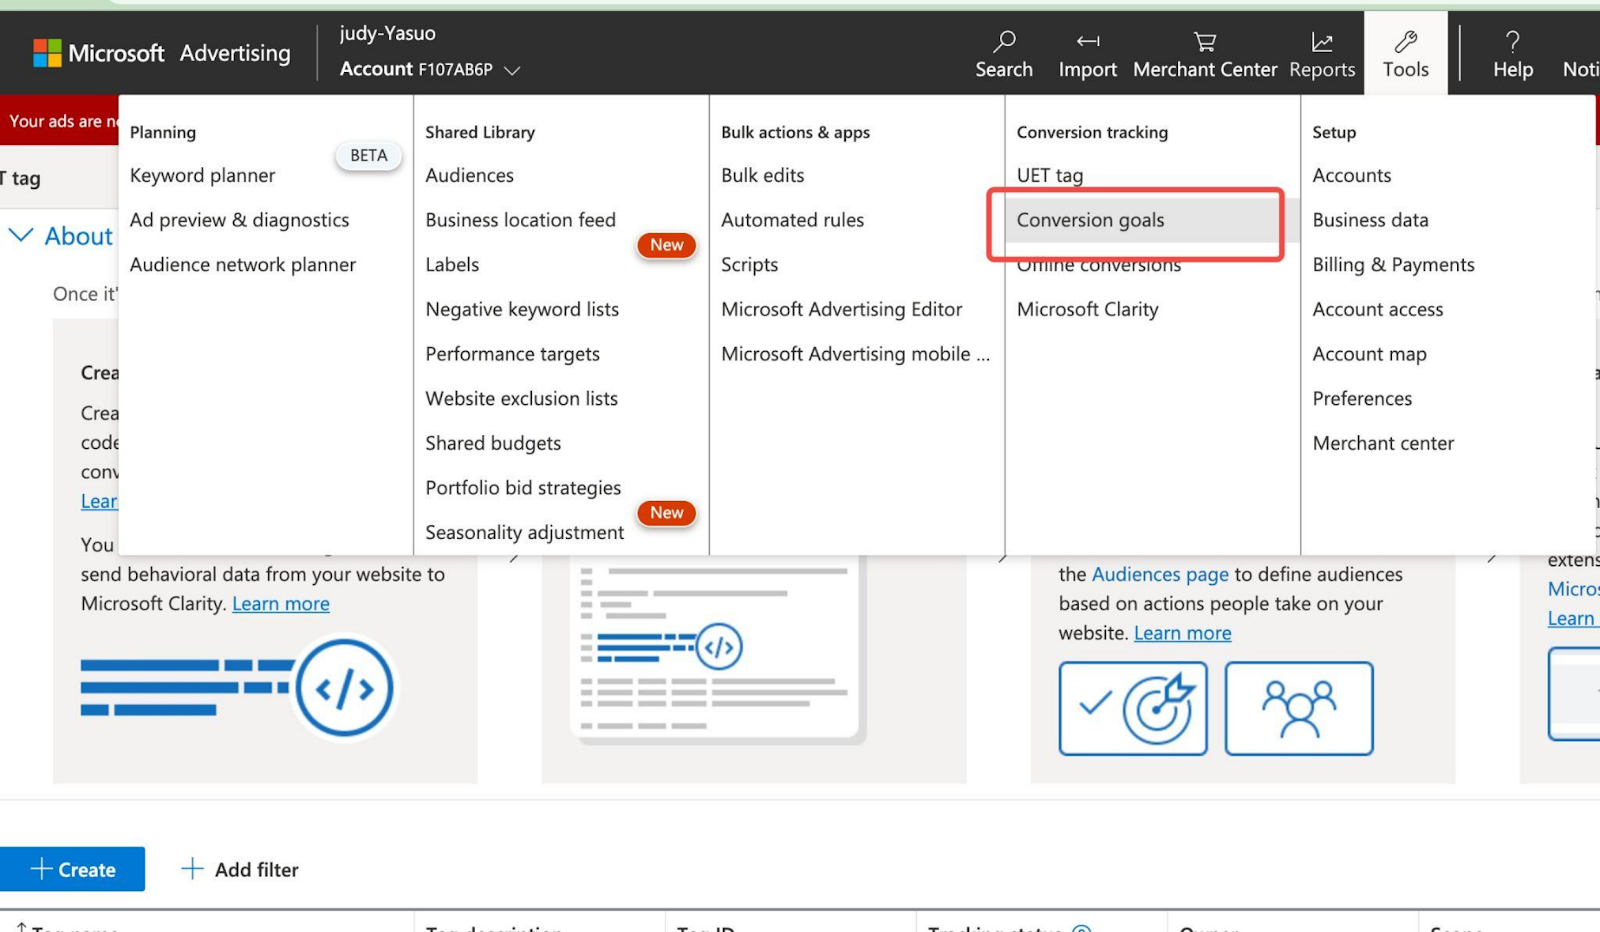
1. Enter the Microsoft Ads website: Go to the Microsoft Ads login page , log in to your account, and navigate to Tools > UET tag.
2. Copy the Tag ID: Copy the Tag ID, then return to your Shoplazza admin.
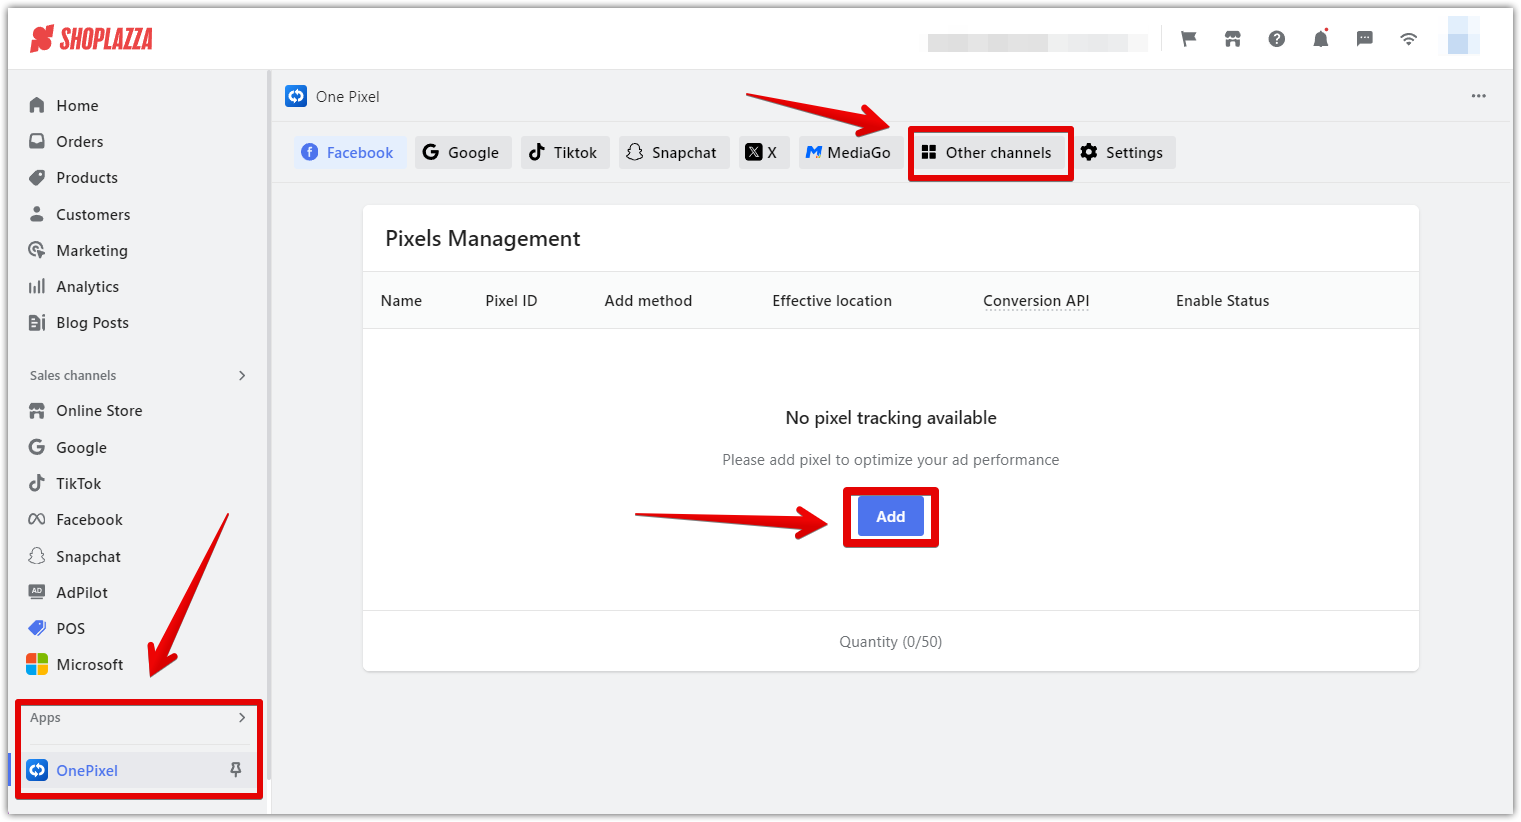
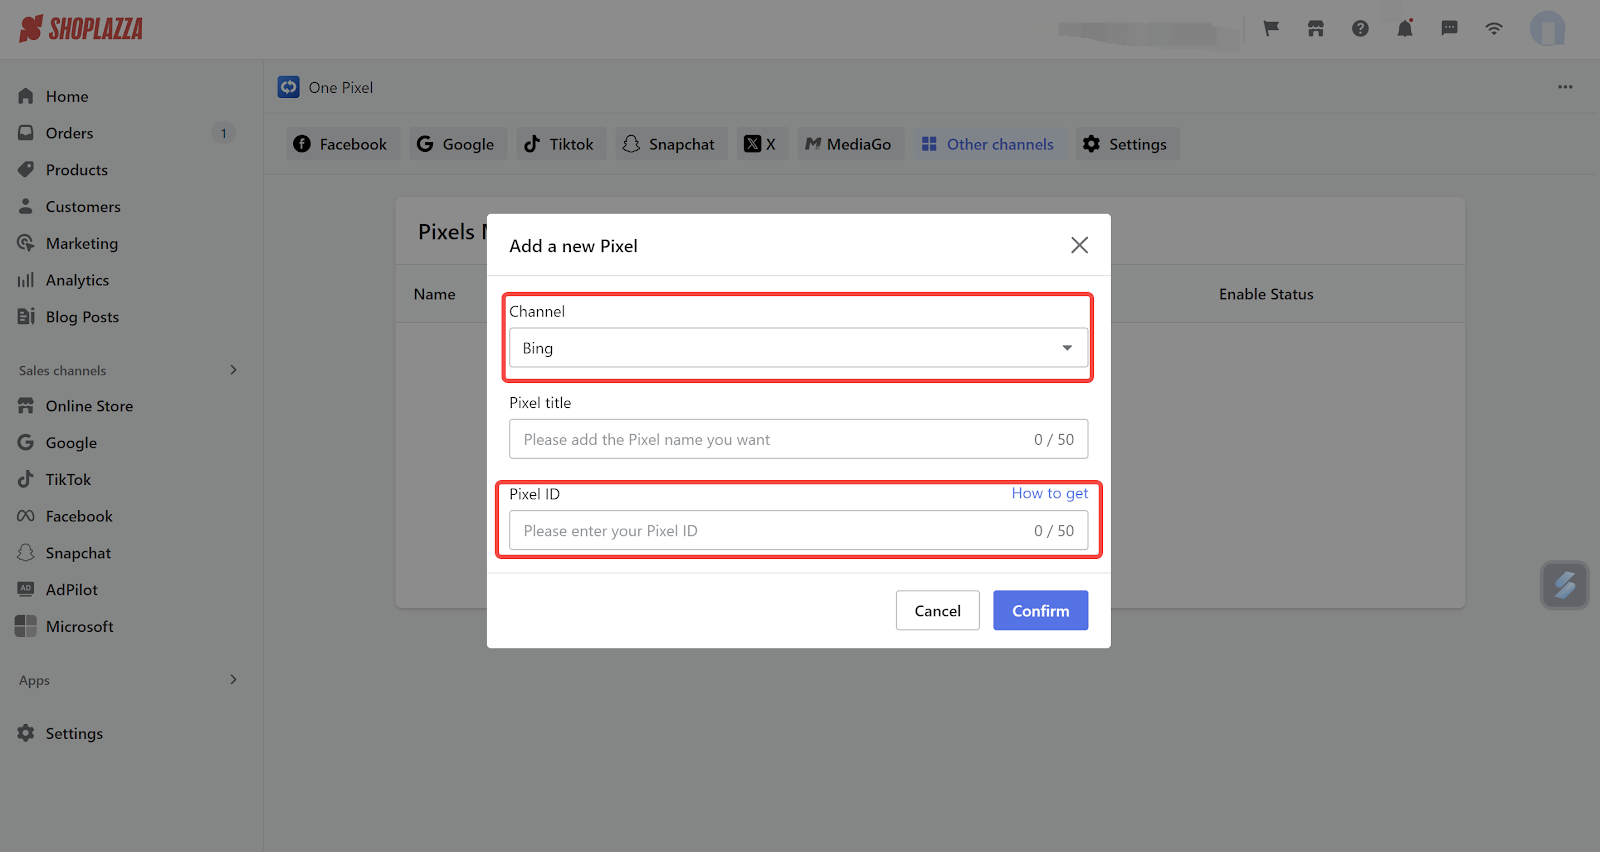
3. Add the Pixel ID in Shoplazza: Go to Apps > OnePixel > Other Channels > Add Pixel and select Bing as the channel. Then paste the Tag ID into the Pixel ID input box and click Confirm.
Creating a new Microsoft Pixel ID
If you don’t yet have a Microsoft Pixel ID, you’ll need to create one. Here’s how to do it:
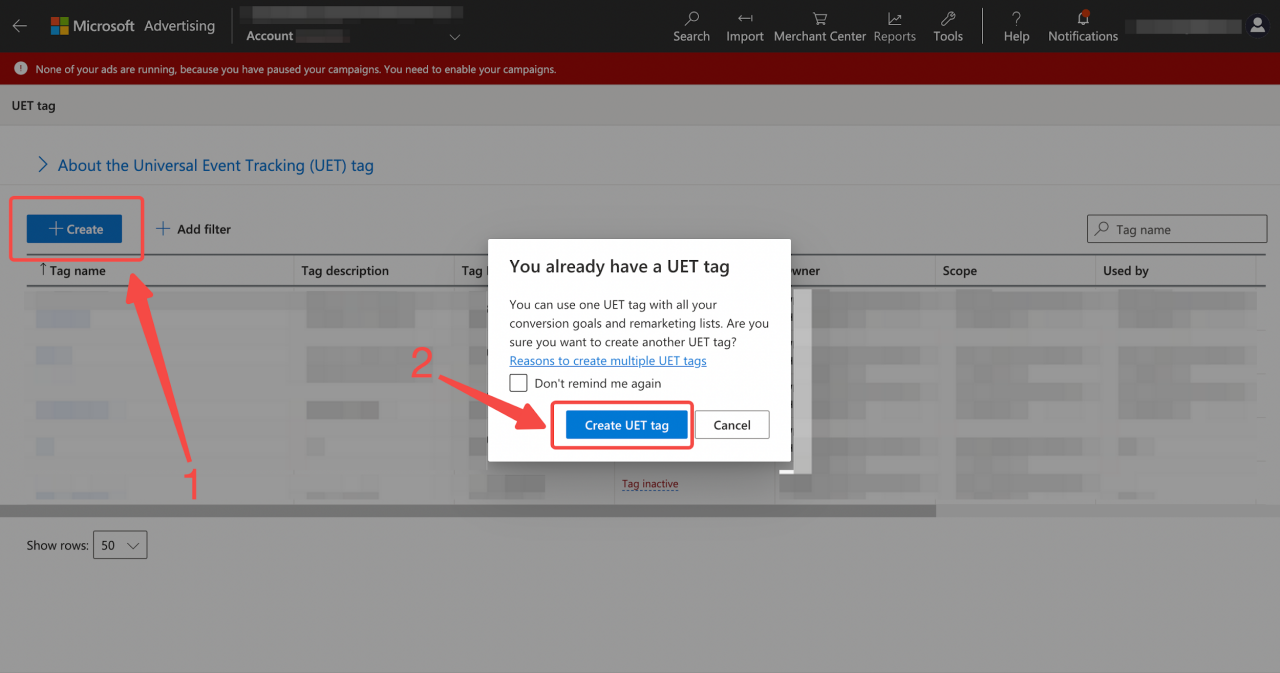
1. Return to the Microsoft Ads website: Log in to your Microsoft Ads account and navigate to Tools > UET tag. Click Create to set up a new Tag ID.
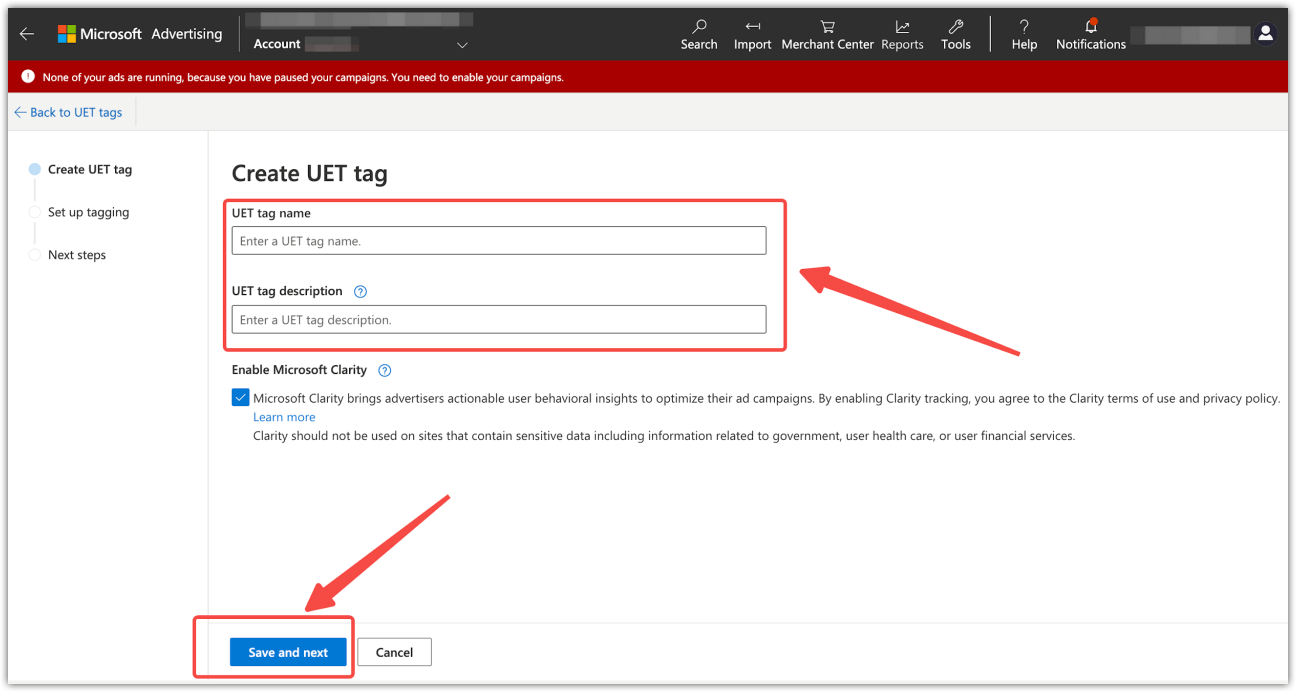
2. Enter the UET tag information: Enter the UET tag name (required) and UET tag description (optional), then click Save and next.
3. Choose installation method: Select Install the tag yourself (manual installation mode), then click Next.

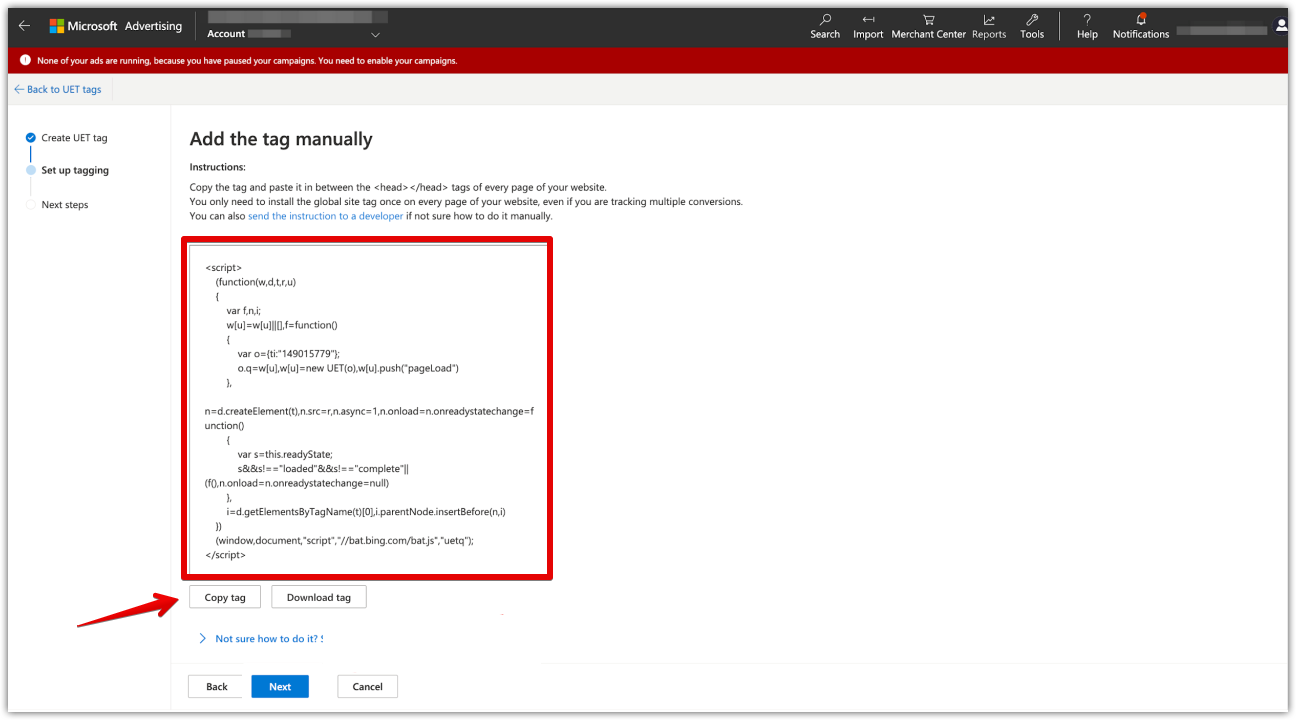
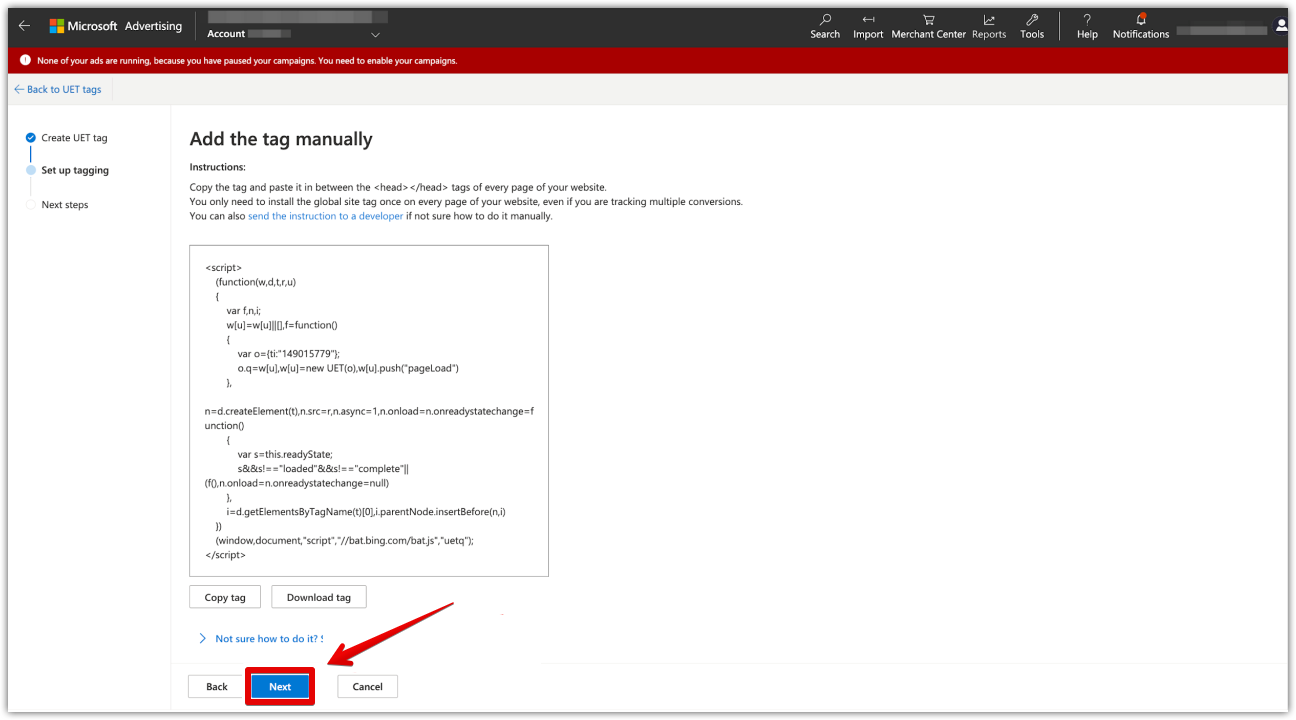
4. Install the tag: Copy the provided code and paste it between the <head></head> tags of every page on your website. If you’re not familiar with editing code, you can use the Custom Code app on Shoplazza to easily insert the code into your site.
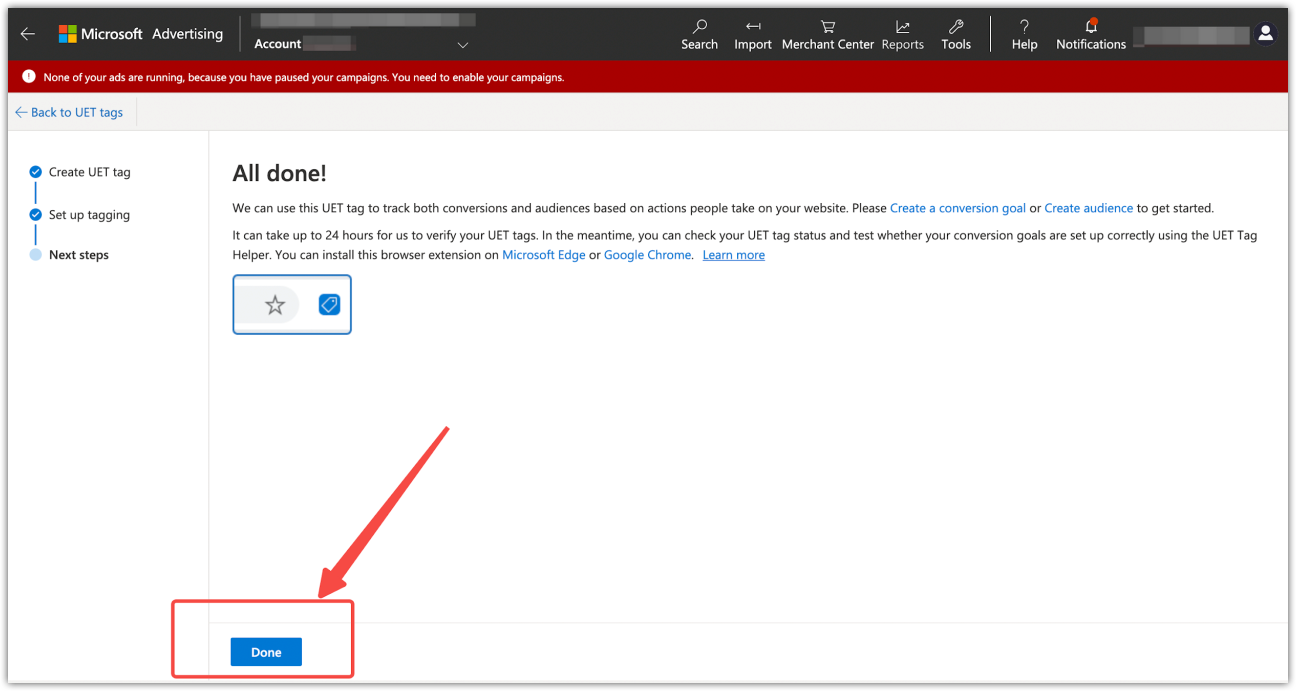
5. Finish Installation: Once the code is added, return to Microsoft Ads and click Next to finalize the setup, then click Done.
Setting up Microsoft Ads Conversion Goals
Setting up Microsoft Ads Conversion Goals lets you track specific user actions, like purchases or sign-ups, to measure and optimize ad performance.
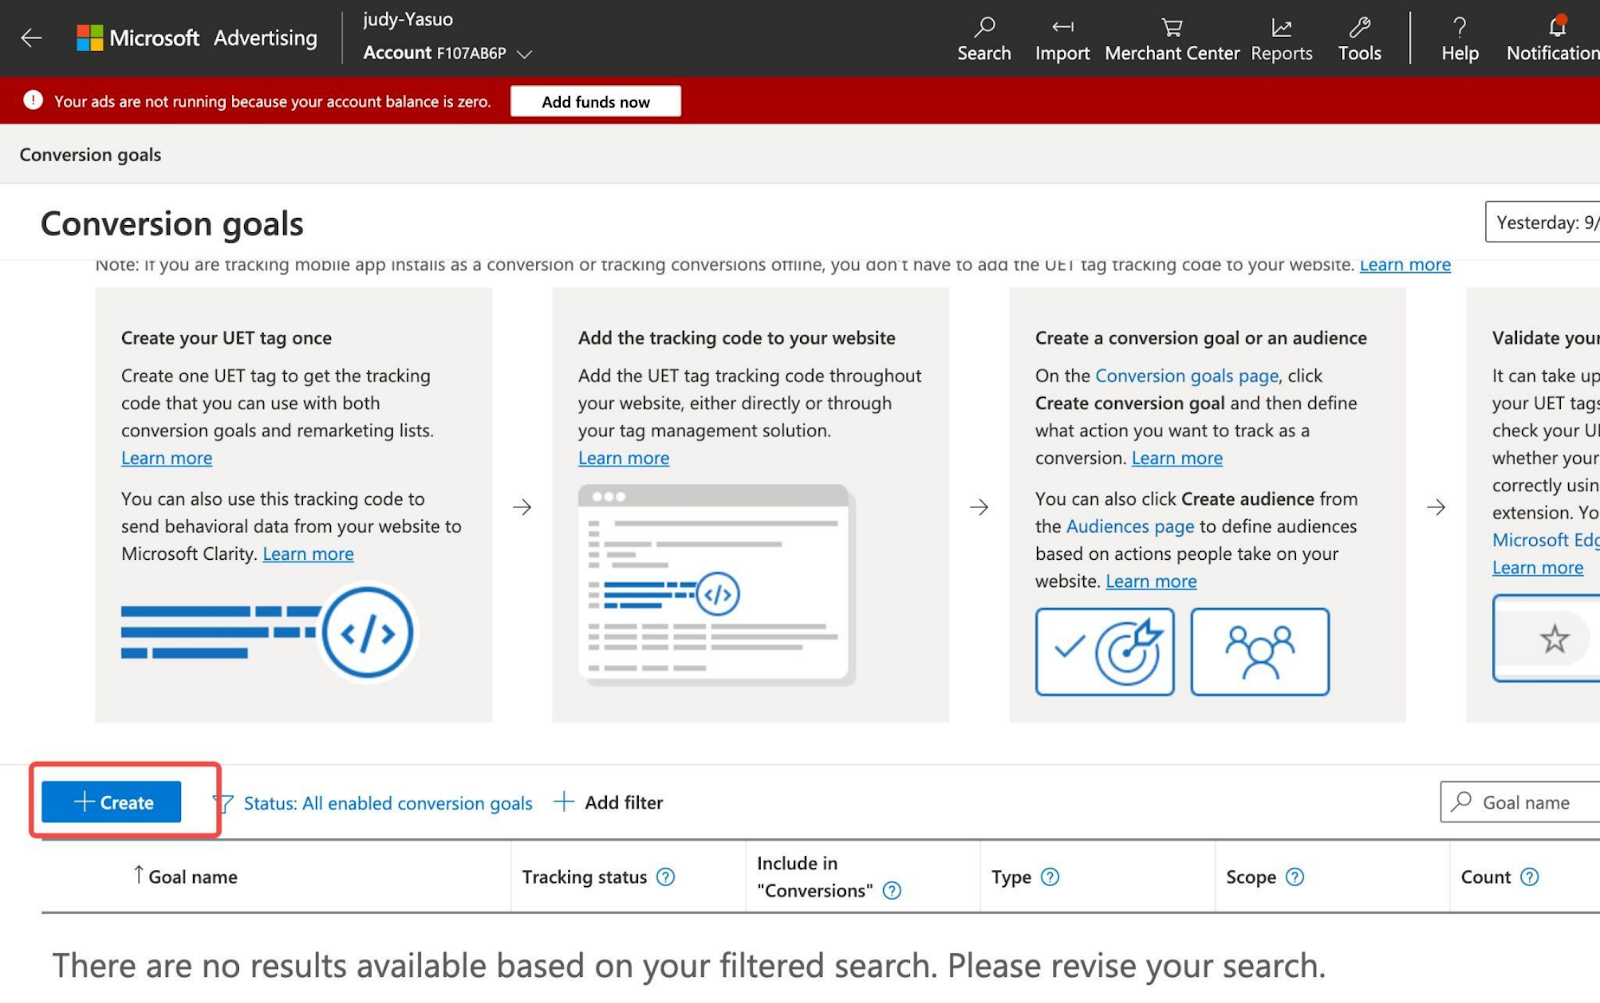
1. Log in to Microsoft Ads: Go to the Microsoft Ads login page , log in to your account, and navigate to Tools > Conversion Goals.
2. Create conversion goal: Click Create to create a conversion event.
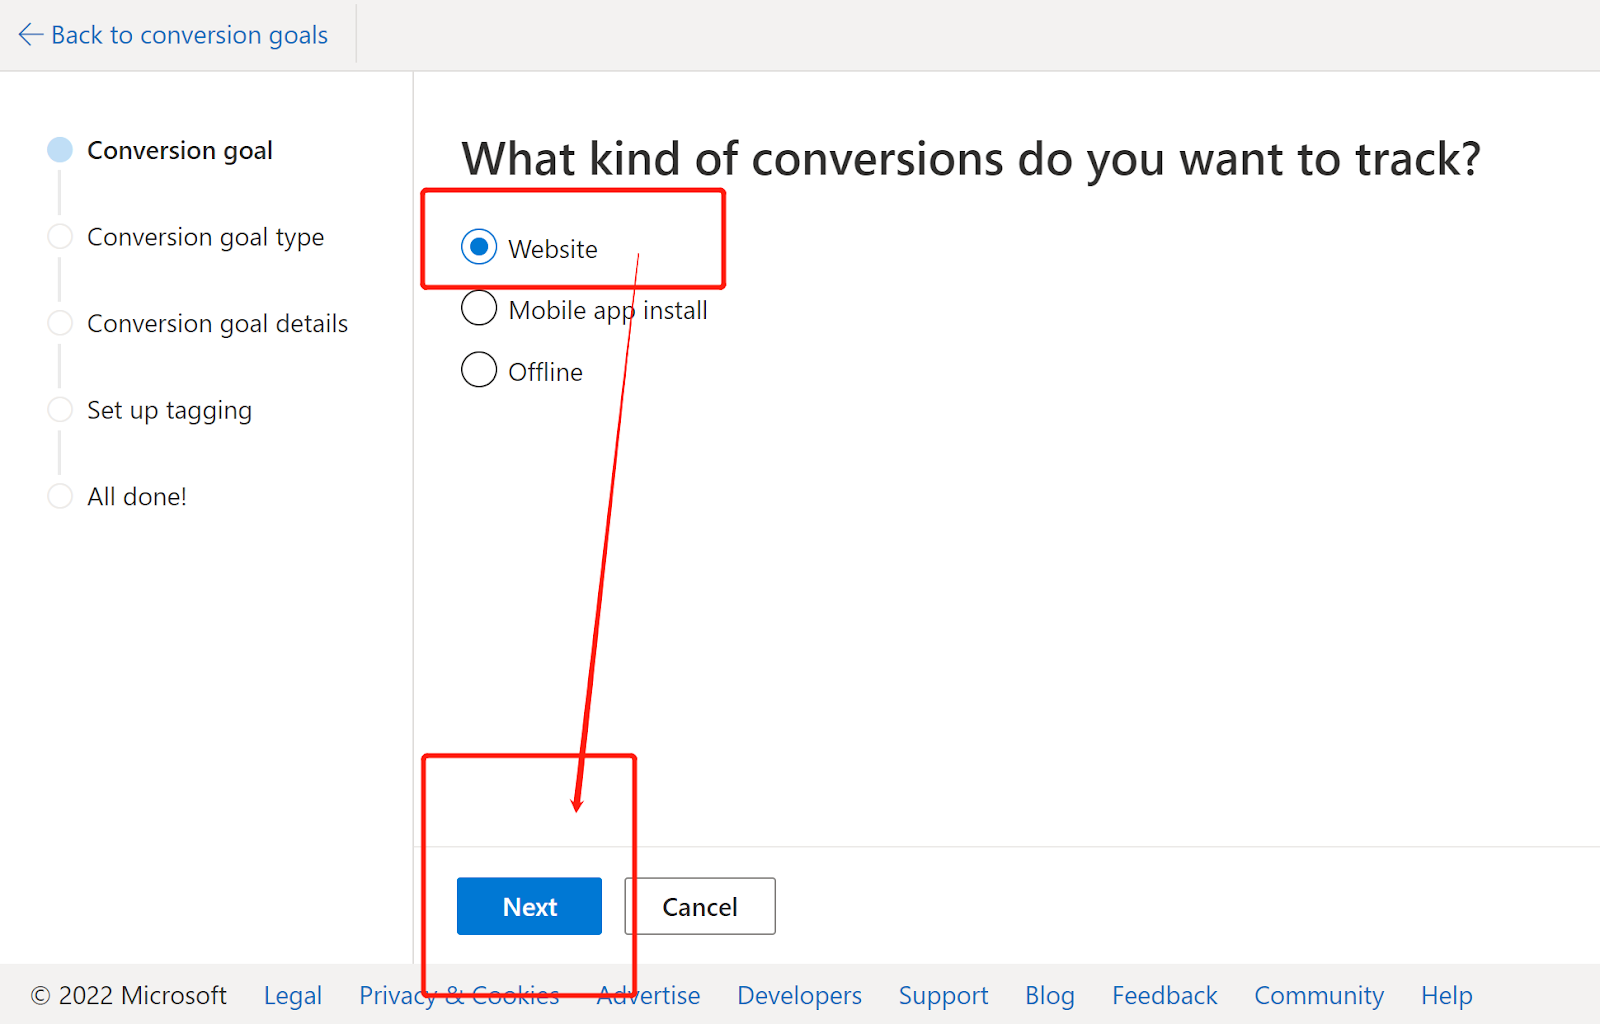
3. Choose Website: Choose the Website option and click Next.
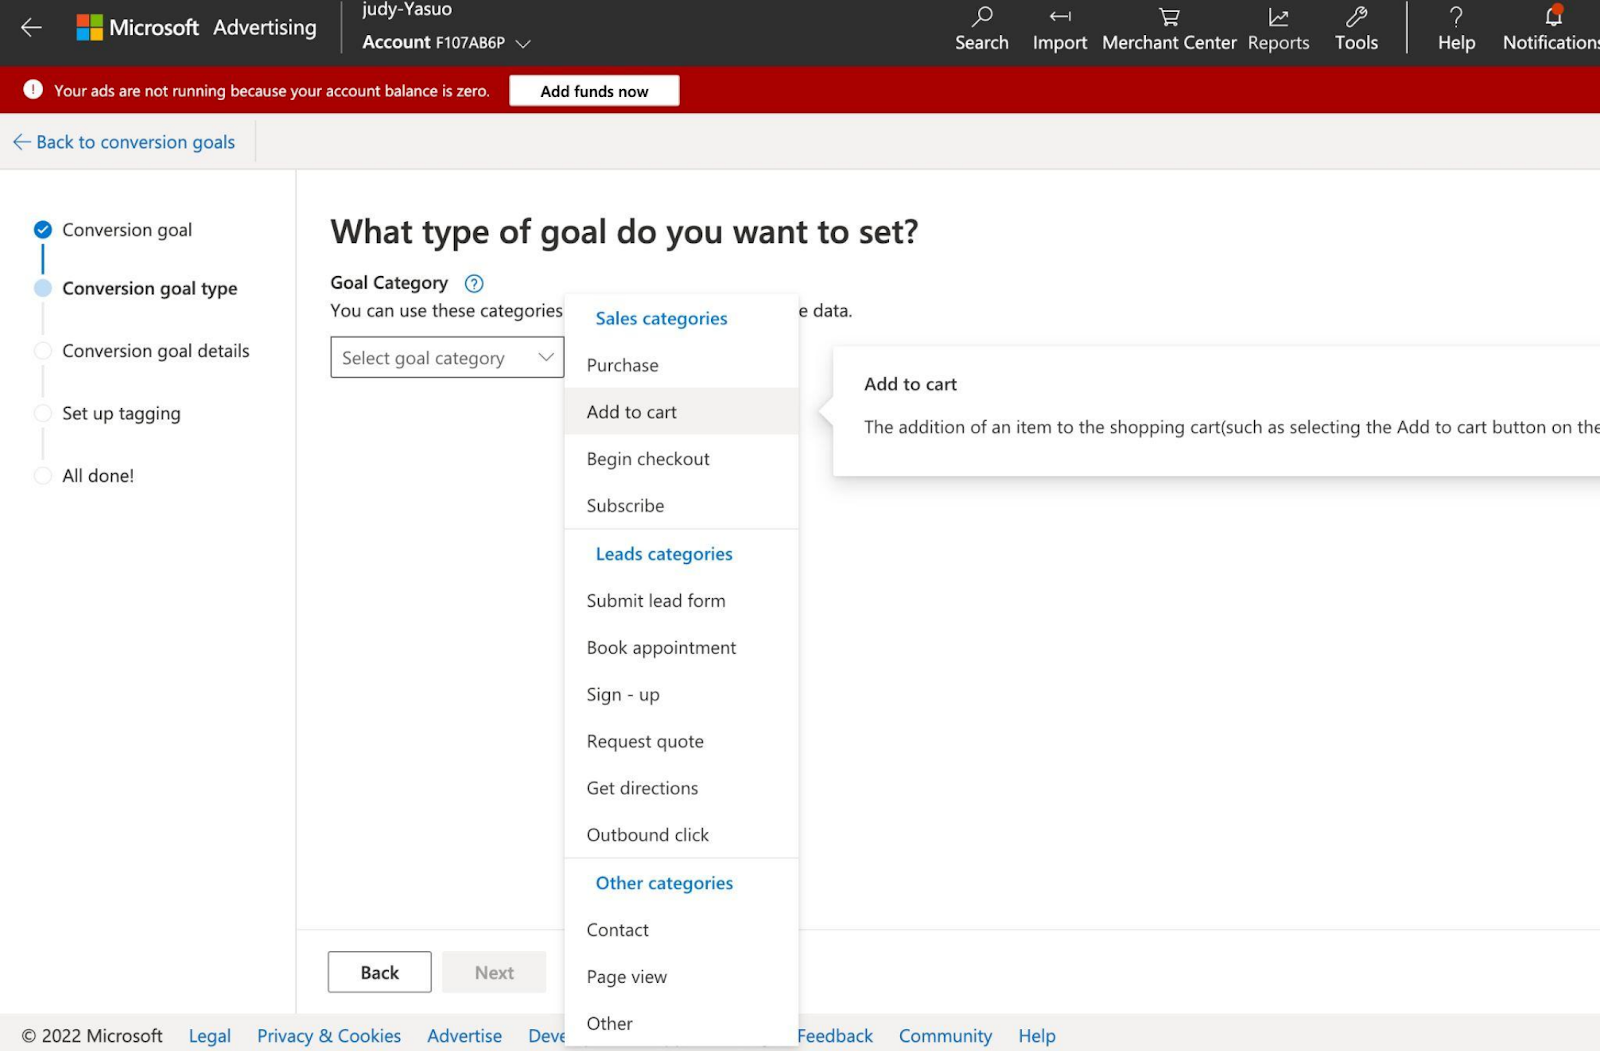
4. Choose the conversion type: Choose the type of conversion goal.
5. Choose the event option: Select Event, then click Next.

6. Name the event goal: Enter the name of the event goal.
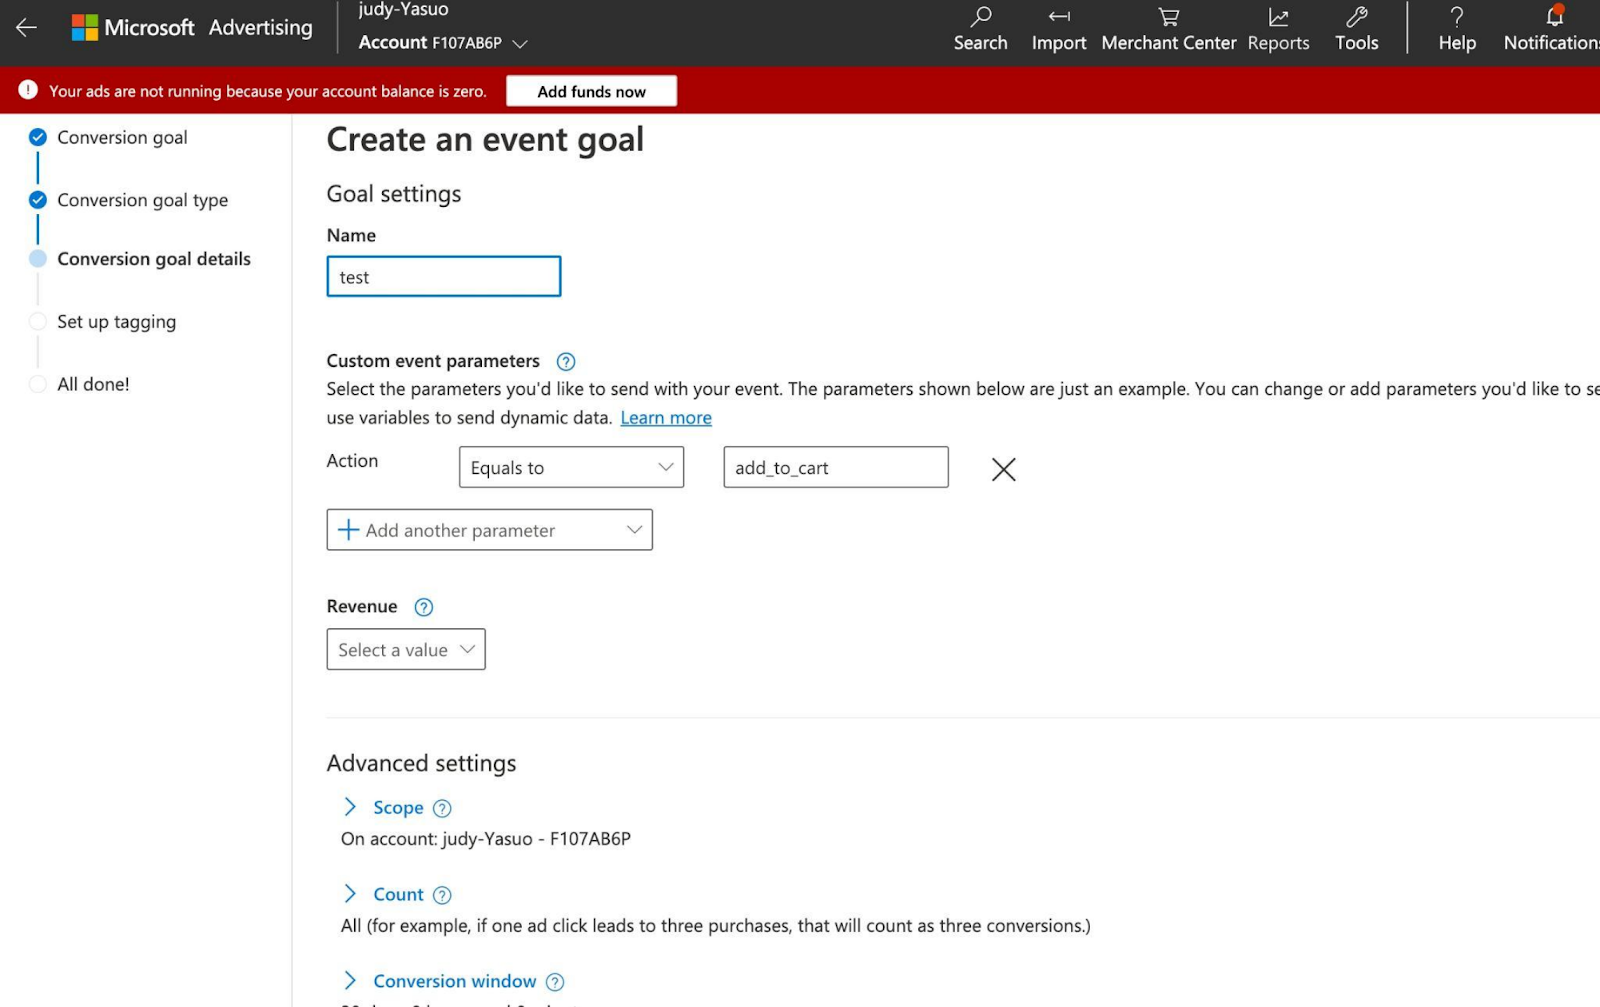
7. Confirm and save: Confirm that the current conversion event tracks this Tag, then click Save and next.

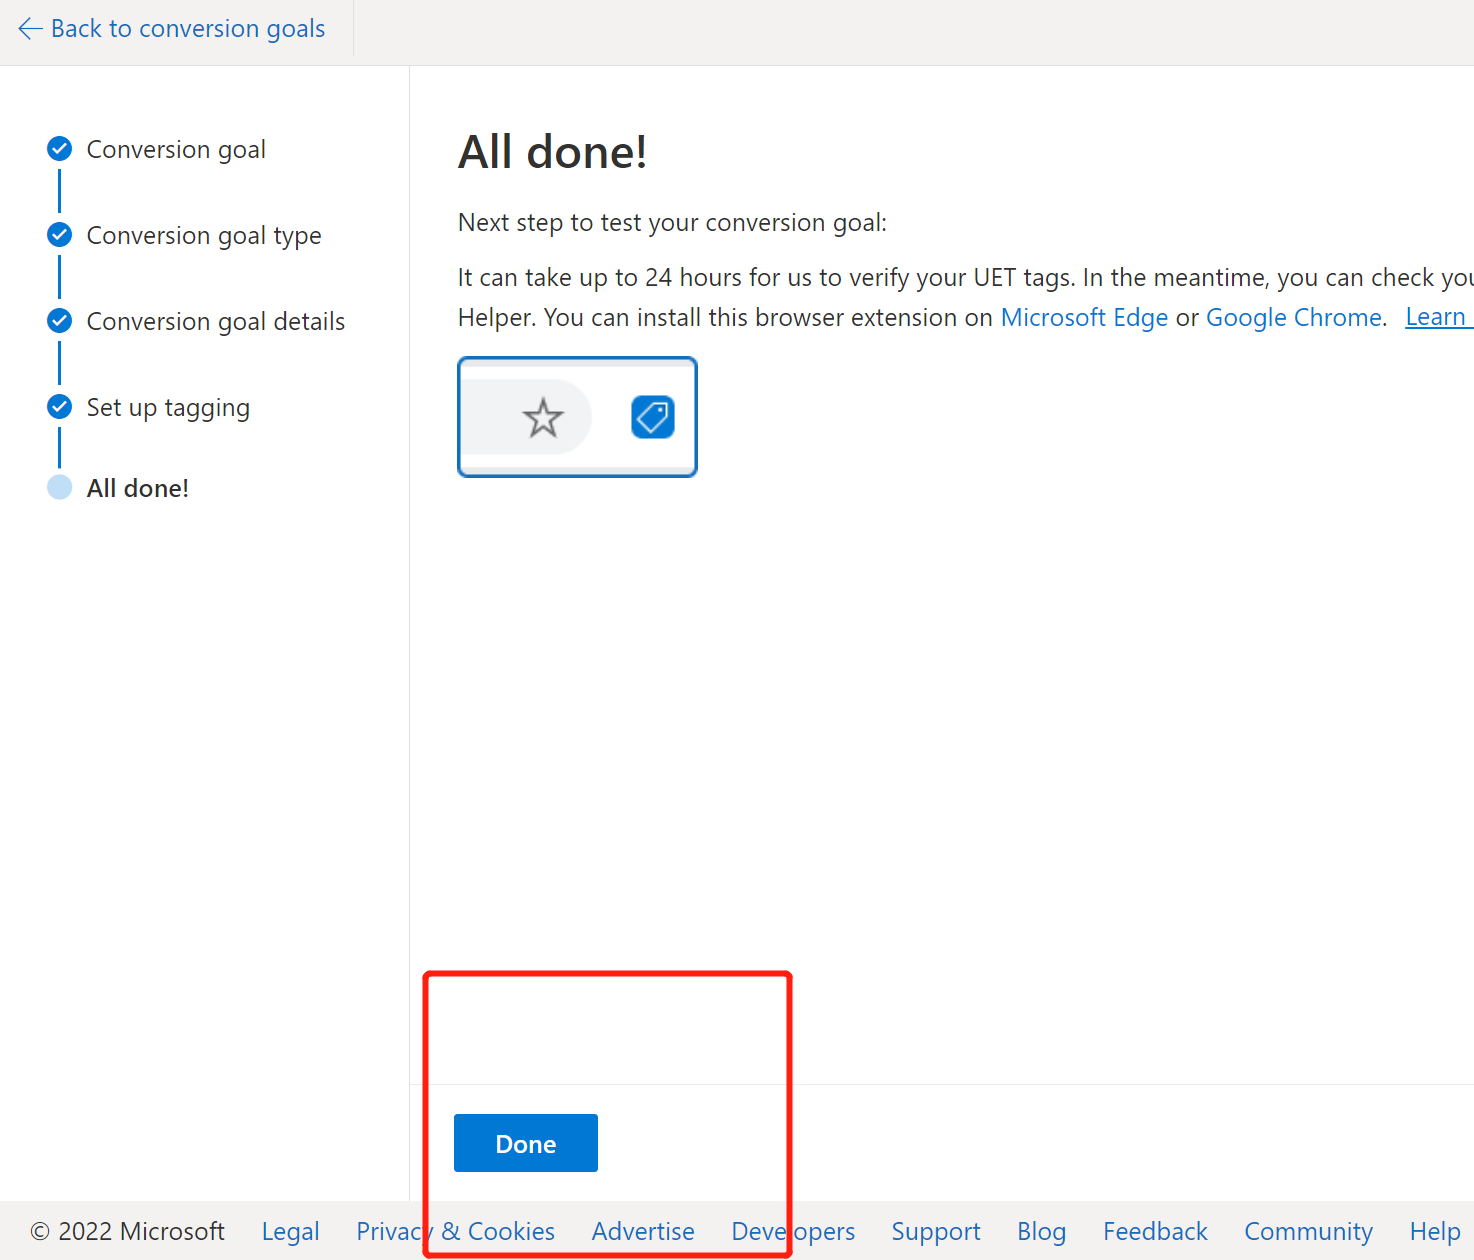
8. Complete the configuration: Click Done to complete the configuration of the conversion goal.
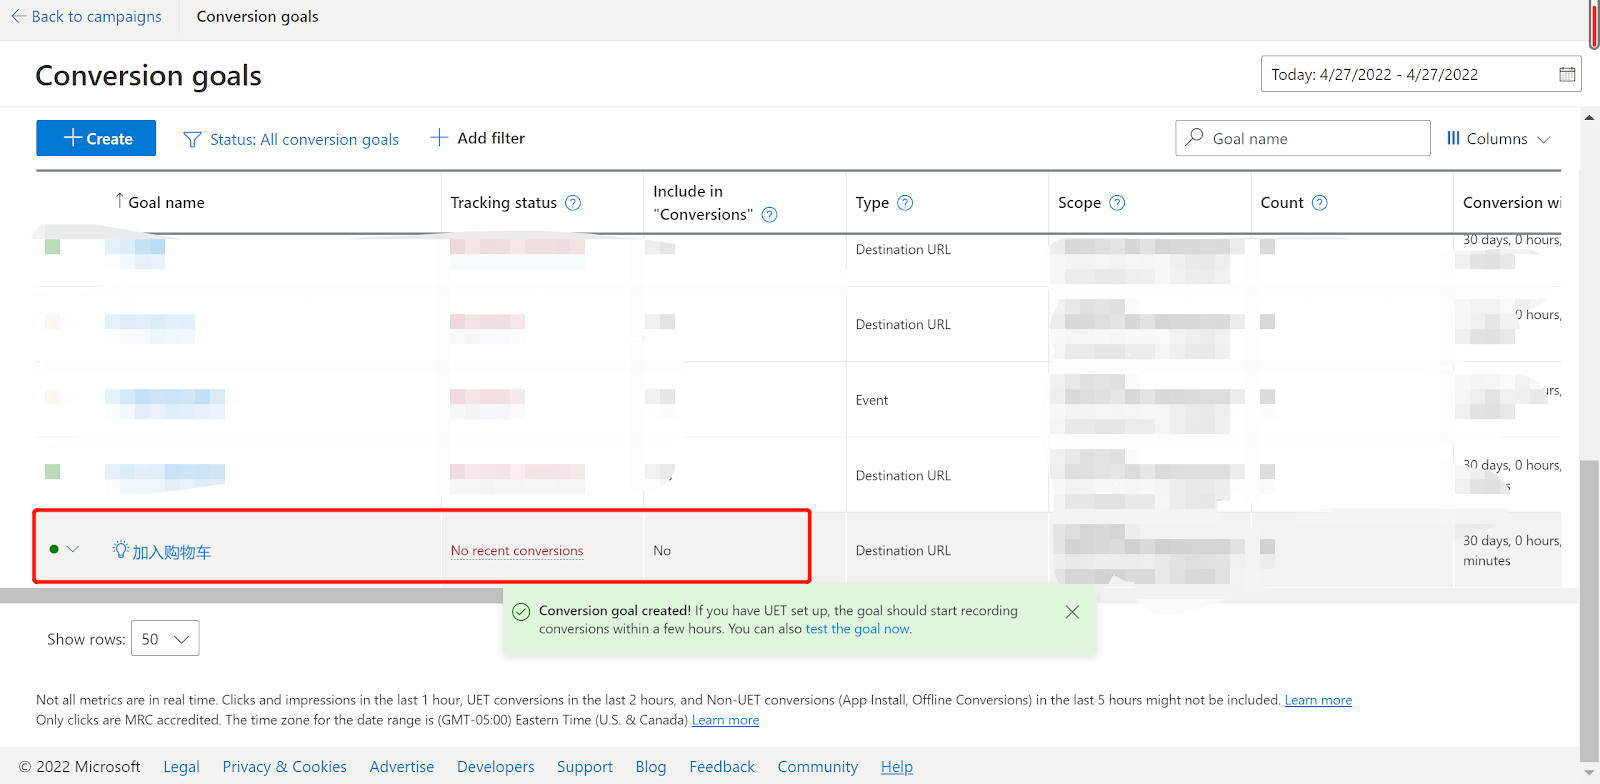
9. Check the conversion goal: Review the event you just created on the conversion goals page to ensure everything is set up correctly.
Using Microsoft Pixel ID allows you to track and report website traffic, enhancing your ad campaign performance. Gather invaluable data on visitor behavior, sources, and activities, optimizing your advertising strategies and improving conversion rates.


Comments
Please sign in to leave a comment.