
The Size Guide entry is the size chart link displayed to customers on the product details page. It supports customization of the link text, icon, icon size, and the display style after clicking. This article explains how to configure the Size Guide entry in the plugin backend.
Navigation Path
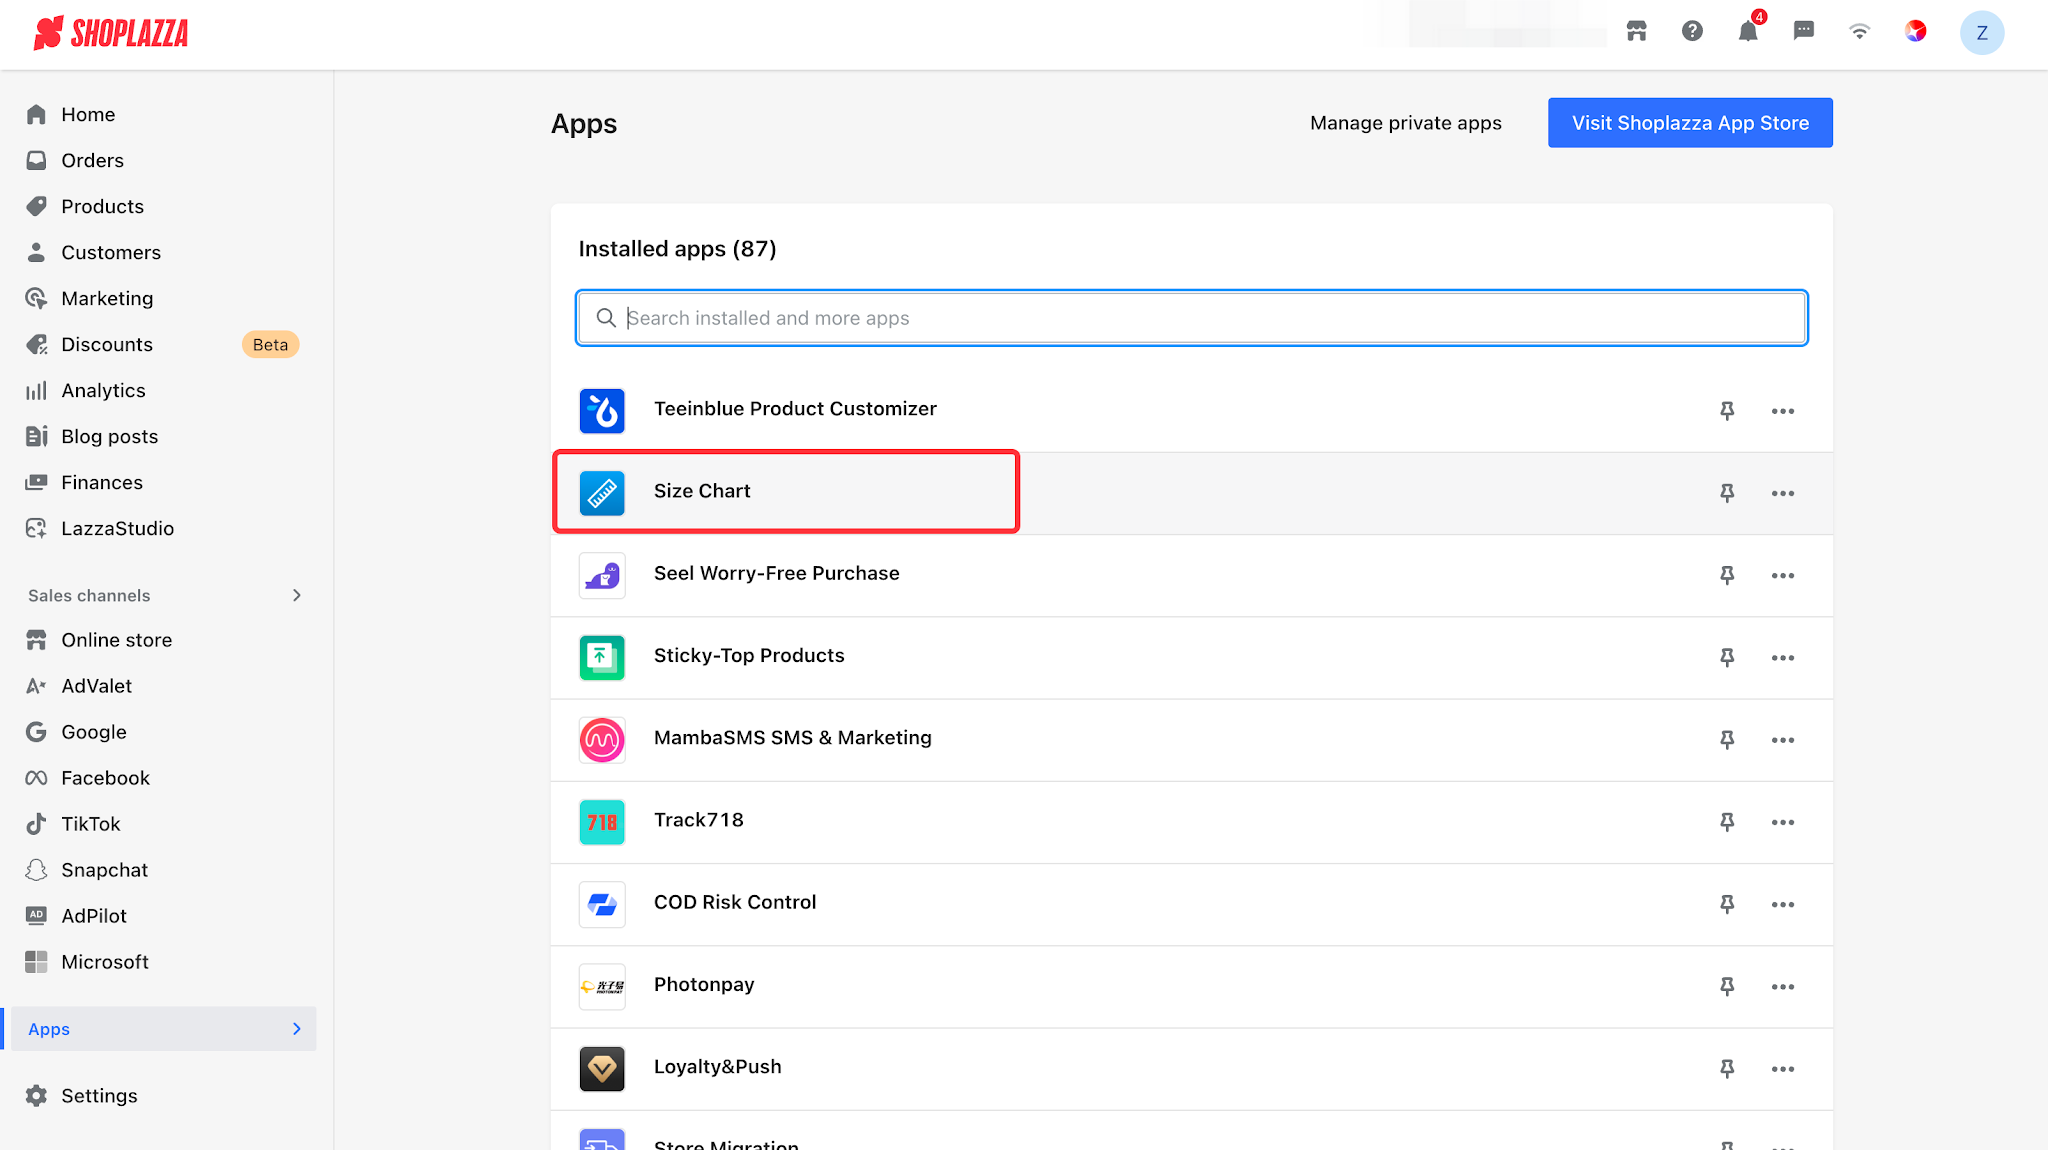
1. Log in to your Shoplazza Admin, then click the Size Guide plugin under Apps.
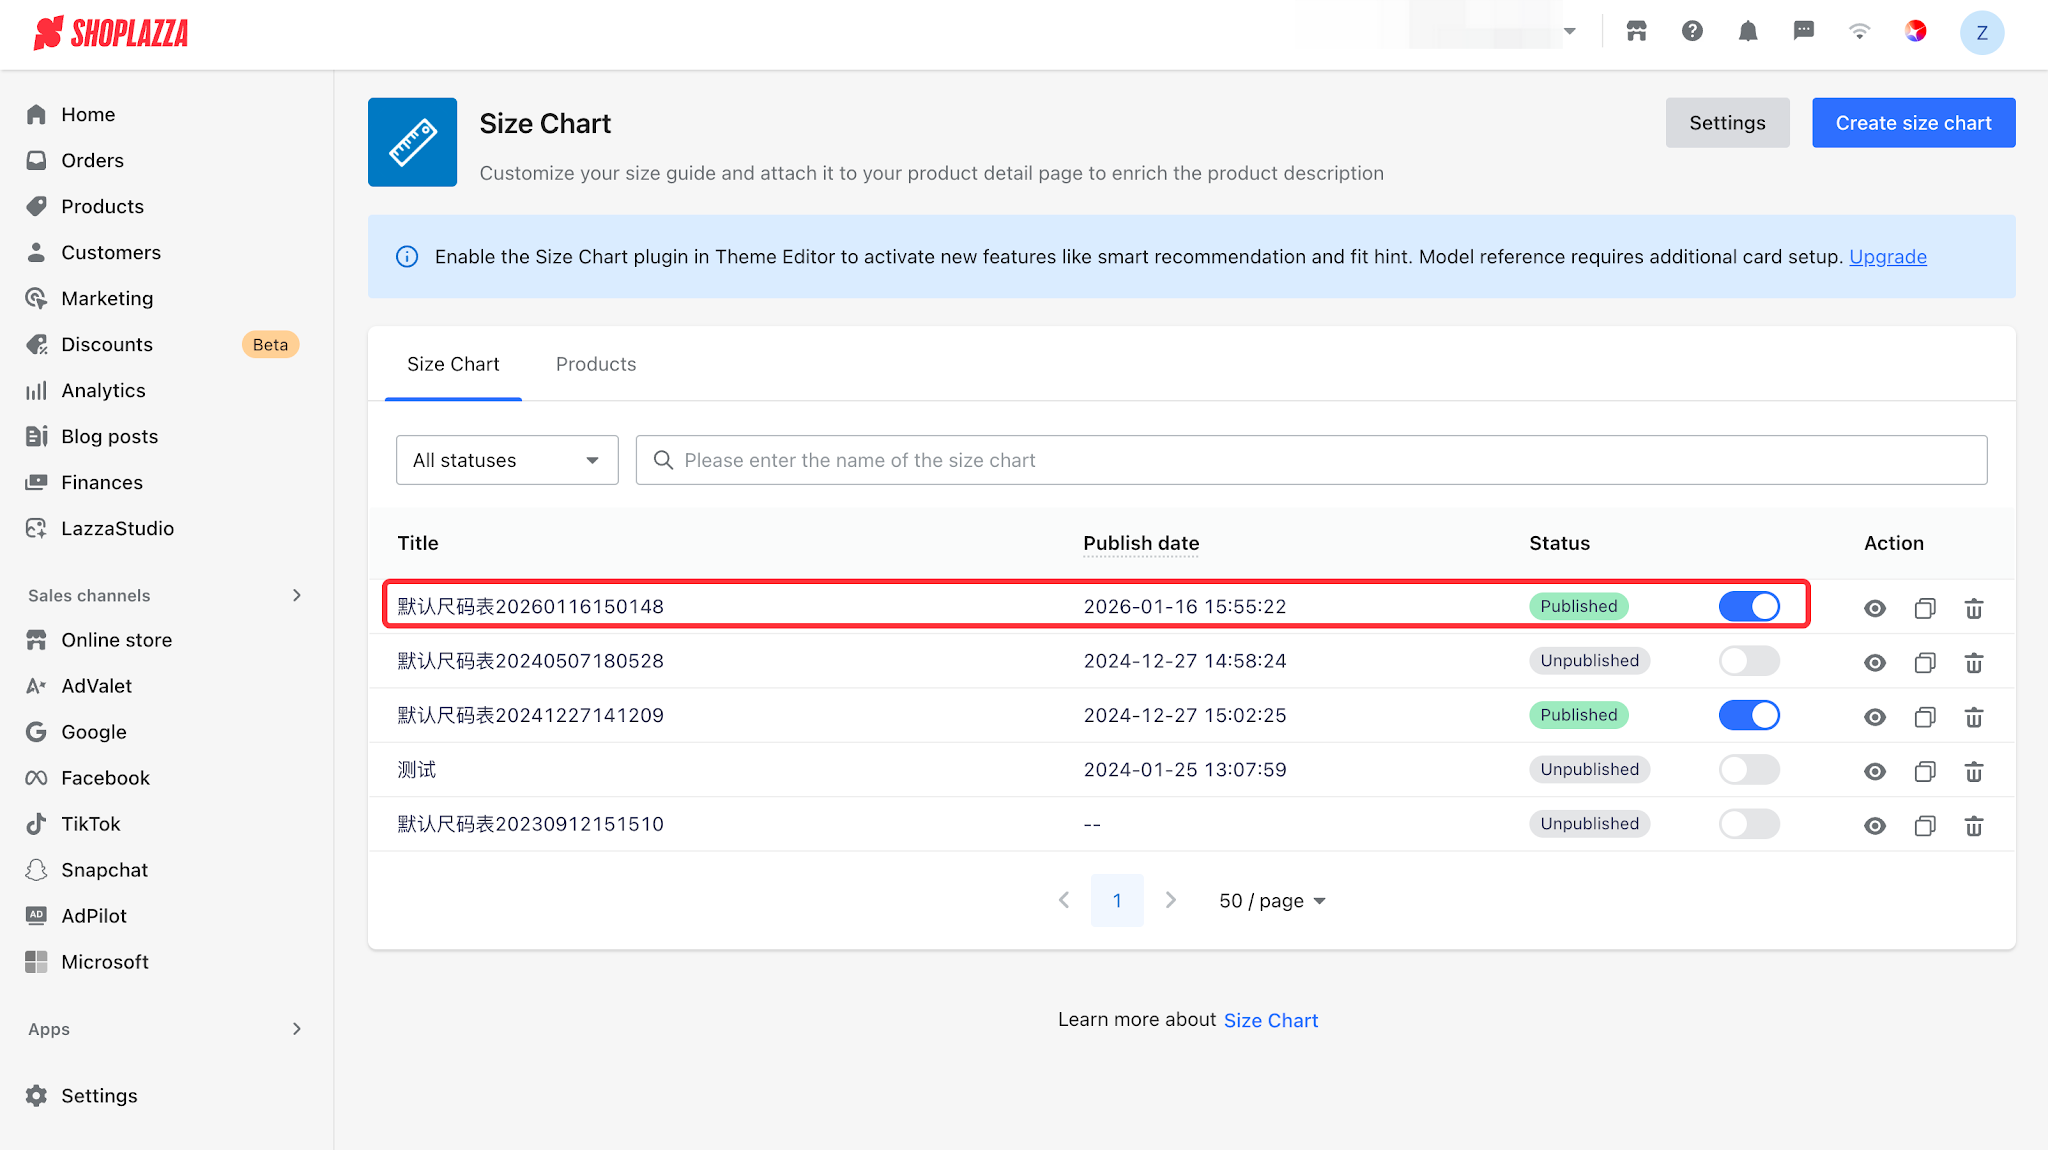
2. In the plugin, select an existing Size Guide and enter the editing page. Find the Entry Configuration section in the left panel.
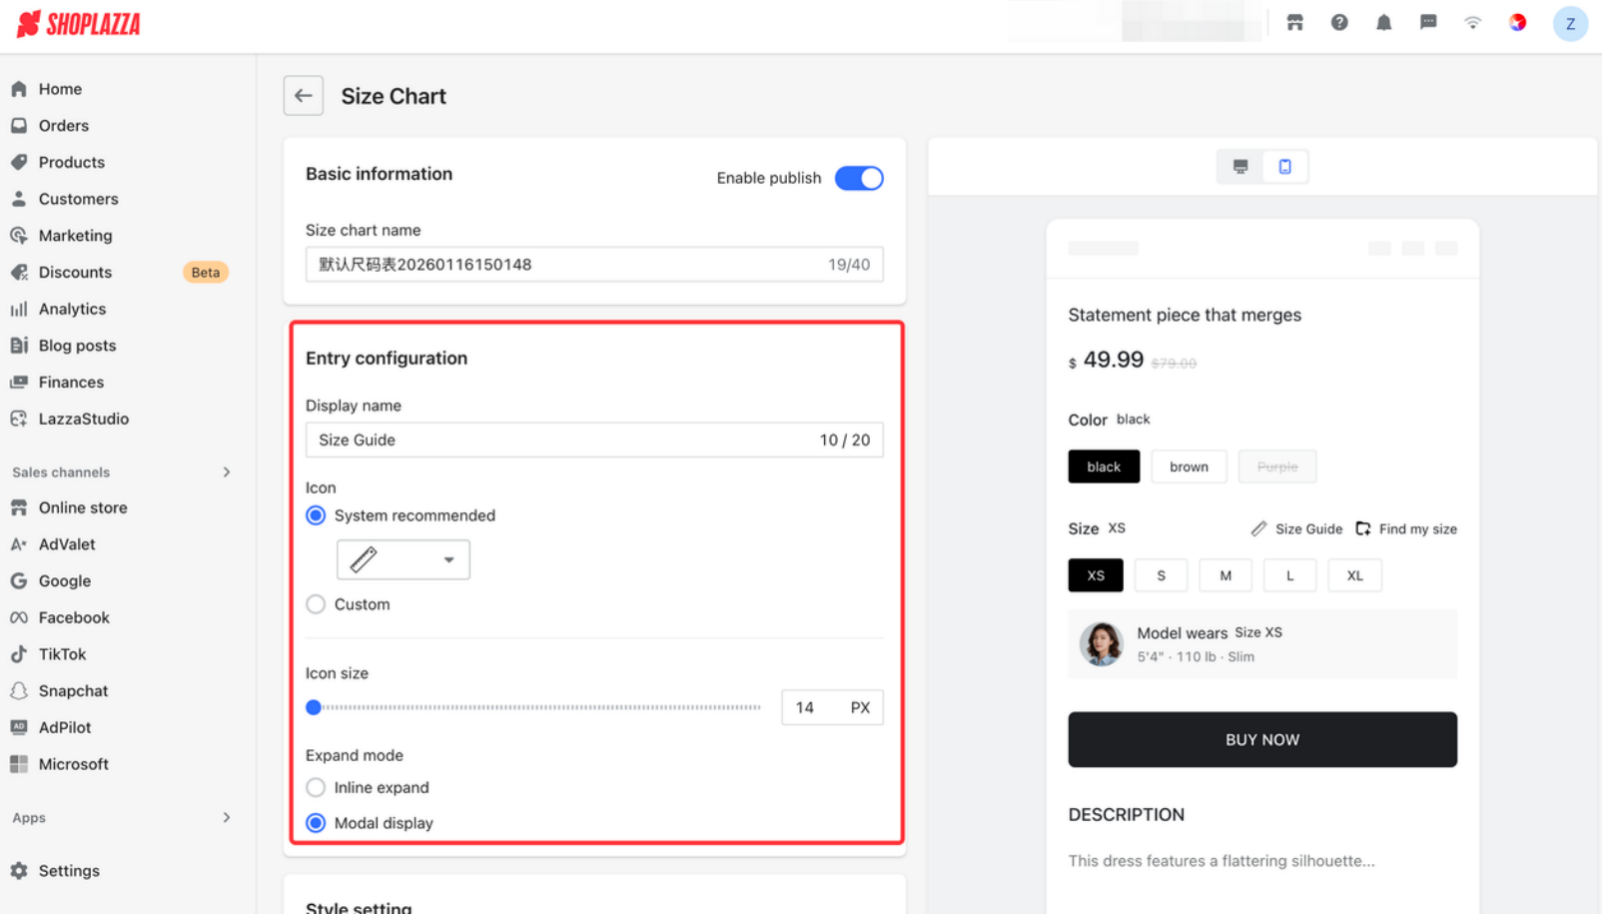
3. Configure the Entry Text: This determines the link text displayed to customers on the product details page. You can enter up to 20 characters. The default text is Size Guide.
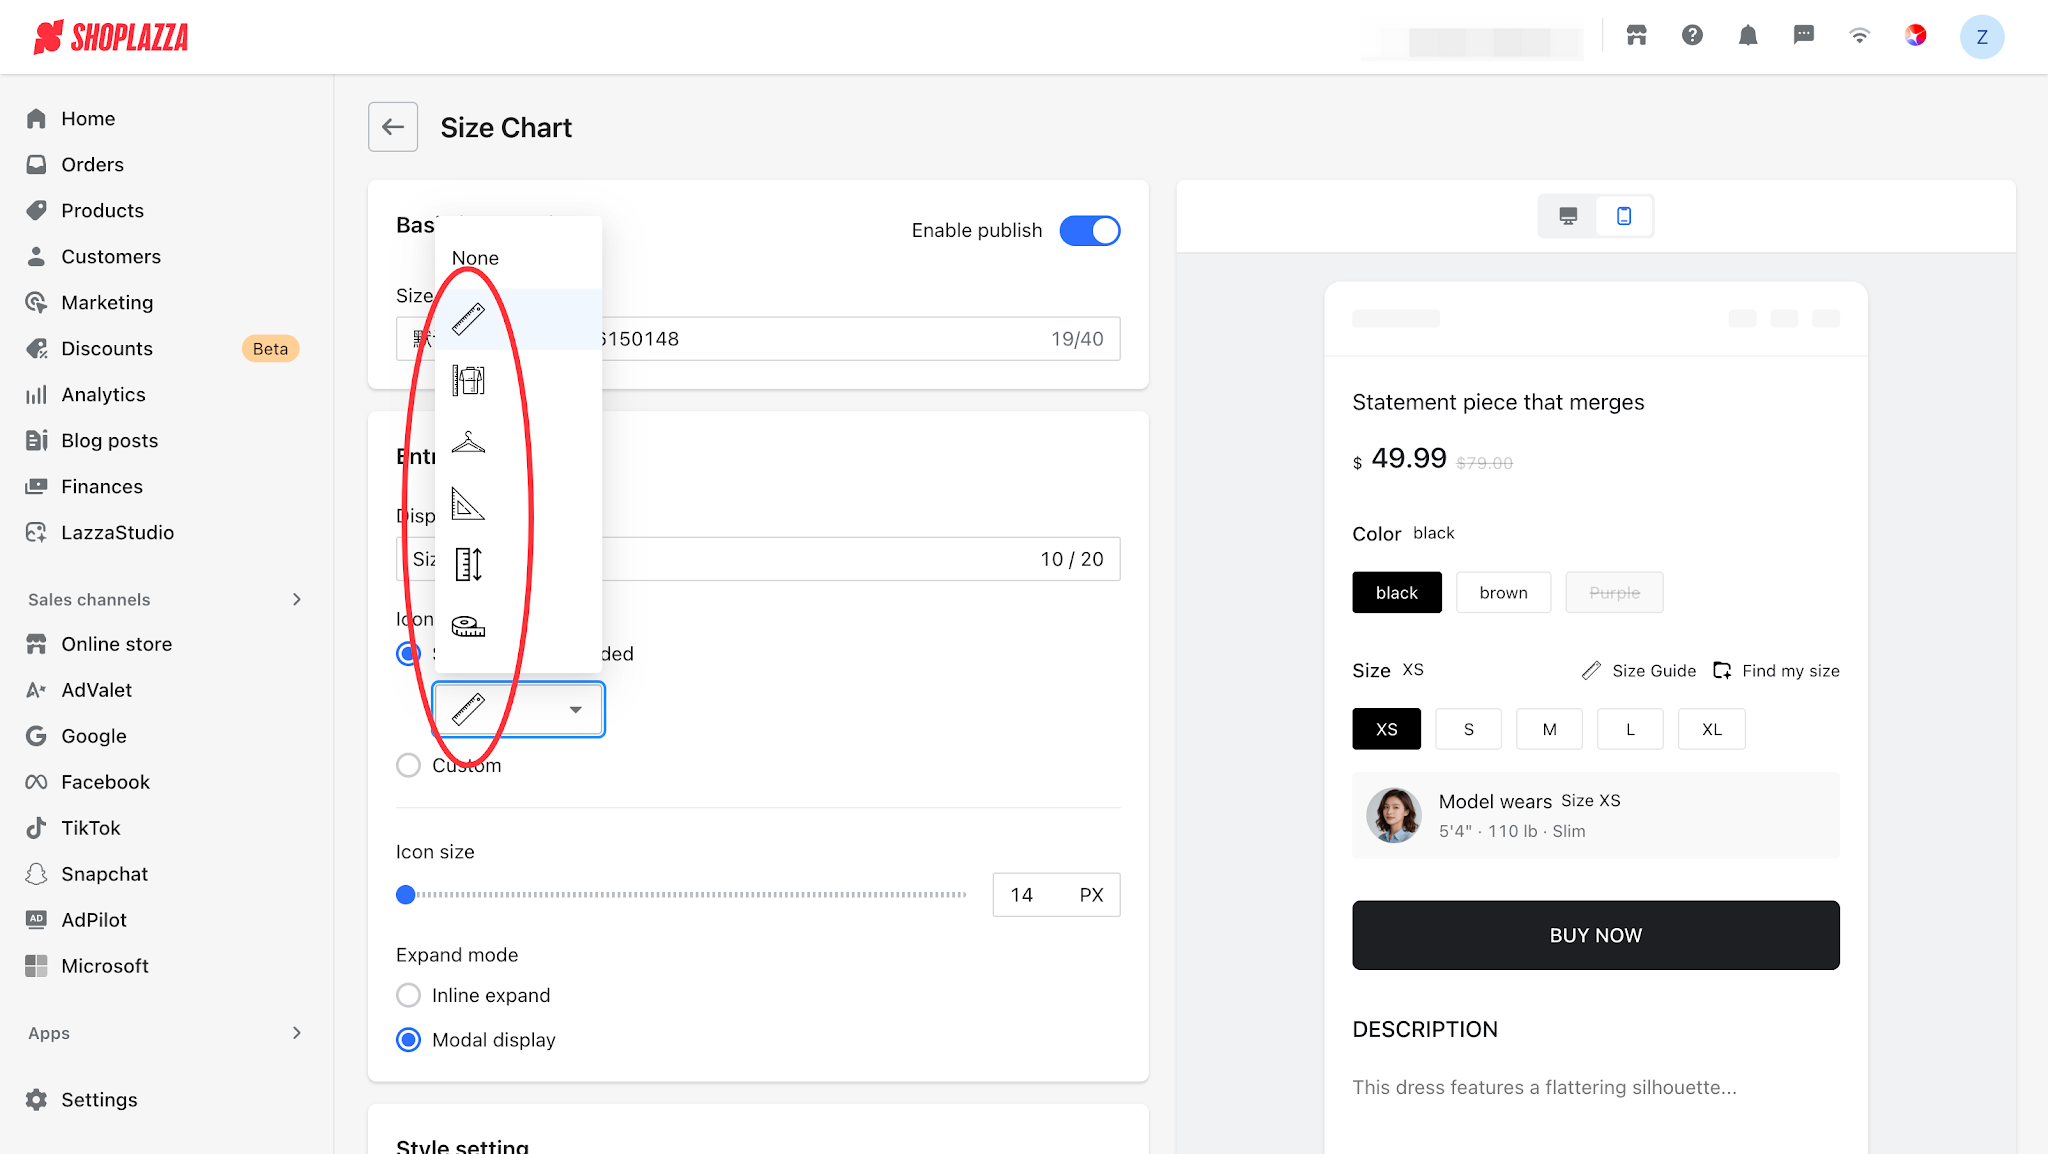
4. Configure the Entry Icon: Click the upload button and select the icon image you want to display.
- Supports JPG, PNG, GIF, and SVG formats.
- The file size must not exceed 100 KB.
- The default icon is the system-provided 📏 icon.
5. Drag the Icon Size slider to adjust the display size of the entry icon.
- Available range: 14–32 px
- Increment: 1 px
- The current size is retained by default.
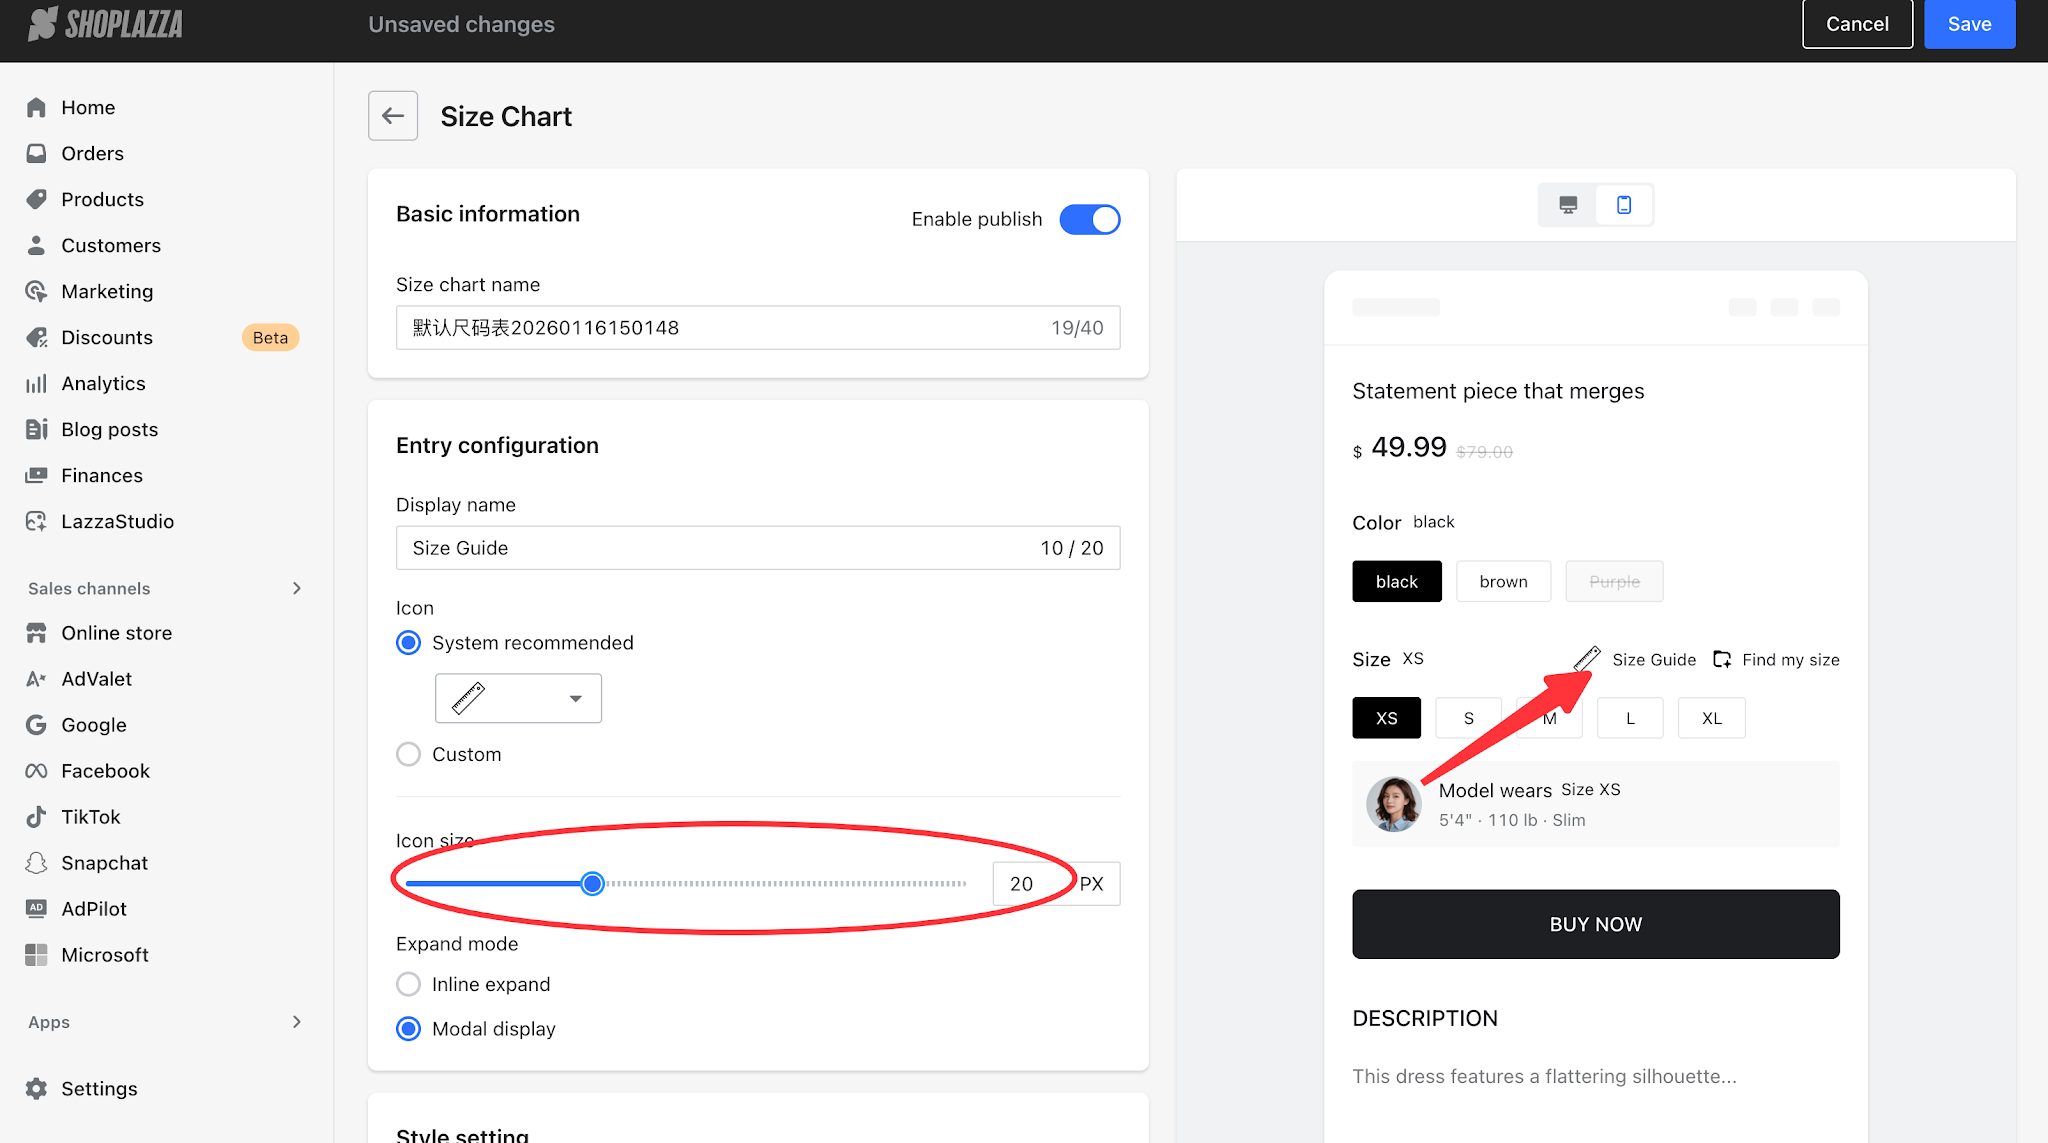
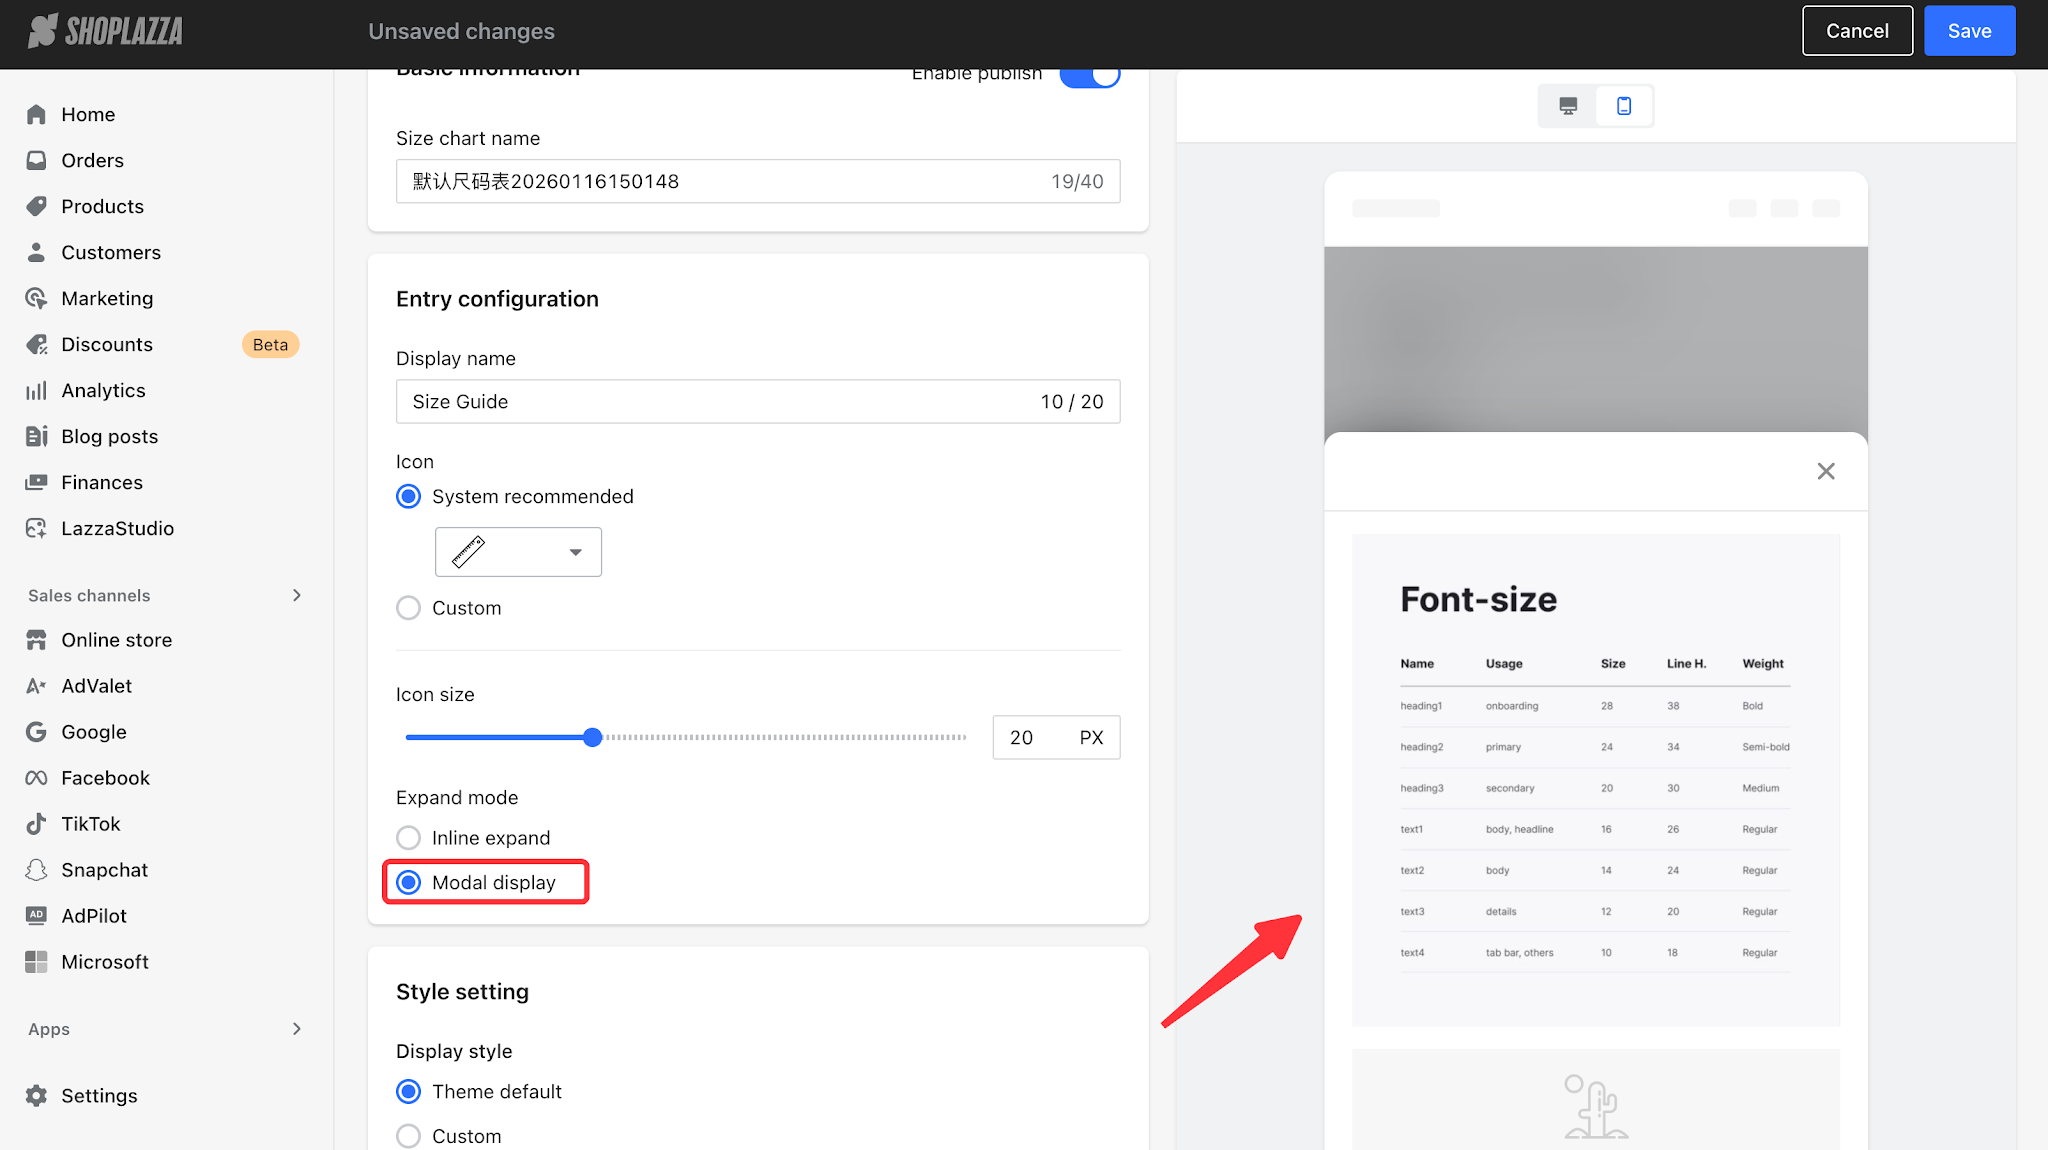
6. Select the Expand Mode to determine how the Size Guide is displayed after customers click the Size Guide entry:
- Inline Expand: The Size Guide content expands directly within the product details page (default).
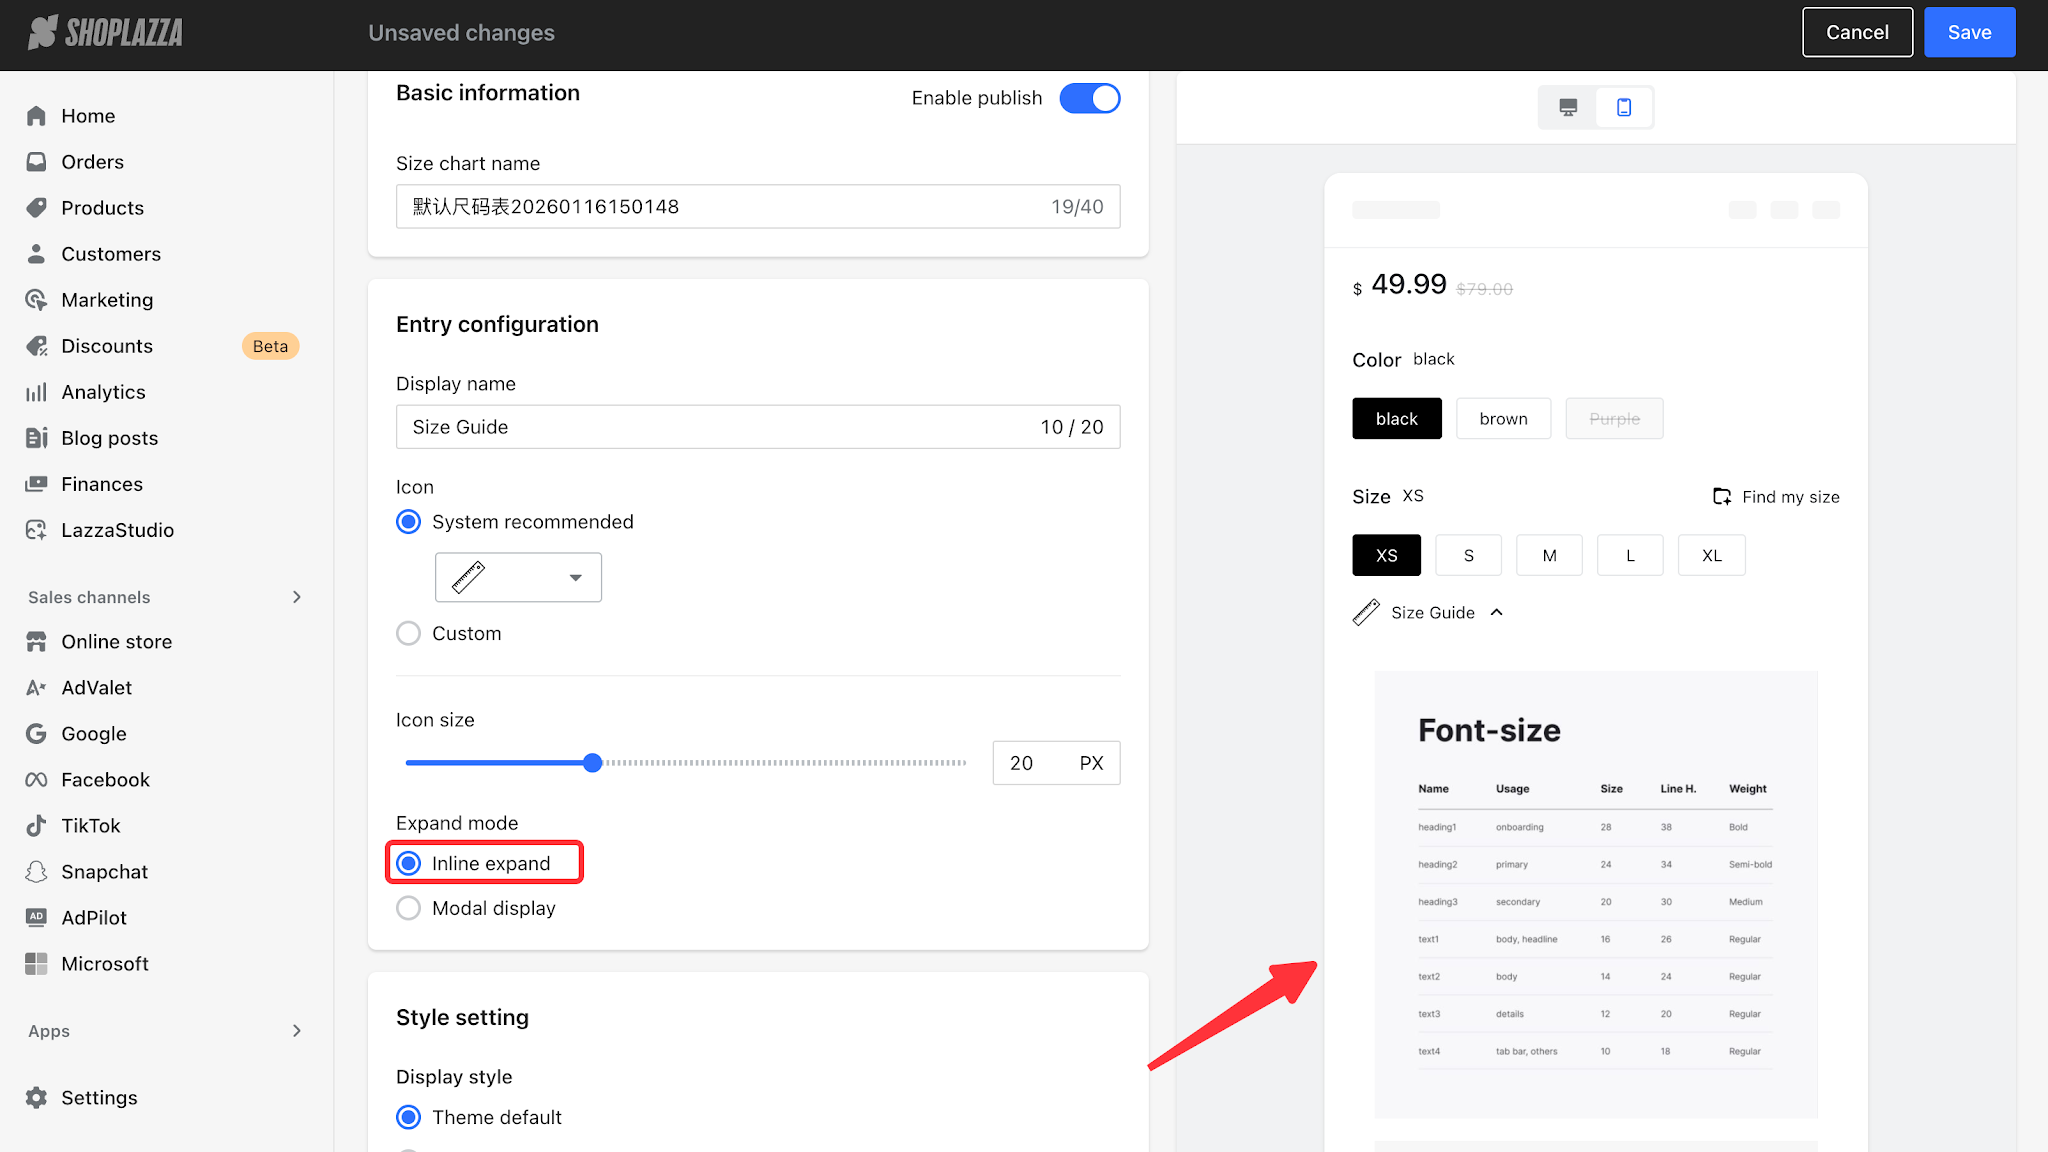
- Modal Display: Displays the Size Guide content in a separate pop-up window
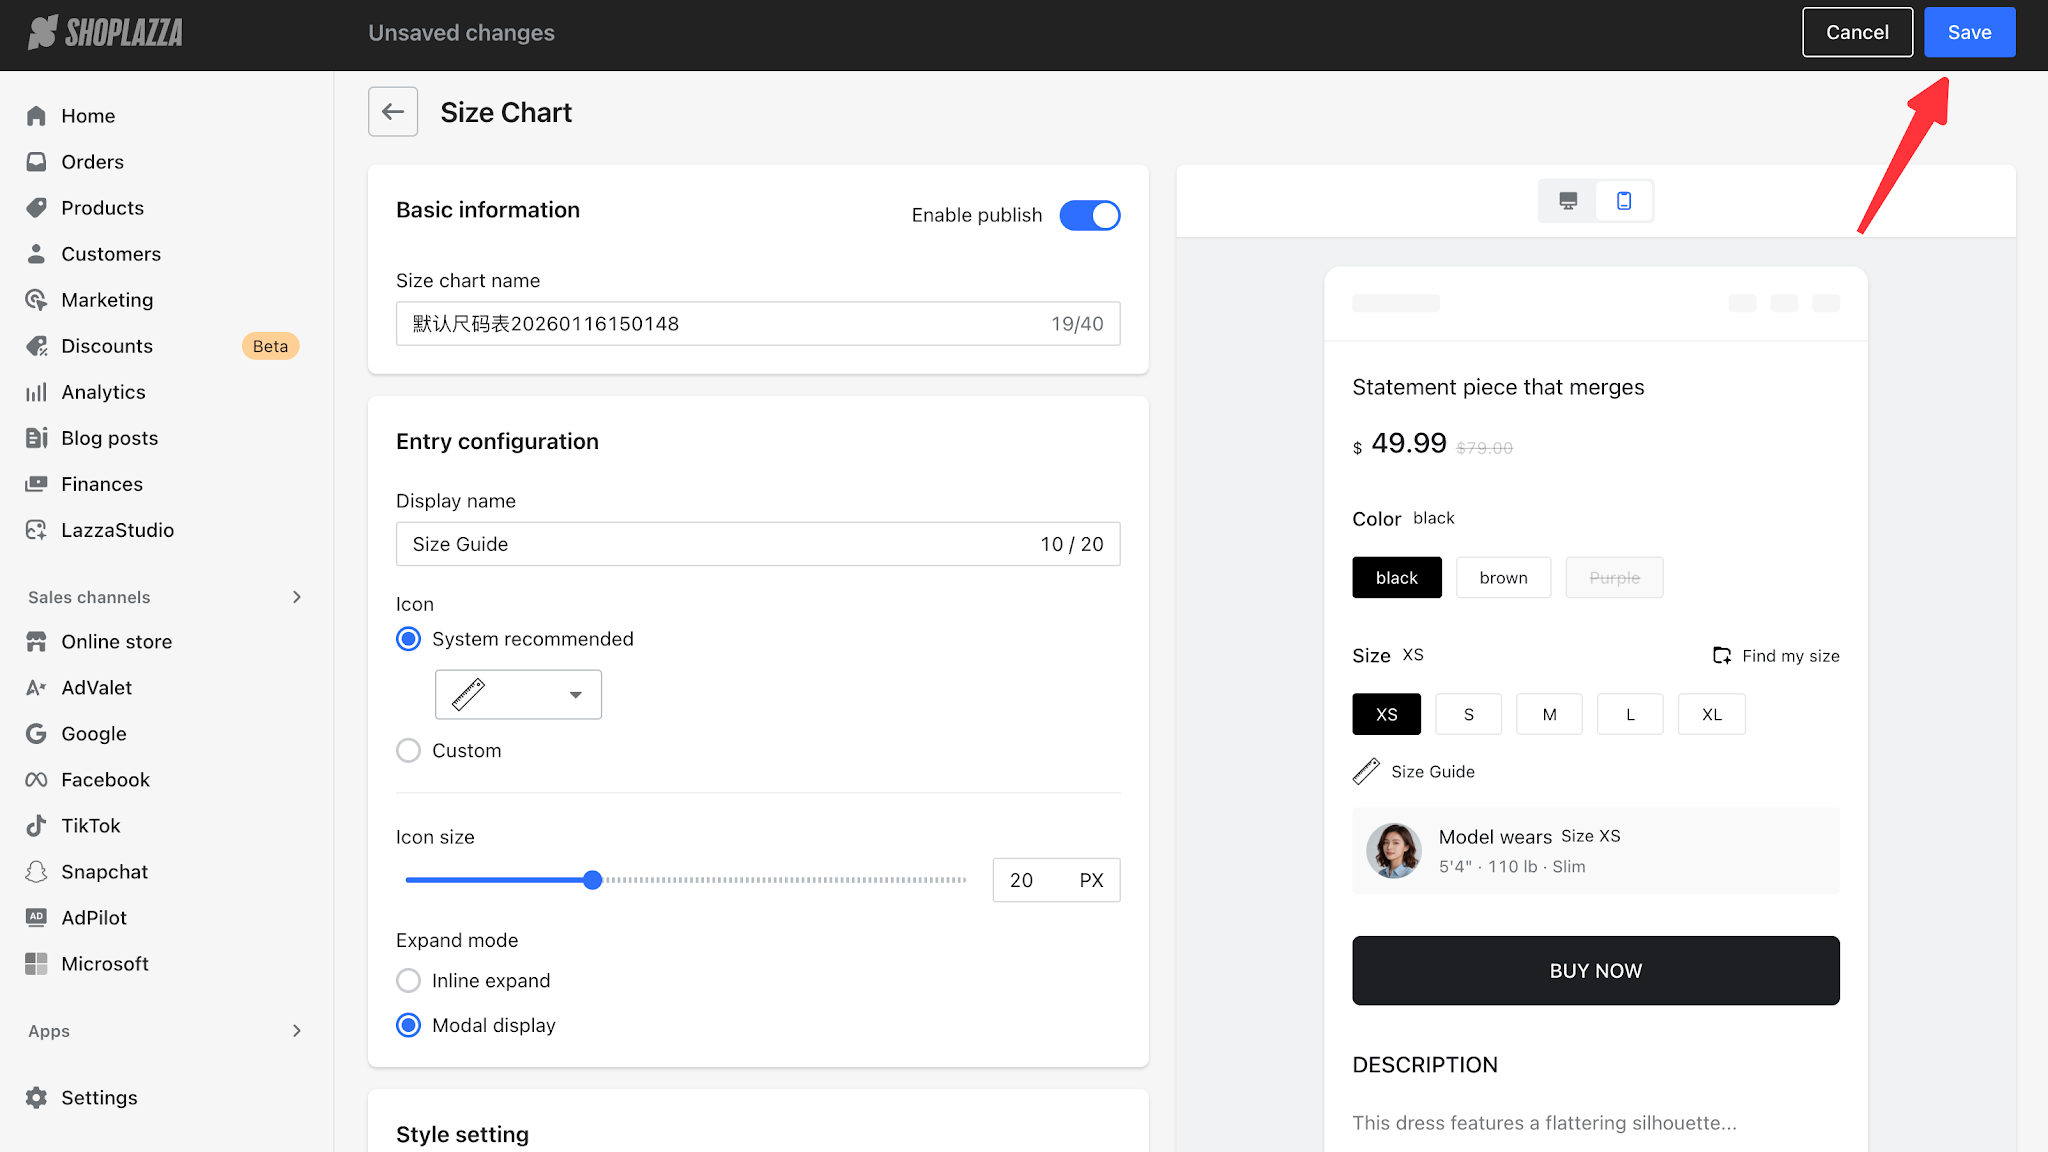
7. The preview area on the right will update in real time to reflect your configuration. Once you have confirmed the settings, click Save in the top-right corner.


Comments
Please sign in to leave a comment.