
A local bank recipient lets you send payouts to a company or individual bank account through local clearing networks, including ACH in the US, SEPA in Europe, and FPS and RTGS in Hong Kong, among other major local clearing networks. Once added, the recipient can be selected directly when you create a payout later, without re-entering the bank account details.
Before you start
Before adding a local bank recipient, please have the following information ready:
- The recipient's basic details (company or individual);
- The recipient's bank account details;
- The currencies the receiving account can accept and their corresponding local clearing networks (if applicable).
Add a local bank recipient
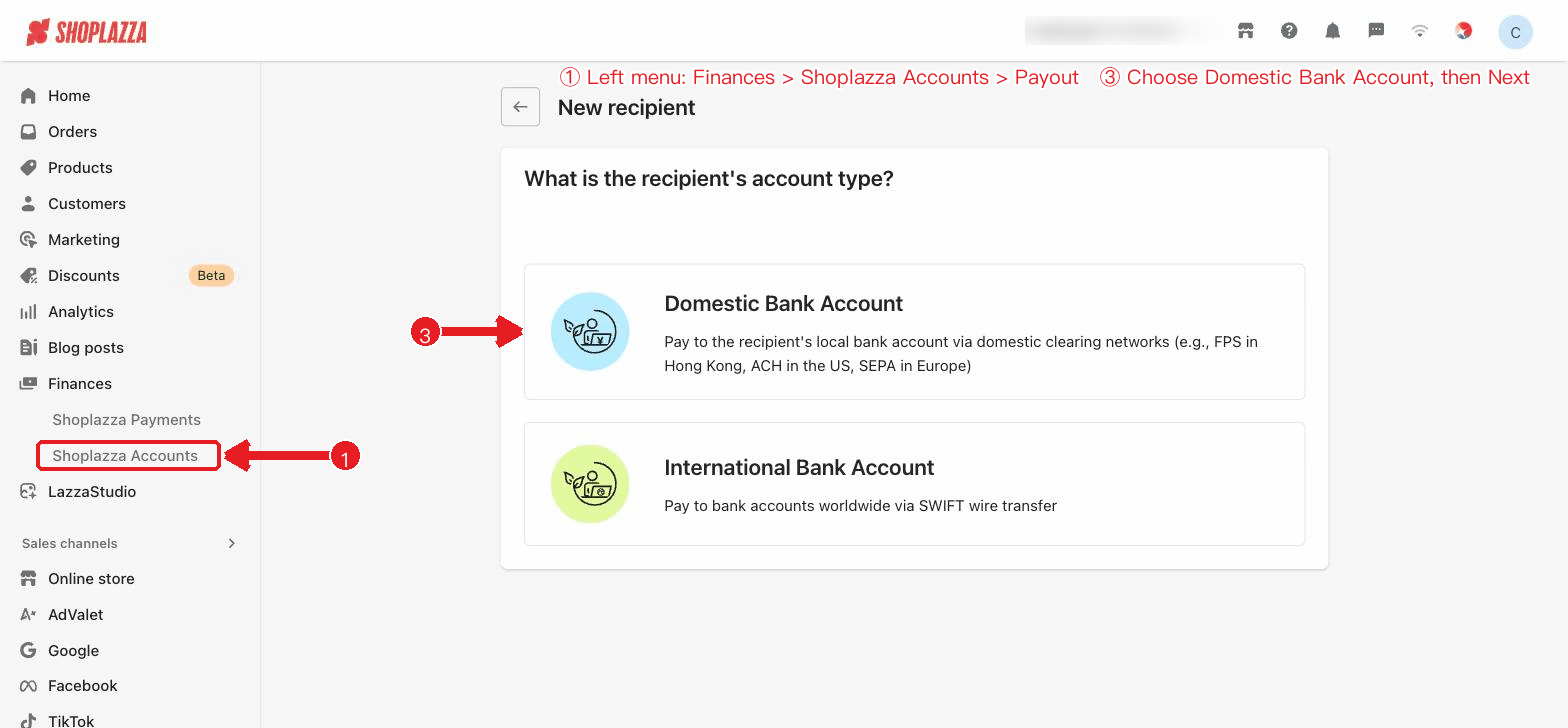
1. Open the Payout page: Go to Finances > Shoplazza Accounts > Payout.
2. Start adding a recipient: Click the Recipients tab, then click New recipient on the Recipients page.
3. Select Local Bank Account: On the account type page, select Local Bank Account.
Figure: Selecting the recipient account type — Local Bank Account or International Bank Account.
4. Select the recipient type: Choose Business or Individual as appropriate.
5. Fill in the recipient details: Complete the recipient details and bank account information as prompted. When entering the bank account information, first select the Country / Region, Account currency, and Transfer method (local clearing network).
Figure: Entering the local bank account and recipient details.
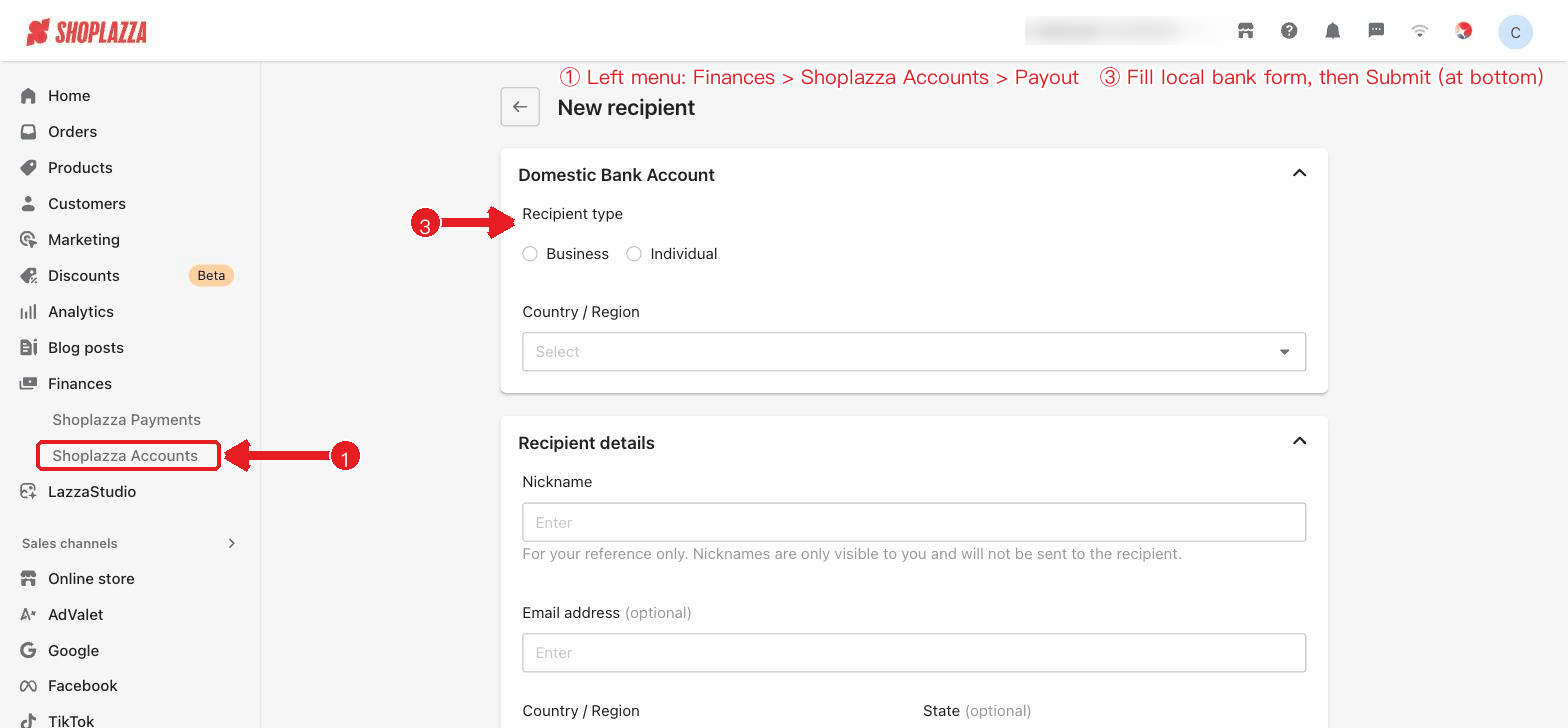
Some countries or regions support multiple local clearing networks, such as FPS, RTGS, ACH, or SEPA. Please choose the transfer method that the receiving account actually supports. After you select a transfer method, the system automatically displays the corresponding bank account fields.
- Business recipient: You usually need to enter the company name (must match the bank account name), business registration number (if applicable), recipient nickname (for internal reference only), email address (optional), contact address, and local bank account details.
- Individual recipient: You usually need to enter the recipient's name, ID document number (if applicable), recipient nickname, email address (optional), contact address, and local bank account details.
Tips
The bank account information you actually need to provide adjusts automatically based on the Country / Region, Account currency, and Transfer method you select. Different scenarios may require a Routing Number, Sort Code, IBAN, BSB, FPS ID, or other bank clearing details. Please follow the fields shown on the page.
6. Submit the recipient: Click Submit to finish adding. Once added successfully, the recipient is saved to your recipient list and can be selected directly when you create a payout later.
Notes
- Account name must match: The recipient name should match the bank account name; otherwise the payout may fail.
- Bank details must be accurate: Errors in the bank account number or local clearing details may cause the payout to be returned.
- Nickname is for internal reference only: The recipient nickname is only shown within Shoplazza Accounts and is not sent to the recipient.
- Fill in details as required by the page: Different countries or regions and local clearing networks may require different bank clearing details. Please follow the fields shown on the page.
- Confirm the account can accept the receiving currency: The receiving account must be able to accept the selected payout currency; otherwise the payout may fail or be returned.
Interface controls and buttons
| Button / Control | Location | Function |
| Local Bank Account / International Bank Account | Step 1 | Selects the recipient account type; this article uses "Local Bank Account". |
| Recipient type: Business / Individual | Bank account information panel | Selects the type of recipient, which determines the fields you need to fill in afterward. |
| Country / Region, Account currency, Transfer method (dropdowns) | Bank account information panel | After you make these selections in order, the system automatically displays the corresponding bank account fields (such as FPS ID, Routing, Sort Code, or IBAN). |
| Bank account information / Recipient details / Recipient address / Supplementary ID materials (collapsible panels) | Form | Expand or collapse each group to fill in the bank, recipient, address, and ID information respectively. |
| Add file (upload) | Supplementary ID materials | Upload documents such as a business license (company) or ID card (individual). PNG/JPG/PDF are supported, up to 10MB each. |
| Back / Submit | Bottom | Back clears the form and lets you reselect the account type; Submit finishes adding and takes you to the result page. |
| Done / Add another recipient / Pay this recipient | Result page | Return to the list / continue adding / start a payout directly to the recipient you just created. |
| Add file (result page / details) | When the status is "Pending supplement" | Provide the required materials to complete the recipient review. |


Comments
Please sign in to leave a comment.