
To enable virtual try-onin your store, each product must go through a simple setup process in the GlassOn app. This includes uploading images, generating a 3D model, and activating the feature on your storefront. Use the Try-on List to manage all product setup and track progress from start to finish.
Accessing the Try-on List
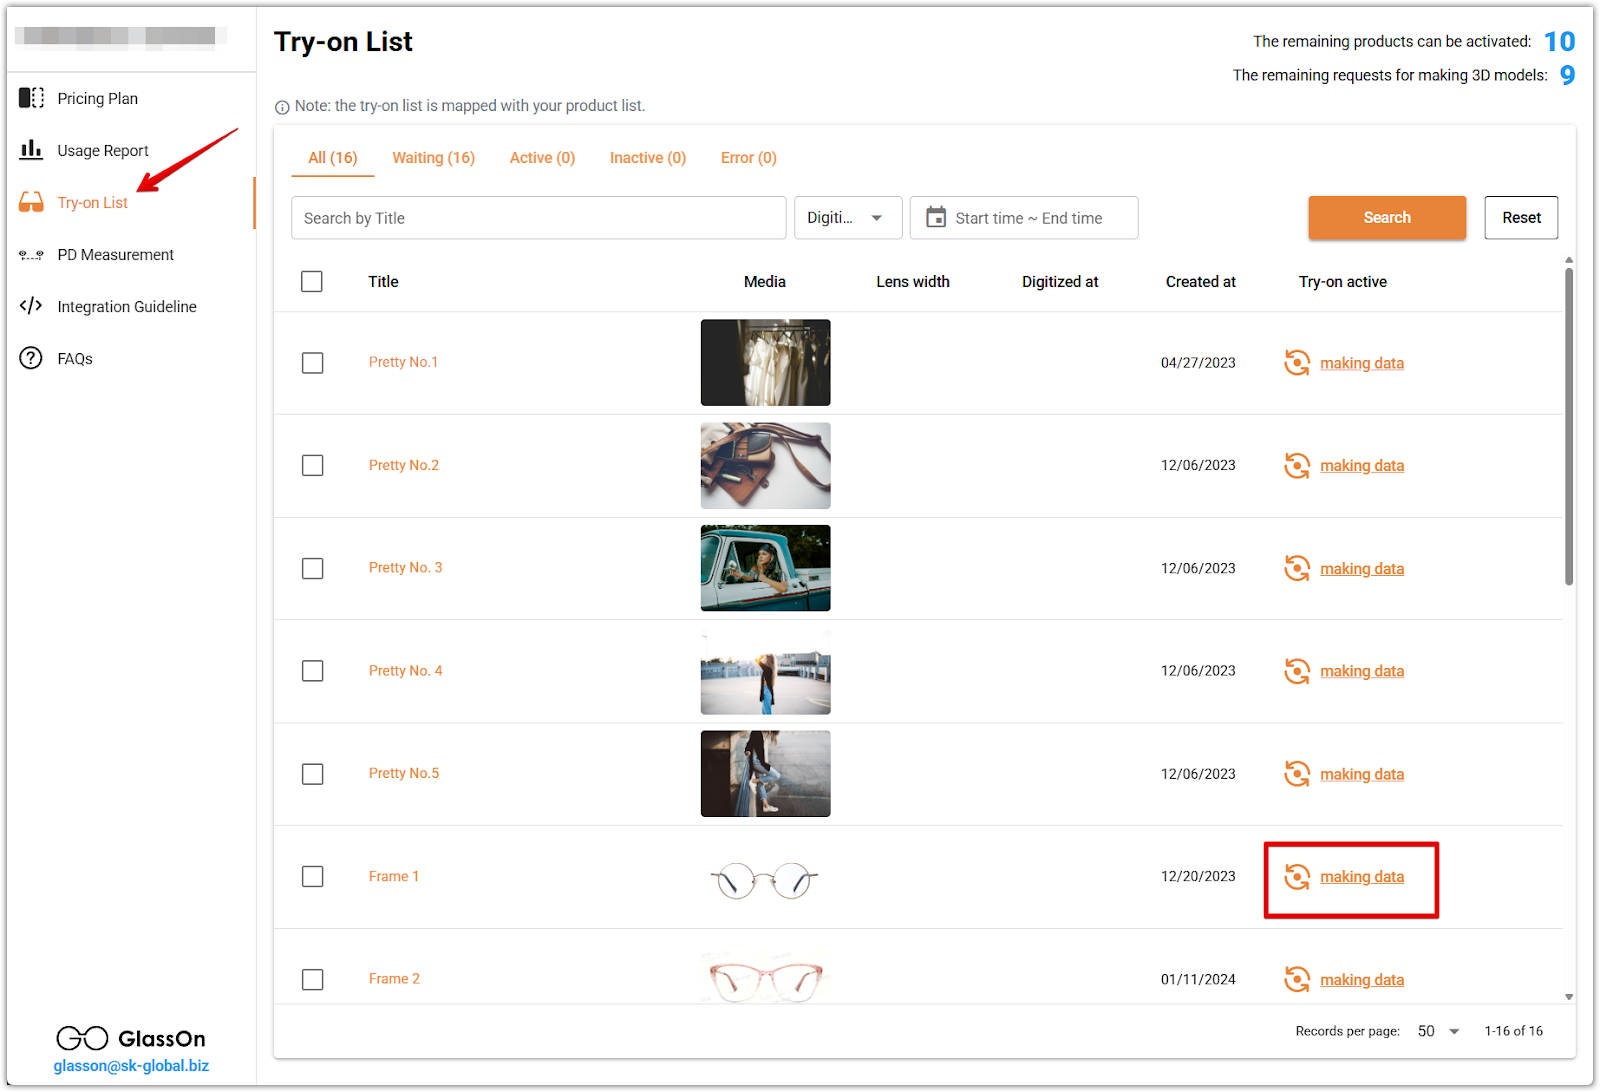
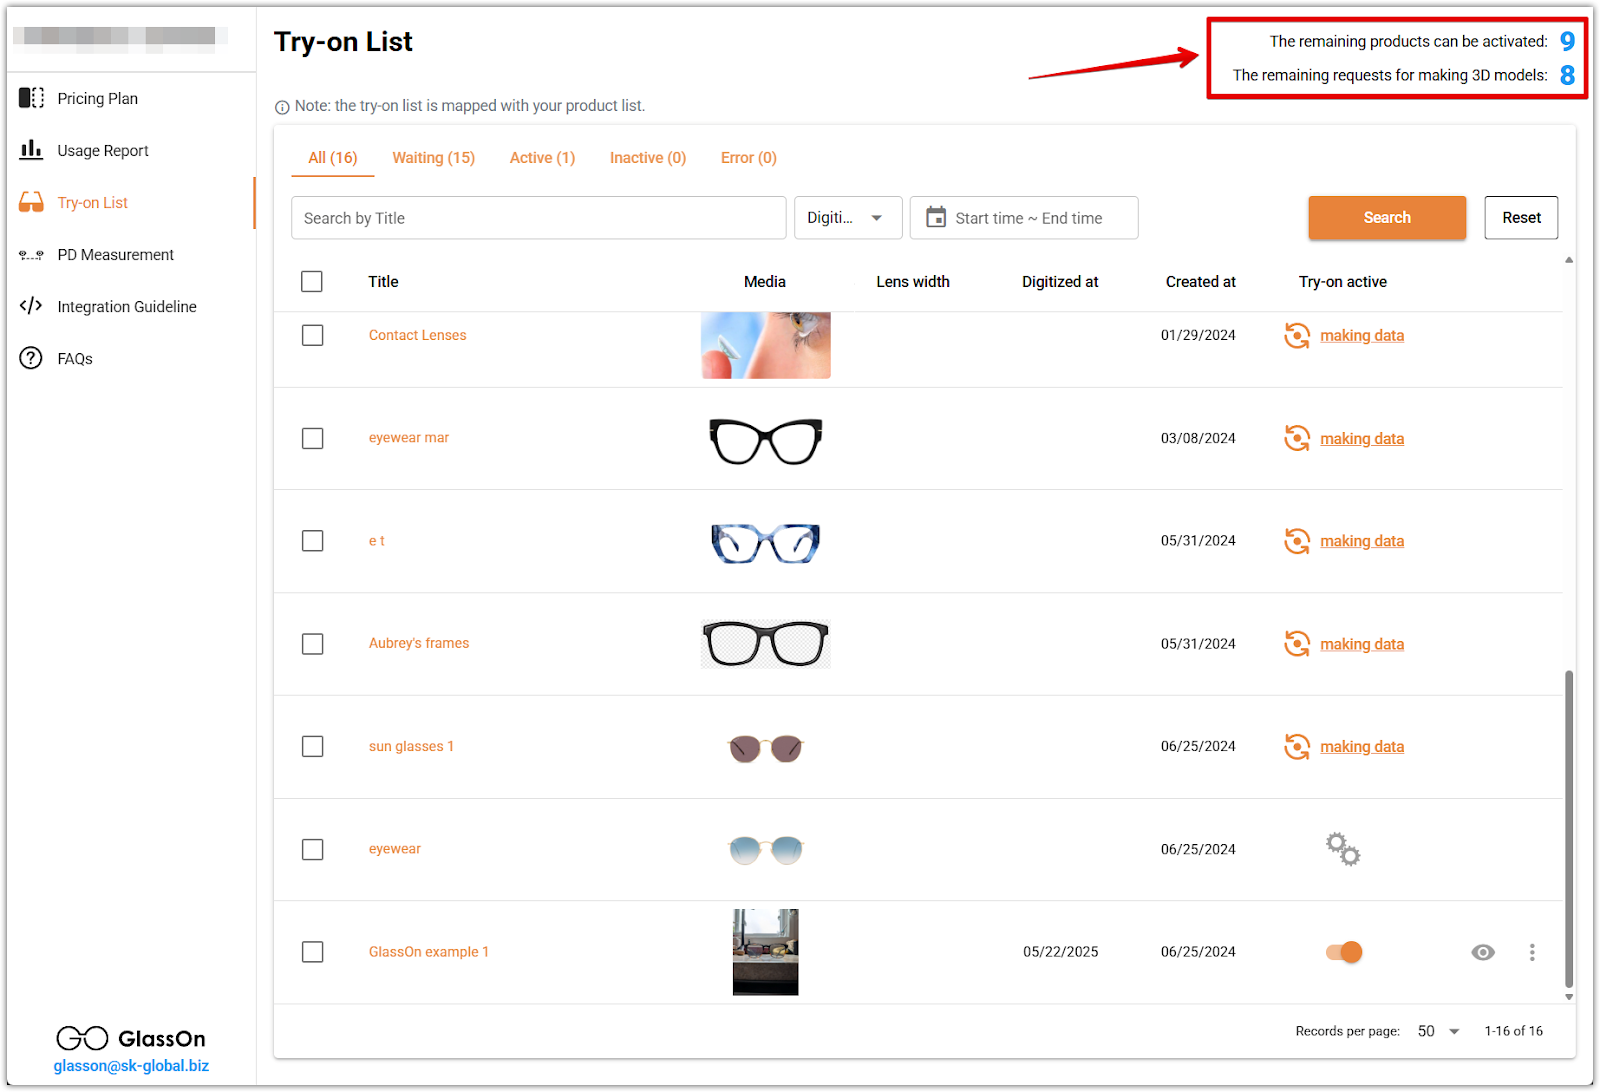
1. Go to the Try-on List tab: Click Try-on List from the left-hand menu in the GlassOn app to view all products synced from your Shoplazza store. This list includes every product in your catalogue.
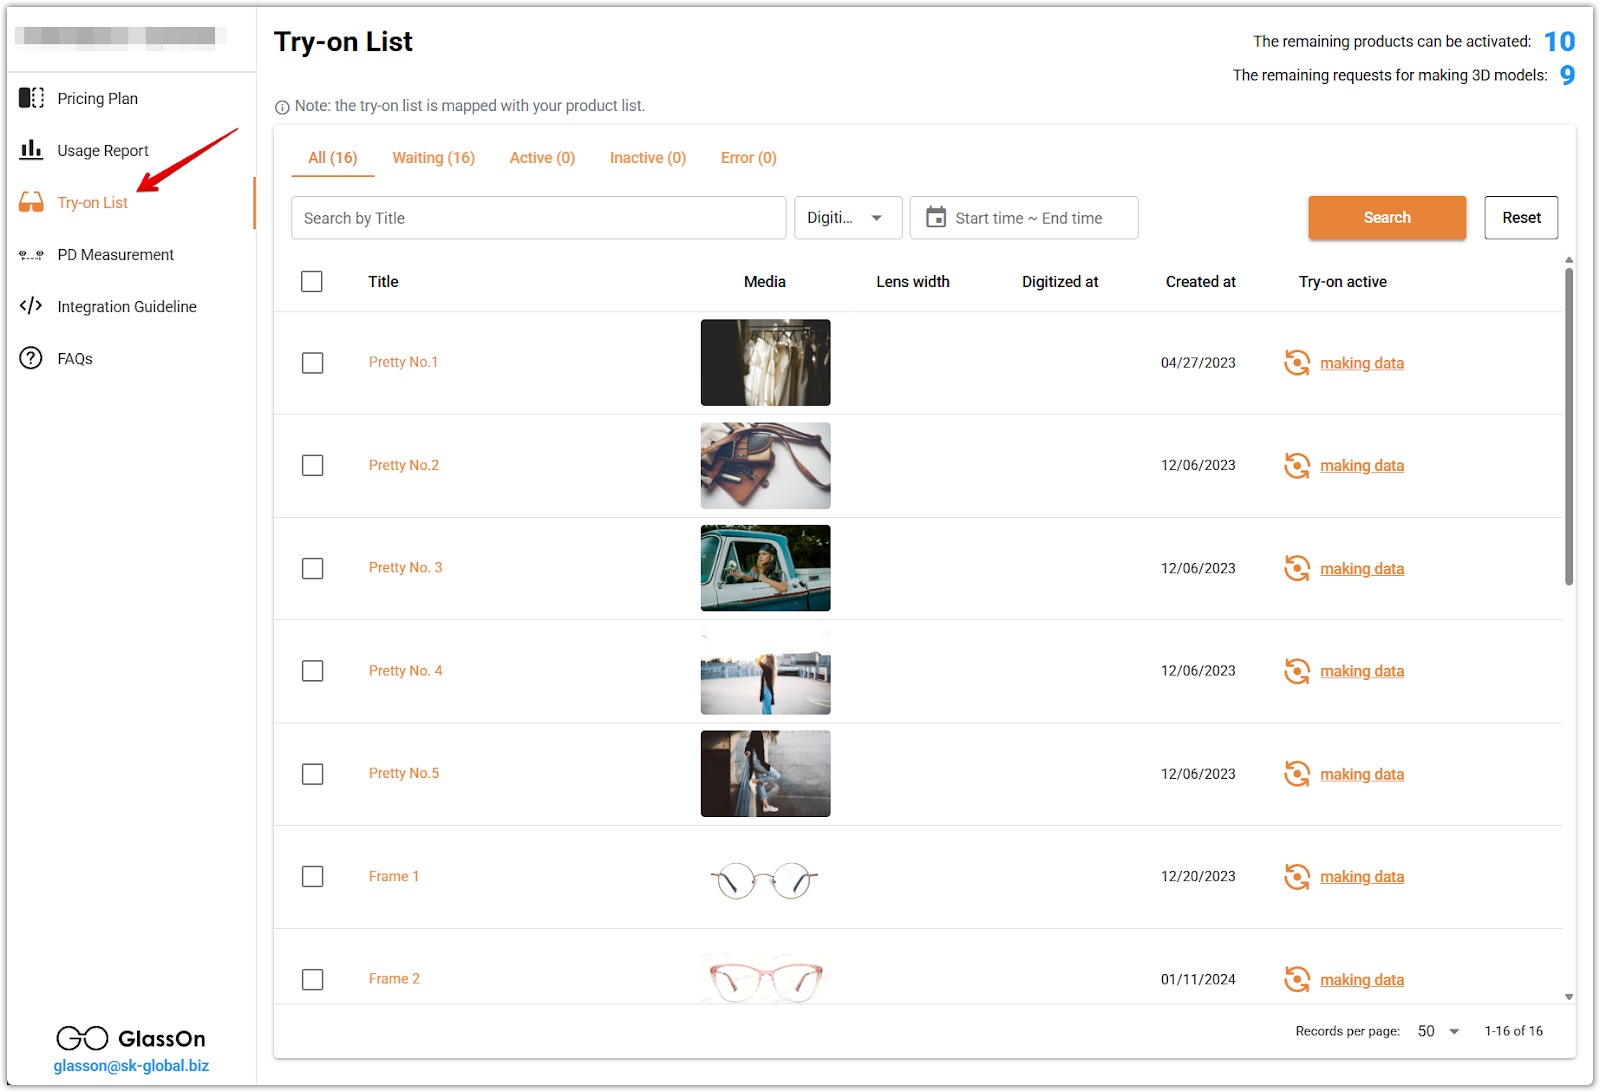
2. Check product statuses: Each product includes a Try-on Active status that tells you where it is in the setup process. Products labeled as making data need image uploads. Products showing a gear icon are currently being processed.

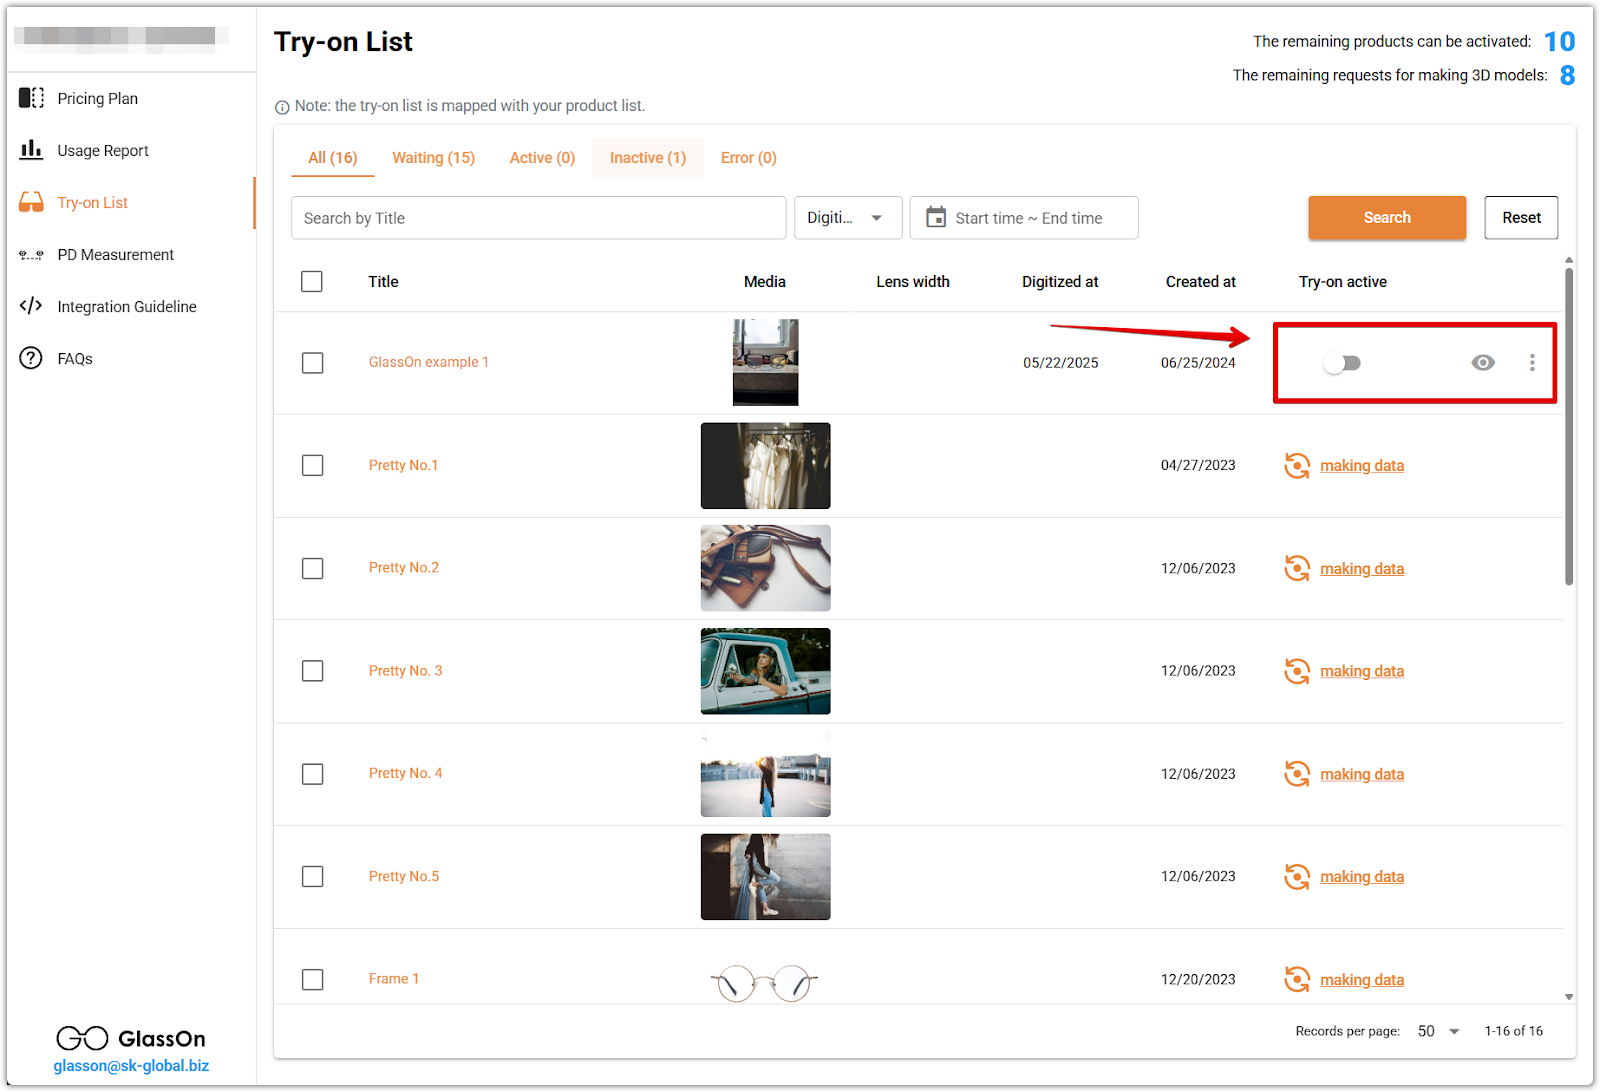
3. Refer to the Try-on Active controls: When a product is ready, the Try-on Active section includes a toggle switch to activate or deactivate the feature, a preview icon that launches a live webcam preview of the 3D model, and a three-dot menu for options such as remaking the 3D model.
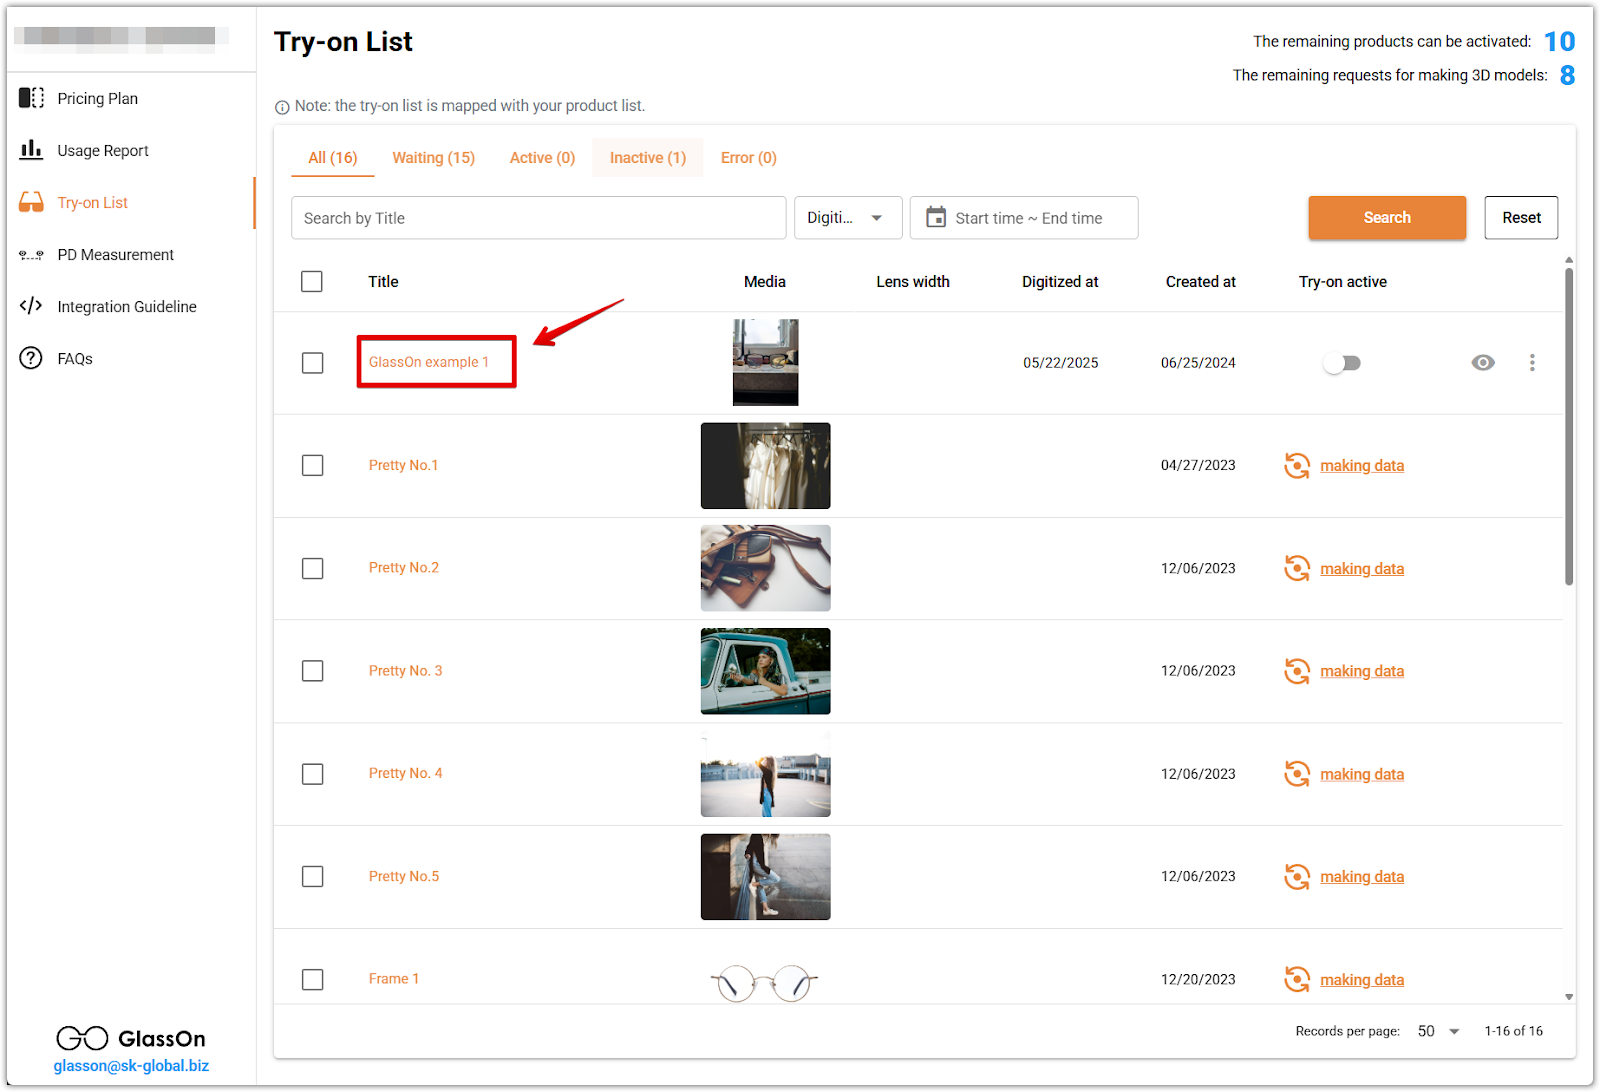
4. Click the product name to view the listing: Clicking a product title opens the product page as it appears on your storefront, allowing you to preview how the try-on feature will be displayed to customers.
Uploading images for 3D model generation
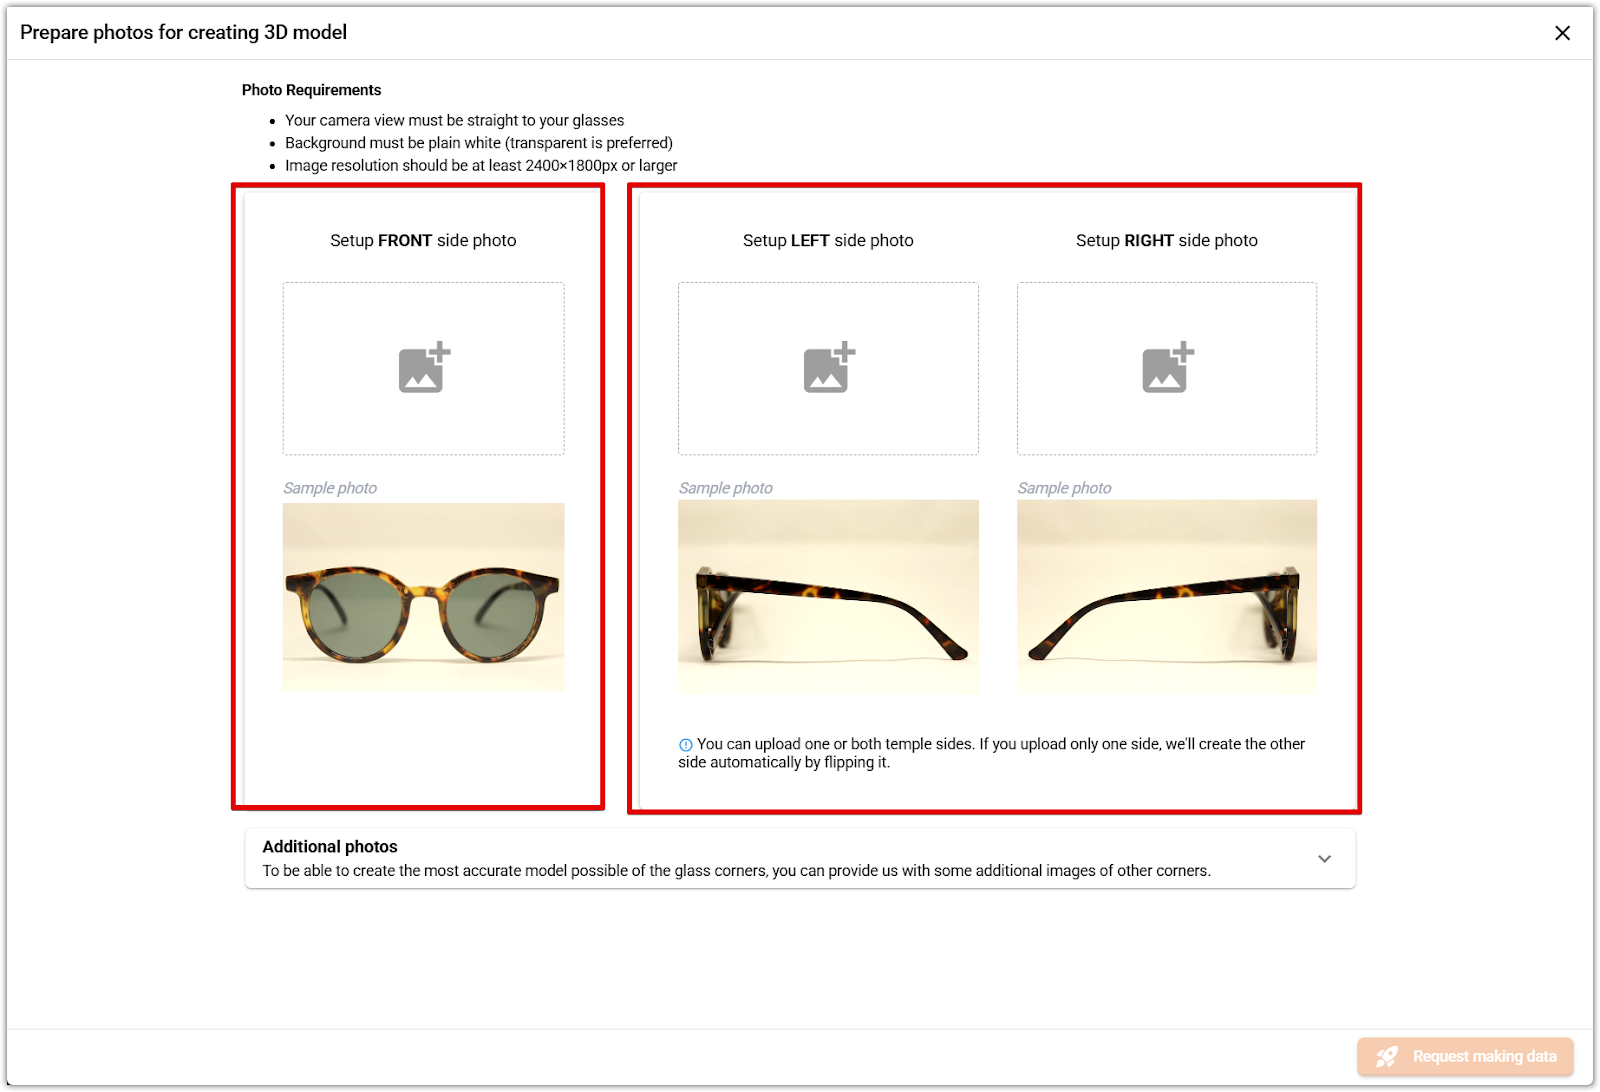
1. Click making data to begin setup: For products showing making data, click the label to open the upload interface where you will submit product photos and request a 3D model.
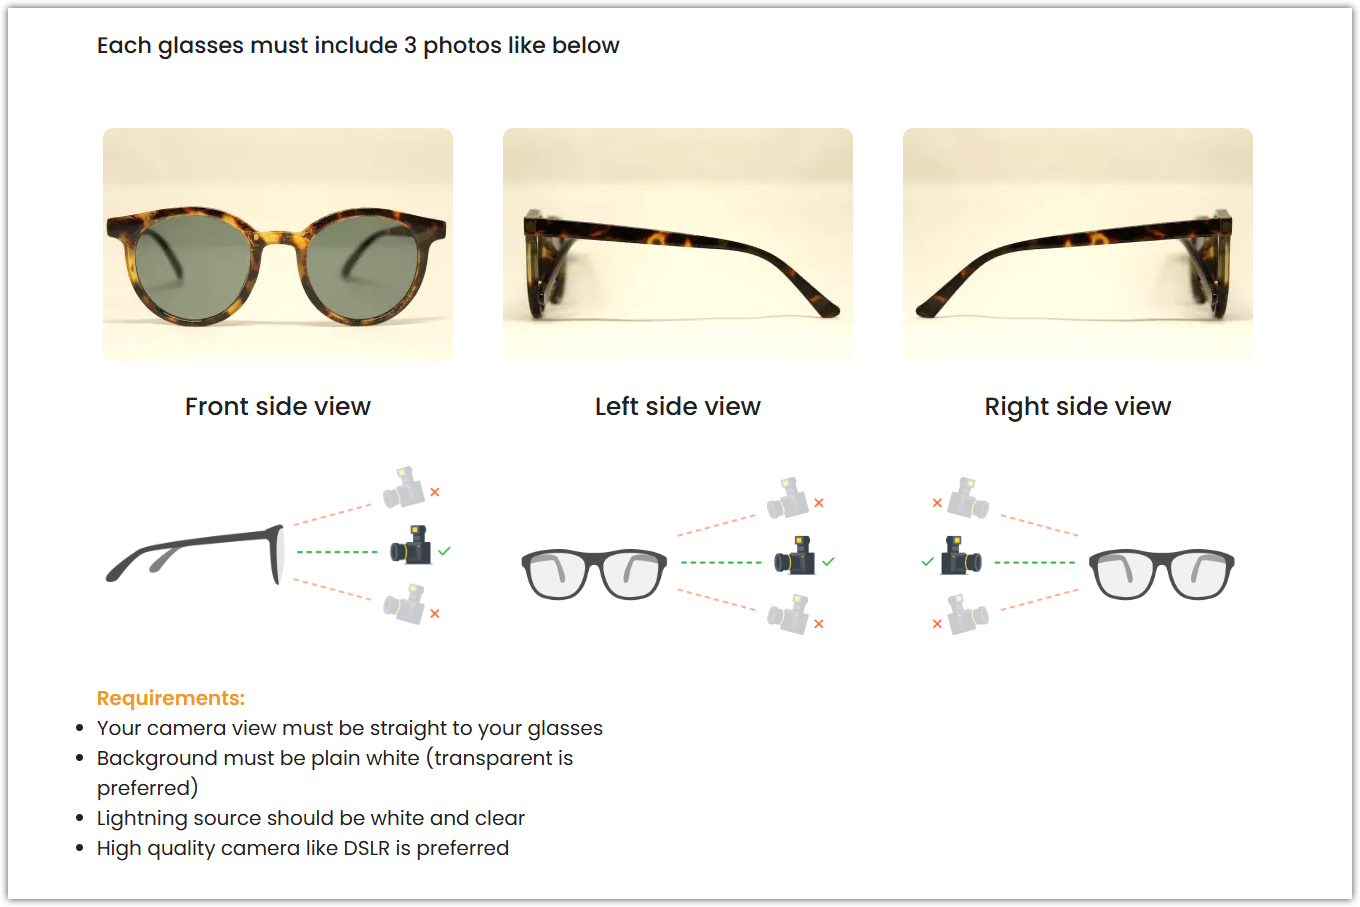
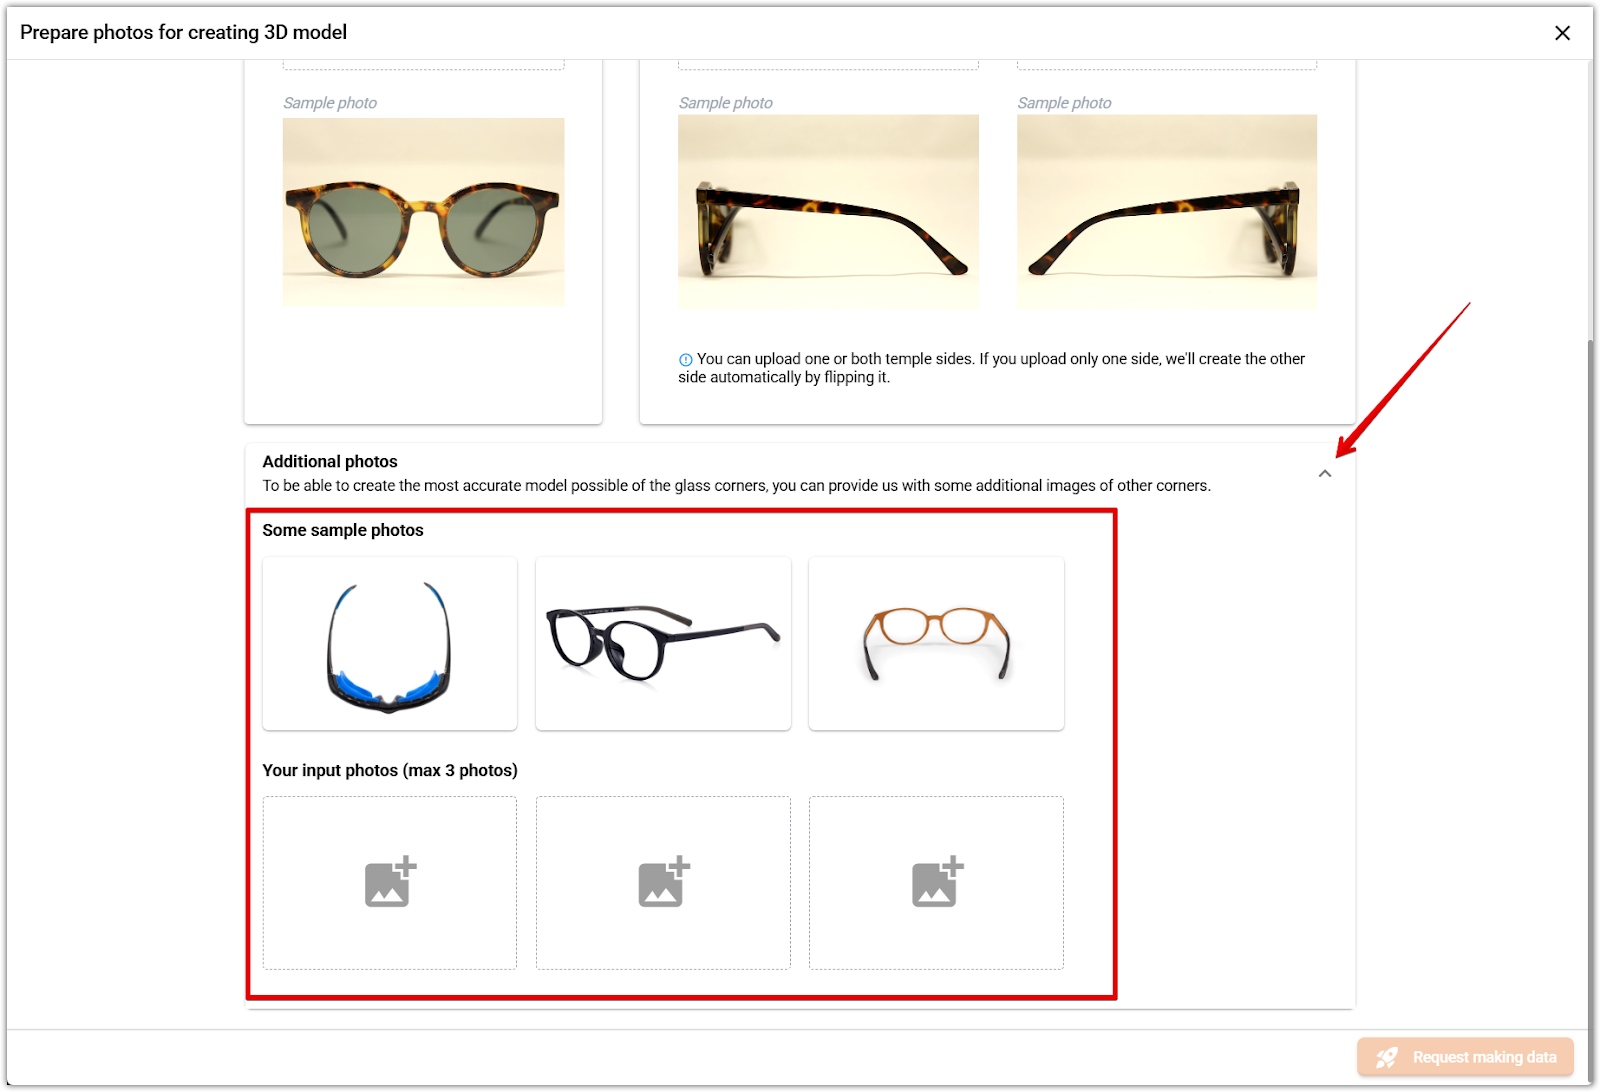
2. Upload front and side photos: You must upload a front-facing image of the glasses, along with a left-side and right-side image. All photos must follow the provided angle and alignment guides.
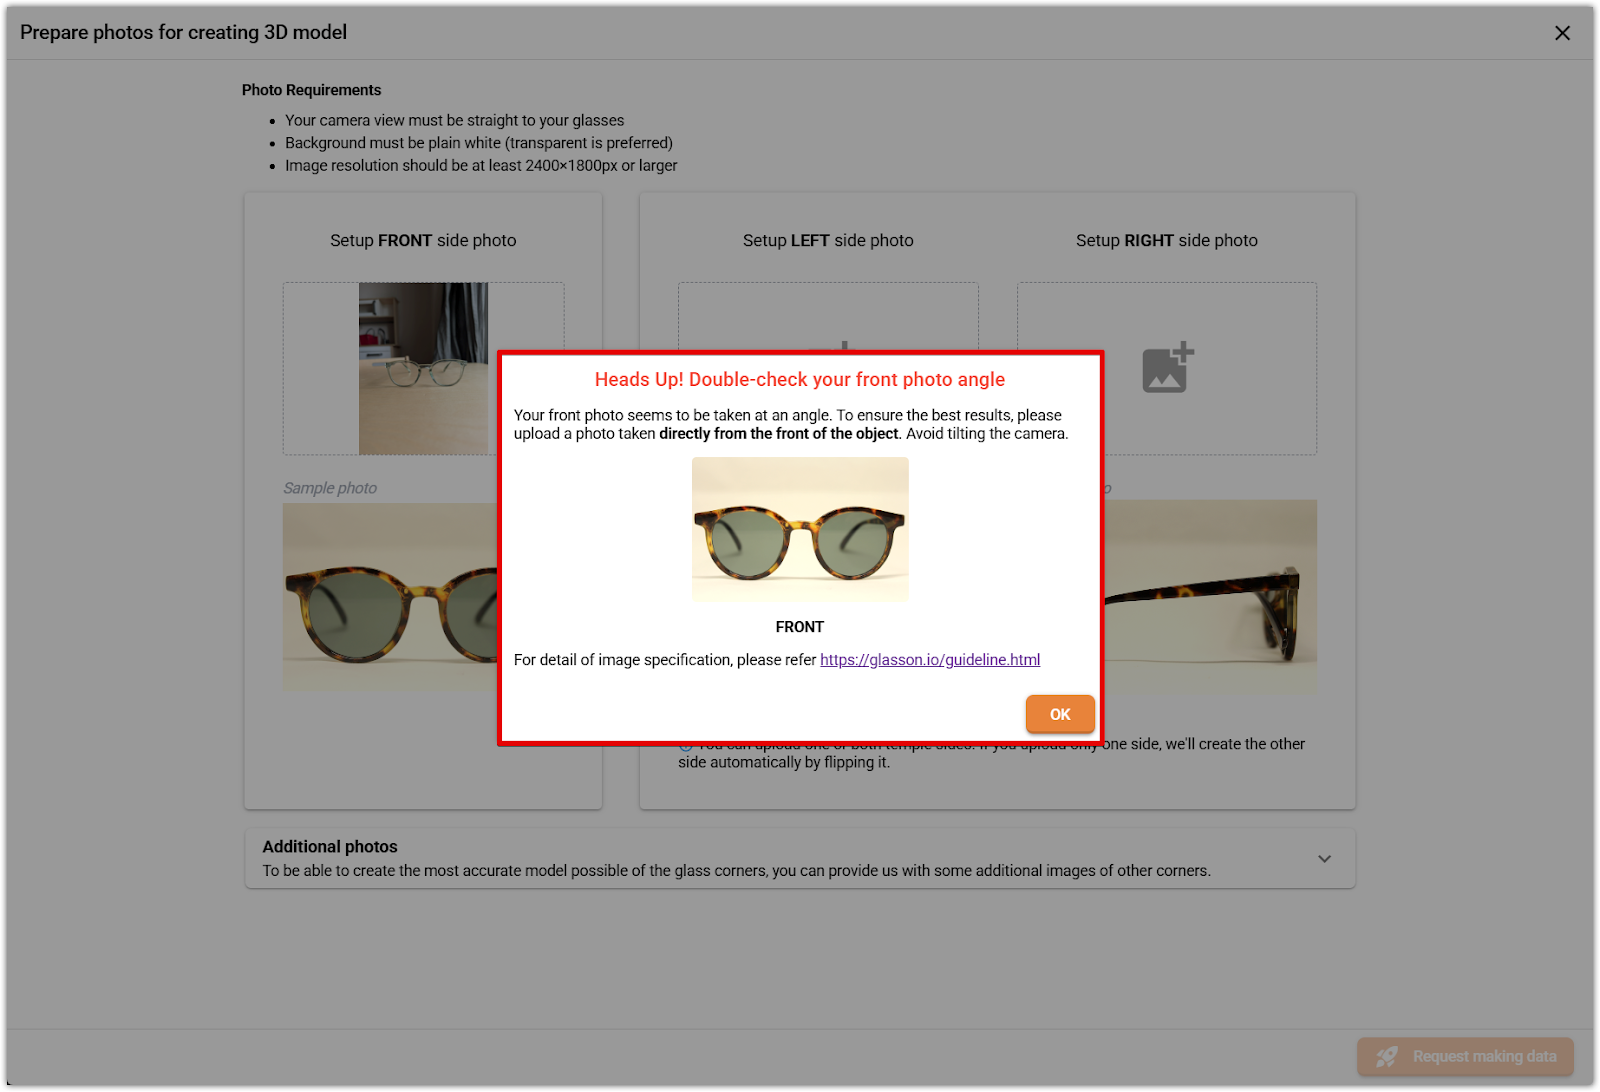
3. Watch for image warnings: If any uploaded image is off-angle or does not meet the required quality, GlassOn will display a warning prompting you to retake the photo.
4. Upload additional images if needed: You can upload extra angle photos to improve model accuracy. This step is especially useful for thick frames or unique designs.
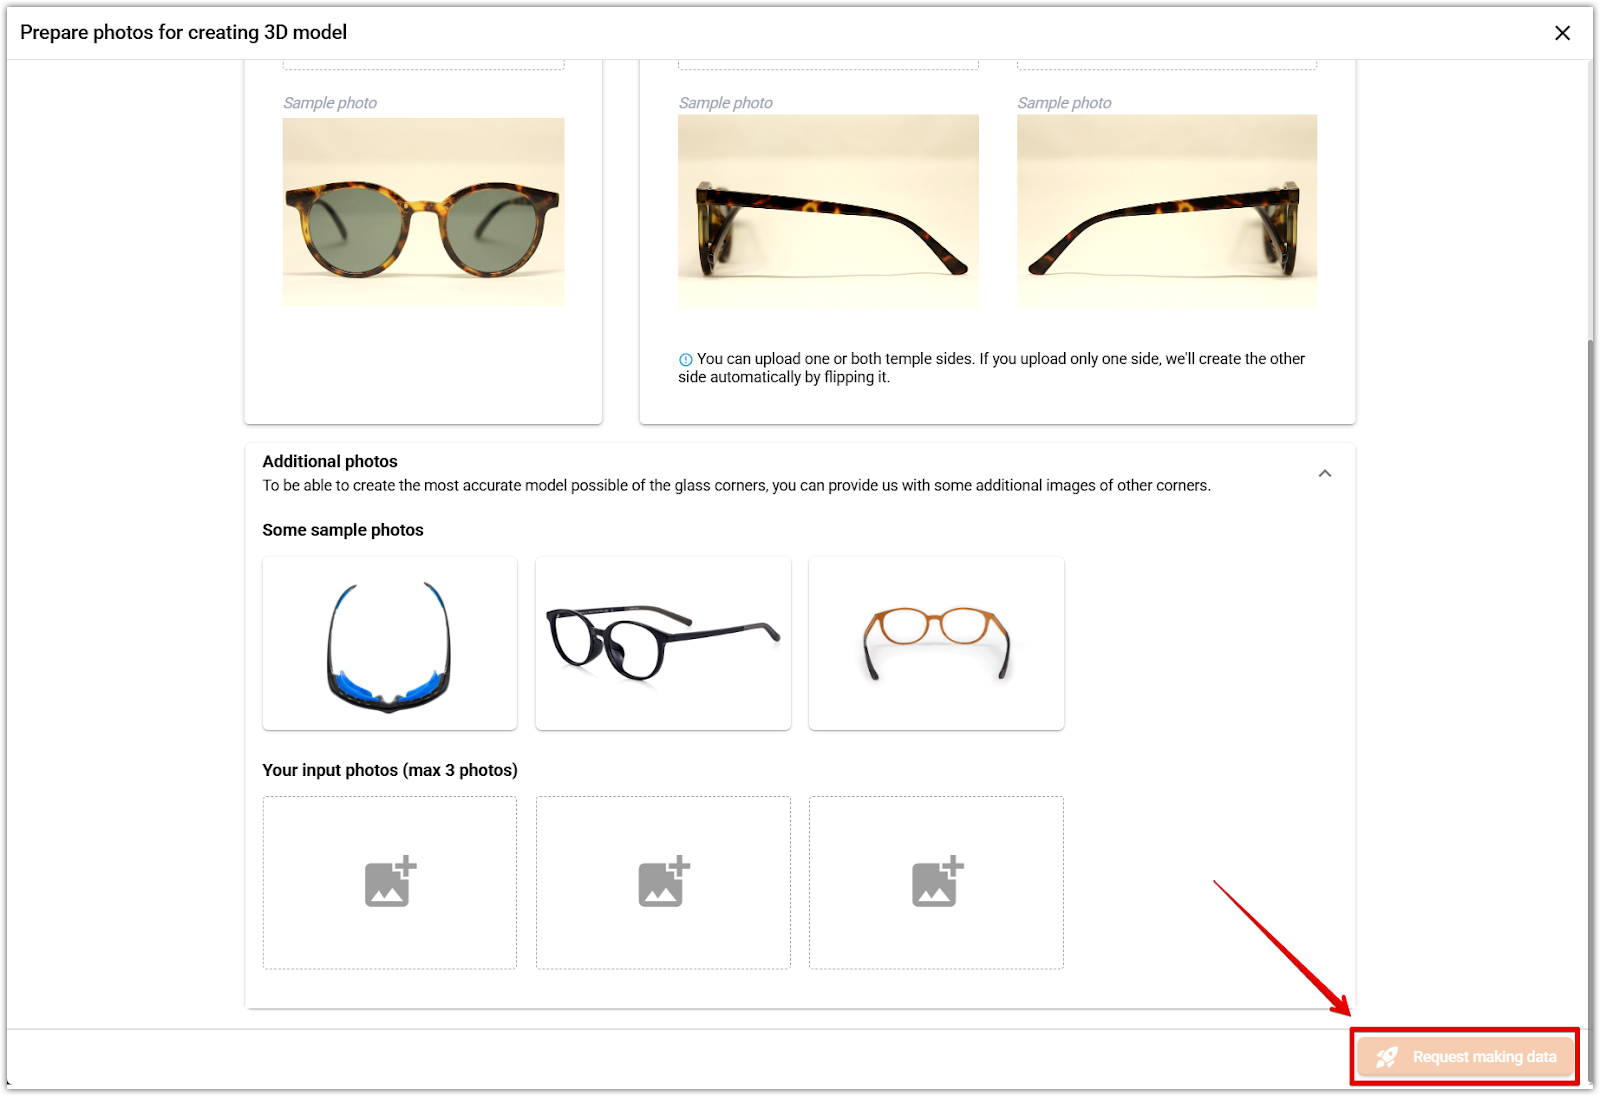
5. Click Request making data: Once the required images are uploaded and pass basic checks, click Request making data to submit your model for processing. The product status will update accordingly.
Managing product limits and activation
1. Track remaining product limits: At the top right of the Try-on List tab, you’ll see counters showing your available try-on product slots and remaining 3D model requests based on your subscription plan.
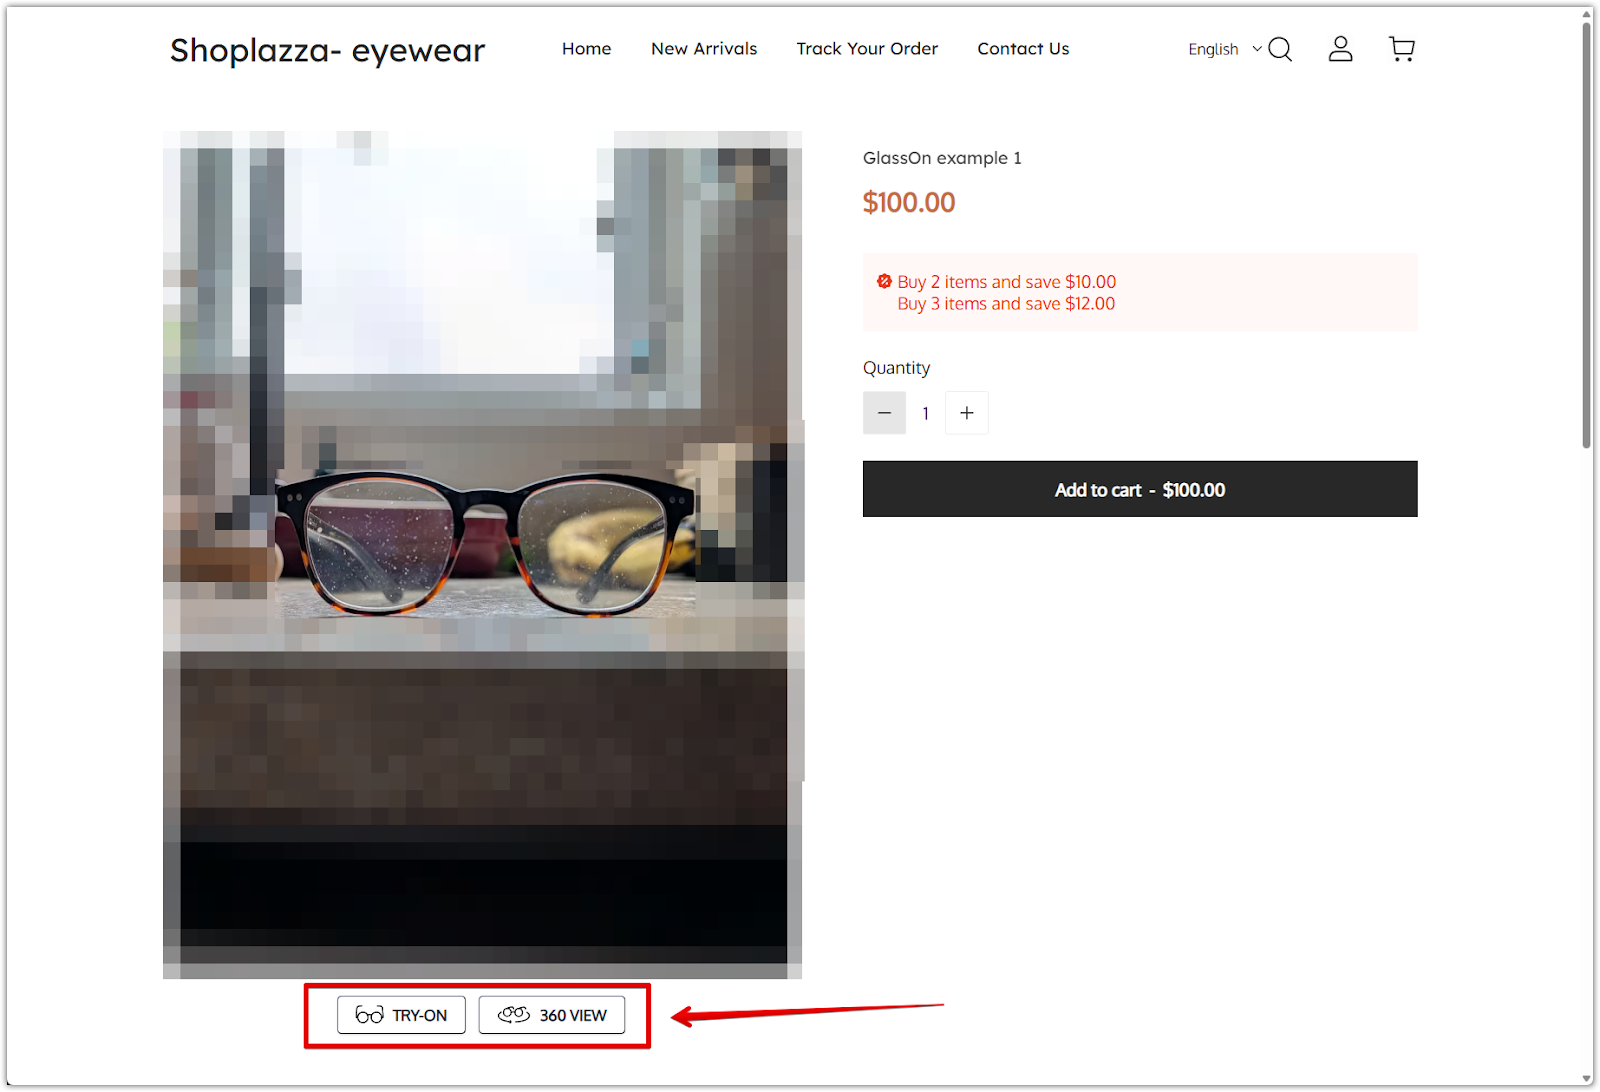
Once your products are uploaded, modeled, and activated, customers will be able to interact with them using real-time try-on and 360° viewing directly from your storefront. Keeping your Try-on List updated and accurate ensures a smooth experience that builds trust and supports confident purchasing decisions.


Comments
Please sign in to leave a comment.