
A rich text section is a versatile canvas that enhances your store by offering a space to connect with your customers meaningfully. Use it to showcase your brand's personality, highlight key product collections, share blog posts, or deliver your brand message. This versatile tool empowers you to make your store more engaging and visually appealing in creative ways.
Adding a rich text section
Adding or editing a rich text section is straightforward, whether it’s included in your theme by default or you need to add it manually.
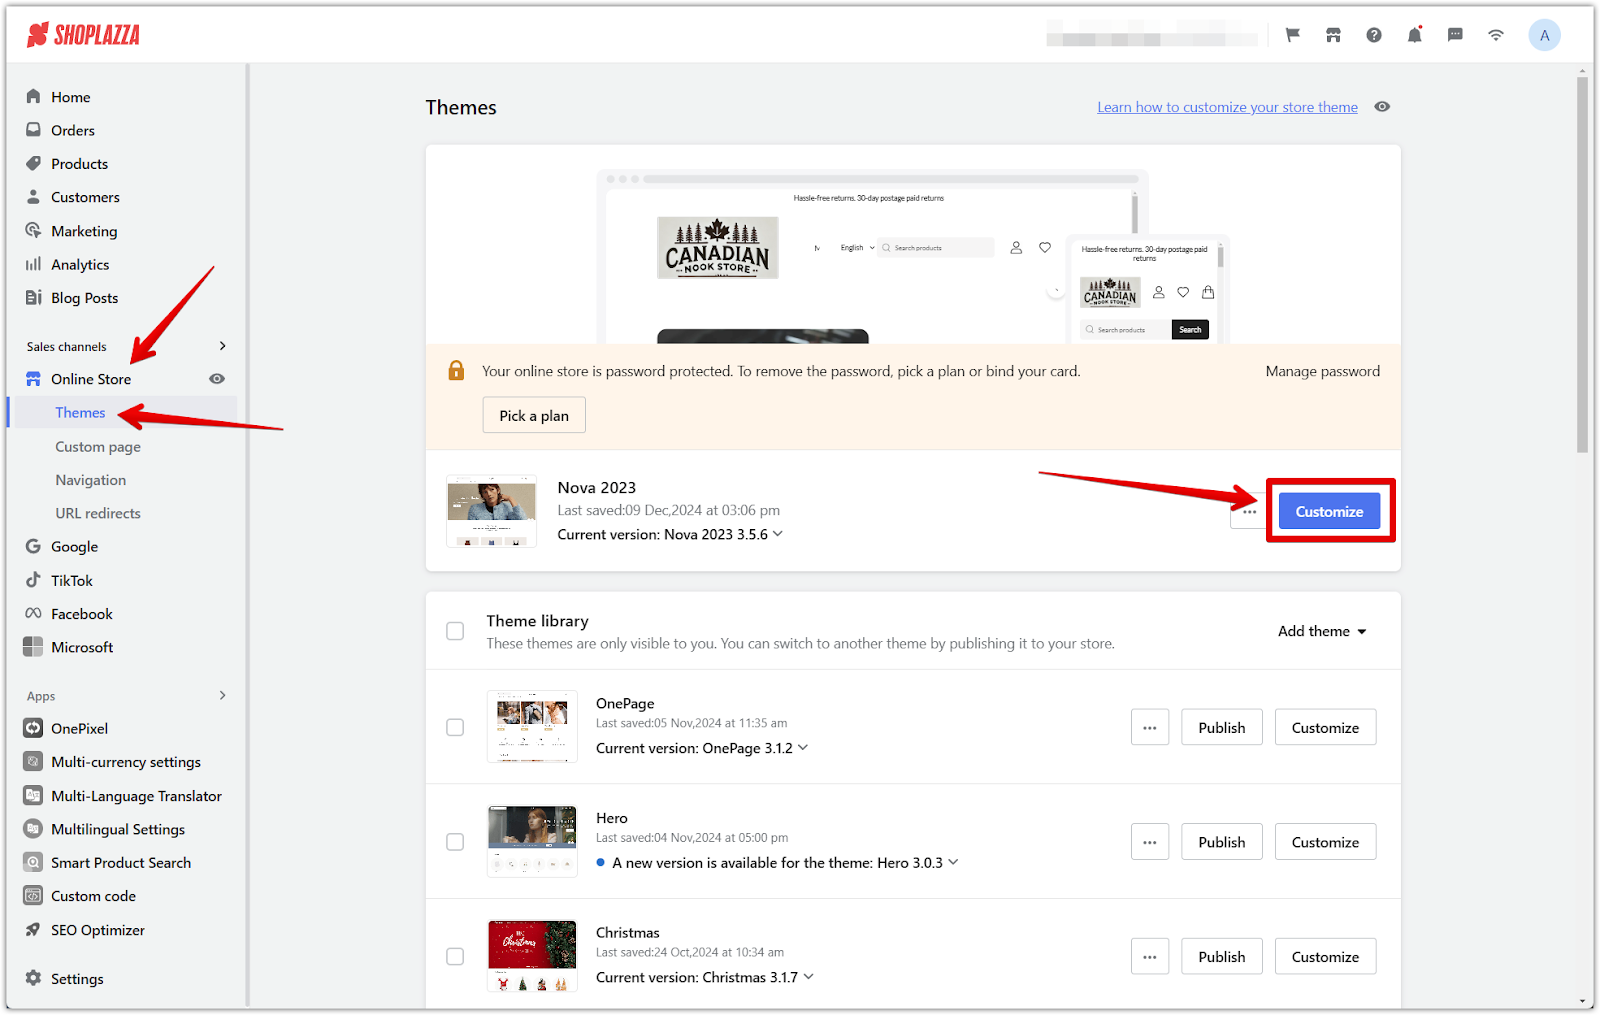
1. Access the theme editor: From your Shoplazza admin > Online store > Themes, click Customize next to the target theme.
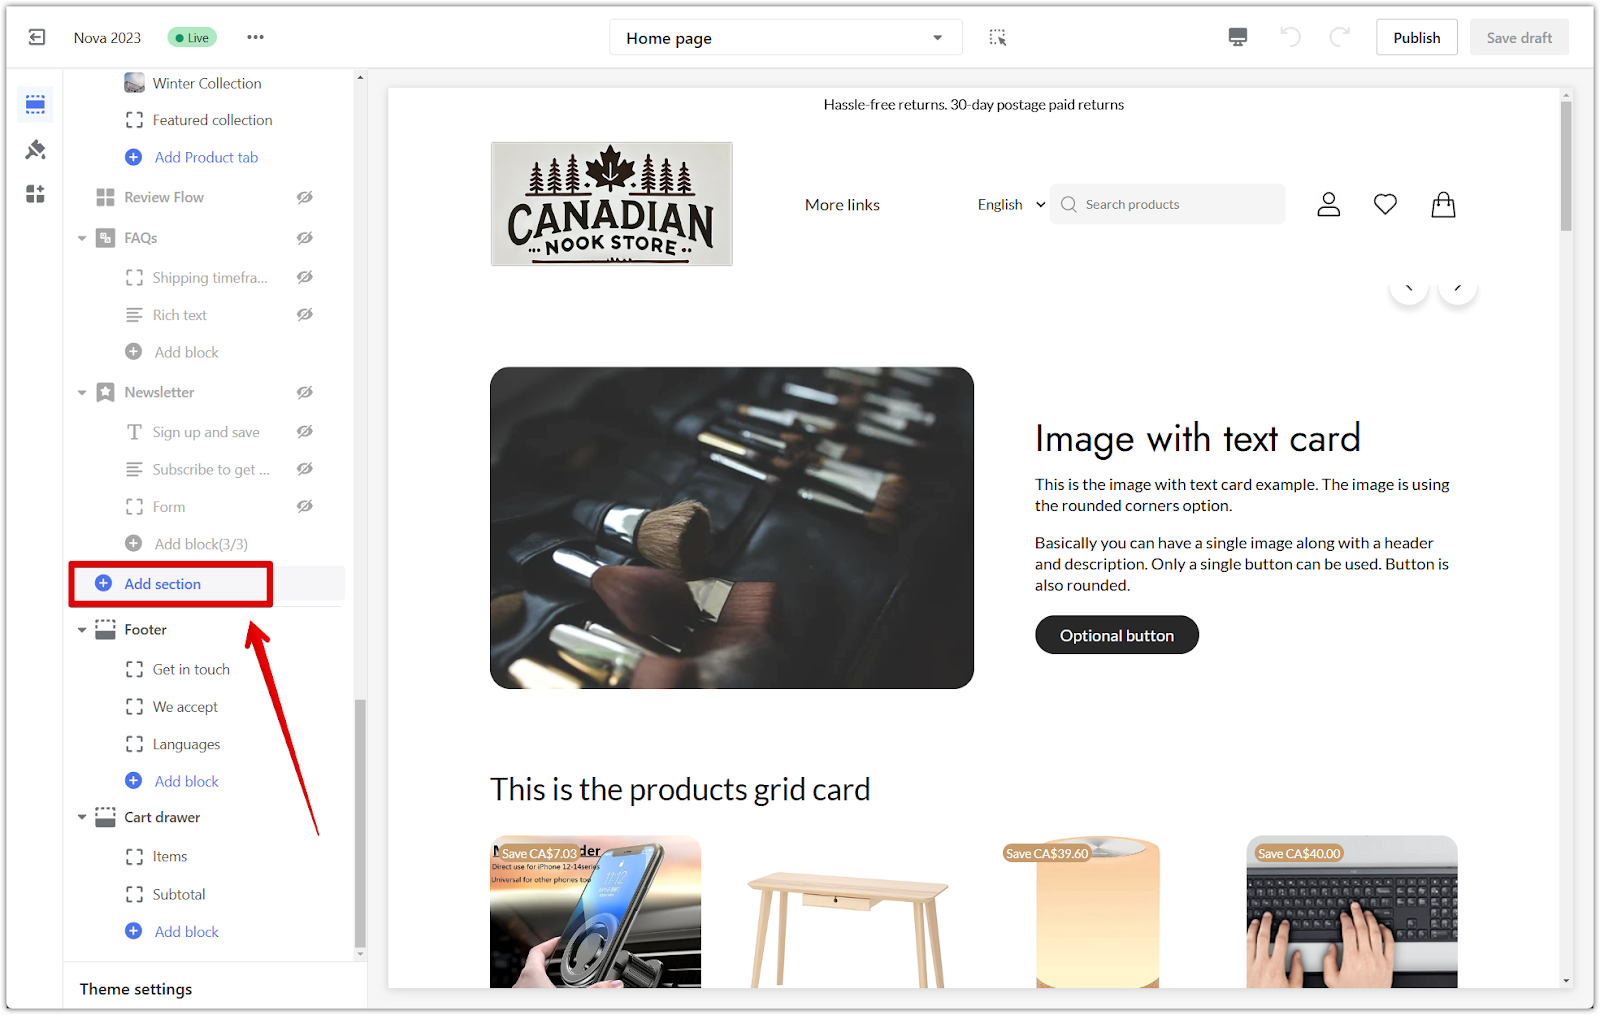
2. Add the section: Scroll down and click Add section on the side navigation bar.
3. Locate the rich text section:
- The Rich text section is visible under the Theme sections in some themes.
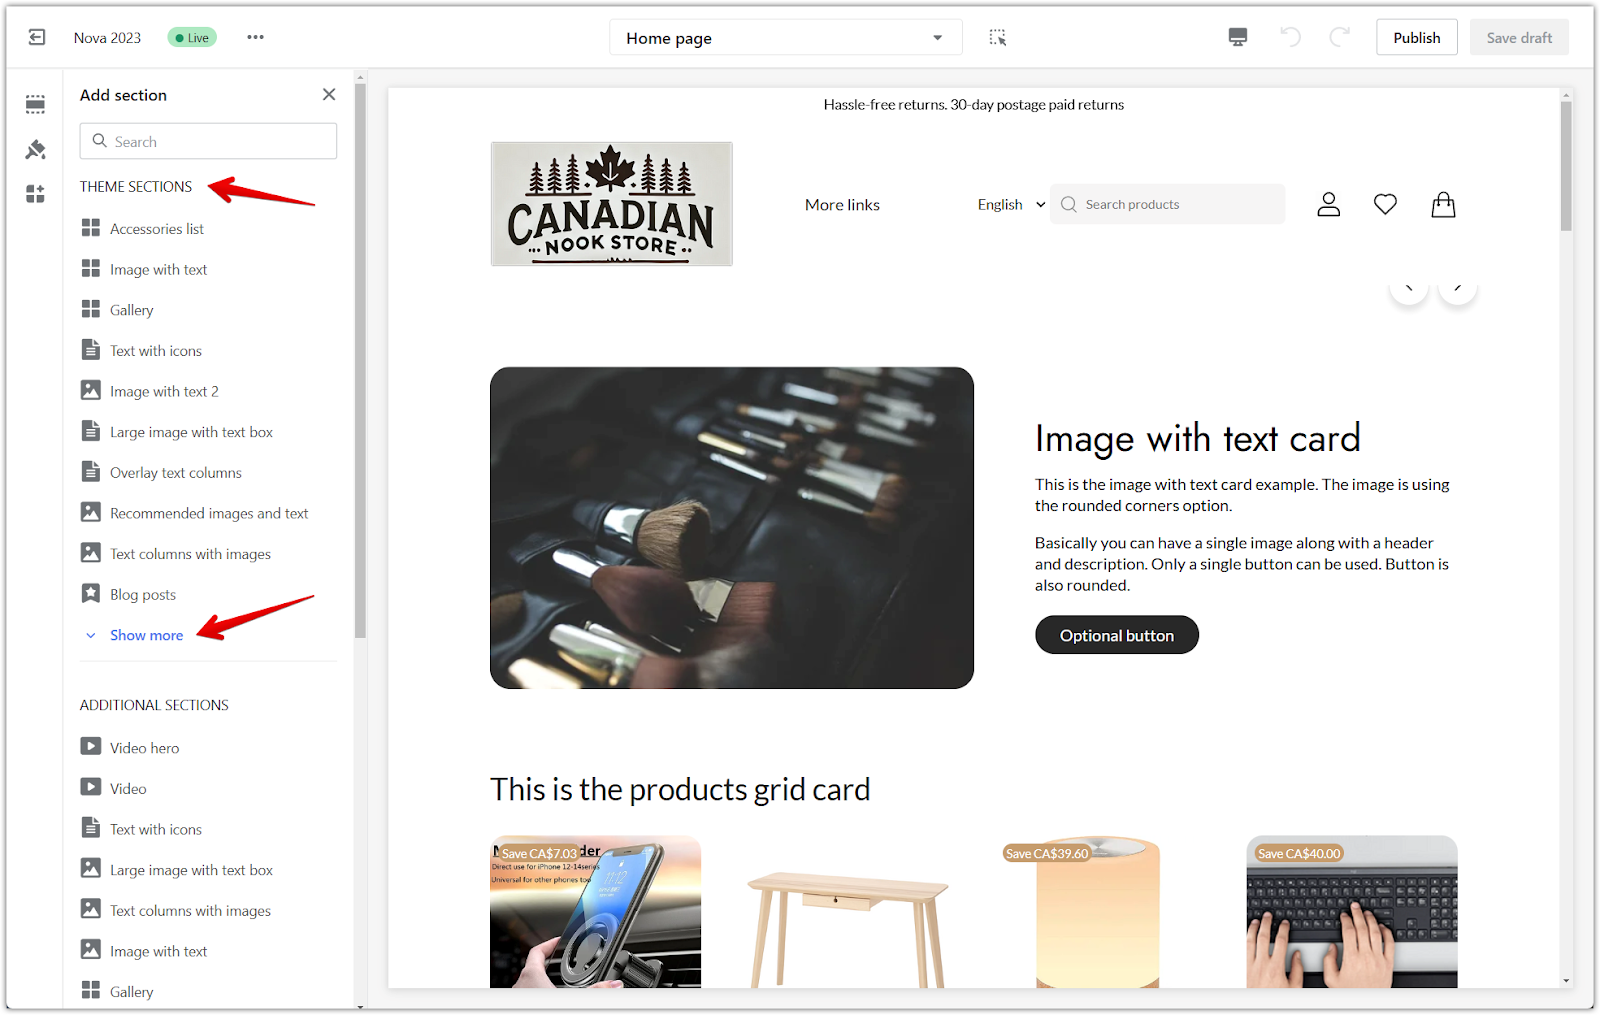
- In other themes, you may need to click Show more to reveal additional options and find the Rich text section.
4. Add the rich text section: Click on the Rich text block to add it to your theme.

Setting up your rich text section
Once added, the rich text section offers flexibility to arrange and customize its content.
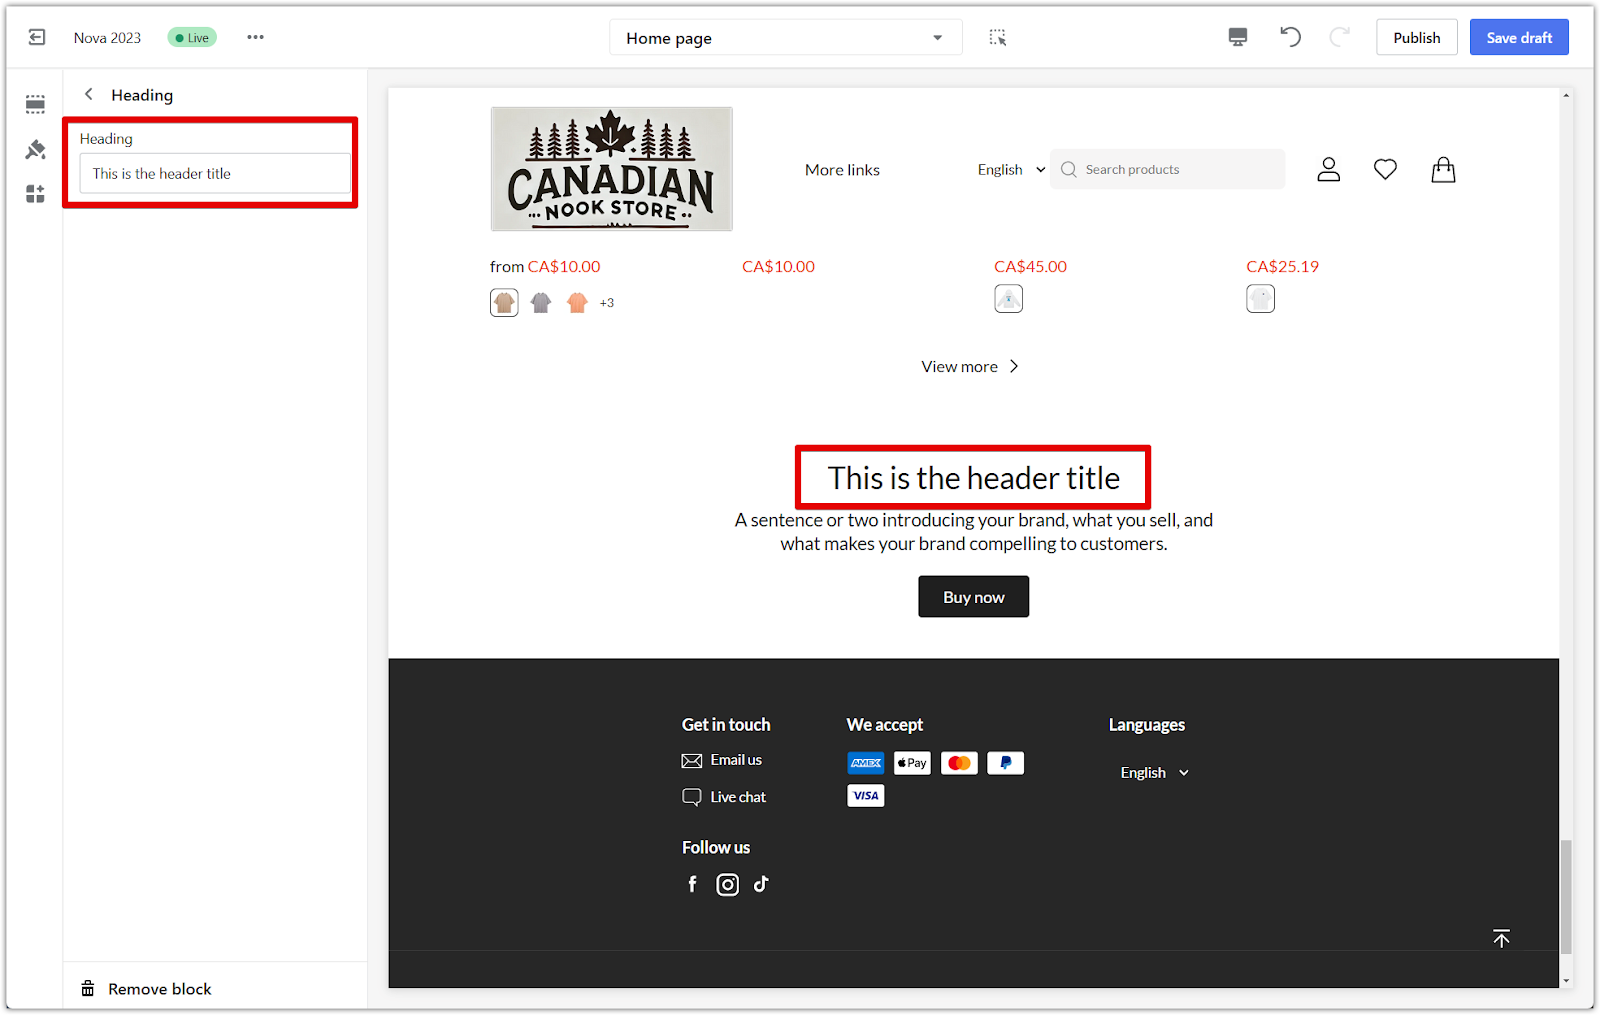
1. Open section settings: Click the Rich text title to access the section’s settings. Here, you can:
- Adjust text alignment: Choose between text left, centered, or right to align the section’s text.
- Enable narrow column: Toggle this option to create a more compact section layout.
- Customize spacing: Use the spacing editor to add or adjust padding around the section for a balanced design.

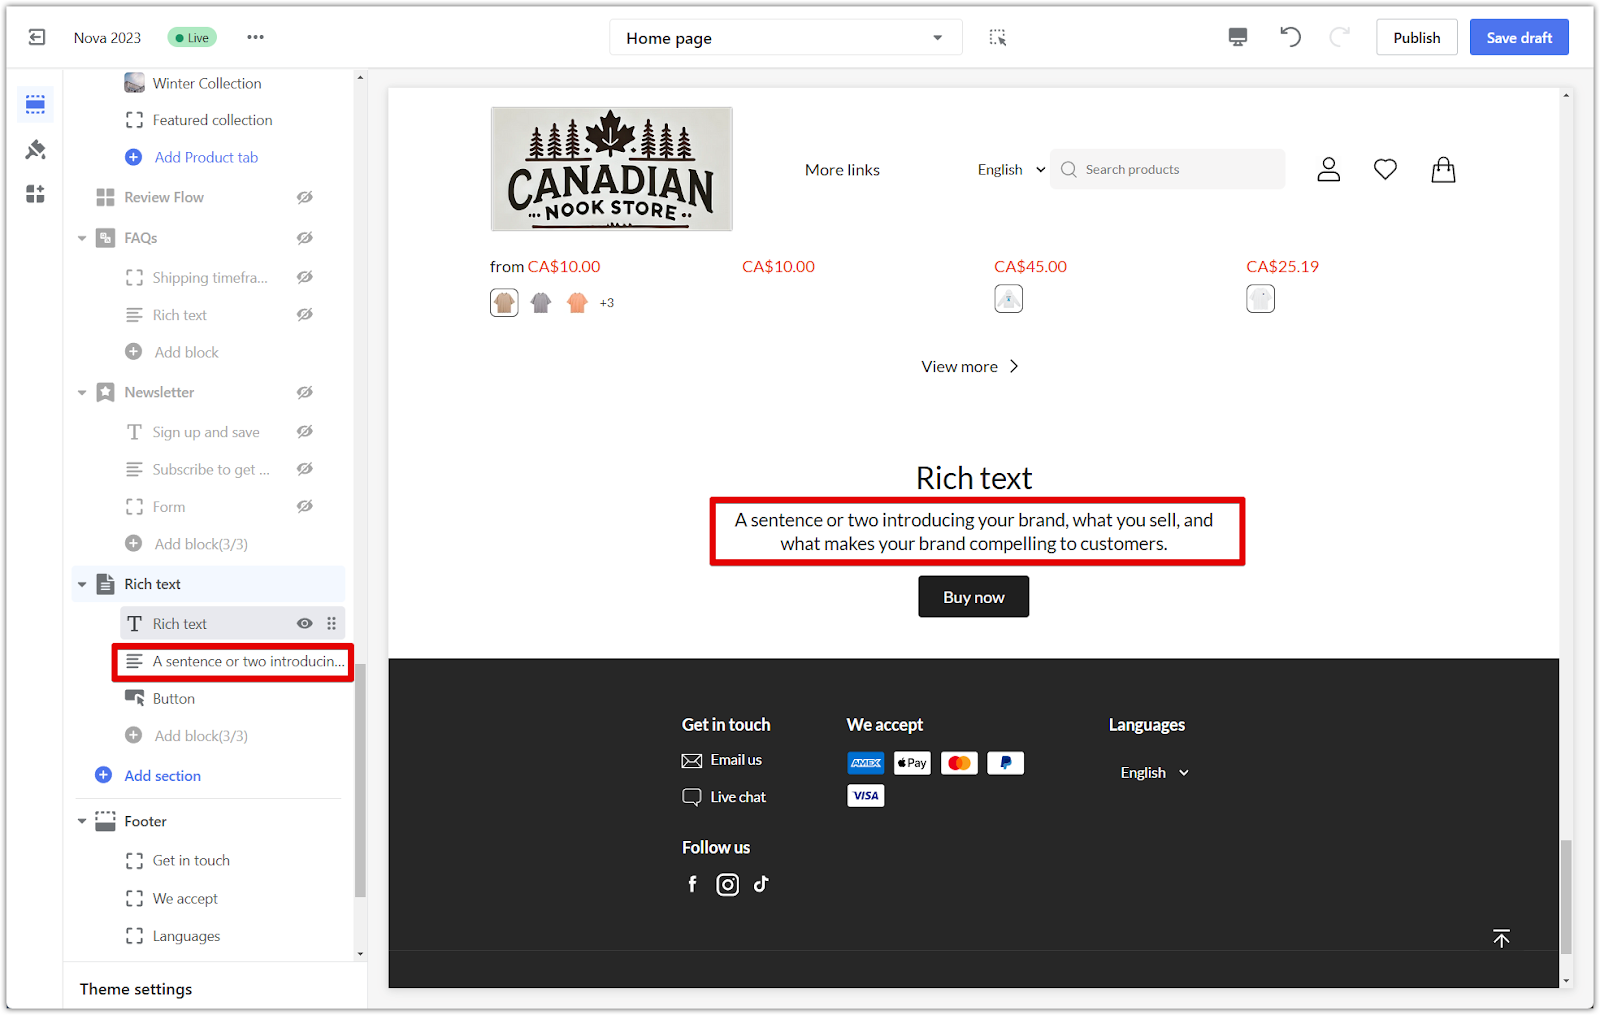
2. Edit the heading: Customize the heading text to align with your brand message.

3. Customize the text block: Add a description or message to introduce your brand, highlight a product, or share a story.

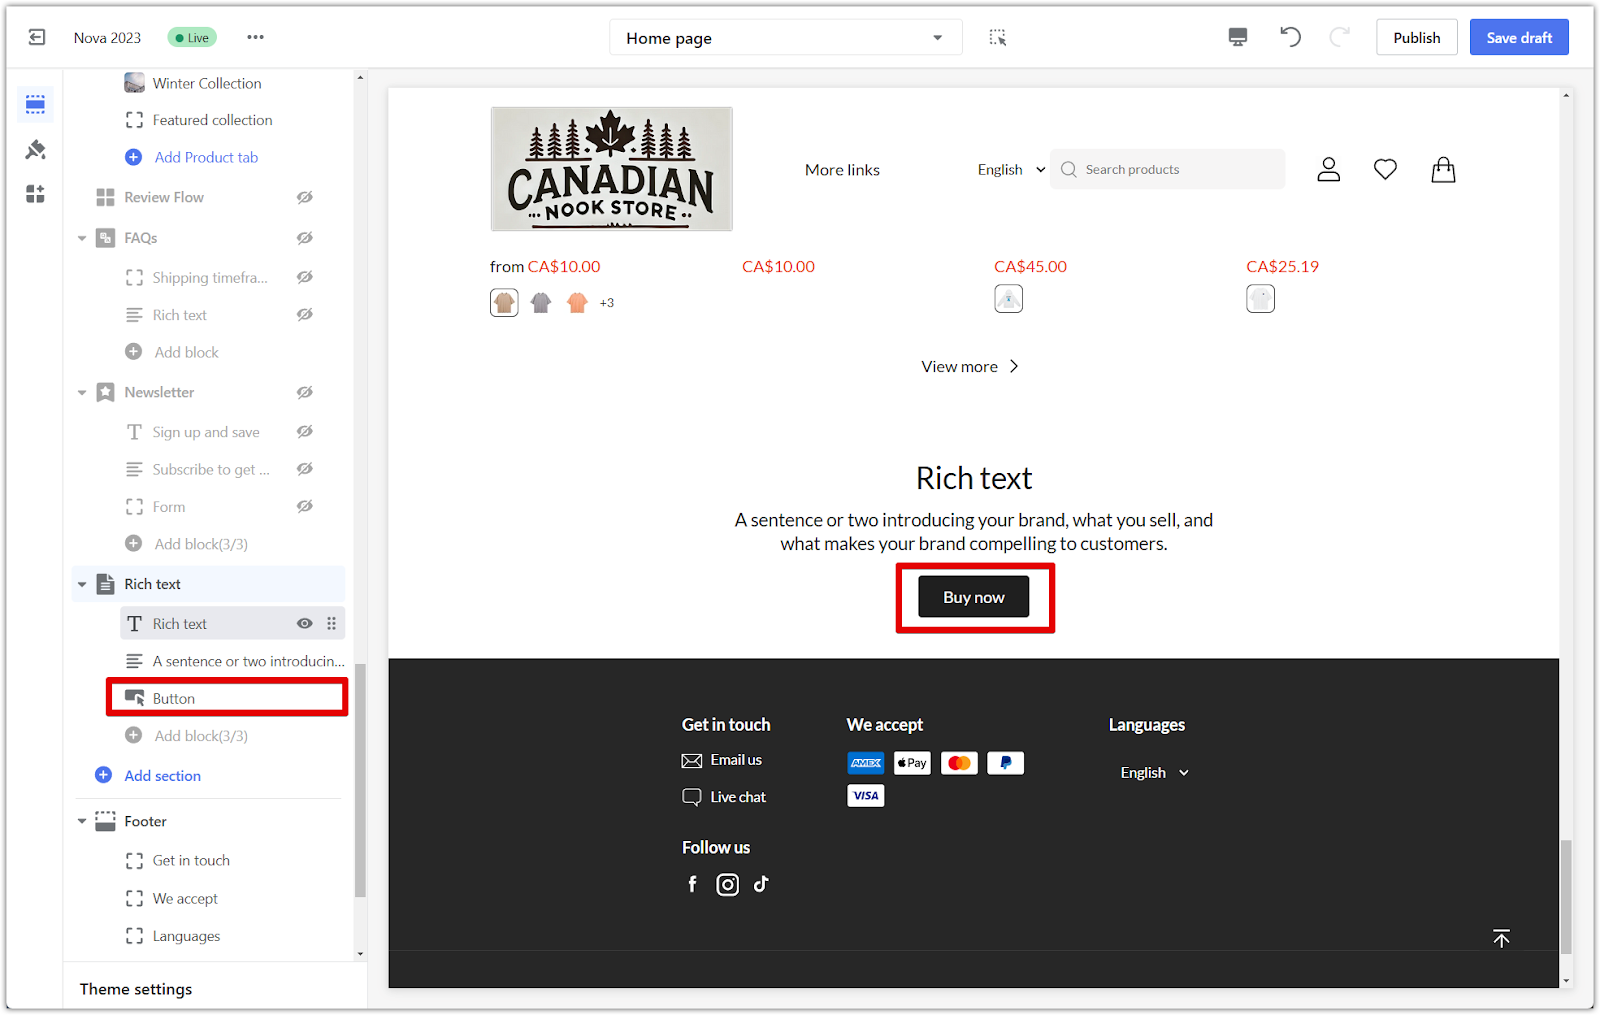
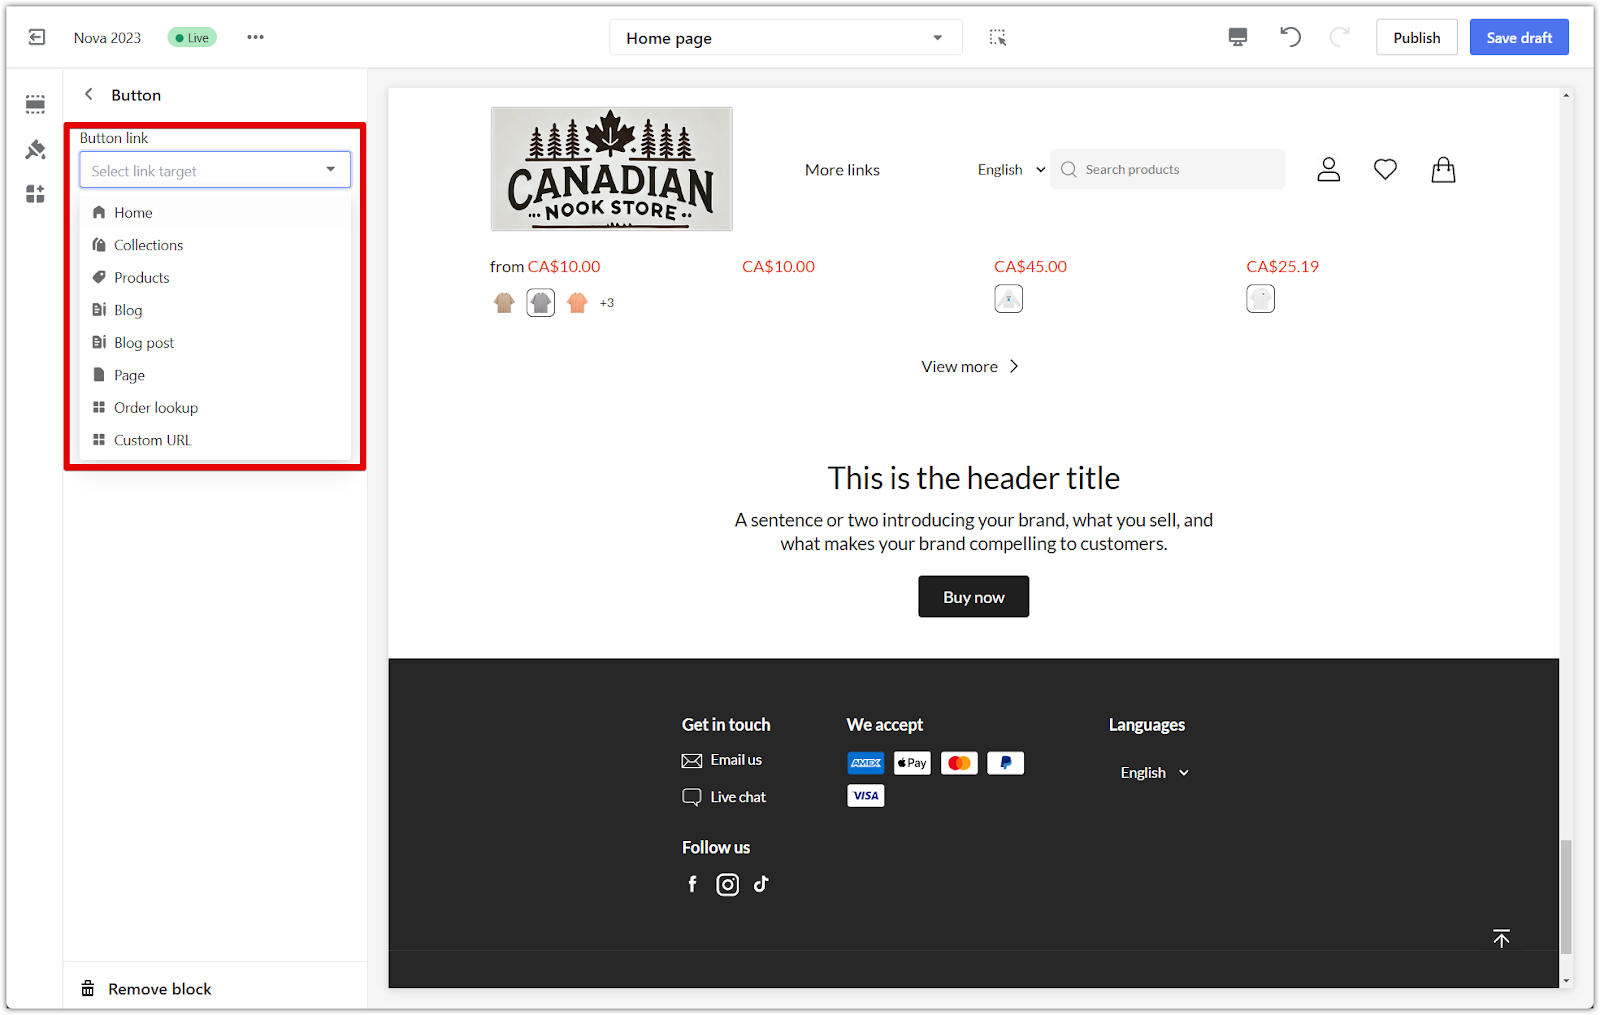
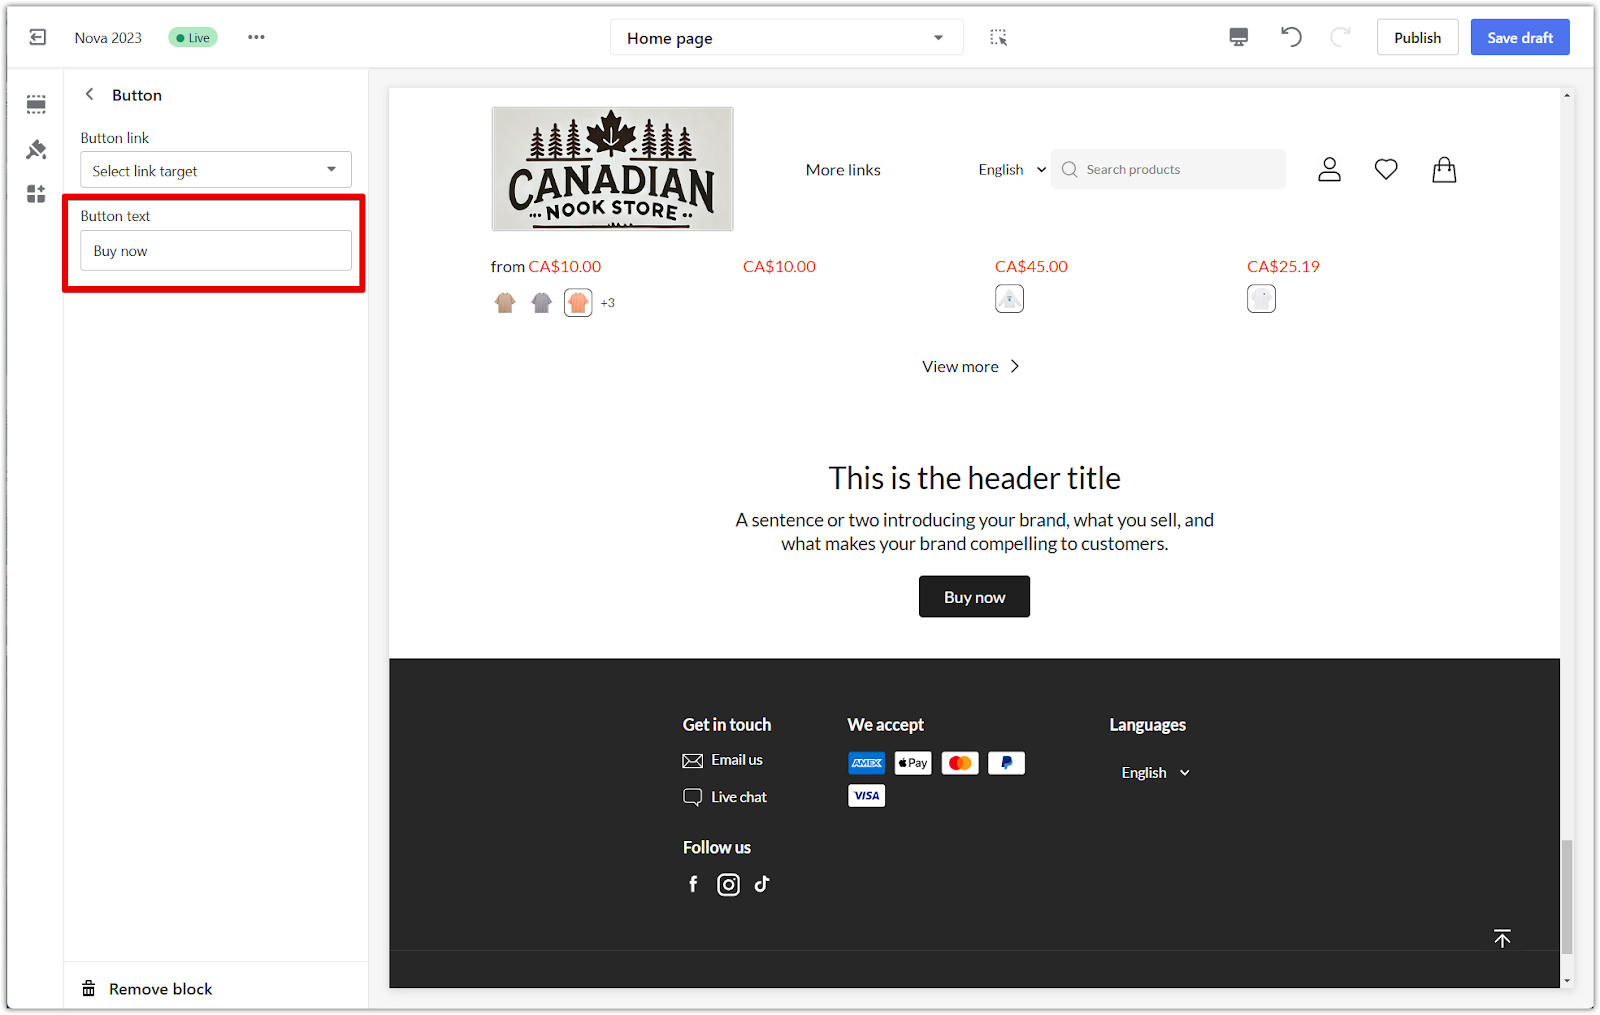
4. Configure the button: Click the Button block to set up a clickable link. Use this to redirect customers to another page, such as a product collection, blog post, a custom page, or a custom URL. Add a button label that clearly conveys its purpose (e.g., "Shop Now" or "Learn More").
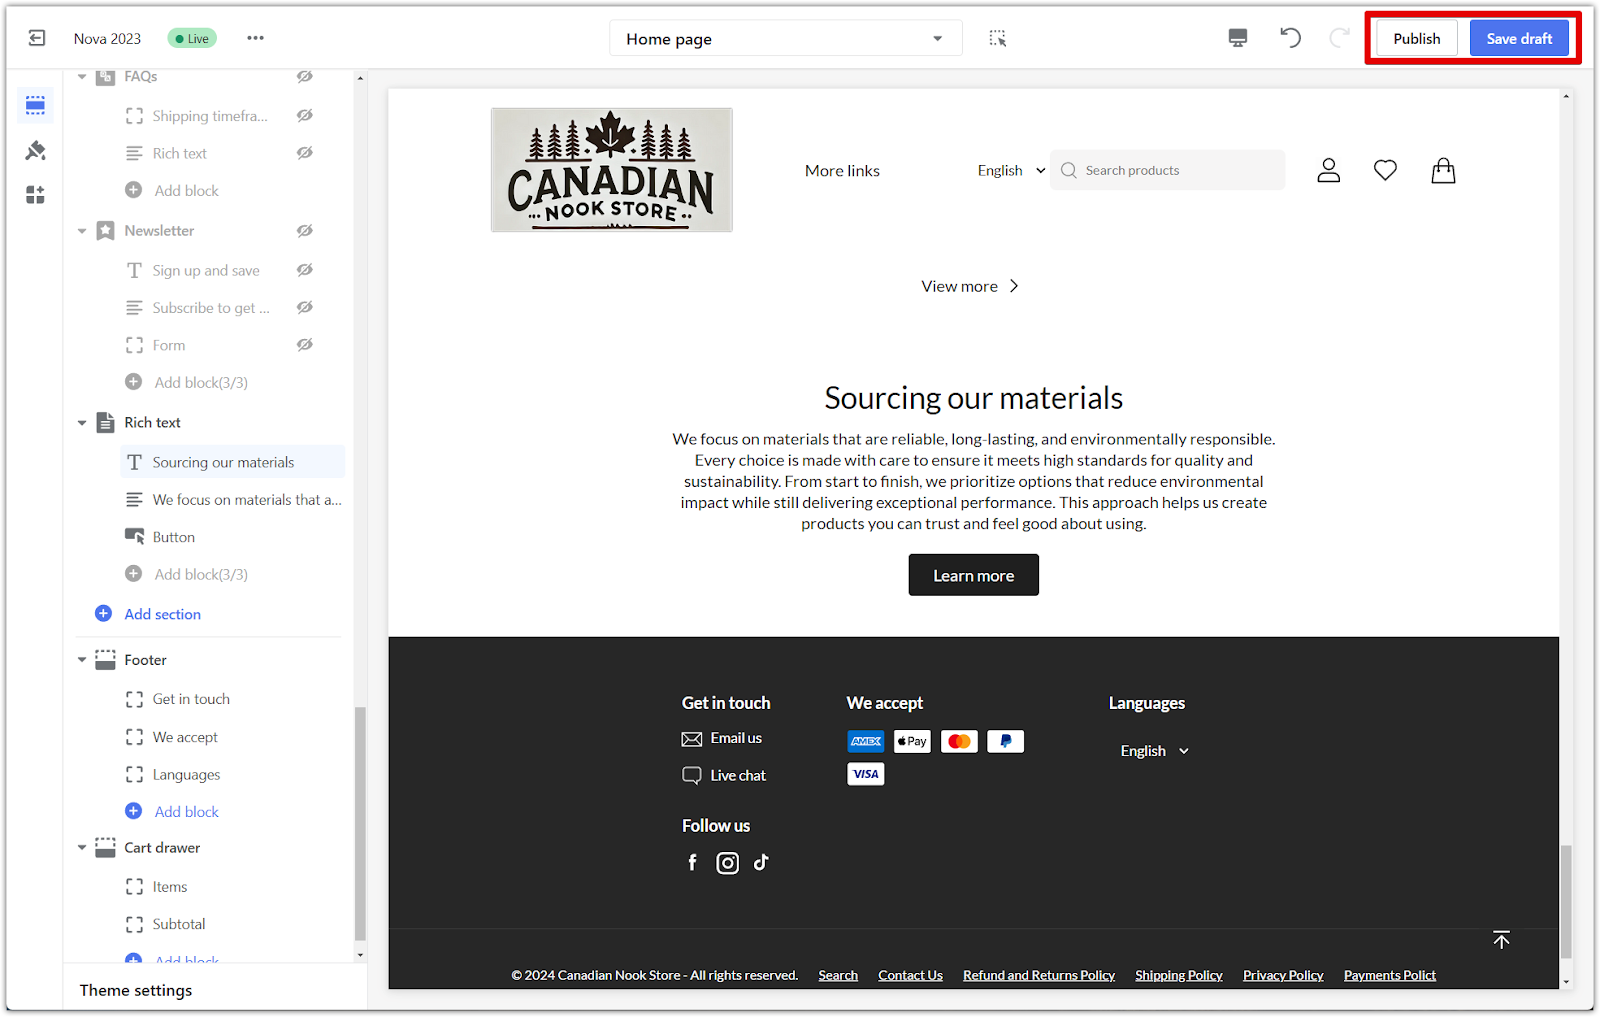
5. Save your changes: Click Save draft to save your progress or Publish to make the updates live.
A rich text section is a simple way to share your brand’s message or highlight important customer updates. It provides a space to introduce your brand, share stories, or feature promotions clearly and engagingly.


Comments
Please sign in to leave a comment.